
NoBake Vanilla Desserts: Simple & Refreshing

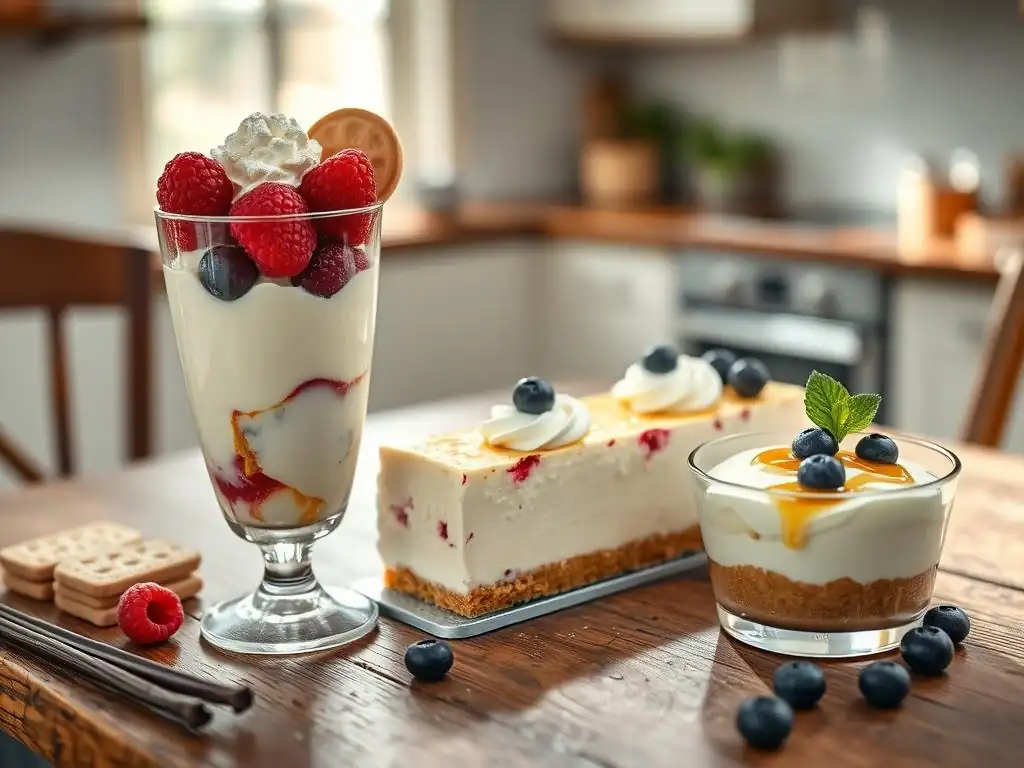
Welcome to BakeWithEase, where delightful desserts are just a few simple steps away! Are you craving a sweet treat but don't want to turn on the oven? You're in the right place! This article dives into the world of no-bake vanilla dessert recipes, offering incredibly easy and refreshing options. Discover how to create mouthwatering vanilla-infused delights without the heat. Intrigued? Keep reading to unlock the secrets to these effortless and delicious desserts!
- No-Bake Vanilla Desserts: Simple & Refreshing Treats from BakeWithEase
- Discover Easy No-Bake Vanilla Dessert Recipes
- Why Choose No-Bake Vanilla Desserts?
- Top 5 No-Bake Vanilla Dessert Recipes
- Tips for Perfecting Your No-Bake Vanilla Desserts
- Variations and Customizations for No-Bake Vanilla Recipes
- Troubleshooting Common No-Bake Vanilla Dessert Problems
- Elevate Your Baking with BakeWithEase
- Frequently Asked Questions
- Final Reflection: The Enduring Allure of No-Bake Vanilla
- Unlock Your Inner Pastry Chef: No-Bake Bliss Awaits!
No-Bake Vanilla Desserts: Simple & Refreshing Treats from BakeWithEase
Discover Easy No-Bake Vanilla Dessert Recipes
Welcome to BakeWithEase, where we believe that mastering delicious desserts doesn't always require turning on the oven! This guide is dedicated to the wonderful world of no-bake vanilla dessert recipes. Vanilla, with its comforting and versatile flavor, is the perfect base for creating simple yet elegant treats that can be enjoyed year-round.
Whether you're short on time, looking to beat the heat, or just love the simplicity of assembly-only creations, these easy no bake vanilla dessert recipes are for you. We'll explore classic favorites and introduce you to some new delightful ideas, all featuring that beloved vanilla taste without the need for baking. Get ready to discover how effortless and rewarding crafting no bake vanilla desserts can be!
No-bake desserts are a fantastic entry point for beginner bakers, offering a chance to build confidence with layering, chilling, and flavor combinations without the complexities of oven temperatures and bake times. For experienced bakers, they provide a quick win and a refreshing change of pace. Our focus here is specifically on vanilla, highlighting its ability to shine in various forms – from creamy puddings and rich cheesecakes to light parfaits and elegant panna cotta. We've curated a selection of simple no bake vanilla dessert recipes designed for maximum flavor with minimal fuss, ensuring delightful results every time.
Why Choose No-Bake Vanilla Desserts?
Choosing no-bake vanilla dessert recipes offers a multitude of advantages, making them incredibly popular among home cooks and dessert enthusiasts alike. Beyond their inherent simplicity, these treats provide practical benefits that cater to busy schedules and diverse needs. They are a fantastic solution for those moments when you crave something sweet and satisfying but lack the time, energy, or even the necessary equipment for traditional baking methods. The core appeal lies in their ease of preparation, often involving just mixing, layering, and chilling.
Furthermore, no-bake desserts are remarkably forgiving. Unlike baked goods where precise measurements and oven timings are critical, no-bake recipes often allow for more flexibility. If a mixture seems a little thin, a bit more chilling time or a slight adjustment in thickeners (like cornstarch or gelatin, depending on the recipe) can often salvage it. This makes experimenting with no bake vanilla dessert recipes less intimidating and more enjoyable, encouraging creativity in the kitchen without the fear of a collapsed cake or burnt cookies.
Convenience and Time-Saving Benefits
One of the most significant draws of no-bake vanilla dessert recipes is the unparalleled convenience they offer. Traditional baking can be a time-consuming process, involving preheating ovens, precise timing, and often cooling periods before assembly or decoration. No-bake desserts drastically cut down on this active preparation time. For example, many no-bake cheesecakes require only about 15-20 minutes of hands-on mixing before going into the refrigerator for chilling. A simple vanilla pudding can be whisked together and ready to chill in under 10 minutes.
This time-saving aspect is particularly valuable on busy weeknights or when preparing for last-minute gatherings. Instead of dedicating an hour or more to baking and cooling, you can often whip up a delicious no bake vanilla dessert in under 30 minutes of active work, leaving the refrigerator to do the rest. This efficiency doesn't compromise on taste or elegance, allowing you to serve impressive treats with minimal effort, freeing up your time for other tasks or simply to relax.
Perfect for Warm Weather Baking
When temperatures rise, the last thing many people want to do is turn on a hot oven, which can significantly heat up the kitchen. No-bake vanilla dessert recipes offer a cool and comfortable alternative. They rely solely on refrigeration or freezing to set, making them ideal for spring and summer months. Imagine a light, chilled vanilla parfait or a frosty icebox cake – these are the perfect antidotes to a hot day, providing refreshment without adding extra heat to your home.
Moreover, the textures and flavors of many no-bake vanilla desserts are inherently refreshing. Creamy, smooth puddings, airy mousse, or cool, layered cakes provide a pleasant contrast to the warmth outside. They often pair wonderfully with fresh fruits, which are abundant during warmer seasons, enhancing their appeal as a light and summery treat. Opting for no bake vanilla dessert recipes keeps your kitchen cool and your desserts deliciously chilled.
Beginner-Friendly Vanilla Dessert Options
No-bake vanilla dessert recipes are incredibly welcoming for those new to the kitchen or baking. The techniques involved are typically straightforward: mixing ingredients in bowls, layering components, and waiting for the magic of chilling to happen. There's no need to worry about yeast activation, gluten development, or achieving the perfect rise – common challenges in traditional baking. Basic skills like whisking, folding, and simple assembly are usually all that's required.
Recipes like no-bake vanilla pudding or simple layered parfaits are excellent starting points. They use readily available ingredients and involve minimal steps. Success is highly probable, which builds confidence and encourages beginners to explore more complex recipes later. The forgiving nature of many no bake vanilla dessert recipes means small errors are less likely to result in complete failure, making the learning process enjoyable and rewarding.
Top 5 No-Bake Vanilla Dessert Recipes
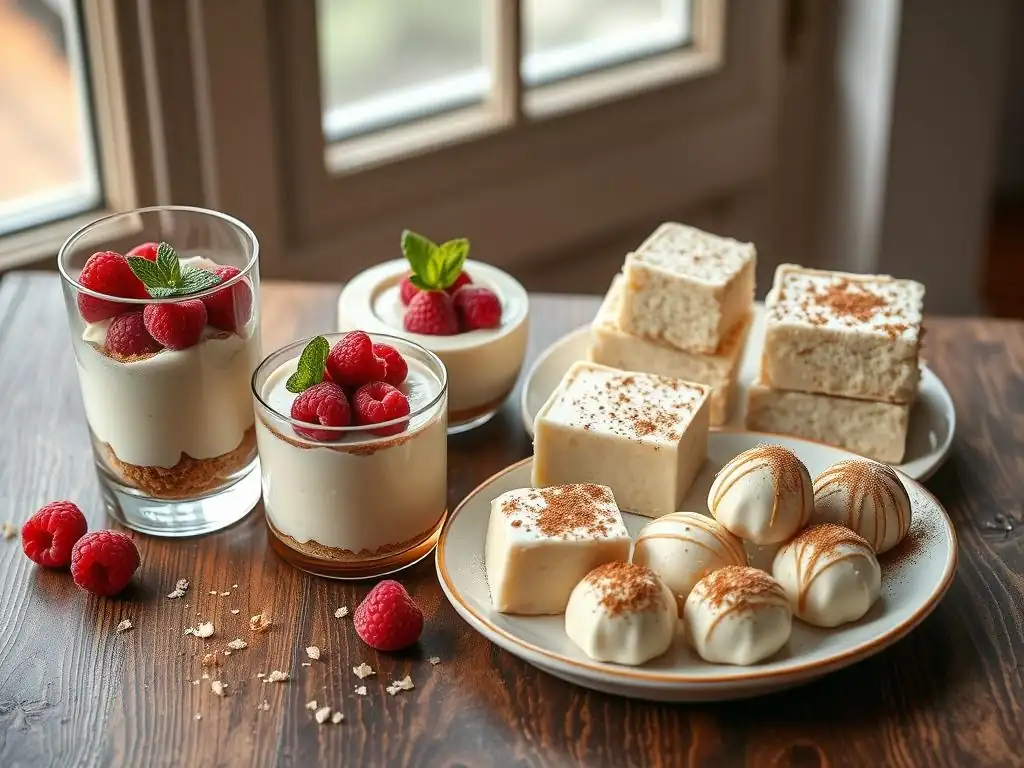
1. Classic No-Bake Vanilla Cheesecake Parfaits
No-bake vanilla cheesecake parfaits are a delightful combination of creamy, tangy vanilla cheesecake filling, crumbled cookie crust, and often layers of fruit or whipped cream, all assembled in individual glasses. They offer the luxurious taste of cheesecake without the need for baking, making them quick and easy to prepare. A standard recipe might yield about 4-6 parfaits depending on glass size, requiring around 20 minutes of active prep time and at least 2-4 hours of chilling.
These parfaits are incredibly versatile and visually appealing. Using clear glasses showcases the distinct layers, making them perfect for entertaining. The base is typically made from crushed graham crackers or other cookies mixed with melted butter, providing a satisfying crunch. The filling is a simple blend of cream cheese, sugar, vanilla extract, and often whipped cream or a stabilizer like gelatin or cornstarch to ensure it sets firmly in the refrigerator, creating a smooth, rich, and creamy texture.
Ingredients for Vanilla Cheesecake Parfaits
To make classic no-bake vanilla cheesecake parfaits, you'll need a few key components. For the crust layer, approximately 1 ½ cups of finely crushed graham cracker crumbs (about 10-12 full sheets) are typically combined with ¼ cup of melted unsalted butter and 1-2 tablespoons of sugar. This mixture forms the base.
The creamy vanilla cheesecake filling requires about 8 ounces of softened cream cheese, ½ cup of powdered sugar, 1 teaspoon of pure vanilla extract, and often ½ cup of heavy cream whipped to stiff peaks or a similar amount of condensed milk for richness and texture. Some recipes might also call for a tablespoon of lemon juice for a slight tang or a small amount of gelatin dissolved in water to ensure a very firm set.
Step-by-Step Instructions for Parfait Assembly
Assembling no-bake vanilla cheesecake parfaits is straightforward. First, prepare the crust by mixing the crushed graham crackers, melted butter, and sugar until the crumbs are evenly moistened. Press a small amount (about 2-3 tablespoons) into the bottom of each parfait glass using a spoon or the bottom of a small cup. Chill these bases in the refrigerator for about 10-15 minutes while you prepare the filling.
Next, make the vanilla cheesecake filling. In a medium bowl, beat the softened cream cheese and powdered sugar until smooth. Stir in the vanilla extract. Gently fold in the whipped heavy cream or condensed milk until fully combined and smooth.
Spoon or pipe the vanilla cheesecake mixture over the chilled crust layers, filling the glasses about two-thirds full. Add a layer of fruit topping (like berries or cherry pie filling) if desired, then top with more vanilla cheesecake filling, or finish with whipped cream. Chill the assembled parfaits for at least 2-4 hours, or preferably longer, until the filling is firm.
Tips for the Perfect Parfait Texture and Flavor
Achieving the ideal texture in your no-bake vanilla cheesecake parfaits is key. Ensure your cream cheese is fully softened to room temperature before mixing; this prevents lumps and results in a smoother filling. When folding in whipped cream, do so gently to maintain its airy texture, which contributes to a lighter filling. If using gelatin, ensure it's fully dissolved and slightly cooled before incorporating it into the cream cheese mixture to avoid streaks or clumps.
For the best vanilla flavor, use a high-quality pure vanilla extract or even scrape seeds from half a vanilla bean directly into the filling. This provides a more complex and authentic vanilla taste compared to imitation extract. Chill time is crucial; allowing the parfaits to chill for the recommended duration (or longer) ensures the filling sets properly, providing that classic creamy cheesecake texture. Serving them directly from the refrigerator is best for maintaining their structure and cool, refreshing taste.
2. No-Bake Vanilla Pudding Dessert Cups
No-bake vanilla pudding dessert cups are a classic, comforting treat that's incredibly simple to make. They feature creamy vanilla pudding layered with cookies, cake pieces, or fruit, served in individual cups. These desserts are quick to assemble and require minimal ingredients, making them a budget-friendly option. A typical batch might yield 6-8 dessert cups and can be ready to chill in under 15 minutes.
These dessert cups are endlessly customizable based on what you layer with the pudding. Vanilla wafers, crumbled pound cake, fresh berries, or even chocolate cookie crumbs can add delightful texture and flavor contrasts to the smooth vanilla pudding. Their ease of preparation makes them perfect for impromptu desserts or involving children in the kitchen – a fun and simple way to create sweet treats.
Easy Vanilla Pudding Recipe
Making the vanilla pudding base for these dessert cups is straightforward. You can use a high-quality store-bought instant vanilla pudding mix for ultimate speed and simplicity – just follow the package directions, typically whisking the mix with cold milk and letting it sit for a few minutes to thicken. For a slightly richer, homemade taste without the oven, you can make a stovetop no-bake vanilla pudding.
A simple stovetop vanilla pudding recipe involves whisking together sugar, cornstarch (as the thickening agent), and a pinch of salt in a saucepan. Gradually whisk in cold milk until smooth, then heat the mixture over medium heat, stirring constantly, until it thickens and comes to a gentle simmer (about 5-8 minutes). Remove from heat, stir in butter (optional, for richness) and a generous amount of pure vanilla extract. Pour into a bowl, cover the surface directly with plastic wrap to prevent a skin from forming, and chill thoroughly for at least 2-3 hours until firm.
Creative Toppings and Variations for Pudding Cups
The beauty of no-bake vanilla pudding dessert cups lies in the ability to get creative with toppings and layers. Classic vanilla wafers are a popular choice, providing a simple crunch. Try crumbling shortbread cookies, ginger snaps, or even Oreos (for a vanilla-chocolate twist). Crumbled pieces of leftover cake, like vanilla or pound cake, also work wonderfully, absorbing some of the pudding's moisture.
Fresh fruits are excellent additions – sliced bananas pair perfectly with vanilla, as do berries like strawberries, blueberries, or raspberries. A dollop of whipped cream on top is a simple yet elegant finish. For added texture, consider sprinkling chopped nuts, toasted coconut flakes, or chocolate shavings. You can also swirl in a little caramel sauce or fruit puree before serving to elevate the flavor profile of your no bake vanilla dessert recipes.
Serving Suggestions for Vanilla Pudding
No-bake vanilla pudding dessert cups are best served chilled. Prepare them in individual glasses, jars, or dessert cups for easy portioning and presentation. For a more elegant look, you can pipe the pudding using a pastry bag. Layering is key to making them visually appealing and providing interesting textures in each bite.
Serve them straight from the refrigerator. You can prepare them several hours or even a day in advance, allowing the flavors to meld and the layers (especially cookie layers) to soften slightly. Garnish just before serving with fresh whipped cream, a sprinkle of cinnamon, a few fresh berries, or a cookie standing upright. These simple no bake vanilla dessert recipes are perfect for casual family treats or individual desserts at a gathering.
3. Simple No-Bake Vanilla Slice (Millionaire's Slice Alternative)
A no-bake vanilla slice offers a delightful twist on classic bar desserts, providing layers of texture and flavor without the need for baking. Often compared to a no-bake version of Millionaire's Shortbread (minus the caramel, focusing on vanilla), it typically features a biscuit or cookie base, a creamy vanilla filling, and sometimes a simple glaze. This type of no bake vanilla dessert recipe is great for cutting into squares or bars, making it easy to serve a crowd.
Preparing a vanilla slice involves distinct stages for each layer, but none require oven time. The base is usually a simple mix pressed into a pan, the filling is cooked briefly on the stovetop or simply mixed and chilled, and the final layer is spread on top. While chilling time is essential for setting, the active preparation is minimal, making it a convenient option for a substantial vanilla treat.
Making the Vanilla Slice Base
The base for a simple no-bake vanilla slice is typically made from crushed biscuits or cookies combined with melted butter, similar to a cheesecake crust. Popular choices include digestive biscuits, vanilla wafers, or even shortbread cookies. You'll need about 250-300 grams (around 8-10 ounces) of crushed biscuits, which are then mixed with about 125-150 grams (around ½ to ¾ cup) of melted butter.
This mixture is then firmly pressed into the bottom of a lined square or rectangular baking pan (a standard 8x8 or 9x13 inch pan works well, depending on desired thickness). Using the back of a spoon or a flat-bottomed glass helps to create an even, compact layer. Once pressed, the base should be chilled in the refrigerator for at least 30 minutes while you prepare the vanilla filling, allowing the butter to solidify and bind the crumbs together.
Preparing the Creamy Vanilla Filling
The creamy vanilla filling for a no-bake vanilla slice can vary. A common method involves a stovetop custard-like filling thickened with cornstarch or flour. You might whisk together sugar, cornstarch/flour, and milk (or a mix of milk and condensed milk) in a saucepan, heating and stirring until it thickens considerably, then stirring in butter and a generous amount of pure vanilla extract. This cooked filling is then poured over the chilled base.
Alternatively, a simpler, no-cook filling can be made by beating softened cream cheese with powdered sugar, softened butter, and vanilla extract until smooth and creamy. This mixture is then spread over the base. Both methods result in a rich, smooth vanilla layer that contrasts nicely with the crunchy base. Ensure the filling is smooth and lump-free before spreading it evenly over the chilled base layer.
Assembling and Chilling the No-Bake Slice
Once the vanilla filling is prepared, pour or spread it evenly over the chilled biscuit base in the prepared pan. Smooth the top with a spatula. At this point, you can add a final topping if desired, such as a simple glaze made from powdered sugar and a little milk or lemon juice, or simply dust with powdered sugar after chilling.
The assembled no-bake vanilla slice must be chilled thoroughly to allow the filling to set firmly. This typically requires at least 4-6 hours in the refrigerator, or ideally overnight. Proper chilling is crucial for being able to cut the slice neatly into squares or bars. Once fully set, use a sharp knife dipped in hot water and wiped dry between cuts to slice the vanilla dessert into your desired portions.
4. Refreshing No-Bake Vanilla Icebox Cake
A no-bake vanilla icebox cake is a wonderfully simple yet impressive layered dessert. It traditionally consists of layers of crisp cookies (most commonly chocolate or vanilla wafers) and whipped cream, which softens the cookies into a cake-like texture as it chills in the refrigerator. The vanilla flavor comes primarily from the whipped cream layer, often enhanced with pure vanilla extract or vanilla bean paste.
This dessert is incredibly easy to make, often requiring just two main ingredients plus vanilla. It's perfect for warm weather as it's served chilled and has a light, airy texture. The magic happens during the long chilling period, where moisture from the cream transforms the crisp cookies, creating a unique and delightful texture that's somewhere between cake and pudding.
Key Ingredients for the Icebox Cake
The core ingredients for a no-bake vanilla icebox cake are very simple. You'll need about 2-3 packages of crisp cookies; classic choices are Nabisco Famous Chocolate Wafers or vanilla wafers, but you could experiment with others like graham crackers or even thin shortbread. The other main component is heavy whipping cream, typically about 2-3 cups, which is whipped until soft or stiff peaks form.
To infuse the vanilla flavor, you'll add pure vanilla extract or vanilla bean paste to the whipped cream. About 1-2 teaspoons of extract or paste per 2 cups of cream is a good starting point, but adjust to your preference for a stronger vanilla presence. Some recipes might also add a little powdered sugar to sweeten the cream, perhaps 1-2 tablespoons per cup of cream, though the sweetness of the cookies is often sufficient.
Layering the Vanilla Icebox Cake for Optimal Texture
Layering is the key technique for a no-bake vanilla icebox cake. Start by spreading a thin layer of whipped vanilla cream on the bottom of your serving dish or pan (a loaf pan, 8x8 or 9x13 inch pan, or even individual glasses work). This prevents the first layer of cookies from sticking and helps everything meld.
Arrange a single layer of cookies snugly over the cream. Don't worry if you need to break some to fit. Then, spread a generous layer of whipped vanilla cream over the cookies, ensuring they are fully covered. Repeat these layers – cookies, then cream – until you run out of ingredients, finishing with a layer of cream on top. For an 8x8 inch pan, you might get 4-5 layers of cookies and cream.
Storing and Serving Your Icebox Cake
After layering, the no-bake vanilla icebox cake requires significant chilling time for the cookies to soften and the flavors to meld. Cover the cake tightly with plastic wrap and refrigerate for at least 4-6 hours, but preferably 8-12 hours or even overnight. The longer it chills, the softer and more "cake-like" the cookies will become.
When ready to serve, you can decorate the top layer of cream with additional whipped cream, chocolate shavings, cookie crumbs, or fresh berries. Slice the cake using a sharp knife; the texture should be soft and easy to cut, similar to a very moist cake. Serve immediately from the refrigerator. Leftovers should be kept covered in the refrigerator and are usually best enjoyed within 1-2 days before the texture becomes too soft.
5. Elegant No-Bake Vanilla Bean Panna Cotta
No-bake vanilla bean panna cotta is an elegant Italian dessert known for its silky-smooth texture and rich vanilla flavor. Panna cotta, meaning "cooked cream," is traditionally made by simmering cream, sugar, and vanilla, then thickening it with gelatin and chilling until set. While it involves a brief cooking step on the stovetop, it requires no baking and sets beautifully in the refrigerator.
This dessert showcases the pure, aromatic taste of vanilla bean exceptionally well. Its simple appearance belies a sophisticated flavor and luxurious mouthfeel. It's often served unmolded, revealing its smooth, wobbly form, or served directly in elegant glasses or ramekins, making it a perfect dessert for special occasions or when you want something refined yet easy to prepare among your no bake vanilla dessert recipes.
Authentic Panna Cotta Recipe
An authentic no-bake vanilla bean panna cotta recipe typically starts with gelatin. You'll need about 1-2 teaspoons of unflavored gelatin powder or 1-2 gelatin sheets, bloomed in a small amount of cold liquid (water or milk) for about 5-10 minutes. This softens the gelatin.
Meanwhile, combine about 2 cups of heavy cream (or a mix of heavy cream and milk for a lighter version) with ½ cup of sugar and the seeds scraped from half to a whole vanilla bean (plus the pod for extra infusion) in a saucepan. Heat this mixture over medium heat, stirring occasionally, until the sugar dissolves and the cream is hot but not boiling. Remove from heat, discard the vanilla pod, and whisk in the bloomed gelatin until completely dissolved and smooth.
Vanilla Bean Infusion Techniques
To get the most intense and authentic vanilla flavor in your no-bake vanilla bean panna cotta, using a real vanilla bean is highly recommended. Split the vanilla bean lengthwise with a sharp knife and scrape out the tiny black seeds using the back of the knife. Add both the seeds and the scraped pod to the cream and sugar mixture while it heats.
Allowing the vanilla bean pod to steep in the warm cream for about 15-20 minutes off the heat after heating can deepen the flavor infusion before removing the pod and stirring in the gelatin. If you don't have vanilla beans, you can use 1-2 teaspoons of high-quality pure vanilla extract, stirring it in after the mixture is removed from the heat and the gelatin is dissolved, as heat can diminish the flavor of extract. Vanilla bean paste is another excellent option, providing both flavor and the visual appeal of the seeds.
Garnishing and Plating Your Panna Cotta
Once the vanilla bean panna cotta mixture is prepared and the gelatin is dissolved, pour it into individual ramekins, glasses, or molds. Chill them in the refrigerator for at least 4-6 hours, or until fully set. For unmolding, briefly dip the bottom of the mold in warm water, then invert onto a serving plate. If serving in glasses, no unmolding is needed.
Panna cotta is often garnished simply to let the vanilla flavor shine. A popular choice is a fresh berry compote or coulis (a simple sauce made by simmering fruit with a little sugar and water, then pureeing). Sliced fresh fruit, a drizzle of caramel or chocolate sauce, or a sprinkle of toasted nuts also make lovely additions. A sprig of mint or a few fresh vanilla bean seeds sprinkled on top can add a final touch of elegance to this refined no bake vanilla dessert.
Tips for Perfecting Your No-Bake Vanilla Desserts
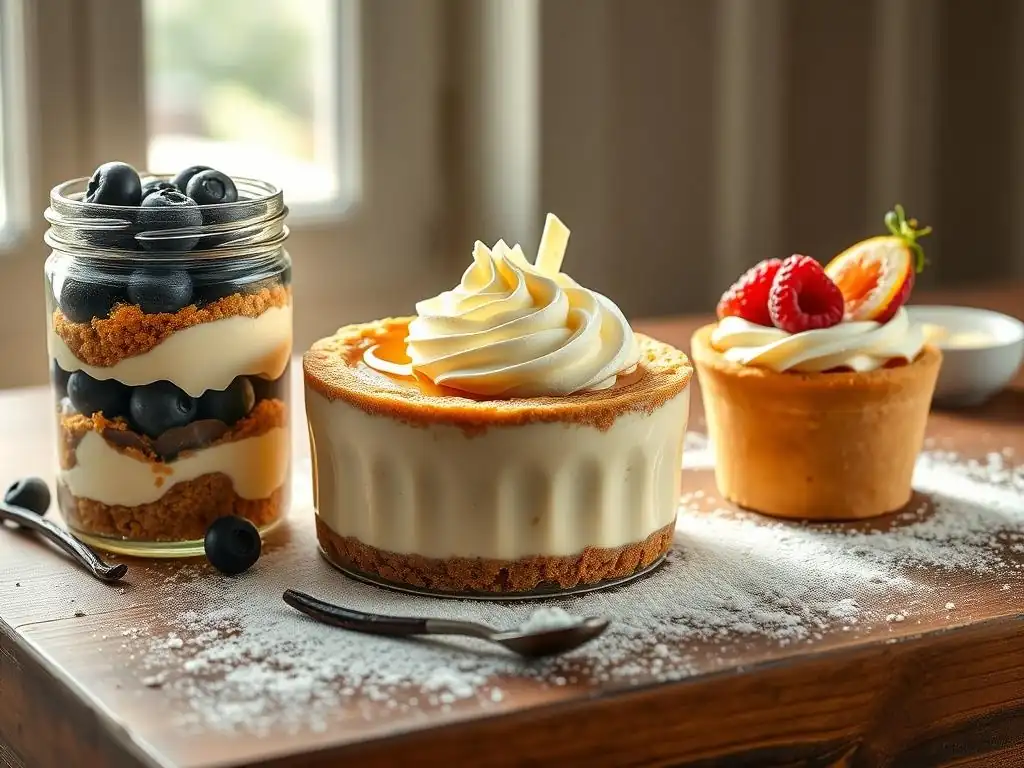
Mastering no-bake vanilla dessert recipes involves paying attention to a few key details that can significantly impact the final outcome. While they are generally easier than baked goods, understanding how ingredients interact and how chilling affects texture is crucial. Focusing on these elements will help you achieve consistent, delicious results every time you prepare these simple treats.
From selecting the best vanilla products to ensuring your dessert sets correctly, these tips are designed to elevate your no-bake creations. Pay close attention to ingredient temperatures, mixing techniques, and sufficient chilling time – these are often the most important factors for success in the world of no-bake desserts.
Choosing the Right Vanilla Extract (or Vanilla Bean)
The quality of your vanilla product has a profound impact on the flavor of your no-bake vanilla desserts. Pure vanilla extract, made from soaking vanilla beans in alcohol and water, provides a complex, well-rounded vanilla flavor. Look for extracts labeled "pure" rather than "imitation vanilla extract," which is made from synthetic vanillin and has a less nuanced taste. Madagascar vanilla is common and has a classic, sweet flavor, while Mexican vanilla can be smoky or spicy, and Tahitian vanilla often has floral or cherry notes.
Using a real vanilla bean or vanilla bean paste (extract with vanilla seeds) offers the most intense and authentic vanilla experience, plus the visual appeal of the seeds. For recipes where vanilla is the star, like panna cotta or simple puddings, investing in good quality vanilla makes a noticeable difference. Consider where the vanilla flavor comes from in your no bake vanilla dessert recipes and choose the best quality you can.
Achieving the Ideal Texture in No-Bake Desserts
Texture is paramount in no-bake desserts, whether it's the creamy set of a cheesecake, the smooth wobble of panna cotta, or the soft layers of an icebox cake. The most common issue is a dessert that doesn't set properly, resulting in a runny or too-soft consistency. This is often due to insufficient chilling time or incorrect ratios of setting agents (like gelatin, cornstarch, or cream cheese).
Ensure you chill your desserts for the minimum time specified in the recipe, and often longer for best results. Refrigerators vary in temperature, so checking for firmness is key. If using gelatin, make sure it's properly bloomed and fully dissolved in a warm liquid before incorporating it into the main mixture. For cream cheese-based fillings, ensure the cream cheese is soft before mixing and that you don't over-mix once liquids are added, as this can sometimes break down the structure.
Storing No-Bake Vanilla Treats for Freshness
Proper storage is essential to maintain the texture and freshness of your no-bake vanilla dessert recipes. Because they rely on chilling to set, they must be kept refrigerated until serving. Cover them tightly with plastic wrap or store them in airtight containers to prevent them from absorbing odors from the refrigerator and to keep the surface from drying out or forming a skin.
Most no-bake vanilla desserts containing dairy are best consumed within 2-3 days of preparation. Desserts with fruit layers might have a slightly shorter shelf life as the fruit can release moisture. Freezing is an option for some no-bake desserts like cheesecakes or icebox cakes, but the texture may change slightly upon thawing. Always check the specific recipe's recommendations for storage duration and methods to ensure your no bake vanilla desserts remain delicious.
Variations and Customizations for No-Bake Vanilla Recipes
One of the joys of working with no-bake vanilla dessert recipes is how easily they can be customized and varied. Vanilla provides a neutral yet comforting base that pairs well with a wide range of other flavors and ingredients. This makes it simple to adapt basic recipes to suit different tastes, dietary needs, or whatever ingredients you happen to have on hand.
Exploring variations allows you to put your own spin on classic no-bake desserts and discover new favorite combinations. Adding fruit, incorporating chocolate, or modifying recipes to be vegan or gluten-free are just a few ways to customize these versatile treats.
Adding Fruit to Your No-Bake Vanilla Desserts
Adding fruit is a fantastic way to introduce freshness, color, and a contrasting texture to no-bake vanilla dessert recipes. Berries like strawberries, raspberries, blueberries, and blackberries are particularly popular, offering a bright, slightly tart counterpoint to the sweet, creamy vanilla. Sliced bananas, mangoes, or peaches also work well, especially when layered with vanilla pudding or cream.
You can incorporate fruit in several ways: layering fresh fruit pieces between creamy layers in parfaits or icebox cakes, topping cheesecakes or panna cotta with a fruit compote or coulis, or folding small pieces of soft fruit into a pudding or mousse before chilling. Be mindful that some fruits, like fresh pineapple or kiwi, contain enzymes that can prevent gelatin from setting; cooking these fruits briefly inactivates the enzymes.
Chocolate and Vanilla Combinations (No-Bake Options)
The combination of chocolate and vanilla is a timeless classic, and it translates beautifully into no-bake dessert recipes. There are numerous ways to incorporate chocolate into your no-bake vanilla treats. Use chocolate cookie crumbs for the base of a vanilla cheesecake or slice. Layer vanilla pudding or cream with chocolate wafers in an icebox cake.
You can also swirl melted chocolate or chocolate sauce into a vanilla pudding or cheesecake mixture before chilling for a marbled effect. Top your no-bake vanilla slice or panna cotta with chocolate ganache or shaved chocolate. For a simple yet effective combination, alternate layers of no-bake vanilla pudding and no-bake chocolate pudding in dessert cups. These simple additions can transform a pure vanilla dessert into a delightful vanilla-chocolate experience.
Making No-Bake Vanilla Desserts Vegan or Gluten-Free
Adapting no-bake vanilla dessert recipes to be vegan or gluten-free is often quite achievable. For vegan versions, dairy can be replaced with plant-based alternatives like coconut cream, cashew cream, almond milk, or soy milk. Vegan cream cheese is available for no-bake cheesecakes, and agar-agar or specific vegan gelatin substitutes can replace traditional gelatin. Ensure your cookies or biscuits for the base are also vegan-friendly (check ingredients for dairy, eggs, and honey).
For gluten-free no-bake vanilla desserts, the primary substitution needed is in the base layer. Instead of using wheat-based graham crackers or biscuits, opt for gluten-free cookie crumbs, crushed gluten-free rice cereal mixed with butter, or a nut-based crust. Always check the labels of other ingredients like pudding mixes or extracts to ensure they are certified gluten-free if cross-contamination is a concern.
Troubleshooting Common No-Bake Vanilla Dessert Problems
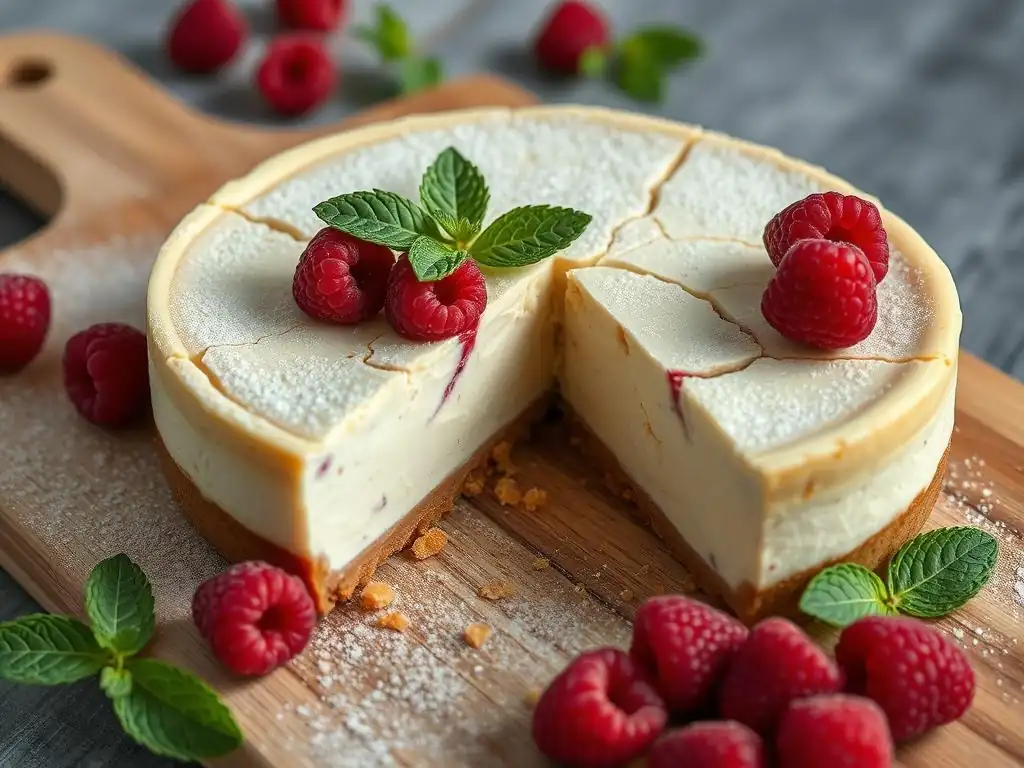
Even with simple no-bake vanilla dessert recipes, you might occasionally encounter issues. Understanding common problems and how to address them can save your dessert and help you learn for future attempts. Don't be discouraged if a dessert doesn't turn out perfectly the first time; troubleshooting is part of the learning process.
The most frequent challenges involve texture – whether the dessert is too runny, the base is soggy, or the overall consistency isn't quite right. Addressing these issues often involves adjusting ingredients, technique, or chilling time.
Dealing with a Runny Filling
A runny filling in a no-bake vanilla dessert, such as a cheesecake or panna cotta, is usually a result of insufficient setting agent or not enough chilling time. If your mixture contains gelatin, ensure it was properly bloomed and fully dissolved without boiling the mixture it was added to (which can weaken gelatin's setting power). If using cream cheese, make sure it was the correct type (full-fat block cream cheese works best for structure) and that you used the amount specified.
If your dessert is already assembled and still too runny after adequate chilling (say, 6+ hours), there are limited fixes without starting over. For future attempts, slightly increase the amount of gelatin or stabilizer, ensure ingredients (especially cream cheese and whipped cream) are the correct temperature before mixing, and guarantee sufficient, uninterrupted chilling time in the coldest part of your refrigerator (typically the back).
Preventing a Soggy Crust
A soggy crust in no-bake vanilla cheesecakes or slices is often caused by moisture from the filling seeping into the cookie or biscuit base. This can happen if the crust isn't properly compacted, if the filling is too wet, or if the dessert isn't chilled long enough before being cut.
To prevent this, ensure the crushed biscuit base is firmly pressed into the pan – this creates a denser layer less susceptible to moisture. Chilling the crust before adding the filling can also help solidify the butter and create a slight barrier. Ensure your filling isn't excessively liquid. Finally, allowing the assembled dessert to chill for the full recommended time (often overnight is best) allows the texture to stabilize completely before slicing, which can minimize sogginess.
Achieving the Right Level of Sweetness
Sometimes a no-bake vanilla dessert can turn out too sweet or not sweet enough. Unlike baked goods where sugar affects structure, in no-bake recipes, it primarily affects taste. Adjusting sweetness is relatively simple in many no-bake vanilla dessert recipes.
Taste your filling mixture before chilling (if safe to do so, e.g., cream cheese or pudding base). If it's not sweet enough, you can often whisk in a little more powdered sugar. If it's too sweet, adding a pinch of salt can help balance the sweetness, or incorporating a slightly tart element in the layers or topping (like lemon zest, yogurt, or a fruit compote) can offset it. For future batches, slightly adjust the amount of sugar up or down based on your preference and the sweetness of other components like cookies or toppings.
Elevate Your Baking with BakeWithEase
At BakeWithEase, we are passionate about making baking accessible and enjoyable for everyone, and that includes the fantastic world of no-bake creations. We hope these no bake vanilla dessert recipes and tips inspire you to get into the kitchen and create something delicious. Remember, baking (or no-baking!) is a journey, and every attempt is a step towards perfecting your skills and discovering new favorites.
We offer a wealth of resources to support you on your baking adventures. Explore our extensive collection of recipes, from simple cookies to complex pastries. Dive into our technique guides to learn fundamental skills. And join our community to share your experiences and learn from others.
Explore More Vanilla Recipes
Vanilla is a foundational flavor in baking, and its versatility extends far beyond no-bake treats. Once you've mastered these easy no bake vanilla dessert recipes, we encourage you to explore our wider collection of vanilla-centric delights. Find recipes for classic vanilla cakes, fluffy vanilla cupcakes, rich vanilla bean cookies, and creamy vanilla ice cream.
Understanding how vanilla behaves in different contexts – baked goods, custards, creams, and no-bake fillings – will deepen your appreciation for this incredible ingredient. Search our site for "vanilla cake," "vanilla cookies," or "vanilla custard" to find your next baking project featuring this beloved flavor.
Baking Tips and Techniques for Beginners
BakeWithEase is designed with beginners in mind. Our site is filled with articles, guides, and videos explaining fundamental baking tips and techniques. Learn about measuring ingredients accurately, understanding the role of different ingredients, mastering basic mixing methods, and navigating common baking challenges.
Whether you're unsure about whipping cream to the right consistency for your no bake vanilla dessert or want to understand the difference between baking powder and baking soda for future baked projects, our resources are here to help. Building a strong foundation of knowledge will make all your dessert-making experiences, both baked and no-bake, more successful and less stressful.
We love seeing what our community creates! If you try any of our no bake vanilla dessert recipes, or put your own spin on a classic, we encourage you to share your results. Tag us on social media or use our dedicated hashtag (check our website for details) to show off your delicious vanilla treats.
Sharing your successes, and even your challenges, helps inspire others and fosters a supportive community of dessert lovers. We can't wait to see your beautiful parfaits, perfect panna cotta, or delightful icebox cakes. Happy no-baking!
Frequently Asked Questions
What makes "no-bake" vanilla desserts so appealing?
No-bake vanilla desserts are appealing because they require no oven, making them perfect for hot weather or when you want a quick and easy treat. They also often use simple ingredients and are quick to assemble.
Are "no-bake" vanilla desserts suitable for beginners?
Absolutely! Most no-bake vanilla dessert recipes are incredibly easy, even for those new to baking. They often involve mixing ingredients and chilling, so minimal skill is required.
What are some common ingredients in "no-bake" vanilla desserts?
Common ingredients include vanilla extract, graham crackers, whipped cream, cream cheese, and chocolate. Many recipes also incorporate fresh fruit for added flavor and texture.
How can I customize my "no-bake" vanilla desserts?
You can customize them by adding different fruit toppings, such as berries, peaches, or bananas. You can also experiment with different cookie crusts or incorporate chocolate chips or nuts.
How long do "no-bake" vanilla desserts typically last in the refrigerator?
Most no-bake vanilla desserts will last for 2-3 days in the refrigerator. Be sure to store them in an airtight container to maintain their freshness and prevent them from drying out.
Final Reflection: The Enduring Allure of No-Bake Vanilla
The simplicity of no-bake vanilla desserts transcends mere convenience; it's a testament to the power of pure, unadulterated flavor. In a world obsessed with complex techniques and elaborate presentations, these recipes offer a refreshing counterpoint, reminding us that sometimes the most satisfying treats are the easiest to make. Their accessibility makes them perfect for busy weeknights, spontaneous gatherings, or simply a moment of self-indulgence.
The enduring appeal of vanilla, a flavor universally loved, is undeniable. Its subtle sweetness and versatility allow it to shine in countless no-bake creations, from creamy cheesecakes to light and airy mousses. Vanilla is the queen of flavors; it enhances, it complements, it never overpowers.
This quote perfectly encapsulates the elegance and adaptability of vanilla in the culinary world, particularly in the context of these simple, yet impactful, desserts. The recipes shared here are not just recipes; they are invitations to explore the boundless possibilities of this classic flavor profile.
Now, I invite you to consider the joy of creating these desserts. Imagine the satisfaction of whipping up a delicious treat without the need for an oven, the delight of sharing it with loved ones, and the simple pleasure of savoring a cool, creamy, and utterly satisfying vanilla confection. Don't just read these recipes – make them. Embrace the simplicity, the flavor, and the joy of creating something delicious and beautiful with your own hands. Let the sweet simplicity of no-bake vanilla desserts become a part of your culinary story.
Unlock Your Inner Pastry Chef: No-Bake Bliss Awaits!
Thanks for joining us on this delicious journey into the world of no-bake vanilla desserts! We hope you've found inspiration and easy recipes to satisfy your sweet tooth without the oven. Ready to dive in?
- Whip up your favorite recipe: We know you're itching to create one of these delightful treats. Pick your go-to recipe and get baking (without the oven! ).
- Share your creations: Tag us on social media – we'd love to see your masterpieces! Use #BakeWithEaseNoBake to showcase your vanilla dessert magic.
- Challenge yourself: Try a new flavor combination or technique from the article – even a simple twist can elevate your baking game.
Ready to experience the joy of no-bake baking? What unique vanilla flavor will you create today?