
Making Edible Decorations Fun and Easy for Kids' Treats

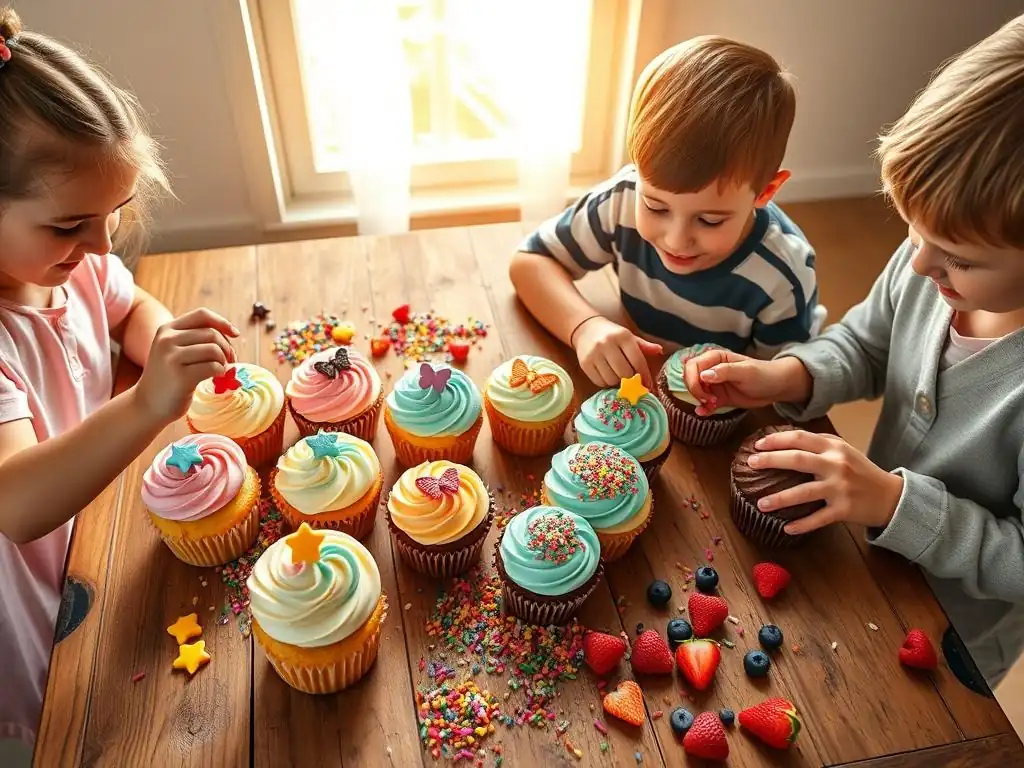
Welcome to BakeWithEase, your kitchen companion for all things baking! Ever wished you could add that extra sprinkle of magic to your kids' treats without the fuss? Dive into our guide on Easy Kids Edible Decorations and discover how to transform ordinary baked goods into delightful masterpieces. Get ready to spark creativity and make baking a truly memorable experience – let's get started!
- Edible Decorations for Kids: Fun & Easy Treats
- Introduction: Unleashing Creativity
- Preparing for Decoration Fun: Supplies & Ingredients
- Step-by-Step Guide: No-Bake Options
- Baking Recipes for Edible Decorations
- Advanced Techniques (For Older Kids & Adults)
- Tips and Tricks for Success
- Troubleshooting
- Decoration Ideas by Theme
- Showcase: Inspiring Examples
- Conclusion: Baking Memories
-
Frequently Asked Questions
- What are some easy edible decoration ideas for kids' treats?
- What ingredients are best for kids to use when making edible decorations?
- How can I make edible decorations a safe activity for my kids?
- What's the best way to store edible decorations made in advance?
- How can I make edible decorations more fun for kids?
- Final Reflection: The Sweetness of Shared Creation
- Unleash Your Inner Cake Artist!
Edible Decorations for Kids: Fun & Easy Treats
Introduction: Unleashing Creativity
Welcome to Edible Art for Kids
Baking is a wonderful activity to share with children, and adding edible decorations takes the fun to a whole new level! It transforms simple cookies, cupcakes, or rice krispie treats into canvases for imagination. This guide focuses on making these easy kids edible decorations accessible, enjoyable, and mess-manageable for bakers of all ages, especially the little ones. We'll explore simple techniques and ingredients that turn baking projects into memorable creative sessions.
Getting kids involved in making edible decorations isn't just about the final tasty result; it's about the process. It helps develop fine motor skills, encourages following instructions, and boosts confidence as they see their edible creations come to life. From arranging colorful sprinkles to molding soft candy melts, the possibilities for kids edible decorations are vast and surprisingly simple to execute, making every baking session an adventure in edible art.
Why Edible Decorations are Perfect for Parties
Edible decorations are a fantastic addition to any kids' party, serving as both a fun activity and delicious party favors or treats. Setting up a "Decorate Your Own" station is a popular choice, providing entertainment that keeps children engaged and allows them to personalize their snacks. This interactive element is often a highlight, offering a creative outlet amidst the party games and excitement.
Beyond the activity itself, treats adorned with fun edible decorations add a personalized touch to the party theme. Whether it's cupcakes topped with candy eyeballs for a monster party or cookies shaped like stars for a space adventure, these customized snacks enhance the overall atmosphere. They are also relatively inexpensive to create in bulk compared to store-bought decorated items, and the sense of accomplishment for kids who helped make them is priceless.
Preparing for Decoration Fun: Supplies & Ingredients
Essential Tools
Having the right tools ready makes the decoration process much smoother and more enjoyable, especially when working with children. Basic items like small bowls for holding different types of sprinkles or candies are crucial for organization and easy access. Spoons or small scoops can help distribute sprinkles or icing without making a large mess.
Cookie cutters in various fun shapes are essential for creating decorated cookies or even cutting shapes out of fruit leather or soft candies. Wax paper or parchment paper laid down on the workspace is a lifesaver for easy cleanup, catching drips and spills. Small offset spatulas are great for spreading frosting evenly, providing a smooth base for applying easy kids edible decorations.
Kid-Friendly Ingredients
Choosing ingredients that are safe, easy to handle, and appealing to children is key for kids edible decorations. Sprinkles are a universal favorite, available in countless colors, shapes, and sizes. Jimmies, nonpareils, sanding sugar, and edible glitter add texture and sparkle instantly.
Soft candies like gummy bears, mini marshmallows, and small jelly beans are perfect for pressing into frosting or arranging into patterns. Melted chocolate or candy melts (colored confectionery wafers) are versatile for dipping, drizzling, or molding, and they harden quickly. Edible markers are fantastic for drawing designs directly onto smooth surfaces like fondant, royal icing, or certain cookies. Fruit leather or roll-ups can be cut into shapes for colorful accents.
Planning: Themes & Ideas
Planning a theme can add an extra layer of excitement to your easy kids edible decorations project. It helps focus the creative process and makes the results feel cohesive, especially for parties or special occasions. Popular themes include animals, superheroes, holidays (like Halloween or Christmas), underwater worlds, or space adventures.
Once a theme is chosen, gather inspiration for specific decoration ideas. For an animal theme, think about using mini marshmallows for sheep's wool, pretzel sticks for antlers, or candy eyes for faces. A space theme might involve using silver sprinkles for stars, blue frosting for the galaxy, and circular candies for planets. Having a few simple ideas ready can help guide children, though allowing for spontaneous creativity is also important!
Step-by-Step Guide: No-Bake Options
Decorating with Sprinkles
Decorating with sprinkles is perhaps the simplest and most classic method for kids edible decorations. Start by ensuring the base treat (like a frosted cupcake or cookie) has a slightly sticky surface, like fresh frosting or a thin layer of melted chocolate. Provide small bowls of different sprinkles.
Children can hold the treat over a tray or piece of parchment paper to catch excess sprinkles (which can often be reused). They can dip the frosted surface directly into a bowl of sprinkles, or pinch small amounts and scatter them by hand. For more precise application, show them how to use a spoon to gently tap sprinkles onto specific areas.
Cookie cutters aren't just for dough! They can be used to create fun edible decorations from other pliable ingredients. Fruit leather or fruit roll-ups are excellent for this; their texture is firm enough to hold a shape but soft enough to cut easily.
Unroll the fruit leather onto a clean surface. Press small cookie cutters firmly into the fruit leather to cut out shapes like stars, hearts, or animals. Carefully peel the shapes away from the excess fruit leather. These shapes can then be pressed onto frosted cookies, cupcakes, or even attached to chocolate-dipped pretzels.
Mastering Melted Chocolate: Drizzling & Dipping
Melted chocolate or candy melts are versatile for creating easy kids edible decorations. For dipping, melt chocolate gently in a microwave-safe bowl (stirring every 30 seconds) or over a double boiler until smooth. Dip cookies, pretzels, or fruit pieces partially or fully into the melted chocolate, then place on parchment paper to set.
For drizzling, put melted chocolate into a piping bag with a fine tip, a zip-top bag with a corner snipped off, or simply use a fork. Hold the bag or fork above the treat and move it back and forth to create random or patterned lines. This technique adds a professional touch with minimal effort, perfect for easy baking decorations kids can help with.
Using Edible Markers
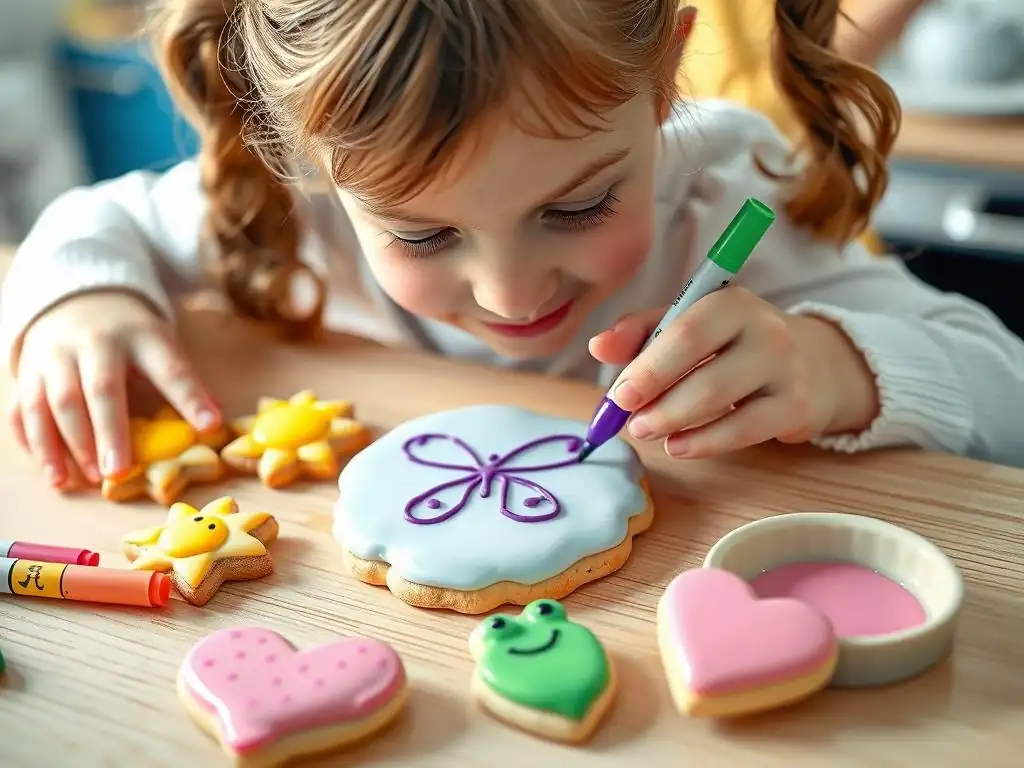
Edible markers are a mess-free way for kids to draw directly onto baked goods, making them ideal for easy kids edible decorations. They work best on smooth, dry surfaces. Good candidates include cookies covered in set royal icing or fondant, or even some types of smooth candies.
Provide children with edible markers in various colors and pre-frosted or covered treats. Encourage them to draw faces, patterns, letters, or any design they can imagine. This is similar to drawing on paper, making it intuitive for kids. Ensure they use a light touch to avoid damaging the surface of the decoration base.
Candy Melt Shapes
Candy melts are colored, vanilla-flavored confectionery wafers that melt smoothly and set firmly, making them perfect for molding fun edible decorations. They come in a wide range of colors, eliminating the need for food coloring.
Melt candy melts according to package directions. Pour the melted candy into silicone molds designed for chocolates or candies (shapes like hearts, stars, or small animals work well). Alternatively, you can pipe shapes directly onto parchment paper, such as dots, lines, or simple outlines. Let the candy melts set completely at room temperature or briefly in the refrigerator before carefully removing them from molds or parchment paper. These solid shapes can then be placed on top of cakes, cupcakes, or cookies.
Baking Recipes for Edible Decorations
Sugar cookies are a classic base for kids edible decorations because of their flat, sturdy surface and mild flavor. A reliable recipe typically includes butter, sugar, eggs, flour, vanilla extract, and baking powder. Creaming together 1 cup softened butter with 1.5 cups sugar until light and fluffy is a crucial first step for texture. Incorporating 2 large eggs and 1 teaspoon of vanilla adds richness and flavor.
Gradually mixing in about 3 cups of all-purpose flour combined with 2 teaspoons of baking powder creates the dough. Chilling the dough for at least 30 minutes (or up to 2 days) makes it easier to roll out to about 1/4 inch thickness without sticking. Baking at 350°F (175°C) for 8-12 minutes, depending on size and thickness, yields cookies that are firm enough to handle extensive decorating once cooled, providing a perfect canvas for easy baking decorations kids can apply.
Cupcakes
Cupcakes are miniature cakes that offer a fluffy, rounded surface ideal for a variety of easy kids edible decorations. A standard vanilla cupcake recipe often starts with creaming 1/2 cup butter with 1 cup sugar, then beating in 2 eggs and 1 teaspoon vanilla. Combining 1.5 cups flour with 1.5 teaspoons baking powder and a pinch of salt in a separate bowl is typical.
Alternately adding the dry ingredients with about 1/2 cup milk (or buttermilk for tenderness) to the wet ingredients results in a smooth batter. Filling cupcake liners about two-thirds full prevents overflow. Baking at 350°F (175°C) for 18-22 minutes yields moist cupcakes ready for frosting and decorating. The slightly domed top provides an excellent base for swirls of frosting, into which sprinkles, candies, and other fun edible decorations can be pressed.
Rice Krispie Treats
Rice Krispie treats are a fantastic no-bake base that is incredibly forgiving and easy for kids to work with, making them perfect for easy kids edible decorations. The basic recipe involves melting 3 tablespoons of butter with a 10-ounce bag of marshmallows in a large saucepan over low heat, stirring until smooth. Once melted, remove from heat and stir in 6 cups of crispy rice cereal until well coated.
Press the mixture into a buttered 9x13 inch pan using buttered spatulas or wax paper to prevent sticking. Allow to cool slightly before cutting into squares or using buttered cookie cutters to make shapes. The slightly sticky but firm texture of cooled treats holds lightweight decorations well. They can be dipped in melted chocolate, drizzled with icing, or adorned with sprinkles and small candies, proving they are versatile for kids edible decorations even without traditional baking.
Advanced Techniques (For Older Kids & Adults)
Piping with Royal Icing
Piping with royal icing allows for more detailed and intricate edible decorations for kids' treats, suitable for older children or with adult supervision. Royal icing is made from powdered sugar, egg whites (or meringue powder), and water, drying to a hard, smooth finish. A common ratio is 2 cups powdered sugar to 1 tablespoon meringue powder and 2-3 tablespoons water.
The consistency of the icing is key; a thicker consistency is used for outlines and borders, while a thinner "flood" consistency fills in areas smoothly. Using piping bags fitted with various tips (like round tips for dots or lines, or star tips for borders) allows for precise application. This technique is excellent for creating detailed patterns, writing messages, or outlining areas to be filled with sprinkles or edible glitter, significantly enhancing the complexity of fun edible decorations.
Creating Fondant Figures
Working with fondant allows for sculpting three-dimensional kids edible decorations, like small animals, flowers, or characters. Fondant is a pliable sugar paste, often purchased pre-made in various colors, although it can be made at home. It's similar to edible playdough.
To use fondant, knead a small amount until soft and pliable. Dust the work surface and your hands with a little cornstarch or powdered sugar to prevent sticking. Roll the fondant out and cut shapes with cookie cutters or a knife, or simply mold it with your hands into desired forms. Small amounts of water or edible glue can be used to stick pieces together. Fondant figures add impressive, custom elements to cakes and cupcakes, showcasing more advanced easy baking decorations kids can attempt with guidance.
Airbrushing (with Supervision)
Airbrushing is a technique that applies edible food colors using an airbrush machine, creating smooth gradients, stencils, and vibrant effects on edible decorations for kids. This method requires specific equipment and should always be done with strict adult supervision due to the machinery involved.
Edible airbrush colors are thin liquids specifically formulated for this use. The airbrush machine sprays a fine mist of color onto the surface of cakes, cookies, or fondant-covered treats. It allows for quick, even coverage and the creation of professional-looking effects like shading, highlights, or applying color through stencils for intricate patterns. While perhaps not the most "easy" technique, it offers older kids a chance to explore more artistic and sophisticated ways to make fun edible decorations.
Tips and Tricks for Success
Keeping It Clean
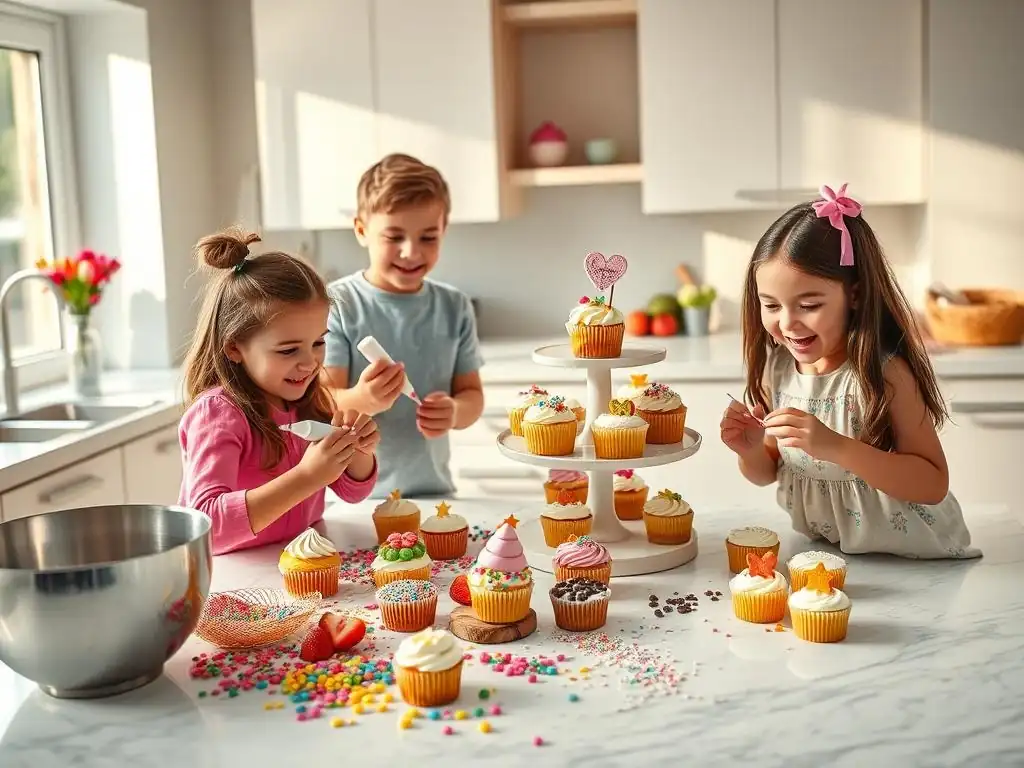
Baking and decorating with kids can get messy, but a little preparation goes a long way in keeping things manageable. Lay down newspaper, a plastic tablecloth, or parchment paper over the work surface before starting. Provide aprons or old t-shirts to protect clothing.
Have wet cloths or paper towels readily available for quick cleanups of sticky fingers or spills. Use small containers for sprinkles and candies rather than large bags, reducing the chance of a massive spill. Cleaning up as you go, like putting away ingredients once used, also helps maintain order and makes the final cleanup less daunting when creating easy kids edible decorations.
Engaging Kids
Keep kids engaged by giving them age-appropriate tasks and allowing for creativity. For very young children, simple tasks like sprinkling decorations or placing pre-made candy eyes are perfect. Older kids can help with frosting, cutting shapes, or even simple piping.
Talk about what you're doing and encourage them to describe their creations. Ask them about the colors they're using or the story behind their decorated cookie. Provide choices ("Would you like blue or red sprinkles on that?") to give them a sense of control and ownership over their fun edible decorations. Celebrate their efforts and creativity, no matter how imperfect the results may seem!
Storing Decorations
Proper storage ensures your beautiful edible decorations for kids stay fresh and intact. If you've made decorations separately (like fondant figures or candy melt shapes), store them in airtight containers at room temperature, away from direct sunlight or humidity. Avoid refrigerating fondant decorations unless the recipe specifically requires it, as condensation can cause them to soften or become sticky.
Decorated cookies or cupcakes should also be stored in airtight containers. If stacking, place parchment or wax paper between layers to prevent decorations from sticking together or getting smushed. Most decorated treats are best enjoyed within a few days to ensure the freshest taste and appearance of the easy kids edible decorations.
Troubleshooting
Dealing with Sticky Fondant
Fondant can become sticky, especially in warm or humid conditions, making it difficult to work with for kids edible decorations. If your fondant is sticky, try kneading a small amount of powdered sugar or cornstarch into it. Add just a little at a time until it reaches a smooth, non-sticky consistency.
Ensure your hands and the work surface are lightly dusted with powdered sugar or cornstarch before rolling or shaping. If using food coloring, gel colors are preferred over liquid colors, as excess liquid can make fondant sticky. If the fondant is very soft, chilling it briefly in the refrigerator can help firm it up, making it easier to handle when creating fun edible decorations.
Preventing Chocolate Seizing
Chocolate seizing occurs when melted chocolate comes into contact with even a tiny amount of water, causing it to clump up and become unusable for dipping or drizzling easy kids edible decorations. To prevent this, ensure all your equipment (bowls, spatulas) is completely dry before melting chocolate.
If using a double boiler, make sure the bottom of the bowl doesn't touch the simmering water below, and prevent steam from entering the chocolate. If melting in the microwave, use a clean, dry, microwave-safe bowl and stir frequently. If chocolate does seize, sometimes you can rescue it by stirring in a teaspoon of vegetable oil or melted shortening, but it won't be quite as smooth.
Fixing Broken Decorations
Sometimes, despite best efforts, edible decorations for kids' treats can break, particularly delicate ones like fondant figures or thin candy melt shapes. Don't despair! Often, breaks can be fixed using a little edible glue or a tiny amount of water.
For fondant pieces, slightly dampen the broken edges with a brush dipped in water or edible glue and gently press them back together. Hold in place for a few seconds until they adhere. For candy melt shapes, a tiny dab of fresh melted candy melt can act as glue. Be patient and use minimal adhesive to avoid visible lines. Small cracks on cookies or icing can sometimes be covered up with strategically placed sprinkles or other easy baking decorations kids have on hand.
Decoration Ideas by Theme
Ocean-Themed Treats: Edible Seaweed & Fish
For an ocean theme, turn cupcakes or cookies into underwater scenes using easy kids edible decorations. Blue frosting makes a great base for the water. Edible seaweed can be made by pressing green fruit roll-ups through a garlic press or cutting wavy strips of green fondant.
Small fish shapes can be cut from orange, yellow, or red fruit leather using miniature cookie cutters. Gummy fish candies are also a simple, ready-made option to place on the "water." Use blue sanding sugar or edible glitter for sparkle. Crushed graham crackers can represent sand around the edges, completing the fun edible decorations underwater scene.
Garden-Themed Treats: Flower Decorations & Ladybugs
A garden theme is perfect for colorful kids edible decorations. Cupcakes can be decorated with green frosting "grass" using a star tip. Edible flowers are easy to make using small flower-shaped cookie cutters on thinly rolled fondant in various colors.
Ladybugs can be created using red candies (like M&M's or red candy melts) with dots of black icing or edible marker for spots and a black sprinkle or icing line for the head. Green sprinkles or crushed green candies can represent leaves or moss. These easy kids edible decorations bring the beauty of a garden right onto your treats.
Sports-Themed Treats: Edible Baseballs & Team Logos
Sports themes offer fun possibilities for edible decorations for kids' treats. Round cookies or cupcakes can become edible baseballs, basketballs, or soccer balls. For a baseball, use white frosting and draw red stitching lines with edible marker or thin red icing.
For a basketball, use orange frosting and draw black lines. Soccer balls need white frosting with black hexagon patterns drawn on. Team logos can be simplified and drawn onto cookies with edible markers or piped with icing. These easy baking decorations kids can relate to their favorite sports and teams.
Space-Themed Treats: Edible Planets & Stars
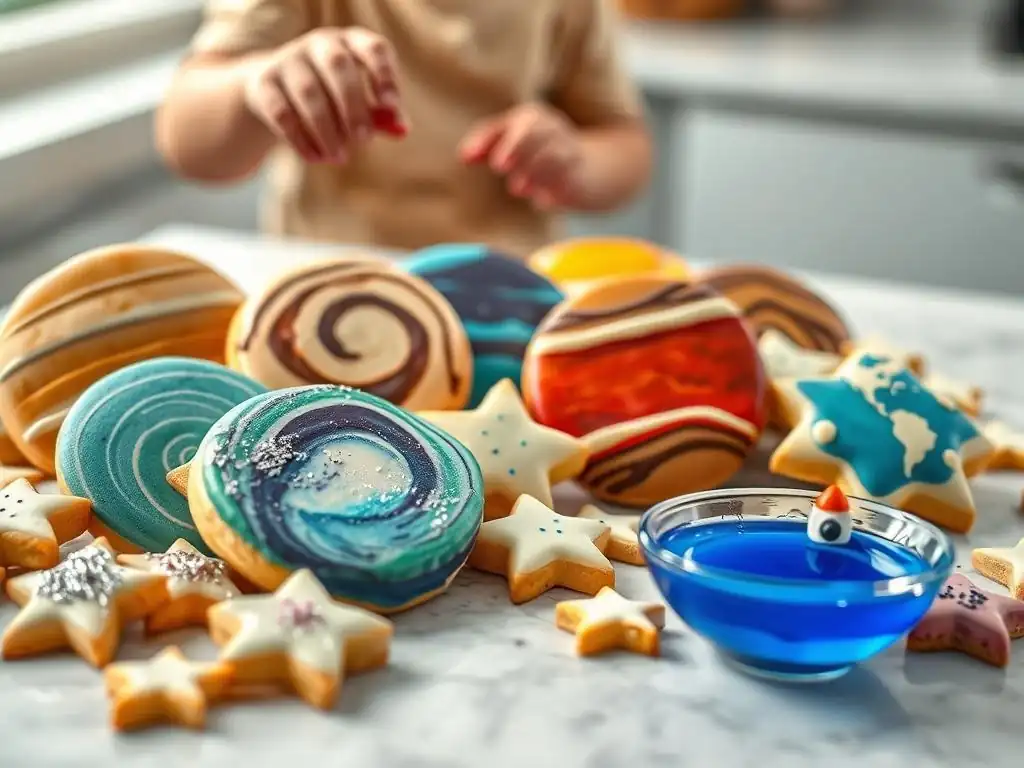
Explore the galaxy with space-themed fun edible decorations. Dark blue or black frosting serves as the night sky. Use round candies or molded candy melts in different colors and sizes to represent planets; swirl different colors together before they set for a marbled effect.
Stars can be silver or gold sprinkles, yellow icing dots, or star shapes cut from yellow fondant or fruit leather. Add edible glitter for extra sparkle like distant galaxies. Small pretzel sticks can become rocket ship bodies, with candy melts or frosting for flames, creating easy kids edible decorations that are out of this world.
Dinosaur-Themed Treats: Edible Dinosaur Footprints & Bones
Roar into a dinosaur theme with prehistoric kids edible decorations. Brown or green frosting can represent muddy or grassy terrain. Dinosaur footprints are simple to make: press a mini marshmallow or a large round sprinkle onto the frosting, then add three small dots or lines in front of it with brown or black icing.
Edible bones can be piped with white icing or made from white candy melts molded into bone shapes (or even just small white candies arranged like bones). Plastic dinosaur toys (cleaned!) can be placed on top of the decorated treats for extra effect, alongside the easy kids edible decorations you've created.
Showcase: Inspiring Examples
Inspiring Creations
Imagine cupcakes transformed into miniature oceans, complete with blue swirled frosting, gummy fish swimming on top, and edible green fruit leather waving like seaweed. Picture sugar cookies shaped like dinosaurs, iced green or brown, with simple three-toed footprints pressed into the frosting before it sets, created using small candy pieces.
Consider a batch of rice krispie treats cut into squares, some dipped halfway in melted chocolate and sprinkled with colorful jimmies, others drizzled with white icing in zig-zag patterns. Visualize cupcakes frosted white and decorated with edible markers drawn by children – one might have a wobbly robot, another a smiling sun, showcasing the direct, uninhibited creativity possible with easy kids edible decorations. These examples highlight how simple techniques and ingredients yield delightful, personalized results.
Conclusion: Baking Memories
Encourage Creativity!
Making edible decorations for kids' treats is more than just a baking activity; it's an opportunity to encourage creativity and self-expression. Provide the tools and ingredients, offer guidance when needed, but most importantly, allow children the freedom to experiment and make their own choices. There are no wrong answers in edible art!
Embrace the process, even the mess, and focus on the fun and the shared experience. The skills learned, from measuring ingredients to decorating techniques, are valuable, but the memories created while working together on these easy kids edible decorations are truly priceless. Celebrate each unique creation and the effort that went into it.
Once your delicious and beautifully decorated treats are complete, share them! Whether it's with family, friends, or at a party, the joy of sharing something you've made is immense. Take photos of the finished products and the decorating process itself to remember the fun you had.
Consider sharing your fun edible decorations photos online in baking communities or on social media. Seeing what others have created can be inspiring, and sharing your own work can encourage others to try making easy baking decorations kids will love. Happy decorating and happy baking!
Frequently Asked Questions
What are some easy edible decoration ideas for kids' treats?
Some simple ideas include using melted chocolate to create shapes, applying sprinkles in fun patterns, or using fruit slices to make simple designs.
What ingredients are best for kids to use when making edible decorations?
Kid-friendly ingredients include melted chocolate chips, colorful sprinkles, pre-made frosting, and soft candies like gummy bears or mini marshmallows. Avoid anything requiring sharp tools or high heat.
How can I make edible decorations a safe activity for my kids?
Always supervise children, especially when using heat sources like a microwave. Provide age-appropriate tools and ensure they understand basic hygiene, like washing hands before and after decorating.
What's the best way to store edible decorations made in advance?
Store homemade sprinkles or decorated cookies in an airtight container at room temperature or in the refrigerator, depending on the ingredients used. Frosting decorations are best refrigerated.
How can I make edible decorations more fun for kids?
Turn it into a creative activity by providing a variety of decorations and letting them express themselves. Use themed cutters or coloring techniques to add even more excitement to the process.
The joy of creating edible decorations with children isn't just about the pretty sprinkles and whimsical designs; it's about fostering creativity, connection, and lasting memories. These simple, easy-to-follow techniques empower both parents and children to transform ordinary treats into extraordinary celebrations, making even the simplest cupcake a masterpiece.
The impact of shared creative experiences, especially in the kitchen, extends far beyond the finished product. It's about building confidence, nurturing patience, and strengthening the bond between generations. As the saying goes, The best things in life are homemade,
and this extends to the joy of making something beautiful and delicious together. The memories forged around a table covered in sprinkles and frosting are often more valuable than the treats themselves, shaping family traditions and fostering a love of cooking and creativity that can last a lifetime.
Now, I invite you to consider how you can incorporate these simple techniques into your own life. Think about the next birthday party, holiday celebration, or even a quiet afternoon at home. Gather your loved ones, gather your ingredients, and let the creative juices flow. Don't be afraid to experiment, to make mistakes, and most importantly, to have fun. The mess is worth it, the smiles are priceless, and the memories created will be sweeter than any frosting.
Unleash Your Inner Cake Artist!
Thanks for joining us on this sweet journey into edible decorating! We hope you've discovered fun, easy ways to add a touch of magic to your kids' treats. Now it's time to put your newfound skills to the test!
- Transform your next baking project: Try one of the decorating techniques we explored today – maybe those whimsical fondant flowers or the surprisingly simple piped frosting designs?
- Share your creations: Show us your masterpieces on social media using #BakeWithEaseKids! We’d love to see what deliciousness you create.
- Challenge yourself: Think outside the sprinkles! What unique edible decoration will you create next?
What's your favorite edible decorating trick that makes baking with kids extra fun? Let us know in the comments!