
Preventing Chocolate Bloom: Keep Your Bakes Looking Perfect

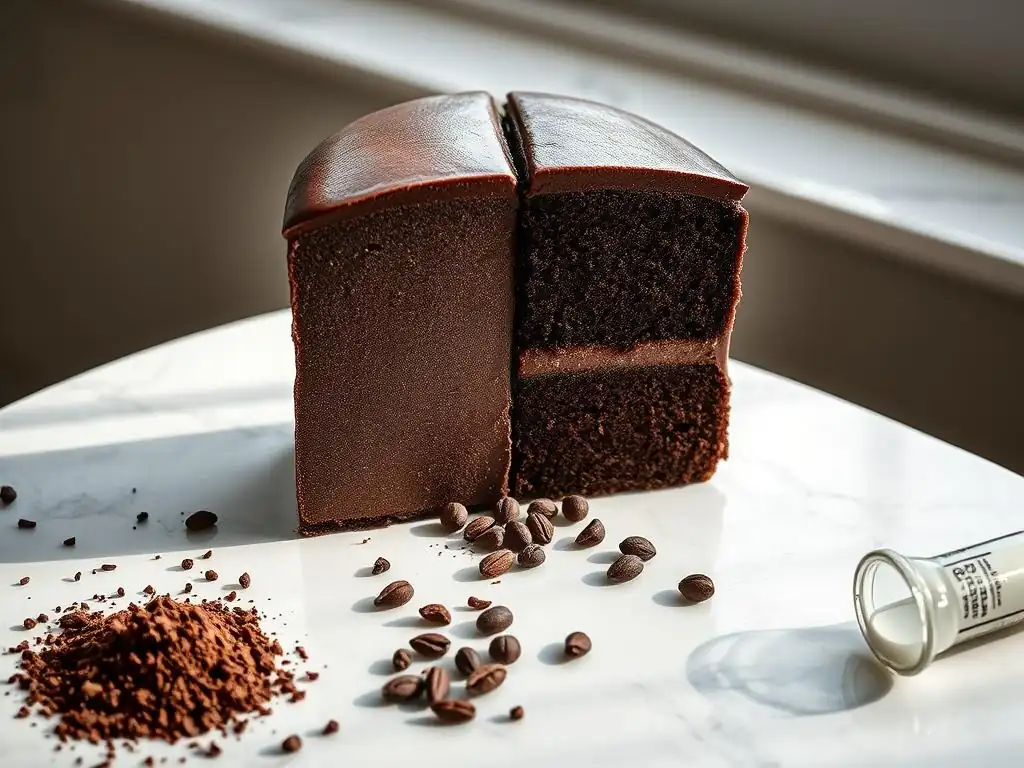
Welcome to BakeWithEase, your guide to baking bliss! Ever wondered how to keep that gorgeous sheen on your chocolate creations? Dive in to discover our essential chocolate bloom prevention tips and unlock the secrets to perfectly tempered and visually stunning baked goods. Don't let unsightly bloom ruin your masterpiece - let's explore how to keep your chocolate looking its best!
Chocolate bloom can be a baker's nemesis, turning beautifully crafted treats into something that looks less than appealing. While often mistaken for spoilage, it's usually just a physical change that affects appearance and texture, not safety. Understanding why it happens and implementing effective chocolate bloom prevention tips is key to ensuring your baked goods look as good as they taste.
- Understanding Chocolate Bloom: A Baker's Guide
- Chocolate Bloom Prevention Tips: Mastering Chocolate Tempering
- Controlling Temperature and Humidity: Key to Preventing Chocolate Bloom
- Selecting the Right Chocolate for Baking: Impact on Bloom Resistance
- Best Practices for Working with Chocolate in Recipes: Bloom-Proofing Your Bakes
- Addressing Existing Chocolate Bloom: Can You Fix It?
- Long-Term Chocolate Storage: Maintaining Quality and Preventing Bloom
- Frequently Asked Questions
- Final Reflection: The Enduring Allure of Flawless Chocolate
- Unlock Your Chocolate's Full Potential!
Understanding Chocolate Bloom: A Baker's Guide
Navigating the world of chocolate for baking involves more than just melting and mixing. A common challenge bakers face is chocolate bloom, those unsightly grayish streaks or spots that can appear on the surface of chocolate. This phenomenon doesn't necessarily mean the chocolate is bad, but it certainly impacts its visual appeal and can slightly alter its texture, making it less smooth or snappy.
Getting a handle on what causes bloom is the first step in mastering chocolate bloom prevention tips. It's primarily related to the cocoa butter crystals within the chocolate and their behavior under certain conditions, particularly temperature fluctuations. When these crystals melt and recrystallize improperly, or when sugar migrates to the surface, bloom occurs.
What is Chocolate Bloom and Why Does it Happen?
Chocolate bloom is a common issue where the surface of chocolate develops a dull, grayish, or streaky appearance. This isn't mold or spoilage but a physical separation or crystallization process within the chocolate itself. It primarily happens because chocolate is a complex mixture, with cocoa butter forming a specific crystal structure when properly tempered.
The fundamental reason bloom occurs is instability in the chocolate's structure, often triggered by changes in temperature. Cocoa butter can solidify into six different crystal forms, each melting at a different temperature. When chocolate is properly tempered, the cocoa butter is encouraged to form the most stable crystal type (Type V), which melts smoothly just below body temperature (around 32-34°C or 90-93°F).
If the chocolate is melted and then cools without proper tempering, or if tempered chocolate is exposed to significant temperature changes, these stable crystals can melt and recrystallize into less stable, larger, and visible forms on the surface, causing fat bloom. Similarly, exposure to moisture can dissolve sugar crystals, which then recrystallize on the surface as sugar bloom.
Types of Chocolate Bloom: Fat Bloom vs. Sugar Bloom
There are two distinct types of chocolate bloom: fat bloom and sugar bloom. While both result in a dull, grayish appearance, their causes and characteristics differ. Fat bloom is much more common and is caused by the migration and recrystallization of cocoa butter (or other fats, if present) on the chocolate surface.
This typically happens when chocolate is stored at inconsistent temperatures, allowing the stable Type V cocoa butter crystals to melt and reform into larger, less stable crystals like Type I or II, which are visible and give the chocolate a dusty or streaky look. For instance, leaving a tempered chocolate bar in a warm room (say, 25°C or 77°F) and then moving it to a cooler pantry (18°C or 64°F) repeatedly can easily induce fat bloom.
Sugar bloom, on the other hand, is caused by moisture. When chocolate is exposed to high humidity or condensation (like taking a cold chocolate bar directly into a warm, humid room), moisture dissolves sugar crystals on the surface. As the moisture evaporates, the sugar crystals are left behind, but they recrystallize in a larger, disorganized manner, creating a gritty, sandy texture and a grayish surface layer.
This is often seen when chocolate is stored in a refrigerator without proper packaging, as the humidity inside can be quite high. While both blooms affect appearance and texture, fat bloom tends to feel greasy or waxy, while sugar bloom feels rough and gritty.
Identifying Chocolate Bloom: Visual Cues and Texture Changes
Identifying chocolate bloom is usually straightforward by observing its appearance and feeling its texture. The most obvious sign of bloom is a grayish or whitish film, streaks, or spots on the surface of the chocolate. This discoloration can range from subtle haziness to a dense, powdery coating, depending on the severity and type of bloom.
Fat bloom often looks like a waxy or greasy film, sometimes forming swirl patterns, and the chocolate might feel slightly soft or crumbly rather than having a crisp snap. A common example is a chocolate chip that looks dusty or streaky instead of uniformly dark and glossy.
Sugar bloom typically presents as a dull, uniform gray layer, often with a rough or sandy texture. If you rub the surface, sugar bloom will feel gritty, whereas fat bloom will feel smooth or greasy. While bloomed chocolate is generally safe to eat, the altered crystal structure affects its mouthfeel.
Fat-bloomed chocolate can feel waxy or oily and may not melt as smoothly in your mouth. Sugar-bloomed chocolate will have an unpleasant gritty texture due to the large sugar crystals. These visual and textural changes, while harmless from a food safety standpoint, are undesirable in baking as they impact the final look and eating experience of your creations.
Chocolate Bloom Prevention Tips: Mastering Chocolate Tempering
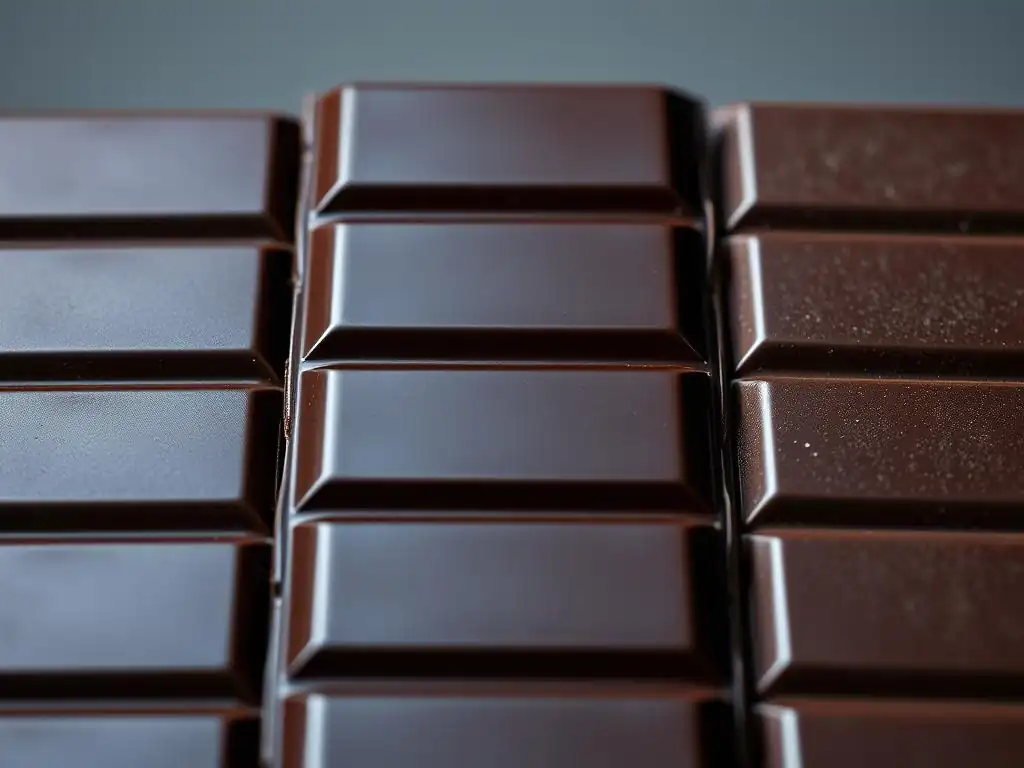
One of the most powerful chocolate bloom prevention tips revolves around the process of tempering. Tempering chocolate is a critical technique, especially when you need the chocolate to set with a glossy finish, a firm snap, and resistance to melting at room temperature. It's the process of carefully melting and cooling chocolate to encourage the cocoa butter to form specific, stable crystal structures. Without proper tempering, chocolate is highly susceptible to fat bloom, as the cocoa butter crystals will solidify randomly into unstable forms.
Mastering tempering allows you to control the crystallization of cocoa butter, ensuring it solidifies into the desired Type V form. This stable crystal structure is what gives properly tempered chocolate its characteristic shine, snap, and resistance to fat bloom, even when exposed to minor temperature fluctuations. For bakers making chocolate decorations, dipped items, or coatings, tempering is non-negotiable for achieving professional results and preventing bloom.
The Importance of Proper Chocolate Tempering for Bloom Prevention
Proper chocolate tempering is arguably the single most important step in preventing fat bloom in chocolate used for coating, dipping, and molding. When chocolate is melted, all the cocoa butter crystals break down. As it cools, these crystals reform. Untempered chocolate allows cocoa butter to crystallize into various unstable forms (Types I through IV), which are prone to migrating to the surface and recrystallizing into larger, visible structures – this is fat bloom. The melting point of these unstable crystals is lower, making the chocolate softer and more likely to bloom even at slightly elevated room temperatures.
Tempering guides the cocoa butter to crystallize predominantly into the stable Type V form. This crystal structure is compact and stable, melting sharply at around 32-34°C (90-93°F). Chocolate with a high proportion of Type V crystals is resistant to fat bloom because these crystals require a higher temperature to melt and are less likely to rearrange themselves under normal room temperature conditions.
Think of it like building a wall: untempered chocolate is like stacking bricks haphazardly, while tempered chocolate is like carefully laying them with mortar in a strong pattern. This stable structure prevents the fat from migrating and blooming, keeping your chocolate glossy and beautiful.
Step-by-Step Guide to Tempering Chocolate: Techniques for Success
Tempering involves carefully controlling temperature to encourage the formation of Type V crystals. Here are a few common methods:
Seed Tempering Method
The seed tempering method is popular for home bakers due to its relative simplicity. It involves melting chocolate completely, cooling it down to a specific temperature, and then adding finely chopped, already tempered chocolate ("seed") to initiate crystallization.
- Melt: Gently melt about 2/3 of your chopped chocolate in a double boiler or microwave until it reaches its initial melting temperature (e.g., 45-50°C/113-122°F for dark, 40-45°C/104-113°F for milk/white). Ensure no water comes into contact with the chocolate.
- Cool: Remove from heat (or microwave) and let the chocolate cool naturally or over an ice bath, stirring constantly, until it reaches a lower temperature (e.g., 28-29°C/82-84°F for dark, 26-28°C/79-82°F for milk/white).
- Seed: Add the remaining 1/3 of finely chopped, tempered chocolate (the seed). Stir continuously. The seed chocolate, containing stable Type V crystals, will "seed" the melted chocolate, encouraging it to form the same stable structure as it cools.
- Bring to Working Temperature: Continue stirring until the seed chocolate is fully melted and the mixture reaches the correct working temperature (e.g., 31-32°C/88-90°F for dark, 29-30°C/84-86°F for milk/white). Test a small amount on parchment paper; it should set quickly (within 3-5 minutes) with a glossy finish and snap. If it thickens too much, gently warm it slightly, staying below the maximum working temperature.
Tabliering Method (Marble Slab Tempering)
The tabliering method, often used by professionals, involves working the chocolate on a cool surface like a marble slab to rapidly cool and agitate it, promoting crystallization.
- Melt: Melt all of your chopped chocolate to the initial melting temperature (same as seed method).
- Pour & Spread: Pour about 2/3 of the melted chocolate onto a clean, cool marble or granite slab.
- Work: Using a metal scraper or palette knife, spread the chocolate thinly and then scrape it back together. Repeat this motion continuously. This cools the chocolate rapidly while the movement encourages stable crystal formation.
- Check Temperature: Continue working the chocolate until it reaches the cooling temperature (same as seed method, e.g., 28-29°C/82-84°F for dark). It will start to thicken slightly.
- Combine & Warm: Scrape the worked chocolate back into the bowl with the remaining melted chocolate. Stir thoroughly. The warmer chocolate in the bowl will gently raise the temperature of the worked chocolate to the correct working temperature (same as seed method, e.g., 31-32°C/88-90°F for dark).
- Test: Test a small amount on parchment paper. It should set quickly with a glossy finish and snap.
Using a Chocolate Tempering Machine
A chocolate tempering machine automates the process, offering the most consistent results and being ideal for larger quantities.
- Add Chocolate: Place chopped chocolate into the machine's basin.
- Set Temperature: Set the machine to the melting temperature for your chocolate type (e.g., 45-50°C/113-122°F for dark).
- Melt: The machine will gently heat and stir the chocolate until fully melted.
- Cool & Temper: Lower the machine's temperature setting to the tempering temperature (e.g., 31-32°C/88-90°F for dark). The machine will cool the chocolate while continuously stirring, maintaining the correct temperature for crystallization. Some machines require adding seed chocolate during the cooling phase.
- Maintain: The machine holds the chocolate at the working temperature, keeping it in temper for extended periods, making it perfect for continuous dipping or molding.
Avoiding Common Tempering Mistakes That Lead to Bloom
Even with careful technique, mistakes can happen that lead to bloom. A primary error is overheating the chocolate during the initial melting phase. Exceeding the recommended melting temperature can destroy some of the desirable cocoa butter crystals, making it harder to achieve proper temper. Forgetting to stir continuously during cooling is another pitfall; agitation is necessary to distribute the forming crystals evenly and encourage the right type to form. Skipping the "seed" step or using insufficient seed chocolate in that method means there aren't enough existing stable crystals to guide the rest of the chocolate into temper.
Another frequent mistake is allowing water or steam to come into contact with the chocolate. Even a single drop can cause the chocolate to seize, becoming a lumpy, unusable mess. While seized chocolate isn't bloomed, improper attempts to fix it can certainly lead to bloom later.
Not checking the temperature accurately with a reliable thermometer is also a major cause of tempering failure; slight variations outside the narrow temperature ranges can result in poor crystallization and subsequent bloom. Finally, working in a room that is too warm or humid can make maintaining temper difficult and increase the risk of both fat and sugar bloom. Proper chocolate bloom prevention tips start with precise temperature control and avoiding moisture.
Controlling Temperature and Humidity: Key to Preventing Chocolate Bloom
Beyond tempering, controlling the environment where chocolate is stored and worked is fundamental to preventing both fat and sugar bloom. Chocolate is highly sensitive to its surroundings, and inconsistent temperatures or excessive moisture can quickly undo the stability achieved through tempering or lead to sugar migration. Maintaining a stable, cool, and dry environment is one of the most effective chocolate bloom prevention tips you can practice consistently.
Think of chocolate as a delicate ingredient that thrives in conditions similar to a cool, dry pantry. Drastic swings in temperature cause the cocoa butter crystals to expand and contract, leading to fat bloom. High humidity introduces moisture, which is the primary culprit behind sugar bloom. By managing these environmental factors, you create conditions where chocolate can remain stable and bloom-free for longer periods.
Ideal Storage Conditions for Chocolate: Temperature and Humidity Levels
Storing chocolate correctly is crucial for maintaining its quality and preventing bloom. The ideal temperature range for storing chocolate is relatively cool, typically between 15°C and 18°C (59°F and 64°F). Temperatures significantly above this range, especially above 25°C (77°F), can cause the stable Type V cocoa butter crystals to melt, leading to fat bloom upon resolidification. Temperatures too low, particularly refrigeration temperatures below 5°C (41°F), can cause condensation when the chocolate is brought back to room temperature, potentially leading to sugar bloom if not properly wrapped.
Equally important is controlling humidity. Chocolate should be stored in a dry environment with relative humidity below 50%. High humidity (above 60%) can cause sugar bloom as moisture on the surface dissolves sugar crystals. Storing chocolate in a cool, dry pantry away from direct sunlight and strong odors is generally ideal. Avoid storing it near sources of heat like ovens or radiators, or in areas prone to temperature fluctuations like near windows or exterior walls. Proper packaging is also key to protect against both humidity and odor absorption.
Protecting Chocolate from Temperature Fluctuations
Temperature fluctuations are a major enemy of tempered chocolate and a prime cause of fat bloom. Even chocolate that was perfectly tempered can bloom if subjected to repeated warming and cooling cycles. For example, if a box of chocolates is moved from a cool store shelf to a warm car, then into a cool pantry, and perhaps later handled in a warm kitchen, the cocoa butter crystals undergo stress.
Each time the temperature rises above the stable melting point (around 32-34°C/90-93°F for Type V), some crystals melt. If the cooling is slow or uncontrolled, they reform into larger, less stable crystals on the surface, causing bloom.
To protect chocolate, store it in a location with a consistent temperature, ideally within the 15-18°C range. If you must transport chocolate, especially in warm weather, use insulated containers. When working with chocolate in the kitchen, try to keep the environment cool and stable. If you need to bring chocolate out of refrigeration or a very cool storage area, allow it to come to room temperature slowly while still in its packaging to prevent condensation from forming on the surface, which could lead to sugar bloom. This slow acclimatization minimizes thermal shock and reduces the risk of crystal instability.
How Humidity Affects Chocolate and Bloom Formation
Humidity directly contributes to sugar bloom by providing the moisture necessary to dissolve surface sugar crystals. Chocolate contains sugar, typically sucrose, which is water-soluble. When the relative humidity of the surrounding air is high, water vapor can condense on the chocolate surface, especially if the chocolate is cooler than the ambient temperature. This is particularly noticeable when taking chocolate directly from a cold refrigerator into a warm, humid room.
As the moisture sits on the chocolate, it dissolves the tiny sugar crystals on the surface. When the moisture evaporates, the dissolved sugar recrystallizes. However, unlike the smooth, microscopic crystals originally incorporated into the chocolate, the newly formed crystals are larger, irregular, and visible, creating a rough, gritty, and grayish surface layer – sugar bloom. Preventing this involves storing chocolate in a dry environment (below 50% relative humidity) and allowing cold chocolate to warm up slowly to room temperature before unwrapping it, preventing condensation. Using airtight packaging also helps create a barrier against ambient humidity.
Selecting the Right Chocolate for Baking: Impact on Bloom Resistance
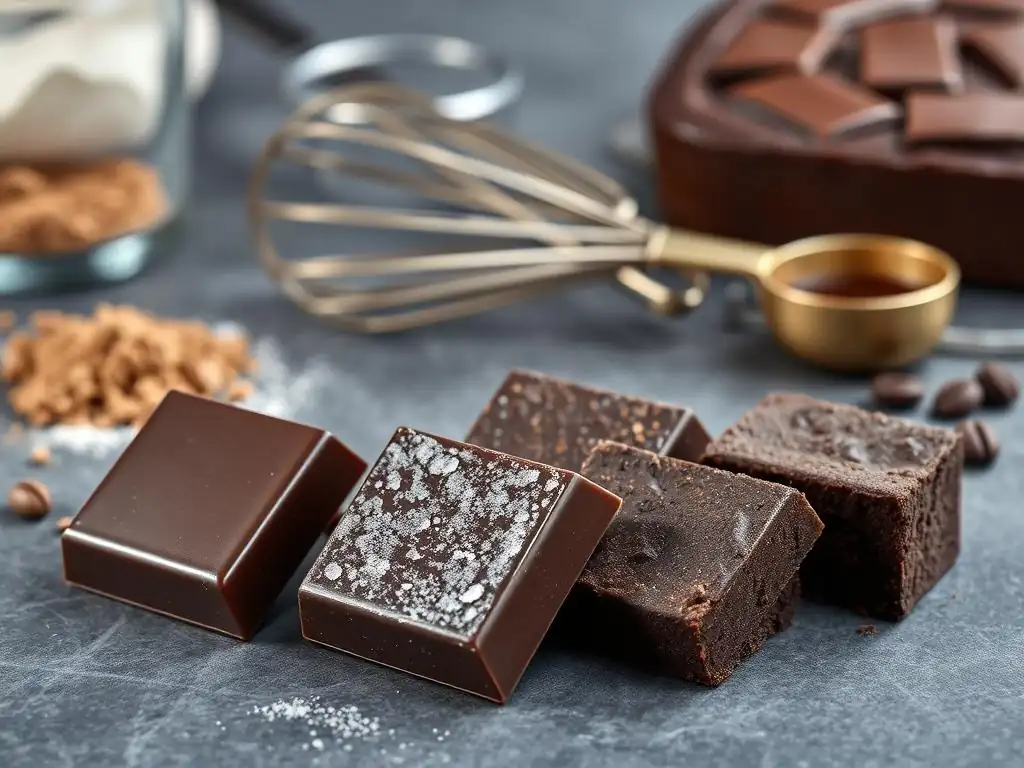
The type and quality of chocolate you choose can also play a role in its susceptibility to bloom. Not all chocolates are created equal, and understanding the impact of ingredients and processing on bloom resistance is another valuable set of chocolate bloom prevention tips. Using high-quality chocolate designed for baking can give you a head start in avoiding bloom issues.
The composition of chocolate, particularly its cocoa butter content and the presence of other fats, significantly affects its stability and how it behaves during melting, tempering, and storage. Choosing chocolate with a higher percentage of cocoa butter and avoiding those with added vegetable oils can lead to better results and less susceptibility to bloom.
Choosing High-Quality Chocolate: Cocoa Butter Content and Stability
The quality of chocolate is heavily influenced by its cocoa butter content and the purity of that cocoa butter. High-quality couverture chocolate, often preferred by professional bakers, contains a higher percentage of cocoa butter (typically 32-39% or more) and no added vegetable fats. Cocoa butter is a unique fat with specific crystallization properties that allow for proper tempering and the formation of stable Type V crystals. Chocolate made with high-quality cocoa butter is inherently more stable and less prone to fat bloom when properly handled.
Conversely, many compound coatings or lower-grade chocolates use alternative vegetable fats (like palm kernel oil or coconut oil) instead of or in addition to cocoa butter. While these fats might make the chocolate easier to melt and work with in some applications, they don't have the same crystallization properties as cocoa butter. They often solidify into less stable crystal structures, making the finished product highly susceptible to fat bloom, sometimes even without significant temperature fluctuations.
Checking the ingredient list for "cocoa butter" as the primary fat and avoiding products listing vegetable oils or "partially hydrogenated oils" is a good strategy for better bloom resistance. For example, a fine dark couverture might list cocoa mass, sugar, and cocoa butter as the main ingredients, often with a minimum cocoa solids percentage like 70%.
Understanding Different Types of Chocolate: Dark, Milk, and White
Different types of chocolate have varying compositions, which affects their behavior and susceptibility to bloom. Dark chocolate typically contains cocoa mass (cocoa solids and cocoa butter), sugar, and sometimes vanilla and lecithin. It has the highest percentage of cocoa solids and often the highest proportion of cocoa butter relative to sugar compared to milk or white chocolate. The higher cocoa butter content means that tempering is crucial for dark chocolate, but when properly tempered, it is relatively stable. Dark chocolate typically requires tempering temperatures around 31-32°C (88-90°F) for the working temperature.
Milk chocolate contains cocoa mass, sugar, cocoa butter, and milk solids (usually in powder form). The addition of milk solids and often a lower percentage of cocoa solids means it has less cocoa butter overall than dark chocolate, and the presence of milk fat can also influence crystallization. Milk chocolate is slightly more sensitive to heat than dark chocolate and requires slightly lower tempering temperatures, typically around 29-30°C (84-86°F).
White chocolate contains cocoa butter, sugar, milk solids, vanilla, and lecithin, but no cocoa solids. It has a high percentage of cocoa butter and milk solids. Due to the milk fat and lack of cocoa solids, white chocolate is the most sensitive to heat and requires the lowest tempering temperatures, usually around 28-29°C (82-84°F), making it the most challenging type to temper correctly and potentially more susceptible to bloom if not handled carefully.
How Chocolate Composition Affects Bloom Susceptibility
The specific ratio of cocoa butter to cocoa solids and sugar, as well as the presence of other fats (like milk fat in milk/white chocolate or added vegetable fats), directly influences how susceptible chocolate is to bloom. Chocolate with a higher percentage of cocoa butter, like good quality dark couverture (e.g., 70% cocoa solids often implies a significant cocoa butter content), is more reliant on proper tempering for stability but, when tempered correctly, is quite resistant to fat bloom because the stable Type V crystals are robust.
Chocolate with lower cocoa butter content or the addition of other fats is generally more prone to bloom. Milk chocolate (typically 30-40% cocoa solids) and white chocolate (containing cocoa butter and milk solids but no cocoa solids) have different fat profiles due to the inclusion of milk fat. Milk fat can interfere with the formation of stable Type V cocoa butter crystals, making milk and white chocolate slightly more challenging to temper and potentially more susceptible to fat bloom than dark chocolate, even when properly tempered.
Furthermore, the sugar content plays a role in sugar bloom; chocolates with higher sugar content might be slightly more prone to sugar bloom if exposed to moisture. Ultimately, understanding these differences helps bakers choose the right chocolate for their application and apply appropriate chocolate bloom prevention tips based on the type of chocolate being used.
Best Practices for Working with Chocolate in Recipes: Bloom-Proofing Your Bakes
Preventing chocolate bloom isn't just about storage and tempering; it also involves how you handle and incorporate chocolate into your actual recipes. From melting and mixing to applying decorative elements, each step presents an opportunity to either promote or prevent bloom. Implementing best practices during the baking process adds another layer to your chocolate bloom prevention tips arsenal, ensuring your finished products remain beautiful and stable.
Consider how chocolate interacts with other ingredients and the environment during preparation and cooling. Techniques for melting, combining, and setting chocolate components are crucial for maintaining its structure and preventing bloom from forming on the surface or within the baked item itself.
Incorporating Melted Chocolate Correctly into Batters and Ganaches
When incorporating melted chocolate into batters (like cakes or brownies) or creating ganaches, the goal is typically not to maintain the temper of the chocolate (as it will be mixed with other ingredients and undergo further heating/cooling), but to avoid introducing conditions that could lead to bloom later or affect the texture of the finished product. The primary risk here is overheating the chocolate during melting before combining it. Melting chocolate too quickly or at too high a temperature can cause the cocoa butter to separate slightly or burn, negatively impacting flavor and texture.
For batters, melt chocolate gently using a double boiler or microwave on low power, stirring frequently, until just smooth. Avoid direct high heat. Allow the melted chocolate to cool slightly before adding it to your batter, especially if other ingredients are cold, to prevent shocking the mixture and causing the chocolate to seize or solidify unevenly.
For ganaches, which are a mixture of chocolate and cream, the hot cream melts the chocolate. It's crucial to use finely chopped chocolate or chocolate callets to ensure it melts smoothly and completely in the hot cream.
Pour the hot cream over the chocolate, let it sit for a minute or two, then whisk gently from the center outwards until smooth. Over-whipping can incorporate air, affecting texture, but gentle mixing ensures the chocolate is fully emulsified with the fat in the cream, creating a stable ganache that is less prone to fat separation and bloom within the mixture itself.
Handling Chocolate Decorations and Coatings: Preventing Bloom After Application
Applying chocolate as a coating or using it for decorations requires properly tempered chocolate to achieve a glossy finish and prevent fat bloom on the surface. Once tempered chocolate is applied, how it cools and sets is critical. Ensure the environment is cool and dry, ideally between 18-20°C (64-68°F) with low humidity. Allowing tempered chocolate to set at room temperature is usually best; refrigerating it can cause condensation (sugar bloom risk) or stress the crystals (fat bloom risk) if the temperature change is too drastic or the chocolate isn't perfectly tempered.
When making chocolate curls, shards, or molded shapes, work quickly with tempered chocolate on a cool surface. Once formed, let them set fully at a stable room temperature before handling. For dipped items like truffles or cookies, ensure the item being dipped isn't too cold, as this can cause the chocolate coating to set too quickly and unevenly, potentially trapping moisture or stressing the temper.
After dipping, place items on parchment paper and allow them to set undisturbed in a cool, dry place. Avoid handling them until completely firm. Storing finished items in airtight containers in a cool, dry place helps maintain the bloom-free finish.
Preventing Bloom in Chocolate-Covered Treats: Techniques and Tips
Ensuring that chocolate-covered treats remain bloom-free involves a combination of tempering, handling, and storage. For items like chocolate-covered strawberries, pretzels, or candies, starting with properly tempered chocolate is non-negotiable for a stable, glossy coating. The temperature of the item being dipped is also important; room temperature is generally best. Dipping very cold items can lead to thermal shock and potential bloom.
After dipping, allowing the chocolate coating to set correctly is vital. This should happen at a stable, cool room temperature (ideally 18-20°C) rather than in a cold refrigerator, which can cause condensation and sugar bloom. Ensuring adequate air circulation around the setting items can help. Once fully set and firm, store the chocolate-covered treats in airtight containers in a cool, dry place, away from direct light and strong odors.
Layering items with parchment paper can prevent them from sticking together. For longer storage, or in warmer climates, refrigeration might be necessary, but always ensure items are in airtight containers and allow them to come to room temperature slowly in the container before opening to prevent condensation. These careful steps are essential chocolate bloom prevention tips for preserving the beauty of your coated confections.
Addressing Existing Chocolate Bloom: Can You Fix It?
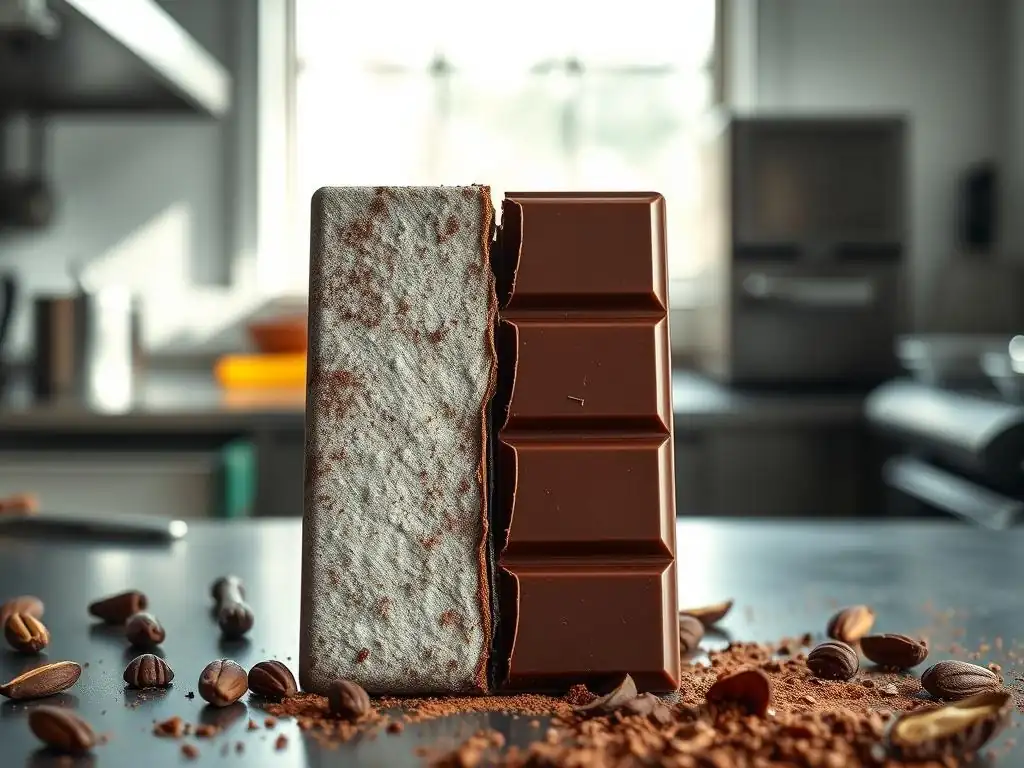
So, you've found bloom on your chocolate. Don't despair immediately! While the appearance is compromised, bloomed chocolate is usually still perfectly safe to eat. The good news is that fat bloom can often be reversed, while sugar bloom is more difficult to fix on the surface but doesn't render the chocolate unusable for all applications. Knowing how to address existing bloom is a useful skill in any baker's repertoire.
The possibility of "fixing" bloomed chocolate depends on the type of bloom and the intended use of the chocolate. For applications where the chocolate needs to set with a snap and shine (like dipping or molding), you'll need to attempt to restore its temper. For uses where the chocolate will be fully melted and mixed into a batter or ganache, the bloom is mostly an aesthetic issue that resolves upon melting.
Remelting and Retempering Bloomed Chocolate: A Possible Solution
Fat bloom can often be "fixed" by simply remelting the chocolate and tempering it again. Since fat bloom is caused by the cocoa butter crystals being in an unstable form, fully melting the chocolate breaks down all crystal structures, including the undesirable ones.
Once melted, the chocolate can be retempered using any of the standard methods (seed, tabliering, machine) to encourage the formation of stable Type V crystals again. For example, if you have a bar of dark chocolate with fat bloom, you can chop it up, melt it gently to around 45-50°C (113-122°F), and then follow the seed tempering process, cooling it down and adding seed chocolate to bring it back into temper around 31-32°C (88-90°F).
This process works because the fat itself hasn't changed chemically; it's just the physical arrangement of the crystals that was incorrect. Remelting and retempering essentially resets this crystalline structure. However, this method is primarily effective for fat bloom. Sugar bloom, being a surface issue of recrystallized sugar, is not reversed by simply remelting the chocolate. The gritty sugar crystals will still be present within the melted mass, affecting the texture, though the gray appearance will disappear upon melting.
Masking Chocolate Bloom: Techniques for Surface Treatment [e.g., Dusting with Cocoa Powder]
If the bloom is minor or if the chocolate is being used in a way where a perfect finish isn't critical (like chopping it up for inclusion in cookies), you might choose to simply mask the bloom rather than retemper. This is particularly useful for sugar bloom, which cannot be fixed by remelting and tempering.
One simple masking technique for both fat and sugar bloom is dusting the surface with cocoa powder or powdered sugar. For example, if a chocolate truffle coating has developed a slight bloom, rolling it in cocoa powder will hide the discoloration and add to the aesthetic. A thin fat bloom on a chocolate bar might be less noticeable if the bar is going to be broken up and melted into a sauce.
However, these methods only hide the visual issue; they do not restore the chocolate's snap or smooth texture if it was intended to be tempered. They are purely cosmetic solutions for situations where the bloom is superficial and doesn't impact the core use of the chocolate.
When to Discard Bloomed Chocolate: Food Safety Considerations
While bloom is usually not a sign of spoilage, there are instances when bloomed chocolate might indicate underlying issues or simply be past its prime. As mentioned, bloomed chocolate is generally safe to eat because the bloom is a physical change, not a result of microbial growth. However, if the chocolate has been stored poorly enough to cause significant bloom, it might also have absorbed off-odors from its environment, which can affect its flavor.
You should consider discarding bloomed chocolate if:
- It smells rancid or otherwise unpleasant. Poor storage conditions that lead to bloom can also accelerate fat oxidation, leading to off-flavors.
- There are any signs of actual mold growth (which looks fuzzy and is different from the smooth/gritty texture of bloom). This is rare on pure chocolate due to its low water activity but can happen if inclusions are present or if exposed to extreme moisture.
- The bloom is excessive, the texture is significantly compromised, and you cannot or do not wish to remelt and retemper (for fat bloom) or the gritty texture (from sugar bloom) is unacceptable for your intended use.
Ultimately, the decision to discard bloomed chocolate comes down to quality and whether it meets your standards for flavor, texture, and appearance in your baking projects. For most home baking uses like melting into brownies or cookies, bloomed chocolate is perfectly fine to use after melting, as the bloom disappears. For applications requiring a perfect finish, remelting and retempering (for fat bloom) is necessary, or you might opt for fresh chocolate.
Long-Term Chocolate Storage: Maintaining Quality and Preventing Bloom
Proper long-term storage is a fundamental aspect of chocolate bloom prevention tips. Even the highest quality, perfectly tempered chocolate can develop bloom if not stored correctly over time. Creating the right storage environment protects the chocolate from the environmental factors that cause both fat and sugar bloom, extending its shelf life and preserving its quality.
Consider storage not just for finished products but also for blocks, bars, or chips of chocolate you keep on hand for baking. Protecting chocolate from air, moisture, light, temperature fluctuations, and odors is key to keeping it in optimal condition and ensuring it's ready to perform beautifully when you need it.
Proper Packaging for Chocolate Storage: Air-Tight Containers and Wraps
Effective packaging is your first line of defense against the environmental factors that cause chocolate bloom. Chocolate can easily absorb moisture and odors from its surroundings due to its fat content. Storing chocolate in airtight containers or wrapping it tightly in materials that provide a barrier against air and moisture is crucial.
Original packaging is often designed for this purpose, but once opened, or for bulk chocolate, transfer it to an airtight container made of glass or food-grade plastic. Heavy-duty zip-top bags can also work, ensuring all air is squeezed out before sealing. For large blocks or bars, wrapping tightly in plastic wrap, then foil, and placing in an airtight container provides excellent protection.
This barrier prevents moisture from reaching the surface (reducing sugar bloom risk) and minimizes exposure to air and odors, helping to maintain flavor and preventing fat bloom by keeping the temperature more stable locally. For example, storing chocolate chips in their original bag inside a sealed plastic container in the pantry is much better than leaving the bag open.
Storing Chocolate in the Refrigerator or Freezer: Pros and Cons
Storing chocolate in the refrigerator or freezer can extend its shelf life, especially in warm or humid climates, but it comes with risks regarding bloom if not done carefully.
- Refrigerator (Pros): Provides a consistently cool temperature (around 4-5°C/39-41°F) that significantly slows down fat migration and oxidation. Can be beneficial in hot, humid environments where room temperature storage is impossible.
- Refrigerator (Cons): High humidity inside refrigerators is a major risk for sugar bloom. Taking cold chocolate out of the fridge into a warm room causes condensation. Can also lead to absorption of refrigerator odors if not perfectly sealed. Not ideal for maintaining the temper of finished items.
- Freezer (Pros): Provides very low, stable temperatures that essentially halt fat migration and significantly extend shelf life (up to a year or more for baking chocolate). Useful for long-term storage.
- Freezer (Cons): Extreme cold can stress the chocolate structure slightly. The transition from freezer to room temperature requires very careful handling to prevent massive condensation and sugar bloom. Requires extremely secure, airtight packaging to prevent freezer burn and odor absorption.
If you must refrigerate or freeze chocolate, place it in an absolutely airtight container or wrap it meticulously to create a strong barrier against moisture and odors. When ready to use, transfer the sealed container from the freezer to the refrigerator for 24 hours, and then from the refrigerator to a cool room for several hours more, allowing it to come to temperature very slowly before opening. This gradual acclimatization prevents condensation.
Shelf Life of Chocolate: Understanding Expiration Dates and Quality Degradation
Chocolate does have a shelf life, although it's often quite long due to its low water content. The "expiration date" on packaging is typically a "best by" date, indicating when the chocolate is expected to be at peak quality. While often safe to eat beyond this date, its quality, flavor, and texture can degrade over time.
Factors affecting shelf life include storage conditions and composition. Dark chocolate, with its higher antioxidant content and lower milk/sugar content, generally has the longest shelf life, often 2+ years if stored correctly. Milk and white chocolate, due to milk solids and different fat compositions, typically have shorter shelf lives, ranging from 1 to 1.5 years.
Even if stored perfectly, older chocolate can become brittle, lose some of its vibrant flavor, and develop off-notes due to fat oxidation. While bloom doesn't mean the chocolate is expired, significant bloom or off-flavors suggest the quality has degraded. Adhering to proper storage practices, as outlined in these chocolate bloom prevention tips, helps ensure your chocolate remains in excellent condition throughout its intended shelf life, ready for all your baking adventures.
Frequently Asked Questions
What exactly is chocolate bloom, and why does it happen?
Chocolate bloom is a whitish or grayish coating that appears on the surface of chocolate. It's caused by changes in fat crystals or sugar crystals rising to the surface, often due to temperature fluctuations.
What are some common mistakes that lead to chocolate bloom?
Storing chocolate in warm or humid environments is a major culprit. Also, repeatedly melting and solidifying chocolate, especially without proper tempering, can disrupt the crystal structure and cause bloom.
How can I properly temper chocolate to prevent bloom?
Tempering involves carefully heating and cooling chocolate to specific temperatures. This creates stable crystal structures that prevent fat bloom. Resources on BakeWithEase.com offer step-by-step guides for different tempering methods.
Besides tempering, what other storage tips can help prevent bloom?
Store chocolate in a cool, dry place away from direct sunlight and strong odors. An airtight container is ideal for maintaining a stable environment and preventing moisture absorption.
If my chocolate already has bloom, is it still safe to eat?
Yes, chocolate with bloom is perfectly safe to eat. While the appearance may be less appealing, the bloom only affects the aesthetic quality, not the safety or flavor. You can still use it in baking!
Final Reflection: The Enduring Allure of Flawless Chocolate
The fight against chocolate bloom isn't just about aesthetics; it's about preserving the integrity and enjoyment of a perfectly crafted treat. A seemingly minor imperfection, bloom significantly impacts the sensory experience, transforming a decadent delight into something less appealing. This article has explored the science behind bloom, offering practical, actionable steps to prevent this unwelcome visitor from spoiling your baking masterpieces.
The pursuit of flawless chocolate is a testament to our dedication to culinary excellence. It reflects a desire to create not just food, but an experience – a sensory journey that begins with the eye and culminates in a symphony of flavors and textures. The best things in life are worth fighting for,
and the fight against chocolate bloom is a small battle in the larger war of creating truly exceptional desserts. This pursuit, I believe, speaks to a deeper human need for beauty, perfection, and the satisfaction of a job well done.
Now, consider your own baking journey. What steps will you take to ensure your chocolate creations remain pristine and delightful? Will you meticulously control temperature and humidity? Will you carefully select your ingredients? The knowledge you've gained here empowers you to elevate your baking game. Embrace this knowledge, experiment with these techniques, and watch as your chocolate confections become testaments to your skill and dedication. The perfect chocolate experience awaits – let's prevent the bloom and unlock its full potential together.
Unlock Your Chocolate's Full Potential!
Thanks for diving into the world of preventing chocolate bloom with us! You've now learned the secrets to keeping your bakes looking their absolute best. Ready to put your newfound knowledge to the test?
- Master the art of tempering: Practice your tempering techniques with your next batch of chocolate treats. Remember, consistency is key!
- Share your success (or challenges!): Post a picture of your perfectly-bloomed (or bloom-free!) creations on social media and tag #BakeWithEase – we'd love to see them!
- Explore our other guides for more baking tips and tricks.
Ready to create your most stunning chocolate masterpieces yet? What's your biggest challenge when working with chocolate?