
Quick & Customizable Chocolate Bark

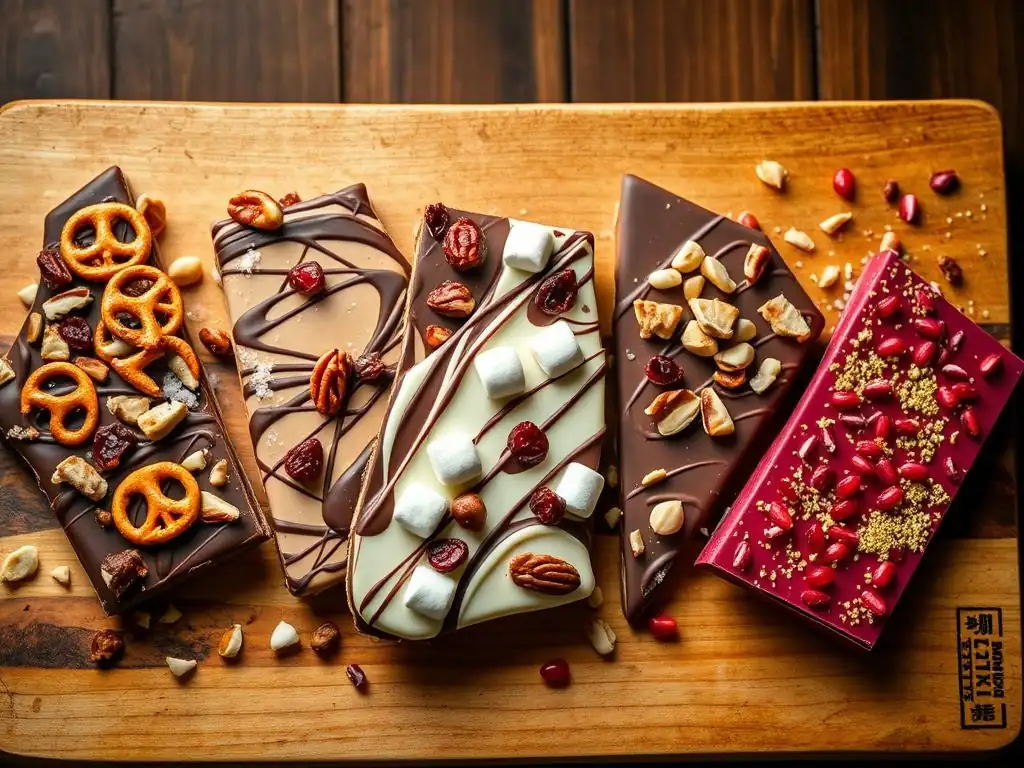
Welcome to BakeWithEase, your kitchen companion for all things baking! Ready to transform simple ingredients into decadent treats? In this article, we're diving into the world of Quick & Customizable Chocolate Bark. But what if we told you there's a secret ingredient that can elevate your bark from ordinary to extraordinary? Discover the easy chocolate bark recipe variations that will have everyone begging for more, and unlock the endless possibilities of this delightful pastry. Keep reading to unleash your inner chocolatier!
- Quick & Customizable Chocolate Bark: Easy Dessert Recipes
- Introduction to Easy Chocolate Bark Recipes
- Essential Ingredients for Homemade Chocolate Bark
- Step-by-Step Guide to Making Chocolate Bark
- Customizable Chocolate Bark Recipe Variations
- Tips and Tricks for Perfect Chocolate Bark Every Time
- Chocolate Bark Recipe: Serving Suggestions and Presentation
- Conclusion: Enjoying Your Quick & Customizable Chocolate Bark
-
Frequently Asked Questions
- What makes this chocolate bark recipe "easy"?
- What kind of chocolate is best for chocolate bark variations?
- Can I use different types of nuts and dried fruits in my chocolate bark?
- How long does chocolate bark typically last?
- What are some creative "easy chocolate bark recipe variations" that BakeWithEase recommends?
- Final Reflection: The Enduring Allure of Customizable Chocolate Bark
- Unleash Your Inner Chocolatier: Craft Your Perfect Bark!
Quick & Customizable Chocolate Bark: Easy Dessert Recipes
Introduction to Easy Chocolate Bark Recipes
Why Chocolate Bark is the Perfect Easy Dessert
Chocolate bark is the quintessential easy dessert, offering minimal fuss for maximum reward. It requires very few ingredients, often just chocolate and a handful of toppings, making it accessible even for novice bakers. Unlike multi-step recipes that demand precise timing and technique, melting chocolate and sprinkling toppings is a forgiving process. This simplicity means you can whip up a batch in well under an hour from start to finish, including cooling time, making it ideal for last-minute treats or spontaneous baking urges.
Beyond its ease, chocolate bark is incredibly versatile. It serves as a fantastic canvas for countless flavor combinations, allowing you to tailor batches to specific tastes, dietary needs (within limits), or seasonal themes. For instance, a simple dark chocolate bark can be transformed into a festive holiday treat with the addition of peppermint and white chocolate swirls, or an autumnal delight with dried cranberries and pecans. This adaptability, combined with its speed and simplicity, cements chocolate bark's status as a go-to easy chocolate bark recipe variation for any occasion.
Guide to Mastering Simple Chocolate Bark
Mastering simple chocolate bark hinges on two primary techniques: properly melting the chocolate and choosing complementary toppings. Achieving smooth, glossy chocolate without burning or seizing is crucial. This can be done using a microwave with careful, short bursts of heat and frequent stirring, or via the gentle heat of a double boiler.
Both methods aim to melt the chocolate evenly and gradually, preventing it from overheating, which can cause it to become thick and unusable. While precise temperature control (tempering) is needed for truly professional, snap-able chocolate that resists melting at room temperature, simply melting it carefully is sufficient for delicious homemade bark that will be stored in a cool place.
Once the chocolate is melted and spread, the magic happens with the toppings. The key here is variety in texture and flavor. Think crunchy nuts, chewy dried fruit, salty pretzels, or sweet candy pieces. Applying toppings while the chocolate is still wet ensures they adhere properly.
Don't be shy about pressing them in gently. The final step is patience: allowing the bark to set completely before breaking it into pieces. This can take anywhere from 30 minutes to a couple of hours at room temperature, or significantly faster in the refrigerator (though this can sometimes affect the chocolate's finish). Following these basic steps provides the foundation for countless easy chocolate bark recipe variations.
Essential Ingredients for Homemade Chocolate Bark
Choosing the Best Chocolate for Your Bark
The quality of your chocolate significantly impacts the final taste and texture of your bark. For the best results, opt for good quality chocolate bars or wafers specifically designed for melting or baking, often labeled as couverture or baking chocolate. These typically contain a higher percentage of cocoa butter compared to standard chocolate chips, which often contain stabilizers that prevent them from melting as smoothly.
While chocolate chips can be used, they may produce a duller finish and a less satisfying snap. You'll typically need about 1 to 1.5 pounds (approximately 450-675 grams) of chocolate to make a decent-sized batch on a standard baking sheet.
Consider the type of chocolate based on your desired flavor profile. Dark chocolate (50% cocoa or higher) offers a rich, intense flavor that pairs well with salty or fruity toppings. Milk chocolate provides a sweeter, creamier base, popular with nuts and caramels. White chocolate, technically not chocolate as it contains no cocoa solids, is made from cocoa butter, sugar, and milk solids and provides a sweet, vanilla-like backdrop for tart fruits or crunchy elements. Using a combination, like dark and white chocolate swirls, is also a popular and visually appealing approach for easy chocolate bark recipe variations.
Must-Have Toppings for Customizing Your Chocolate Bark
Toppings are where you transform simple melted chocolate into a personalized treat. A good selection of toppings provides contrast in both flavor and texture. Crunchy elements like nuts (almonds, pecans, walnuts, pistachios), seeds (pumpkin seeds, sunflower seeds), or pretzels are classic choices.
For a standard 1-pound batch of chocolate, you might use anywhere from 1/2 cup to 1 cup of chopped nuts or pretzels, depending on how densely you want to cover the surface. Salty elements, such as flaky sea salt or chopped salted pretzels, are excellent for balancing the sweetness of the chocolate; a sprinkle of flaky sea salt over dark chocolate, for example, is a simple yet sophisticated pairing.
Chewy components add another layer of texture. Dried fruits like cranberries, cherries, apricots, or raisins are popular, offering bursts of sweetness and tanginess. Candy pieces, such as crushed candy canes, toffee bits, or mini marshmallows, introduce different flavors and fun textures, especially for themed barks. A combination of these elements – perhaps salty pretzels, sweet dried cranberries, and crunchy almonds on milk chocolate – creates a dynamic and satisfying bite. The key is to have your toppings prepped and ready before you melt the chocolate, as you'll want to add them while the chocolate is still liquid.
Optional Add-Ins for Unique Chocolate Bark Flavors
Beyond the standard toppings, optional add-ins can infuse your easy chocolate bark recipe variations with truly unique flavors. Extracts, like peppermint, almond, or even a hint of orange extract, can be stirred directly into the melted chocolate (use sparingly, perhaps just 1/4 to 1/2 teaspoon per pound of chocolate, as too much can cause the chocolate to seize). Spices are another fantastic option; a pinch of cinnamon or chili powder can add warmth and complexity to dark chocolate. For a coffee kick, finely ground espresso powder can be stirred in.
Other creative additions include things like small candies, cereals, or cookie pieces. Crushed Oreos, graham cracker crumbs, or even breakfast cereals like crisped rice can add interesting textures and flavors. A drizzle of caramel sauce or peanut butter over the melted chocolate before adding solid toppings creates swirls of flavor. Just be mindful of the consistency of drizzles – they should be thick enough not to completely sink into the chocolate but liquid enough to swirl. These optional elements allow for endless experimentation, making each batch of chocolate bark a new culinary adventure.
Step-by-Step Guide to Making Chocolate Bark
Melting Chocolate for Bark: The Easy Way
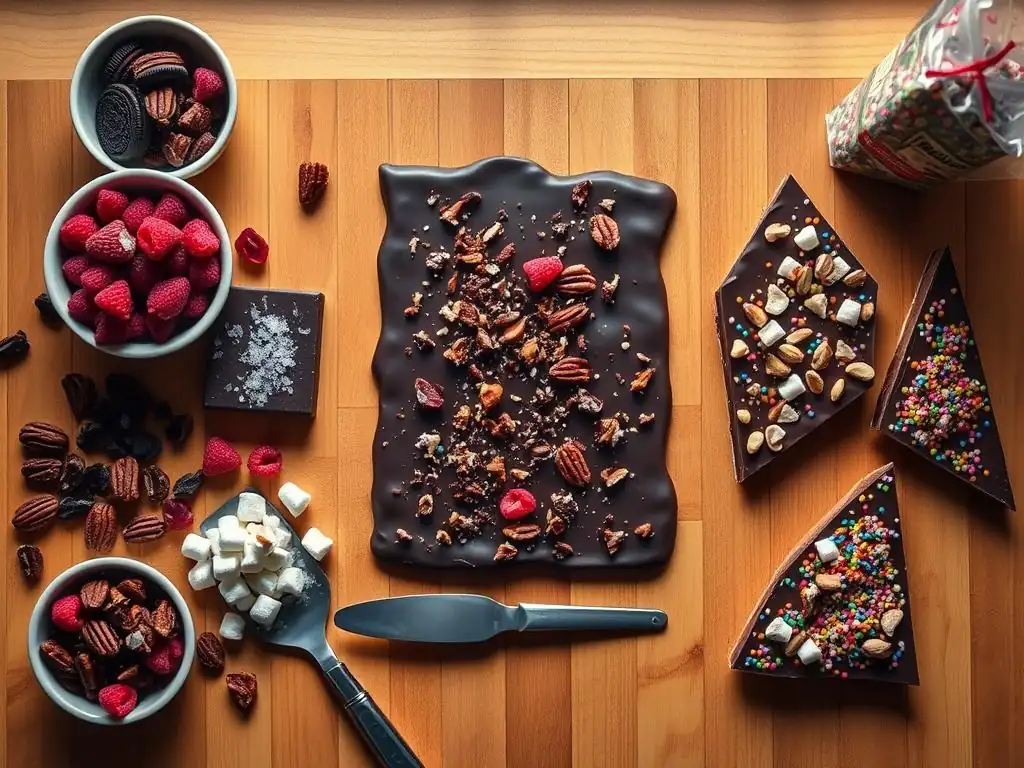
Melting chocolate properly is the most critical step for smooth, beautiful bark. The easiest method for home bakers is often the microwave. Place your chopped chocolate or wafers in a microwave-safe bowl. Heat on medium power (around 50%) for 30-second intervals, stirring thoroughly after each interval.
Chocolate holds its shape even when melted, so stirring is essential to distribute the heat and prevent scorching. Continue heating and stirring until the chocolate is mostly melted, with just a few small lumps remaining. Remove from the microwave and stir until the residual heat melts the rest. This gradual approach minimizes the risk of burning the chocolate.
Alternatively, you can use a double boiler setup on the stovetop. Place chopped chocolate in a heatproof bowl set over a pot of simmering water (ensure the bottom of the bowl does not touch the water). Stir gently and continuously as the chocolate melts from the steam's heat. This method offers more controlled, gentle heat. Whichever method you choose, the goal is to reach a smooth, pourable consistency without overheating. Avoid getting even a single drop of water into the melting chocolate, as this will cause it to seize, turning into a thick, grainy paste.
Spreading the Chocolate and Adding Toppings
Once your chocolate is perfectly melted and smooth, it's time to spread it out. Line a baking sheet with parchment paper or a silicone baking mat; this prevents the chocolate from sticking and makes cleanup much easier. Pour the melted chocolate onto the prepared baking sheet.
Use an offset spatula or the back of a spoon to spread the chocolate into a relatively even layer, typically about 1/4 to 1/3 inch thick. You don't need to be precise; the irregular shape is part of bark's charm. Aim for a rectangle or square shape that fills a good portion of your sheet.
Immediately after spreading the chocolate, while it is still wet and glossy, generously sprinkle your chosen toppings over the surface. Ensure your toppings are prepped (chopped nuts, crushed candy, etc.) before you start melting the chocolate. Distribute them evenly across the surface, or arrange them in patterns if you're feeling artistic. Gently press the toppings into the chocolate with your hands or the back of a spatula to ensure they adhere firmly once the chocolate sets. If using more than one type of chocolate (e.g., swirls), add the swirls before adding the solid toppings.
Setting and Breaking Your Chocolate Bark
After adding your toppings, the chocolate bark needs time to set completely. The best place for this is usually at cool room temperature, away from direct sunlight or heat sources. Depending on the thickness of the bark and the temperature of your room, this can take anywhere from 1 to 3 hours.
You'll know it's set when it's firm to the touch and easily peels away from the parchment paper. For faster setting, especially if your kitchen is warm, you can place the baking sheet in the refrigerator for about 30-60 minutes. Be mindful that refrigerating can sometimes cause condensation on the chocolate, which might slightly affect its appearance.
Once fully set, it's time for the fun part: breaking the bark. Simply lift the parchment paper from the baking sheet and place it on a flat surface. Use your hands to break the large sheet of chocolate into smaller, irregular pieces.
Aim for pieces ranging from about 1-2 inches in size, though the beauty of bark is its imperfection. If you find it difficult to break, the chocolate may not be fully set, or it might be very cold from the refrigerator; letting it warm up slightly at room temperature can help. This breaking process yields unique pieces, ready for snacking, sharing, or storing.
Customizable Chocolate Bark Recipe Variations
Peppermint Chocolate Bark Recipe
Peppermint chocolate bark is a festive classic, especially popular during the holiday season. It typically uses layers of dark or milk chocolate and white chocolate, topped with crushed peppermint candies or candy canes. To make it, melt your dark or milk chocolate, spread it on a baking sheet, and let it set partially until firm but not hard (about 15-20 minutes in the fridge).
Melt white chocolate separately and pour it over the set dark layer, spreading it evenly. While the white chocolate is still wet, generously sprinkle about 1/2 cup of crushed peppermint candies over the surface of a 1-pound batch.
Sometimes, a few drops (start with 1/4 teaspoon) of pure peppermint extract are added to the melted white chocolate for an extra minty kick. Ensure the extract is oil-based if possible, or add alcohol-based extract sparingly and stir quickly to avoid seizing. The contrast between the rich chocolate layers and the cool, crunchy peppermint makes this an irresistible treat. This is a quintessential easy chocolate bark recipe variation that looks impressive but is surprisingly simple to execute.
Salted Caramel Chocolate Bark Recipe
Combining sweet, gooey caramel with chocolate and a sprinkle of salt creates a truly decadent bark. For this variation, you can use milk or dark chocolate as the base. Melt your chosen chocolate and spread it on a prepared baking sheet. While the chocolate is still wet, drizzle warm (but not hot) caramel sauce generously over the surface. You can use store-bought caramel or make your own. Aim for roughly 1/4 to 1/3 cup of caramel drizzle per pound of chocolate, depending on how intense you want the caramel flavor.
After drizzling the caramel, immediately sprinkle flaky sea salt over the top. The amount of salt is a matter of personal preference, but start with about 1/2 to 1 teaspoon for a standard batch, distributing it evenly. The salt enhances the sweetness of both the chocolate and the caramel, creating a balanced flavor profile. You can also add other toppings like chopped pecans or pretzels to the salted caramel bark for added texture. Allow this bark to set fully, which might take a little longer due to the caramel layer.
Dark Chocolate Almond Bark Recipe
Dark chocolate and almonds are a classic pairing, and they shine in a simple bark format. Start with high-quality dark chocolate (at least 60% cocoa) for a rich, slightly bitter base that complements the nuts. Melt about 1 pound of dark chocolate and spread it onto a prepared baking sheet.
While the chocolate is still melted, sprinkle about 1 to 1.5 cups of toasted almonds over the surface. Toasting the almonds beforehand enhances their flavor and crunch; you can do this by spreading them on a dry pan over medium heat for a few minutes until fragrant, or baking them at 350°F (175°C) for 8-10 minutes.
For an extra touch, you can add a sprinkle of flaky sea salt over the almonds before the chocolate sets. The combination of deep dark chocolate, crunchy toasted nuts, and a hint of salt is incredibly satisfying. This easy chocolate bark recipe variation is straightforward and highlights the quality of its core ingredients. It's a robust flavor combination that appeals to many palates and is simple enough for anyone to make.
White Chocolate Cranberry Pistachio Bark
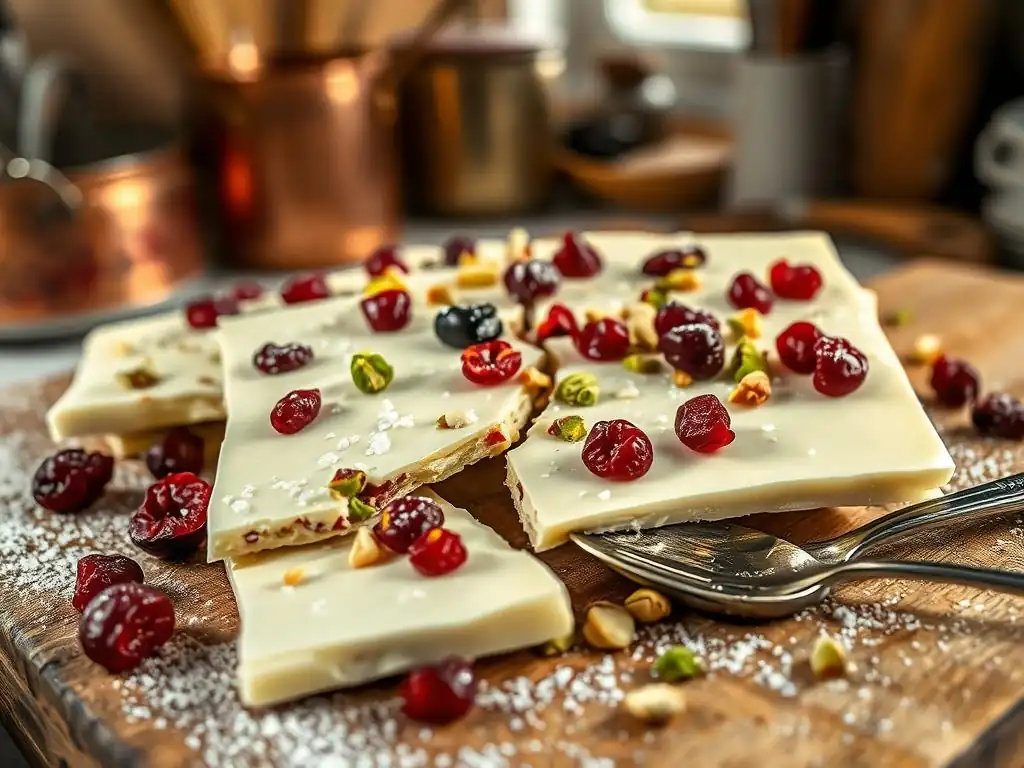
White chocolate provides a sweet, creamy base that beautifully contrasts with tart dried cranberries and vibrant green pistachios. Melt about 1 pound of white chocolate, being extra careful as white chocolate can seize more easily than dark or milk. Spread the melted white chocolate onto your prepared baking sheet. While the white chocolate is still liquid, sprinkle approximately 1/2 to 3/4 cup of dried cranberries and 1/2 to 3/4 cup of shelled pistachios over the surface.
The bright red of the cranberries and the green of the pistachios make this bark visually appealing, especially for holidays like Christmas or Valentine's Day. The chewiness of the cranberries and the crunch of the pistachios provide excellent textural contrast to the smooth white chocolate. This easy chocolate bark recipe variation is a popular choice for its festive colors and delightful combination of sweet, tart, and nutty flavors. Ensure the pistachios are unsalted unless you specifically want a salty element.
Peanut Butter Cup Chocolate Bark
Capture the beloved flavor of peanut butter cups in an easy bark format. This variation typically uses milk or dark chocolate, combined with peanut butter chips, chopped peanuts, and sometimes swirls of melted peanut butter. Melt about 1 pound of milk or dark chocolate and spread it on your baking sheet. While the chocolate is still wet, sprinkle about 1/2 cup of peanut butter chips and 1/2 cup of chopped roasted peanuts over the surface.
For an extra layer of peanut butter flavor, you can gently warm about 1/4 cup of creamy peanut butter until it's pourable (microwave in 15-second bursts). Drizzle the warm peanut butter over the chocolate and toppings, then use a skewer or knife to gently swirl it into the chocolate. Be careful not to over-mix, or you'll lose the distinct swirl pattern. This easy chocolate bark recipe variation is a dream for peanut butter lovers, offering multiple textures and intense flavor.
Tips and Tricks for Perfect Chocolate Bark Every Time
Avoiding Common Mistakes When Making Chocolate Bark
Several common pitfalls can affect the outcome of your chocolate bark. The most frequent mistake is overheating the chocolate, which can cause it to burn or seize (become thick and grainy). To avoid this, melt chocolate slowly using gentle heat, whether in the microwave on medium power with frequent stirring or over a double boiler, ensuring no water gets into the chocolate. If your chocolate does seize, sometimes stirring in a teaspoon of vegetable oil or melted shortening can help rescue it, though the texture may be slightly different.
Another common issue is toppings not sticking. This happens if you wait too long to add the toppings after spreading the chocolate. Work quickly once the chocolate is on the sheet, sprinkling and gently pressing in the toppings while the chocolate is still fully melted and warm.
Not allowing the bark to set completely before breaking is another mistake; it will result in messy, melty pieces. Patience is key here; let it set until firm, which might take longer if you've added wet ingredients like caramel or peanut butter swirls. Following these simple tips helps ensure your easy chocolate bark recipe variations turn out perfectly.
Storing Your Homemade Chocolate Bark for Maximum Freshness
Proper storage is essential for keeping your homemade chocolate bark fresh and delicious for as long as possible. Once the bark is fully set and broken into pieces, store it in an airtight container. This protects it from moisture, air, and odors, all of which can degrade the quality of the chocolate and toppings. Layer the bark pieces between sheets of parchment or wax paper within the container to prevent them from sticking together.
Store the airtight container in a cool, dry place, such as a pantry or cupboard, away from direct sunlight and heat sources. Room temperature storage is ideal for maintaining the chocolate's texture and preventing blooming (white streaks caused by fat separation), provided the room isn't too warm (ideally below 70°F or 21°C).
Stored correctly at cool room temperature, chocolate bark can remain fresh for several weeks, sometimes up to 2-3 months, depending on the toppings used (ingredients like fresh fruit or soft caramels may shorten shelf life). For longer storage, it can be kept in the refrigerator or freezer, but allow it to come to room temperature before serving to appreciate the full flavor and texture.
Troubleshooting Chocolate Bark Problems
Even with the best intentions, sometimes things don't go exactly as planned when making chocolate bark. If your melted chocolate appears dull or streaky after setting (known as blooming), it's often due to temperature fluctuations during setting or storage, or not melting the chocolate evenly. While bloomed chocolate is perfectly safe to eat, its appearance and texture might be slightly compromised. You can try re-melting the chocolate and starting over, being careful with temperatures, or simply accept the cosmetic imperfection.
If your bark is too soft or doesn't set properly, it might be due to adding too many liquid ingredients (like excessive extract or a very runny caramel) or the chocolate not being fully melted before spreading. Ensure extracts are added sparingly and liquids are incorporated carefully.
If the chocolate is still soft after ample setting time in a cool place, refrigerating it for a period will usually firm it up, though this might increase the chance of blooming. For hard toppings that won't stick, ensure you are adding them immediately after spreading the chocolate while it is still completely liquid.
Chocolate Bark Recipe: Serving Suggestions and Presentation
Creative Ways to Gift Your Homemade Chocolate Bark
Homemade chocolate bark makes a wonderful and thoughtful gift, especially during holidays or for special occasions. Its rustic, broken shape lends itself well to simple yet elegant packaging. Once cooled and broken, place pieces of your easy chocolate bark recipe variations into clear cellophane bags. Tie the bags with festive ribbons or twine. You can add a small tag with the flavor description (e.g., "Dark Chocolate Peppermint Bark") and ingredients for those with allergies.
Another appealing presentation is using decorative tins or boxes lined with tissue paper or parchment. Arrange the different flavored bark pieces artfully inside. For instance, a selection box featuring Dark Chocolate Almond, White Chocolate Cranberry Pistachio, and Peppermint Bark offers variety and visual appeal. A typical batch made from 1 pound of chocolate can easily fill several small gift bags or one medium-sized tin, making it a cost-effective option for gifting multiple people. The personal touch of homemade treats is always appreciated.
Pairing Chocolate Bark with Other Desserts
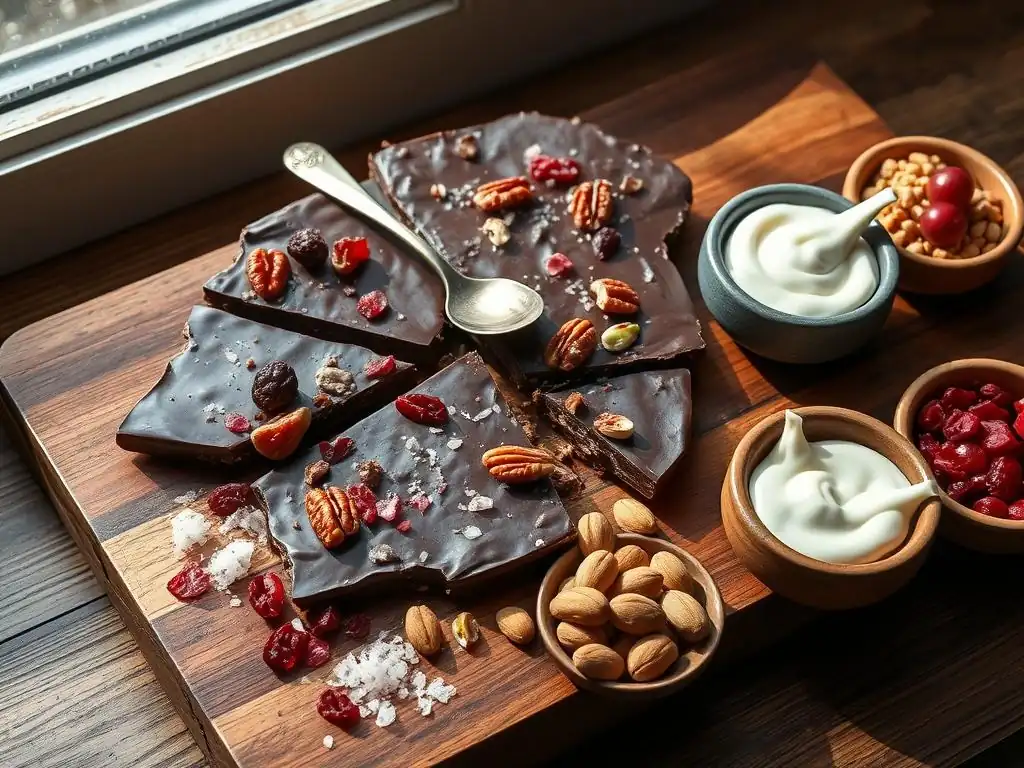
Chocolate bark is delicious on its own, but it can also be a fantastic accompaniment to other desserts or beverages. Serve a few pieces alongside a scoop of ice cream – a shard of dark chocolate almond bark with vanilla bean ice cream, or peppermint bark with chocolate ice cream, for example. The crunchy texture of the bark provides a nice contrast to the creamy ice cream.
It also pairs well with hot drinks. A piece of rich dark chocolate bark served with coffee or espresso is a classic combination. White chocolate bark with cranberries and pistachios is lovely with tea. For a more indulgent pairing, serve chocolate bark with a dessert wine or liqueur. The different flavor profiles of your easy chocolate bark recipe variations can be matched to complement or contrast with other sweet treats or beverages, elevating the overall dessert experience.
Conclusion: Enjoying Your Quick & Customizable Chocolate Bark
Making chocolate bark is a rewarding process that offers delicious results with minimal effort. From selecting your favorite chocolate to choosing vibrant and flavorful toppings, each step allows for creativity and personalization. The beauty of this easy chocolate bark recipe variation is its adaptability – you can create a unique treat every time you make it, simply by changing the mix of ingredients.
Whether you're whipping up a batch for a last-minute party, preparing homemade gifts, or simply craving a sweet snack, chocolate bark delivers. It proves that you don't need complex techniques or fancy equipment to create something truly delightful. So gather your ingredients, get melting, and enjoy the satisfying process of making and sharing your own quick and customizable chocolate bark.
Frequently Asked Questions
What makes this chocolate bark recipe "easy"?
The recipe emphasizes simple instructions and readily available ingredients, making it a quick and beginner-friendly treat to create. No special equipment is needed!
What kind of chocolate is best for chocolate bark variations?
While dark chocolate is often preferred, you can use milk, semi-sweet, or even white chocolate. The best choice depends on your personal preference and the flavor profile you're aiming for.
Can I use different types of nuts and dried fruits in my chocolate bark?
Absolutely! This recipe is highly customizable. Feel free to experiment with your favorite nuts, seeds, dried fruits, candies, or other toppings to create unique variations.
How long does chocolate bark typically last?
Properly stored, chocolate bark can last for about 2-3 weeks. Store it in an airtight container in a cool, dry place to prevent it from melting or becoming stale.
What are some creative "easy chocolate bark recipe variations" that BakeWithEase recommends?
BakeWithEase suggests trying variations like Peppermint Bark (with crushed candy canes), Salted Caramel Bark (with caramel bits and sea salt), or Trail Mix Bark (with nuts, seeds, and dried fruit). Get creative with your own combinations!
Final Reflection: The Enduring Allure of Customizable Chocolate Bark
The ease and adaptability of chocolate bark recipes make them a perfect reflection of our modern desire for personalized experiences and quick, satisfying treats. It's more than just a dessert; it's a canvas for creativity, a testament to the simple joys of deliciousness, and a surprisingly versatile solution for any occasion.
The enduring appeal of chocolate bark lies not just in its taste, but in its ability to connect us to cherished memories and traditions. Each variation, each carefully chosen topping, tells a story – a personal narrative woven into every bite. The best things in life are simple,
a sentiment perfectly encapsulated by this delightful confection. From holiday gatherings to impromptu celebrations, chocolate bark offers a tangible way to share joy and personalize a simple pleasure, fostering connection and creativity in the kitchen.
Now, consider your own culinary adventures. What unique combinations will you create? What flavors and textures will you explore to make this simple recipe truly your own? Don't be afraid to experiment, to push boundaries, and to discover the endless possibilities within this seemingly straightforward dessert. The world of customizable chocolate bark awaits your personal touch – go forth and create something delicious!
Unleash Your Inner Chocolatier: Craft Your Perfect Bark!
Thanks for joining us on this delicious journey into the world of chocolate bark! We hope you've gained some inspiration and new techniques to create your own customized masterpieces. Now it's time to put your newfound skills to the test!
- Dive into creation: Experiment with different combinations of chocolate, nuts, fruits, and spices from your pantry. Let your creativity run wild! This is your chance to become a true chocolate artisan.
- Share your bark creations: Show us your unique bark designs on social media using #BakeWithEaseBark – we’d love to see your delicious results!
- Explore new flavor profiles: Try substituting ingredients or adding unexpected elements – maybe some chili flakes or lavender? What unexpected flavors will you discover?
Ready to transform your kitchen into a chocolate haven? What exciting combinations are you going to try first?