
Simple Candy Cane Bark Recipe for the Holidays

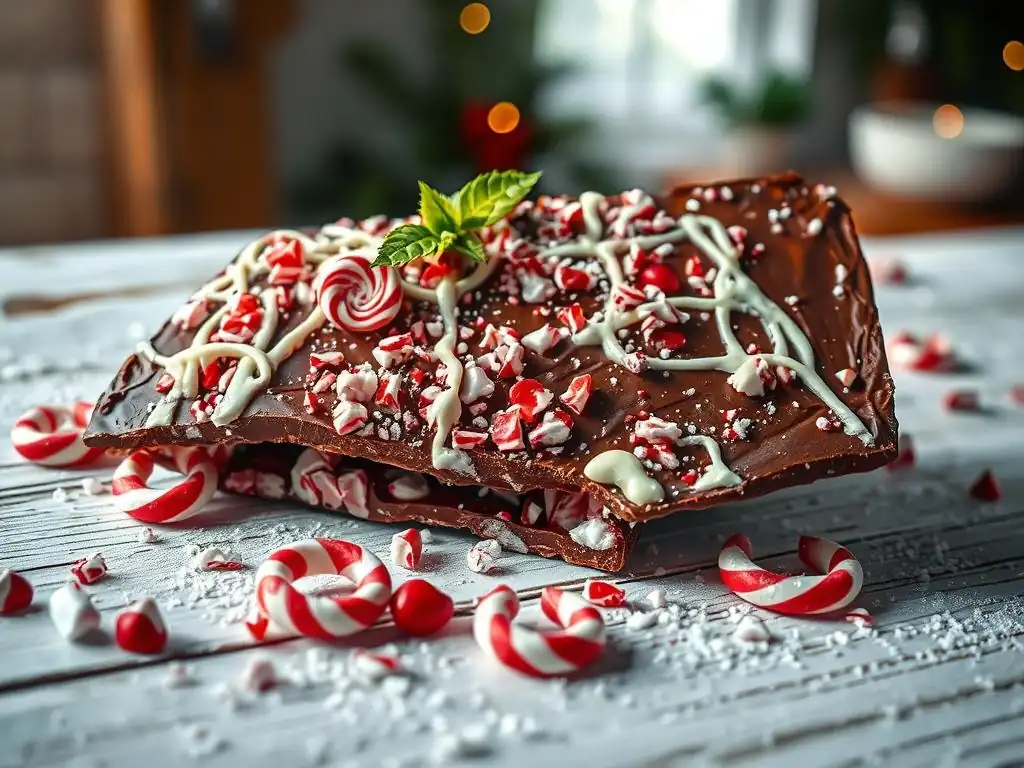
Welcome to BakeWithEase, your guide to delicious baking adventures! Ever dreamed of creating stunning holiday treats without the fuss? This season, dive into our Easy Candy Cane Bark Recipe and discover how simple it is to craft a festive dessert that's sure to impress. Intrigued? Keep reading to unlock the secrets to perfect, pepperminty bark and more delightful pastry and dessert creations!
- Peppermint Bark Recipe: A Holiday Classic
- Introduction to Peppermint Bark
- Ingredients for Peppermint Bark
-
Step-by-Step Guide to Making Peppermint Bark
- Preparing the Baking Sheet: Lining with Parchment Paper
- Melting the Dark Chocolate: Achieving a Smooth Temper
- Spreading the Dark Chocolate: Creating a Thin, Even Layer
- Setting the Dark Chocolate: Chilling Until Firm
- Melting the White Chocolate: Maintaining a Smooth Consistency
- Spreading the White Chocolate: Layering Over the Dark Chocolate
- Crushing the Candy Canes: Creating Peppermint Pieces
- Sprinkling the Candy Canes: Evenly Distributing on Top
- Setting the Bark: Fully Cooling and Hardening
- Breaking the Bark: Creating Irregular Pieces
- Tips and Tricks for Perfect Peppermint Bark
- Peppermint Bark Variations
- Storing Homemade Peppermint Bark
- Serving Suggestions for Your Holiday Treat
- Troubleshooting Common Peppermint Bark Issues
- Conclusion: Share and Enjoy Your Homemade Peppermint Bark
- Frequently Asked Questions
- Final Reflection: The Sweet Simplicity of Holiday Baking
- Unleash Your Inner Candy Cane Master!
Peppermint Bark Recipe: A Holiday Classic
Introduction to Peppermint Bark
What is Peppermint Bark and Why It's a Holiday Favorite
Peppermint bark is a quintessential holiday confection, beloved for its festive appearance and delightful combination of rich chocolate and refreshing peppermint crunch. Typically made with layers of dark and white chocolate infused with peppermint extract and studded with crushed candy canes, it's a treat that instantly evokes the spirit of the season. Its popularity stems from its simple elegance, striking visual contrast, and the satisfying textural interplay between smooth chocolate and crunchy candy pieces. Making homemade peppermint bark has become a cherished holiday tradition for many families.
This simple candy cane bark recipe is not only incredibly easy to prepare, requiring minimal baking skills and common pantry ingredients, but it also yields impressive results that are perfect for sharing. Unlike complex holiday desserts that demand hours in the kitchen, you can whip up a batch of this delightful treat in under an hour, including chilling time. The ease of preparation makes it an ideal project for bakers of all levels, including those just starting their holiday baking adventures. Its universal appeal ensures it's a welcome addition to any holiday gathering or gift basket.
A Simple and Delicious Peppermint Bark Recipe for Festive Celebrations
Creating your own peppermint bark at home is a rewarding experience, offering control over ingredient quality and the ability to customize flavors. This guide provides an easy candy cane bark recipe designed for simplicity without sacrificing flavor or texture. We'll walk you through selecting the best chocolate, infusing the perfect amount of peppermint, and achieving that satisfying snap that defines great bark. The process is straightforward: melt, layer, sprinkle, and chill.
Our easy candy cane bark recipe is perfect for adding a homemade touch to your holiday festivities. Whether you're making it for a cookie exchange, as a charming edible gift, or simply to enjoy with a cup of hot cocoa by the fire, this recipe delivers consistent, delicious results. We aim to make this process as approachable as possible, ensuring that even novice bakers can confidently create beautiful and tasty peppermint bark that will impress friends and family.
Ingredients for Peppermint Bark
Chocolate Base: Selecting High-Quality Dark and White Chocolate
The foundation of a truly exceptional peppermint bark lies in the quality of the chocolate you choose. For the dark chocolate layer, opt for a good quality bar or melting wafers with a cocoa content between 60% and 70%. These types of chocolate melt smoothly and provide a rich, slightly bitter counterpoint to the sweet white chocolate and refreshing peppermint.
Avoid chocolate chips if possible, as they contain stabilizers that prevent them from melting as smoothly as bar chocolate or wafers, potentially resulting in a grainy texture. Approximately 12-16 ounces (about 340-450 grams) of dark chocolate is a good starting point for a standard batch.
For the white chocolate layer, it's crucial to select a product made with real cocoa butter, not just vegetable oil. White chocolate of higher quality will melt more smoothly and have a creamier texture and richer flavor. Look for white chocolate bars or wafers specifically designed for melting or tempering.
Avoid "white confectionery coating" or "compound chocolate," which lacks cocoa butter and won't provide the same quality or set with the same snap. You'll typically need about 8-12 ounces (about 225-340 grams) of white chocolate, aiming for roughly a 2:1 or 3:2 ratio of dark to white chocolate by weight for balanced layers. Using quality chocolate is key to an easy candy cane bark recipe that tastes gourmet.
Peppermint Flavor: Using Peppermint Extract and Candy Canes
To infuse your bark with that signature holiday flavor, you'll need both peppermint extract and crushed candy canes. Peppermint extract is concentrated, so a little goes a long way. Start with about 1/4 to 1/2 teaspoon per batch of bark, adding it to the melted white chocolate layer. Be cautious not to add too much, as it can make the chocolate seize (thicken and become unusable) or result in an overwhelmingly strong minty flavor. A good quality pure peppermint extract will provide the cleanest flavor profile.
Crushed candy canes add both peppermint flavor and a delightful crunch, along with festive color. You'll need about 1 to 1.5 cups of crushed candy canes. You can crush them by placing unwrapped candy canes in a sturdy zip-top bag and hitting them with a rolling pin or heavy pan until they are broken into small pieces and dust.
Some recipes call for adding a tiny bit of peppermint extract to the dark chocolate layer as well, but adding it solely to the white chocolate ensures a clear color distinction and prevents potential issues with the dark chocolate setting correctly. This combination of extract and candy canes is essential for any easy candy cane bark recipe.
Step-by-Step Guide to Making Peppermint Bark

Preparing the Baking Sheet: Lining with Parchment Paper
The first crucial step in making this easy candy cane bark recipe is preparing your workspace. You'll need a baking sheet, typically a standard half-sheet size (approximately 13x18 inches), or two smaller sheets if you're making a double batch. Line the baking sheet completely with parchment paper. Parchment paper is non-stick and makes removing the finished bark incredibly easy once it has set. Avoid using wax paper, as chocolate can stick to it.
Ensure the parchment paper lies flat against the surface of the baking sheet. If it curls, you can secure the corners with a tiny dab of melted chocolate from your first batch, or use small binder clips on the edges if your baking sheet allows. A smooth, flat surface is essential for creating an even layer of chocolate, which is key to achieving that characteristic "bark" look when broken.
Melting the Dark Chocolate: Achieving a Smooth Temper
Melting the dark chocolate properly is vital for a smooth, shiny finish and a good "snap" when broken. This is often referred to as tempering, although a quick melt-and-cool method is sufficient for this easy candy cane bark recipe. Chop your quality dark chocolate into small, uniform pieces to ensure even melting.
You can melt it using a double boiler or in the microwave. For the microwave method, place the chopped chocolate in a microwave-safe bowl and heat on 50% power in 30-second intervals, stirring thoroughly after each interval. Continue until the chocolate is mostly melted, with a few small pieces remaining.
Remove the bowl from the microwave and stir continuously. The residual heat will melt the remaining pieces, bringing the chocolate to a smooth, fluid consistency. Aim for a temperature around 115-120°F (approximately 46-49°C) if you have a thermometer. Avoid overheating, as this can burn the chocolate or cause it to seize. Stir until completely smooth and glossy, ready for spreading.
Spreading the Dark Chocolate: Creating a Thin, Even Layer
Once the dark chocolate is perfectly melted and smooth, pour it onto the center of the prepared baking sheet lined with parchment paper. Use an offset spatula or a clean, dry rubber spatula to spread the chocolate evenly across the sheet into a thin layer. Aim for a thickness of about 1/8 to 1/4 inch (approximately 3-6 mm).
Work relatively quickly, as the chocolate will begin to cool and set, especially if your kitchen is cool. Spread from the center outwards, ensuring the edges are also covered. A uniform thickness is important for even chilling and breaking later on. Gently tap the baking sheet on the counter a couple of times to help level the chocolate and remove any air bubbles.
Setting the Dark Chocolate: Chilling Until Firm
After spreading the dark chocolate layer, it needs to set completely before you add the white chocolate. Carefully transfer the baking sheet to the refrigerator or a cool place (like a garage or basement, if it's cold enough) for chilling. The goal is for the chocolate to become firm and solid, but not overly cold.
This process typically takes about 20-30 minutes in the refrigerator. You'll know it's ready when the surface looks matte (not glossy) and it's firm to the touch. Avoid chilling it for too long, as condensation can form on the surface when you remove it, which can cause the white chocolate layer to not adhere properly.
Melting the White Chocolate: Maintaining a Smooth Consistency
While the dark chocolate layer is setting, prepare the white chocolate. Chop the white chocolate into small pieces, just as you did with the dark chocolate. White chocolate is more delicate than dark chocolate and can burn or seize more easily, so it requires more care during melting. Use the same method as before – either a double boiler or the microwave on 50% power – but be extra vigilant with the stirring intervals.
Heat in very short bursts (15-20 seconds in the microwave), stirring thoroughly after each one. White chocolate melts at a lower temperature than dark chocolate, typically around 105-110°F (approximately 40-43°C). Stir until it is smooth and fluid, with no lumps. If adding peppermint extract, stir it into the melted white chocolate now, being careful not to add too much. A small amount, like 1/4 teaspoon for 12 ounces of chocolate, is usually sufficient to start.
Spreading the White Chocolate: Layering Over the Dark Chocolate
Once the dark chocolate is firm and the white chocolate is perfectly melted and flavored, it's time to create the second layer. Pour the melted white chocolate evenly over the set dark chocolate layer on the baking sheet. Use your offset spatula or rubber spatula to gently spread the white chocolate all the way to the edges, covering the dark chocolate completely.
Work quickly but carefully to avoid disturbing the dark chocolate layer underneath. Aim for a similar thickness to the dark chocolate layer, creating a beautiful contrast in color and flavor. Ensure the white chocolate is spread smoothly and evenly, as this forms the surface upon which you'll sprinkle the candy canes.
Crushing the Candy Canes: Creating Peppermint Pieces
While the white chocolate is still wet and soft, you need to have your crushed candy canes ready. Unwrapping the candy canes is the first step. You'll likely need about 10-15 standard-sized candy canes to get enough crushed pieces. Place the unwrapped candy canes in a sturdy, freezer-safe zip-top bag or between two layers of parchment paper.
Use a rolling pin, the flat side of a meat tenderizer, or the bottom of a heavy pan to crush the candy canes into varying sizes. You want a mix of fine dust and small chunks for texture and visual appeal. Avoid turning it all into powder. This step is best done just before you're ready to sprinkle, as the crushed candy canes can start to clump if left sitting for too long, especially in humid conditions.
Sprinkling the Candy Canes: Evenly Distributing on Top
Immediately after spreading the white chocolate layer (while it's still liquid), generously sprinkle the crushed candy canes evenly over the entire surface. The wet chocolate will act as the "glue" to hold the candy pieces in place as it sets. Don't be shy with the candy canes; they provide the signature look and crunch of peppermint bark.
Distribute the pieces as evenly as possible, trying to cover the entire white surface. You can gently press the candy cane pieces into the chocolate with your hand or the back of a spatula, but be careful not to press too hard and disturb the chocolate layers underneath. This step not only adds flavor but also makes your easy candy cane bark recipe visually festive.
Setting the Bark: Fully Cooling and Hardening
With the candy canes sprinkled on top, the peppermint bark needs to fully set and harden. Carefully transfer the baking sheet back into the refrigerator. This final chill time is crucial for the chocolate layers to bond together and become brittle enough to break cleanly.
Allow the bark to chill for at least 30-60 minutes, or until both chocolate layers are completely firm and rigid. You should be able to lift a corner of the parchment paper and the bark will come with it without bending or feeling soft. Adequate chilling ensures the bark snaps crisply when broken, a key characteristic of well-made peppermint bark.
Breaking the Bark: Creating Irregular Pieces
Once the peppermint bark is fully set and cold, it's time for the final, satisfying step: breaking it into pieces. Remove the baking sheet from the refrigerator and lift the entire sheet of bark off the pan using the parchment paper. Place the bark on a cutting board or clean surface.
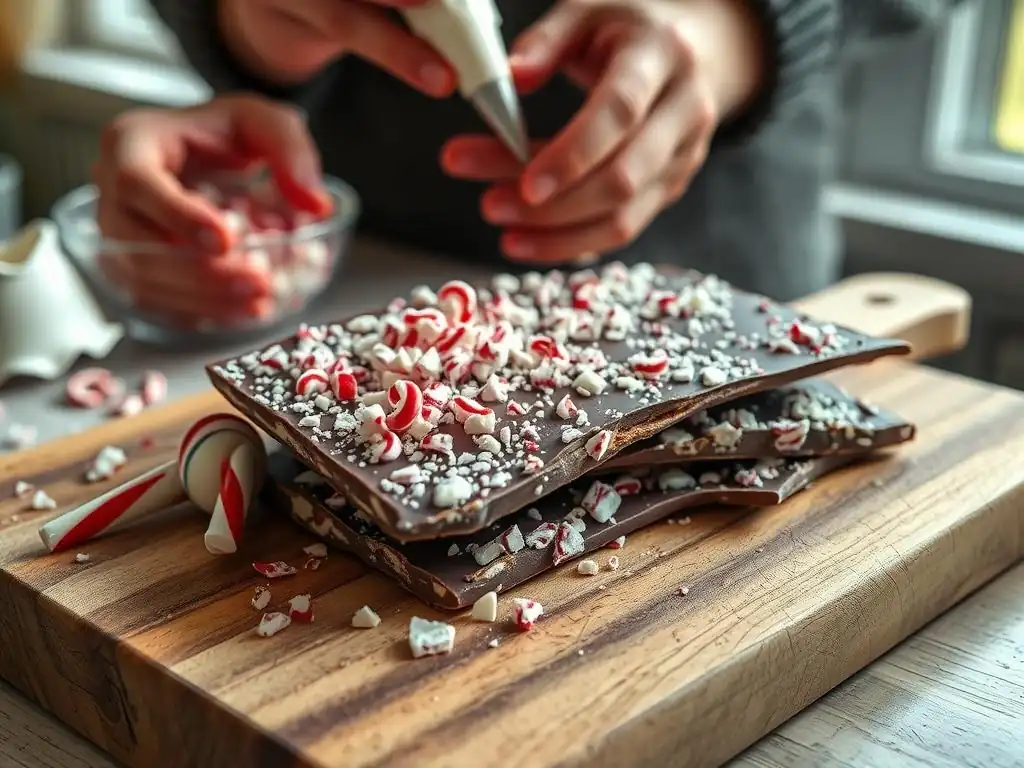
Using your hands, simply break the bark into irregular-sized pieces. The joy of bark is its rustic, imperfect shape, so there's no need for precision. You can start by breaking it roughly in half, then breaking those halves into smaller chunks. Aim for pieces that are easy to handle and eat, typically ranging from 1x1 inch to 3x4 inches. This step is fun and signals that your easy candy cane bark recipe is almost ready to enjoy!
Tips and Tricks for Perfect Peppermint Bark
Tempering Chocolate: Preventing Bloom and Achieving Shine
While simply melting and chilling works for an easy candy cane bark recipe, properly tempering your chocolate will result in a more stable, glossy finish and prevent "bloom" – those grayish streaks or spots that can appear on chocolate that hasn't set correctly. Tempering involves heating and cooling the chocolate to specific temperatures to stabilize the cocoa butter crystals.
For dark chocolate, this typically means heating to around 115-120°F (46-49°C), cooling to 84-88°F (29-31°C), and then reheating slightly to 88-91°F (31-33°C). White chocolate requires slightly lower temperatures: heat to 105-110°F (40-43°C), cool to 80-82°F (27-28°C), and reheat to 84-86°F (29-30°C).
Achieving perfect temper can be tricky, especially for beginners. A simpler approach for home cooks is the "seed" method: melt about two-thirds of your chopped chocolate, then stir in the remaining one-third (the "seed" chocolate) off the heat until it fully melts and the temperature drops to the correct working temperature. This helps align the cocoa butter crystals without precise temperature control. While not strictly necessary for a basic easy candy cane bark recipe, mastering tempering elevates your chocolate work significantly, resulting in bark that looks professional and resists melting at room temperature.
Achieving a Clean Break: Using a Warm Knife
Breaking the bark by hand gives it that characteristic rustic look. However, if you prefer slightly neater edges or want to cut the bark into squares or rectangles, using a warm knife can help achieve a cleaner break or cut. Heat a large, sharp knife by dipping it in hot water and then wiping it completely dry with a towel. The warmth of the blade will help it slice through the chocolate more smoothly.
Place the warmed knife on the bark and press down firmly but carefully. You can score the bark first, then break along the score lines, or attempt to cut all the way through. Reheat and dry the knife as needed between cuts. While the charm of bark lies in its irregular shapes, a warm knife is a useful trick if you're aiming for more uniform pieces, perhaps for packaging neatly in gift boxes.
Customizing Your Bark: Adding Sea Salt or Other Toppings
While classic peppermint bark is simple, there are many ways to customize your easy candy cane bark recipe. A popular addition is a sprinkle of flaky sea salt over the dark chocolate layer before it sets, or lightly over the white chocolate layer before sprinkling the candy canes. The salt enhances the chocolate flavor and provides a delightful sweet and salty contrast.
Other toppings can include chopped nuts (like pistachios or almonds), dried cranberries, or even a drizzle of contrasting chocolate color. For example, after the white chocolate layer is set, you could melt a small amount of dark chocolate, put it in a piping bag or zip-top bag with the corner snipped off, and drizzle it decoratively over the top before the final set. Just ensure any added toppings are dry and won't introduce moisture, which can cause the chocolate to seize or bloom.
Peppermint Bark Variations
Double Dark Chocolate Peppermint Bark
For dark chocolate enthusiasts, a double dark chocolate peppermint bark variation is a rich and intense alternative to the classic recipe. Instead of using white chocolate for the second layer, you would use another type of dark chocolate, perhaps one with a slightly lower cocoa percentage (like 50-60%) or a different flavor profile than the base layer. This creates a deeper, more complex chocolate experience.
The process remains largely the same as the easy candy cane bark recipe: melt and spread the first dark chocolate layer, let it set, then melt and spread the second dark chocolate layer (infused with peppermint extract if desired), and sprinkle with crushed candy canes while wet. This variation highlights the nuances of different dark chocolates while still providing the festive crunch and minty flavor from the candy canes.
Milk Chocolate Peppermint Bark
Using milk chocolate for one or both layers creates a sweeter, creamier version of peppermint bark that is particularly appealing to those who prefer a less intense chocolate flavor. You could use milk chocolate for the bottom layer and white chocolate for the top, or vice versa. A layer of milk chocolate topped with white chocolate and candy canes is a very popular and approachable variation.
When working with milk chocolate, remember that it melts at an even lower temperature than dark or white chocolate due to its higher sugar and milk content. Be extra careful when melting to avoid overheating. An easy candy cane bark recipe using milk chocolate is often a hit with children and those with a sweeter tooth, offering a milder backdrop for the vibrant peppermint flavor.
Espresso Peppermint Bark
For a sophisticated twist, consider adding espresso powder to your dark chocolate layer. Espresso naturally enhances the flavor of chocolate without making it taste like coffee. Stir about 1-2 teaspoons of finely ground espresso powder or instant espresso into the melted dark chocolate until fully combined before spreading it.
This espresso-infused dark chocolate base pairs wonderfully with the bright white chocolate and refreshing peppermint topping. The subtle bitterness and depth from the espresso add another layer of complexity to the classic holiday treat. This variation is perfect for gifting to coffee lovers or serving alongside after-dinner coffee.
Storing Homemade Peppermint Bark
Best Practices for Maintaining Freshness
Proper storage is key to keeping your homemade peppermint bark fresh and delicious for as long as possible. Once the bark is fully set and broken into pieces, store it in an airtight container. Layer the pieces between sheets of parchment paper to prevent them from sticking together, especially if you have multiple layers in the container.
Keep the airtight container in a cool, dry place, away from direct sunlight and heat sources. A pantry shelf or a cool cupboard is ideal. Avoid storing it near anything with strong odors, as chocolate can absorb smells. Storing it correctly ensures the chocolate retains its snap and the candy canes remain crunchy.
Shelf Life of Peppermint Bark
When stored properly in a cool, dry, airtight container, homemade peppermint bark can maintain its quality for quite some time. Generally, it will stay fresh and delicious for about 2-3 weeks at room temperature. If you've used high-quality chocolate and stored it correctly, it might even last longer.
For extended storage, you can refrigerate the bark, which can prolong its shelf life up to a month or two. However, be mindful of condensation when removing it from the fridge. Allow it to come to room temperature slowly in the sealed container before opening.
Freezing is also an option for very long-term storage (up to 6 months), but the texture and appearance might be slightly affected upon thawing. For the best flavor and texture, consuming it within a few weeks of making it is recommended, especially if you followed an easy candy cane bark recipe designed for quick enjoyment.
Serving Suggestions for Your Holiday Treat

Peppermint Bark as a Gift: Festive Packaging Ideas
Homemade peppermint bark makes a wonderful and thoughtful holiday gift. Its vibrant colors and festive flavor are perfect for sharing. Once broken into pieces, you can package it in various ways. Clear cellophane bags tied with festive ribbons showcase the beautiful layers and candy cane bits.
You can also arrange pieces in decorative tins, holiday-themed boxes, or layered glass jars. Adding a small tag with the ingredients or a simple "Happy Holidays" message adds a personal touch. Since this is an easy candy cane bark recipe, you can easily make multiple batches to give away to friends, neighbors, teachers, and colleagues.
Pairing Peppermint Bark with Coffee or Hot Chocolate
Peppermint bark is the perfect accompaniment to warm holiday beverages. The cool, minty crunch pairs exceptionally well with the richness of hot chocolate or the robust flavor of coffee. Enjoying a piece (or two!) with a steaming mug is a simple pleasure that embodies the coziness of the holiday season.
You can even use small pieces of the bark as a garnish for whipped cream on top of your hot drinks. The chocolate will slowly melt into the beverage, adding extra flavor. Serving homemade peppermint bark alongside a coffee or hot chocolate bar at a holiday party is also a great way for guests to enjoy this festive treat.
Troubleshooting Common Peppermint Bark Issues
Chocolate Blooming
Chocolate bloom appears as grayish streaks or a dull, powdery surface on the chocolate. It's caused by temperature fluctuations during setting or storage, which cause the cocoa butter or sugar to separate and crystalize on the surface. While harmless and the chocolate is still edible, it affects the appearance and texture.
To prevent bloom, ensure your chocolate is melted properly (avoid overheating) and sets in a cool, stable temperature environment (like the refrigerator). Avoid moving the bark too much while it's setting. Storing the finished bark in a cool, consistent temperature also helps. If bloom does occur, you can often remelt the chocolate and try setting it again, although the texture might be slightly different. Using quality chocolate designed for melting also reduces the risk of bloom in your easy candy cane bark recipe.
Uneven Chocolate Layers
Uneven layers can happen if the chocolate isn't spread uniformly or if one layer starts to set before the next layer is poured. To ensure even layers, spread the melted chocolate quickly and smoothly using an offset spatula, trying to maintain a consistent thickness across the entire baking sheet.
Make sure the first layer (dark chocolate) is fully set but not overly cold before pouring the second layer (white chocolate). If the dark chocolate is too soft, the layers might swirl together. If it's too cold, the white chocolate might set too quickly on contact, preventing it from spreading smoothly. Working efficiently once the chocolate is melted is key to achieving distinct, even layers in your easy candy cane bark recipe.
Bark Not Setting Correctly
If your peppermint bark doesn't set firmly and remains soft or pliable, there are a few potential culprits. The most common reason is not chilling it for long enough. Ensure it spends at least 30-60 minutes in the refrigerator until it's completely hard. Another reason could be using a chocolate product that isn't designed for setting, such as chocolate syrup or certain types of compound coatings that require different setting methods.
Adding too much liquid or extract to the chocolate can also prevent it from setting properly or cause it to seize. Peppermint extract should be added sparingly, especially to white chocolate. Ensure all your tools and bowls are completely dry, as even a tiny drop of water can cause melted chocolate to seize and become unusable. Following the measurements and steps in an easy candy cane bark recipe carefully helps avoid these issues.
Frequently Asked Questions
What makes this candy cane bark recipe "easy"?
The recipe uses only a few simple ingredients like chocolate and candy canes, and requires no baking. It's a melt-and-spread method, making it quick and accessible.
Can I use different types of chocolate for the candy cane bark?
Yes, you can! While the recipe likely suggests a specific type, you can experiment with dark, milk, or white chocolate. Just be mindful of their different melting points.
How long does the candy cane bark need to chill before breaking it?
Generally, the bark needs to chill in the refrigerator until it is completely firm and set. This usually takes around 30 minutes to an hour.
What's the best way to crush the candy canes for this recipe?
A good method is to place the candy canes in a zip-top bag and crush them with a rolling pin or mallet. Be careful not to crush them into powder!
How should I store the candy cane bark to keep it fresh?
Store the candy cane bark in an airtight container at room temperature or in the refrigerator. This will help prevent it from melting or becoming sticky.
Final Reflection: The Sweet Simplicity of Holiday Baking
The ease of creating delicious treats shouldn't be underestimated, especially during the busy holiday season. This simple candy cane bark recipe proves that festive baking can be accessible and enjoyable for everyone, regardless of skill level. The joy of sharing homemade sweets with loved ones far outweighs any perceived difficulty, and this recipe offers a perfect example of that.
The enduring appeal of homemade treats, particularly during the holidays, lies in their ability to connect us to cherished traditions and loved ones. The aroma of melting candy canes and chocolate filling a kitchen evokes a sense of warmth and nostalgia, a feeling that transcends generations. The best things in life are the people we love, the places we've been, and the memories we've made along the way.
This simple recipe allows us to create those memories, to share a piece of ourselves with others, and to savor the sweet moments of the season.
This holiday season, I encourage you to embrace the simplicity of this recipe and create your own batch of candy cane bark. Don't be intimidated by the kitchen; let the process be a joyful experience, a time for reflection and connection. Share your creations, share your time, and share the sweet spirit of the holidays with those you cherish. The memories you make, like the taste of this bark, will be long-lasting and sweet.
Unleash Your Inner Candy Cane Master!
Thanks for spending some time with us and discovering this simple yet delicious candy cane bark recipe! We hope you’re feeling inspired to create some festive treats this holiday season. Ready to get baking?
- Whip up a batch of this easy candy cane bark: Gather your ingredients and follow the recipe – it's quicker than you think! Let the sweet aroma fill your kitchen.
- Share your creation: Tag us on social media with your stunning candy cane bark photos! We love seeing your baking masterpieces.
- Experiment with flavors: Try adding other crushed candies, nuts, or sprinkles to customize your bark. What unique twist will you create?
Ready to transform your holiday baking? What's your favorite festive candy to incorporate into your treats?