
Why Your Classic Cookies Don't Spread (Beginner Help)


Welcome to BakeWithEase, your trusted companion on your baking journey! Ever wondered why your classic cookies stubbornly refuse to spread, leaving you with puffy, disappointing results? This article dives deep into the common culprits, offering beginner-friendly solutions to achieve that perfectly thin and chewy texture you crave. Curious to unlock the secrets to cookie perfection? Let's get baking!
- Troubleshooting Flat Cookies: A Baker's Guide
- Introduction: Understanding Cookie Spread and Baking Variables
- Common Culprits: Why Your Cookies Aren't Spreading
- Troubleshooting Your Cookie Recipe: Identifying and Addressing the Issues
- Preventing Cookie Spread Problems: Proactive Baking Techniques
- Achieving Perfect Cookie Spread: Recap and Best Practices
-
Frequently Asked Questions
- What are the most common reasons why my classic cookies aren't spreading?
- How does the type of fat used in a cookie recipe affect its spreading?
- Can the oven temperature influence whether classic cookies spread properly?
- Is there a specific type of flour that's more likely to prevent cookie spreading?
- How does chilling cookie dough affect its spreading during baking?
- Final Reflection: The Science of the Perfect Spread
- Unlock Perfectly Spread Cookies: Your Baking Journey Starts Now!
Baking classic cookies seems simple enough: mix ingredients, scoop, and bake. But sometimes, the result isn't the perfectly spread, slightly chewy cookie you envisioned. Instead, you might end up with thick, puffy discs that look more like scones than cookies. This lack of spread is a common issue for many home bakers, especially when tackling classic cookie recipes like chocolate chip or peanut butter. Understanding why your classic cookies aren't spreading is the first step to fixing the problem and achieving that ideal texture.
Cookie spread is influenced by a delicate balance of ingredients and techniques. Factors like the type and temperature of fat, the sugar ratio, how you measure your flour, the leavening agents used, and even the accuracy of your oven temperature all play critical roles. When one or more of these variables are off, it can dramatically affect how your cookies behave in the oven. Don't worry – identifying the culprits behind classic cookies not spreading is a skill every baker can learn and master with a little practice and knowledge.
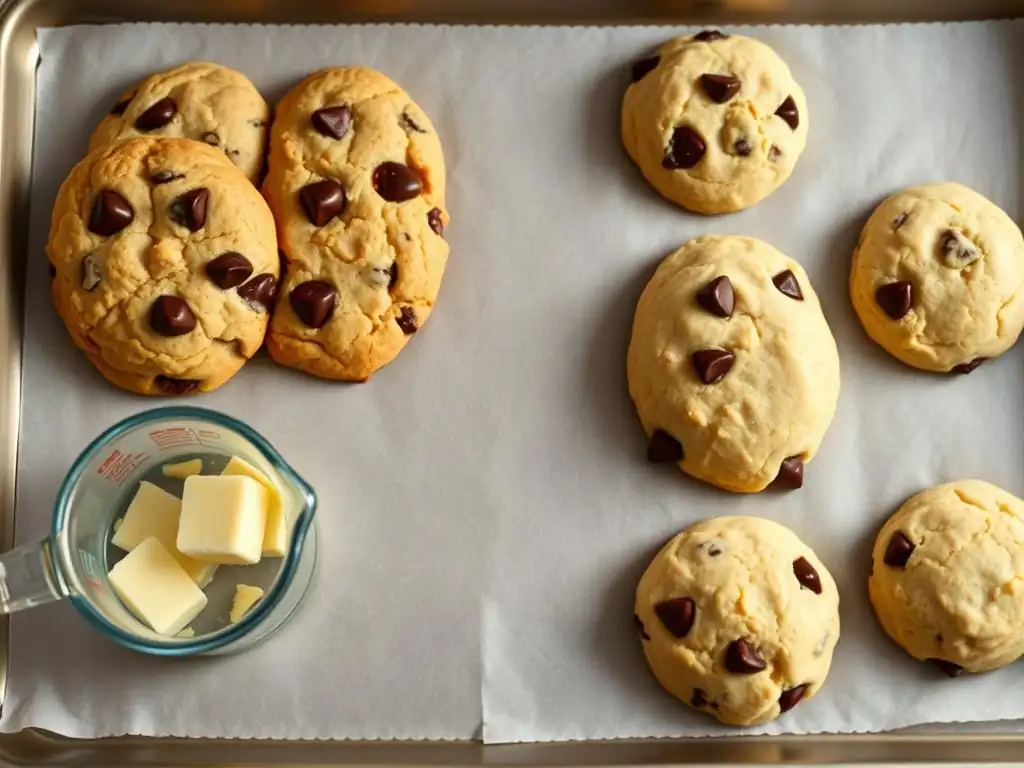
The temperature of your butter is perhaps one of the most significant factors determining how much your classic cookies spread. Recipes often call for "softened" or "room temperature" butter. This means the butter should be pliable enough to leave an indentation when pressed gently, but not melted or greasy. Typically, this is around 65-68°F (18-20°C). Using butter that is too cold prevents it from creaming properly with the sugar, hindering the creation of air pockets essential for leavening and spread during baking.
Conversely, using butter that is too warm or melted is also detrimental. Melted butter bypasses the creaming stage entirely, meaning no air is incorporated. While some recipes specifically call for melted butter for a chewier texture, for a standard classic cookie aiming for good spread, melted butter will often result in cookies that spread too much and become thin and greasy, or surprisingly, sometimes not enough if the fat separates unevenly in the dough. The ideal softened butter allows for proper emulsification and aeration, providing the foundation for predictable spread.
Sugar Ratio: Balancing Sweetness and Spread
The types and ratios of sugar in your classic cookie recipe significantly impact texture and spread. Granulated sugar contributes to spread because it melts at a relatively high temperature during baking. As it melts, it causes the cookie dough to spread outwards before the structure sets. Brown sugar, on the other hand, contains molasses, which is acidic and reacts with baking soda to produce carbon dioxide, aiding in lift and some spread. Brown sugar also retains moisture, contributing to a chewier texture.
A common ratio in classic chocolate chip cookies, for instance, might be equal parts granulated and brown sugar, or slightly more brown sugar. If a recipe calls for a higher proportion of brown sugar compared to granulated sugar, the cookies might be thicker and chewier with slightly less spread than those made with mostly granulated sugar. If your classic cookies aren't spreading as expected, check the sugar ratio. A dough with too little sugar overall, or too much brown sugar relative to granulated sugar, can contribute to a lack of spread.
Flour Measurement: Accuracy is Essential
Measuring flour correctly is crucial for successful baking, especially when dealing with classic cookies not spreading. Too much flour is a very common reason for cookies that don't spread. Flour provides structure to the cookie. If there's an excess, the structure sets too quickly in the oven before the fat has fully melted and allowed the cookie to spread.
The best way to measure flour is by weight using a kitchen scale. One cup of all-purpose flour typically weighs around 120-125 grams. If you're using volume measurements (cups), the "spoon and level" method is recommended: gently spoon the flour into the measuring cup until it's overflowing, then level off the excess with a straight edge. Scooping flour directly from the bag with the measuring cup can compact the flour, adding up to 25% more flour than intended per cup, leading to dense, cakey cookies that refuse to spread.
Baking Soda vs. Baking Powder: Understanding Leavening Agents
Leavening agents like baking soda and baking powder are essential for giving cookies lift and contributing to their texture, including spread. Baking soda requires an acid to activate and produce carbon dioxide gas. Common acidic ingredients in cookie dough include brown sugar (molasses), buttermilk, yogurt, or chocolate. Baking powder, on the other hand, is a complete leavening agent containing both an acid and a base, often activated by moisture and then again by heat (double-acting).
Using the wrong leavening agent or an incorrect amount can affect spread. Baking soda tends to promote more spread and a crispier edge, while baking powder leads to puffier, cakeier cookies with less spread. If your classic cookie recipe calls for baking soda and you don't have enough acidic ingredients, or if you accidentally use baking powder instead of baking soda, your cookies might not spread properly and could end up thick and puffy. Ensure your leavening agents are fresh; they lose potency over time, typically lasting about 6-12 months once opened.
Oven Temperature: Ensuring Consistent Baking
An inaccurate oven temperature can wreak havoc on your baked goods, including causing classic cookies not spreading. If your oven runs too hot, the edges and surface of the cookies might set too quickly before the center has a chance to warm up and the fat melts sufficiently to allow for spread. This results in cookies that hold their shape and don't flatten out as intended.
Conversely, an oven that is too cool can also cause issues, sometimes leading to excessive spread if the leavening doesn't activate properly, or inconsistent baking. To ensure your oven is heating accurately, use an inexpensive oven thermometer placed inside. If your oven temperature is significantly off (more than 15-20°F or about 8-11°C), you'll need to adjust the temperature called for in the recipe or consider professional calibration. Baking at the correct temperature is vital for the chemical reactions that govern spread and texture.
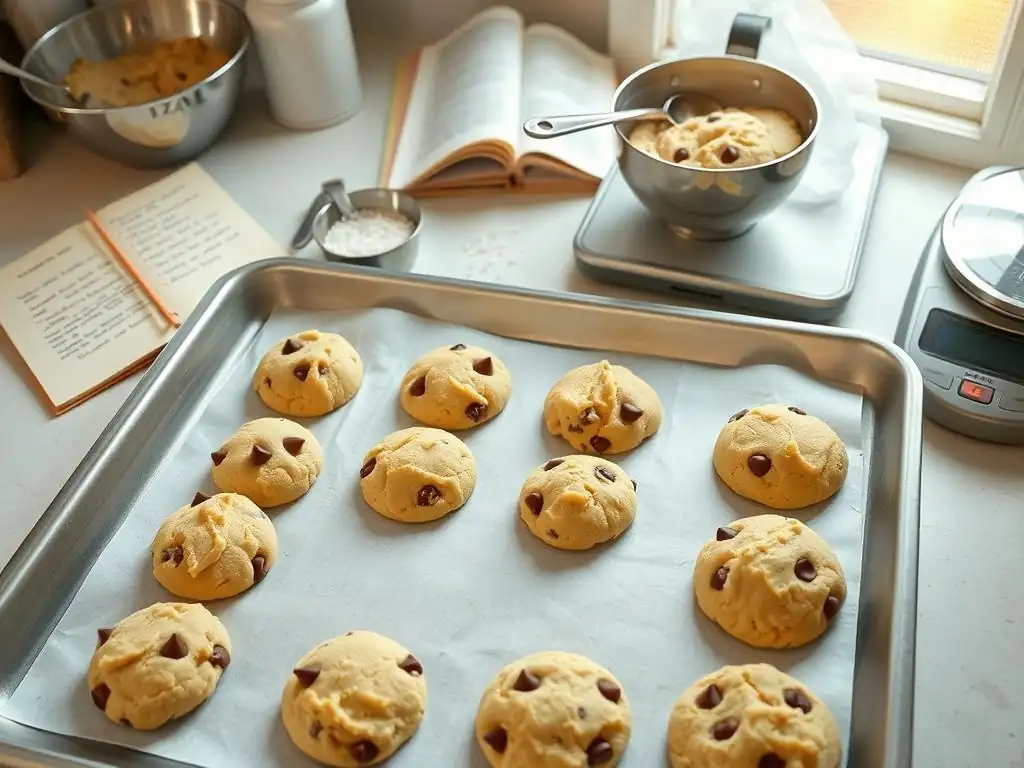
Achieving the Right Butter Consistency: Softened, Not Melted
If your classic cookies aren't spreading, the first thing to check is your butter. Was it truly softened to room temperature? Softened butter should yield slightly when pressed, but not be greasy or liquid. If it was too cold, the dough will be stiff and won't relax enough in the oven. If it was too warm or melted, you'll miss the crucial aeration step when creaming.
To fix cold butter, cut it into smaller pieces and let it sit at room temperature for 15-30 minutes. Avoid microwaving, which can melt the butter unevenly. For butter that is too warm, pop it in the refrigerator for 10-15 minutes until it firms up slightly to that ideal pliable state. Getting the butter temperature right before you even start mixing is a fundamental step for achieving good spread in classic cookie recipes.
Adjusting Sugar Ratios for Desired Spread
If you suspect your sugar ratio is the issue behind classic cookies not spreading, consider slightly altering the balance between granulated and brown sugar in your next batch. For more spread and a crispier texture, you can increase the proportion of granulated sugar relative to brown sugar. For example, if a recipe calls for 1 cup (200g) granulated and 1 cup (220g) brown, you might try 1.25 cups (250g) granulated and 0.75 cups (165g) brown sugar.
Be cautious not to drastically change the total amount of sugar, as this will affect sweetness and other aspects of the cookie's structure. Small adjustments, like increasing granulated sugar by 10-20%, can often encourage more spread without completely altering the cookie profile. Keep notes on your adjustments to find the perfect balance for your preferred classic cookie spread.
Measuring Flour Accurately: Spooning vs. Weighing
Inaccurate flour measurement is a primary culprit for many baking failures, including classic cookies not spreading. If you've been scooping flour directly from the bag, try switching to the spoon and level method. Use a spoon to lightly fill your dry measuring cup, then level the excess off with a straight edge like the back of a knife. Don't tap the cup or pack the flour down.
For the most accurate results, invest in a digital kitchen scale. Weighing ingredients, especially flour, eliminates the variability inherent in volume measurements. A recipe might call for 2.5 cups of flour; using a scale, you'd measure out 300-312.5 grams (based on 120-125g per cup), ensuring you have the precise amount the recipe developer intended. This simple change can make a huge difference in preventing those thick, non-spreading cookies.
Understanding Leavening Agents: Choosing the Right One for Your Recipe
Double-check the leavening agent called for in your classic cookie recipe. Is it baking soda, baking powder, or a combination? Ensure you are using the correct one and that it is fresh. To test if baking soda is still active, mix a teaspoon with a tablespoon of vinegar; it should fizz immediately. For baking powder, mix a teaspoon with a tablespoon of hot water; it should also fizz.
If your leavening is fresh but your classic cookies still aren't spreading, consider the recipe's balance of acidic ingredients if using baking soda. If there isn't enough acid, the soda won't fully activate. Sometimes, adding a tiny pinch more baking soda (perhaps 1/4 teaspoon extra per batch) can encourage slightly more spread, especially if your recipe is light on acidic components like brown sugar. However, too much baking soda can leave a metallic taste.
Calibrating Your Oven: Ensuring Accurate Temperature
An oven thermometer is an essential tool for any baker. Place it in the center of your oven to see if the temperature displayed on your oven's dial or digital readout matches the actual internal temperature. It's common for ovens to be off by 25-50°F (about 14-28°C) or more.
If your oven runs hot, which often causes classic cookies not spreading because they set too fast, you can try lowering the oven temperature called for in the recipe. For example, if the recipe says 350°F (175°C) but your oven thermometer reads 375°F (190°C), try setting your oven to 325°F (160°C) to achieve a more accurate temperature of 350°F inside. Baking at the correct temperature allows the cookies to spread gradually before setting.
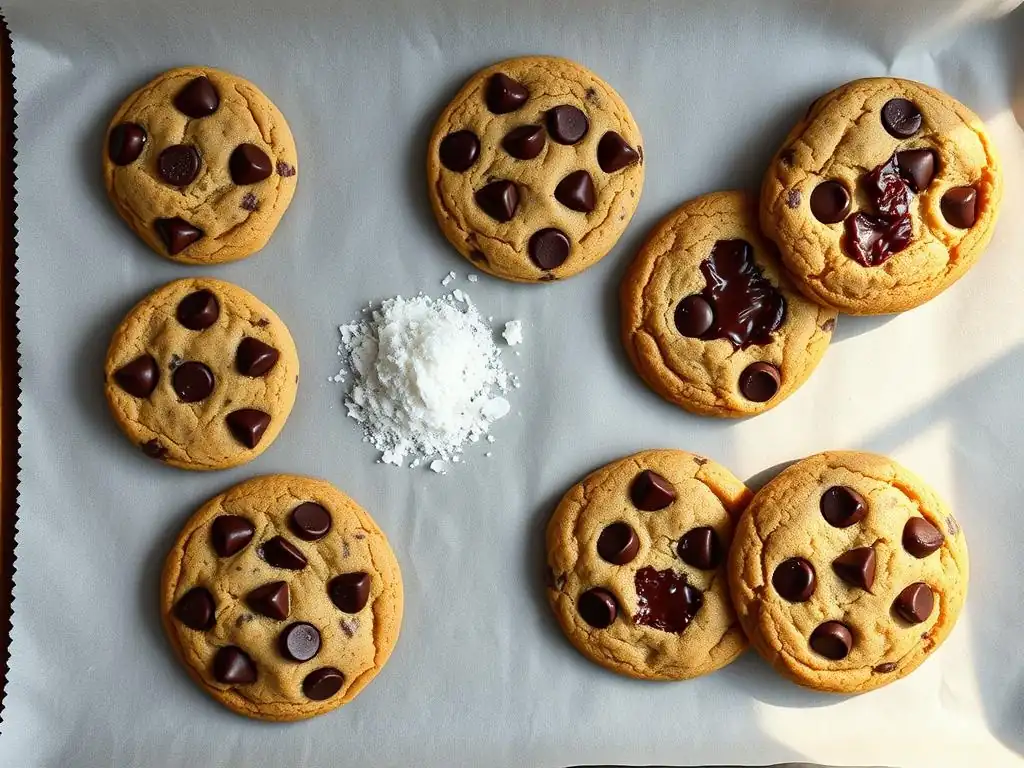
Creaming Butter and Sugar: Achieving the Right Aeration
The creaming step is where softened butter and sugar are beaten together until light and fluffy. This process incorporates air bubbles into the butter. During baking, these air bubbles expand, helping the cookie rise and spread. For classic cookies, cream the butter and sugar for a full 2-3 minutes (or even longer with a stand mixer), scraping down the sides of the bowl occasionally. The mixture should become noticeably lighter in color and volume.
Under-creaming is a common reason for classic cookies not spreading adequately. If the mixture still looks dense and yellowish after only a minute of mixing, you haven't incorporated enough air. Aim for a pale, fluffy texture. Proper creaming is the foundation for good structure and predictable spread in many classic cookie recipes.
Many classic cookie recipes benefit from chilling the dough before baking. While chilling doesn't directly cause spread, it stabilizes the fat (butter). Cold butter melts more slowly in the oven than room-temperature butter. This slower melting process means the cookie holds its shape longer in the initial stages of baking, allowing the edges to set while the center gradually melts and spreads.
Chilling also allows the flavors to meld and the flour to hydrate, often resulting in a better texture. Chilling for at least 30 minutes is usually recommended, but chilling for 24-72 hours can significantly improve both flavor and texture, often leading to a more controlled and desirable spread compared to baking the dough immediately. If your classic cookies aren't spreading enough, ensure you aren't over-chilling the dough or baking it directly from frozen unless specified by the recipe.
Using Parchment Paper: Promoting Even Baking
Baking classic cookies on parchment paper or silicone baking mats can promote more even heating and prevent sticking. While not a direct cause of cookies not spreading, a sticky surface can sometimes hinder the dough's ability to spread outwards freely as it heats. Parchment paper provides a non-stick surface that allows the cookies to expand naturally.
Using parchment paper also makes cleanup much easier! Avoid greasing your baking sheets directly with butter or shortening unless the recipe specifically instructs you to. Excess grease can cause cookies to spread too much and become thin and crispy around the edges. A clean, dry baking sheet lined with parchment is ideal for consistent results.
Avoiding Overmixing: Preventing Gluten Development
Once you add the flour to your classic cookie dough, it's important to mix just until combined. Overmixing after the flour is added develops gluten, the protein structure that gives bread its chewiness and structure. While essential for bread, too much gluten development in cookies results in a tougher, less tender texture and can contribute to cookies that are thick and cakey rather than spreading out nicely.
Mix on low speed and stop as soon as you no longer see streaks of dry flour. Sometimes, it's best to mix the last bit of flour in by hand with a spatula. This prevents toughening the dough and helps ensure your classic cookies achieve the desired spread and tender texture.
To prevent classic cookies not spreading and achieve that ideal texture, remember these key points:
- Butter Temperature: Use softened, room-temperature butter (approx. 65-68°F / 18-20°C).
- Accurate Measurement: Weigh your flour or use the spoon and level method.
- Sugar Balance: Understand how granulated vs. brown sugar affects spread.
- Fresh Leavening: Ensure baking soda/powder are active and used correctly.
- Oven Accuracy: Use an oven thermometer and adjust temperature if needed.
- Creaming: Cream butter and sugar until light and fluffy (2-3+ minutes).
- Chilling: Chill dough as recommended; it helps control spread.
- Gentle Mixing: Avoid overmixing once flour is added.
- Baking Surface: Use parchment paper for even baking and release.
By paying attention to these fundamental variables, you'll significantly improve your chances of baking classic cookies with perfect spread every time.
Exploring Advanced Techniques: Brown Butter and More.
Once you've mastered the basics and consistently achieve good spread in your classic cookies, you can experiment with more advanced techniques. Using brown butter, for example, involves cooking the butter until the milk solids toast, creating a nutty flavor. Brown butter needs to cool and resolidify slightly before creaming with sugar, and it can affect spread differently than regular softened butter, sometimes leading to cookies that are chewier and slightly thinner, depending on the recipe's balance.
Other factors that can influence spread include the addition of liquid ingredients (like milk or extra egg yolk), the type of fat used (shortening tends to produce thicker cookies than butter), and even the color of your baking sheet (dark sheets absorb more heat and can cause faster setting). As you gain confidence, try small modifications to classic recipes, observing how each change impacts the final cookie spread and texture. Baking is a science, and understanding these variables empowers you to troubleshoot and perfect your favorite classic cookies.
Frequently Asked Questions
Several factors can prevent cookies from spreading. The most frequent culprits are using too much flour, too little fat, or chilling the dough excessively. Also, baking at a lower temperature might affect the cookies' spread.
The type of fat significantly impacts cookie spread. For instance, butter generally leads to flatter cookies compared to shortening, which tends to create thicker, less spread-out cookies. Melted butter can also promote spreading.
Yes, oven temperature plays a crucial role. Baking at the correct temperature ensures the fats melt properly, allowing the cookies to spread. A lower temperature might solidify the fats too quickly, preventing spreading.
Yes, using too much flour of any type is the biggest problem. However, bread flour, which contains more gluten, can contribute to less spreading compared to all-purpose flour if not properly balanced with other ingredients.
Chilling cookie dough can significantly reduce spreading. The cold fat takes longer to melt in the oven, giving the gluten in the flour more time to develop structure. This results in thicker, less spread-out cookies.
Final Reflection: The Science of the Perfect Spread
Understanding why your classic cookies don't spread isn't just about baking better cookies; it's about mastering the fundamental science behind baking itself. A seemingly simple question – why are my cookies flat or thick? – unlocks a deeper understanding of ingredient interactions, temperature control, and the delicate balance that creates the perfect texture. This knowledge empowers you to troubleshoot any baking challenge, not just cookie-related ones.
The pursuit of the perfect cookie, a seemingly trivial pursuit, reflects a larger human desire for control and precision. We strive for that ideal, that picture-perfect result, and understanding the science behind it allows us to achieve it. This isn't just about following a recipe; it's about understanding why a recipe works, and how to adapt it to your own preferences and ingredients. The best bakers are those who understand the 'why' behind the 'how.'
– (This needs a source, add a relevant quote here)
So, the next time you're faced with a batch of stubbornly thick or disappointingly flat cookies, remember the lessons learned here. Don't just blame the recipe; investigate! Experiment with different ratios of butter, sugar, and flour. Pay attention to your oven temperature and baking time. Embrace the scientific method in your baking, and you'll not only achieve perfectly spread cookies but also a deeper appreciation for the art and science of baking. You'll find yourself empowered to create your own perfect cookie, tailored to your exact preferences.
Thanks for joining us on this baking adventure! You now understand the science behind perfectly spread cookies – no more flat or puffy disappointments! Ready to put your new knowledge into practice?
- Bake a test batch today! Use your newfound understanding to adjust your recipe and see the difference. Try experimenting with one ingredient change at a time.
- Share your cookie creations! Show off your perfectly spread cookies on social media – tag us @BakeWithEase so we can see your delicious results!
- Consider joining our BakeWithEase community forum – ask questions, share tips, and connect with other baking enthusiasts!
What ingredient change are you most excited to try for your next batch of perfectly spread cookies?