
Precision Autolyse & Fermentolyse: FineTuning Dough Hydration

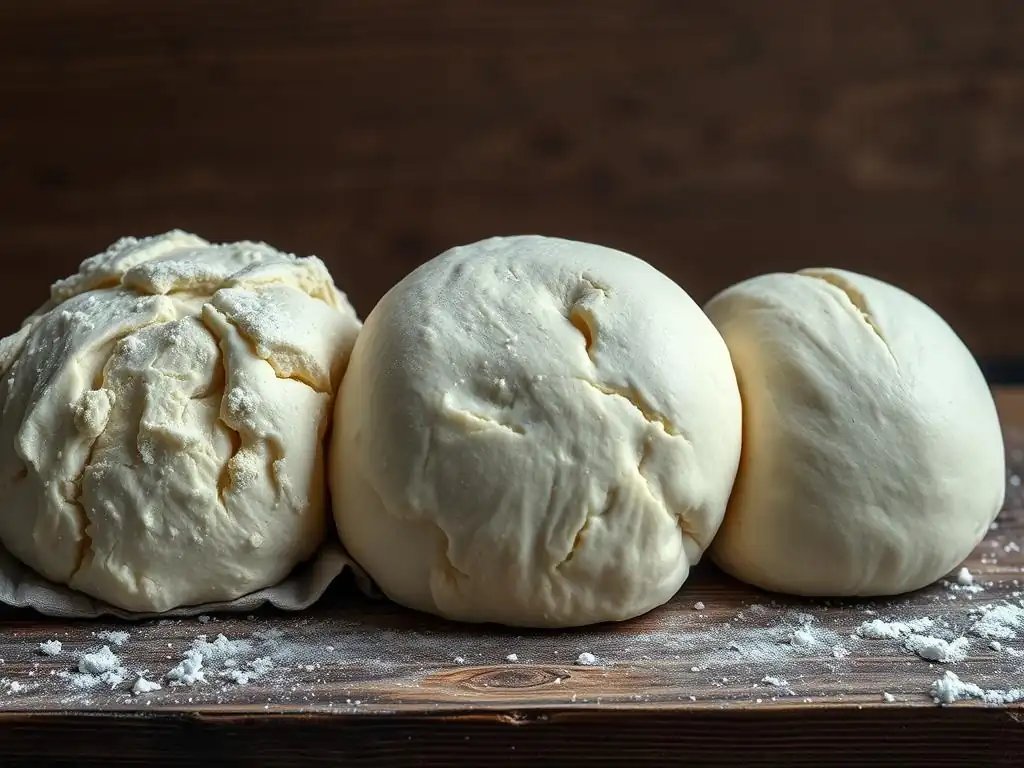
Welcome to BakeWithEase, your guide to unlocking baking brilliance! Ever wondered how to elevate your breads from good to extraordinary? Dive into the fascinating world of dough hydration as we explore Autolyse dough hydration techniques. Discover how precision autolyse and fermentolyse can transform your baking, creating richer flavors and superior textures. Ready to unravel the secrets of perfect dough? Let's get started!
- Mastering Dough Hydration: Autolyse and Fermentolyse for Sourdough
- Understanding Autolyse for Enhanced Dough Hydration
- Demystifying Fermentolyse: A Deeper Dive into Dough Hydration
-
Precision Autolyse Techniques: Mastering the Process
- Choosing the Right Flour and Water for Autolyse
- Autolyse Time: How Long Should You Autolyse Your Dough?
- Autolyse Temperature: Optimizing Conditions for Best Results
- Incorporating Starter and Salt in Fermentolyse
- Fermentolyse Time: Determining Optimal Fermentation Duration
- Monitoring Dough Development During Fermentolyse
- Autolyse vs. Fermentolyse: A Detailed Comparison
- Fine-Tuning Dough Hydration: Practical Tips and Troubleshooting
- Advanced Autolyse and Fermentolyse Techniques for Sourdough Perfection
- Sourdough Recipes Utilizing Autolyse or Fermentolyse
- Achieving Consistent Results: Tips for Reproducible Sourdough Baking
-
Frequently Asked Questions
- What is Autolyse and why is it important for dough hydration?
- How does Autolyse differ from Fermentolyse?
- What type of flour is best suited for Autolyse dough hydration techniques?
- How long should I Autolyse my dough for optimal hydration?
- Can I adjust the water ratio during Autolyse for better hydration?
- Final Reflection: The Transformative Power of Precision in Baking
- Unlock Your Baking Potential: Master Dough Hydration Today!
Mastering Dough Hydration: Autolyse and Fermentolyse for Sourdough
Understanding Autolyse for Enhanced Dough Hydration
What is Autolyse and Why is it Crucial for Sourdough Baking?
Autolyse is a simple yet powerful technique in bread baking, particularly valuable when exploring autolyse dough hydration techniques for sourdough. It involves mixing just the flour and water in a recipe and letting this mixture rest before adding other ingredients like salt or sourdough starter. This seemingly basic step allows the flour to fully hydrate, starting the process of gluten development naturally without the need for immediate kneading. The enzymes present in the flour, proteases and amylases, begin to break down proteins and starches, respectively, preparing the dough for better structure and fermentation later on.
Implementing autolyse is crucial because it significantly impacts the dough's handling characteristics and the final bread's quality. By allowing the flour to absorb water thoroughly and gluten strands to start aligning, the dough becomes more extensible and less sticky. This initial rest period means you'll need less intensive kneading later, reducing the risk of overworking the dough. For sourdough bakers, mastering autolyse dough hydration techniques is fundamental to achieving that signature open crumb structure and desirable crust.
Autolyse's Impact on Dough Strength and Extensibility
The period of autolyse has a profound effect on the dough's rheology – its flow and deformation properties. During this rest, the flour particles are fully saturated, and the gluten-forming proteins, gliadin and glutenin, begin to bond and form a network. This process happens passively, resulting in a dough that is more relaxed and pliable compared to a dough mixed with all ingredients from the start. For instance, a dough mixed with 75% hydration might feel shaggy initially, but after a 30-minute autolyse, it becomes noticeably smoother and more cohesive.
This improved extensibility is key for sourdough baking, especially for high-hydration doughs. It allows the dough to be stretched and folded gently during subsequent steps, incorporating air and further developing the gluten structure without tearing. While autolyse itself doesn't build significant strength (the ability to hold shape), it sets the stage for more efficient strength development during kneading or stretching and folding. Think of it as conditioning the dough, making it easier to work with and more capable of trapping the gases produced by the sourdough starter, leading to a higher rise and better crumb.
Benefits of Autolyse: Improved Texture and Flavor in Sourdough
Beyond dough handling, autolyse contributes significantly to the final texture and flavor of sourdough bread. By giving enzymes time to act on starches, autolyse can lead to a slightly sweeter crumb as complex carbohydrates are broken down into simpler sugars. These sugars also provide more food for the sourdough starter, potentially leading to a more active and robust fermentation. Furthermore, the enhanced gluten development facilitated by autolyse often results in a more open and airy crumb structure, a hallmark of artisan sourdough.
The overall improvement in dough structure thanks to precise autolyse dough hydration techniques means the bread is likely to have a better rise and a more satisfying chew. The crust can also benefit, potentially developing a deeper color and better crispness due to the improved sugar availability and dough handling. Anecdotal evidence from bakers suggests that even a short 20-minute autolyse can make a noticeable difference in dough feel and crumb structure compared to mixing everything at once.
Demystifying Fermentolyse: A Deeper Dive into Dough Hydration
What is Fermentolyse and How Does it Differ from Autolyse?
Fermentolyse is a variation of the autolyse technique that takes autolyse dough hydration techniques a step further by including the sourdough starter along with the flour and water during the initial rest period. Unlike a traditional autolyse where only flour and water are mixed, fermentolyse incorporates the live culture from the beginning. This means that fermentation begins immediately upon mixing. Salt is typically still withheld during the fermentolyse phase, as it can tighten the gluten structure and potentially inhibit initial enzyme activity and fermentation speed.
The key difference lies in the active biological process occurring during the rest. While autolyse relies solely on enzymatic action and passive gluten relaxation, fermentolyse combines these with the metabolic activity of the sourdough starter's yeasts and bacteria. This simultaneous hydration, enzymatic breakdown, and fermentation impact the dough's development in unique ways. For example, a standard autolyse might rest for 30 minutes to 2 hours, whereas a fermentolyse might be shorter, perhaps 30-60 minutes, before salt is added, or it could be extended, depending on the desired outcome and ambient temperature.
The Role of Fermentation in Fermentolyse
The inclusion of the sourdough starter from the outset introduces the active processes of fermentation into the initial rest phase. The wild yeasts and lactic acid bacteria in the starter immediately begin consuming the available sugars (some of which are made accessible faster by the autolytic enzymes) and producing carbon dioxide and organic acids. This early gas production can start to inflate the dough matrix, while the acids contribute to flavor development and can influence gluten structure over time.
This early fermentation subtly alters the dough's characteristics compared to a pure autolyse. The acids produced can slightly modify the gluten structure, and the early gas production can help open up the crumb. For instance, if using a vigorous starter at a percentage like 15% baker's percentage, significant activity will be noticeable even within an hour during a fermentolyse. This integrated approach to autolyse dough hydration techniques means that the dough is not just hydrating and developing gluten passively, but also actively undergoing metabolic changes that will impact its strength, extensibility, and flavor profile.
Advantages of Fermentolyse: Complex Flavors and Increased Dough Stability
Employing fermentolyse can offer distinct advantages, particularly concerning flavor complexity and dough handling, especially for certain types of sourdough. By allowing the starter to work on the flour and water from the beginning, more complex flavor compounds can develop earlier in the process. The organic acids produced during this initial fermentation contribute to the characteristic tang of sourdough and can also help strengthen the gluten network over a longer period, potentially leading to increased dough stability, particularly beneficial for higher hydration doughs or those with a significant percentage of whole grains.
Furthermore, some bakers find that fermentolyse can make doughs, especially those with whole wheat or rye, easier to handle. The early enzymatic activity combined with the starter's work can help break down some of the components that make whole grain doughs feel stiff or less extensible. While specific data is challenging to quantify universally, many experienced bakers report that fermentolyse results in a dough that feels more harmonious and less prone to tearing during stretching and folding, leading to a more robust final structure and a deeper, more nuanced flavor profile in the baked loaf.
Precision Autolyse Techniques: Mastering the Process
Choosing the Right Flour and Water for Autolyse
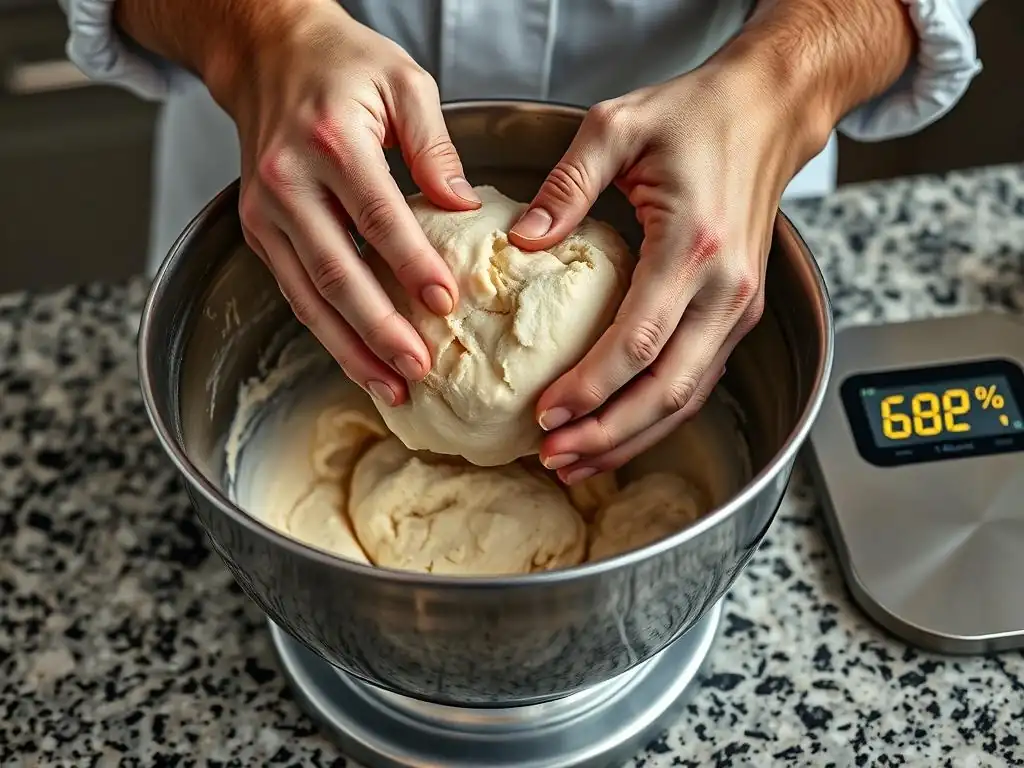
Selecting the appropriate flour and water is paramount when implementing precision autolyse dough hydration techniques. The type of flour significantly impacts how much water it can absorb and how quickly gluten develops. High-protein bread flours, typically containing 12-14% protein, can absorb more water and benefit from longer autolyse periods compared to lower-protein all-purpose flours ( 10-12% protein). Whole wheat flour, with its bran and germ, is highly absorbent but contains components that can hinder gluten development; therefore, autolysing whole wheat flour is particularly beneficial, often showing dramatic changes in hydration within 30-60 minutes.
The water quality also plays a role. Non-chlorinated water is generally preferred for sourdough as chlorine can potentially inhibit microbial activity, although its impact during a pure autolyse (without starter) is less critical. The temperature of the water can influence the rate of enzymatic activity; lukewarm water ( 25-30°C or 77-86°F) can speed up enzyme action compared to cold water, which might be desirable for shorter autolyse times. However, room temperature water is standard and reliable for most applications.
Autolyse Time: How Long Should You Autolyse Your Dough?
Determining the optimal autolyse time is crucial for mastering these autolyse dough hydration techniques and depends heavily on the type of flour used and the desired outcome. For white bread flour, a minimum of 20-30 minutes is often sufficient to see noticeable hydration and initial gluten relaxation. Many bakers extend this to 1-2 hours for improved dough handling. When working with significant percentages of whole wheat or other whole grains, longer autolyse periods, sometimes up to 4 hours, can be highly beneficial to allow the bran to soften and fully hydrate, preventing it from cutting the gluten strands later.
However, there's a point of diminishing returns, and excessively long autolyse times (e.g., 6+ hours at warm temperatures) can potentially lead to excessive enzymatic breakdown of the gluten structure, resulting in a sticky, degraded dough. The ideal time is often found through experimentation, but starting with a 30-minute autolyse for white flour and 60-90 minutes for whole wheat is a good baseline. Observe how the dough changes – it should become smoother and more pliable over time.
Autolyse Temperature: Optimizing Conditions for Best Results
The temperature during the autolyse period affects the rate of enzymatic activity and thus the speed of hydration and initial gluten development. Room temperature, typically around 20-24°C ( 68-75°F), is standard and provides a moderate rate of activity that is predictable for most recipes and timings. Warmer temperatures will accelerate enzymatic action; for instance, an autolyse at 28°C ( 82°F) will proceed faster than one at 18°C ( 64°F). This can be useful if you're on a tight schedule, but it also increases the risk of over-autolysing if the time isn't adjusted.
Conversely, colder temperatures slow down the enzymes. While a cold autolyse (e.g., in the refrigerator) is possible and can be extended for many hours, the enzymatic benefits are significantly reduced compared to a warmer autolyse. Generally, aiming for a dough temperature within the 22-26°C ( 72-79°F) range during autolyse is effective for balancing hydration speed and enzymatic breakdown for typical timings. Covering the dough tightly is essential regardless of temperature to prevent a skin from forming, which would hinder uniform hydration.
Incorporating Starter and Salt in Fermentolyse
In precision fermentolyse dough hydration techniques, the key difference from autolyse is the inclusion of the active sourdough starter from the initial mix with flour and water. The starter is added right along with the water and flour, and the mixture is brought together until just combined. It's crucial to ensure the starter is active and healthy, as its activity drives the fermentation process during this phase. The percentage of starter used will influence the speed of fermentolyse; a higher percentage (e.g., 20%) will lead to faster activity than a lower one (e.g., 10%).
Salt is almost universally excluded from the initial fermentolyse mix. Salt's presence tightens the gluten network, which can counteract the relaxing effect that is one of the goals of this initial rest period. Salt also regulates fermentation, so omitting it initially allows the starter to begin working on the available sugars without this constraint. Salt is typically added after the fermentolyse period is complete, often along with any remaining water or inclusions, before the main phase of kneading or stretching and folding begins.
Fermentolyse Time: Determining Optimal Fermentation Duration
The optimal fermentolyse time is a balance between allowing sufficient hydration and initial enzymatic action (like autolyse) and managing the early fermentation initiated by the starter. Since fermentation is active, fermentolyse times are often shorter than or equal to typical autolyse times, ranging from 30 minutes to 1.5 hours for many recipes. The duration depends on the dough temperature, the activity level and percentage of the starter, and the desired overall fermentation timeline.
For example, if working with a warm kitchen ( 25°C/ 77°F) and an active starter at 15%, a fermentolyse of 45-60 minutes might be sufficient to see noticeable signs of fermentation like small bubbles forming and the dough becoming slightly more airy. In a cooler environment or with a less vigorous starter, extending the time to 90 minutes might be necessary. Monitoring the dough is key – you're looking for a slight puffiness and a change in dough texture, but not significant volume increase, as that comes later during bulk fermentation.
Monitoring Dough Development During Fermentolyse
Effective monitoring is vital for successful fermentolyse dough hydration techniques. During the fermentolyse rest, observe the dough for visual and tactile changes. Initially, it might be shaggy, but over the rest period, it should become smoother and more cohesive, similar to an autolysed dough. Additionally, because the starter is active, you might start to see tiny bubbles appearing on the surface or around the edges of the dough mass, indicating the beginning of gas production.
The dough's temperature is also an important indicator, as it affects the rate of fermentation. Aim to keep the dough within a desirable temperature range, often 22-26°C ( 72-79°F), throughout this period. Gently poke the dough to feel its texture; it should feel more relaxed and slightly more extensible than when initially mixed. While significant gluten development isn't the primary goal during this short phase, the dough should show signs of becoming easier to handle for the subsequent steps.
Autolyse vs. Fermentolyse: A Detailed Comparison
Key Differences in Ingredients and Process
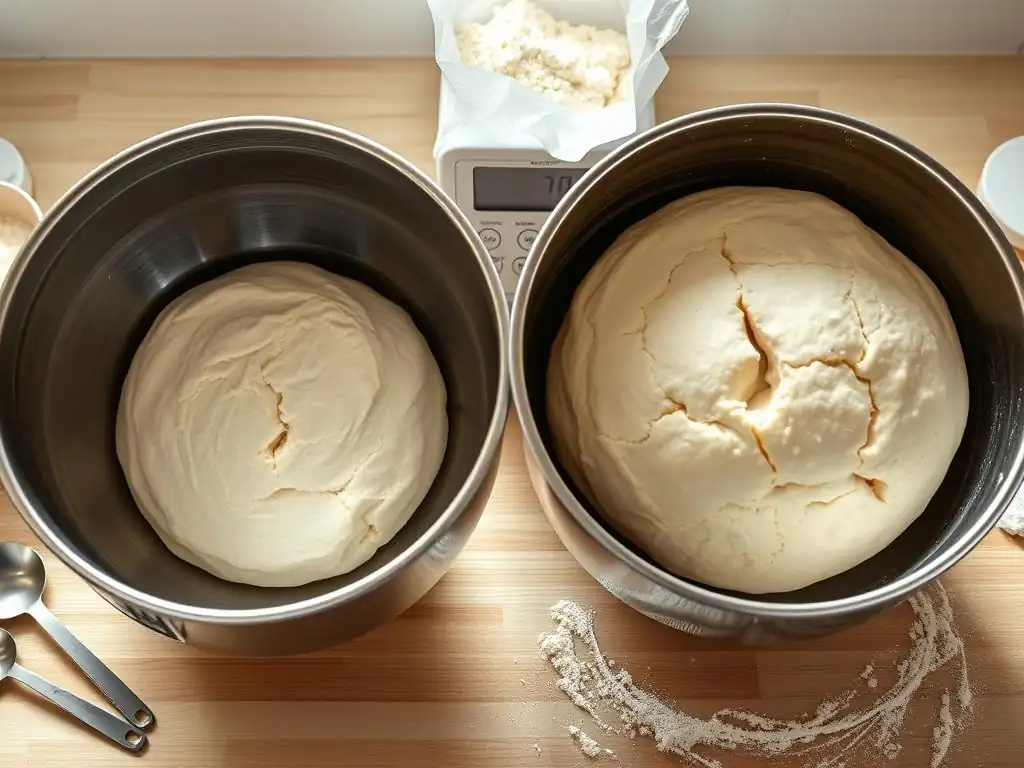
The fundamental difference between autolyse and fermentolyse lies in the ingredients included in the initial mix and the processes that occur during the rest period. Autolyse involves only flour and water, allowing purely enzymatic and passive gluten development to occur. The process is primarily physical (hydration) and chemical (enzyme activity). Fermentolyse, on the other hand, includes flour, water, and the active sourdough starter. This introduces a biological process – fermentation – from the very beginning of the rest period, alongside the enzymatic and passive gluten development.
Salt is typically excluded from both initial mixes to avoid tightening the gluten prematurely and, in the case of fermentolyse, to allow the starter to begin working unimpeded. The typical duration of the rest period can also differ; autolyse times are often longer (e.g., 30 mins to 4 hours) compared to fermentolyse times (e.g., 30 mins to 1.5 hours), although this varies greatly depending on the specific recipe and desired outcome. Understanding these initial setup differences is key to choosing the right autolyse dough hydration techniques for your loaf.
Impact on Sourdough Flavor Profiles
The choice between autolyse and fermentolyse can subtly influence the final flavor profile of your sourdough bread. A pure autolyse, by giving enzymes more time to break down starches into simple sugars before fermentation begins, can potentially lead to a slightly sweeter crumb and provide more fuel for the starter during the main bulk fermentation and proofing stages. This might result in a tang that develops more gradually and is possibly less pronounced initially.
Fermentolyse introduces the starter's metabolic activity earlier, meaning acid production begins sooner. This can contribute to a more pronounced sourdough tang that is integrated throughout the dough from an earlier stage. While subjective, some bakers find that fermentolyse yields a more complex flavor profile with a deeper sourness, particularly noticeable when using whole grain flours where the starter has access to a wider range of compounds from the bran and germ from the start. Experimenting with both autolyse dough hydration techniques is the best way to discover which you prefer.
Effects on Dough Handling and Final Product
Both autolyse and fermentolyse aim to improve dough handling, but they can do so in slightly different ways. Autolyse primarily focuses on hydrating the flour thoroughly and relaxing the gluten, making the dough more extensible and easier to knead or stretch and fold without resistance or tearing. This often leads to a dough that feels very smooth and pliable.
Fermentolyse also benefits from hydration and enzyme activity, but the early fermentation adds another dimension. The slight acidity developed during fermentolyse can influence gluten structure, and the early gas production can make the dough feel slightly more airy and potentially more resilient earlier in the process. Some bakers find fermentolyse particularly helpful for integrating whole grain flours smoothly. Ultimately, both techniques, when executed properly as part of comprehensive autolyse dough hydration techniques, contribute to a better developed gluten structure, improved oven spring, and a more desirable crumb structure in the final bread.
Fine-Tuning Dough Hydration: Practical Tips and Troubleshooting
Adjusting Hydration Levels Based on Flour Type
Successfully applying autolyse dough hydration techniques requires understanding how different flours handle water. All-purpose flour typically performs well at hydration levels between 60-70%. Strong bread flour, with its higher protein content, can often handle and benefit from higher hydration, commonly ranging from 70-80% or even higher for very open crumb structures. Whole wheat flour is significantly more absorbent due to the presence of bran and germ; it often requires hydration levels upwards of 80% to feel similar in consistency to a 65% hydration white dough.
When substituting flours or developing a new recipe, be prepared to adjust the water content. If using more whole wheat than usual, increase the hydration percentage. If using a weaker flour, you might need to slightly decrease hydration or rely more heavily on stretching and folding to build strength. Observing the dough during the initial mix and autolyse/fermentolyse is key – does it feel too stiff or too slack? This real-time assessment is crucial for fine-tuning hydration.
Recognizing Signs of Over-Autolysed or Over-Fermentolysed Dough
While autolyse and fermentolyse are beneficial, overdoing them can harm the dough structure. Signs of over-autolysed dough include excessive stickiness, a lack of elasticity, and the dough potentially becoming "soupy" or degrading, particularly noticeable if left too long at warm temperatures. The enzymatic activity, if unchecked, can start breaking down the gluten network excessively rather than just relaxing it.
Over-fermentolysed dough will show signs of significant fermentation activity during the initial rest, such as excessive bubbling, a noticeable increase in volume (more than just slight puffiness), and potentially a very slack consistency. Because fermentation is active, the risk of over-processing the dough structure and potentially developing too much acidity too early is present. If you notice these signs, it means your initial rest period was likely too long for the temperature or starter activity level.
Recovering Over-Hydrated Dough: Techniques and Solutions
Accidentally adding too much water during the initial mix or finding your dough too slack after autolyse or fermentolyse is a common issue when exploring autolyse dough hydration techniques. One primary solution is to add a small amount of additional flour during the initial mixing or subsequent stretching and folding steps. Start with a tablespoon or two, incorporate it gently, and see how the dough responds before adding more. Be careful not to add too much flour at once, as this can make the dough stiff.
Another technique is to rely more heavily on building tension through stretching and folding or coil folds during the bulk fermentation. These actions help strengthen the gluten network, which can compensate for excessive hydration. Reducing the total bulk fermentation time slightly can also help prevent the dough from becoming too slack later on. Lastly, shaping techniques that build maximum surface tension are crucial for managing high-hydration or slightly over-hydrated doughs during the final proof and baking.
Advanced Autolyse and Fermentolyse Techniques for Sourdough Perfection
Multi-Stage Autolyse and Fermentolyse
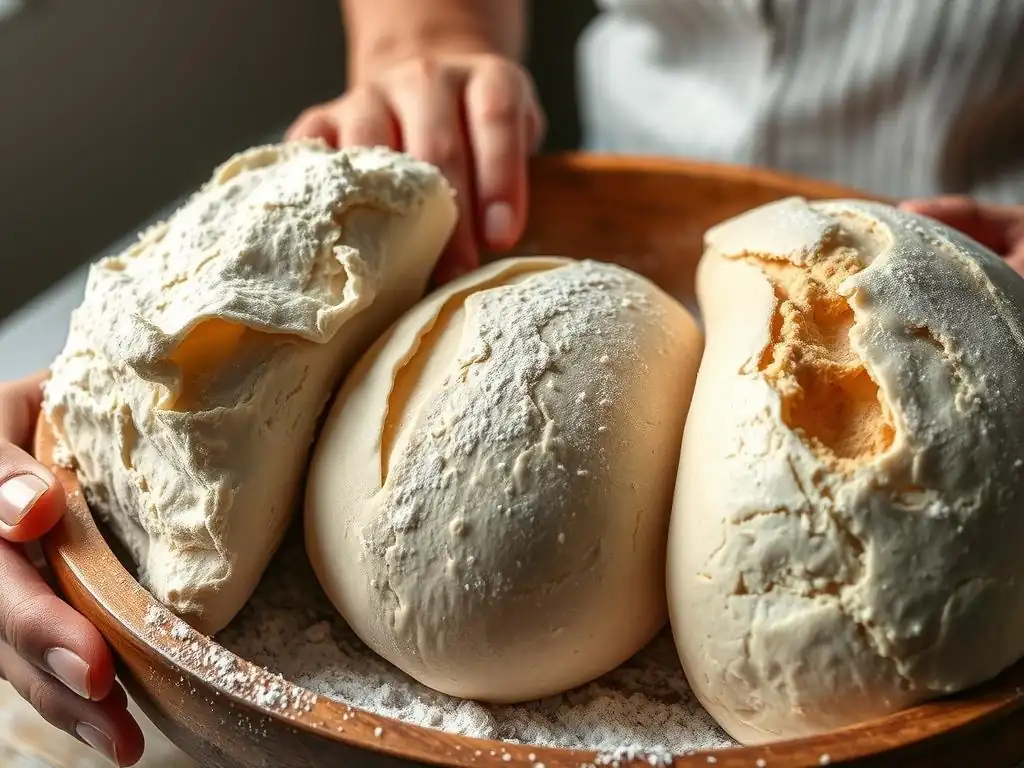
For bakers looking to push their autolyse dough hydration techniques, multi-stage processes offer further control. A common advanced technique is a staged hydration during autolyse. For instance, you might mix only flour and 80% of the water for a 1-hour autolyse, then incorporate the remaining 20% of the water along with the starter and salt. This allows the initial hydration to occur with less water resistance, potentially leading to a smoother dough, before adding the final hydration boost.
Similarly, a multi-stage fermentolyse could involve an initial short fermentolyse (e.g., 30 minutes with flour, water, and starter), followed by the addition of salt and potentially more water, and then proceeding with bulk fermentation. These staged approaches allow bakers to observe how the dough develops at different hydration levels and with different ingredient combinations, offering finer control over the final dough consistency and structure, particularly beneficial for very high hydration doughs ( 85%+).
Incorporating Pre-Ferments for Enhanced Flavor and Texture
While autolyse and fermentolyse deal with the main dough mix, incorporating pre-ferments like a poolish, biga, or levain (a portion of the mature sourdough starter fed specifically for the batch) introduces another layer of complexity and flavor. A levain is essentially a pre-fermented dough made from flour, water, and starter, typically built 6-12 hours before mixing the main dough. Using a levain means a portion of your flour is already fermented and acidic when it enters the autolyse or fermentolyse stage.
When using a levain, the "water" component of your autolyse/fermentolyse includes the water from the levain itself. For example, if your levain is 100% hydration and constitutes 20% of the total flour weight, it contributes 20% hydration to the final dough. Incorporating a mature levain into a fermentolyse mix (flour + water + levain) essentially starts with a more active and acidic base, which can influence gluten structure and accelerate overall fermentation slightly, leading to unique flavor nuances compared to using starter directly.
Experimenting with Different Hydration Percentages
Pushing the boundaries of hydration is a common goal when mastering autolyse dough hydration techniques, leading to airier crumbs. While standard sourdough might be 70-75% hydration, many bakers explore 80%, 85%, or even 90%+. Higher hydration doughs are stickier and harder to handle but can yield incredibly open, light crumbs. Autolyse is almost essential at these levels to allow sufficient hydration before handling.
Experimenting involves gradually increasing hydration by 2-3% per bake and observing how the dough behaves through autolyse/fermentolyse, bulk fermentation, shaping, and baking. It requires adjusting techniques like using wet hands, employing coil folds instead of traditional stretching and folding, and mastering tension during shaping. For instance, moving from a 75% hydration white loaf to an 85% hydration loaf will require significantly more reliance on the initial autolyse for dough structure and more careful handling throughout the process.
Sourdough Recipes Utilizing Autolyse or Fermentolyse
High-Hydration Country Loaf with Autolyse
A classic application of autolyse dough hydration techniques is in a high-hydration country-style sourdough loaf, often around 78-82% hydration using a blend of strong bread flour and a small percentage of whole wheat. The recipe might start with mixing 90% of the water with all the flour for a 1 to 2-hour autolyse. This allows the significant amount of water to be fully absorbed by the flour, making the subsequent incorporation of the starter and salt much easier.
After the autolyse, the active sourdough starter, salt, and the remaining 10% of water are added. The dough is then mixed (gently or using a stand mixer for a few minutes) to incorporate the new ingredients and begin gluten development. The rest of the process follows standard sourdough practices: bulk fermentation with several sets of stretching and folding every 30-45 minutes, shaping, and proofing. The initial autolyse is credited with contributing to the dough's extensibility, allowing for gentle handling and leading to a beautiful open crumb structure typical of this style of bread.
Whole Wheat Sourdough Boule with Fermentolyse
Fermentolyse is particularly effective when working with significant amounts of whole wheat flour (e.g., 30-50% of the total flour weight) at moderate to high hydration (e.g., 75-80%). A recipe might call for mixing all the whole wheat flour, the white bread flour, all the water, and the sourdough starter together for a 45-60 minute fermentolyse. This initial period allows the bran in the whole wheat to soften while the starter begins its work.
Following the fermentolyse, the salt is added, and the dough is mixed to distribute it. The bulk fermentation then proceeds, often requiring fewer sets of stretching and folding compared to a non-fermentolysed whole wheat dough, as the fermentolyse has already contributed to structure and extensibility. The early activity of the starter combined with the enzymatic action on the whole grains results in a dough that is often easier to handle and yields a whole wheat loaf with a surprisingly open crumb and complex flavor profile, showcasing the benefits of fermentolyse dough hydration techniques.
Sourdough Pizza Dough with Cold Fermentolyse
Fermentolyse can also be adapted for doughs intended for longer, cold fermentation, such as sourdough pizza dough. For a pizza dough at around 65-70% hydration, a cold fermentolyse might involve mixing flour, water, and a small amount of starter (e.g., 5-10%) and placing it immediately in the refrigerator for several hours or overnight (e.g., 8-12 hours). The cold temperature significantly slows down fermentation but allows the enzymatic activity and hydration to occur over an extended period.
After the cold fermentolyse, the salt is mixed in, and the dough might undergo a short period at room temperature with a few folds before being portioned and returned to the fridge for the main cold proof (24-72 hours). This technique leverages the benefits of both cold fermentation for flavor development and the initial fermentolyse for hydration and early enzymatic breakdown, resulting in a pizza dough that is both easy to stretch and develops a wonderful sourdough tang and crust texture.
Achieving Consistent Results: Tips for Reproducible Sourdough Baking
Recording and Analyzing Your Autolyse and Fermentolyse Experiments
Consistency in sourdough baking, especially when fine-tuning autolyse dough hydration techniques, relies heavily on meticulous record-keeping. Maintain a baking journal noting details like:
- Flour types and percentages used.
- Exact hydration percentage (
Total Water Weight / Total Flour Weight * 100). - Autolyse or fermentolyse time and ambient temperature.
- Dough temperature at the start and end of the rest period.
- Observations on dough feel (stickiness, extensibility) before and after the rest.
- Starter activity level (e.g., how long after feeding was it used? ).
- Bulk fermentation duration, number of folds, and dough temperature.
- Proofing time and temperature.
- Baking temperature and duration.
- Outcome (oven spring, crumb structure, flavor).
Analyzing these notes after each bake allows you to identify patterns and understand how variations in your autolyse or fermentolyse approach impact the final result. For example, you might discover that a 90-minute autolyse at 24°C consistently yields a dough you prefer compared to a 30-minute one, or that fermentolyse works better for your specific whole wheat flour at 80% hydration.
Using Dough Temperature Control for Predictable Outcomes
Controlling dough temperature is paramount for reproducible results in sourdough, particularly when incorporating autolyse or fermentolyse dough hydration techniques. Enzymatic activity during autolyse and fermentation activity during fermentolyse are highly sensitive to temperature. A few degrees difference can significantly alter the rate of these processes. For instance, a fermentolyse at 26°C (79°F) will progress much faster than one at 20°C (68°F).
Aim for a target dough temperature throughout your process, often referred to as the Desired Dough Temperature (DDT). Factors influencing DDT include room temperature, flour temperature, and starter temperature. Water temperature is the easiest variable to adjust to hit your DDT. Using a probe thermometer to check dough temperature after mixing and throughout the autolyse/fermentolyse and bulk fermentation periods allows you to stay on track and predict fermentation timelines more accurately. Consistent temperature control minimizes variability between bakes.
Adapting Techniques to Different Baking Environments
Your baking environment, including ambient temperature and humidity, plays a significant role in how your autolyse and fermentolyse dough hydration techniques will perform. In a warm, humid environment, doughs will hydrate faster, enzyme activity will be more rapid, and fermentation will proceed quickly. This might necessitate shorter autolyse/fermentolyse times or using cooler water to control dough temperature. Conversely, in a cold, dry environment, processes slow down, potentially requiring longer rest periods or warmer water/ambient temperatures.
For example, a fermentolyse that takes 60 minutes in a kitchen at 23°C might need 90 minutes in a kitchen at 18°C, or you might need to use warmer water to hit a similar dough temperature. High altitude baking also presents unique challenges with hydration and fermentation. Being aware of your environment and making conscious adjustments to water temperature, rest times, and overall fermentation duration based on observation is key to achieving consistent, successful sourdough loaves regardless of external conditions.
Frequently Asked Questions
What is Autolyse and why is it important for dough hydration?
Autolyse is a resting period where flour and water are mixed before adding other ingredients like yeast or salt. This allows the flour to fully hydrate, resulting in improved dough extensibility and a better crumb structure.
How does Autolyse differ from Fermentolyse?
Fermentolyse is similar to Autolyse, but it includes a small amount of yeast or starter during the resting period. This jumpstarts fermentation alongside hydration, adding complex flavors early on.
What type of flour is best suited for Autolyse dough hydration techniques?
Generally, high-protein flours like bread flour benefit most from autolyse, as they have more gluten to develop. However, autolyse can also improve the handling and texture of lower-protein flours.
How long should I Autolyse my dough for optimal hydration?
The ideal Autolyse time varies, but typically ranges from 20 minutes to 1 hour. Longer autolyses may be beneficial for some doughs, but monitor the dough to prevent over-hydration.
Can I adjust the water ratio during Autolyse for better hydration?
Yes, you can adjust the water ratio during Autolyse. Many bakers prefer to add a small amount of water initially and then incorporate more during the mixing phase to achieve the desired dough consistency.
Final Reflection: The Transformative Power of Precision in Baking
Understanding the nuances of autolyse and fermentolyse is no longer a niche pursuit; it's a fundamental key to unlocking truly exceptional bread baking. The precision these techniques offer allows bakers of all levels to achieve unparalleled control over dough development, resulting in loaves with superior texture, flavor, and overall quality. This isn't just about following recipes; it's about understanding the very essence of gluten formation and its impact on the final product.
The impact of these techniques extends far beyond the kitchen; they represent a shift in how we approach the craft of baking. It's a move away from simply following instructions and towards a deeper understanding of the scientific principles at play. This mindful approach, focusing on the interaction of flour and water, resonates with a growing appreciation for artisanal techniques and the pursuit of perfection. The baker who understands the science behind his craft is a better baker than one who doesn't.
– This sentiment, while not directly referencing autolyse and fermentolyse, perfectly encapsulates the spirit of precision and understanding that these techniques embody.
Now, consider your own baking journey. Are you ready to move beyond the limitations of standard recipes and embrace the possibilities of precise hydration control? Experiment with varying autolyse and fermentolyse times, observe the changes in your dough, and discover the unique characteristics that emerge. The journey of mastering these techniques is a journey of discovery, one that will reward you with bread that is not only delicious but also deeply satisfying to create. Embrace the precision, embrace the process, and embrace the transformative power of truly understanding your dough.
Unlock Your Baking Potential: Master Dough Hydration Today!
Thanks for taking the time to explore the art of precision autolyse and fermentolyse! You've now unlocked a powerful technique to elevate your bread baking. Ready to put this knowledge into action?
- Experiment with different hydration levels: Try varying the water amount in your next loaf, paying close attention to the dough's texture and rise. Document your findings—you might be surprised by the results!
- Share your baking journey: Post a picture of your improved loaf on social media and tag #BakeWithEaseHydration – let's inspire each other!
- Dive deeper: Explore our other articles on advanced bread baking techniques to further refine your skills.
What unique flavor or texture are you hoping to achieve in your next bread experiment?