
Achieve Perfect, ProfessionalLooking Cookie Borders

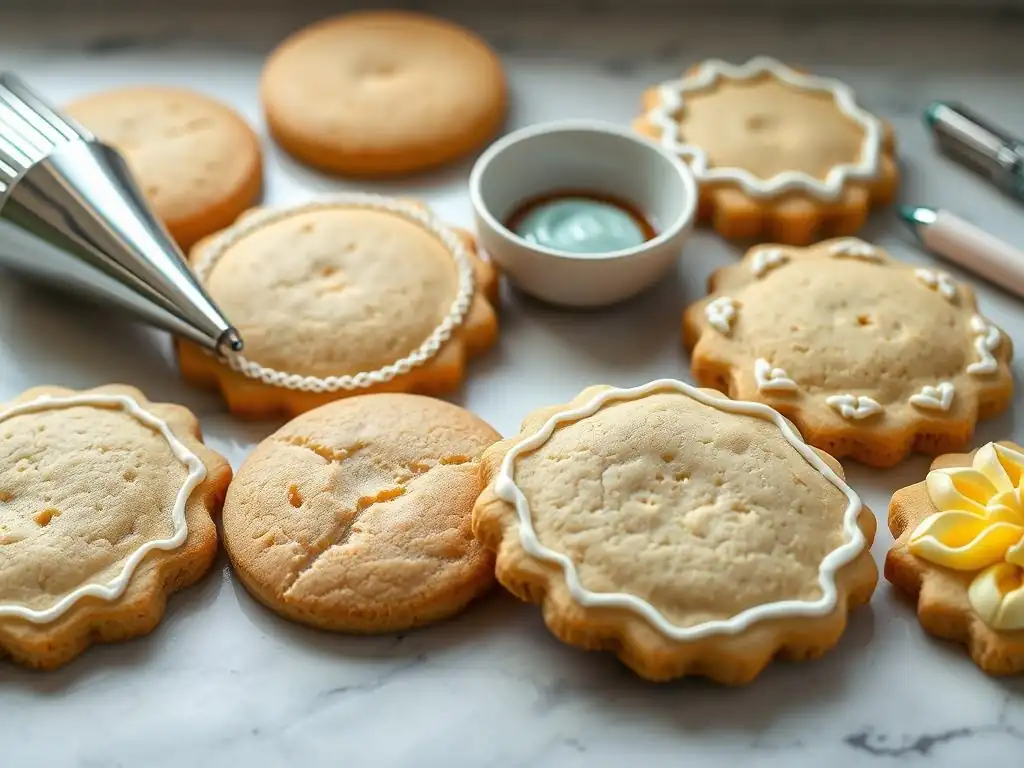
Welcome to BakeWithEase, your haven for all things baking! Ever wondered how professional bakers achieve those flawlessly crisp and clean cookie borders? Unlock the secrets in our latest article, " Achieve Perfect, ProfessionalLooking Cookie Borders," where we divulge easy-to-follow techniques to elevate your cookie game. Intrigued? Let's dive in and transform your cookies from simple treats to edible masterpieces!
- Achieve Perfect, Professional-Looking Cookie Borders: Bake Like a Pro
- Mastering Cookie Borders: An Introduction
- The Importance of Perfect Cookie Borders for Professional Results
- Essential Tools & Ingredients for Flawless Cookie Outlines
- Step-by-Step Guide to Piping Perfect Cookie Borders
- Common Cookie Bordering Mistakes and How to Avoid Them
- Advanced Cookie Border Techniques for Stunning Designs
- Tips for Practicing and Improving Your Cookie Border Skills
- Sealing the Deal: Final Touches for Long-Lasting Cookie Borders
- Beyond the Basics: Exploring Creative Cookie Border Variations
- Conclusion: Perfecting Your Cookie Borders for BakeWithEase Creations
-
Frequently Asked Questions
- How important are perfect cookie borders for overall cookie presentation?
- What are some common mistakes people make when creating cookie borders?
- What type of icing is best for creating defined cookie borders?
- What tools are essential for achieving perfect cookie borders?
- Can I practice my cookie border techniques before decorating the actual cookies?
- Final Reflection: Mastering the Art of the Perfect Cookie Border
- Unleash Your Inner Cookie Artist!
Creating beautifully decorated cookies is a rewarding pastime, and achieving a professional look often starts with the foundation: the cookie border. A crisp, clean border acts like a frame for your edible artwork, defining the shape and containing the flood icing within. Mastering perfect cookie border techniques is a fundamental skill that elevates your baked goods from homemade treats to impressive, display-worthy creations. Whether you're aiming for intricate designs or simple elegance, the ability to pipe a consistent, smooth border is paramount.
This guide will walk you through everything you need to know to achieve perfect cookie borders, from selecting the right tools and ingredients to troubleshooting common issues and exploring advanced techniques. We'll cover the nuances of royal icing consistency, the best practices for piping, and how to ensure your borders dry flawlessly. Get ready to enhance your cookie decorating skills and impress everyone with your perfectly bordered BakeWithEase cookies!
The visual appeal of a cookie is significantly enhanced by a well-executed border. A crisp, clean line around the edge of your cookie creates a polished finish that immediately suggests professional craftsmanship. Imagine a set of sugar cookies decorated for a special event, like a wedding or baby shower. Cookies with sharp, uniform borders look sophisticated and intentional, whereas uneven or bleeding borders can detract from even the most intricate flooding and detail work. This attention to the border demonstrates skill and care, making your cookies not just delicious, but also miniature works of art.
Consider a simple circle cookie decorated with a single color of flood icing. Without a defined border, the flood icing might spread unpredictably, leading to an amorphous shape. However, a perfectly piped border contains the flood icing neatly within the desired area, resulting in a clean, controlled fill. This foundational technique is crucial for achieving the smooth, flat surface needed for subsequent decorating steps, such as adding piped details, wet-on-wet designs, or edible images. Mastering perfect cookie border techniques is the first step towards cookies that look like they came from a high-end bakery.
Consistency in your cookie borders is key to a harmonious and balanced design. When all the cookies in a set have borders of similar thickness and height, it creates a sense of uniformity and professionalism across the entire collection. Inconsistent borders, on the other hand, can make the set look amateurish, even if the individual flood fills and details are well-executed. This uniformity is especially important when creating themed sets or multi-cookie arrangements where the individual pieces are meant to complement each other.
Moreover, a consistent border provides a reliable dam for your flood icing. If one part of the border is too thin or has a gap, the flood icing is likely to breach it, causing spills or misshapen sections. A consistently piped border, typically around 1/8 to 1/4 inch wide depending on the desired look, ensures that your flood icing stays precisely where you want it. This prevents frustration and wasted effort, allowing you to proceed confidently with the flooding stage, knowing your foundation is solid. Achieving this consistency is a core element of perfect cookie border techniques.
Royal Icing Consistency: The Key to Sharp Edges
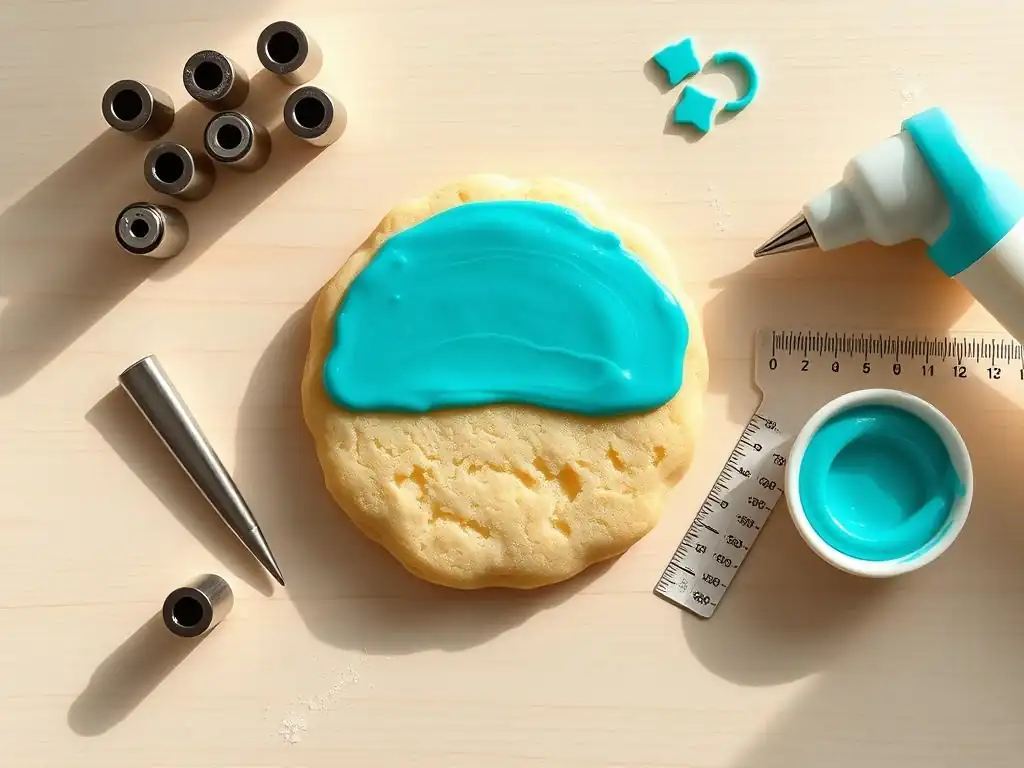
The consistency of your royal icing is arguably the single most important factor in achieving perfect cookie borders. For outlining, you need icing that is firm enough to hold its shape when piped, creating a defined line, but not so stiff that it's difficult to pipe smoothly or causes jagged edges. This is often referred to as "piping consistency" or "outline consistency."
A common test involves lifting your spoon or spatula from the icing and observing how quickly the ribbon of icing disappears back into the bowl. For outlining, you're typically looking for a consistency where the ribbon holds its shape for perhaps 5-10 seconds before slowly melting back in. If it holds indefinitely, it's too stiff; if it disappears instantly, it's too thin.
Using the correct consistency prevents common problems like spreading borders (icing is too thin) or shaky, broken lines (icing is too stiff). Many decorators use a slightly thicker consistency for borders than for flooding, which is often tested by counting how long it takes for a line drawn on the surface to disappear – flood consistency might be 10-15 seconds or even 20 seconds, while outline is faster. Getting this right through careful addition of water (or powdered sugar) is fundamental to mastering perfect cookie border techniques.
Choosing the right piping bag and tip is crucial for control and precision. Disposable piping bags are popular for their convenience and hygiene, allowing you to easily switch colors or discard used bags. Reusable bags are also an option but require thorough cleaning. For cookie borders, smaller tips are generally preferred for detailed work and fine lines. Common tip sizes for outlining include PME 1, 1.5, 2, or Wilton 1, 2, or 3. A PME 1.5 tip, for example, provides a fine, delicate line suitable for intricate shapes, while a Wilton 3 gives a slightly bolder border.
The shape of the tip opening also matters. Round tips (like those mentioned) are standard for smooth lines. Using a coupler allows you to change tips on the same bag of icing without emptying it, which is handy if you want to experiment with slightly different line weights or switch to a different technique. The combination of a sturdy piping bag and a clean, appropriately sized round tip provides the necessary control to execute perfect cookie border techniques.
Other Helpful Tools: Scribe Tools, Turntables, and More
Beyond the basics, several other tools can significantly improve your cookie bordering process. A scribe tool, or even a toothpick, is invaluable for gently guiding your icing line, popping air bubbles in the border, or fixing small mistakes before the icing sets. A rotating turntable allows you to easily turn the cookie as you pipe, maintaining a comfortable angle and promoting a smooth, continuous line without having to awkwardly reposition yourself or the cookie. This is particularly helpful for round or complex shapes.
Additionally, parchment paper or wax paper is excellent for practicing your piping technique before working on actual cookies. You can draw shapes on the paper and practice piping lines and outlines, scraping off the icing and reusing it as you refine your control over pressure and speed. Having damp paper towels nearby is also useful for wiping your piping tip clean periodically, preventing dried icing from clogging the opening and causing uneven lines. These simple tools, combined with practice, contribute significantly to achieving perfect cookie border techniques.
Preparing Your Royal Icing for Bordering
The first step is to ensure your royal icing is the correct consistency for outlining, as discussed earlier. Start with your basic royal icing recipe (powdered sugar, meringue powder or egg whites, water). Mix it thoroughly until smooth. Then, test the consistency. If it's too thick (breaks easily when piped, doesn't settle at all), add water very gradually, a teaspoon or even half a teaspoon at a time, mixing well after each addition. If it's too thin (spreads immediately, doesn't hold a peak), add more sifted powdered sugar, a tablespoon at a time, mixing until incorporated and re-testing.
Achieving the ideal piping consistency might take a few adjustments. A good test is to scoop some icing onto a spoon and let it fall back into the bowl. It should form a ribbon that holds its shape briefly (5-10 seconds) before slowly melting back into the surface. Once you have the correct consistency, ensure your icing is lump-free. If necessary, you can push it through a fine-mesh sieve to remove any undissolved sugar or meringue powder. Properly prepared icing is the foundation for perfect cookie border techniques.
Filling Your Piping Bag Correctly
Filling your piping bag properly is important for comfortable and efficient piping. Start by placing your chosen piping tip (with or without a coupler) into the end of the bag. If using a coupler, screw the ring onto the tip. Fold the top edge of the piping bag down to create a cuff around your hand – this helps keep the top edge clean. Use a spatula or spoon to fill the bag with your prepared outline-consistency royal icing.
Fill the bag only about half to two-thirds full. Overfilling makes the bag unwieldy and harder to control, and you're more likely to get icing squeezing out the top. Once filled, unfold the cuff and twist the top of the bag tightly, just above the level of the icing.
This twist creates pressure to push the icing down towards the tip and prevents it from coming out the wrong end. You can secure the twist with a rubber band or clip if desired, although a firm grip is often sufficient. A well-filled bag is essential for executing perfect cookie border techniques smoothly.
Mastering the Piping Technique: Pressure and Speed
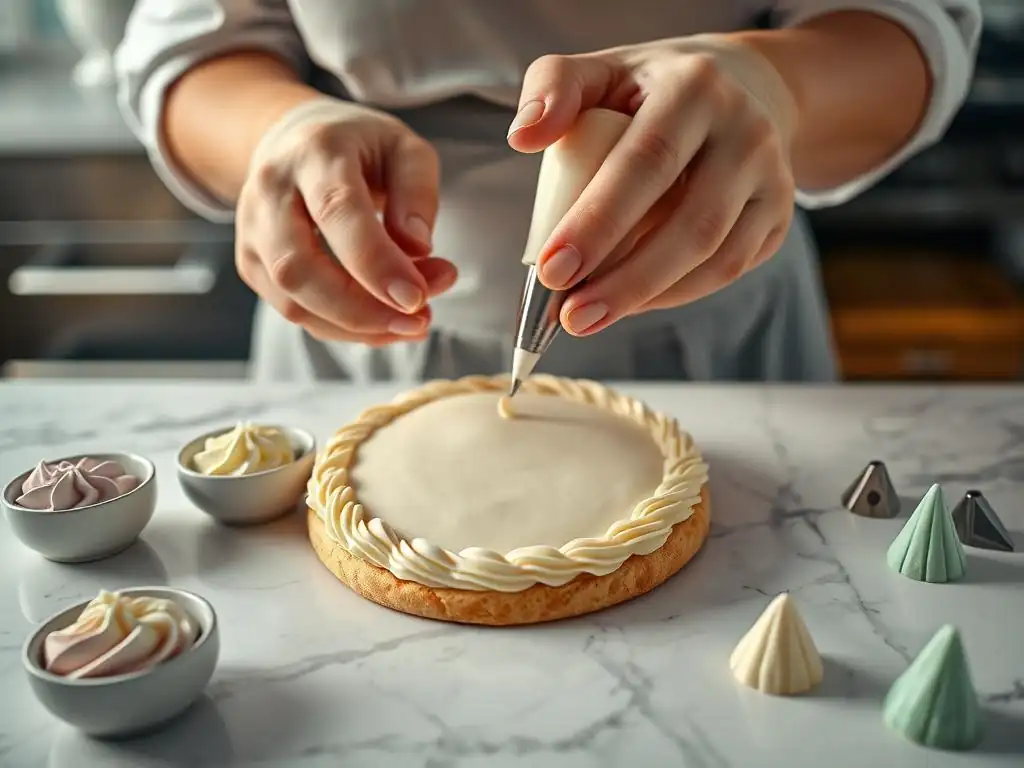
Piping a perfect cookie border requires a combination of steady, consistent pressure and controlled speed. Hold the twisted end of the piping bag firmly in your dominant hand to control the flow of icing. Your non-dominant hand can gently guide the tip end of the bag. Position the tip slightly above the surface of the cookie, almost touching it. Apply gentle, even pressure to the bag to start the flow of icing.
As the icing begins to come out, lift the tip slightly away from the cookie surface (perhaps an eighth of an inch) and allow the stream of icing to fall onto the cookie edge. Move your hand smoothly and consistently along the desired outline. Don't drag the tip on the cookie, as this can cause jagged lines. Instead, let the icing fall into place.
Maintain constant pressure and speed as you move. Practice helps you find the right balance – too little pressure results in thin, broken lines, while too much pressure creates thick, uncontrolled blobs. Consistent pressure and speed are hallmarks of perfect cookie border techniques.
Creating a Consistent Border: A Detailed Walkthrough
Piping a consistent border involves executing the pressure-and-speed technique over the entire outline of the cookie shape.
Here's a step-by-step approach:
- Start at a less visible point on the cookie (like the bottom edge of a heart or the side of a circle).
- Touch the tip almost to the cookie surface where you want to begin.
- Apply steady pressure to start the icing flow.
- Lift the tip slightly (about 1/8 inch) off the cookie surface.
- Move your hand smoothly along the edge of the cookie, letting the stream of icing fall onto the border line. Keep your speed constant.
- As you approach curves, slow down slightly while maintaining pressure to ensure a smooth arc.
- When you reach your starting point, gently decrease the pressure as you bring the tip back down to meet the beginning of the line.
- Stop applying pressure completely and quickly lift the tip away.
Practice on parchment paper first! Draw shapes and pipe over them repeatedly to build muscle memory and control.
For square or rectangular cookies, you can pipe one side, stop, reposition, and pipe the next side, slightly overlapping at the corners, or attempt to pipe continuously around the corners with a steady hand. For more complex shapes, break the outline down into manageable sections if needed. The goal is a smooth, continuous line of uniform thickness all the way around the cookie. This detailed approach is key to mastering perfect cookie border techniques.
Icing Bleeding: Understanding and Preventing Color Migration
Icing bleeding occurs when colors from your royal icing migrate into adjacent colors, creating blurred or muddy lines. This is a common frustration and often happens when wet icing of different colors touch or when certain colorings (particularly dark reds, blacks, and some blues) are used heavily or applied to icing that is still too wet. The moisture content plays a big role; if your flood icing is too wet or hasn't crusted over sufficiently before you add other colors or details, bleeding is more likely.
To prevent bleeding, ensure your icing consistency is correct – outline icing should crust relatively quickly. Allow your outline to dry for at least 30-60 minutes (or until crusted) before flooding the cookie. After flooding, allow the flood layer to dry completely (ideally 8-12 hours, or overnight) before adding piped details, especially if those details are dark colors or involve wet-on-wet techniques with different colors.
Some color manufacturers also offer "no-bleed" food colorings. Using less coloring can also help, though this might mean sacrificing some color vibrancy. Patience in drying time is a critical factor in preventing this issue and achieving perfect cookie border techniques.
Uneven Borders: Troubleshooting and Correction Techniques
Uneven borders manifest as lines that vary in thickness, have wobbly sections, or show visible breaks. This is often a result of inconsistent pressure on the piping bag, uneven speed while piping, or dragging the tip on the cookie surface. If your icing consistency is too stiff, it can also be difficult to maintain a smooth, even flow, leading to choppy lines.
Troubleshooting involves checking your technique and icing.
- Is your pressure steady? Try squeezing the bag with your whole hand from the top, rather than just your fingers, for more consistent force.
- Is your speed constant? Practice on parchment paper to develop a smooth, continuous movement.
- Are you lifting the tip? Ensure the icing is falling onto the cookie, not being pushed or dragged by the tip.
- Is the icing consistency right? If it's too stiff, add a tiny bit more water.
If you spot an uneven section immediately after piping, you can often gently use a scribe tool to nudge the icing into place or carefully scrape off the wet icing and re-pipe that section. For small wobbles, sometimes a gentle tap of the cookie on the counter can help the icing settle slightly, though this is more effective for flood icing. Consistent practice is the best way to overcome unevenness and perfect cookie border techniques.
Air Bubbles in Icing: Prevention and Removal Strategies
Air bubbles in royal icing can disrupt the smooth flow and leave unsightly gaps or bumps in your borders. They are often introduced during the mixing process or when vigorously stirring the icing. Allowing your mixed royal icing to sit for 10-15 minutes before coloring and bagging can help surface some bubbles. Gently stirring the icing by hand rather than using a mixer on high speed can also minimize bubble formation.
Once the icing is in the piping bag, you can often encourage bubbles to rise by gently massaging the bag or holding it tip-down for a few minutes before piping. As you pipe, keep an eye out for bubbles forming near the tip. If you see one, you can often squeeze the bag gently to force it out before it reaches the tip opening.
If a bubble appears in your piped line, quickly use a scribe tool or a fine pin to pop it and gently smooth the area before the icing crusts over. Removing or preventing air bubbles contributes significantly to achieving perfect cookie border techniques.
Overpiping and Underpiping: Achieving Different Border Effects
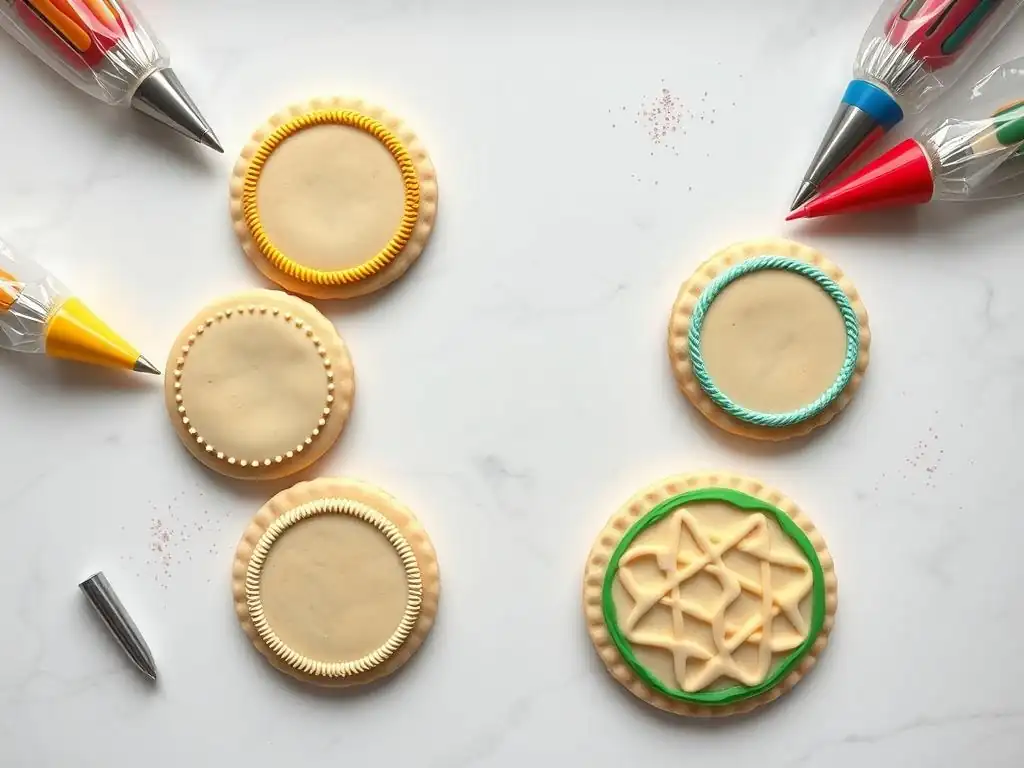
Once you've mastered the basic outline, you can explore techniques like overpiping and underpiping to add dimension and visual interest. Overpiping involves piping a second line directly on top of the first, slightly dried border. This creates a thicker, more pronounced border that stands out. It's useful for creating a robust frame or adding texture. For example, piping a second line with slightly thicker icing can give a rope-like appearance.
Underpiping, less commonly used for the main border but valuable for details, involves piping a shape or line underneath where your main border will go. While this isn't typically for the outer edge, understanding layering is key. More relevant to borders is piping a second, different colored line next to the first border, perhaps slightly overlapping, to create a layered or two-tone effect. For instance, a white border followed by a thin gold line piped just inside it adds elegance. These techniques build upon basic perfect cookie border techniques to add complexity.
Beyond smooth lines, royal icing borders can be textured for unique effects. One simple method is to use a piping tip with a different opening, like a star tip (#16 or #18) to create a ruffled or shell border instead of a smooth line. This adds an immediate decorative element to the edge of the cookie.
Another technique involves manipulating the wet border icing immediately after piping. Using a scribe tool or a toothpick, you can gently drag through the wet line to create swirls, dots, or other patterns. For instance, piping a thicker line and then dragging a scribe tool through it at regular intervals can create a stitched effect. Experimenting with how you manipulate the wet icing adds a new dimension to your perfect cookie border techniques.
Incorporating Different Colors and Effects
Using multiple colors in your borders can dramatically change the look of a cookie. You can pipe a border in one color and then, while it's still wet (or after it's crusted, depending on the effect), pipe a thin line of a contrasting color right next to it. Wet-on-wet techniques can also be applied to the border itself; for example, piping dots of a second color onto the wet border and then dragging a scribe tool through them to create marbling or heart patterns along the edge.
Adding edible glitter, sanding sugar, or nonpareils to your wet border immediately after piping is another way to incorporate color and sparkle. Gently sprinkle the desired decoration onto the wet icing line. Once the icing is dry, tap off the excess. This adds texture and visual appeal right to the border itself. Exploring these color and texture variations allows you to move beyond basic perfect cookie border techniques into more creative territory.
Practicing on Parchment Paper: A Beginner-Friendly Approach
Before you tackle your beautifully baked cookies, dedicate time to practicing on parchment paper. This low-stakes environment allows you to experiment freely without the pressure of potentially ruining a cookie. Draw various shapes on the parchment paper – circles, squares, hearts, stars – and practice piping your outline icing directly over the lines. Focus on maintaining consistent pressure and speed, keeping the tip slightly elevated, and making smooth transitions around curves and corners.
You can scrape the icing off the parchment paper, put it back in the bag (if it hasn't dried out), and reuse it for more practice. Aim to pipe continuous lines without breaks and try to make the line thickness uniform. Practice different shapes and sizes. Set a goal, like piping 10 perfect circles or tracing a complex shape smoothly. This repeated action builds muscle memory and control, which are essential for executing perfect cookie border techniques confidently on actual cookies.
Experimenting with Different Piping Tips and Techniques
Don't be afraid to try different piping tips to see how they affect the line you produce. As mentioned, a PME 1.5 will give a very fine line, while a Wilton 3 will be much bolder. Experimenting helps you understand how tip size influences the final look and how it feels to pipe with different openings. Try piping the same shape with several different tips to compare the results.
You can also experiment with slightly different icing consistencies during practice. How does a slightly thicker icing handle compared to a slightly thinner one? Which gives you more control for fine details? Which is easier to pipe smoothly? Trying out variations helps you find what works best for your hand and the specific effect you're trying to achieve. This exploration is a vital part of refining your perfect cookie border techniques.
Learning from Your Mistakes: Analyzing and Adjusting Your Approach
Mistakes are part of the learning process! When a border doesn't turn out as planned, take a moment to analyze why. Was the icing consistency off? Was your hand shaky? Did you drag the tip? Did you apply uneven pressure? Identifying the cause is the first step to correcting it.
If you notice a pattern – for example, all your curves are wobbly – focus your practice specifically on piping curves. If your lines are consistently too thick, try using less pressure or a smaller tip. If they're breaking, your icing might be too stiff, or your pressure is inconsistent. Don't just keep piping the same way; actively think about what went wrong and adjust your technique or icing. Persistence and thoughtful adjustment based on analyzing your results are key to improving your perfect cookie border techniques over time.
Drying Time: Ensuring Your Borders Set Properly
Proper drying is critical to ensuring your perfect cookie border techniques result in durable, professional-looking lines that won't smudge or get damaged. Royal icing dries through air exposure, forming a hard, candy-like shell. While the surface might feel dry to the touch within 30-60 minutes (crusting), the icing is not fully hardened internally for much longer.
For borders, allowing them to crust over for at least 30 minutes before adding flood icing is usually sufficient to create a dam. However, for the borders (and the rest of the icing) to be fully hardened and resistant to damage during handling or packaging, a much longer drying time is needed. Ideally, decorated cookies should be left to air dry completely for 8-12 hours, or even overnight, exposed to the air.
Using a fan on a low setting, directed across the cookies (not directly at them, which can cause craters), can speed up the drying process significantly, sometimes reducing full drying time to 4-6 hours depending on humidity. Proper drying is non-negotiable for robust, perfect cookie border techniques.
Once your beautifully bordered and decorated cookies are completely dry, proper storage is essential to preserve their appearance and freshness. The hard royal icing shell protects the cookie underneath to some extent, but moisture is the enemy. Store fully dried cookies in an airtight container at room temperature. Avoid refrigerating or freezing cookies decorated with royal icing, as condensation can form when they return to room temperature, causing colors to bleed or the icing to become sticky.
Layer the cookies carefully within the container, using parchment paper or wax paper between layers to prevent them from sticking to each other or getting scratched. Ensure the container is truly airtight to protect against humidity, which can soften the icing and make it fragile or sticky. Stored correctly, royal icing decorated cookies can maintain their quality and appearance for several weeks. Protecting your finished work ensures that the effort you put into perfect cookie border techniques pays off.
Using Sprinkles and Edible Glitter for Decorative Borders
Adding sprinkles or edible glitter to your wet royal icing border is a simple yet effective way to create eye-catching effects. Immediately after piping your border line, hold the cookie over a tray or plate to catch the excess, and gently sprinkle your chosen decoration directly onto the wet icing. The wet icing acts like glue, adhering the sprinkles or glitter.
Popular choices include fine sanding sugar for a sparkly finish, nonpareils for tiny dots of color, or even finely chopped edible glitter flakes. Be careful not to apply too heavily, which can obscure the border shape. Once the icing is completely dry (allow extra time for the added material), gently tap or brush off any excess sprinkles or glitter that didn't adhere to the border. This technique adds texture, color, and sparkle, enhancing your perfect cookie border techniques with minimal effort.
For borders that truly stand out, you can create 3D effects. One method is to pipe a very thick line of outline consistency icing and, while it's still wet, use a tool to shape it into ridges, waves, or other textures. Another approach is to allow a base border to crust slightly and then pipe a second, different type of border on top, such as a string of beads, small dots, or a piped rope design using a star tip or a specialized border tip.
Creating a "dam" border using a medium-sized round tip (#3 or #4) and then piping a smaller, decorative border (#1 or #2 tip) just inside it once the dam has crusted is another way to build dimension. You can also use multiple layers, allowing each layer to dry partially before adding the next, to build up height. These 3D perfect cookie border techniques add significant visual interest and complexity to your designs.
While royal icing is the staple for piped borders, incorporating fondant can add unique border effects. You can cut thin strips of fondant using a rotary cutter or knife and attach them around the edge of a cookie using a tiny amount of edible glue or corn syrup. These fondant strips can be left plain, textured with impression mats, or even molded into shapes.
Another technique involves piping a royal icing border and, once it's dry, attaching small fondant shapes or rolled fondant pearls along the border line with a tiny dot of royal icing acting as glue. For example, tiny fondant leaves or flowers could be attached along a green piped border. Combining fondant with royal icing borders offers creative possibilities for texture, shape, and detail, expanding the range of your perfect cookie border techniques.
Mastering perfect cookie border techniques is a foundational skill that significantly elevates the quality and appearance of your decorated cookies. From understanding the crucial role of royal icing consistency and choosing the right tools to practicing your piping technique and troubleshooting common issues, each step contributes to achieving those sought-after crisp, clean lines. We've explored how consistent borders enhance overall design and looked at advanced methods like overpiping, adding texture, and incorporating other mediums like sprinkles or fondant.
Remember that practice is key. Spend time piping on parchment paper, experiment with different tips and consistencies, and learn from every cookie. Patience during drying times will protect your hard work and ensure your borders are durable. With dedication and attention to detail, you'll be well on your way to piping flawless borders on all your BakeWithEase creations, transforming simple cookies into stunning, professional-looking treats that are sure to impress.
Frequently Asked Questions
Perfect cookie borders are crucial for achieving a professional look. They enhance visual appeal and make your cookies stand out, creating a polished and refined final product.
Common mistakes include using incorrect icing consistency, applying too much pressure, and not having a steady hand. These lead to uneven lines and bleeding.
Royal icing is generally considered the best choice for creating defined borders. Its consistency can be adjusted to achieve the desired stability and sharpness.
Essential tools include piping bags, various sized round tips (like a #2 or #3), and a scribe tool or toothpick. These allow for precise icing application and correction.
Absolutely! Practicing on parchment paper is a great way to perfect your technique and icing consistency. This helps you build confidence before decorating your baked cookies.
The pursuit of the perfect cookie border isn't merely a culinary pursuit; it's a reflection of our desire for precision, artistry, and the joy found in creating something beautiful. In a world often characterized by imperfection and fleeting trends, the meticulous detail of a flawlessly piped cookie border offers a tangible sense of accomplishment and a delightful visual reward. This seemingly small detail elevates a simple cookie into a miniature work of art, demonstrating the power of attention to detail in any endeavor.
The impact of mastering even the simplest baking techniques, like creating perfect cookie borders, extends far beyond the kitchen. It speaks to a broader cultural appreciation for craftsmanship and the satisfaction derived from honing one's skills. The details are not the details. They make the design.
– Charles Eames. This quote perfectly encapsulates the importance of seemingly minor elements in achieving overall excellence, a principle applicable to baking and life alike. The dedication required to perfect a cookie border mirrors the dedication needed to achieve any goal, teaching patience, perseverance, and the rewarding feeling of mastery.
Now, consider your own aspirations. What seemingly small detail in your life, your work, or your passions, could benefit from the same focused attention you'd give to perfecting a cookie border? Take a moment to reflect on this.
Perhaps it's a project you've been putting off, a skill you'd like to improve, or a relationship you want to nurture. Embrace the spirit of precision and dedication, and watch as the seemingly small details transform into something truly extraordinary. The journey to perfection, even in the realm of cookie decorating, can teach us valuable lessons applicable to all aspects of our lives.
Thanks for taking the time to elevate your cookie decorating skills! We hope you're feeling inspired and ready to create stunning, professional-looking cookie borders. Now it's time to put your new knowledge into practice.
- Master the perfect border: Try out the techniques we discussed, experimenting with different piping bags and tips to find your favorite style. Don't be afraid to get a little messy – that's how we learn!
- Share your creations: Post a picture of your masterpiece on social media and tag us! We'd love to see your beautifully bordered cookies.
- Explore our other cookie decorating tutorials for even more inspiration – there's a whole world of sweet possibilities waiting for you!
Ready to transform your next batch of cookies into edible works of art? What unique border design will you create first?