
Exploring Alternative Flours in Sourdough: Rye, Spelt, and Beyond

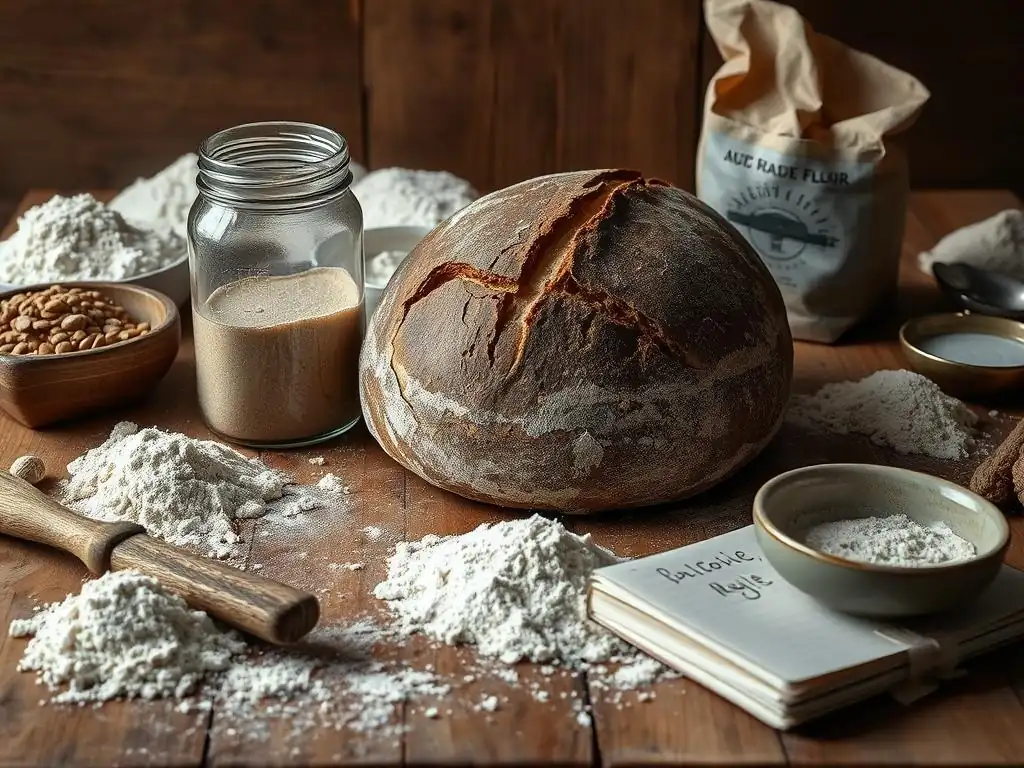
Welcome to BakeWithEase, your partner in creating delicious baked goods! Are you ready to take your sourdough game to the next level? This week, we're diving deep into the world of alternative flours, exploring the unique characteristics of rye, spelt, and more in sourdough baking. But, before we embark on this flavorful journey, are you encountering issues with your Rye Sourdough Starter?
Unlock the secrets to a thriving rye starter with our essential troubleshooting tips below. Learn how to diagnose and fix common problems, ensuring a robust foundation for your most ambitious sourdough creations. Prepare to elevate your baking with unexpected textures and flavors – let's get started!
- Exploring Alternative Flours in Sourdough: Rye, Spelt, and Beyond - BakeWithEase
- Understanding Rye Sourdough
- Spelt Flour in Sourdough: A Nutty Alternative
- Beyond Rye and Spelt: Other Flour Options for Sourdough
- Rye Sourdough Starter Troubleshooting Tips
- Advanced Techniques for Baking with Alternative Flours in Sourdough
- Rye Sourdough Recipe: A Step-by-Step Guide
- Experimenting with Flour Blends in Sourdough
- Elevating Your Sourdough: Adding Inclusions to Alternative Flour Loaves
- Conclusion: Mastering Alternative Flours for Exceptional Sourdough
-
Frequently Asked Questions
- What are the benefits of using rye flour in sourdough starter?
- How does rye flour affect the texture of sourdough bread?
- What are some common rye sourdough starter troubleshooting tips?
- Can I substitute rye flour directly for wheat flour in any sourdough recipe?
- How do I store my rye sourdough starter?
- Final Reflection: The Bountiful World of Sourdough Beyond Wheat
- Unlock Your Sourdough's Potential: Flour Power Unleashed!
Exploring Alternative Flours in Sourdough: Rye, Spelt, and Beyond - BakeWithEase
Introduction to Alternative Flours in Sourdough Baking
Venturing beyond the familiar territory of all-purpose or bread flour opens up a world of flavor, texture, and nutritional benefits in sourdough baking. While wheat flour provides the structural backbone for many classic loaves, incorporating alternative flours like rye, spelt, einkorn, or even buckwheat can transform your bread, adding depth, complexity, and unique characteristics. These flours often behave differently from traditional wheat, requiring adjustments in hydration, mixing, and proofing techniques. Understanding the specific properties of each alternative flour is key to successfully integrating them into your sourdough routine and elevating your baking results.
Exploring these different grains isn't just about novelty; it's about celebrating biodiversity and tapping into the diverse potential of fermentation. Each flour carries its own microbial profile and nutrient composition, influencing the activity of your sourdough starter and the final crumb structure of your bread. For instance, rye flour is known for its high enzyme activity, which can affect gluten development differently than wheat.
Spelt, an ancient wheat variety, offers a distinct nutty flavor and a slightly different gluten structure. By experimenting with these flours, you not only expand your baking repertoire but also gain a deeper appreciation for the subtle nuances that different grains bring to the art of sourdough.
Understanding Rye Sourdough
The Unique Characteristics of Rye Flour in Sourdough
Rye flour possesses distinct characteristics that set it apart from wheat flour in sourdough baking. Unlike wheat, rye has a lower gluten content, and the gluten it does contain is less elastic and doesn't form the same strong network. Instead, rye contains high levels of pentosans, complex carbohydrates that are highly water-absorbent. These pentosans contribute significantly to the structure of rye bread, creating a dense, moist crumb rather than the open, airy structure typical of wheat sourdough. This high water absorption means rye doughs are often stickier and wetter than wheat doughs at the same hydration percentage.
Furthermore, rye flour is rich in enzymes, particularly amylase, which break down starch into sugars. This enzymatic activity is much higher in rye than in wheat. While beneficial for feeding the starter and contributing to flavor, excessive enzymatic activity can degrade the dough structure if not managed properly through techniques like controlling fermentation temperature and time.
The natural acidity of rye also plays a role, contributing to the characteristic tangy flavor of rye sourdough and helping to manage the enzymatic breakdown of the dough. Understanding these properties is crucial for successful rye sourdough starter troubleshooting tips and overall baking success.
Benefits of Baking with Rye Flour in Sourdough Bread
Incorporating rye flour into your sourdough offers numerous benefits, ranging from enhanced flavor and texture to improved nutritional value. Rye imparts a distinctive, robust, and slightly tangy flavor that complements the sour notes of fermentation beautifully. Even a small percentage of rye flour (say, 10-20%) can dramatically alter the taste profile of a wheat loaf, adding depth and complexity. For those who appreciate a stronger, more traditional European-style sourdough, higher percentages or even 100% rye loaves deliver an intense, earthy flavor experience.
Beyond taste, rye flour adds significant nutritional value. It is higher in dietary fiber than wheat flour, particularly soluble fiber, which can aid digestion. It also contains various vitamins and minerals, including B vitamins, magnesium, and iron. The pentosans in rye contribute to a moister crumb that stays fresh longer compared to pure wheat loaves. While working with sticky rye dough can present challenges, mastering rye sourdough starter troubleshooting tips and dough handling techniques allows you to harness these benefits for delicious and nutritious bread.
Achieving the Right Rye Sourdough Hydration
Determining the optimal hydration level for rye sourdough can be tricky due to rye flour's high water absorption capacity. Unlike wheat flour, which develops structure through gluten, rye relies heavily on pentosans and starch for its structure. A dough made with 100% rye flour at 70% hydration might feel and handle like a wheat dough at 80% or even 85% hydration. The "right" hydration depends on the specific rye flour used (whole vs. light), the desired loaf structure, and personal preference.
For loaves incorporating a percentage of rye (e.g., 20-40% rye, 60-80% wheat), you might start with a total hydration similar to your usual wheat sourdough (e.g., 70-75%) and adjust based on how the dough feels. Remember that the rye flour will absorb water more slowly and hold onto it more firmly. For high-percentage or 100% rye loaves, hydration levels often range from 75% to 90% or even higher. The dough will be very sticky and more like a thick batter than a kneadable dough.
It's common to handle high-rye doughs with wet hands or a spatula rather than traditional kneading. Experimentation is key; perhaps start with 80% hydration for a 100% rye loaf and see how it handles, adjusting in subsequent bakes. Monitoring your rye sourdough starter activity is also part of achieving the right hydration in the final dough, as a healthy starter is essential.
Spelt Flour in Sourdough: A Nutty Alternative
Exploring the Flavor Profile of Spelt Sourdough
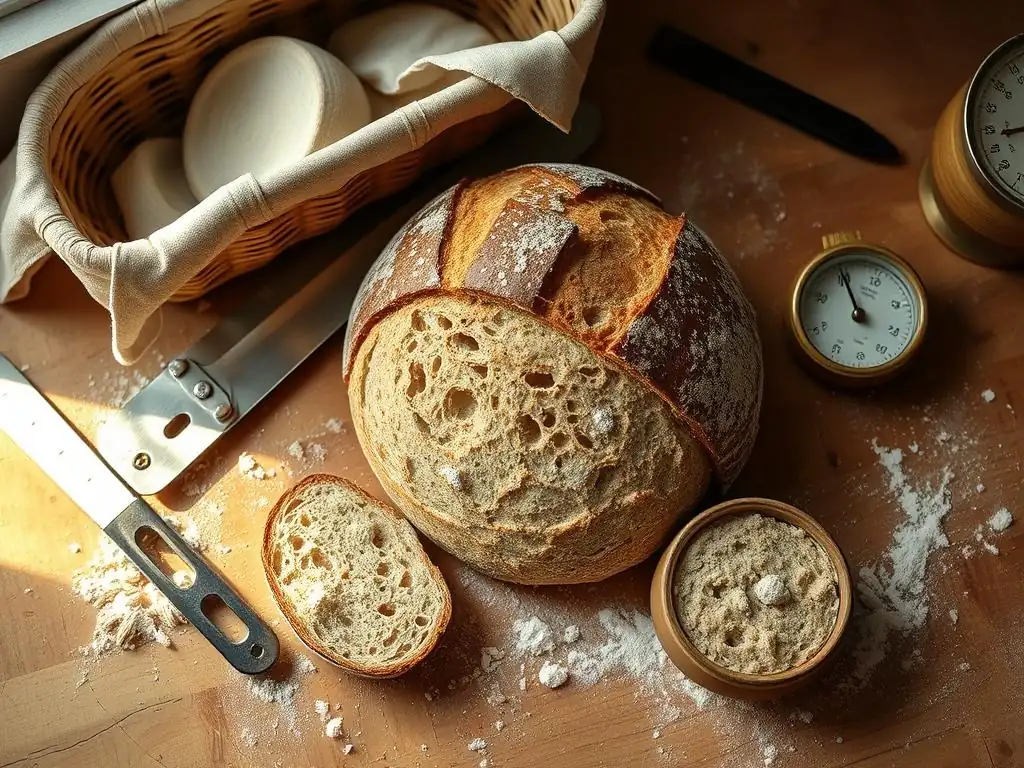
Spelt, an ancient grain and a relative of modern wheat, offers a distinct and appealing flavor profile when used in sourdough baking. Its taste is often described as nutty, slightly sweet, and more complex than standard wheat flour. This characteristic flavor comes through beautifully in sourdough, adding warmth and depth to the loaf. Whether used as a portion of the flour blend or as 100% spelt, it imparts a unique character that is both comforting and sophisticated.
Compared to the robust tang of rye or the neutral base of white wheat flour, spelt provides a pleasant middle ground. It pairs well with various inclusions like seeds, nuts, and fruits, enhancing their flavors without overpowering them. Many bakers find that spelt sourdough has a slightly milder, less acidic tang than wheat sourdough, making it a great option for those who prefer a less sour loaf. The specific flavor intensity can vary depending on whether you use whole spelt flour, which is richer and more pronounced, or sifted/light spelt flour, which is milder.
Working with Spelt Flour: Tips and Techniques
Working with spelt flour in sourdough requires paying attention to its unique gluten structure. Spelt gluten is more fragile and water-soluble than modern wheat gluten. This means that spelt doughs can become overmixed or overworked relatively easily, leading to a sticky, slack dough that lacks structure. Gentle handling and minimal kneading are often recommended. Techniques like autolyse (mixing flour and water and letting it rest) can be particularly beneficial with spelt, allowing the flour to hydrate fully before the starter and salt are added, reducing the need for extensive mixing.
Spelt also tends to absorb water differently than wheat, often requiring slightly less hydration initially or absorbing water more slowly. It's advisable to start with a slightly lower hydration than you might use for a similar wheat loaf and add more water gradually if the dough seems dry. Due to its delicate gluten, spelt dough benefits from shorter fermentation and proofing times compared to wheat. Over-proofing spelt can lead to a collapsed loaf. Paying attention to the dough's feel and visual cues is essential, as the signs of readiness might differ slightly from what you're used to with wheat.
Spelt Sourdough Starter Guide: A Complete Overview
Creating and maintaining a spelt sourdough starter is similar to managing a wheat starter, but with a few key considerations. You can establish a new starter using spelt flour and water, following the standard process of daily feeding. Spelt flour is often quite active and can lead to a vigorous starter. When feeding an existing wheat starter with spelt, transition gradually by substituting a portion of the wheat flour with spelt over several feedings.
Once established, feed your spelt starter with spelt flour and water. Pay attention to its activity cycle; spelt starters may peak and fall faster than wheat starters due to different enzyme activity and gluten structure. A typical feeding ratio might be 1:1:1 (starter:flour:water by weight), but observe your starter's behavior.
If it peaks quickly and becomes very liquidy, you might increase the flour ratio (e.g., 1:2:2 or 1:3:3) or feed it more frequently. The ideal consistency is often described as a thick, bubbly batter. Maintaining a healthy, active spelt starter is the first step towards successful spelt sourdough baking and is less prone to the issues that necessitate rye sourdough starter troubleshooting tips.
Beyond Rye and Spelt: Other Flour Options for Sourdough
Einkorn Flour: An Ancient Grain for Sourdough
Einkorn is considered one of the oldest cultivated wheat varieties, known for its simple genetic structure and potentially easier digestibility for some individuals. When used in sourdough, einkorn flour contributes a sweet, slightly earthy flavor and a beautiful golden crumb. Like spelt, einkorn's gluten structure is weaker and more delicate than modern wheat, requiring gentle handling.
Einkorn doughs tend to be stickier and less elastic than modern wheat doughs. They also hydrate differently, often requiring less water than you might expect for a similar feel. Due to its fragile gluten, einkorn benefits from shorter fermentation times and minimal handling. Techniques like no-knead methods or gentle stretch-and-folds work well. Over-proofing is a common issue, leading to a dense crumb, so watch your dough closely. Despite the handling challenges, the unique flavor and potential health benefits make einkorn a rewarding flour to explore in sourdough.
Khorasan (Kamut) Flour: Adding Richness to Your Sourdough
Khorasan wheat, often marketed under the brand name Kamut®, is another ancient grain gaining popularity in sourdough baking. This large-grained wheat is known for its rich, buttery, and slightly sweet flavor, often described as having notes of nuts and honey. It imparts a lovely golden color to the crumb and crust.
Khorasan flour has a stronger gluten structure than spelt or einkorn, making it easier to work with, though still different from modern hard wheat. It can handle moderate kneading and develops reasonable elasticity. Khorasan also has good water absorption properties. It works well as a significant portion of a sourdough blend or even as 100% of the flour. Sourdough made with Khorasan tends to have a satisfying chew and a delightful aroma. It integrates well into standard sourdough recipes, often requiring only slight adjustments to hydration and fermentation times compared to using modern wheat.
Using Buckwheat Flour in Sourdough: A Gluten-Free Option
For those seeking gluten-free alternatives, buckwheat flour offers a unique path into sourdough. Buckwheat is not related to wheat but is a pseudocereal, providing a distinct earthy, slightly bitter, and nutty flavor. When used in sourdough, particularly in 100% gluten-free recipes, it relies on starches and other components for structure, as it contains no gluten.
Buckwheat sourdough starters can be created and maintained similarly to grain-based starters, using buckwheat flour and water. They tend to be quite active. When baking, buckwheat flour is often blended with other gluten-free flours (like rice flour, sorghum flour, or starches) and binders (like psyllium husk or xanthan gum) to create a dough that can hold its shape and achieve some rise.
A 100% buckwheat sourdough loaf will have a dense, moist texture, different from wheat bread. The hydration for gluten-free sourdoughs is often higher than wheat doughs to compensate for the lack of gluten structure. While different, mastering the techniques allows for delicious, tangy gluten-free sourdough loaves.
Rye Sourdough Starter Troubleshooting Tips
Common Problems with Rye Sourdough Starters
Working with rye sourdough starters can sometimes present unique challenges compared to those made purely with wheat. One common issue is excessive stickiness, making the starter hard to manage and feed accurately. Another frequent problem is a lack of vigorous activity or a "weak" starter, which may not rise predictably or double in size after feeding. Mold growth can also be a concern, although this is less frequent with active, well-maintained starters. Foul or off smells, such as acetone (nail polish remover) or putrid odors, indicate the starter is either hungry or battling undesirable bacteria.
These issues often stem from imbalances in feeding ratios, temperature fluctuations, infrequent feeding, or the initial stages of establishing a new starter. Understanding the expected behavior of a healthy rye starter – like its typical peak time after feeding (often 6-12 hours at room temperature) and its texture – is crucial for effective rye sourdough starter troubleshooting tips. A healthy rye starter should have a tangy, slightly yeasty aroma and show noticeable bubble activity and rise before falling back down.
Troubleshooting Sticky Rye Sourdough
A sticky rye sourdough starter is a common complaint, but it's usually manageable. Rye flour naturally absorbs more water than wheat, and its pentosans contribute to a gel-like consistency. If your starter feels excessively sticky and difficult to work with, consider slightly adjusting your feeding ratio. For example, if you're feeding 1 part starter to 1 part flour and 1 part water (1:1:1), try increasing the flour ratio to 1:2:2 (1 part starter, 2 parts flour, 2 parts water) or even 1:3:3. This adds proportionally more dry matter, which can help reduce stickiness.
Ensure you are accurately measuring ingredients by weight, as volume measurements for flour and water can be imprecise and lead to inconsistent hydration. Using a digital scale is highly recommended. If the starter is still too sticky, you can slightly decrease the water component in your feeding ratio (e.g., 1:2:1.8).
Remember that a rye starter will always be stickier than a wheat starter at the same hydration, so a certain level of stickiness is normal. Handling the starter with wet hands or a rubber spatula can also make managing sticky rye sourdough easier. These rye sourdough starter troubleshooting tips focus on adjusting hydration for better consistency.
Identifying and Solving Weak Rye Sourdough Starter
A weak rye sourdough starter is one that doesn't show consistent, predictable activity – it might not double in size, have minimal bubbles, or take excessively long to show signs of life after feeding. This often indicates insufficient microbial activity, usually due to infrequent feeding, incorrect feeding ratios, or unfavorable temperatures.
To solve a weak rye starter, the most effective rye sourdough starter troubleshooting tips involve more frequent and consistent feeding. Try feeding it every 12 hours for a few days, ensuring you discard a significant portion before each feeding (e.g., keeping only 20-30g of starter and feeding it with 50-100g each of flour and water). Increase the feeding ratio (e.g., 1:2:2) to provide more 'food' for the microbes. Ensure your feeding water is lukewarm (around 25-30°C or 77-86°F), as warmer temperatures promote faster activity.
If your kitchen is cool, find a warmer spot (like near a warm appliance or in an oven with the light on). Using organic rye flour can sometimes help, as it may contain a richer microbial population. Persistence is key; a weak starter can often be revived with consistent care and optimal conditions.
Feeding Schedule for a Healthy Rye Sourdough Starter
Maintaining a consistent feeding schedule is paramount for a healthy and active rye sourdough starter. For a starter kept at room temperature (around 20-24°C or 68-75°F), daily feeding is typically necessary. Feed your starter at roughly the same time each day to establish a rhythm. Before feeding, discard a portion of the starter, leaving behind a small amount (e.g., 20-30 grams). Then, add fresh rye flour and water according to your desired ratio (common ratios are 1:1:1, 1:2:2, or 1:3:3 by weight).
The feeding ratio you choose will affect how quickly the starter peaks. A 1:1:1 ratio requires more frequent feeding (perhaps twice a day if very warm), while a 1:3:3 ratio provides food for longer, suitable for once-daily feeding or slightly cooler temperatures. Observe how long it takes for your starter to double or triple in size after feeding and aim to feed it just as it begins to fall back down.
If you won't be baking frequently, storing your rye starter in the refrigerator (and feeding it once a week) slows down activity and reduces the need for daily feeding. Remember to revive it with a few room-temperature feedings before baking. Following a regular feeding schedule is one of the best rye sourdough starter troubleshooting tips to prevent issues from arising in the first place.
Advanced Techniques for Baking with Alternative Flours in Sourdough
Autolyse with Alternative Flours: Maximizing Hydration
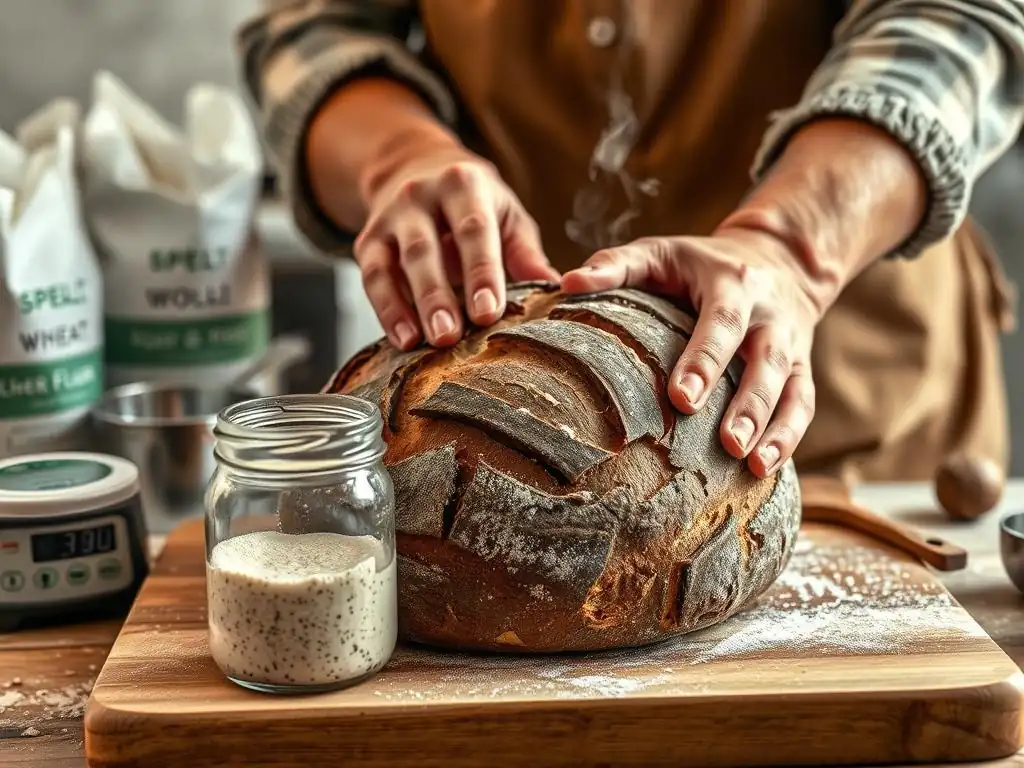
Autolyse is a technique where you mix only the flour and water in a recipe and let it rest for a period (typically 20 minutes to several hours) before adding the starter and salt. This rest allows the flour to fully hydrate and enzymes to begin breaking down proteins and starches. For alternative flours, especially those with weaker or different gluten structures like spelt or einkorn, autolyse can be particularly beneficial. It helps maximize hydration without the need for extensive mixing, which can damage delicate gluten networks.
With rye flour, which has very little gluten but high pentosan content, autolyse works differently. The pentosans absorb water and swell, creating a gel-like structure. A short autolyse (20-30 minutes) can help the rye flour hydrate evenly. However, very long autolyse periods with high percentages of rye are generally not recommended, as excessive enzymatic activity can degrade the dough structure. For blends, autolysing the wheat portion with water before adding the rye and starter can also be an effective strategy. Experimentation with timing is key when using autolyse with alternative flours.
Adjusting Baking Times for Different Flour Types
Alternative flours often require adjustments to baking times and temperatures compared to standard wheat loaves. Flours like rye and spelt tend to retain more moisture, which can necessitate a longer bake or slightly higher temperature to ensure the interior is fully cooked and the crust develops properly. A high-percentage rye loaf, for instance, will often require baking for 60-90 minutes, sometimes even longer for very large loaves, compared to 40-50 minutes for a typical white wheat loaf.
Monitoring internal temperature is the most reliable way to determine doneness. For most sourdough loaves, an internal temperature of 96-100°C (205-210°F) indicates it is fully baked. However, dense loaves with high percentages of rye or other alternative flours might benefit from reaching the higher end of this range.
Baking in a Dutch oven or with steam during the initial phase is crucial for good oven spring and crust development, regardless of flour type. After the initial covered bake, removing the lid for the remainder of the time allows the crust to brown and crisp. Be mindful that some alternative flours, like spelt, can brown faster than wheat, so you might need to reduce the oven temperature slightly towards the end of the bake if the crust is darkening too quickly.
Scoring Techniques for Alternative Flour Sourdough Loaves
Scoring, or slashing, the surface of your sourdough loaf before baking is essential to control where the bread expands in the oven, promoting better oven spring and preventing blowouts. However, the best scoring techniques can vary depending on the flour used, particularly for doughs made with alternative flours. Doughs with weaker gluten structures, like those with high percentages of spelt, einkorn, or rye, are often less amenable to intricate or deep scoring patterns.
For rye and high-percentage rye loaves, which tend to have dense, less elastic dough, simple scores are usually best. A single, shallow slash down the center, or a few parallel slashes, is often sufficient. Deep cuts can sometimes cause the loaf to spread out rather than spring up. Spelt and einkorn doughs, with their more delicate gluten, also benefit from simpler scoring.
Avoid overworking the surface when scoring, as this can deflate the dough. For loaves with strong structure (like blends with a good percentage of strong wheat flour) or those with a very taut surface tension from shaping, more elaborate scoring is possible, but it's always wise to consider the dough's strength and elasticity before deciding on a complex pattern. Simple, clean cuts with a sharp lame or razor blade are always recommended.
Rye Sourdough Recipe: A Step-by-Step Guide
Ingredients for Rye Sourdough Bread
To bake a delicious rye sourdough loaf, you'll need a few simple ingredients, assuming you have an active rye sourdough starter or a wheat starter that you've transitioned to rye. A typical recipe for a medium-sized loaf might include:
- Active rye sourdough starter: Approximately 100-150 grams (fed and active)
- Rye flour: Approximately 300-400 grams (whole or light, depending on preference)
- Strong bread flour (optional, for structure): Approximately 100-200 grams (if not making 100% rye)
- Water: Approximately 350-450 grams (warm, around 30°C / 86°F) - adjust based on flour absorption and desired hydration
- Salt: Approximately 8-10 grams
The specific amounts will vary based on the desired loaf size and hydration level. For a 100% rye loaf, you would omit the bread flour and use only rye flour, adjusting the water to achieve a thick, scoopable batter consistency, often around 80-90% hydration relative to the rye flour weight. Using an active starter is crucial; if you're facing issues, consult rye sourdough starter troubleshooting tips before you begin.
Detailed Instructions for Mixing and Kneading Rye Sourdough
Mixing rye sourdough is different from mixing wheat sourdough due to the lack of strong gluten development.
- Autolyse (Optional but Recommended): In a large bowl, mix the rye flour (and bread flour, if using) with the water until no dry spots remain. It will be very sticky. Cover and let rest for 20-60 minutes. This step helps hydrate the flour.
- Add Starter and Salt: Add the active rye sourdough starter and salt to the autolysed mixture.
- Mixing: For high-percentage or 100% rye dough, "kneading" is more about mixing thoroughly. Use a sturdy spoon or dough whisk initially, then switch to wet hands or a spatula. Mix until the starter and salt are fully incorporated, usually 5-10 minutes. The dough will remain very sticky and may resemble a thick batter or paste. Avoid trying to develop traditional gluten structure. For blends with a significant portion of wheat, you can perform gentle stretch-and-folds in the bowl over the first hour or so of bulk fermentation, but avoid aggressive kneading.
- Bulk Fermentation: Cover the bowl and let the dough ferment at room temperature. This phase is typically shorter for rye than wheat, perhaps 2-4 hours, depending on room temperature and starter activity. The dough may show some bubbling but won't necessarily double in size like wheat dough.
Handling 100% rye dough requires techniques like keeping hands wet or using a scraper because of its extreme stickiness. If you've had to use rye sourdough starter troubleshooting tips recently, ensure your starter is vigorous before starting this process.
Proofing and Baking Your Rye Sourdough Loaf
Proofing and baking rye sourdough also require specific approaches.
- Shaping: High-percentage rye dough is often proofed directly in the baking vessel or a lined basket because it's too slack to hold its shape on its own. Gently scrape the dough into a prepared loaf pan or a proofing basket lined with a floured cloth. For blends with wheat, you can attempt a gentle shape, but avoid degassing the dough too much.
- Final Proofing: Cover the shaped loaf and let it proof. This can be done at room temperature (1-2 hours) or in the refrigerator (8-12 hours) for flavor development. Rye dough does not show as dramatic a rise during proofing as wheat dough. It might puff up slightly and feel airy. Avoid over-proofing, which can lead to a dense loaf.
- Baking: Preheat your oven to a high temperature (around 230-250°C or 450-480°F) with your baking vessel (Dutch oven, cloche, or baking stone with steam setup) inside. Carefully transfer the loaf to the hot vessel. Score the loaf (simple scores are best for high rye).
- Bake: Bake covered for 20-30 minutes to create steam and promote initial rise. Then, remove the lid (or steam setup) and continue baking at a slightly lower temperature (around 200-220°C or 400-430°F) for another 30-60 minutes, or until the internal temperature reaches 96-100°C (205-210°F) and the crust is dark brown. Rye crust should be quite dark for optimal flavor.
- Cooling: This is crucial for rye bread! Rye bread needs to cool completely on a wire rack for several hours (at least 2-4, ideally longer) before slicing. Slicing too early can result in a gummy interior.
Patience during the cooling phase is key to enjoying the unique texture of rye sourdough.
Ingredients for Spelt Sourdough Bread
Baking a delicious spelt sourdough loaf requires similar basic ingredients to wheat or rye, with spelt flour taking center stage. Here's a list for a standard loaf:
- Active sourdough starter (can be wheat or spelt, ideally spelt): Approximately 100-150 grams
- Spelt flour (whole or sifted): Approximately 500 grams
- Water: Approximately 325-375 grams (warm, around 30°C / 86°F) - adjust based on flour absorption
- Salt: Approximately 9-10 grams
Spelt flour often requires slightly less water than modern hard wheat to achieve a similar dough consistency, so starting with a lower hydration (around 65-75%) is recommended, adding more water only if needed. Ensure your starter is active and bubbly; if using a spelt starter, its care is less complex than navigating rye sourdough starter troubleshooting tips.
Detailed Instructions for Mixing and Kneading Spelt Sourdough
Working with spelt dough requires a gentle approach due to its delicate gluten.
- Autolyse: In a large bowl, mix the spelt flour with the water until just combined. Ensure no dry pockets remain. Cover and let rest for 30 minutes to 1 hour. This step is very beneficial for spelt, allowing hydration without stressing the gluten.
- Add Starter and Salt: Add your active sourdough starter and salt to the autolysed dough.
- Mixing: Gently incorporate the starter and salt. Avoid aggressive kneading. Use a folding technique: wet your hands slightly, grab a portion of the dough from the edge, stretch it up, and fold it over the center. Rotate the bowl and repeat until the ingredients are evenly distributed, about 5-10 minutes. The dough will feel softer and less elastic than wheat dough.
- Bulk Fermentation and Folding: Cover the bowl. During the first 1.5 to 2 hours of bulk fermentation, perform 2-3 sets of gentle stretch-and-folds at 30-45 minute intervals. Again, handle the dough gently to avoid tearing the delicate gluten network. The total bulk fermentation time will be shorter than for wheat, perhaps 3-4 hours at room temperature (20-24°C / 68-75°F), depending on starter strength and temperature. Watch the dough, not the clock; it should increase in volume by about 30-50% and feel slightly airy.
Overmixing or over-fermenting spelt dough is a common mistake. Pay close attention to the dough's feel and appearance throughout this stage.
Proofing and Baking Your Spelt Sourdough Loaf
Proofing and baking spelt sourdough follows a familiar pattern but with attention to timing.
- Shaping: Gently turn the dough out onto a lightly floured surface. Perform a gentle pre-shape and let rest for 15-20 minutes. Then, shape the dough into your desired form (batard or boule). Handle gently to maintain the airy structure developed during bulk fermentation.
- Final Proofing: Place the shaped loaf into a floured proofing basket or bowl. Cover and proof. Spelt proofs faster than wheat; room temperature proofing might only take 1-2 hours. Cold proofing in the refrigerator (8-12 hours) is also an option and helps develop flavor, but be careful not to over-proof even in the cold. The dough should feel airy and slightly increased in volume, but not significantly puffed up. A gentle poke test should show the dough springing back slowly, leaving a slight indentation.
- Baking: Preheat your oven and baking vessel (Dutch oven or baking stone) to a high temperature (around 230-250°C or 450-480°F). Carefully transfer the loaf to the hot vessel. Score the loaf; simple scores are often best.
- Bake: Bake covered for 20-25 minutes. Then, remove the lid and continue baking at a slightly lower temperature (around 200-220°C or 400-430°F) for another 20-30 minutes, or until the internal temperature reaches 96-100°C (205-210°F) and the crust is golden brown. Spelt can brown quickly, so monitor the crust.
- Cooling: Let the spelt loaf cool completely on a wire rack for at least 2-3 hours before slicing to allow the crumb structure to set and moisture to redistribute.
Spelt sourdough produces a lovely, moist loaf with a beautiful nutty flavor when handled correctly.
Experimenting with Flour Blends in Sourdough
Combining Rye, Spelt, and Bread Flour for Complex Flavors
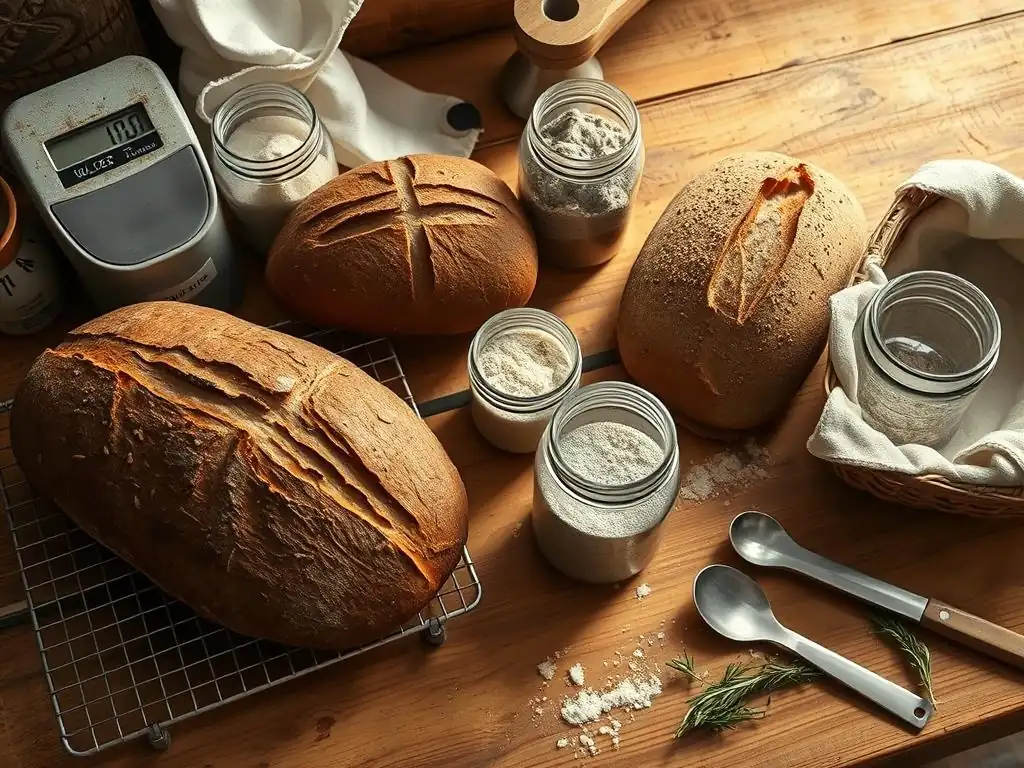
One of the most rewarding aspects of using alternative flours is the ability to create custom blends. Combining rye, spelt, and strong bread flour allows you to harness the unique qualities of each grain while mitigating some of their individual challenges. For instance, adding 10-20% rye flour to a wheat base provides that characteristic tang and moisture retention without the handling difficulties of high-percentage rye. Blending in 20-30% spelt flour introduces a nutty sweetness and tender crumb, while the bread flour provides the necessary gluten strength for structure and oven spring.
A popular blend might be 70% strong bread flour, 20% whole spelt, and 10% whole rye. This combination yields a dough that is relatively easy to handle, develops a good gluten network, and bakes into a loaf with complex layers of flavor – the tang from the rye, the sweetness from the spelt, and the classic sourdough notes from the fermentation of wheat. Experimenting with different ratios allows you to fine-tune the texture, flavor intensity, and handling properties of your dough. Remember that even small additions of alternative flours can significantly impact the final result.
Creating Custom Flour Blends for Unique Sourdough Profiles
Beyond combining rye and spelt with wheat, the possibilities for creating unique sourdough profiles using custom flour blends are vast. Consider incorporating other grains like Khorasan (Kamut) for richness, einkorn for sweetness, or even a small percentage of less common flours like barley or oat flour (though these contain less gluten). The key is understanding the characteristics of each flour – its protein content, water absorption, flavor profile, and gluten potential – and how they will interact in a fermented dough.
When creating a custom blend, think about the desired outcome. Do you want a very open crumb or a tighter, moist one? A tangy loaf or a sweet, nutty one? For structure, you'll likely need a base of strong wheat flour (like bread flour or high-protein all-purpose).
Then, add alternative flours to contribute specific qualities. For example, a blend aiming for a moist, flavorful crumb might use 60% bread flour, 20% whole wheat, 10% rye, and 10% spelt. Keep track of your blends and results to refine your recipes. Remember that each new blend might require adjustments to hydration, fermentation time, and handling techniques, so start with small batches.
Elevating Your Sourdough: Adding Inclusions to Alternative Flour Loaves
Seeds and Grains: Enhancing Texture and Flavor
Adding seeds and grains is a fantastic way to enhance both the texture and flavor of sourdough loaves made with alternative flours. These inclusions not only provide a pleasant crunch or chew but also contribute their own unique flavors and nutrients. Common additions include flax seeds, sesame seeds, sunflower seeds, pumpkin seeds, poppy seeds, and whole grains like oats, cracked wheat, or rye berries.
Seeds can be incorporated in several ways: mixed directly into the dough during the final stages of kneading, rolled onto the exterior of the shaped loaf before proofing, or both. Grains like oats or cracked wheat are often soaked overnight (making a "soaker" or "porridge") before being added to the dough. This prevents them from absorbing moisture from the dough during fermentation, which can lead to a dry crumb.
The nutty flavors of seeds and grains pair particularly well with the earthy notes of rye and the sweetness of spelt. For example, a rye sourdough with caraway seeds is a classic combination, while spelt sourdough with sunflower and pumpkin seeds offers a delightful texture contrast.
Fruits and Nuts: Sweet and Savory Combinations
Incorporating dried fruits and nuts adds another layer of flavor and texture to alternative flour sourdoughs, creating loaves that can range from sweet and breakfast-friendly to savory and robust. Dried fruits like cranberries, raisins, figs, or apricots contribute sweetness and chewiness, while nuts such as walnuts, pecans, hazelnuts, or almonds add richness and crunch.
When adding fruits or nuts, it's often best to mix them in during the final stages of bulk fermentation or during shaping. For dried fruits, consider soaking them in warm water, tea, or even a spirit like rum for 30 minutes beforehand to plump them up and prevent them from absorbing moisture from the dough. Drain them well before adding.
Nuts can be used raw or lightly toasted to enhance their flavor. The pairing possibilities are exciting: rye sourdough with walnuts and cranberries, spelt sourdough with figs and hazelnuts, or a Khorasan sourdough with pecans and raisins. These additions turn a simple loaf into a treat, perfect on its own or paired with cheese or spreads.
Conclusion: Mastering Alternative Flours for Exceptional Sourdough
The Future of Sourdough: Embracing Diversity in Flours
Exploring alternative flours like rye, spelt, einkorn, Khorasan, and even gluten-free options like buckwheat is a rewarding journey that expands the horizons of sourdough baking. Each flour presents its own set of characteristics, requiring adjustments in handling, hydration, fermentation, and baking. While they may initially seem challenging compared to working with standard wheat, understanding their unique properties and applying appropriate techniques unlocks a world of diverse textures, flavors, and nutritional benefits.
From the dense, moist tang of rye to the nutty sweetness of spelt, and the unique profiles of ancient grains, incorporating alternative flours allows you to create truly exceptional loaves. Mastering techniques like autolyse, adjusting hydration based on flour type, and refining your baking process for different doughs are key skills.
Furthermore, learning rye sourdough starter troubleshooting tips and understanding how to maintain healthy starters with various flours ensures a strong foundation for all your baking endeavors. Embracing the diversity of grains enriches your baking practice and allows you to share a wider variety of delicious, wholesome sourdough breads with your community.
Frequently Asked Questions
What are the benefits of using rye flour in sourdough starter?
Rye flour adds a unique flavor profile and can boost starter activity. It also contains enzymes that promote faster fermentation due to its higher levels of amylase.
How does rye flour affect the texture of sourdough bread?
Rye flour typically results in a denser and more moist crumb compared to using only wheat flour. It can also contribute to a slightly tangy flavor and a darker color.
What are some common rye sourdough starter troubleshooting tips?
Patience is key! If your rye starter isn't rising, ensure the temperature is consistent and feed it regularly. Also, consider using unbleached rye flour for best results.
Can I substitute rye flour directly for wheat flour in any sourdough recipe?
No, rye flour absorbs more water than wheat flour. You'll likely need to adjust the hydration level of your recipe. Start by replacing a small percentage initially.
How do I store my rye sourdough starter?
You can store it in the refrigerator to slow down fermentation. Remember to feed it at least once a week to keep it active and healthy.
Final Reflection: The Bountiful World of Sourdough Beyond Wheat
The exploration of alternative flours in sourdough baking isn't just a culinary trend; it's a gateway to unlocking a world of flavor and texture, directly impacting the accessibility and sustainability of this ancient craft. The rise in popularity of sourdough, coupled with increasing awareness of dietary needs and environmental concerns, makes understanding the nuances of different flours more crucial than ever. This journey into rye, spelt, and beyond highlights the potential for innovation and adaptation within the sourdough community.
My own experience with troubleshooting rye sourdough, initially fraught with frustration, ultimately deepened my appreciation for the unique challenges and rewards of working with these alternative grains. The unpredictable nature of rye, its tendency towards stickiness and its distinctive tang, taught me patience and a deeper understanding of the symbiotic relationship between flour, water, and time. The best bread is made with love and patience.
This simple statement, often overlooked, encapsulates the essence of successful sourdough baking, regardless of the flour used.
Now, armed with this knowledge, I invite you to embark on your own exploration. Don't be afraid to experiment, to embrace the unexpected results, and to learn from your mistakes. The journey of mastering sourdough with alternative flours is a continuous process of discovery, a testament to the enduring power of tradition and the boundless potential of innovation. Each loaf, whether perfectly risen or slightly imperfect, represents a step forward in your understanding of this beautiful craft. So, gather your ingredients, embrace the challenge, and let the journey begin!
Unlock Your Sourdough's Potential: Flour Power Unleashed!
Thanks for joining us on this flavorful journey into the world of alternative sourdough flours! We hope you’ve discovered new possibilities for your baking adventures. Ready to put your newfound knowledge into practice?
- Bake your next sourdough masterpiece: Experiment with rye, spelt, or another exciting flour you learned about today. Note down your observations and share your results!
- Share your sourdough journey: Tag BakeWithEase on social media (@BakeWithEase – imaginary handle) and inspire others with your creations. Show us what you've baked!
- Join our online baking community: Connect with fellow sourdough enthusiasts in our forums (imaginary forum link) to discuss your experiences and learn from others. Ask us anything!
What unique flour blend will you try next to elevate your sourdough game?