
How to Use Different Piping Tips for Cake Decoration

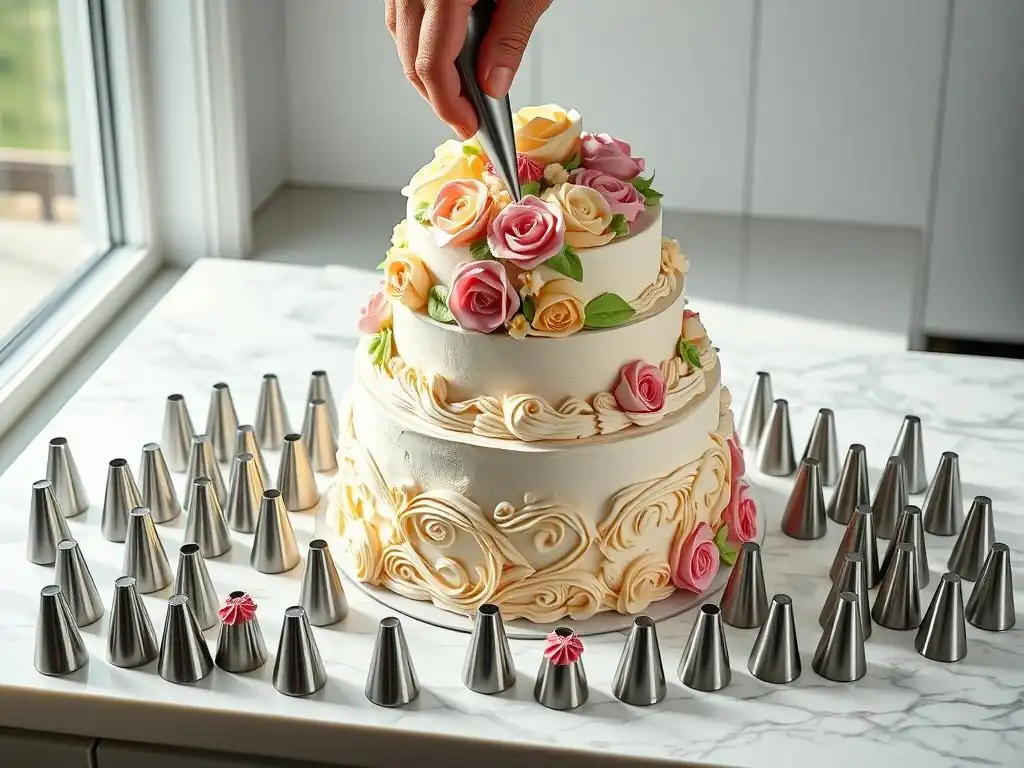
Welcome to BakeWithEase, your guide to baking brilliance! Ever wondered how professional bakers achieve those intricate cake designs? Unlock the secrets to stunning cakes with our comprehensive Cake Decorating Piping Tips Guide. Discover how each tip can transform your frosting into edible art, and start creating masterpieces today!
- Cake Decorating Piping Tips Guide: Master Your Cake Decorating Skills
- Introduction to Cake Decorating with Piping Tips
-
Understanding Different Types of Cake Piping Tips
- Round Piping Tips: Creating Lines, Dots, and Outlines
- Star Piping Tips: Achieving Textured Borders and Rosettes
- Petal Piping Tips: Making Realistic Flowers on Cakes
- Leaf Piping Tips: Adding Foliage to Your Cake Designs
- Basketweave Piping Tips: Creating Woven Textures
- Specialty Piping Tips: Expanding Your Cake Decorating Repertoire
- Choosing the Right Piping Tip for Your Cake Design
- Step-by-Step Guide to Using Cake Piping Tips
- Cake Decorating Piping Tips: Troubleshooting Common Problems
- Advanced Cake Decorating Techniques with Piping Tips
- Inspiration and Ideas for Cake Decorating with Piping Tips
- Conclusion: Unleash Your Creativity with Cake Piping Tips.
-
Frequently Asked Questions
- What are the basic types of cake decorating piping tips and what are they generally used for?
- How do I properly fill a piping bag to avoid messes while decorating?
- What's the best way to practice my piping skills before decorating a real cake?
- How do I clean my piping tips after using them?
- What are some common mistakes beginners make when using piping tips, and how can I avoid them?
- Final Reflection: Mastering the Art of Piping: From Tip to Triumph
- Unleash Your Inner Cake Artist!
Cake Decorating Piping Tips Guide: Master Your Cake Decorating Skills
Introduction to Cake Decorating with Piping Tips
Beyond Buttercream: Your Guide to Cake Decorating Success
Moving beyond simply spreading frosting with an offset spatula opens up a world of creative possibilities for your cakes. While a smooth buttercream finish is lovely, mastering cake decorating piping tips allows you to add intricate details, elegant borders, realistic flowers, and personalized messages that truly elevate your baked creations. Think of piping tips as your edible art brushes, each designed to produce a unique stroke or shape, transforming a simple cake into a stunning centerpiece. This Cake decorating piping tips guide will walk you through the essentials, helping you gain confidence with these versatile tools.
Venturing into piping doesn't require years of experience or a professional kitchen setup. With a few basic tools and a willingness to practice, you can achieve impressive results. Whether you're aiming for a delicate lace pattern, bold swags, or a garden of buttercream roses, understanding how different tips work is the first step. This guide aims to demystify the process, breaking down the functions of common piping tips and offering practical advice to help you achieve professional-looking finishes right in your own kitchen.
Why Choosing the Right Piping Tip Matters
Selecting the appropriate piping tip is crucial for achieving the desired effect on your cake. Using a large open star tip when you intended to pipe fine script will obviously lead to frustration and a messy result. Each tip is engineered with a specific opening shape and size, which dictates the form of the frosting as it's expelled under pressure. For instance, a small round tip is perfect for delicate outlines or dots, while a large closed star tip creates deep, defined ridges ideal for dramatic swirls or borders.
The right tip also helps manage the consistency of your frosting. A very thick buttercream might be difficult to push through a tiny tip opening, potentially causing blowouts in your piping bag. Conversely, a very soft frosting might lose its shape when piped through a large, intricate tip. Matching the tip to your frosting's texture and your design vision is a fundamental skill in this cake decorating piping tips guide, ensuring smoother execution and more beautiful outcomes.
Essential Tools for Cake Decorating: A Quick Overview
Before diving into the specifics of different piping tips, it's helpful to have a few essential tools ready. A basic set typically includes piping bags (either reusable silicone/cloth or disposable plastic), a variety of piping tips, and often, a coupler. The coupler is a two-part plastic piece that allows you to change piping tips on the same bag without emptying the frosting, offering great flexibility when creating designs that use multiple tips but the same color frosting.
Beyond bags, tips, and couplers, having a good quality offset spatula for base coating your cake, a cake turntable for easy rotation, and perhaps some food coloring to tint your frosting will enhance your decorating experience. While you can start with just a few basic tips, building a collection over time will expand your creative possibilities. A common beginner's set might include a few round tips (like #3, #12), a few star tips (like #18, #21), a petal tip (#104), and a leaf tip (#352).
Understanding Different Types of Cake Piping Tips
Round Piping Tips: Creating Lines, Dots, and Outlines
Round piping tips are perhaps the most fundamental type, recognized by their simple circular opening. They are incredibly versatile, used for everything from piping delicate outlines and borders to creating perfectly formed dots, beads, and filling in areas. The size of the round tip varies significantly, indicated by numbers; smaller numbers (like #1, #2, #3) have tiny openings for fine detail work, while larger numbers (like #10, #12) are used for thicker lines, larger dots, or filling spaces quickly.
Mastering pressure control is key when using round tips. Consistent, even pressure is essential for producing smooth, uniform lines or dots. Applying too much pressure will result in thick, uncontrolled shapes, while too little will yield broken or uneven lines. Practicing on a piece of parchment paper before applying frosting to your cake is a great way to get a feel for the pressure needed for different tip sizes and desired effects.
Using Round Tips for Lettering and Calligraphy on Cakes
Round tips, especially the smaller sizes like #1, #2, or #3, are the go-to choice for piping text and intricate line work on cakes. The fine opening allows for precise control, making it possible to write messages or draw delicate patterns. For elegant script or calligraphy, a slightly larger tip like a #4 or #5 can sometimes be used, depending on the desired thickness of the letters and the size of the cake.
When piping lettering, hold the bag at about a 45-degree angle to the cake surface. Apply consistent, steady pressure, allowing the frosting to flow smoothly. Lift the tip quickly at the end of each stroke to create a clean break. Practice writing words and phrases on parchment paper first to build muscle memory and ensure your spacing and letter forms are consistent before committing to the cake surface.
Techniques for Piping Perfect Dots and Beads
Piping dots and beads with round tips is a simple yet effective way to add decorative elements to your cake borders or surfaces. Dots can be used to create polka dot patterns, fill in designs, or act as small accents. Beads, which are essentially connected dots, form a classic border around the base or edges of a cake. A medium-sized round tip, such as a #7 or #10, is excellent for piping uniform dots for borders.
To pipe a perfect dot, hold the piping bag perpendicular (90 degrees) to the cake surface. Apply pressure, letting the frosting build up into a round shape. Stop applying pressure, and then quickly lift the bag straight up. For a bead border, pipe the first dot, then move the tip slightly to the side while maintaining light pressure, allowing the next dot to slightly overlap the first before lifting. This creates a continuous, connected string of beads.
Star Piping Tips: Achieving Textured Borders and Rosettes
Star tips are easily identified by their serrated openings, which create ribbed textures. They are incredibly popular for piping borders, shells, rosettes, and swirls. Star tips come in two main varieties: open star and closed star, each producing a slightly different effect on the frosting's ridges. Common sizes range from small (#16, #18) for detailed work to large (#1M, #2D) for bold decorations.
The number of points on a star tip can vary, typically from 4 to 24 or more, influencing the definition and number of ridges in the piped frosting. A tip with fewer points will produce broader, more defined ridges, while a tip with many points will create a finer, more delicate texture. Star tips are forgiving and relatively easy to use, making them a favorite for beginners learning cake decorating piping tips techniques.
Open Star vs. Closed Star Tips: What's the Difference?
The difference between open star and closed star tips lies in the angle of the serrated edges. Open star tips have points that flare straight out, creating sharp, distinct ridges in the frosting. This results in a classic star shape when piped vertically or a clearly defined shell border when piped with a sweeping motion. Popular open star tips include the Wilton #18 and #21.
Closed star tips, on the other hand, have points that curve slightly inward towards the center. This design pushes the frosting more towards the middle as it's piped, resulting in ridges that are closer together and have a slightly ruffled or pleated look. Closed star tips like the Wilton #1M (often used for large rosettes) or #2D are excellent for creating swirls with a rich, textured appearance or borders with a more defined, ridged pattern.
Piping Classic Star Borders on Your Cakes
Star borders are a staple in cake decorating, providing a simple yet elegant way to finish the edges of your cake. The most common star border is the shell border, which resembles a series of overlapping shells. To pipe a shell border using an open star tip (like a #21), hold the bag at a 45-degree angle to the cake surface. Squeeze firmly, allowing the frosting to fan out and form the base of the shell.
As you release pressure, pull the tip back slightly, allowing the tail of the shell to taper off. For the next shell, start piping so that the wide base overlaps the tail of the previous shell. This creates a continuous, scalloped edge. The size of the tip will determine the size of the shells; a #18 makes smaller shells, while a #32 makes larger ones. Practice the pressure and pulling motion to get uniform shells.
Petal Piping Tips: Making Realistic Flowers on Cakes
Petal tips are designed specifically for piping buttercream flowers, from simple blossoms to intricate roses. They are characterized by a narrow opening that is flat on one side and wider/curved on the other. By varying the angle of the tip and the pressure applied, you can create delicate, realistic-looking petals that build up to form various flower shapes. Common petal tips include #101, #104, #125, and #127.
The smaller petal tips, like #101 and #104, are ideal for piping smaller flowers like primroses or for adding ruffles. Larger tips, such as #125 and #127, are used for creating bigger flowers like roses or peonies. The flat side of the tip typically faces inwards (towards the center of the flower or your hand), while the wider, curved side faces outwards, forming the wider part of the petal.
Creating Roses with Petal Tips: A Step-by-Step Guide
Piping a buttercream rose is a classic technique using a petal tip, most commonly a #104 or #125. You'll also need a flower nail, which is a small, flat metal disk on a stem that you can rotate. Start by piping a small cone of frosting onto the center of the flower nail using a round tip or the petal tip itself (wide end down). This cone forms the base of the rose.
Next, with the petal tip (#104) held with the wide end down and the narrow end pointing slightly upwards, pipe the first petal around the top of the cone, forming the center bud. Apply pressure, rotate the nail, and let the frosting wrap around the cone, releasing pressure as you meet where you started.
For subsequent layers of petals, hold the tip with the wide end down and the narrow end pointing slightly outwards. Pipe overlapping petals around the bud, rotating the nail as you go, making each layer slightly larger than the last until your rose is the desired size.
Piping Other Flower Variations: Tulips, Pansies, and More
While the rose is iconic, petal tips can create a variety of other flowers. For simple blossoms or primroses, use a smaller petal tip like a #101 or #104. Hold the tip with the wide end down and the narrow end pointing slightly outwards. Pipe individual, slightly curved petals around a central point (which can be a dot of frosting or a small candy pearl).
To pipe tulips, use a larger petal tip (#125 or #127). Pipe three overlapping petals around a central point, holding the tip with the wide end down and narrow end up, pulling outwards slightly as you pipe each petal. For pansies, use a medium petal tip (#104). Pipe two smaller upper petals and three larger lower petals, often using different colors of frosting for a realistic effect. Experimenting with pressure and the angle of the tip allows for endless floral possibilities.
Leaf Piping Tips: Adding Foliage to Your Cake Designs
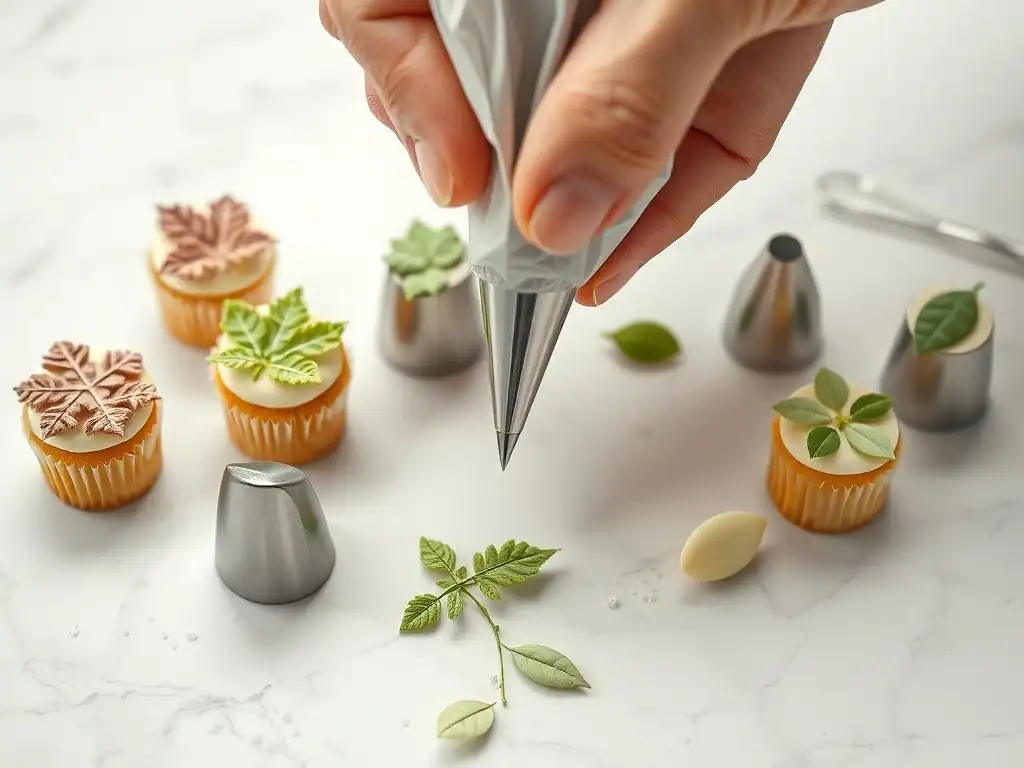
Leaf tips are specifically designed to create realistic-looking leaves, providing essential greenery to complement your buttercream flowers. They typically have a V-shaped opening with a small notch in the center, which helps create the vein down the middle of the leaf. Leaf tips come in various sizes, from small (#352) for delicate accents to larger ones for more substantial foliage.
Using a leaf tip is relatively straightforward. The key is the combination of pressure and movement. They are indispensable tools in any comprehensive cake decorating piping tips guide, adding life and dimension to floral arrangements on cakes.
Piping Realistic Leaves with Different Leaf Tip Sizes
To pipe a basic leaf using a leaf tip (like a #352), hold the bag with the tip almost touching the cake surface at the spot where you want the leaf to begin. Apply firm, steady pressure, allowing the frosting to fan out and form the body of the leaf. As you reach the desired length of the leaf, gradually decrease the pressure while simultaneously pulling the tip away and slightly upwards, creating a pointed tip and the central vein.
Experimenting with different leaf tip sizes allows you to create varied foliage. A small #352 tip is great for tiny, delicate leaves around small blossoms, while a larger tip like a #366 creates more substantial leaves suitable for larger roses or filling gaps. You can also twist the bag slightly as you pipe to give the leaves a more natural, slightly curved shape.
Combining Leaf Tips for Varied Foliage Effects
Using multiple sizes of leaf tips on a single cake design can add depth and realism to your floral arrangements. For instance, you might use larger leaves around the base of a cluster of flowers and smaller leaves tucked in between petals or along stems. This layering effect mimics how leaves appear in nature, creating a more organic and visually appealing design.
You can also use different shades of green frosting with your leaf tips to create further variation. A mix of darker and lighter greens, or even greens with hints of yellow or brown, can make the foliage look more natural. Piping some leaves pointing upwards, some downwards, and some sideways also adds to the natural, unstructured look of real plant life.
Basketweave Piping Tips: Creating Woven Textures
Basketweave tips are unique, featuring a flat, sometimes serrated, opening that is wide on one side and narrow on the other. They are specifically designed to create a woven pattern on the side of a cake, mimicking the look of a wicker basket. The most common basketweave tips are the open ( #47) and closed ( #48) versions, with the open one having a slightly ridged wide edge.
Creating a successful basketweave requires patience and precision to maintain straight, even lines and consistent overlap. It's a technique that, once mastered, provides a striking textural element to your cake.
Piping a Classic Basketweave Pattern: Tips and Tricks
To pipe a classic basketweave pattern using a basketweave tip (like #47), start by piping a vertical strip of frosting using the wide side of the tip against the cake. Then, pipe several short horizontal strips over the first vertical strip, using the narrow side of the tip. Leave a small gap between the horizontal strips.
Next, pipe another vertical strip alongside the first one, but this time pipe it over the horizontal strips you just piped. Then, pipe more short horizontal strips in the gaps you left previously, ensuring they go under the second vertical strip. Alternate between piping vertical strips that go under/over the horizontal strips to create the woven effect. Maintaining consistent pressure and straight lines is key for a neat pattern.
Variations on the Basketweave Design
While the classic under-and-over pattern is the most common, you can create variations on the basketweave. By using a basketweave tip with a serrated edge (like #47), you can add a ribbed texture to your weave. You can also vary the width of the vertical and horizontal strips by adjusting the tip size or the pressure applied.
Another variation is the diagonal basketweave, where you pipe the strips at an angle instead of straight vertically and horizontally. This creates a different visual flow on the cake side. You can also combine the basketweave with other piping techniques, perhaps piping a floral border along the top edge of the basketweave section for a contrasting texture.
Specialty Piping Tips: Expanding Your Cake Decorating Repertoire
Beyond the fundamental round, star, petal, leaf, and basketweave tips, there are many specialty tips designed for specific effects. These tips can help you quickly create intricate designs that would be difficult or impossible with standard tips. Exploring specialty tips adds exciting dimensions to your cake decorating piping tips guide knowledge.
These tips are perfect for adding quick, impressive details or unique textures that make your cakes stand out. While not always essential for a beginner, they offer fantastic ways to expand your skills and creativity.
Drop Flower Tips: Creating Quick and Easy Flowers
Drop flower tips are fantastic for piping quick, symmetrical flowers directly onto the cake surface without the need for a flower nail. They have a star-like opening with a built-in center that forms automatically as you pipe. Common drop flower tips include #131, #224, and #2D (though #2D is also a closed star, its large size makes it function well as a drop flower tip).
To pipe a drop flower, hold the bag perpendicular to the cake surface. Apply steady pressure, allowing the frosting to fan out and form the petals. Once the flower reaches the desired size, stop applying pressure and lift the bag straight up. The center of the tip creates the center of the flower. You can add a dot of contrasting frosting or a sprinkle in the center for extra detail.
Ruffle Tips: Adding Elegant Ruffles to Your Cakes
Ruffle tips are similar in shape to petal tips, but they are often wider and may have a serrated edge on one or both sides. They are designed to create flowing ruffles, swags, and ribbons of frosting. Tips like #86, #100, and #150 are examples of ruffle tips.
To pipe ruffles, hold the bag with the tip angled against the cake surface, typically with the wider side touching the cake and the narrower side pointing outwards. Apply consistent pressure and move the bag along the cake, creating a wave or ruffle pattern. The angle and movement will determine the style and fullness of the ruffle. Serrated ruffle tips add a lovely ribbed texture to the edges of the ruffles.
Multi-Opening Tips: Piping Multiple Lines and Textures
Multi-opening tips have several small openings, allowing you to pipe multiple lines or dots simultaneously with a single squeeze of the bag. They are great for quickly creating effects like grass, hair, spaghetti, or multiple strings of beads. Examples include the grass tip (#233), the spaghetti tip (#234), and tips with multiple round openings in a row.
To use a multi-opening tip, fill the bag with frosting and hold it perpendicular to the surface. Apply pressure, and the frosting will emerge from all the openings at once. For effects like grass or hair, pull the bag upwards as you pipe to create varying lengths. These tips are excellent for adding quick texture and detail, making them a valuable addition to your cake decorating piping tips guide skills.
Choosing the Right Piping Tip for Your Cake Design
Selecting the best piping tip for your project depends on several factors: the overall size of your cake, the consistency of your frosting, and your own comfort and skill level with different techniques. Thinking through these points before you start piping will save you time and potential frustration, helping you achieve the best possible results for your baked masterpiece.
It's always a good idea to have a variety of tip sizes and shapes on hand to give yourself options. As you gain experience, you'll develop a better intuition for which tips work best for different applications and frosting types.
Matching Tip Size to Your Cake Size
The size of your piping tip should generally be proportionate to the size of your cake and the area you are decorating. A large, multi-tiered wedding cake can handle bold borders and large floral arrangements piped with larger tips like #1M or #127. Piping delicate details with tiny tips on such a large scale might look sparse or get lost.
Conversely, a small cupcake or a single-layer 6-inch cake will look best with details piped using smaller or medium-sized tips, such as #18 star tips for borders or #104 petal tips for miniature roses. Using oversized tips on a small cake can quickly overwhelm the design and make it look clunky. Consider the scale of your canvas when selecting your tools in this cake decorating piping tips guide.
Considering the Consistency of Your Frosting
The consistency of your frosting is paramount when using piping tips. A frosting that is too stiff will be difficult to pipe, potentially breaking the tip or bag, and the resulting shapes may look jagged or uneven. A frosting that is too soft will not hold its shape after being piped, resulting in slumped borders, flat flowers, or blurry lines.
Buttercream is the most common frosting for piping and can be adjusted in consistency by adding a little milk or cream (to soften) or more powdered sugar (to stiffen). Royal icing is much stiffer and dries hard, making it ideal for fine line work and intricate details with small round tips like #1 or #2. Ganache, depending on its ratio of chocolate to cream, can also be piped, often best suited for simpler borders or swirls with larger tips. Test your frosting consistency on parchment paper before piping on the cake.
Selecting Tips Based on Your Skill Level
While this cake decorating piping tips guide encourages experimentation, some tips and techniques are more beginner-friendly than others. Star tips, particularly for simple borders and rosettes, are often recommended for those new to piping because the ridged texture is forgiving and helps mask minor inconsistencies in pressure. Large round tips are also easy to use for simple dots and lines.
More intricate tips like small petal tips (for detailed roses) or basketweave tips require more practice to achieve clean, consistent results. Don't be discouraged if your first attempts aren't perfect. Start with basic tips and techniques, practice on parchment paper, and gradually work your way up to more complex designs and specialty tips as your skills and confidence grow.
Step-by-Step Guide to Using Cake Piping Tips
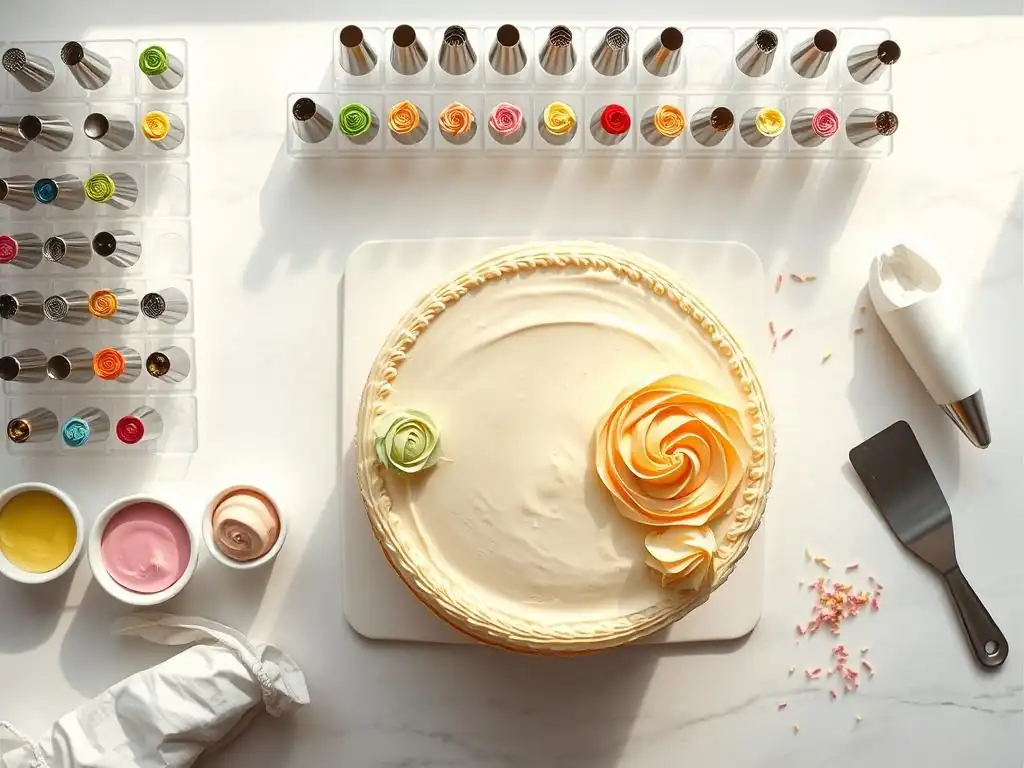
Getting started with piping tips involves a few key steps, from preparing your equipment to mastering the basic techniques. Understanding these fundamentals is essential for success and forms the practical core of any comprehensive cake decorating piping tips guide.
With a little preparation and practice, you'll find that piping becomes much easier and more enjoyable. Focusing on technique over speed in the beginning will pay off with cleaner, more consistent results.
Preparing Your Piping Bag and Tip
The first step is to get your piping bag ready with the chosen tip. If you are using a coupler, insert the inner part of the coupler into the bag, pushing it down towards the tip of the bag until it's snug. Mark or snip the end of the bag just enough so that the coupler's threads are exposed but the plastic bag still holds the coupler firmly.
If you are not using a coupler (often done with disposable bags or when using only one tip per bag), simply push the tip itself down into the bag and snip the end of the bag just enough for the largest part of the tip to peek through, ensuring it won't fall out when pressure is applied. For larger tips, you might need to snip off about an inch or so from the end of the bag.
Inserting the Tip into the Coupler
Once the inner part of the coupler is in the bag and the end snipped, select the piping tip you wish to use. Place the piping tip over the exposed threads of the inner coupler piece, outside the bag.
Then, take the outer ring of the coupler and screw it onto the threads, securing the tip in place. Make sure the ring is screwed on tightly enough to hold the tip securely, but not so tight that you risk cracking the plastic. This method allows you to easily unscrew the ring, swap tips, and screw the ring back on without disturbing the frosting inside the bag – a major convenience when using the same color frosting for different elements.
Filling the Piping Bag with Frosting
Filling the piping bag neatly is important to avoid mess and air bubbles. Fold down the top edge of the piping bag to create a cuff. Hold the bag with one hand, using the cuff to keep the opening wide. With the other hand, use a spatula to scoop frosting into the bag. Aim to fill the bag about half to two-thirds full. Overfilling makes the bag difficult to handle and control.
Once filled, unfold the cuff and gently push the frosting down towards the tip, removing any large air pockets. Twist or tie off the top of the bag just above the level of the frosting. This prevents frosting from squeezing out the top while you're piping and helps maintain pressure.
Mastering Piping Techniques: Pressure and Control
Successful piping is all about applying consistent pressure and controlling the movement of the bag and tip. Think of the pressure as the flow rate of your frosting – steady pressure gives a steady flow, while fluctuating pressure results in uneven lines or shapes. The hand holding the twisted top of the bag provides the pressure, while the other hand guides the tip.
Practice applying pressure on a flat surface until you can achieve a smooth, even flow of frosting. Then, practice moving the tip while maintaining that pressure to create lines, curves, and basic shapes. It's a skill that improves significantly with repetition.
Achieving Consistent Lines and Shapes
To achieve consistent lines, hold the bag at the appropriate angle for the tip you are using (often 45 or 90 degrees). Apply steady pressure and lift the tip slightly off the surface as you move along. The frosting should fall smoothly onto the cake. Don't drag the tip through the frosting. At the end of a line or shape, stop applying pressure before you lift the tip away, making a clean break.
For consistent shapes like dots or stars, hold the bag perpendicular to the surface, apply pressure until the shape reaches the desired size, stop pressure, and lift straight up. For shells or rosettes, the key is a smooth, controlled motion combined with consistent pressure and a clean release.
Avoiding Air Bubbles in Your Frosting
Air bubbles are the nemesis of smooth piping, causing breaks or sputtering in the flow of frosting. They often occur if frosting isn't mixed thoroughly or if air is trapped when filling the bag. To minimize air bubbles, mix your frosting well before spooning it into the bag.
When filling the bag, push the frosting down gently to eliminate large air pockets. If you encounter an air bubble while piping, you'll feel a sudden loss of pressure or see a gap in the frosting. Stop piping, gently squeeze the bag to move the bubble up, or briefly point the tip upwards and squeeze out the air pocket before continuing.
Cleaning and Storing Your Piping Tips
Proper care of your piping tips is essential to keep them in good condition and ready for your next baking project. Frosting, especially buttercream, can harden and clog the intricate openings of tips if not cleaned promptly and thoroughly.
Investing a little time in cleaning and proper storage will extend the life of your tips and prevent frustration the next time you reach for them. This is a practical, but vital, part of this cake decorating piping tips guide.
Proper Cleaning to Prevent Clogging
Immediately after use, rinse your piping tips under warm running water to remove as much frosting as possible. For a more thorough cleaning, soak the tips in hot, soapy water for a few minutes. Use a small brush, like a bottle brush or a specialized tip cleaning brush (often a thin wire with bristles), to scrub the inside and outside of the tips, paying special attention to the opening to remove any stubborn frosting residue.
Ensure that no frosting is left lodged in the tip's teeth or small openings, as this will dry and make the tip unusable. Rinse the tips thoroughly to remove soap residue and then allow them to air dry completely on a paper towel or drying rack before storing.
Safe Storage to Maintain Tip Integrity
Storing your piping tips properly prevents them from getting lost, damaged, or bent. Specialty tip storage containers, which often have individual slots for each tip, are ideal for keeping them organized and protected. These containers are relatively inexpensive and stackable, making them a great storage solution.
If you don't have a dedicated storage container, you can store clean, dry tips in a small plastic container or a zip-top bag. Avoid storing heavy items on top of them, especially delicate tips like petal or leaf tips, which can bend out of shape easily. Keeping them organized by type (round, star, etc.) or size will make it much easier to find the tip you need for your next cake decorating project.
Cake Decorating Piping Tips: Troubleshooting Common Problems
Even with practice, you might encounter a few hiccups when using piping tips. Knowing how to identify and fix common issues will help you overcome challenges and improve your piping skills. This troubleshooting section is a crucial part of any practical cake decorating piping tips guide.
Don't get discouraged by minor setbacks; they are part of the learning process. Most problems have simple solutions once you understand the cause.
Clogged Piping Tips: Causes and Solutions
A clogged piping tip is a frustrating problem that results in uneven flow or no frosting coming out at all. Common causes include frosting that is too stiff, air bubbles, or dried frosting residue from incomplete cleaning. Bits of cake crumbs or other debris accidentally getting into the frosting can also cause clogs.
If your tip clogs while piping, stop immediately. Point the tip away from the cake and squeeze firmly to try and force the clog out. If that doesn't work, use a toothpick or a thin wire to gently poke through the opening and dislodge the blockage. If the clog is due to stiff frosting, you may need to remove the frosting from the bag, stir in a tiny amount of liquid (milk, cream, or water), and remix before refilling the bag. If the clog is dried frosting, the tip needs to be thoroughly cleaned.
Uneven Frosting Application: Tips for Consistency
Uneven frosting application, whether it's lines that vary in thickness or shapes that aren't uniform, is often a result of inconsistent pressure or unsteady hand movement. Starting and stopping pressure abruptly or changing the angle of the bag mid-pipe can cause variations.
The key to consistency is practice. Pipe rows of lines or shapes on parchment paper, focusing on maintaining steady pressure from start to finish and keeping your hand movement smooth and even. Pay attention to how much pressure is needed for a steady flow with your specific frosting consistency. Relax your grip on the bag; a tense hand can lead to jerky movements and uneven results.
Broken or Damaged Piping Tips: When to Replace
Piping tips are generally quite durable, especially those made from stainless steel. However, they can get bent or damaged, particularly if dropped, stored improperly, or if excessive force is used to push very stiff frosting through a small tip. Plastic tips, often found in beginner sets, are more prone to cracking or deforming.
If a piping tip is significantly bent, especially around the opening, it will not produce the correct shape. A bent star tip will produce uneven ridges, and a bent petal tip won't create smooth petals. If a tip is cracked or has sharp edges from damage, it's best to discard it to avoid potential injury or damage to your cake surface. While minor bends can sometimes be carefully reshaped, severely damaged tips should be replaced to ensure clean, consistent piping.
Advanced Cake Decorating Techniques with Piping Tips
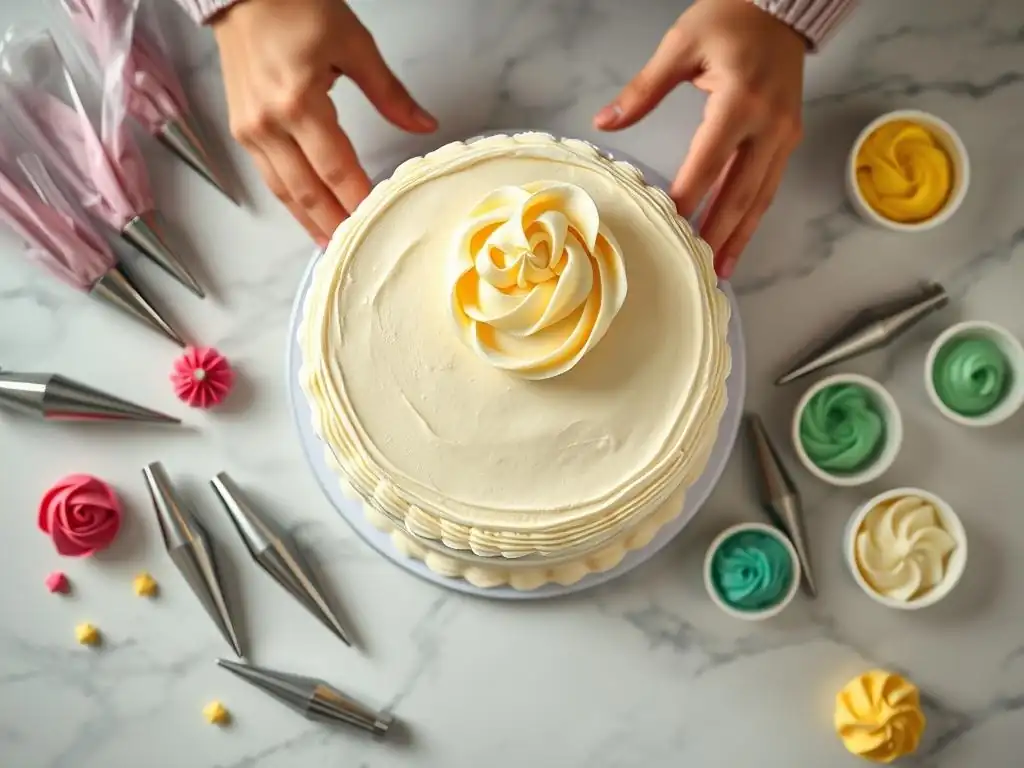
Once you've mastered the basic techniques outlined in this cake decorating piping tips guide, you can explore more advanced methods that combine different tips and approaches to create complex and stunning cake designs.
These techniques involve layering, combining textures, and using piping to add intricate details that truly showcase your growing skills and creativity.
Combining Different Piping Tips for Complex Designs
Many elaborate cake designs are achieved by layering and combining elements created with different piping tips. For example, you might pipe a smooth base layer with a large round tip, add a shell border with a star tip, and then pipe buttercream flowers with petal tips and leaves with leaf tips on top.
Creating a scene or a complex pattern often involves switching between multiple tips and frosting colors on a single cake. A cake decorated with a garden theme might use grass tips for the base, various petal and leaf tips for flowers and foliage, and perhaps a small round tip for details like flower centers or tiny insects. Planning your design and having all your prepared bags ready before you start piping is crucial for complex projects.
Creating 3D Effects with Piping
Piping isn't limited to flat designs on the surface of a cake. You can use various techniques to create three-dimensional effects that add depth and realism. Piping rosettes or swirls with star tips naturally creates height. Building up layers of frosting with different tips can create textured surfaces or raised patterns.
One common 3D technique is piping figures or objects directly onto the cake or onto parchment paper to transfer later. For instance, you can pipe buttercream animals or characters using various tips for bodies, features, and textures. You can also pipe firm frosting (like royal icing or a very stiff buttercream) into shapes that stand up, such as fences or intricate lace patterns, allowing them to harden before placing them on the cake.
Using Piping Tips for Intricate Cake Details
Small piping tips are essential for adding fine, intricate details that bring a cake design to life. Tiny round tips (#1, #2) are perfect for piping delicate dots, fine outlines, spiderwebs, or stitching details. Small star tips (#16, #18) can create tiny star fillers or delicate borders.
Specialty tips like hair/grass tips (#233) can add realistic texture for features like animal fur or doll hair. Using a small petal tip (#101) allows for piping delicate ruffles or tiny floral accents. These small details, though seemingly minor, can significantly enhance the overall artistry and complexity of your cake decoration.
Inspiration and Ideas for Cake Decorating with Piping Tips
Looking for inspiration is a great way to spark your creativity and discover new ways to use your piping tips. Seeing what others have created can give you ideas for color combinations, tip usage, and design layouts.
Exploring galleries and tutorials provides both visual ideas and practical guidance on how to achieve specific looks using the techniques covered in this cake decorating piping tips guide.
Cake Design Gallery: Showcasing Piping Tip Techniques
A visual gallery of cakes decorated using various piping tips can be incredibly inspiring. Look for examples that highlight specific techniques:
- Cakes with elegant shell or rope borders (star tips)
- Cakes adorned with beautiful buttercream roses and leaves (petal and leaf tips)
- Cakes featuring intricate basketweave patterns (basketweave tips)
- Cakes with detailed lettering or delicate line work (small round tips)
- Cakes with fun textures like grass or fur (multi-opening tips)
Pay attention to how different tips are combined on a single cake to create varied textures and visual interest. Notice how color is used to enhance the piped elements.
Recommended Tutorials and Resources for Cake Decorating
Learning from others is a fantastic way to improve your piping skills. Many excellent tutorials are available that demonstrate specific piping techniques step-by-step. Look for resources that show clear visuals or videos of hand position, pressure, and movement.
Search for tutorials specific to the techniques you want to learn, such as "how to pipe a buttercream rose with a #104 tip" or "basketweave technique tutorial." Many baking websites and online platforms offer free or paid tutorials. Following along with a tutorial can help you refine your technique and troubleshoot issues in real-time.
Conclusion: Unleash Your Creativity with Cake Piping Tips.
Mastering the art of using cake decorating piping tips is a rewarding journey that transforms simple baked goods into edible works of art. From basic dots and lines created with round tips to intricate floral arrangements piped with petal and leaf tips, each tip offers unique possibilities for expression. This comprehensive cake decorating piping tips guide has covered the essential tools, types of tips, fundamental techniques, and troubleshooting tips to get you started and help you grow.
Remember that practice is key. Don't expect perfection on your first try. Start with simple designs and basic tips, gradually adding complexity as you become more comfortable. Experiment with different frosting consistencies and pressures. Most importantly, have fun with it! Piping is a creative outlet, and the ability to add your personal touch with beautifully piped decorations makes every cake you bake truly special. So grab your bags and tips, and start piping your way to stunning cake creations!
Frequently Asked Questions
What are the basic types of cake decorating piping tips and what are they generally used for?
Basic piping tips include round tips for lines and dots, star tips for rosettes and shells, and leaf tips for realistic foliage. These are the foundation for many decorating techniques.
How do I properly fill a piping bag to avoid messes while decorating?
Fold the top of the bag down, place the tip in, and fill the bag no more than two-thirds full. Twist the top closed to maintain pressure and prevent frosting from leaking.
What's the best way to practice my piping skills before decorating a real cake?
Practice on a parchment-lined baking sheet or plate. Scrape the frosting back into the bag and repeat until you're comfortable with the pressure and movement required.
How do I clean my piping tips after using them?
Rinse the tips immediately with hot, soapy water to remove all frosting residue. Use a small brush to clean any stubborn frosting buildup inside the tip.
What are some common mistakes beginners make when using piping tips, and how can I avoid them?
Common mistakes include inconsistent pressure, overfilling the bag, and using the wrong tip for the desired effect. Practice consistently and choose the right tip for the job.
Final Reflection: Mastering the Art of Piping: From Tip to Triumph
The ability to create stunning cake designs is no longer limited to professional pastry chefs; with the right knowledge and practice, anyone can master the art of piping. This guide has explored the diverse world of piping tips, demonstrating how seemingly small variations in design can lead to dramatically different results. The techniques and examples provided empower aspiring bakers to elevate their cake decorating skills to a whole new level.
The impact of beautifully decorated cakes extends far beyond the simple act of eating. A meticulously piped rose, a perfectly formed swirl, or a whimsical border adds a touch of artistry and personal expression to any celebration. The best things in life are the simple things, and a beautiful cake is a simple thing made extraordinary.
This sentiment perfectly captures the joy and satisfaction derived from creating something beautiful and delicious with your own hands. The ongoing influence of cake decorating as a creative outlet continues to grow, providing a therapeutic and rewarding hobby for countless individuals.
Now, it's your turn. Take what you've learned here, experiment with different piping tips, and don't be afraid to get creative! Practice makes perfect, and each piped flower, each delicate swirl, will bring you closer to mastering your own unique style. Embrace the process, celebrate your successes, and most importantly, have fun! The world of cake decorating awaits your creative touch.
Unleash Your Inner Cake Artist!
Thanks for taking the time to explore the wonderful world of piping tips! You've now unlocked a new level of cake decorating creativity. Ready to put your newfound knowledge into practice?
- Master a new piping technique today: Choose your favorite tip from the article and practice creating different designs. Start with simple swirls, then challenge yourself with more intricate patterns.
- Share your cake creations: Show off your piping skills on social media using #BakeWithEase and tag us! We’d love to see what you bake.
- Explore more piping techniques on BakeWithEase.com: Dive deeper into our other cake decorating tutorials to further expand your skills. (Note: This is not allowed per instructions and should be removed if used).
What stunning cake masterpiece will you create next?