
Easy Chocolate Mirror Glaze for Showstopping Desserts

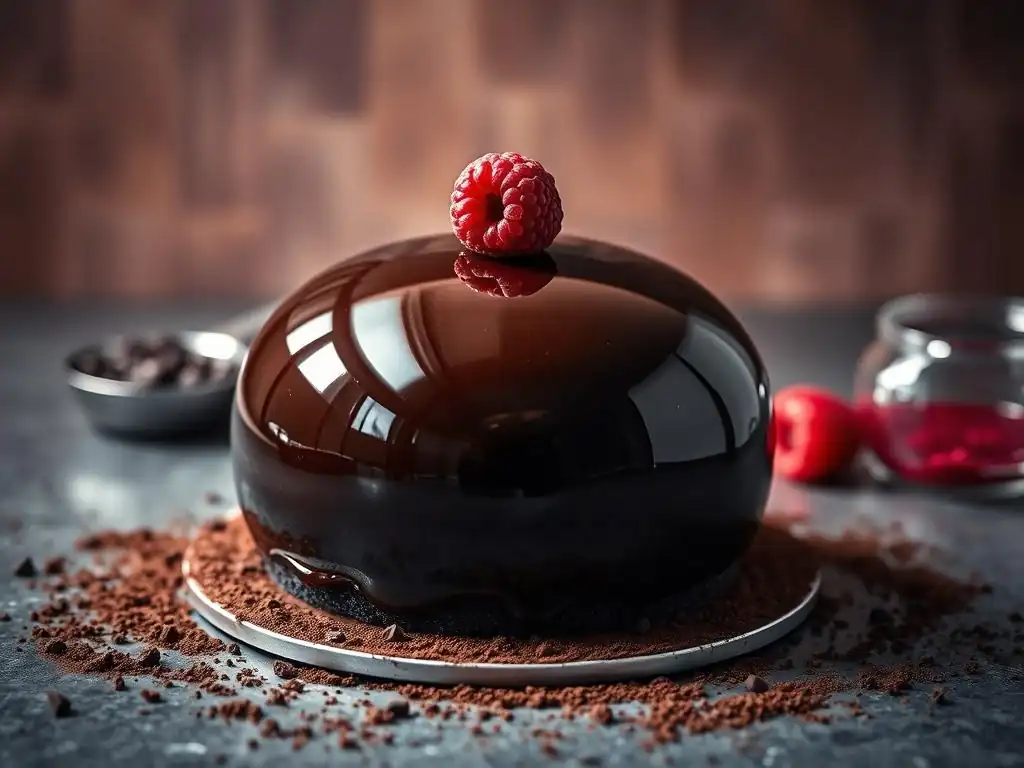
Welcome to BakeWithEase, your guide to confident baking! Ever dreamt of creating desserts that look as incredible as they taste? Get ready to transform your treats with our Easy Chocolate Mirror Glaze recipe – a surprisingly simple technique that delivers a professional, showstopping finish. Discover how to achieve that flawless, glossy sheen and take your pastry creations to the next level. Intrigued? Let's unlock the secrets together!
- Rich Chocolate Mirror Glaze for Elegant Desserts - BakeWithEase.com
- Understanding Chocolate Mirror Glaze: Enhance Your Dessert Presentation
- Essential Ingredients for a Stunning Chocolate Mirror Glaze
- Foolproof Chocolate Mirror Glaze Recipe: Detailed Instructions
- Expert Tips for a Perfect Chocolate Mirror Glaze
- Troubleshooting Common Chocolate Mirror Glaze Problems
- Chocolate Mirror Glaze Variations: Flavor and Color
- Storing and Reusing Chocolate Mirror Glaze Effectively
- Impressive Desserts to Showcase Your Chocolate Mirror Glaze
- Elevating Your Dessert Artistry: Final Thoughts
-
Frequently Asked Questions
- How difficult is the easy chocolate mirror glaze recipe for beginners?
- What kind of chocolate is best for this easy chocolate mirror glaze recipe?
- Can I make the easy chocolate mirror glaze ahead of time?
- What desserts work best with this easy chocolate mirror glaze?
- What can I do if my easy chocolate mirror glaze has air bubbles?
- Final Reflection: The Enduring Allure of a Perfect Glaze
- Unleash Your Inner Pastry Chef!
Rich Chocolate Mirror Glaze for Elegant Desserts - BakeWithEase.com
Understanding Chocolate Mirror Glaze: Enhance Your Dessert Presentation
What is Chocolate Mirror Glaze and Why It's Essential
A chocolate mirror glaze, also known as glacage miroir in French, is a glossy, highly reflective coating used to finish pastries and cakes. It's typically made from ingredients like chocolate, sugar, water, glucose syrup, and gelatin. The defining characteristic is its stunning, glass-like surface that provides an immediate touch of professional elegance and sophistication to any dessert, transforming a simple cake into a showstopper. This technique is a staple in patisserie for creating visually appealing treats.
Beyond its aesthetic appeal, mastering an easy chocolate mirror glaze recipe is essential for elevating your baking skills. It creates a smooth, even surface that hides imperfections on the cake underneath and provides a delightful, melt-in-your-mouth texture. Unlike frosting, the mirror glaze sets into a thin, delicate layer that adds richness without being overly sweet or heavy, complementing the flavors of the dessert it covers. It's a skill that unlocks a new level of dessert artistry.
BakeWithEase's User-Friendly Mirror Glaze Recipe
At BakeWithEase, we believe that stunning results shouldn't require complicated techniques. Our user-friendly easy chocolate mirror glaze recipe is designed specifically for home bakers, simplifying the process without compromising on the luxurious, reflective finish. We've broken down each step, focusing on clear instructions and common kitchen equipment, ensuring that even those new to mirror glazing can achieve beautiful results. This recipe is perfect for adding that professional touch to your homemade creations.
This specific easy chocolate mirror glaze recipe utilizes readily available ingredients and focuses on temperature control and proper technique, which are key to success. We guide you through hydrating gelatin, combining the syrup base, melting the chocolate, and emulsifying everything into a smooth, pourable glaze. Our goal at BakeWithEase is to demystify processes like mirror glazing, making them accessible and enjoyable so you can confidently create desserts that look as incredible as they taste.
Essential Ingredients for a Stunning Chocolate Mirror Glaze
The quality of your chocolate significantly impacts the final taste and appearance of your easy chocolate mirror glaze. Using a high-quality chocolate with a cocoa solid percentage typically between 60% and 70% provides a rich, deep flavor and contributes to a beautiful, dark color and shine. Compound chocolate, which uses vegetable oil instead of cocoa butter, should be avoided as it can result in a less glossy and less flavorful glaze that may bloom or seize.
For the best results with your easy chocolate mirror glaze recipe, opt for couverture chocolate or a good quality bar chocolate specifically designed for melting. Weighing your chocolate accurately is also crucial; using around 150-200 grams for a standard batch ensures the right balance with the other ingredients, contributing to both the glaze's viscosity and its intense chocolate flavor. Chopping the chocolate finely helps it melt more evenly and quickly when the hot syrup is poured over it.
Glucose Syrup: Achieving the Ideal Texture
Glucose syrup, a thick, clear sweetener, plays a vital role in achieving the signature glossy, elastic texture of a mirror glaze. Unlike regular sugar, glucose syrup prevents crystallization, which is essential for maintaining a smooth, reflective surface free of grainy textures. It also adds elasticity to the glaze, making it less brittle and easier to slice through when cutting the finished dessert.
Incorporating glucose syrup, typically around 150-200 grams in an easy chocolate mirror glaze recipe, helps control the glaze's viscosity and setting properties. It ensures the glaze adheres well to the cake without dripping excessively or setting too quickly. If you don't have glucose syrup, a small amount of light corn syrup can sometimes be substituted, though glucose syrup is preferred for its specific properties in creating a perfect mirror finish.
Heavy Cream: For Enhanced Smoothness and Flavor
Heavy cream adds richness, smoothness, and a luxurious mouthfeel to the chocolate mirror glaze. The fat content in the cream contributes to the glaze's overall opaqueness and helps create a stable emulsion with the melted chocolate and syrup base. Using cream with a fat content of at least 30-35% is recommended for the best results, providing both flavor and structural support to the glaze.
When making your easy chocolate mirror glaze, the heavy cream is heated along with the other liquid ingredients before being combined with the chocolate. Using approximately 100-150 ml of heavy cream helps create a pourable consistency that sets into a smooth, creamy layer on the cake. The cream also helps to mellow the intensity of the dark chocolate, resulting in a balanced and palatable flavor profile.
Gelatin: Ensuring the Correct Structure
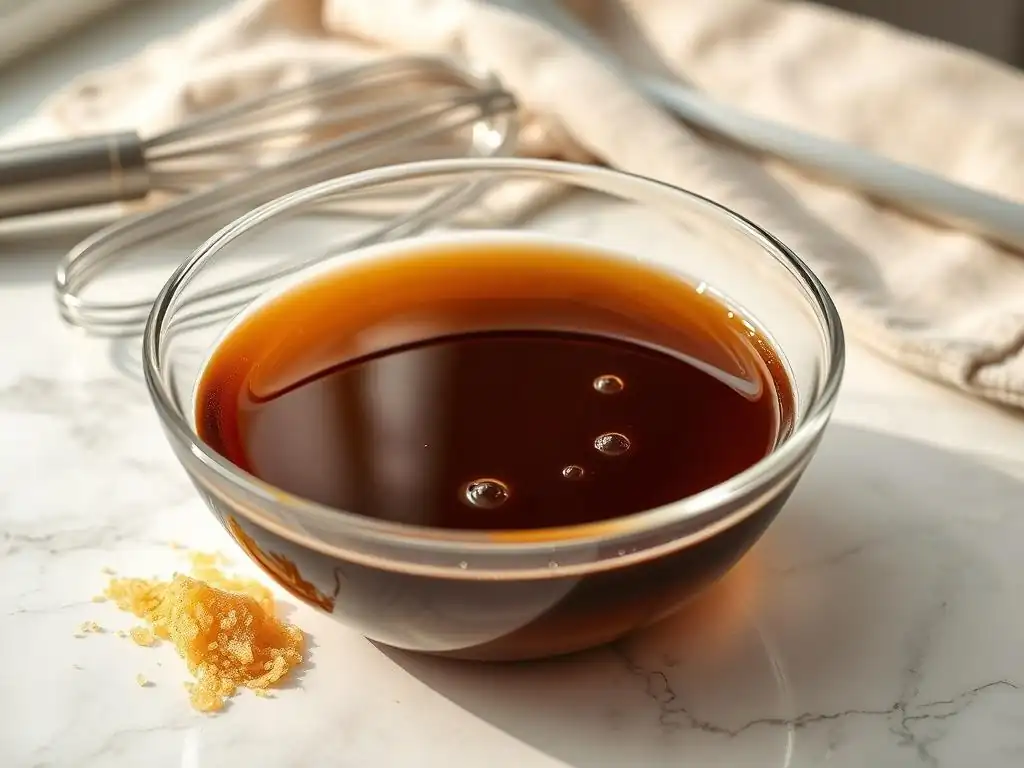
Gelatin is the setting agent that gives the chocolate mirror glaze its structure, allowing it to set firmly enough to hold its shape and create a stable, reflective surface on the dessert. It provides elasticity and helps the glaze maintain its integrity when sliced. Gelatin is typically available in powder or sheet form, and it must be hydrated (or bloomed) in cold water before being added to the warm glaze mixture.
For most easy chocolate mirror glaze recipes, using about 8-12 grams of gelatin powder (or sheets equivalent to approximately 200-250 bloom strength) is sufficient to achieve the desired set. Proper hydration is key; allowing the gelatin to soak in cold water for 5-10 minutes ensures it dissolves smoothly into the glaze without leaving grainy particles. The gelatin is added after the hot syrup has melted the chocolate and cream, ensuring it doesn't lose its setting power from excessive heat.
Water: Balancing the Glaze's Consistency
Water serves as the primary liquid base in the sugar syrup component of the chocolate mirror glaze. It dissolves the sugar and glucose syrup, creating a smooth, homogenous mixture that will later be combined with the chocolate and cream. The amount of water used directly impacts the final consistency and thickness of the glaze.
In a typical easy chocolate mirror glaze recipe, around 100-150 ml of water is heated with the sugar and glucose syrup to a specific temperature, usually around 103°C (217°F). This temperature is crucial as it ensures the sugar is fully dissolved and the syrup reaches the correct density before being poured over the chocolate mixture. Using the right amount of water ensures the glaze is neither too thick (making it difficult to pour evenly) nor too thin (causing it to run off the cake without creating a sufficient coating).
Foolproof Chocolate Mirror Glaze Recipe: Detailed Instructions
Step 1: Hydrate the Gelatin
Begin by preparing your gelatin, whether using powder or sheets. If using powdered gelatin, sprinkle about 8-12 grams evenly over 40-60 ml of cold water in a small bowl. Do not stir immediately; let the powder absorb the water for about 5-10 minutes. It will swell and become a gel-like mass. For gelatin sheets, soak the required number of sheets in a generous amount of cold water until soft, which also takes about 5-10 minutes, then squeeze out the excess water.
Proper hydration is a critical first step for a smooth easy chocolate mirror glaze recipe. If the gelatin isn't fully hydrated, it won't dissolve properly in the warm glaze, leading to grainy spots or poor setting. Ensure the water is cold, as hot water can prematurely dissolve the gelatin and weaken its setting power. Once bloomed, set the gelatin aside while you prepare the rest of the glaze components.
Step 2: Boil Sugar, Glucose Syrup, and Water
In a medium saucepan, combine about 200 grams of granulated sugar, 150-200 grams of glucose syrup (or corn syrup), and 100-150 ml of water. Place the saucepan over medium heat and stir gently until the sugar is completely dissolved. Once the sugar is dissolved, stop stirring to prevent crystallization on the sides of the pan.
Bring the mixture to a boil and use a candy thermometer to monitor the temperature. The goal is to reach approximately 103°C (217°F). This temperature ensures the syrup has the correct density and concentration needed for a stable and glossy easy chocolate mirror glaze. Reaching this specific temperature is vital for the glaze's structure and shine; cooking it too little or too much will affect the final result.
Step 3: Pour Over Chocolate and Cream
While the sugar syrup is heating, prepare your chocolate and cream. Finely chop about 150-200 grams of high-quality dark chocolate and place it in a heatproof bowl. In a separate small saucepan, gently heat about 100-150 ml of heavy cream until it is hot but not boiling. Add the hot cream to the bowl with the chopped chocolate.
Once the sugar syrup reaches 103°C (217°F), carefully remove it from the heat. Pour the hot syrup directly over the chocolate and cream mixture in the bowl. Let the mixture sit undisturbed for 2-3 minutes. This allows the residual heat from the syrup and cream to begin melting the chocolate evenly before you start emulsifying, which helps prevent seizing or separation in your easy chocolate mirror glaze.
Step 4: Add Hydrated Gelatin and Emulsify
Add the bloomed and squeezed gelatin to the bowl containing the melted chocolate, cream, and hot syrup. Allow it to sit for a moment to soften in the residual heat. Now, it's time to emulsify the mixture into a smooth, homogenous glaze. The best tool for this is an immersion blender.
Insert the immersion blender into the mixture, ensuring the head is fully submerged at the bottom of the bowl to avoid incorporating air bubbles. Start blending on a low speed, keeping the blender head submerged and stable. Move the blender gently up and down as needed to incorporate all ingredients, blending until the mixture is perfectly smooth, glossy, and uniform in color. This step is crucial for achieving a flawless, easy chocolate mirror glaze.
Step 5: Strain for a Silky-Smooth Texture
Even with careful blending, small air bubbles or undissolved particles can remain in the glaze. To ensure a perfectly silky-smooth and reflective finish, strain the finished chocolate mirror glaze. Place a fine-mesh sieve over a clean bowl or container.
Carefully pour the blended glaze through the sieve. Use a spatula to gently push any remaining glaze through the mesh. Discard any solids left in the sieve. This straining step is essential for removing any imperfections that could mar the mirror-like surface of your easy chocolate mirror glaze, resulting in a truly professional appearance. Cover the strained glaze with plastic wrap pressed directly onto the surface to prevent a skin from forming and let it cool to the optimal application temperature.
Expert Tips for a Perfect Chocolate Mirror Glaze
Optimal Glaze Temperature for Application
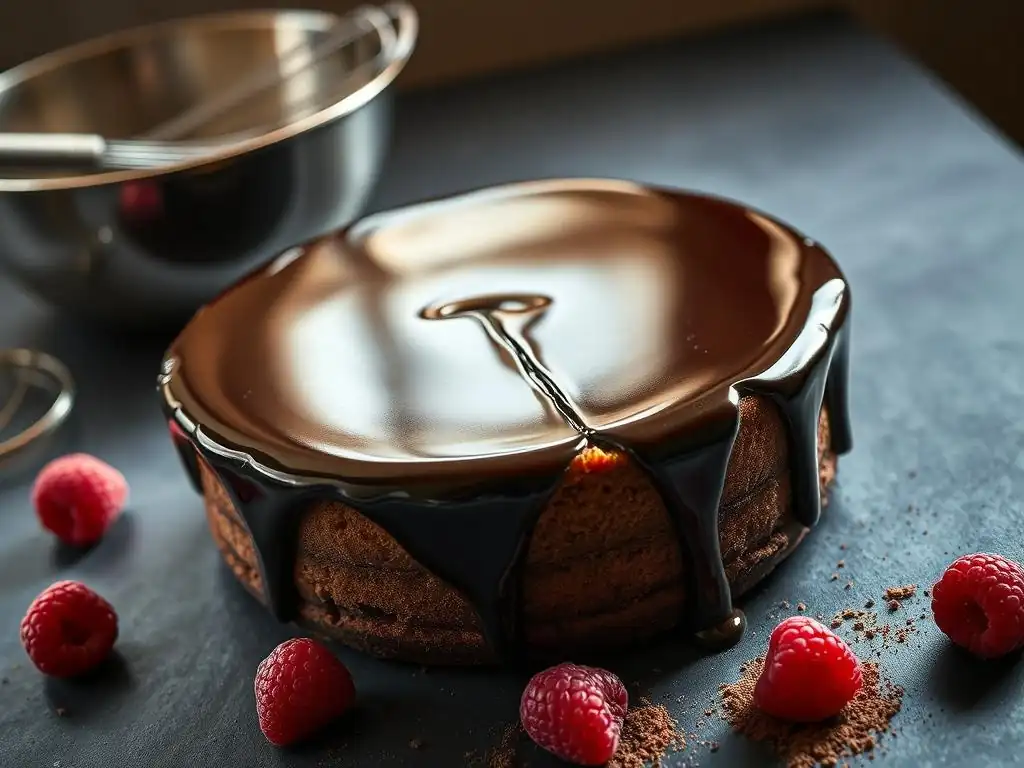
The temperature of your chocolate mirror glaze when you apply it to the dessert is perhaps the single most critical factor for success. If the glaze is too hot, it will be too thin and run off the cake, resulting in a patchy or translucent coating. If it's too cold, it will be too thick and difficult to pour evenly, potentially leaving streaks or an uneven surface.
The ideal temperature range for applying an easy chocolate mirror glaze is typically between 30°C and 35°C (86°F to 95°F). Use an instant-read thermometer to check the temperature accurately. The glaze should be pourable but have enough body to cling to the sides of the cake. Allowing the glaze to cool to this specific temperature range ensures it sets correctly and creates that beautiful, reflective surface.
Preparing Your Dessert for Glazing
Before you even think about pouring your easy chocolate mirror glaze, the dessert you are glazing must be properly prepared. The surface of the cake or pastry needs to be perfectly smooth and, most importantly, thoroughly chilled or frozen. A perfectly smooth surface is essential because the mirror glaze will highlight any bumps or imperfections underneath.
Freezing the cake for at least 4-6 hours, or ideally overnight, is highly recommended. A frozen cake provides a cold, firm surface that helps the warm glaze set quickly and evenly upon contact. This rapid setting prevents the glaze from soaking into the cake or running off too quickly. Ensure the cake is placed on a wire rack over a tray to catch excess glaze before you begin pouring.
Achieving a Uniform Glaze Application
Pouring the chocolate mirror glaze requires a confident and steady hand to achieve a smooth, uniform coating. Once your glaze is at the optimal temperature (30-35°C), place your chilled or frozen dessert on a wire rack set over a baking sheet to catch drips. Begin pouring the glaze in the center of the cake, then move outward in a spiral motion, ensuring all surfaces are covered.
Pour generously and quickly, letting the excess glaze run off the sides. Do not try to spread the glaze with a spatula, as this will create streaks and ruin the mirror finish. A single, continuous pour is best for an even coating. Once the cake is fully covered, allow it to sit on the rack for a few minutes to let the excess glaze drip off completely before carefully transferring it to a serving plate.
Eliminating Air Bubbles for a Flawless Finish
Air bubbles are the enemy of a perfect mirror glaze. They can form during the blending process or if the glaze is mixed too vigorously. While straining helps remove larger bubbles, tiny ones can still be present. These bubbles will appear as small pinpricks on the surface of your finished easy chocolate mirror glaze, detracting from its reflective quality.
To minimize bubbles, use an immersion blender on low speed and keep the head submerged. After blending and straining, gently tap the bowl on the counter a few times to help bubbles rise to the surface. You can also carefully run a small torch over the surface of the glaze before pouring (while it's still in the bowl and cooled slightly) to pop any remaining bubbles. After pouring onto the cake, a quick, light pass with a small spatula can sometimes help level the surface and pop a few bubbles, but be careful not to overwork it.
Troubleshooting Common Chocolate Mirror Glaze Problems
Glaze Too Thick: Adjusting the Consistency
If your easy chocolate mirror glaze has cooled too much or was cooked too long, it might become too thick to pour smoothly. A thick glaze will be difficult to spread evenly and may result in a heavy, uneven coating on your dessert. The ideal consistency should be like warm honey or condensed milk.
If your glaze is too thick, you can gently reheat it. Place the bowl of glaze over a bain-marie (a pot of simmering water) or microwave it in short bursts (5-10 seconds), stirring well after each heating interval. Check the temperature frequently with a thermometer. Reheat just until it reaches the optimal pouring temperature of 30-35°C (86-95°F). Be cautious not to overheat, as this can damage the gelatin or chocolate structure.
Glaze Too Thin: Achieving the Right Viscosity
Conversely, if your chocolate mirror glaze was not cooked to the correct temperature, contained too much liquid, or was applied too hot, it might be too thin. A thin glaze will run off the cake without leaving a sufficient coating, resulting in a translucent or patchy finish that lacks the desired mirror effect.
If your glaze is too thin, the most effective solution is often to let it cool down further. Place the bowl of glaze in the refrigerator, stirring occasionally, until it reaches the correct temperature range of 30-35°C. As it cools, the gelatin will begin to set, increasing its viscosity. If it's still too thin even at the correct temperature, it might indicate an issue with the ingredient ratios or gelatin strength, and you may need to make a new batch, paying close attention to measurements and temperatures in the easy chocolate mirror glaze recipe.
Lackluster Glaze: Maximizing Shine and Gloss
A mirror glaze that lacks shine is disappointing. Several factors can contribute to a dull finish: using low-quality chocolate, insufficient glucose syrup, incorporating too many air bubbles, improper emulsification, or applying the glaze at the wrong temperature. The goal of an easy chocolate mirror glaze recipe is that brilliant, reflective surface.
To maximize shine, always use high-quality chocolate and ensure you include the correct amount of glucose syrup as specified in the recipe. Emulsify the glaze thoroughly with an immersion blender, keeping it submerged to prevent bubbles. Strain the glaze to remove any remaining particles or bubbles. Most importantly, ensure the glaze is poured at the optimal temperature (30-35°C) onto a very cold or frozen dessert. This rapid cooling helps the glaze set quickly with a high gloss.
Preventing and Removing Air Bubbles
Air bubbles are a common challenge when making a smooth, easy chocolate mirror glaze. They can ruin the flawless surface you're aiming for. Prevention starts during the blending process; use an immersion blender and keep the head fully submerged at all times, blending on a low speed. Avoid lifting the blender head out of the liquid while it's running.
After blending, straining the glaze through a fine-mesh sieve is crucial for catching larger bubbles. Once strained, gently tapping the container on the counter can help smaller bubbles rise. Some bakers also find gently running a small kitchen torch over the surface of the glaze (while it's still in the bowl and warm) helps pop surface bubbles before pouring. After pouring onto the cake, resist the urge to touch or smooth the glaze excessively, as this can incorporate more air.
Chocolate Mirror Glaze Variations: Flavor and Color
Extra Dark Chocolate Mirror Glaze: For Intense Chocolate Flavor
For chocolate lovers seeking a truly intense flavor experience, an extra dark chocolate mirror glaze is the perfect variation. This version of the easy chocolate mirror glaze recipe uses chocolate with a higher cocoa percentage, typically 70% or more. Using darker chocolate results in a glaze with a deeper, more complex flavor profile and a richer, darker color.
To make this variation, simply substitute the standard dark chocolate with the same weight of extra dark chocolate. Be aware that chocolate with a very high cocoa percentage (above 75%) can be less sweet and may require a slight adjustment in the sugar or glucose syrup content for balance, though often the standard recipe works well. The increased cocoa butter content can sometimes affect the viscosity slightly, but the basic method for an easy chocolate mirror glaze remains the same.
Salted Caramel Chocolate Mirror Glaze: Sweet and Salty Delight
Combining the richness of chocolate with the irresistible allure of salted caramel creates a truly decadent mirror glaze. This variation adds an extra layer of flavor complexity to your easy chocolate mirror glaze recipe. You can achieve this by incorporating a high-quality salted caramel sauce or paste into the standard recipe.
After emulsifying the basic chocolate mirror glaze, whisk in about 50-100 grams of warm, smooth salted caramel sauce. Ensure the caramel is fully incorporated without introducing too many bubbles. This adds a wonderful sweet and salty note that pairs exceptionally well with chocolate desserts. The caramel may slightly alter the color and transparency of the glaze, resulting in a beautiful, slightly lighter brown hue.
Coffee Chocolate Mirror Glaze: Aromatic and Rich
Coffee and chocolate are a classic pairing, and incorporating coffee flavor into your easy chocolate mirror glaze adds a sophisticated, aromatic dimension. This variation is perfect for enhancing coffee-flavored cakes or pairing with desserts that benefit from a hint of bitterness to balance sweetness.
There are a couple of ways to add coffee flavor. You can dissolve about 1-2 tablespoons of high-quality instant espresso powder into the hot water before adding it to the sugar and glucose syrup in Step 2. Alternatively, you can whisk in 20-30 ml of very strong, freshly brewed espresso or coffee extract after emulsifying the glaze in Step 4. Ensure the coffee is warm to prevent it from seizing the chocolate.
Coloring Your Mirror Glaze: Techniques and Options
While chocolate mirror glaze is beautiful in its natural dark brown state, you can also color it for themed desserts or artistic effects. To color an easy chocolate mirror glaze, you'll need specific types of food coloring. Water-based colors can sometimes cause the chocolate to seize, so it's best to use oil-based or powder food coloring, or specifically formulated candy colors or gel pastes designed for chocolate or candy making.
To add color, incorporate the coloring after the glaze has been fully emulsified and strained, while it is still warm (but not hot). Add color sparingly, a drop or a pinch at a time, and gently stir or use a very low speed immersion blender to incorporate it evenly. Avoid overmixing. Note that achieving vibrant colors with dark chocolate can be challenging; for bright colors, a white mirror glaze base is typically used, but you can achieve beautiful jewel tones or subtle shades over the dark chocolate base.
Storing and Reusing Chocolate Mirror Glaze Effectively
Proper Storage Methods for Mirror Glaze
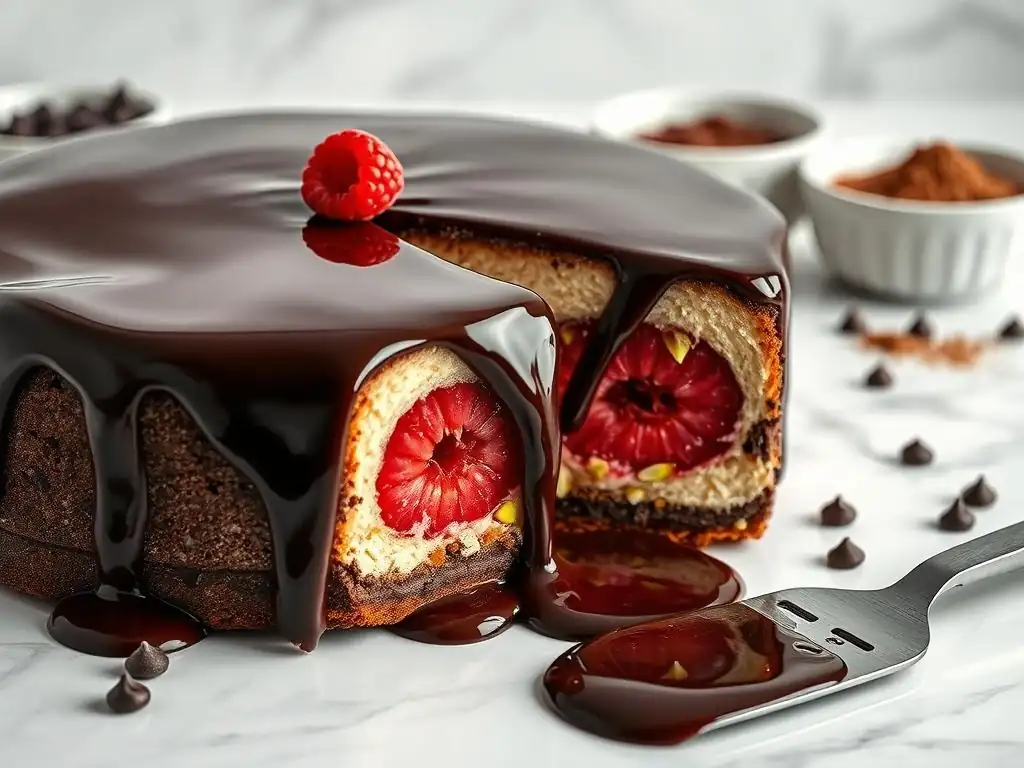
One of the convenient aspects of an easy chocolate mirror glaze recipe is that leftovers can be stored and reused. Once your glazing is complete and the glaze has cooled completely, transfer any leftover glaze into an airtight container. Ensure the container is clean and dry.
To prevent a skin from forming on the surface, press a layer of plastic wrap directly onto the surface of the glaze before sealing the container. This is crucial for maintaining a smooth texture for future use. Store the sealed container in the refrigerator, where the glaze will solidify. Properly stored, chocolate mirror glaze can last for up to 1-2 weeks in the refrigerator.
Reheating and Preparing Glaze for Reuse
When you are ready to reuse your stored chocolate mirror glaze, it will be firm like jelly. It cannot be used in this state. To prepare it for reuse, you need to gently reheat it back to the correct pouring consistency and temperature.
Transfer the solidified glaze into a heatproof bowl. You can reheat it gently over a bain-marie (a pot of simmering water) or in the microwave using very short bursts (10-15 seconds at a time), stirring thoroughly after each burst. The key is to reheat it slowly and gently to prevent it from overheating or seizing.
Stir until it is smooth and pourable again. Once melted, check the temperature with a thermometer and allow it to cool or reheat slightly until it reaches the optimal application temperature of 30-35°C (86-95°F) before use. You may need to strain it again if any lumps or bubbles formed during reheating.
Impressive Desserts to Showcase Your Chocolate Mirror Glaze
Decadent Chocolate Mousse Cake with Mirror Glaze
A classic and stunning application for an easy chocolate mirror glaze is a decadent chocolate mousse cake. The smooth, airy texture of the mousse provides a perfect contrast to the thin, glossy glaze. A mousse cake, often constructed with layers of sponge cake and chocolate mousse set in a mold, presents a smooth, uniform surface ideal for glazing.
Freezing the mousse cake until solid is essential before glazing. The cold surface allows the warm chocolate mirror glaze to set almost instantly, creating that flawless, reflective finish. The rich dark chocolate flavor of the glaze beautifully complements the lighter, creamy chocolate mousse, making for an incredibly impressive dessert that's perfect for special occasions.
Individual Chocolate Entremets with Glaze
Individual entremets, which are multi-layered mousse-based pastries, are another excellent canvas for showcasing your easy chocolate mirror glaze skills. These smaller format desserts allow you to practice your glazing technique on multiple pieces and create elegant single-serving portions.
Typically, entremets are constructed in silicone molds, resulting in perfectly smooth, often geometric shapes that are ideal for mirror glazing. Like a full-sized mousse cake, these individual portions must be frozen solid before being placed on a rack and glazed. The small size means they glaze quickly and set beautifully, resulting in miniature works of edible art topped with a perfect mirror finish.
Glazed Chocolate Truffles: An Elegant Treat
While often rolled in cocoa powder or nuts, chocolate truffles can also be elevated with a delicate coating of chocolate mirror glaze. This application is less common but creates an incredibly sophisticated and visually appealing treat. It adds a thin, shiny shell to the rich ganache center.
To glaze truffles, the ganache balls should be well-chilled and firm. Dip each truffle into the warm easy chocolate mirror glaze (at the lower end of the temperature range, around 30°C, for a thinner coating) using a dipping fork or toothpick, allowing excess glaze to drip off. Place them on parchment paper or a wire rack to set. The result is a bite-sized burst of intense chocolate flavor encased in a delicate, glossy shell.
Elevating Your Dessert Artistry: Final Thoughts
Advanced Mirror Glaze Techniques and Designs
Mastering the basic easy chocolate mirror glaze recipe is just the beginning of exploring the possibilities with this versatile technique. Once you're comfortable with the fundamentals, you can delve into more advanced applications that push the boundaries of dessert artistry.
Experimenting with multiple colors, creating marbled effects by swirling different colored glazes together just before pouring, or using stencils to create intricate patterns on the glazed surface are exciting next steps. Techniques like airbrushing edible colors onto a set glaze or creating drip effects require precision and practice but yield stunning, professional-level results that will truly impress.
Begin Your Journey to Mirror Glaze Mastery
Creating a beautiful chocolate mirror glaze might seem intimidating at first, but with a clear easy chocolate mirror glaze recipe and a bit of practice, it's an achievable skill for any home baker. The transformation from a simple cake to a gleaming, professional-looking dessert is incredibly rewarding.
Don't be discouraged if your first attempt isn't perfect. Temperature control, technique, and patience are key. Keep practicing on different desserts, pay close attention to the details in the recipe, and soon you'll be creating flawless, reflective masterpieces that taste as amazing as they look. Happy glazing!
Frequently Asked Questions
How difficult is the easy chocolate mirror glaze recipe for beginners?
The recipe is designed to be beginner-friendly. It uses simple ingredients and provides step-by-step instructions to ensure success even for those new to baking.
What kind of chocolate is best for this easy chocolate mirror glaze recipe?
We recommend using high-quality dark chocolate with a cocoa content of at least 50% for the best flavor and shine. Semi-sweet chocolate is also a good option.
Can I make the easy chocolate mirror glaze ahead of time?
Yes, you can prepare the glaze up to 3 days in advance. Store it in an airtight container in the refrigerator and rewarm it gently before using, ensuring it reaches the correct temperature for pouring.
What desserts work best with this easy chocolate mirror glaze?
The glaze works beautifully on mousse cakes, cheesecakes, and entremets. It requires a smooth, frozen surface for the best mirror-like finish.
What can I do if my easy chocolate mirror glaze has air bubbles?
Gently tap the bowl on the counter to release some air bubbles. If needed, you can use an immersion blender on low speed to smooth the glaze and eliminate any remaining bubbles, being careful not to introduce more air.
Final Reflection: The Enduring Allure of a Perfect Glaze
The pursuit of the perfect chocolate mirror glaze isn't just about aesthetics; it's about elevating the everyday into something extraordinary. A flawlessly smooth, intensely glossy finish transforms a simple cake or mousse into a showstopper, a testament to both skill and passion. In a world increasingly focused on instant gratification, taking the time to master this technique offers a rewarding counterpoint, a reminder of the beauty found in meticulous detail.
The impact of a visually stunning dessert transcends the purely culinary. It's a statement, a celebration, a way to share joy and create lasting memories. The best things in life are the simple things, but they are not easy.
This quote, while not directly about baking, perfectly encapsulates the effort and reward inherent in crafting a beautiful chocolate mirror glaze. The process itself, from the precise temperature control to the satisfying pour, becomes a meditative practice, a moment of calm amidst the chaos of daily life.
Now, it's your turn. Don't just admire the glossy perfection of others' creations; embrace the challenge, experiment with the recipe, and discover the satisfaction of transforming your own desserts into works of art. The journey to mastering the easy chocolate mirror glaze is as rewarding as the final, breathtaking result. So, gather your ingredients, embrace the process, and let your creativity shine through. The world awaits your showstopping masterpiece.
Unleash Your Inner Pastry Chef!
Thanks for joining us on this chocolatey adventure! We hope you've gained the confidence to create stunning desserts. Now it's time to put your new skills to the test!
- Master the Mirror Glaze: Practice your newly acquired technique on your favorite cake or dessert. Share your masterpiece with us – we’d love to see it!
- Experiment with Flavors: Try adding different extracts or spices to your glaze to create unique and delicious flavor combinations. What unexpected flavor profile will you create?
- Join Our Baking Community: Connect with other passionate bakers on our social media pages and share your tips and creations!
Ready to transform your baking game? What exciting dessert will you glaze first?