
The Secret to Glossy Chocolate Ganache: A Baker's Essential

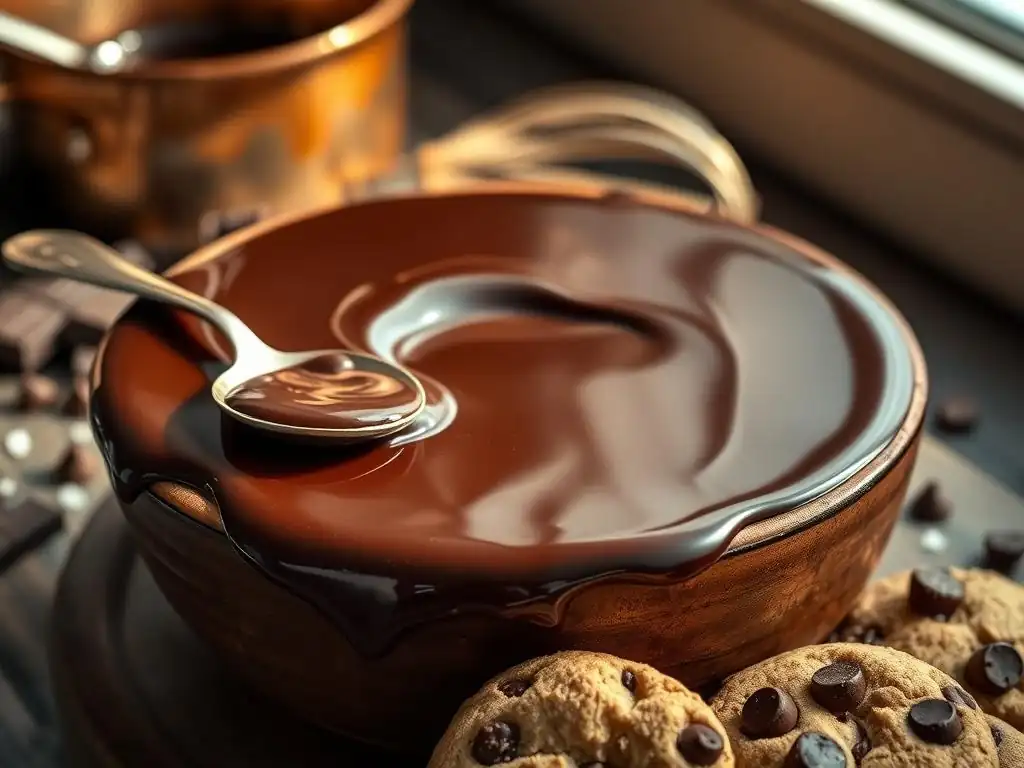
Welcome to BakeWithEase, your guide to baking bliss! Ever wondered how professional bakers achieve that perfectly glossy chocolate ganache? We're diving deep into this baker's essential, revealing the secrets to a foolproof recipe. Get ready to unlock the magic and create stunning desserts that will impress everyone. Are you ready to transform your baking? Let's get started!
- Introduction to Glossy Chocolate Ganache for Baking
- Understanding the Science Behind Glossy Ganache
- Glossy Chocolate Ganache Recipe Easy: A Step-by-Step Guide
- Troubleshooting Common Ganache Problems
- Achieving Different Gloss Levels in Chocolate Ganache
- Using Glossy Chocolate Ganache in Baking
- Storing and Handling Glossy Chocolate Ganache
- Advanced Techniques for Chocolate Ganache Perfection
- Conclusion: Mastering the Art of Glossy Chocolate Ganache
- Frequently Asked Questions
- Final Reflection: The Enduring Allure of a Perfect Ganache
- Unlock Your Inner Chocolatier: Master the Art of Ganache!
Introduction to Glossy Chocolate Ganache for Baking
Achieving a perfectly smooth and shiny finish is often the hallmark of professional-looking baked goods. One of the most versatile and delicious ways to accomplish this is by using chocolate ganache. While simple in ingredients – typically just chocolate and cream – mastering the technique to get that coveted glossy sheen can sometimes feel elusive. Understanding the fundamentals is key to unlocking this baking secret.
A glossy chocolate ganache recipe easy to follow is a valuable tool in any baker's repertoire. It's not just about aesthetics; a well-made ganache has a luxurious texture and intense chocolate flavor that elevates cakes, pastries, and confections. This guide will walk you through the essential steps and science behind creating a beautiful, glossy ganache every time, making impressive baking results accessible to everyone.
Why a Glossy Ganache Matters in Your Baking
A glossy finish on your ganache isn't just for show; it indicates a properly emulsified mixture, which translates to a smooth, melt-in-your-mouth texture. Visually, a shiny ganache makes cakes, tarts, and truffles look incredibly appealing, suggesting richness and quality. Think of a mirror-like glaze on a chocolate torte or perfectly smooth drips down the side of a celebration cake – the gloss is what catches the eye and promises a delightful experience.
Beyond the visual appeal, the gloss is a sign that the cocoa butter crystals in the chocolate have set correctly within the emulsion of fat and water from the cream. This proper structure prevents a dull, streaky, or grainy appearance. Whether you're aiming for a simple glossy chocolate ganache recipe easy enough for a weeknight treat or a show-stopping finish for a special occasion, understanding how to achieve and maintain that shine is fundamental to professional-looking results.
BakeWithEase's Guide to Perfect Chocolate Ganache
At BakeWithEase, we believe that achieving stunning results in the kitchen should be accessible to bakers of all levels. Our approach to perfect chocolate ganache focuses on quality ingredients and clear, step-by-step techniques. We simplify the process, breaking down the science into understandable terms so you can troubleshoot and master this essential element.
This guide provides a comprehensive look at creating a glossy chocolate ganache recipe easy to execute. We cover everything from selecting the right type of chocolate and cream to understanding the crucial emulsification process. By focusing on these core principles, you'll gain the confidence to create beautiful, glossy ganache for all your baking needs, turning simple desserts into elegant creations.
Understanding the Science Behind Glossy Ganache
Achieving a glossy finish in ganache isn't magic; it's chemistry! Specifically, it's about creating a stable emulsion between the fat from the chocolate (cocoa butter) and the cream, and managing the crystallization of the cocoa butter as the ganache cools. Understanding these processes demystifies ganache making and helps you troubleshoot when things don't go exactly as planned.
The interaction between melted chocolate and heated cream is the foundation. When hot cream is poured over chocolate, the heat melts the cocoa butter. As you stir or whisk, you're working to disperse the tiny droplets of liquid fat (from both cream and chocolate) evenly throughout the water-based liquid from the cream, with solid particles (like cocoa solids and sugar) suspended within. This stable mixture of ingredients that normally wouldn't mix is called an emulsion, and a good emulsion is the first step towards gloss.
The Role of Chocolate in Achieving Gloss
The type and quality of chocolate you use play a significant role in the final gloss of your ganache. Chocolate with a higher cocoa butter content tends to produce a glossier ganache. This is because cocoa butter is responsible for the characteristic snap of chocolate and its ability to set firmly with a shine. High-quality couverture chocolate, which typically contains a higher percentage of cocoa butter (often 32% or more in dark chocolate), is ideal for ganache intended for glazing or coating due to its superior flow properties when melted and its ability to set with a beautiful shine.
Using chocolate chips, which often contain stabilizers to help them maintain their shape when baked, can sometimes result in a less glossy or even slightly dull ganache. These stabilizers can interfere with the smooth crystallization of cocoa butter needed for maximum shine. For the best glossy chocolate ganache recipe easy results, opt for high-quality chocolate bars (couverture or good quality baking chocolate) and chop them finely to ensure even melting.
The Importance of Cream: Choosing the Right Fat Content
Heavy cream (sometimes called whipping cream) is typically specified for ganache recipes because of its high fat content, usually around 30-36%. The fat in the cream contributes to the richness and smooth texture of the ganache. Crucially, the fat helps to stabilize the emulsion, preventing the ganache from separating as it cools. A higher fat content provides more 'structure' and stability for the emulsion.
Using milk or half-and-half, which have significantly lower fat content (milk is typically 3-4%, half-and-half around 10-18%), will result in a much thinner ganache that may struggle to form a stable emulsion and is unlikely to achieve the same level of gloss. The ratio of fat to liquid is critical for achieving the desired consistency and shine, making heavy cream the preferred choice for a truly glossy chocolate ganache recipe easy.
Achieving the Right Emulsion: Ganache Chemistry Explained
Emulsification is the process of combining two liquids that don't naturally mix, like oil and water, by dispersing one throughout the other in tiny droplets. In ganache, you are emulsifying the melted fats (from chocolate and cream) into the water-based liquid of the cream. This is achieved through mechanical force (stirring or whisking) after the hot cream has melted the chocolate. The lecithin naturally present in chocolate also acts as an emulsifier, helping to stabilize the mixture.
The key to a stable, glossy emulsion is gentle, consistent stirring from the center outwards after the initial melt. Avoid incorporating too much air, as this can lead to a dull or foamy ganache. The stirring encourages the fat droplets to disperse evenly and become coated by the liquid, creating a smooth, homogeneous mixture. If the mixture looks separated or oily, the emulsion has likely broken, often due to temperature issues or aggressive stirring – but don't worry, there are ways to fix this!
Glossy Chocolate Ganache Recipe Easy: A Step-by-Step Guide
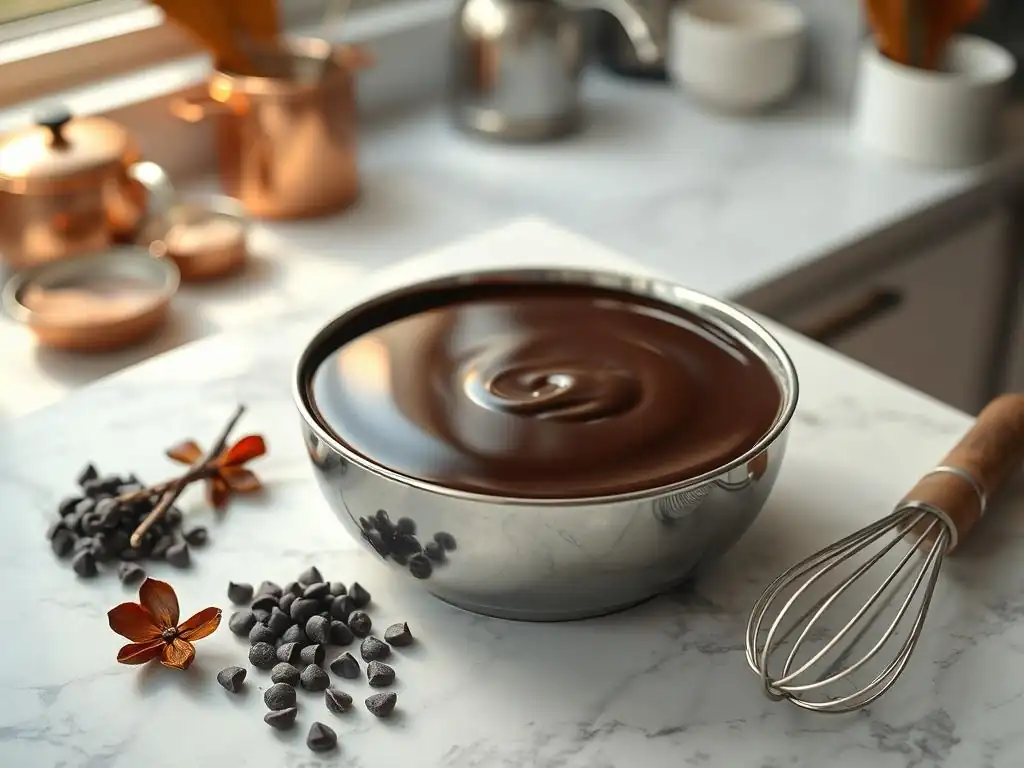
Creating a beautiful, glossy chocolate ganache doesn't have to be complicated. With just two main ingredients and a few simple steps, you can achieve professional-looking results. This glossy chocolate ganache recipe easy focuses on the fundamental techniques that ensure a smooth, shiny finish perfect for various baking applications.
The ratio of chocolate to cream is flexible and depends on the desired consistency. A 1:1 ratio (by weight) of chocolate to cream yields a soft ganache, great for fillings or pourable glazes when warm. A 2:1 ratio creates a firmer ganache, suitable for truffles or thicker glazes. For a standard pourable or spreadable glossy ganache, a ratio between 1:1 and 1.5:1 is often ideal.
Ingredients for the Perfect Glossy Chocolate Ganache
For a basic glossy chocolate ganache recipe easy, you'll need just two core ingredients: high-quality chocolate and heavy cream. The success of your ganache relies heavily on the quality of these components. Using the best ingredients you can afford will make a noticeable difference in both flavor and texture.
Optional ingredients like butter, corn syrup, or flavorings can be added to enhance gloss, texture, or taste, but they are not strictly necessary for a basic recipe. For a truly glossy finish, focusing on the quality and preparation of the chocolate and cream is paramount.
Quality Chocolate: Selecting the Best Type for Ganache
As discussed earlier, the type of chocolate significantly impacts the gloss. For a glossy chocolate ganache recipe easy, aim for high-quality bar chocolate (couverture or good baking chocolate) with a decent cocoa butter percentage. Dark chocolate (50-70% cocoa solids) is commonly used for its rich flavor and good setting properties.
Milk chocolate and white chocolate can also be used, but they have different fat/sugar ratios and require different cream ratios to achieve a similar consistency and gloss. For instance, white chocolate ganache often uses a 3:1 or 4:1 ratio of chocolate to cream due to white chocolate's higher fat content.
Finely chopping the chocolate is crucial. Small, uniform pieces will melt quickly and evenly when the hot cream is added, facilitating a smooth emulsion. Using chocolate that is not finely chopped can result in unmelted lumps or require excessive stirring, potentially cooling the mixture too much before it's fully emulsified.
Heavy Cream: The Key to a Smooth and Glossy Finish
Heavy cream (with at least 30% fat) is essential for a smooth, stable, and glossy ganache. The fat content provides the necessary structure for the emulsion. Avoid using lower-fat creams, as they will result in a thinner, less stable ganache that is less likely to achieve a significant gloss and may separate easily.
The cream should be heated, but not boiled vigorously. Simmering or gently heating the cream just until bubbles appear around the edges of the pan is sufficient. Overheating can cause the water in the cream to evaporate too quickly, altering the ratio, or potentially scorch the cream, affecting the flavor.
Optional Ingredients: Flavor Enhancements and Variations
While not essential for gloss, other ingredients can enhance your ganache. A tablespoon of unsalted butter added at the end, stirred in while the ganache is still warm, can increase shine and richness. A small amount of corn syrup or glucose syrup (perhaps 1-2 tablespoons per cup of cream) can also boost gloss and help prevent sugar crystallization, leading to a smoother texture.
Flavorings like vanilla extract, a splash of liqueur (like Grand Marnier or Kahlúa), or even espresso powder can be stirred in after the ganache is emulsified and still warm. Ensure any liquid additions are minimal so they don't break the emulsion or significantly alter the consistency.
Equipment You'll Need
Making a simple glossy chocolate ganache recipe easy doesn't require specialized equipment, but having the right tools makes the process smoother and increases your chances of success. You'll need a heatproof bowl, preferably glass or stainless steel, large enough to hold your ingredients comfortably.
A small saucepan is needed to heat the cream. For stirring, a rubber spatula or a whisk is suitable. A spatula is often preferred for the initial stirring to avoid incorporating too much air, while a whisk can be useful for the final emulsification if needed, used gently.
Step-by-Step Instructions for Easy Glossy Chocolate Ganache
Follow these steps for a reliable glossy chocolate ganache recipe easy. Precision in temperature and technique is more important than speed. Take your time to ensure each step is completed correctly.
Remember the ratio: For a versatile ganache, a 1:1 or 1.5:1 ratio of chocolate to cream by weight is a good starting point. For example, use 8 ounces (about 225g) of finely chopped chocolate and 8 ounces (about 225g) of heavy cream for a pourable glaze or soft filling. For a firmer ganache, use 12 ounces (about 340g) of chocolate to 8 ounces (about 225g) of cream.
Step 1: Heating the Cream Properly
Measure your heavy cream and pour it into a small saucepan. Heat the cream over medium heat, stirring occasionally, just until it begins to simmer. You'll see tiny bubbles forming around the edges of the pan, and wisps of steam rising. This typically takes 3-5 minutes depending on the amount of cream. Do not bring it to a rolling boil, as this can reduce the liquid content and potentially scorch the cream.
While the cream is heating, ensure your finely chopped chocolate is in your heatproof bowl. The finer the chop, the faster and more evenly the chocolate will melt.
Step 2: Pouring Cream Over Chocolate: The Critical Moment
Once the cream is heated to a simmer, immediately remove it from the heat. Pour the hot cream directly over the finely chopped chocolate in the bowl. Ensure all the chocolate is submerged by the hot cream.
Let the mixture sit undisturbed for 5-10 minutes. This allows the heat from the cream to melt the chocolate gently and evenly without immediate stirring. This passive melting phase is crucial for starting the emulsion process smoothly and avoiding seizing or burning the chocolate. The time needed depends on the volume of ingredients and the fineness of the chop.
Step 3: Emulsifying the Ganache: Achieving a Silky Texture
After the resting period, the chocolate should look mostly melted around the edges and soft in the center. Begin gently stirring the mixture from the center of the bowl using a rubber spatula or whisk. Stir in small, tight circles in the center, gradually expanding your circles outwards.
As you stir, you'll notice the mixture starting to come together, transforming from a separated, liquidy state with chunks of chocolate into a smooth, homogeneous, and increasingly glossy emulsion. Continue stirring gently until all the chocolate is completely melted and the ganache is perfectly smooth and shiny. This might take a few minutes of consistent stirring. Avoid vigorous whisking that incorporates air bubbles.
Step 4: Cooling and Achieving the Desired Consistency
Once fully emulsified, the ganache will be quite warm and relatively liquid. To achieve the desired consistency for your application (glazing, filling, piping, etc. ), the ganache needs to cool and thicken. Cover the surface of the ganache directly with plastic wrap to prevent a skin from forming.
Let the ganache cool at room temperature. This is often preferred over refrigeration for maintaining gloss, as rapid cooling can sometimes dull the finish. Cooling time varies significantly based on room temperature and volume of ganache, but can take from 1-3 hours for a pourable glaze to several hours for a thick, spreadable ganache. Stir it gently every 20-30 minutes during cooling to ensure even thickening and maintain smoothness.
Troubleshooting Common Ganache Problems
Even with the best glossy chocolate ganache recipe easy, sometimes things don't go perfectly. Understanding common issues and how to fix them can save your ganache and your dessert. Don't despair if your ganache isn't perfect on the first try!
Most ganache problems relate to temperature or improper emulsification. Learning to identify the issue and apply the correct fix is a valuable baking skill. Here are some common pitfalls and how to address them.
Ganache Too Thick: Solutions and Prevention
If your ganache has cooled too much and become too thick for your intended use (e.g., you wanted a pourable glaze but it's now spreadable), you can gently reheat it. Place the bowl of ganache over a bain-marie (a pot of simmering water, ensuring the bottom of the ganache bowl doesn't touch the water) and stir gently until it reaches the desired consistency. Be careful not to overheat it, which can cause it to separate.
Alternatively, you can stir in a tablespoon or two of additional warm heavy cream, one tablespoon at a time, stirring gently until it's incorporated and the ganache loosens up. Prevention involves monitoring the cooling process and using it at the correct temperature for your application.
Ganache Too Thin: How to Thicken It
If your ganache is too thin for your needs (e.g., it's running off a cake instead of coating it), it likely needs more chocolate or more cooling time. If you realize it's too thin immediately after making it, you can gently reheat it over a bain-marie and stir in a few more ounces of finely chopped chocolate, allowing it to melt completely and re-emulsifying.
If it's thin after cooling, it may just need more time in a cooler spot (like the refrigerator, but stir it frequently to prevent dulling). For a quick fix on a cooled ganache, you can gently whisk a small amount of softened butter into it (about 1-2 tablespoons per cup of ganache), which helps thicken it as it cools further, and also adds gloss.
Ganache Separated: Saving a Broken Ganache
A separated ganache looks oily and curdled, with liquid pooling around solid bits. This often happens from overheating, cooling too quickly, incorporating too much air, or an incorrect ratio. To fix a separated ganache, gently warm it over a bain-marie while stirring continuously with a whisk. Sometimes, this gentle warming and stirring will bring it back together.
If that doesn't work, try adding a tablespoon of warm milk or cream (or even warm water, though cream is better for richness) to the separated ganache while stirring vigorously with a whisk. The added liquid can help re-establish the emulsion. Add just enough liquid, a teaspoon at a time, until it comes back together into a smooth mixture. Patience and gentle whisking are key here.
Dealing with a Grainy Ganache: Tips and Tricks
A grainy ganache can occur if the chocolate wasn't fully melted, if sugar crystals formed (often from poor quality chocolate or aggressive stirring), or if the emulsion broke and couldn't be fully salvaged. If the graininess is due to unmelted chocolate, gentle reheating over a bain-marie and careful stirring can help melt the remaining pieces and smooth it out.
If it's sugar crystallization, it's harder to fix completely. Adding a tiny amount of liquid (like a teaspoon of warm cream) and gently warming can sometimes dissolve some crystals. Prevention is better: use high-quality chocolate, ensure it melts fully before stirring, and avoid over-stirring or letting it cool too quickly without occasional stirring. Adding a touch of corn syrup can also help prevent sugar crystallization.
Achieving Different Gloss Levels in Chocolate Ganache
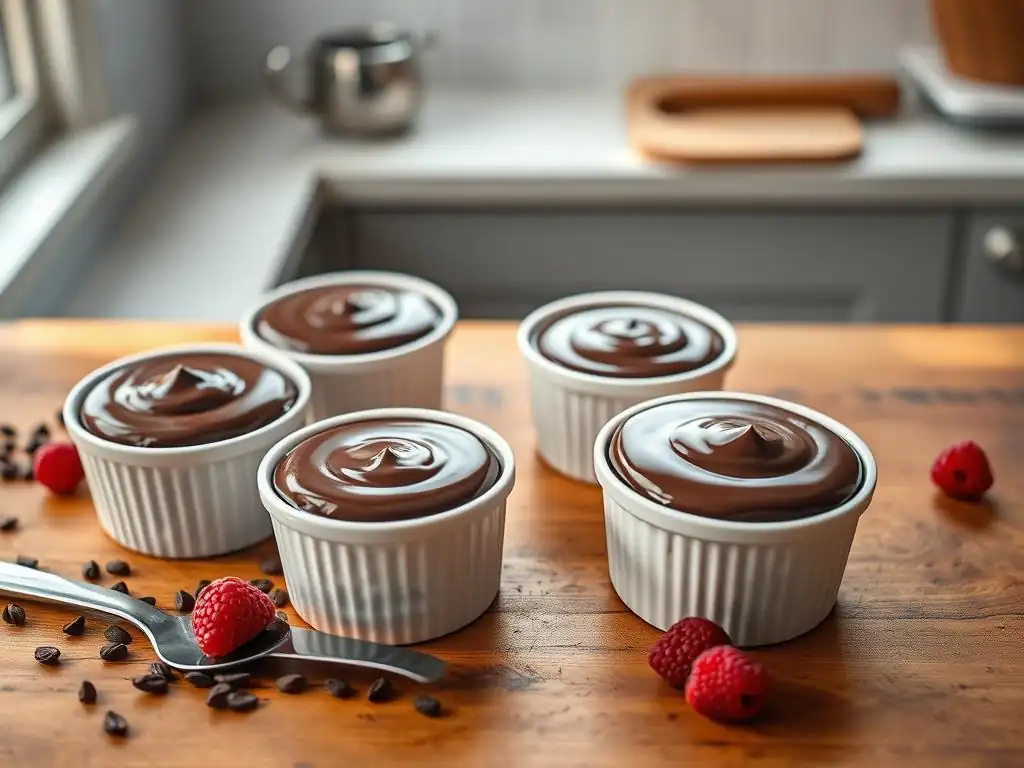
The level of gloss in your ganache can be adjusted based on your needs, from a subtle sheen to a mirror-like shine. Understanding the factors that influence gloss allows you to control the final finish. While a standard glossy chocolate ganache recipe easy provides a good baseline, specific techniques can enhance or reduce the shine.
The desired gloss often depends on the application. A highly reflective glaze is stunning on a smooth cake surface, while a slightly less glossy finish might be preferred for piped decorations or fillings.
Factors Affecting Gloss: Temperature, Chocolate Type, and Technique
Several factors contribute to the gloss of ganache.
- Temperature: Cooling speed and final temperature are critical. Slow cooling at room temperature often results in better gloss than rapid chilling in the refrigerator, as it allows cocoa butter crystals to form more smoothly. Using the ganache at the correct temperature for glazing (typically around 85-90°F or 29-32°C for dark chocolate ganache) ensures it flows smoothly and sets with a shine.
- Chocolate Type: As mentioned, chocolate with higher cocoa butter content generally yields glossier results. Couverture chocolate is formulated for optimal melting and setting properties, making it ideal for maximum gloss.
- Technique: Proper emulsification is fundamental. Gentle, thorough stirring creates a stable emulsion. Avoiding the incorporation of excess air bubbles is also important, as trapped air can make the surface appear dull.
How to Increase the Shine: Specific Techniques for Maximum Gloss
To maximize gloss in your glossy chocolate ganache recipe easy:
- Use High-Quality Couverture: Invest in chocolate specifically designed for melting and coating.
- Add Butter or Syrup: Stirring in a small amount of softened unsalted butter or a tablespoon of corn syrup after emulsification while the ganache is still warm can enhance shine significantly.
- Cool Slowly: Allow the ganache to cool completely at room temperature, stirring occasionally, rather than rushing it in the fridge.
- Warm Slightly Before Use (for Glazing): If using as a pourable glaze, gently warm the cooled ganache back to the ideal temperature (around 85-90°F) for smooth flow and optimal setting with a shine. Use a thermometer if possible.
- Apply to a Smooth Surface: For glazes, the surface you are coating (like a cake) should be perfectly smooth and level for the ganache to settle into a mirror finish.
Matte vs. Glossy Ganache: Choosing the Right Finish for Your Project
Sometimes, a matte finish is desired, particularly for fillings or certain types of frosting. To achieve a less glossy or matte finish:
- Whip the Ganache: Once the ganache has cooled to a thick, spreadable consistency (like peanut butter), you can whip it with an electric mixer or whisk. This incorporates air, lightening the color and creating a matte, fluffy texture. Whipped ganache is great for frosting cupcakes or filling layer cakes.
- Refrigerate Quickly: Rapid cooling can sometimes result in a duller finish compared to slow room temperature cooling.
- Use Chocolate with Lower Cocoa Butter: While less common for ganache, using chocolate with less cocoa butter would inherently result in a less glossy product.
Choosing between matte and glossy depends entirely on the aesthetic and textural goals for your baked good. A glossy chocolate ganache recipe easy can often be transformed into a matte finish simply by whipping it after it cools.
Using Glossy Chocolate Ganache in Baking
A glossy chocolate ganache recipe easy to make is incredibly versatile in the world of baking. Its rich flavor and luxurious texture make it suitable for a wide array of applications, from simple glazes to decadent fillings and coatings. Once you've mastered the basic technique, you'll find countless ways to incorporate this essential element into your desserts.
The consistency of the ganache, determined by the chocolate-to-cream ratio and cooling temperature, dictates its best use. A thin, warm ganache is perfect for pouring, while a thicker, cooled ganache can be spread, piped, or rolled.
Glazing Cakes and Pastries with Glossy Ganache
Glazing cakes and pastries is one of the most popular uses for glossy ganache. A warm, pourable ganache (typically a 1:1 or 1.25:1 chocolate to cream ratio) creates a beautiful, smooth, reflective coating. Ensure the cake or pastry is chilled and placed on a wire rack over a tray to catch drips.
Pour the ganache generously over the center of the cake, letting it flow down the sides. Use an offset spatula to gently guide it if necessary, but try to avoid overworking it, which can dull the shine. The chilled surface helps the warm ganache set quickly, preserving the gloss. This technique works wonderfully on everything from simple loaf cakes to elaborate layer cakes and individual pastries like eclairs.
Making Truffles with a Glossy Ganache Coating
While truffle centers are often made from a thick ganache (a 2:1 or even 2.5:1 ratio, cooled until firm enough to scoop and roll), you can give them a final glossy coating. After rolling the chilled ganache centers, you can dip them in tempered chocolate for a crisp, shiny shell. However, a glossy chocolate ganache recipe easy can also be used for a softer, yet still glossy, coating.
For a softer coating, dip the chilled truffle centers into a slightly warmed (but not hot) thick ganache (maybe a 1.5:1 ratio, slightly cooled but still pourable). The contrast in temperature helps the coating set quickly, giving a soft but potentially still glossy finish depending on the technique. For maximum gloss on truffles, dipping in properly tempered chocolate is the gold standard.
Creating Drip Cakes with Perfect Ganache Drips
Drip cakes rely on ganache with a specific consistency to create appealing drips down the sides. A ratio around 1.5:1 or 1.75:1 (chocolate to cream) often works well, cooled to the perfect temperature – it should be thick enough to create defined drips but thin enough to flow. The cake itself should be chilled.
Apply the ganache using a piping bag or a spoon around the edge of the top of the cake, gently pushing it over the edge to create drips of varying lengths. The temperature of the ganache is critical; if too warm, the drips will run too far; if too cool, they won't drip at all. Experimenting with a test drip on the side of the cake stand is advisable before committing to the cake itself.
Using Ganache as a Filling for Cakes and Cupcakes
A cooled, thickened ganache makes a decadent filling for layer cakes, cupcakes, or even tarts. A 1:1 or 1.25:1 ratio cooled until spreadable (like peanut butter consistency) is excellent for layering. If you want a lighter, fluffier filling, you can whip the cooled 1:1 ganache until it's pale and airy.
For piping decorations or filling cupcakes, a firmer ganache (1.5:1 or 2:1 ratio, cooled until firm but pliable) works best. Ensure the ganache is completely cooled before using it as a filling or frosting, especially in layered cakes, as warm ganache can cause layers to slide or melt buttercream.
Storing and Handling Glossy Chocolate Ganache
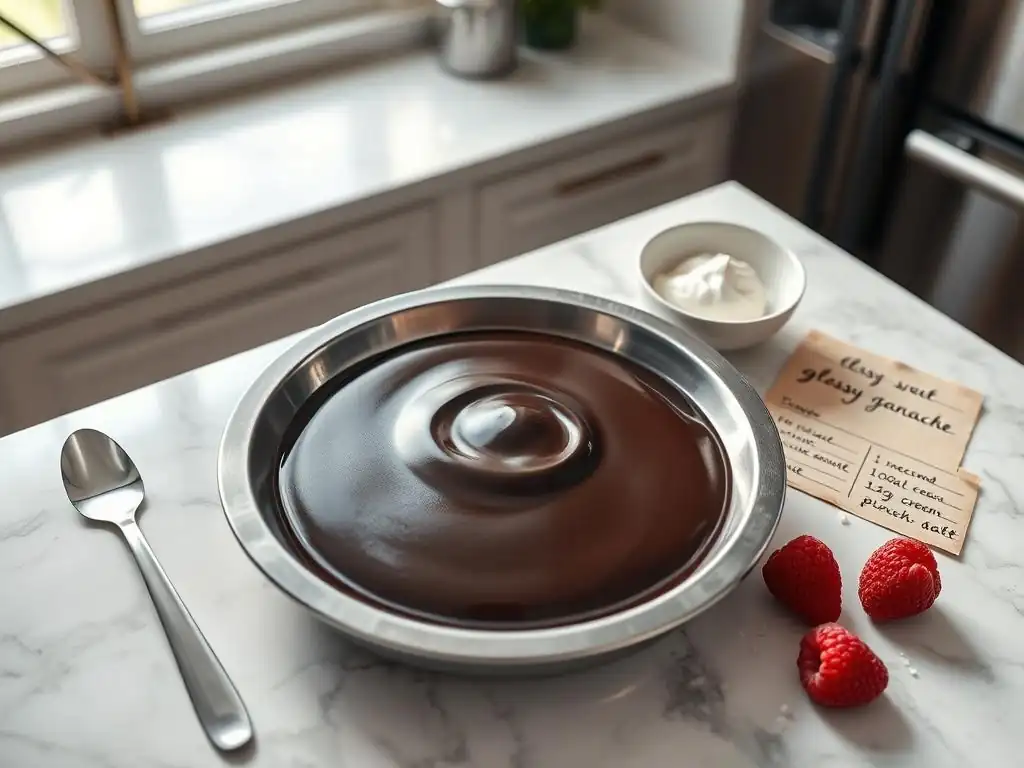
Proper storage is essential to maintain the quality, texture, and gloss of your chocolate ganache. Made primarily of fat and sugar, ganache is relatively stable, but it's still a dairy product and needs appropriate handling to prevent spoilage and crystallization.
Understanding how to store, reheat, and handle ganache ensures you can make it ahead of time and use it successfully when needed, preserving that beautiful glossy finish you worked to achieve with your glossy chocolate ganache recipe easy.
Proper Storage Techniques for Longevity
Once your ganache is made and has reached the desired consistency, store it in an airtight container. If storing at room temperature (only recommended for short periods, ideally less than 24 hours, in a cool environment), cover the surface directly with plastic wrap before putting the lid on to prevent a skin from forming and to maintain moisture.
For longer storage, refrigerate the ganache. Again, press plastic wrap directly onto the surface. Properly stored in the refrigerator, ganache can last for 1-2 weeks. Label the container with the date it was made.
Reheating and Re-emulsifying Ganache
If your refrigerated ganache is too firm to use, you'll need to soften it. The best way to do this while preserving gloss is to gently warm it over a bain-marie, stirring constantly. Avoid microwaving if possible, as it can easily overheat and separate the ganache, and uneven heating can dull the finish.
As the ganache warms over the bain-marie, it may look separated initially. Continue stirring gently but consistently. As it reaches a warm, pourable or spreadable consistency (depending on the original ratio), it should come back together into a smooth, glossy emulsion. If it still looks slightly separated, a few drops of warm cream stirred in can help.
Shelf Life and Best Practices for Using Ganache
The shelf life of ganache depends on its ingredients and storage conditions. A ganache made with just chocolate and heavy cream, stored properly in the refrigerator, is typically good for 1 to 2 weeks. If using other ingredients like butter or flavorings, the shelf life might vary slightly.
Always inspect stored ganache before use. Look for any signs of mold, off smells, or significant discoloration. If in doubt, it's best to discard it. When using stored ganache, ensure it's brought to the correct temperature and consistency for your application through gentle warming and re-emulsifying if necessary.
Advanced Techniques for Chocolate Ganache Perfection
Once you've mastered the basics of a glossy chocolate ganache recipe easy, you can explore more advanced techniques to customize flavors, textures, and applications. These methods allow you to tailor your ganache precisely to your dessert vision, adding complexity and sophistication.
From infusing liquids with aromatic ingredients to adapting ratios for specific dietary needs like vegan baking, there's a wide world of ganache possibilities to explore beyond the classic chocolate and cream combination.
Infusing Flavors into Your Ganache
Adding flavorings directly to the finished ganache is one way to customize it, but infusing the cream beforehand offers a deeper, more integrated flavor. To infuse cream, gently heat it with aromatic ingredients like vanilla beans, citrus zest, cinnamon sticks, star anise, or even tea leaves or coffee beans.
Let the ingredients steep in the hot cream off the heat for 15-30 minutes (or longer, depending on the desired intensity). Then, strain the cream to remove the solids before reheating it to a simmer and pouring it over the chocolate to make the ganache as usual. This technique works beautifully for adding subtle or intense notes to your glossy ganache.
Creating Vegan Glossy Chocolate Ganache
Achieving a glossy ganache without dairy is entirely possible! Instead of heavy cream, you can use full-fat coconut milk (the kind from a can, not the beverage) or a high-quality vegan cream alternative. The key is to use a product with sufficient fat content to create a stable emulsion and a good texture.
The ratio of chocolate to vegan liquid may need adjustment compared to dairy ganache, as vegan chocolates and cream alternatives have different fat and water compositions. A common starting point for vegan dark chocolate ganache is a 1:1 ratio (by weight) of good quality vegan dark chocolate to full-fat canned coconut milk (use only the thick cream from the top). Follow the same steps as a traditional glossy chocolate ganache recipe easy, heating the coconut milk and pouring it over chopped vegan chocolate, then emulsifying gently.
Exploring Different Chocolate Ratios for Varied Textures
As briefly touched upon, varying the ratio of chocolate to cream is the primary way to control the final texture of your ganache, from a pourable glaze to a scoopable truffle base or a firm filling.
- 1:1 Ratio: (Equal parts chocolate and cream by weight) - Yields a soft, pourable ganache when warm, or a soft, spreadable ganache when cooled. Ideal for glazes, soft fillings, or whipped ganache.
- 1.5:1 Ratio: (1.5 parts chocolate to 1 part cream) - A versatile medium consistency. Pourable when warm, sets to a firm, spreadable texture when cooled. Good for drips, firmer fillings, or piping.
- 2:1 Ratio: (2 parts chocolate to 1 part cream) - Yields a thick, fudge-like consistency when cooled. Perfect for rolling truffles or creating very firm fillings.
- 3:1 or 4:1 Ratio: (Higher chocolate to cream) - Typically used for white or milk chocolate ganache to achieve a consistency similar to dark chocolate ganache, due to their different fat/sugar content.
Experimenting with these ratios allows you to tailor your glossy chocolate ganache recipe easy to the specific needs of your baking project.
Conclusion: Mastering the Art of Glossy Chocolate Ganache
Mastering the art of making glossy chocolate ganache is a truly rewarding skill for any baker. It opens up a world of possibilities for enhancing the flavor, texture, and visual appeal of your desserts. By understanding the simple science behind the emulsion and cocoa butter crystallization, and by following a few key techniques, you can reliably achieve that coveted smooth, shiny finish.
Remember that quality ingredients are fundamental, and patience during the cooling and emulsification process pays off. Whether you're making a simple pour-over glaze or a base for decadent truffles, a well-executed ganache elevates your baking from homemade to extraordinary.
Elevate Your Baking with This Essential Technique
Incorporating a glossy chocolate ganache recipe easy into your baking repertoire is one of the quickest ways to achieve professional-looking results. The smooth, reflective surface instantly adds elegance and sophistication to cakes, tarts, and pastries.
Beyond the aesthetics, the rich, intense chocolate flavor of properly made ganache provides a luxurious contrast to other dessert components. It's a technique that builds confidence and allows you to create desserts that are as impressive to look at as they are delicious to eat.
Final Tips for Consistently Perfect Ganache
To ensure consistently perfect, glossy chocolate ganache every time:
- Always use high-quality chocolate with good cocoa butter content.
- Chop your chocolate very finely for even melting.
- Heat your cream just to a simmer, don't boil vigorously.
- Pour hot cream over chocolate and let it sit undisturbed for several minutes before stirring.
- Stir gently from the center outwards to emulsify, avoiding excess air.
- Cool at room temperature whenever possible for optimal gloss, stirring occasionally.
- Use the ganache at the correct temperature for your specific application.
- Don't be afraid to troubleshoot – most issues can be fixed with gentle warming and stirring.
With practice, you'll find your glossy chocolate ganache recipe easy becomes second nature, allowing you to add this beautiful, delicious element to all your baked creations with confidence.
Frequently Asked Questions
What makes a chocolate ganache glossy?
The glossiness of a chocolate ganache comes from the emulsification of fat (chocolate, cream) and water. Using high-quality chocolate and proper temperature control during the mixing process are also crucial.
Can I use different types of chocolate for ganache?
Yes, you can! However, the ratio of chocolate to cream will need to be adjusted depending on the cocoa percentage of the chocolate you use. Darker chocolate requires less cream.
How do I fix a grainy or broken ganache?
A grainy ganache often indicates separation of the ingredients. Gently warming the ganache and adding a tablespoon of warm milk or cream while stirring can help re-emulsify it.
What is the best way to store leftover chocolate ganache?
Store leftover ganache in an airtight container in the refrigerator for up to a week. For longer storage, it can be frozen for up to three months. Allow it to thaw completely before using.
What are some common uses for glossy chocolate ganache?
Glossy chocolate ganache is incredibly versatile! It's commonly used as a cake frosting, a filling for pastries, a glaze for desserts, or even as a decadent dip for fruits and cookies.
Final Reflection: The Enduring Allure of a Perfect Ganache
The pursuit of the perfect glossy chocolate ganache transcends mere culinary skill; it's a testament to the power of precision and the undeniable joy of creating something beautiful. This article explored the seemingly simple yet surprisingly nuanced process of achieving that coveted mirror-like shine, highlighting the crucial role of temperature control and the right ratio of cream to chocolate. In a world increasingly focused on instant gratification, mastering this technique offers a satisfying counterpoint – a reminder that patience and attention to detail yield extraordinary results.
The impact of a flawlessly executed ganache extends far beyond the plate. It's a symbol of dedication, a visual representation of careful craftsmanship, and a delicious embodiment of artistry. It's a skill that connects us to a rich culinary history, echoing the traditions of pastry chefs throughout the ages. As Julia Child once wisely said, Find something you're passionate about and keep tremendously interested in it.
For me, that passion lies in the transformative power of a perfectly glossy ganache, and I hope this article has ignited a similar spark in you.
Now, I invite you to embrace the challenge. Don't be intimidated by the seemingly complex steps; instead, approach the process with curiosity and a willingness to experiment. Try adjusting the ratios, playing with different types of chocolate, and observing the subtle changes in texture and shine. The journey towards mastering the glossy ganache is as rewarding as the destination itself. The next time you create a cake, a truffle, or even a simple chocolate-covered strawberry, remember the power of precision and the enduring satisfaction of a perfectly glossy finish. Go forth and create something truly magnificent!
Unlock Your Inner Chocolatier: Master the Art of Ganache!
Thanks for taking the time to explore the secrets of glossy, perfect chocolate ganache! We hope you now feel confident in creating this decadent treat. Ready to elevate your baking game?
- Whip up your own ganache today! Use your newfound knowledge to create a show-stopping dessert – impress your friends and family (or just yourself! ).
- Share your ganache creation! Post a picture on social media and tag us – we’d love to see your masterpiece!
- Experiment with different chocolate types and flavors. What exciting ganache variations will you discover?
What unexpected ingredient will you add to your next ganache creation to give it a unique twist?