
Easy Homemade Chocolate Peanut Butter Cups

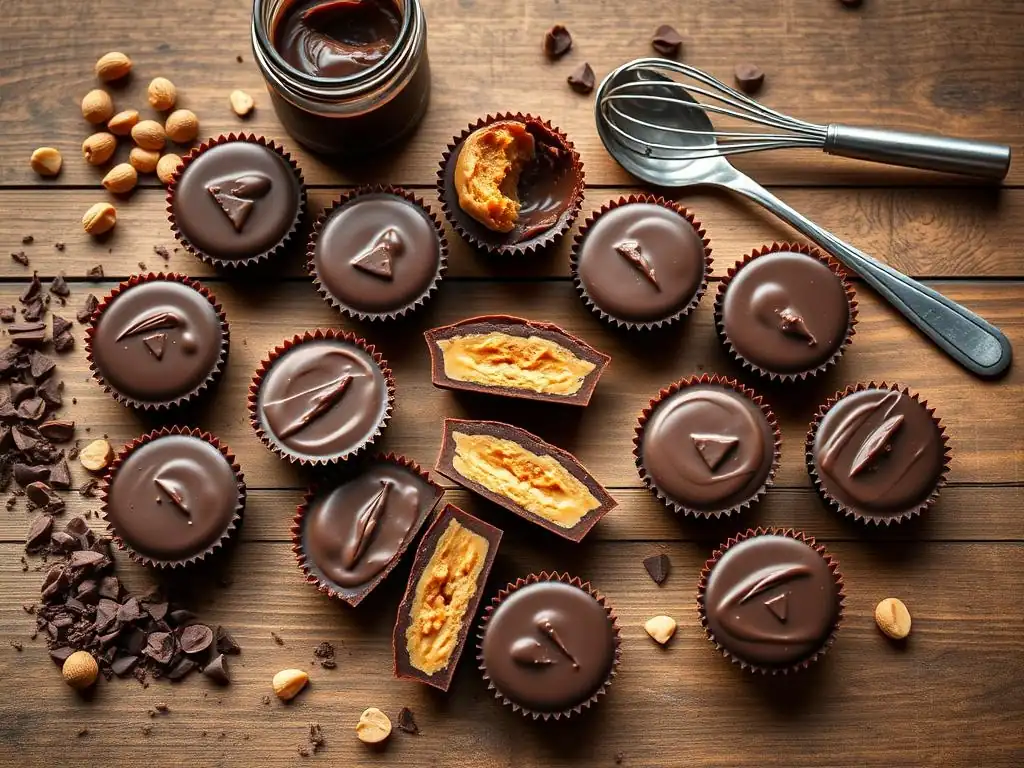
Welcome to BakeWithEase, your guide to unlocking baking bliss! Are you ready to whip up something truly irresistible? Dive into our recipe for Easy Homemade Chocolate Peanut Butter Cups and discover how simple it is to create a decadent treat that rivals anything you'd find in a store. But that's just the beginning! What other delicious secrets await within our pastry and dessert collection? Let's find out together!
- Homemade Chocolate Peanut Butter Cups: A Delicious Treat
- Introduction
- Ingredients
- Step-by-Step Guide
- Variations and Customizations
- Tips and Tricks
- Storing
- Enjoying
- Conclusion
- Frequently Asked Questions
- Final Reflection: The Enduring Allure of Simple Sweets
- Unlock Your Inner Chocolatier: Make the Perfect Peanut Butter Cups!
Homemade Chocolate Peanut Butter Cups: A Delicious Treat
Introduction
Why Make Your Own? Taste and Customization
Making your own easy homemade chocolate peanut butter cups offers a truly unparalleled taste experience compared to store-bought versions. When you craft them yourself, you control the quality and freshness of every ingredient.
This means you can use your favorite type of chocolate, whether it's rich dark chocolate or creamy milk chocolate, and pair it with your preferred peanut butter – smooth, crunchy, or even a natural variety with less sugar. The difference is noticeable: the chocolate is often richer, the peanut butter filling is creamier or more textured depending on your choice, and the overall flavor profile is exactly tailored to your liking.
Beyond taste, customization is a major advantage of making easy homemade chocolate peanut butter cups. Want extra peanut butter? Go for it! Prefer a thinner chocolate shell? You can adjust the amount. You can easily add other ingredients like a pinch of sea salt for a sweet and salty kick, chopped nuts for added crunch, or even a layer of caramel. This level of personalization is impossible with mass-produced candies, allowing you to create a unique treat that perfectly satisfies your specific cravings or dietary preferences. It transforms a simple candy into a gourmet experience.
A Guide to Perfect Peanut Butter Cups
Crafting perfect homemade chocolate peanut butter cups might sound intimidating, but it's surprisingly simple, making it an ideal project for bakers of all skill levels. This guide will walk you through each step, from selecting your ingredients to the final assembly and storage. We'll demystify the process, ensuring you achieve that classic combination of smooth peanut butter filling encased in a delightful chocolate shell. Our focus is on making this process accessible and enjoyable, proving that delicious, professional-looking candy is well within your reach right in your own kitchen.
Whether you're a complete beginner or have some baking experience, this guide is designed to help you succeed in making easy homemade chocolate peanut butter cups. We'll cover common pitfalls and offer simple solutions, ensuring your results are consistently excellent. By the end, you'll have a batch of irresistible treats and the confidence to experiment with variations. Get ready to impress yourself and others with these delightful homemade candies!
Ingredients
Chocolate: Choosing the Right Type
Selecting the right chocolate is crucial for delicious easy homemade chocolate peanut butter cups. You have several options, each offering a different flavor profile and working properties. Semi-sweet chocolate chips are a popular choice because they melt easily and have a balanced sweetness that pairs well with peanut butter.
They typically contain around 35-55% cocoa solids. Milk chocolate offers a sweeter, creamier result, while dark chocolate (often 60% cocoa or higher) provides a more intense, slightly bitter contrast to the sweet and salty filling. Consider using high-quality chocolate bars, which often contain more cocoa butter and melt more smoothly than chips, resulting in a glossier finish.
The type of chocolate also affects how it sets and its texture. Chocolate with a higher cocoa butter content, like couverture chocolate, sets more firmly and has a better snap, although standard baking chocolate or good quality chips work perfectly well for easy homemade chocolate peanut butter cups. Avoid using chocolate intended specifically for melting wafers, as they often contain vegetable oils instead of cocoa butter, which can affect flavor and texture. Experiment with different types to find your favorite combination – perhaps a mix of milk and dark chocolate for complexity.
Peanut Butter: Achieving Creamy Perfection
The peanut butter is the heart of your easy homemade chocolate peanut butter cups, and its type significantly impacts the filling's texture. Conventional creamy peanut butter, like those from major brands, contains added sugar and stabilizers, resulting in a consistently smooth, firm filling that holds its shape well. Natural peanut butter, which typically contains only peanuts and salt, tends to be runnier due to oil separation. If using natural peanut butter, stir it very well before measuring to incorporate the oil, and be aware that your filling might be slightly softer.
To achieve creamy perfection with natural peanut butter, you might need to adjust the amount of powdered sugar or add a binder like a small amount of melted butter or coconut oil. For conventional peanut butter, simply mixing it with the sweetener usually yields a perfect, pliable consistency.
The key is a filling that is firm enough to hold its shape when scooped but soft enough to bite through easily. Crunchy peanut butter is also an option if you enjoy pockets of nuts within your filling, adding an extra layer of texture to your easy homemade chocolate peanut butter cups.
Sweeteners and Other Filling Ingredients
The primary sweetener for the peanut butter filling in easy homemade chocolate peanut butter cups is typically powdered sugar (confectioners' sugar). Powdered sugar mixes smoothly into the peanut butter without creating a grainy texture, helping to thicken it into a workable consistency. The amount needed will vary depending on the type of peanut butter used; natural peanut butter often requires slightly more to firm up. Start with a base amount, like 1/2 cup per cup of peanut butter, and add more until the filling is moldable but not dry.
Other ingredients enhance the flavor and texture of the filling. A pinch of salt, even if your peanut butter is salted, can really boost the flavor contrast with the sweet chocolate. A splash of vanilla extract adds warmth and depth. Some recipes include a tablespoon or two of melted butter or coconut oil, especially when using natural peanut butter, to help bind the ingredients and make the filling smoother and easier to handle. These simple additions elevate the simple peanut butter and sugar mixture into a truly delectable filling for your easy homemade chocolate peanut butter cups.
Step-by-Step Guide
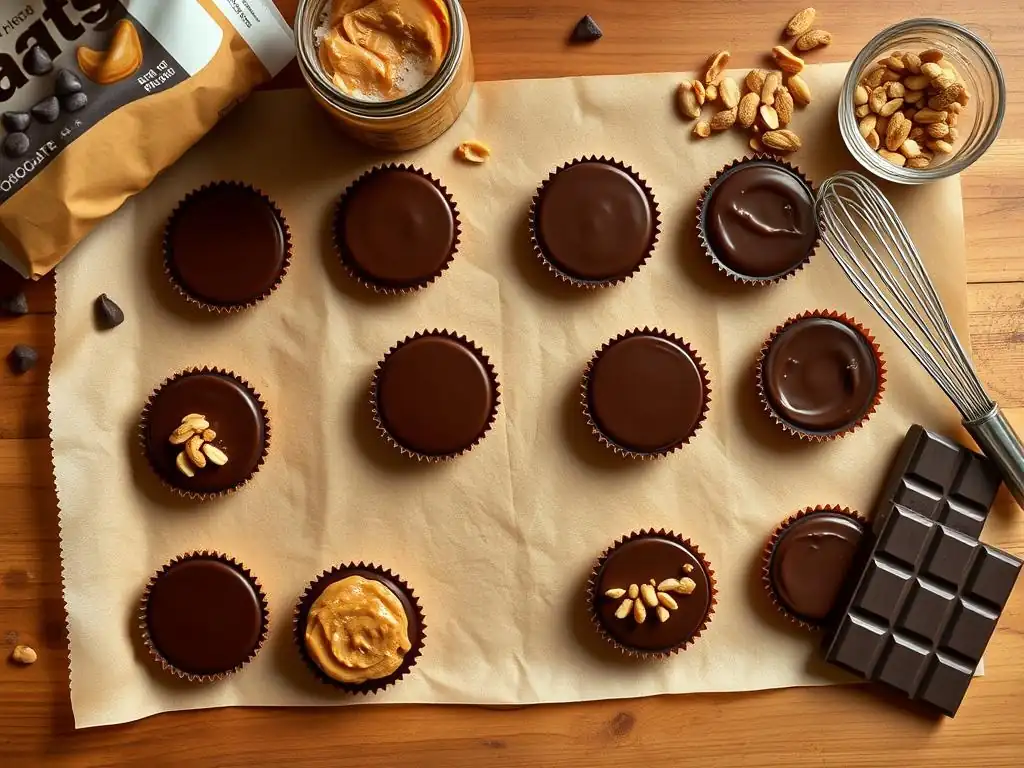
Preparing the Chocolate Shells
The first step in making easy homemade chocolate peanut butter cups is preparing the chocolate shells. You'll need about 10-12 ounces of chocolate for a standard batch yielding 12-18 cups. Start by melting your chosen chocolate. This can be done gently in a microwave, heating in 30-second intervals and stirring well each time until smooth, or using a double boiler on the stovetop over low heat, ensuring the bottom of the bowl doesn't touch the water. Melting chocolate carefully prevents scorching and helps achieve a smooth texture.
Once melted and smooth, place paper cupcake liners in a muffin tin. Spoon about 1-2 teaspoons of melted chocolate into the bottom of each liner. Use the back of the spoon to spread the chocolate up the sides of the liner, creating a cup shape. Aim for a relatively even layer, ensuring the bottom is covered well. Place the muffin tin in the refrigerator for about 10-15 minutes to allow this first layer of chocolate to set firmly. This forms the base and sides of your easy homemade chocolate peanut butter cups.
Creating the Peanut Butter Filling
While the chocolate shells chill, prepare your peanut butter filling. In a medium bowl, combine about 1 cup of peanut butter (creamy or crunchy, based on preference) with 1/2 cup to 1 cup of powdered sugar. The exact amount of sugar depends on how sweet you want the filling and the type of peanut butter used. If using natural peanut butter, you might add a tablespoon of melted butter or coconut oil for better consistency.
Mix the ingredients together using a spoon or rubber spatula until well combined and the mixture forms a pliable dough-like consistency. It should be firm enough to roll into small balls or press into disks but not crumbly. If it's too dry, add a tiny splash of milk or a bit more melted butter/oil. If too wet, add a touch more powdered sugar. This step is crucial for achieving the perfect texture in your easy homemade chocolate peanut butter cups filling.
Assembling the Cups
With the chocolate shells set and the peanut butter filling ready, it's time to assemble your easy homemade chocolate peanut butter cups. Take the muffin tin out of the refrigerator.
For the filling, you can either roll small portions (about 1-2 teaspoons worth) into balls and then flatten them into disks, or simply spoon small amounts directly into the center of each chocolate shell and gently press down. The goal is to have a layer of peanut butter filling that sits on top of the bottom chocolate layer but doesn't touch the sides of the liner, leaving space for the top chocolate layer.
Once the peanut butter filling is in place, re-melt any remaining chocolate if it has started to harden. Spoon the remaining melted chocolate over the top of each peanut butter filling layer, ensuring the peanut butter is completely covered and the top surface is smooth. Use the back of a spoon or gently tap the muffin tin on the counter to help the chocolate settle evenly and remove any air bubbles. This seals the peanut butter inside, completing the assembly of your easy homemade chocolate peanut butter cups.
Setting and Solidifying
After assembling your easy homemade chocolate peanut butter cups, the final step before enjoying them is allowing them to set and solidify completely. Place the muffin tin back into the refrigerator. The time required for setting depends on the temperature of your refrigerator and the type of chocolate used, but it typically takes about 30 to 60 minutes. You'll know they are ready when the chocolate is firm to the touch and easily separates from the paper liner (though you'll keep the liner on until serving).
For the best results and a clean release from the liners, ensure the cups are fully set before handling them extensively. Rushing this step can result in soft, misshapen cups. Once solidified, you can carefully remove the cups from the muffin tin. They are now ready to be stored or enjoyed immediately. This patient waiting period is the last hurdle before you get to savor your delicious easy homemade chocolate peanut butter cups.
Variations and Customizations
Dark Chocolate Peanut Butter Cups
One of the most popular variations for easy homemade chocolate peanut butter cups is using dark chocolate. Swapping out milk or semi-sweet chocolate for dark chocolate, especially varieties with 60% cocoa or higher, creates a more sophisticated and less sweet treat. The slight bitterness of the dark chocolate provides a wonderful contrast to the sweet and savory peanut butter filling. This variation is often preferred by those who find traditional peanut butter cups overly sweet.
To make dark chocolate easy homemade chocolate peanut butter cups, simply follow the steps outlined in the guide, substituting your preferred dark chocolate for the milk or semi-sweet. Ensure you melt dark chocolate carefully, as it can be slightly more prone to seizing if overheated. The setting time should be similar. The resulting cups offer a richer, more intense flavor profile, elevating the classic combination to a new level of deliciousness.
Adding Sea Salt
Adding a pinch of flaky sea salt is a simple yet transformative customization for easy homemade chocolate peanut butter cups. The salt crystals provide bursts of salinity that enhance the sweetness of the chocolate and the richness of the peanut butter, creating a delightful sweet and salty dynamic. This contrast awakens the palate and makes the flavors pop. It's a small addition that has a big impact.
You can add sea salt in a couple of ways. A popular method is to sprinkle a few flakes directly onto the top layer of melted chocolate just after you've poured it over the filling, before it sets. Alternatively, you can mix a tiny pinch directly into the peanut butter filling itself. For the best effect, use flaky sea salt like Maldon, rather than fine table salt, as the larger crystals provide distinct bursts of flavor. This simple touch makes your easy homemade chocolate peanut butter cups even more addictive.
Other Add-Ins
The beauty of making easy homemade chocolate peanut butter cups lies in their versatility. Beyond different chocolates and salt, you can incorporate numerous other add-ins to create unique flavor and texture combinations. For an extra crunch, mix chopped roasted peanuts or pretzels into the peanut butter filling. The pretzels add a fantastic salty crunch that works wonderfully with the sweet and chocolatey elements.
Consider adding a layer of caramel or a drizzle of honey or maple syrup over the peanut butter filling before adding the top chocolate layer for a gooey center. A dash of cinnamon or a pinch of cayenne pepper in the peanut butter can add warmth or a subtle kick. Chopped candy pieces, mini marshmallows, or even a layer of cookie dough are also fun, albeit less traditional, additions. The possibilities are vast, allowing you to truly personalize your easy homemade chocolate peanut butter cups.
Tips and Tricks
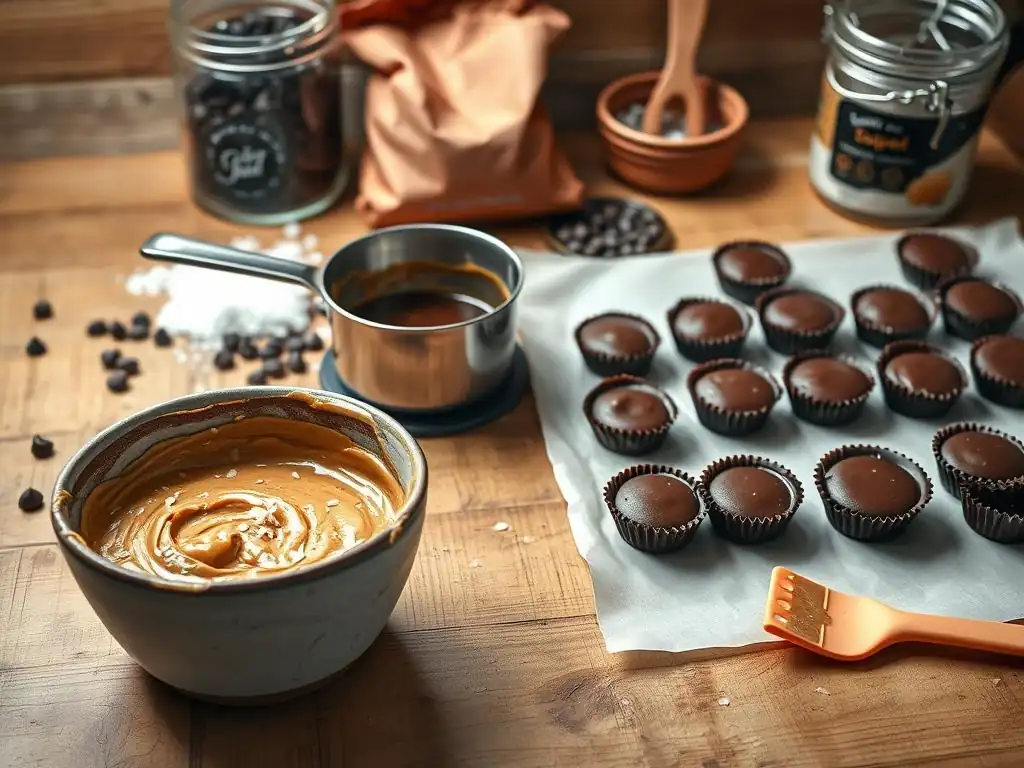
Preventing Chocolate Bloom
Chocolate bloom is the appearance of white or grayish streaks or patches on the surface of chocolate. It's not harmful to eat, but it affects the appearance and can make the chocolate seem stale. There are two types: fat bloom (cocoa butter separating) and sugar bloom (sugar crystals forming). Both are usually caused by improper melting, rapid temperature changes, or storing chocolate in humid conditions. For your easy homemade chocolate peanut butter cups, preventing bloom helps ensure a beautiful, professional finish.
To minimize the risk of bloom, melt your chocolate gently and avoid overheating it. If you're feeling ambitious, tempering the chocolate (heating, cooling, and reheating to specific temperatures) is the best way to ensure a stable crystal structure and prevent fat bloom, resulting in a glossy, snap-able chocolate. However, for easy homemade chocolate peanut butter cups, simply melting carefully and allowing them to set at a consistent cool temperature in the refrigerator is usually sufficient to prevent significant bloom. Storing them properly after they've set also plays a role.
Achieving a Smooth Peanut Butter Filling
A smooth, creamy peanut butter filling is essential for perfect easy homemade chocolate peanut butter cups. The consistency of your filling can be influenced by the type of peanut butter and the amount of powdered sugar used. If your filling feels too dry or crumbly after mixing in the powdered sugar, it will be difficult to press or roll into shape and might not have a pleasant texture when eating.
To achieve a smoother filling, especially when using natural peanut butter which can be stiff, you can slightly warm the peanut butter before mixing in the sugar. Just a few seconds in the microwave can make it more pliable. Adding a small amount of melted butter, coconut oil, or even a teaspoon of milk can also help create a smoother, more workable consistency.
Conversely, if your filling is too soft or runny, gradually add a little more powdered sugar until it reaches the desired moldable texture. Practice makes perfect in finding the right balance for your easy homemade chocolate peanut butter cups.
Troubleshooting
Even when making easy homemade chocolate peanut butter cups, you might encounter a few common issues. One problem is chocolate that doesn't set properly, remaining soft or gooey. This is often due to the type of chocolate used (some compound chocolates don't harden as well) or not chilling the cups long enough. Ensure you're using standard baking chocolate or chips and give them ample time in the refrigerator, at least 30-60 minutes, or even longer if needed.
Another issue could be the peanut butter filling being too hard or too soft. As mentioned, adjust the consistency by adding a little liquid (melted butter/oil, milk) if too hard, or more powdered sugar if too soft. If the chocolate shell cracks when you bite into it, it might be too thick; try using slightly less chocolate for the shells next time. Don't worry if your first batch isn't perfect; making easy homemade chocolate peanut butter cups is a skill that improves with practice.
Storing
Optimal Storage Conditions
Proper storage is key to keeping your easy homemade chocolate peanut butter cups fresh and delicious. The optimal way to store them is in an airtight container at room temperature, ideally in a cool, dry place away from direct sunlight. A pantry or cupboard is usually suitable. Stored this way, they maintain their texture and flavor well.
If your home is particularly warm (above 75°F or 24°C), or if you prefer them chilled, you can store your easy homemade chocolate peanut butter cups in an airtight container in the refrigerator. Refrigeration will make the chocolate harder and the filling firmer, which some people prefer. Just be aware that taking them directly from the cold fridge into a warm room can sometimes encourage chocolate bloom due to condensation, though this is usually cosmetic.
Shelf Life
When stored correctly, easy homemade chocolate peanut butter cups have a surprisingly good shelf life. At cool room temperature in an airtight container, they typically stay fresh for about 1 to 2 weeks. The high sugar and fat content acts as a preservative.
If stored in the refrigerator, their shelf life can extend to 3-4 weeks. While they might be safe to eat for longer, the quality, particularly the texture of the chocolate, can degrade over time. You'll notice they are past their prime if the chocolate develops significant bloom, the filling becomes dry or crumbly, or they develop any off odors. For the best taste and texture, aim to enjoy your easy homemade chocolate peanut butter cups within a couple of weeks of making them.
Enjoying
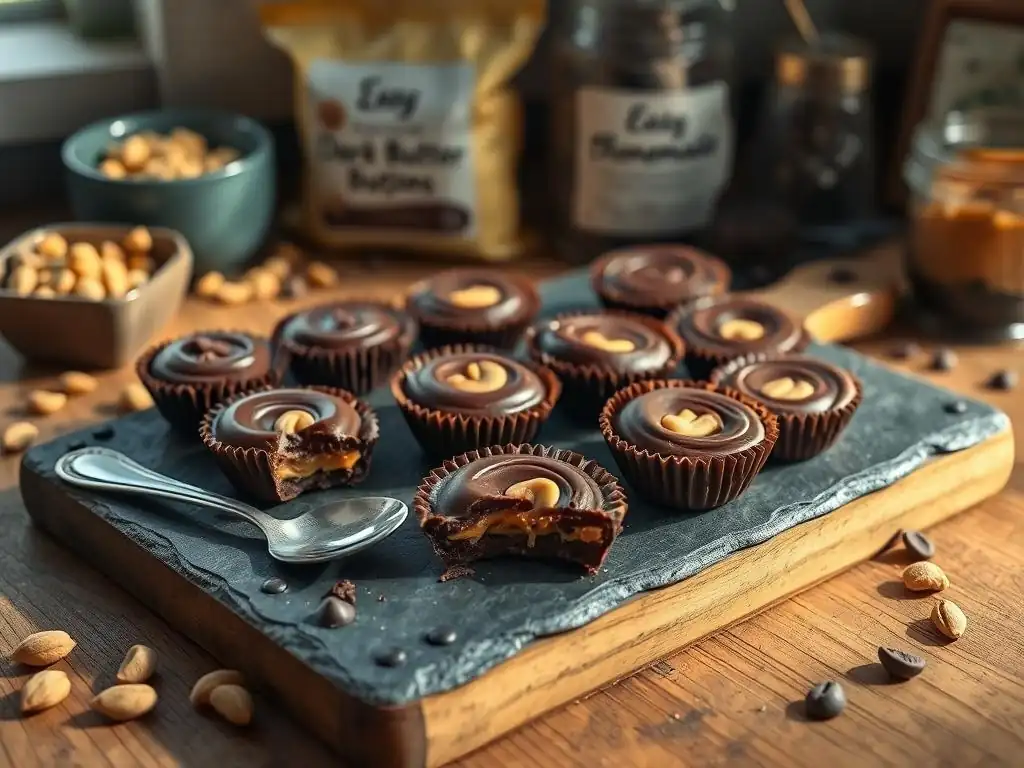
Serving Suggestions
Easy homemade chocolate peanut butter cups are delightful served just as they are, straight from storage. If refrigerated, allowing them to sit at room temperature for 10-15 minutes before serving can soften the chocolate slightly, enhancing the texture and flavor release. They pair wonderfully with a cold glass of milk, a cup of coffee, or even alongside a scoop of vanilla ice cream.
Consider removing the paper liners before serving for a cleaner presentation, especially if giving them as gifts. You can arrange them on a small platter or in miniature candy wrappers. Their rich flavor means just one or two are often enough to satisfy a sweet craving, making them perfect small indulgences. Enjoy the moment you bite through the chocolate shell into the creamy, nutty center of your easy homemade chocolate peanut butter cups.
Perfect for Gifts
Easy homemade chocolate peanut butter cups make truly thoughtful and appreciated gifts. Crafting them yourself adds a personal touch that store-bought candy can't match. They are perfect for holidays, birthdays, or just as a sweet gesture for friends, family, or neighbors.
To package them for gifting, place individual cups in small paper candy cups or wrappers, then arrange them in a decorative box or tin lined with tissue paper. Tie the box with a ribbon for a lovely presentation. Because they store well at room temperature, they are convenient to transport. Giving the gift of easy homemade chocolate peanut butter cups is a sure way to bring a smile to someone's face.
Conclusion
Frequently Asked Questions
What makes these chocolate peanut butter cups easy to make?
These cups rely on simple ingredients and a straightforward process. There's no need for tempering chocolate or complex techniques!
Can I substitute the peanut butter with another nut butter?
Absolutely! Feel free to use almond butter, cashew butter, or even sunflower seed butter for a delicious variation. Just ensure it's a smooth variety for the best texture.
What kind of chocolate is recommended for these cups?
Semi-sweet chocolate is a classic choice, but you can use dark chocolate for a richer flavor or milk chocolate for a sweeter treat. Choose your favorite!
How should I store these homemade chocolate peanut butter cups?
Store them in an airtight container in the refrigerator for up to two weeks. This helps maintain their firm texture and prevents melting.
Can I add any extra ingredients to the peanut butter filling?
Yes! Consider adding a pinch of sea salt, some chopped nuts, or even a drizzle of honey to the peanut butter filling for added flavor and texture.
Final Reflection: The Enduring Allure of Simple Sweets
The ease of crafting delicious treats at home is more relevant than ever in a world obsessed with convenience and instant gratification. Making these chocolate peanut butter cups isn't just about the final product; it's about reclaiming control over what you eat and enjoying the process of creation. The simple act of melting chocolate and assembling these little delights offers a surprising sense of accomplishment and a delicious reward.
The enduring appeal of homemade chocolate peanut butter cups lies not just in their taste, but in the nostalgic comfort they evoke. They represent a simpler time, a connection to childhood memories, and a tangible expression of care, whether for oneself or others. The best things in life are simple,
a sentiment perfectly embodied by this recipe. The act of sharing these homemade treats fosters connection and strengthens bonds, creating memories far sweeter than any store-bought candy.
Now, I invite you to consider the power of simple pleasures. Don't just passively consume; actively create. Try this recipe, adapt it to your liking, and experience the joy of making something delicious with your own two hands. The satisfaction you'll feel, the deliciousness you'll savor, and the memories you'll create will far outweigh the minimal effort involved. Embrace the simplicity, and let the sweet taste of accomplishment linger long after the last cup is gone.
Unlock Your Inner Chocolatier: Make the Perfect Peanut Butter Cups!
Thanks for joining us on this delicious journey! We hope you've gained the confidence to tackle homemade peanut butter cups – and maybe even discovered a new favorite treat. Ready to take your chocolate skills to the next level?
- Master the Melt: Try experimenting with different types of chocolate to discover your perfect blend! White chocolate with sea salt, anyone?
- Share the Sweetness: Post a picture of your creations on social media and tag us @BakeWithEase – we'd love to see your culinary masterpiece!
- Dive Deeper: Explore more of our easy baking recipes on BakeWithEase.com for even more delectable adventures.
What's your favorite unexpected ingredient to add to classic peanut butter cups? Let us know in the comments below!