
5Ingredient NoBake Desserts: Simple Ingredients, Amazing Results

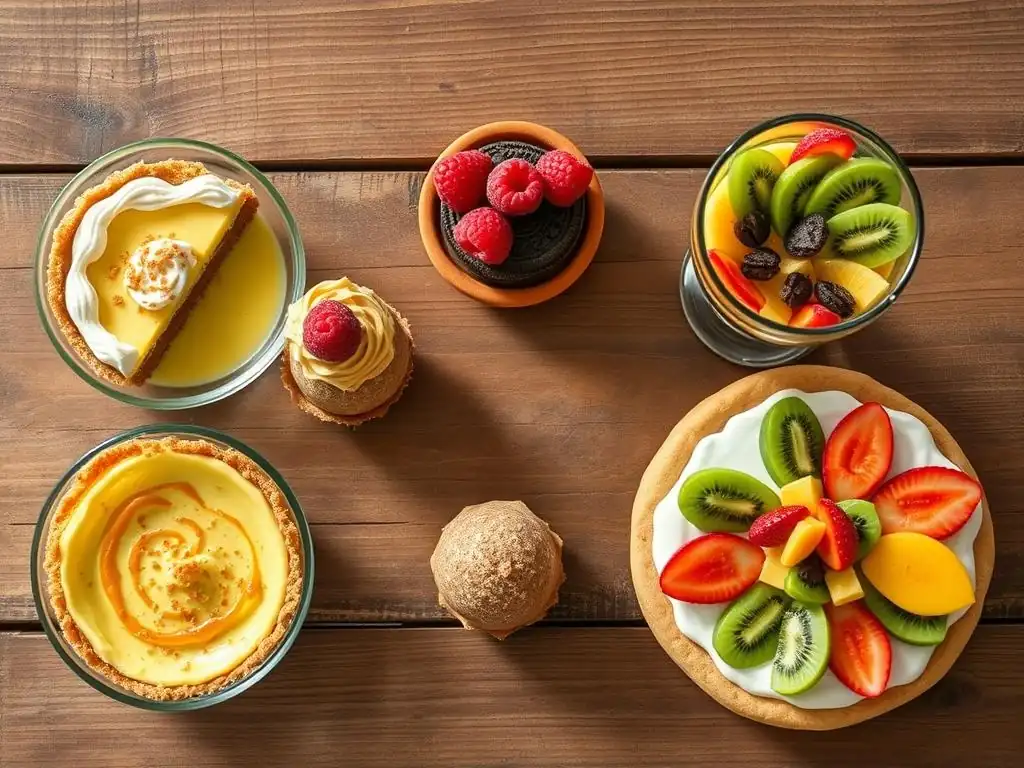
Welcome to BakeWithEase, your trusted guide to effortless baking! Are you craving a delicious treat but dread the thought of turning on the oven? Discover the joy of creating mouthwatering desserts with our 5-Ingredient No-Bake wonders. Intrigued? Keep reading to unlock unbelievably simple recipes that deliver amazing results, proving that baking doesn't have to be complicated. Get ready to impress with minimal effort!
- Sweet Sensations: Delicious No-Bake Desserts with Minimal Ingredients
- Why Choose 5-Ingredient No-Bake Recipes?
- Recipe 1: No-Bake Chocolate Oatmeal Bars (5 Ingredients!)
- Recipe 2: Quick & Easy No-Bake Berry Yogurt Parfaits (5 Ingredients!)
- Recipe 3: 5-Ingredient No-Bake Peanut Butter Cookies
- Recipe 4: No-Bake Graham Cracker Bites (Just 5 Ingredients!)
- Recipe 5: Easy No-Bake Rocky Road Bars (5 Ingredients!)
- Mastering the Art of No-Bake Baking: Essential Tips
- Beyond the Basics: Exploring More No-Bake Dessert Ideas
- Enjoy Your Delicious and Easy 5-Ingredient No-Bake Desserts!
-
Frequently Asked Questions
- What exactly is a 5-Ingredient No-Bake Dessert?
- Why would someone choose a no-bake dessert over a baked one?
- What are some examples of common ingredients used in 5-Ingredient No-Bake Desserts?
- Are 5-Ingredient No-Bake Desserts less impressive than more complex desserts?
- Where can I find reliable recipes for 5-Ingredient No-Bake Desserts?
- Final Reflection: The Sweet Simplicity of Less
- Unleash Your Inner Pastry Chef!
Sweet Sensations: Delicious No-Bake Desserts with Minimal Ingredients
Welcome to the wonderful world of no-bake desserts! Forget heating up the kitchen or wrestling with complex techniques. These recipes focus on using just a handful of basic items – specifically, five ingredients or fewer – to create absolutely delightful treats. Whether you're a complete beginner or just looking for a quick win, these simple ingredient no bake options are your secret weapon for satisfying sweet cravings with minimal fuss and maximum enjoyment.
The beauty of focusing on a minimal ingredient no bake approach is that it strips away complexity, allowing the natural flavors of the ingredients to shine. It’s about accessibility and ease, proving that you don't need a pantry full of exotic items or hours of free time to whip up something truly special. Get ready to explore some incredibly easy and delicious ways to create sweet sensations without ever turning on the oven.
Why Choose 5-Ingredient No-Bake Recipes?
Simplicity and Speed: Perfect for Quick Treats
Opting for a five-ingredient no-bake recipe dramatically cuts down on preparation time. With only a few items to measure and combine, you can often go from craving to creation in under 15 or 20 minutes, excluding chilling time. This makes them ideal for spontaneous get-togethers, last-minute dessert needs, or simply when you want a sweet treat without a lengthy process.
Beyond the quick prep, the simple nature of these ingredient no bake recipes means less mess and fewer dishes to wash. Imagine a dessert that requires just one or two bowls and a spoon – that's the reality for many of these minimalist delights. This efficiency is a major plus for anyone with a busy schedule or limited kitchen space, transforming baking from a chore into a genuinely easy and enjoyable activity.
No-Oven Required: Beat the Heat with Easy No-Bake Treats
One of the most significant advantages of no-bake recipes is the ability to create delicious desserts without generating heat. This is particularly appealing during warm summer months when turning on the oven feels like a punishment. You can enjoy a cool, refreshing treat while keeping your kitchen comfortable and energy bills down.
Furthermore, the 'no oven' aspect opens up possibilities for bakers in various living situations. Dorm rooms, small apartments, or even while traveling with access to a fridge can become your dessert workshop. It democratizes baking, making it accessible to virtually anyone, anywhere, as long as they have a few simple ingredients and a place to chill the finished product.
Budget-Friendly Baking: Delicious Desserts on a Dime
Focusing on a minimal ingredient no bake approach often translates directly into cost savings. Fewer ingredients usually mean a lower grocery bill. Many five-ingredient recipes rely on pantry staples like oats, peanut butter, sugar, butter, or chocolate, which are relatively inexpensive and often already on hand.
This budget-friendly aspect makes ingredient no bake desserts a smart choice for students, families looking to save money, or anyone who loves delicious food without a hefty price tag. For example, a batch of simple chocolate oatmeal bars might cost less than a few dollars to make, yielding multiple servings compared to buying individual store-bought treats.
Recipe 1: No-Bake Chocolate Oatmeal Bars (5 Ingredients!)
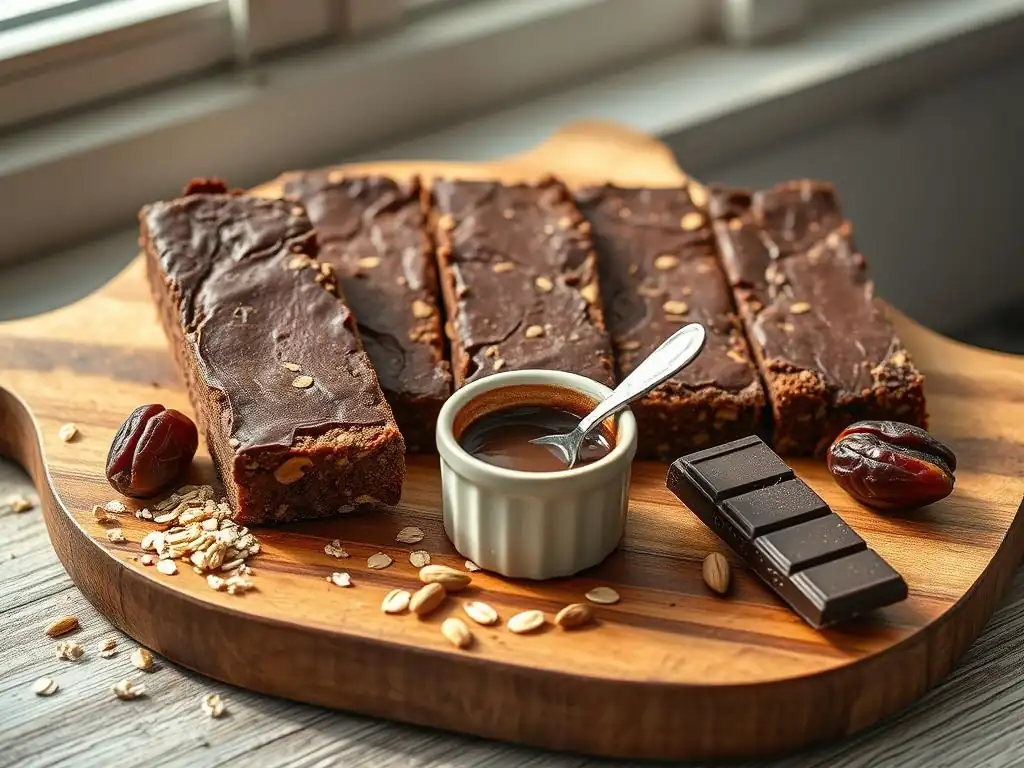
These classic no-bake bars are a staple for a reason: they're incredibly easy, require minimal ingredients, and deliver a satisfyingly rich, chewy texture. You likely have most, if not all, of the necessary items in your pantry right now, making them the perfect spontaneous dessert solution. They come together quickly on the stovetop and simply need time to set in the refrigerator.
The beauty of this simple ingredient no bake recipe lies in its simplicity. The combination of chocolate, peanut butter, and oats creates a nostalgic flavor profile that appeals to almost everyone. Plus, the process is so straightforward that it's an excellent recipe for getting kids involved in the kitchen.
Ingredients for Chocolate Oatmeal Bars
You'll need just five basic items for these delightful bars. Start with 1/2 cup of unsalted butter, melted. You'll also need 1/2 cup of milk (any type will work, but whole milk adds a touch more richness), 1/2 cup of granulated sugar, and 1/3 cup of unsweetened cocoa powder. The final essential component is 3 cups of rolled oats (old-fashioned oats).
These ingredients are widely available and relatively inexpensive. Using rolled oats provides the best texture, offering a pleasant chewiness that distinguishes these bars. Ensure your cocoa powder is unsweetened for the correct balance of flavor against the sugar.
Step-by-Step Guide to Making No-Bake Chocolate Oatmeal Bars
Begin by combining the butter, milk, sugar, and cocoa powder in a medium saucepan over medium heat. Stir constantly as the mixture comes to a gentle boil. Once it reaches a boil, let it simmer for just 1 minute, continuing to stir to prevent scorching. This brief boiling period helps the sugar dissolve fully and creates the right base consistency.
Remove the saucepan from the heat and immediately stir in the 3 cups of rolled oats. Mix quickly and thoroughly until the oats are completely coated in the chocolate mixture. Working fast is key here, as the mixture will start to thicken as it cools.
Once combined, drop spoonfuls of the mixture onto parchment paper or wax paper laid on a baking sheet. You can shape them into mounds or flatten them slightly with the back of a spoon. Alternatively, press the entire mixture into an 8x8 inch pan lined with parchment paper for bars that can be cut later.
Tips for Perfecting Your No-Bake Chocolate Oatmeal Bars
For the best texture, ensure you use rolled oats (old-fashioned) rather than instant oats, which can become mushy. Also, be precise with the 1-minute boiling time; boiling for too long can result in dry, crumbly bars, while not boiling long enough might make them too soft and sticky.
Allow the bars plenty of time to set. While they might seem firm after 30 minutes in the fridge, chilling them for at least 1 to 2 hours yields the ideal chewy yet set consistency. If you pressed them into a pan, chilling for longer makes them easier to cut into neat squares.
Recipe 2: Quick & Easy No-Bake Berry Yogurt Parfaits (5 Ingredients!)
These parfaits are less of a traditional "baked" dessert and more of a layered delight, but they fit perfectly into the minimal ingredient no bake category. They are incredibly refreshing, customizable, and come together in mere minutes. Ideal for breakfast, a healthy snack, or a light dessert, they showcase how simple ingredients can create a visually appealing and delicious treat.
The beauty of a yogurt parfait is its versatility. By combining yogurt, fruit, and a crunchy element, you get a satisfying mix of textures and flavors. This specific five-ingredient version keeps things simple and focuses on natural sweetness and tang, making it a guilt-free indulgence.
Ingredients for Berry Yogurt Delight
To assemble these vibrant parfaits, you'll need 2 cups of Greek yogurt (plain or vanilla works best). You'll also need 1 cup of mixed fresh berries (strawberries, blueberries, raspberries, or a mix). A crunchy element is essential, so have 1/2 cup of granola ready. For a touch of sweetness, a drizzle of 2 tablespoons of honey or maple syrup is perfect. The fifth ingredient is entirely optional but adds a lovely touch: 1/4 teaspoon of vanilla extract mixed into the yogurt if using plain.
These ingredients are readily available at any grocery store. Using Greek yogurt provides a thicker, creamier texture and higher protein content compared to regular yogurt. Fresh berries offer the best flavor and nutritional value, but frozen berries, thawed, can also be used in a pinch.
Assembling Your No-Bake Yogurt Parfaits
Assembly is straightforward and quick. Start with your chosen glass or bowl. Layer about one-third of the yogurt at the bottom. This creates a creamy base for your parfait.
Next, add about one-third of the mixed berries over the yogurt layer. Sprinkle about one-third of the granola over the berries. Repeat these layers two more times, finishing with a layer of granola and berries on top. Drizzle the honey or maple syrup over the top layer just before serving. For best results, assemble just before eating to keep the granola crunchy, or if preparing ahead, add the granola right before serving.
Variations: Different Yogurt & Granola Options
The base of this ingredient no bake parfait is highly adaptable. While Greek yogurt is recommended for its thickness, you can use any type of yogurt you prefer – dairy-free alternatives like coconut or almond milk yogurt work beautifully. Experiment with flavored yogurts, just be mindful of added sugars.
Granola is another area for creativity. Choose your favorite type, whether it's classic oat granola, nut-free, or one with added seeds or dried fruit. For a twist on the crunch, you could substitute granola with crushed graham crackers (staying within the ingredient count if possible) or even chopped nuts like almonds or walnuts.
Yes, you can make delicious, chewy peanut butter cookies without ever turning on your oven! These simple ingredient no bake cookies are a fantastic option when you're short on time or just want a quick fix for a peanut butter craving. They rely on the binding power of peanut butter and the setting ability of a few other key ingredients.
These cookies are surprisingly satisfying and have a texture similar to a dense, chewy candy bar. The ingredient no bake approach means no spreading issues in the oven – they hold their shape beautifully as they chill. They're a nostalgic treat for many and incredibly easy to whip up.
You'll need 1/2 cup of granulated sugar and 1/2 cup of packed light brown sugar for sweetness and chewiness. The star ingredient is 1 cup of smooth peanut butter (natural or conventional both work, but conventional tends to set a bit firmer). You'll also need 1/4 cup of milk and 1/4 cup of unsalted butter.
Using both granulated and brown sugar provides a balanced sweetness and contributes to the cookie's texture. Smooth peanut butter integrates more easily into the mixture, but crunchy can be used if you prefer bits of nuts in your cookies. Ensure your butter is softened but not melted for the best results when combining ingredients.
In a medium saucepan, combine the granulated sugar, brown sugar, milk, and butter. Place the saucepan over medium heat and bring the mixture to a rolling boil, stirring constantly. Let it boil for exactly 1 minute. This step is crucial for dissolving the sugars and achieving the correct consistency.
Remove the saucepan from the heat and immediately stir in the peanut butter. Mix vigorously until the peanut butter is completely melted and the mixture is smooth and well combined. Work quickly, as the mixture will start to thicken as it cools. The result should be a thick, glossy dough-like consistency.
Once the mixture is ready, drop spoonfuls (about 1 to 1.5 tablespoons each) onto sheets of parchment paper or wax paper. Leave a little space between each cookie.
If desired, you can press a fork onto the top of each cookie in a criss-cross pattern, just like traditional baked peanut butter cookies. This step is purely for aesthetics. Let the cookies sit at room temperature for about 30 minutes to cool slightly, then transfer them to the refrigerator to chill for at least 1 to 2 hours, or until completely set. They will firm up as they cool, becoming ready to eat.
Recipe 4: No-Bake Graham Cracker Bites (Just 5 Ingredients!)
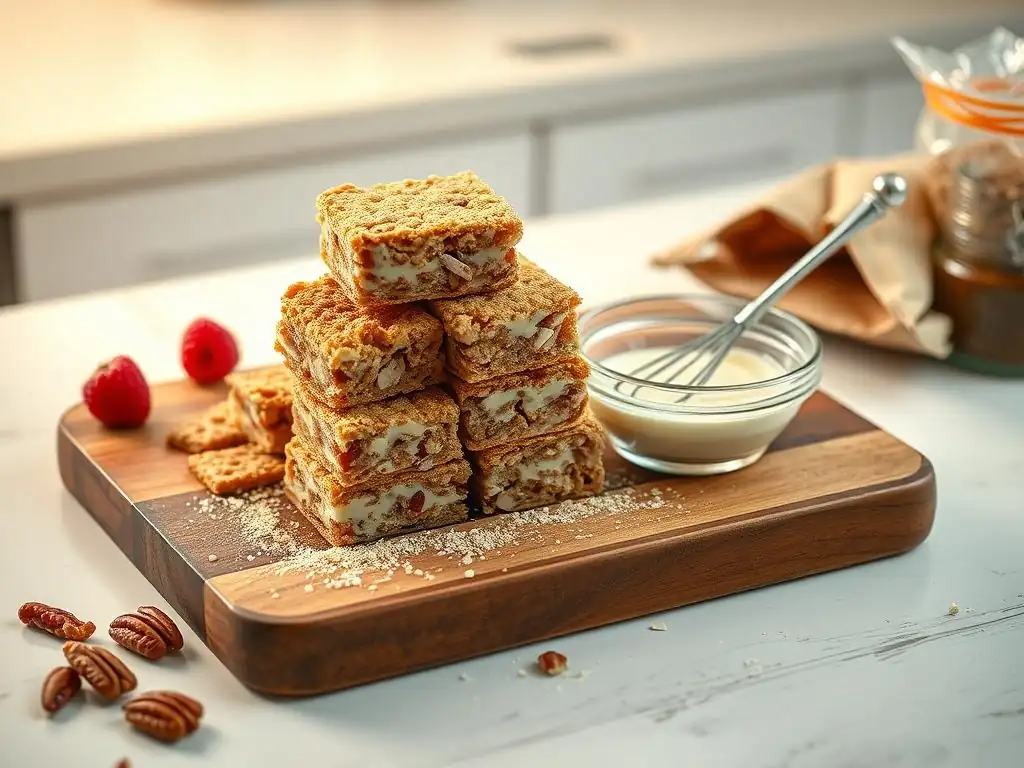
These little bites are incredibly versatile and satisfy a craving for something sweet and crunchy with minimal effort. They're essentially a deconstructed cheesecake or s'mores experience rolled into a simple ingredient no bake treat. Perfect for portion control or easy snacking, they are a hit with both kids and adults.
The combination of crunchy graham crackers, creamy filling, and a touch of sweetness is undeniably appealing. The ingredient no bake method makes them quick to prepare, requiring only melting and mixing, followed by chilling time. They are a testament to how simple components can yield delicious results.
Graham Cracker Bite Ingredients
For these easy bites, you'll need 1 cup of graham cracker crumbs (about 8-10 full graham cracker sheets, crushed). You'll also need 1/4 cup of unsalted butter, melted. The creamy filling comes from 4 ounces of cream cheese, softened. Sweetness is provided by 1/4 cup of powdered sugar. Finally, you'll need 1/2 teaspoon of vanilla extract.
Ensure your cream cheese is properly softened at room temperature so it mixes smoothly without lumps. Crushing graham crackers can be done by hand in a bag or using a food processor for finer crumbs. The powdered sugar dissolves easily and contributes to a smooth filling texture.
Preparing Your No-Bake Graham Cracker Bites
First, combine the graham cracker crumbs and melted butter in a small bowl. Stir until the crumbs are evenly moistened and resemble wet sand. This mixture will form the base and topping for your bites.
In a separate medium bowl, beat the softened cream cheese with the powdered sugar and vanilla extract until smooth and creamy. An electric mixer works best for this, but you can also achieve a smooth consistency with a whisk and some effort. Make sure there are no lumps of cream cheese.
Chilling and Serving Your No-Bake Dessert
Take about half of the graham cracker crumb mixture and press it firmly into the bottom of an 8x4 inch loaf pan lined with parchment paper, or into individual muffin liner cups for mini bites. This forms the base layer.
Spread the cream cheese mixture evenly over the graham cracker base. Sprinkle the remaining graham cracker crumbs over the top of the cream cheese layer. Gently press the top layer down slightly. Cover the pan or individual cups and refrigerate for at least 2 hours, or until the cream cheese layer is firm. Once chilled, lift the parchment paper from the loaf pan and cut into squares or bars. If using muffin cups, simply peel away the liner. Serve cold.
Recipe 5: Easy No-Bake Rocky Road Bars (5 Ingredients!)
Rocky Road is a beloved flavor combination, and turning it into a simple ingredient no bake bar makes it even better. These bars are wonderfully chewy, studded with marshmallows and peanuts, and coated in rich chocolate. They are incredibly forgiving and require minimal active time, making them perfect for a quick dessert project.
The magic happens when melted chocolate and peanut butter bind together marshmallows and peanuts, creating a delicious, slightly sticky, and utterly satisfying treat. This ingredient no bake method ensures a chewy texture without any risk of drying out in an oven. They are simple, classic, and always a crowd-pleaser.
Ingredients for Rocky Road Bars
You'll need 1 cup of semi-sweet chocolate chips (or chopped chocolate). Combine this with 1/2 cup of smooth peanut butter. The classic rocky road additions are 1 cup of miniature marshmallows and 1/2 cup of roasted peanuts. The fifth ingredient is typically 1 tablespoon of unsalted butter, which helps make the chocolate mixture smooth and pliable.
Using semi-sweet chocolate chips provides a balanced sweetness that pairs well with the salty peanuts and sweet marshmallows. Miniature marshmallows distribute more evenly throughout the bars than larger ones. Roasted peanuts add a nice crunch and salty contrast to the sweet components.
No-Bake Bar Preparation Steps
In a large microwave-safe bowl, combine the chocolate chips, peanut butter, and butter. Microwave on high in 30-second intervals, stirring after each interval, until the mixture is completely melted and smooth. This usually takes about 1.5 to 2 minutes total, depending on your microwave power. Stir well to ensure everything is fully incorporated.
Once the chocolate mixture is smooth, quickly stir in the miniature marshmallows and roasted peanuts. Mix until the marshmallows and peanuts are evenly coated. Work relatively fast, as the chocolate will start to set as it cools.
Cutting and Serving Your Simple Rocky Road Bars
Line an 8x8 inch baking pan with parchment paper, leaving some overhang on the sides to make lifting easier. Pour the rocky road mixture into the prepared pan and spread it out evenly using a spatula or the back of a spoon. Press it down gently to compact the mixture.
Cover the pan and refrigerate for at least 2 hours, or until the bars are completely firm. Once set, use the parchment paper overhang to lift the entire block out of the pan. Place it on a cutting board and use a sharp knife to cut it into squares or bars. Store the cut bars in an airtight container in the refrigerator or at room temperature for a few days.
Mastering the Art of No-Bake Baking: Essential Tips
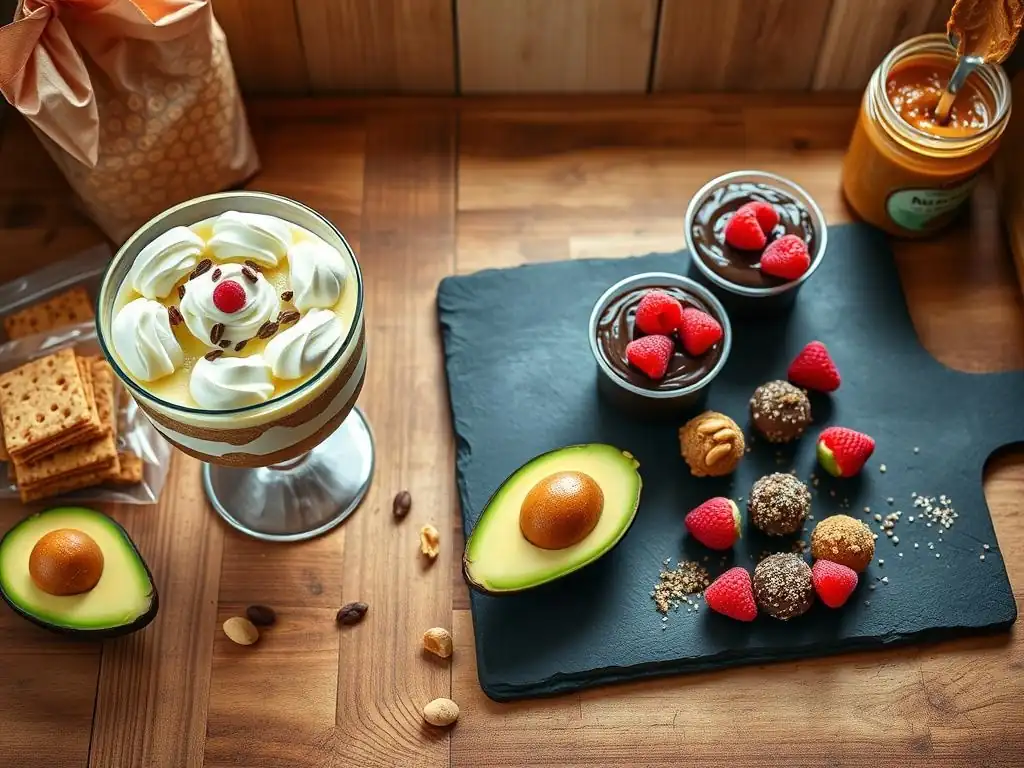
While no-bake desserts are inherently simple, a few tips can elevate your minimal ingredient no bake creations from good to great. Understanding how ingredients behave at different temperatures and the importance of proper chilling are key to success. These techniques apply broadly across many types of ingredient no bake recipes, ensuring consistent and delicious results every time.
Paying attention to detail, even in these simple recipes, makes a difference. Knowing when to stir, how long to chill, and the impact of ingredient quality can transform your no-bake experience. It's about harnessing the power of basic ingredients and techniques to create something truly delightful without the complexities of traditional baking.
Ingredient Substitutions for No-Bake Desserts
Many minimal ingredient no bake recipes are quite flexible when it comes to substitutions. For example, in recipes calling for chocolate, you can often swap semi-sweet for milk or dark chocolate based on preference. Peanut butter can sometimes be substituted with other nut butters like almond or cashew butter, though this might slightly alter the texture and flavor profile.
When substituting, consider the function of the original ingredient. If butter is used for binding and richness, another fat like coconut oil (though this might require slight adjustments) could work, but flavor will change. For sweeteners, honey, maple syrup, or agave can often replace sugar in liquid form, but granulated sugar provides structure in some cooked no-bake bases. Always test small batches if making significant substitutions in an ingredient no bake recipe.
Storage Tips for Your 5-Ingredient No-Bake Creations
Proper storage is crucial for maintaining the texture and freshness of your simple ingredient no bake desserts. Most no-bake treats that rely on chilling to set, like the chocolate oatmeal bars or rocky road bars, should be stored in an airtight container in the refrigerator. This helps them retain their shape and prevents them from becoming too soft or sticky.
Items like yogurt parfaits are best assembled just before serving to keep crunchy elements like granola from becoming soggy. If you must store them assembled, add the granola just before eating. Generally, most no-bake desserts will last for 3-5 days when stored correctly in the refrigerator. Some, like the peanut butter cookies, can even be stored at cool room temperature in an airtight container.
Scaling Your Recipes: Making Larger or Smaller Batches of No-Bake Treats
Adjusting the yield of a minimal ingredient no bake recipe is usually quite straightforward. To double a recipe, simply double the quantity of each of the five ingredients. Ensure you use a larger saucepan or mixing bowl to accommodate the increased volume. Cooking times for stovetop mixtures might need to be slightly adjusted, perhaps boiling for an extra 30 seconds to a minute, but chilling times often remain similar.
Conversely, halving a recipe requires halving each ingredient quantity. This is useful if you're baking for one or two people or just want a small test batch. Use a smaller saucepan or mixing bowl. Chilling times will likely be slightly shorter due to the reduced volume, but always check for firmness before considering them set. The key is maintaining the correct ratio of the five ingredients.
Beyond the Basics: Exploring More No-Bake Dessert Ideas
Once you've mastered these foundational five-ingredient no-bake recipes, you'll realize the potential is vast. The principles of combining simple ingredients that set without heat can be applied to countless other delicious creations. Think beyond bars and cookies – explore layered desserts, simple mousses, or even quick fruit tarts using pre-made crusts (though this might push the ingredient count slightly).
Experimentation is encouraged! The beauty of these simple ingredient no bake concepts is that they are forgiving. Don't be afraid to try new flavor combinations or incorporate different textures. The ease of preparation means that even if an experiment doesn't turn out exactly as planned, you haven't invested a huge amount of time or expensive ingredients.
Experimenting with Flavors in Your No-Bake Baking
The basic frameworks of these minimal ingredient no bake recipes are excellent starting points for flavor variations. For the chocolate oatmeal bars, consider adding a pinch of cinnamon or a touch of instant coffee granules to the chocolate mixture before adding the oats. For the peanut butter cookies, swirl in some melted chocolate right before they set.
For the graham cracker bites, think about adding citrus zest to the cream cheese filling or a different spice like nutmeg. The rocky road bars are perfect for swapping peanuts for other nuts (walnuts, pecans) or adding other mix-ins like dried cranberries or chocolate candies (though these additions would technically increase the ingredient count beyond five, if you're sticking strictly to the rule). The key is to add flavorings that complement the base five ingredients.
No-Bake Dessert Presentation Ideas
Even simple ingredient no bake desserts can look impressive with a little attention to presentation. Instead of just cutting bars, try using cookie cutters on a sheet of chilled mixture before it fully sets to create fun shapes. Drizzle melted chocolate or a simple glaze (like powdered sugar mixed with a tiny bit of milk) over your finished bars or cookies.
For parfaits, use clear glasses to showcase the beautiful layers of yogurt, fruit, and granola. Top with a fresh berry or a sprig of mint. Even simple cookies dropped onto parchment paper can be arranged nicely on a plate or stacked in a visually appealing way. Presentation adds an extra layer of enjoyment to your delicious, easy-to-make treats.
More No-Bake Dessert Recipes
The world of minimal ingredient no bake desserts extends far beyond the five recipes listed here. Consider simple chocolate truffles made from chocolate and heavy cream, or a quick fruit fool combining whipped cream and pureed fruit. Many versions of fudge require only a few ingredients and setting time.
Exploring ingredient no bake recipes online or in cookbooks will reveal a vast array of possibilities. Look for recipes that focus on combining ingredients that set through chilling or simply mixing, like energy balls, simple fruit tarts with pre-made crusts, or layered puddings. The core principle remains the same: achieving delicious results with minimal fuss and no oven required.
Enjoy Your Delicious and Easy 5-Ingredient No-Bake Desserts!
Frequently Asked Questions
What exactly is a 5-Ingredient No-Bake Dessert?
It's a dessert that requires no oven and uses only five ingredients or fewer (excluding common pantry staples like salt and water). These recipes are celebrated for their simplicity and speed.
Why would someone choose a no-bake dessert over a baked one?
No-bake desserts are fantastic when you need a quick and easy treat, or when you want to avoid turning on the oven, especially during hot weather. They're also great for beginner bakers.
What are some examples of common ingredients used in 5-Ingredient No-Bake Desserts?
Typical ingredients include things like chocolate, cream cheese, graham crackers, sweetened condensed milk, and whipped cream. You'll often find fruit as a key component, too.
Are 5-Ingredient No-Bake Desserts less impressive than more complex desserts?
Not at all! With the right combination of high-quality ingredients and a good recipe, these desserts can be incredibly delicious and satisfying. The focus is on flavor and simplicity.
Where can I find reliable recipes for 5-Ingredient No-Bake Desserts?
Websites like BakeWithEase.com are a great resource, offering step-by-step guides and easy-to-find ingredient lists for a variety of no-bake treats. Look for recipes that suit your skill level and taste preferences.
Final Reflection: The Sweet Simplicity of Less
The accessibility of deliciousness is a powerful thing, and five-ingredient no-bake desserts prove it. These recipes aren't just about convenience; they're a testament to the fact that incredible flavor doesn't require endless ingredients or hours of baking. They represent a shift towards mindful consumption and a celebration of simplicity in the kitchen.
The impact of these simple recipes extends beyond just satisfying a sweet tooth. They offer a gateway to baking for those intimidated by complex recipes, fostering a sense of accomplishment and creativity in the kitchen. It's about reclaiming the joy of baking, stripping away the unnecessary, and focusing on the pure pleasure of creating something delicious. The best things in life are simple.
This sentiment rings true when considering the profound satisfaction derived from these uncomplicated yet rewarding desserts.
Now, I invite you to consider your own approach to baking and cooking. What can you simplify? What ingredients can you eliminate without sacrificing flavor? Embrace the power of less; experiment with these recipes, adapt them to your taste, and discover the joy of creating amazing desserts with minimal effort. The sweet simplicity awaits.
Unleash Your Inner Pastry Chef!
Thanks for joining us on this delicious journey into the world of 5-ingredient no-bake desserts! We hope you've discovered some new favorites and feel inspired to create sweet treats with ease. Now it's time to put your newfound skills to the test!
- Master your first 5-ingredient dessert: Choose one recipe from the article and bake it today! Even better, challenge yourself with a flavor combination you haven't tried before.
- Share your creations: Tag us on social media with your baking masterpieces! Let's inspire others with your delicious results.
- Dive into our recipe archive: Explore more simple and satisfying no-bake recipes on BakeWithEase.com – we've got a treasure trove of deliciousness waiting for you.
What unbelievably delicious 5-ingredient creation will you make first?