
Foolproof Molten Lava Cakes with Gooey Centers

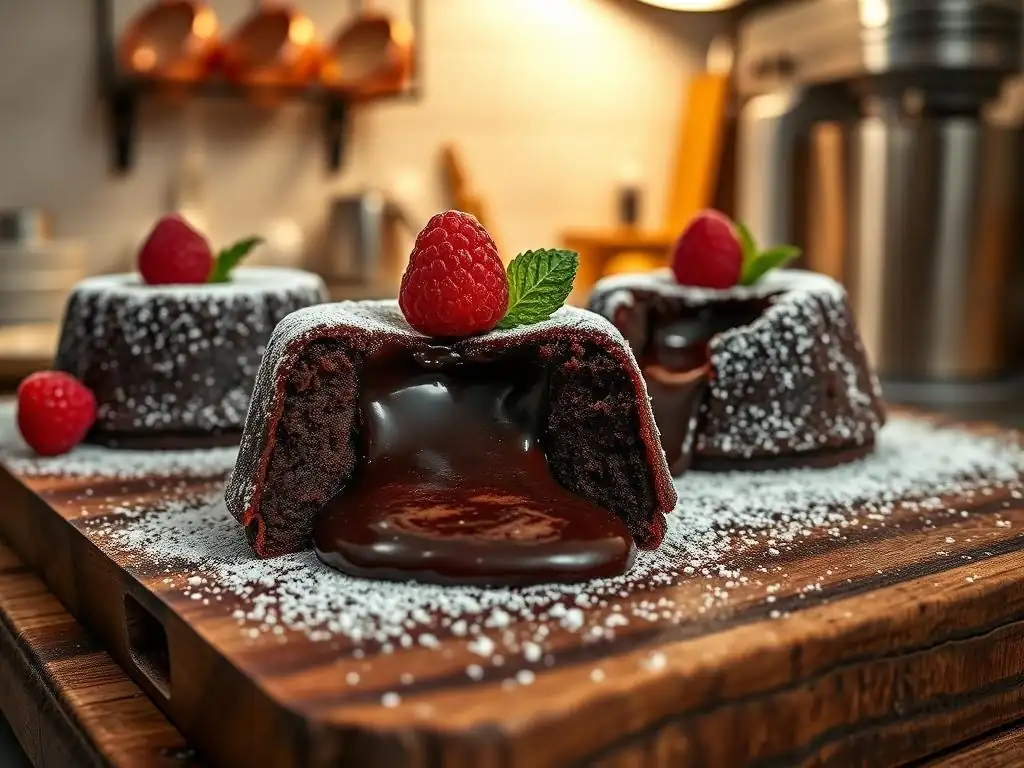
Welcome to BakeWithEase, your ultimate guide to effortless baking! Ever dreamt of creating a dessert that's both elegant and incredibly simple? Dive into our Easy Molten Lava Cake Recipe and discover the secrets to achieving those perfectly gooey centers, even if you're a beginner. Intrigued? Keep reading and unlock the magic of this decadent delight!
- Introduction to Chocolate Molten Lava Cake Recipe
-
Essential Ingredients for Rich Chocolate Lava Cakes
- 70% Dark Chocolate: The Foundation of Intense Flavor
- European-Style Unsalted Butter: For a Velvety Texture
- Free-Range Eggs and Egg Yolks: Achieving Optimal Richness
- Granulated Sugar and All-Purpose Flour: Providing Structure and Sweetness
- Vanilla Extract and Espresso Powder: Enhancing the Chocolate Flavor
-
Step-by-Step Guide to Baking Chocolate Lava Cakes
- Preparing Ramekins: Buttering and Coating with Cocoa Powder
- Melting Chocolate and Butter: Using a Double Boiler
- Combining Wet and Dry Ingredients: Folding Gently to Avoid Overmixing
- Filling Ramekins: Leaving Room for Expansion
- Baking Time and Temperature: 425°F for 12-15 Minutes
- Checking for Doneness: Edges Set, Center Remains Soft
- Tips & Tricks for Molten Lava Cake Perfection
- Serving and Enjoying Homemade Molten Lava Cakes
- Mastering Molten Lava Cakes: Advanced Techniques
-
Frequently Asked Questions
- How difficult is this Easy Molten Lava Cake Recipe from BakeWithEase.com?
- What makes this molten lava cake recipe different from others I've tried?
- Can I substitute ingredients in this Easy Molten Lava Cake Recipe?
- How do I prevent my molten lava cakes from sticking to the ramekins?
- What is the best way to serve these molten lava cakes?
- Final Reflection: The Enduring Allure of the Perfect Molten Lava Cake
- Unleash Your Inner Pastry Chef!
Introduction to Chocolate Molten Lava Cake Recipe
Welcome to the delightful world of molten lava cakes! These individual chocolate desserts, known for their signature liquid chocolate center, are surprisingly simple to make at home. Despite their elegant appearance, mastering this easy molten lava cake recipe is well within reach for any home baker, even those just starting out. The secret lies in precise timing and a few key ingredients that work together to create that perfect contrast between the firm outer cake and the rich, flowing interior.
This particular easy molten lava cake recipe focuses on simplicity without sacrificing flavor or that crucial gooey center. We'll guide you through each step, from selecting the right chocolate to knowing exactly when your cakes are perfectly baked. By following these instructions carefully, you'll be able to recreate this restaurant-quality dessert in your own kitchen, impressing friends and family with minimal effort. Get ready to experience the joy of cracking open a warm cake and watching that luscious chocolate lava spill out!
Why This Recipe Guarantees a Molten Center
The core principle behind achieving a molten center in these cakes relies on a carefully controlled baking time and temperature. The batter is essentially an undercooked cake batter, rich in fat and chocolate. When baked at a relatively high temperature, typically around 425°F (220°C), the outer layer sets quickly, forming the cake structure, while the center remains liquid because it doesn't have enough time to fully solidify before the cake is removed from the oven. This quick bake is crucial.
Furthermore, the high proportion of chocolate and butter in the batter contributes significantly to the molten effect. Chocolate contains cocoa butter, which melts at a lower temperature than the starches and proteins in the flour and eggs coagulate. By using a generous amount of chocolate and butter, you ensure there's plenty of material that should be liquid at the temperature the cake is served, provided it hasn't been overbaked and the center hasn't had time to set completely.
The Secret to a Perfectly Flowing Center
The ultimate secret to a perfectly flowing center lies in the delicate balance of baking time and the initial temperature of your oven. Baking at a high temperature, such as 425°F, allows the edges of the cake to set rapidly, creating a sturdy cup to hold the liquid center, while the interior remains relatively cool and fluid. Overbaking by even a minute or two can turn your molten lava into a regular chocolate cake, so precision is key.
Another critical factor is the temperature of your ingredients when they go into the oven. Using room-temperature eggs and butter, as recommended, helps ensure the batter is consistent and heats evenly. However, the quick, high-temperature bake is the primary mechanism. Imagine the heat rushing in – it sets the outside quickly, but the center, being the last part to heat, doesn't reach a high enough temperature to solidify entirely before you pull it out. It's a race against time, and you want the molten chocolate to win!
Essential Ingredients for Rich Chocolate Lava Cakes
Crafting the perfect molten lava cake begins with selecting high-quality ingredients. Each component plays a vital role in achieving the desired texture and intense chocolate flavor that defines this dessert. Using the best ingredients available will elevate your easy molten lava cake recipe from good to absolutely unforgettable. Let's break down the key players.
From the type of chocolate to the fat content of the butter, every choice impacts the final outcome. This section will guide you through why specific ingredients are recommended and what they contribute to the richness and gooeyness of your homemade molten lava cakes. Pay close attention to these details, as they are fundamental to success.
70% Dark Chocolate: The Foundation of Intense Flavor
Using high-quality dark chocolate with a cocoa percentage of around 70% is paramount for this easy molten lava cake recipe. This percentage strikes a balance between intense chocolate flavor and enough cocoa butter to melt beautifully. Chocolate with a lower cocoa percentage (like milk chocolate) often contains more sugar and milk solids, which can make the center less intensely flavored and potentially affect the molten consistency. A 70% dark chocolate provides that deep, slightly bitter counterpoint to the sweetness, creating a more sophisticated dessert.
When choosing your chocolate, opt for a good quality bar rather than chocolate chips. Chocolate chips contain stabilizers to help them hold their shape when baked, which is the opposite of what you want for a molten center. A bar chocolate, designed for melting, will create a smoother, more luxurious liquid core. Look for brands known for their quality chocolate – the flavor difference is noticeable and truly makes the cake sing.
European-Style Unsalted Butter: For a Velvety Texture
European-style unsalted butter is often recommended for baking due to its higher fat content, typically around 82% butterfat compared to the 80% found in many American-style butters. This higher fat content contributes to a richer flavor and a more tender, velvety texture in baked goods. In the context of an easy molten lava cake recipe, the butter melts with the chocolate to create the luxurious liquid center, and its quality directly impacts the smoothness and richness of that molten core.
Using unsalted butter is important because it gives you control over the amount of salt in the recipe. Different brands of salted butter can vary significantly in their salt content, leading to inconsistent results. By adding salt separately (if the recipe calls for it, often just a pinch to enhance the chocolate flavor), you can ensure the perfect balance of flavors. Melted butter, combined with the melted chocolate, forms the luscious base of the molten center.
Free-Range Eggs and Egg Yolks: Achieving Optimal Richness
Eggs play a crucial role in providing structure to the outer cake while the extra egg yolks contribute significantly to the richness and custardy texture of the molten center. This recipe typically calls for a combination of whole eggs and additional egg yolks. The whole eggs contain both protein (for structure) and fat (for richness), while the added yolks are almost pure fat and emulsifiers.
The extra fat from the egg yolks makes the center even more decadent and helps ensure it remains fluid when heated. Using free-range eggs is often preferred by bakers for their potentially richer yolks and better flavor, though standard large eggs will also work perfectly well for this easy molten lava cake recipe. Ensure your eggs are at room temperature before mixing, as this helps them incorporate more evenly into the batter.
Granulated Sugar and All-Purpose Flour: Providing Structure and Sweetness
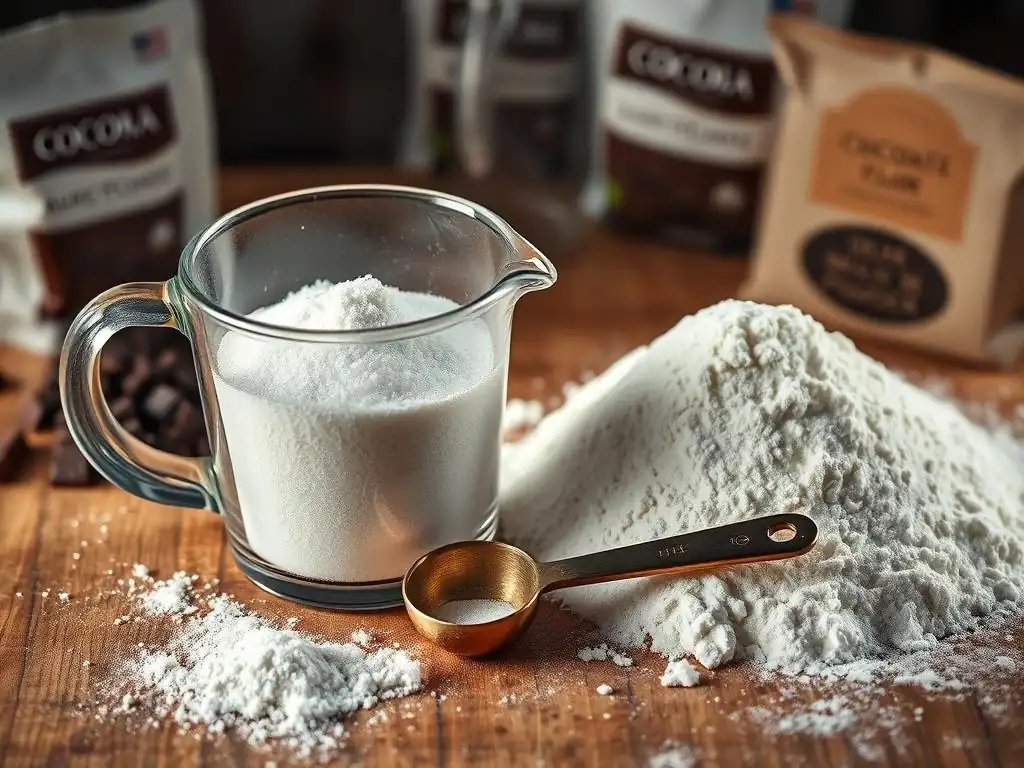
Granulated sugar provides the necessary sweetness to balance the intensity of the dark chocolate and also contributes to the tenderness of the cake. While not a primary structural component compared to flour, sugar affects the texture by interfering with gluten development and promoting moisture retention. The amount of sugar used in this recipe is carefully calibrated to complement the 70% dark chocolate without making the cake overly sweet.
All-purpose flour provides the minimal structure needed to form the outer 'cup' of the lava cake. Only a small amount of flour is used in this recipe, which is key to keeping the center molten. Too much flour would create a more traditional cake batter that would set throughout during baking. The flour, along with the eggs, creates a delicate framework that holds the liquid chocolate center until you break into it. Using standard all-purpose flour is perfectly suitable for this easy molten lava cake recipe.
Vanilla Extract and Espresso Powder: Enhancing the Chocolate Flavor
Vanilla extract is a classic addition to chocolate desserts, and for good reason. It doesn't add a strong vanilla flavor itself, but rather enhances and deepens the existing chocolate notes, making them more complex and pronounced. A good quality pure vanilla extract is recommended over imitation vanilla for the best flavor.
Espresso powder, or finely ground instant coffee, is an optional but highly recommended ingredient. Coffee has a magical ability to amplify the flavor of chocolate without making the dessert taste like coffee. Just a small amount can make the chocolate taste richer and more intense. It's a secret ingredient many professional bakers use to elevate their chocolate creations. Adding a half teaspoon to a teaspoon of espresso powder to your easy molten lava cake recipe can make a significant difference in the final depth of flavor.
Step-by-Step Guide to Baking Chocolate Lava Cakes
Now that we've covered the essential ingredients, let's walk through the simple steps to bring this easy molten lava cake recipe to life. Precision and timing are key, but the process itself is straightforward. Following these steps carefully will ensure you achieve that coveted molten center every time.
We'll start with preparing the baking dishes, move on to creating the rich chocolate batter, and finish with the crucial baking process. Don't be intimidated; this recipe is designed to be foolproof, even for beginners. Just follow along, and you'll be enjoying warm, gooey lava cakes in no time.
Preparing Ramekins: Buttering and Coating with Cocoa Powder
Properly preparing your ramekins is a non-negotiable step to ensure your beautiful molten lava cakes release cleanly after baking. Start by generously buttering the inside of each ramekin. Use softened butter or melted butter applied with a pastry brush, making sure to cover every nook and cranny, including the rim. This layer of fat is the first defense against sticking.
Once buttered, add a tablespoon or two of unsweetened cocoa powder to the ramekin. Rotate and tap the ramekin to coat the entire buttered surface with a thin layer of cocoa powder. This cocoa coating acts like flour but provides a chocolatey buffer that won't leave white marks on your finished cakes. Tap out any excess cocoa powder – a thin, even layer is all you need. This simple preparation is vital for a clean release.
Melting Chocolate and Butter: Using a Double Boiler
The foundation of the lava cake batter is a smooth, melted mixture of chocolate and butter. The best way to achieve this without scorching the chocolate is by using a double boiler. If you don't have a dedicated double boiler, you can easily create one by placing a heatproof bowl (glass or metal) over a saucepan containing about an inch or two of simmering water. Ensure the bottom of the bowl does not touch the water.
Combine your chopped 70% dark chocolate and cubed European-style unsalted butter in the bowl. Stir occasionally as they melt gently from the steam. The low, indirect heat prevents the chocolate from seizing or burning. Once the mixture is completely smooth and glossy, remove the bowl from the heat and let it cool slightly for about 5-10 minutes before proceeding. This prevents the hot mixture from cooking the eggs when they are added later.
Combining Wet and Dry Ingredients: Folding Gently to Avoid Overmixing
In a separate bowl, whisk together the room-temperature whole eggs and extra egg yolks with the granulated sugar and vanilla extract (and espresso powder, if using) until just combined and slightly pale. This usually takes about 1-2 minutes with a whisk. Avoid over-whipping, as you don't want to incorporate too much air, which could make the cake rise unevenly.
Gently fold the cooled melted chocolate and butter mixture into the egg mixture using a spatula. Once mostly combined, sift or whisk the small amount of all-purpose flour over the wet ingredients. Gently fold the flour in until just incorporated. It's crucial not to overmix at this stage; overmixing develops gluten in the flour, which can lead to a tougher cake texture and potentially prevent the center from flowing properly. Stop folding as soon as you no longer see streaks of dry flour.
Filling Ramekins: Leaving Room for Expansion
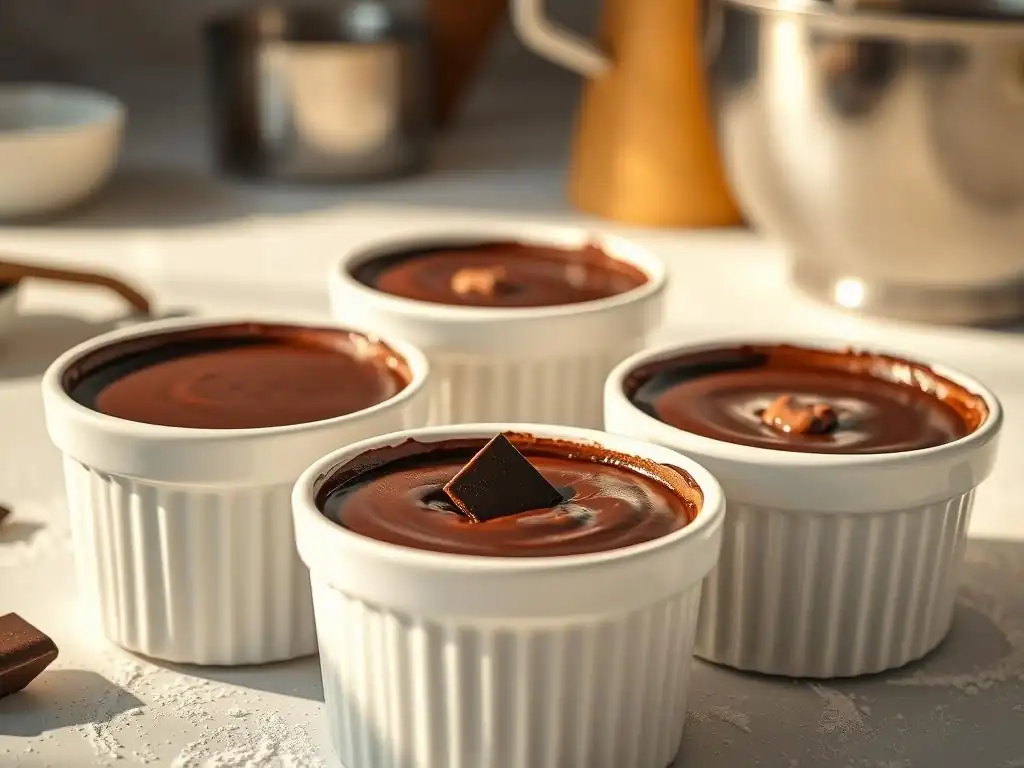
Carefully divide the batter evenly among your prepared ramekins. A standard recipe yielding 4-6 cakes will typically use about 3-4 ounces of batter per ramekin, depending on the size. Pour or spoon the batter into the ramekins, filling them about two-thirds to three-quarters full.
It's important not to fill the ramekins completely to the brim. The batter will rise slightly as it bakes, and leaving some room prevents it from overflowing. Use a spatula or the back of a spoon to gently level the tops of the batter in each ramekin. This ensures even baking and a neat presentation.
Baking Time and Temperature: 425°F for 12-15 Minutes
Preheat your oven to a hot 425°F (220°C). A high temperature is essential for this easy molten lava cake recipe as it allows the outside to set quickly while the inside remains liquid. Place the filled ramekins on a baking sheet – this makes them easier to transfer in and out of the oven and catches any potential drips.
Bake for approximately 12 to 15 minutes. The exact time will vary depending on your oven's calibration and the size of your ramekins. Start checking around the 12-minute mark. The edges should appear set and slightly pulled away from the sides of the ramekin, while the center should look soft and slightly jiggly when you gently shake the baking sheet.
Checking for Doneness: Edges Set, Center Remains Soft
Knowing when your molten lava cakes are done is the most critical step for achieving that perfect gooey center. After 12 minutes, carefully open the oven door and gently nudge the baking sheet or a single ramekin. The edges of the cake should look firm and slightly puffed, potentially pulling away from the sides of the ramekin.
The center, however, should still look soft and jiggle distinctly. If the entire top looks set and firm, they are likely overbaked. If the edges still look wet or the whole cake is liquid when gently jiggled, they need a minute or two more. Err on the side of caution; it's better to slightly underbake and have a very liquid center than to overbake and lose the molten effect entirely. Once they look just right, carefully remove them from the oven.
Tips & Tricks for Molten Lava Cake Perfection
Even with an easy molten lava cake recipe, a few expert tips can make the difference between a good cake and a truly spectacular one. These insights address common challenges and offer ways to enhance your results, ensuring your homemade molten lava cakes are consistently perfect.
From preventing sticking to troubleshooting issues, these tips will help you refine your technique. We'll also touch on exciting variations to keep your baking repertoire fresh and interesting.
Ensuring a Consistent Molten Center Every Time
Consistency in baking is key, and for molten lava cakes, this means ensuring every cake has a flowing center. One major factor is oven temperature accuracy. Ovens can vary by as much as 25-50°F (15-30°C) from the dial setting. Using an oven thermometer can help you verify your oven is truly at 425°F. If your oven runs hot or cool, you may need to adjust the temperature or baking time accordingly.
Another tip is to ensure your batter is evenly distributed and the ramekins are all the same size. Baking cakes of uniform size and thickness in the same oven position helps them cook at the same rate. If you are baking multiple cakes, consider rotating the baking sheet halfway through the baking time for even heat distribution, especially if your oven has hot spots.
Preventing Cakes from Sticking: Thorough Preparation is Key
As mentioned earlier, thorough preparation of the ramekins is the primary defense against sticking. Generously buttering and then coating with cocoa powder (or even fine granulated sugar for a slightly different crust) creates a barrier. Don't skimp on the butter, and ensure the cocoa covers the entire inner surface evenly.
If you are still experiencing sticking, consider using non-stick ramekins if you have them. Alternatively, lining the bottom of the ramekin with a small circle of parchment paper before buttering and cocoa-ing can provide an extra layer of insurance. While this easy molten lava cake recipe is designed for simple release, taking these extra steps guarantees success, especially if your ramekins are older or prone to sticking.
Troubleshooting Common Issues: Overbaking and Undercooking
The most common issue when making molten lava cakes is overbaking, which results in a fully cooked cake with no molten center. This usually happens because the oven temperature was too low, the baking time was too long, or the cakes were left to sit in the hot ramekins for too long after baking. If your cakes are consistently solid, try increasing your oven temperature slightly (verify with a thermometer!) or reducing the baking time by 1-2 minutes. Remember, the center should still jiggle when done.
Undercooking is less common but can result in a cake that collapses or is too liquid throughout, not just in the center. If your cakes are collapsing, they likely needed another minute or two in the oven for the outer structure to set properly. The edges should be firm enough to hold their shape when inverted. If you are unsure, it's better to bake for the minimum recommended time and check, then add time in 1-minute increments.
Flavor Variations: Adding Spices, Citrus Zest, or Liqueurs
While the classic chocolate molten lava cake is divine on its own, this easy molten lava cake recipe is also a fantastic base for creative flavor variations. For a hint of warmth, whisk a pinch of cayenne pepper or ground cinnamon into the melted chocolate mixture. This adds a subtle depth that complements the chocolate beautifully.
Citrus zest, particularly orange zest, pairs wonderfully with chocolate. You can finely grate the zest of half an orange and fold it into the batter just before filling the ramekins. For an adult twist, replace a tablespoon or two of the butter with a chocolate-friendly liqueur like Grand Marnier, Kahlúa, or rum when melting the chocolate and butter. Be mindful that alcohol can affect texture, so small amounts are best. These variations allow you to customize your simple molten lava cake recipe.
Serving and Enjoying Homemade Molten Lava Cakes
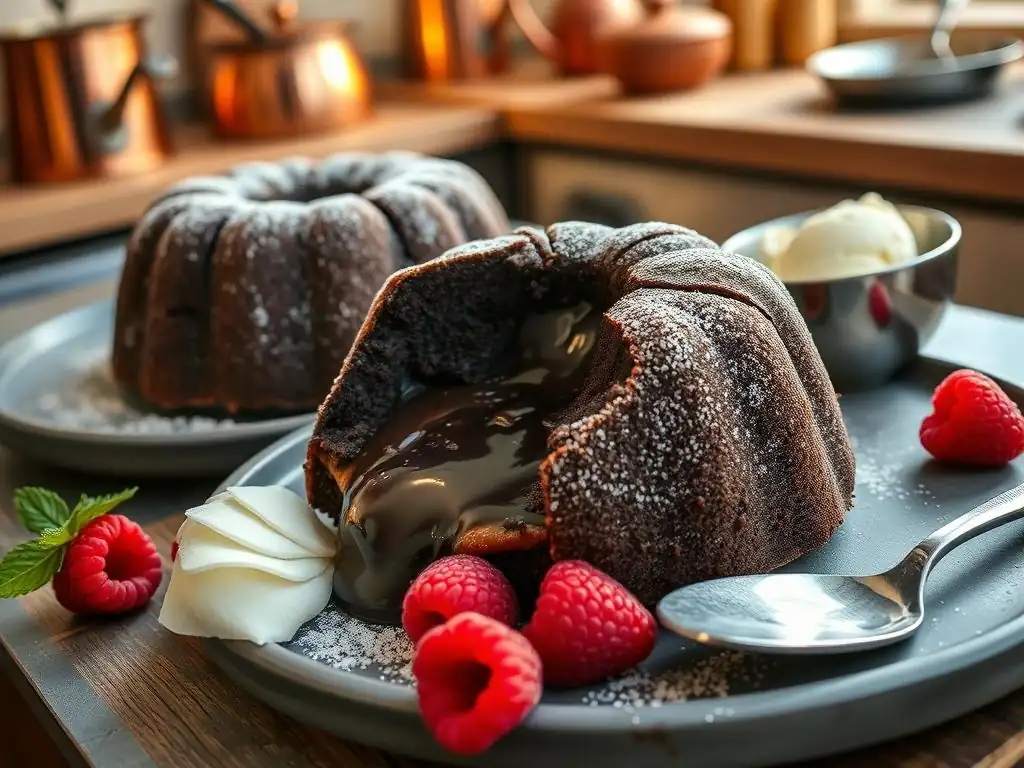
The moment of truth! Serving your freshly baked molten lava cakes is part of the experience. The dramatic reveal of the flowing chocolate center is best enjoyed while the cakes are still warm. Here are some ideas to make the presentation and enjoyment truly special.
From simple garnishes to perfect pairings, these suggestions will help you serve your easy molten lava cake recipe creations like a pro. Get ready for the oohs and aahs as your guests discover the delightful surprise inside.
Presentation Ideas: Dust with Powdered Sugar and Garnish with Berries
A classic and elegant way to present molten lava cakes is a simple dusting of powdered sugar. Once the cakes are inverted onto serving plates (or served directly in the ramekin, if preferred), use a fine-mesh sieve to lightly dust the top. This provides a beautiful visual contrast against the dark chocolate.
Fresh berries, especially raspberries or strawberries, make an excellent garnish. Their bright color and slight tartness cut through the richness of the chocolate. Arrange a few berries around the base of the cake or on top of the powdered sugar. A sprig of fresh mint can also add a pop of color and freshness.
Pairing Suggestions: Vanilla Bean Ice Cream and Raspberry Coulis
Molten lava cakes are wonderfully rich, and pairing them with something cool and slightly tart balances the dessert perfectly. A scoop of high-quality vanilla bean ice cream is a traditional and beloved accompaniment. The cold creaminess of the ice cream contrasts beautifully with the warm, gooey chocolate.
Another fantastic pairing is a vibrant raspberry coulis. This simple sauce is made by pureeing fresh or frozen raspberries with a little sugar and maybe a squeeze of lemon juice, then straining to remove seeds. A drizzle of bright red coulis around the plate or over the cake adds a burst of tangy flavor and a stunning visual element that complements the deep chocolate notes of your easy molten lava cake recipe.
Storing Leftover Cakes: Refrigerate and Reheat Gently
While molten lava cakes are best enjoyed fresh from the oven, you can store leftovers. Allow the cakes to cool completely, then cover the ramekins tightly with plastic wrap or transfer the cakes to an airtight container. Store them in the refrigerator for up to 2-3 days.
To reheat, you have a couple of options. The microwave is the quickest: place a single cake (in its ramekin or on a microwave-safe plate) in the microwave and heat on 50% power for 30-60 seconds, or until the center is warm and gooey again. Be careful not to overheat. Alternatively, you can reheat them in a preheated oven at a lower temperature, around 300°F (150°C), for 5-10 minutes, until warmed through. Reheating might slightly alter the texture, but they will still be delicious.
Mastering Molten Lava Cakes: Advanced Techniques
Ready to take your easy molten lava cake recipe skills to the next level? While the basic recipe is simple and delicious, exploring advanced techniques can further refine your understanding and results. These concepts delve deeper into the science of baking and offer ways to customize the recipe.
From understanding chemical reactions to adapting for dietary needs and incorporating additional elements, these techniques will help you truly master the art of the molten lava cake.
Understanding Maillard Reaction and its Role
The Maillard reaction is a complex chemical process that occurs when amino acids and reducing sugars react under heat. It's responsible for the browning and development of rich, complex flavors in many cooked foods, including baked goods. While the interior of a molten lava cake is deliberately undercooked, the outer crust does undergo the Maillard reaction.
As the edges and top of the cake bake at 425°F, the Maillard reaction contributes to the slight browning, the development of appealing aromas, and the formation of a flavorful crust that contrasts with the soft interior. Understanding this reaction helps appreciate why baking at a high temperature is beneficial – it promotes rapid Maillard browning on the exterior before the interior has a chance to fully set.
Adapting the Recipe for Gluten-Free Diets using Almond Flour
Adapting this easy molten lava cake recipe for gluten-free diets is relatively simple because it uses only a small amount of flour. A common substitute is almond flour or a gluten-free all-purpose flour blend. When using almond flour, you'll typically use the same volume as the all-purpose flour called for in the recipe.
Almond flour will give the cake a slightly different texture and a subtle nutty flavor, but it works well to provide the minimal structure needed. If using a gluten-free blend, ensure it's a blend suitable for baking. You might find the gluten-free version requires a minute or two more in the oven to set the edges, so monitor carefully. Always check ingredient labels to ensure all components, including cocoa powder and chocolate, are certified gluten-free if necessary.
Elevating Your Skills: Incorporating Chocolate Ganache Filling
For an extra level of decadence and a truly guaranteed molten center, some bakers opt to incorporate a pre-made chocolate ganache filling. This technique involves preparing a standard molten lava cake batter but underfilling the ramekins slightly. Then, a spoonful or cube of chilled, firm chocolate ganache (made from equal parts melted chocolate and heavy cream) is placed in the center of the batter before baking.
As the cake bakes, the outer batter sets, while the pre-made ganache in the center melts into a perfectly smooth, rich liquid core. This method can be more reliable for achieving a molten center consistently, especially if you struggle with overbaking. It adds an extra step and ingredient, but the result is a guaranteed flow of luxurious chocolate when the cake is cut into. It's a fantastic way to elevate your simple molten lava cake recipe.
Frequently Asked Questions
How difficult is this Easy Molten Lava Cake Recipe from BakeWithEase.com?
This recipe is designed for bakers of all levels, focusing on simple steps and easy-to-find ingredients to ensure a foolproof result.
What makes this molten lava cake recipe different from others I've tried?
The BakeWithEase recipe emphasizes precise timing and oven temperature to guarantee a perfectly gooey center every time. It prioritizes simplicity and clear instructions.
Can I substitute ingredients in this Easy Molten Lava Cake Recipe?
While the recipe is optimized for the listed ingredients, BakeWithEase provides tips on minor substitutions for things like flour or chocolate, but cautions against major alterations impacting the cake's structure.
How do I prevent my molten lava cakes from sticking to the ramekins?
BakeWithEase recommends thoroughly greasing and flouring the ramekins before pouring in the batter. Parchment paper circles at the bottom can also help with easy release.
What is the best way to serve these molten lava cakes?
BakeWithEase suggests serving the cakes immediately after baking for the ultimate gooey experience. Consider adding powdered sugar, fresh berries, or a scoop of vanilla ice cream for extra flair.
Final Reflection: The Enduring Allure of the Perfect Molten Lava Cake
The pursuit of the perfect molten lava cake transcends mere culinary skill; it's a testament to our desire for simple pleasures and the comforting power of a truly decadent dessert. This seemingly simple recipe, designed for ease and accessibility, unlocks a world of culinary satisfaction that resonates deeply with home bakers of all levels. The ease of execution belies the impressive result, making it a perfect choice for both novice and experienced cooks.
The enduring appeal of the molten lava cake lies in its ability to evoke feelings of warmth, indulgence, and celebration. It's a dessert that effortlessly elevates any occasion, from a quiet night in to a special gathering with loved ones. The rich chocolate, the contrasting textures of the crisp exterior and the molten center, the sheer joy of that first bite – these are experiences that connect us to something deeper than just food. A dessert should be a moment of pure pleasure, a small escape from the everyday.
This sentiment perfectly captures the magic of the molten lava cake.
Now, I invite you to take what you've learned from this recipe and embark on your own culinary adventure. Don't be afraid to experiment, to adjust the recipe to your own tastes, and to share the joy of this delicious dessert with those you care about. The perfect molten lava cake isn't just about the recipe; it's about the experience, the connection, and the memories you create while baking and sharing it. So, gather your ingredients, preheat your oven, and let the magic begin!
Unleash Your Inner Pastry Chef!
Thanks for joining us on this delicious journey into the world of molten lava cakes! We hope you've gained the confidence to create these decadent treats yourself. Ready to take your baking skills to the next level?
- Master the art of the perfectly gooey center: Practice makes perfect! Try making another batch, experimenting with different chocolate types or adding a swirl of raspberry jam for an extra touch of flair.
- Share your baking triumph! Post a picture of your lava cakes on social media and tag us – we'd love to see your creations!
- Explore more of our easy dessert recipes on BakeWithEase.com – discover your next baking adventure!
What unexpected ingredient will you add to your next batch of molten lava cakes to surprise your friends and family?