
Springtime Berry Tart Recipe: Light & Refreshing

Welcome to BakeWithEase, your kitchen companion for all things baking!
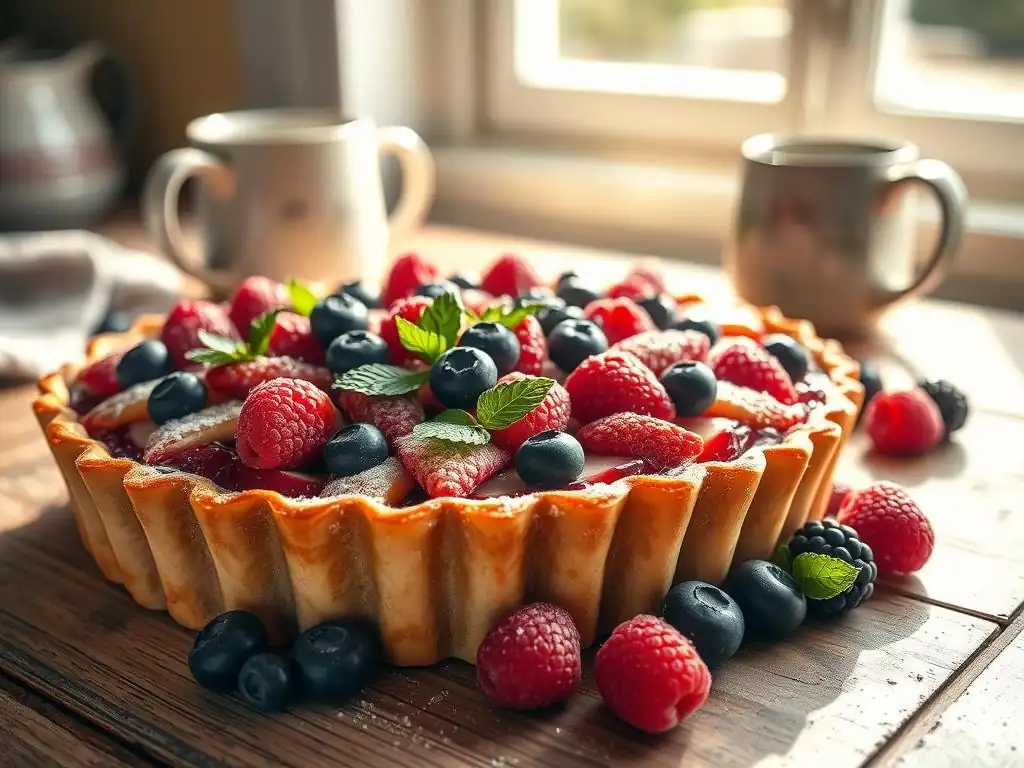
Craving a taste of sunshine? Then you're in the right place! Discover how to create an Easy Springtime Berry Tart that's bursting with flavor and surprisingly simple to make. This light and refreshing dessert is the perfect way to celebrate the season, but what's the secret to achieving that perfect golden crust and vibrant berry filling? Let's get baking and unlock the secrets together...
- Lemon Raspberry Tart Recipe: Bright & Refreshing
- Bake a Delightful Lemon Raspberry Tart
- Lemon Raspberry Tart: A Step-by-Step Baking Guide
- Crafting the Perfect Tart Crust
- Preparing the Lemon Cream Filling
- Assembling Your Lemon Raspberry Tart
- Tips for Baking the Best Lemon Raspberry Tart
- Variations and Additions
- Serving and Storing Your Homemade Tart
- Frequently Asked Questions
- Final Reflection: The Sweetness of Simple Spring
- Unleash Your Inner Pastry Chef!
Lemon Raspberry Tart Recipe: Bright & Refreshing
Bake a Delightful Lemon Raspberry Tart
Welcome Spring with this Refreshing Tart Recipe
As the days lengthen and the world awakens in vibrant hues, nothing signals the arrival of spring quite like fresh berries and bright citrus flavors. This lemon raspberry tart is the quintessential dessert for the season, offering a perfect balance of sweet and tart that is both invigorating and comforting.
It's an ideal centerpiece for Easter brunch, a Mother's Day celebration, or simply a lovely treat to enjoy on a sunny afternoon. The combination of smooth, zesty lemon cream and juicy, slightly tart raspberries nestled in a buttery crust is a delightful symphony of flavors and textures that embodies the freshness of springtime.
Creating an easy springtime berry tart doesn't have to be complicated. This recipe simplifies the process, breaking it down into manageable steps suitable for bakers of all levels. The popularity of berry desserts surges significantly in the spring months; for instance, searches for "raspberry recipes" often see a spike of over 50% from March to May compared to winter months, according to general trend data. Embracing this seasonal bounty allows you to create a dessert that is not only delicious but also timely and visually stunning, making this bright and refreshing tart a guaranteed crowd-pleaser.
Lemon Raspberry Tart: A Step-by-Step Baking Guide
Gathering Your Ingredients
The success of any delicious baked good starts with quality ingredients. For this lemon raspberry tart, selecting fresh, vibrant lemons and plump raspberries is key to achieving that bright, refreshing flavor profile. Look for lemons that feel heavy for their size, indicating they are juicy, and opt for organic if possible, especially since you'll be using the zest.
When choosing raspberries, look for firm, brightly colored berries without any mold or mushy spots. A typical recipe for a 9-inch tart might require the juice and zest of 2-3 medium lemons, yielding approximately 1/4 cup of juice and plenty of aromatic zest.
Beyond the stars of the show, other essential ingredients like butter, flour, sugar, and eggs play crucial supporting roles. Using cold, unsalted butter is vital for a flaky, tender tart crust, while room-temperature eggs are best for creating a smooth, emulsified lemon cream filling. All-purpose flour is standard for the crust, providing structure. Ensure your baking staples are fresh for the best results. Having all your ingredients measured and ready before you begin significantly streamlines the baking process, making this an truly easy springtime berry tart to assemble.
Essential Ingredients for the Crust
- All-purpose flour
- Cold unsalted butter, cut into cubes
- Granulated sugar
- Salt
- Ice water
Fresh Raspberry Selection for the Filling
- Fresh raspberries
- Granulated sugar (optional, for sweetening if needed)
Crafting the Perfect Tart Crust
Making the Sweet Tart Dough
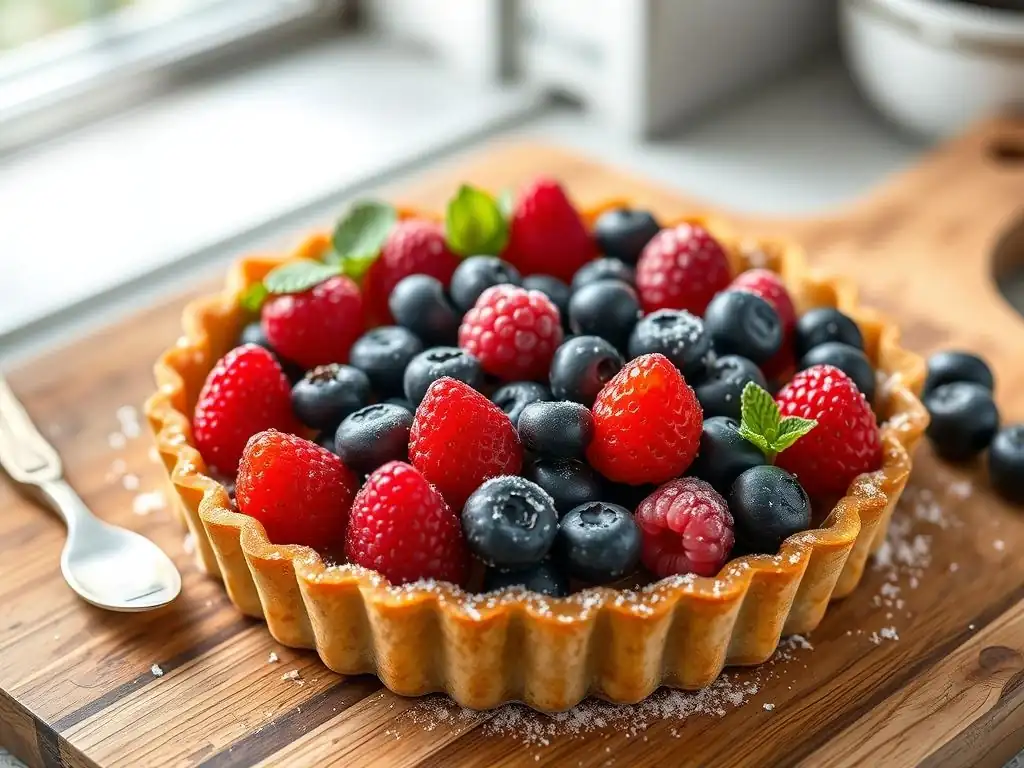
A perfect tart begins with a perfectly crafted crust. For this lemon raspberry tart, we'll use a sweet tart dough, or pâte sucrée, which is less likely to shrink than a standard pastry dough and has a lovely, slightly crumbly texture that complements the creamy filling. The key to a tender crust is to keep your ingredients cold and avoid overworking the dough.
You can make the dough by hand, cutting the cold butter into the dry ingredients using a pastry blender or your fingertips until it resembles coarse meal, or quickly pulse it together in a food processor. Incorporate just enough ice water, usually about 2-3 tablespoons for a standard recipe, until the dough barely comes together.
Once the dough forms, gather it into a disc, wrap it tightly in plastic wrap, and chill it in the refrigerator for at least 30 minutes. Chilling is a non-negotiable step; it allows the gluten to relax, preventing shrinkage during baking, and solidifies the fat, which contributes to flakiness. A well-chilled dough is also much easier to roll out and fit into the tart pan without tearing. This straightforward dough preparation is a simple first step towards your beautiful and easy springtime berry tart.
Blind Baking the Tart Shell
To ensure the crust for your lemon raspberry tart is crisp and fully baked, especially on the bottom, blind baking is essential. This technique involves partially baking the crust before adding the filling. Start by gently pressing the chilled dough into your tart pan, trimming the edges.
Prick the bottom of the dough all over with a fork – this is called docking and helps prevent the crust from puffing up. Then, line the dough with parchment paper and fill it with pie weights, dried beans, or rice, distributing the weight evenly up the sides. Bake in a preheated oven, typically around 375°F (190°C), for about 15-20 minutes, until the edges are set and lightly golden.
After the initial bake, carefully remove the parchment paper and weights. Return the tart shell to the oven for another 10-15 minutes to allow the bottom to dry out and become golden brown. This second bake is crucial for preventing a soggy bottom once the moist lemon filling is added. A properly blind-baked crust provides a sturdy, delicious foundation for your easy springtime berry tart.
Cooling the Tart Shell
Once the tart shell is perfectly golden brown and baked through, remove it from the oven and place it on a wire rack to cool completely. It's important to allow the crust to cool fully in the pan before attempting to remove the ring or add the filling. This prevents the delicate crust from breaking. Cooling allows the structure to set properly.
Preparing the Lemon Cream Filling
Making the Lemon Cream
The heart of this lemon raspberry tart is the vibrant, tangy lemon cream filling, often referred to as lemon curd. This luscious filling is made by gently cooking together eggs, sugar, fresh lemon juice, and butter. The key is to cook it slowly over low heat or in a double boiler, whisking constantly, to prevent the eggs from scrambling. The mixture will gradually thicken as the egg proteins cook and coagulate. You're looking for a consistency similar to pudding or thick yogurt, coating the back of a spoon. This typically takes about 8-10 minutes of gentle heating and stirring.
Once thickened, remove the cream from the heat. For an extra smooth texture, you can strain the mixture through a fine-mesh sieve to catch any small bits of cooked egg. Finally, whisk in cold cubes of butter, one at a time, until fully incorporated and the cream is smooth and glossy. This addition of butter provides richness, a silky texture, and a beautiful sheen. This process results in approximately 1.5 to 2 cups of intensely flavored lemon cream, the perfect amount for a standard 9-inch tart, making it central to your easy springtime berry tart.
Adding Zest for Intense Flavor
To amplify the bright, citrusy notes in your lemon cream, adding lemon zest is indispensable. While lemon juice provides acidity and tang, the zest contains the fruit's essential oils, which hold the majority of the potent lemon aroma and flavor. Using a microplane or fine grater, carefully remove only the yellow part of the peel, avoiding the bitter white pith underneath. The zest from 1-2 lemons is usually sufficient to infuse the cream with a powerful citrus punch.
The best time to add the zest is often towards the end of the cooking process or after the cream is removed from the heat. This helps preserve the volatile oils, ensuring maximum flavor impact. Stirring it into the warm cream allows the oils to infuse beautifully. This simple addition elevates the lemon flavor from merely tangy to truly aromatic and complex, a crucial step in perfecting your easy springtime berry tart.
Chilling the Filling
After making the lemon cream and adding the zest, it's essential to let it cool slightly before chilling. Pour the warm cream into a bowl and press plastic wrap directly onto the surface to prevent a skin from forming. Refrigerate the lemon cream for at least 2-3 hours, or until it is completely chilled and set. As it cools, the cream will thicken further, achieving that ideal consistency for filling the tart shell.
Assembling Your Lemon Raspberry Tart
Arranging the Raspberries
Once your blind-baked tart shell is completely cool and the lemon cream filling is thoroughly chilled and set, it's time to assemble your beautiful lemon raspberry tart. Carefully spoon the chilled lemon cream into the cooled tart shell, spreading it evenly with an offset spatula or the back of a spoon. The cream should fill the shell almost to the top edge.
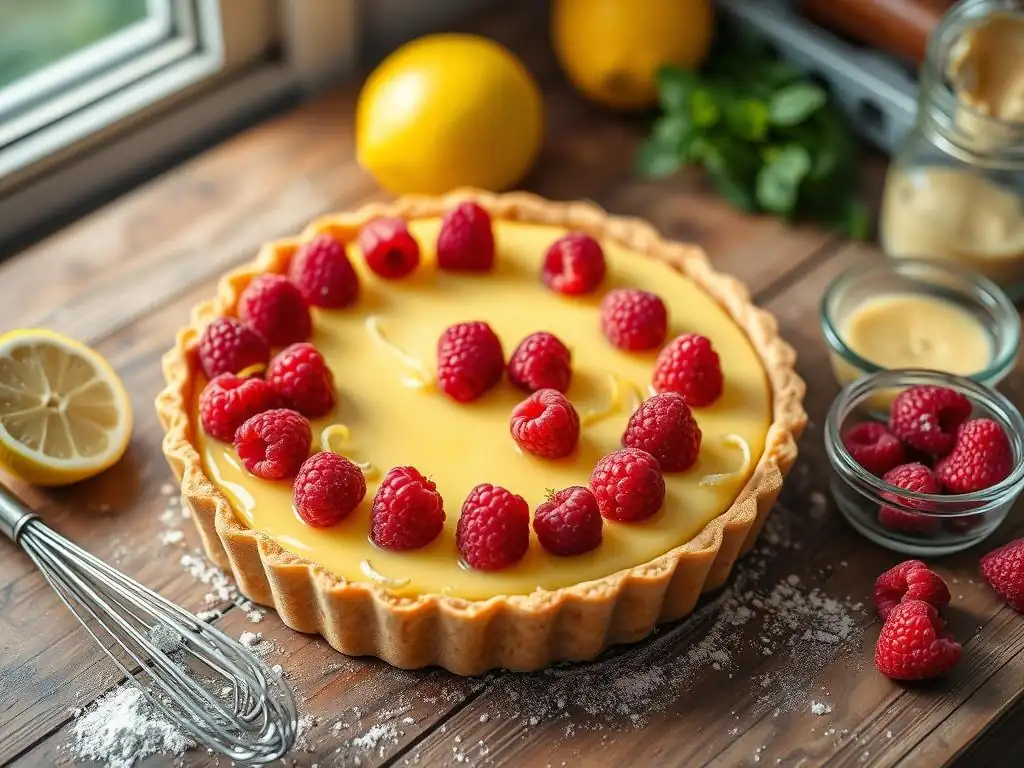
Next, gently arrange the fresh raspberries on top of the lemon cream. You can place them randomly for a rustic look or arrange them in concentric circles or another pattern for a more polished presentation. You'll likely need about 1 to 1.5 cups of fresh, firm raspberries to cover the surface adequately.
Take care when placing the berries, pressing them ever so slightly into the cream to anchor them, but without pushing them down too far. Using only the freshest berries ensures they hold their shape and vibrant color. The visual appeal of the neatly arranged red raspberries against the pale yellow lemon cream is stunning and makes this easy springtime berry tart as lovely to look at as it is to eat.
Tips for Berry Placement
- Choose firm, unblemished berries.
- Start arranging from the outside edge and work your way in.
- Consider size variation for visual interest.
- Don't overcrowd the tart; allow some lemon cream to show through.
Glazing the Berries
For a professional finish and to keep the raspberries looking fresh and glossy, glazing the berries is a wonderful final touch. A simple glaze can be made by warming a few tablespoons of apricot jam with a tiny bit of water or lemon juice until melted and brushable. Strain the mixture for a perfectly smooth glaze. Alternatively, a simple syrup (equal parts sugar and water heated until sugar dissolves) can also work, although it won't provide the same subtle apricot flavor that complements the fruit so well.
Using a pastry brush, gently brush the warm glaze over the tops and sides of the arranged raspberries. This adds a beautiful shine, enhances the color of the berries, and helps prevent them from drying out or oxidizing too quickly. About 2-3 tablespoons of warm, strained apricot jam is typically sufficient for a light, even coating across a 9-inch tart. This simple step elevates the visual appeal, making your easy springtime berry tart truly shine.
Chilling the Assembled Tart
After assembling the tart with the lemon cream and raspberries, and glazing the berries, it's best to chill the entire tart for at least another hour before serving. This allows the flavors to meld and ensures the lemon cream is firm enough for clean slicing. Chilling also helps the glaze set slightly.
Tips for Baking the Best Lemon Raspberry Tart
Achieving a Perfectly Baked Tart Crust
A common challenge in tart baking is ensuring the crust is perfectly cooked through, especially the bottom. The blind baking method, as described earlier, is paramount. Ensure you use enough pie weights or beans to fill the shell completely and press against the sides; this prevents the dough from collapsing or bubbling up. Baking the crust in two stages – first with weights, then without – guarantees the bottom gets sufficient exposure to heat to become golden and crisp. Aim for a uniform golden color on the bottom and edges, which indicates it's fully baked.
Oven temperatures can vary significantly, sometimes by as much as 25-50°F (15-30°C). Using an oven thermometer can help you calibrate your oven's true temperature, ensuring you're baking at the correct heat. If your oven tends to bake unevenly, rotating the tart halfway through the blind baking process can help achieve a more consistent color and texture across the entire crust. A well-baked crust is the foundation of a truly successful and easy springtime berry tart.
Preventing a Soggy Tart Bottom
The fear of a soggy tart bottom haunts many bakers, but it's entirely preventable with the right techniques. As mentioned, thorough blind baking is your primary defense. Ensure the crust is fully baked and golden brown on the bottom before adding the filling. Another effective method is to brush the inside of the blind-baked crust with a thin layer of egg white or melted white chocolate (as a variation) immediately after removing the weights and before the final bake. This creates a seal that acts as a barrier against the moisture from the filling.
Allowing the tart shell to cool completely before adding the chilled lemon cream filling is also crucial. Adding a cold filling to a warm crust can create condensation, leading to sogginess. By chilling both the crust and the filling adequately, you minimize moisture transfer. Following these steps diligently will ensure your easy springtime berry tart boasts a wonderfully crisp base complementing its smooth, bright filling.
Adjusting Sweetness
The balance of sweet and tart is key to this lemon raspberry tart's refreshing quality, and you can easily adjust it to your preference. The lemon cream is inherently tangy due to the high concentration of lemon juice. You can slightly reduce the amount of sugar in the lemon cream if you prefer it more tart, or add an extra tablespoon if you have a sweeter tooth. It's best to taste the lemon cream mixture before it thickens and cools, as flavors are more discernible when warm.
Consider the sweetness of your raspberries as well; some batches are naturally sweeter than others. If your berries are quite tart, a little extra sugar in the lemon cream or a slightly sweeter glaze can create a more harmonious balance. Conversely, if your berries are very sweet, ensuring your lemon cream is sufficiently tangy provides a nice contrast. Adjusting the sugar is a simple way to personalize your easy springtime berry tart.
Variations and Additions
Different Citrus Combinations
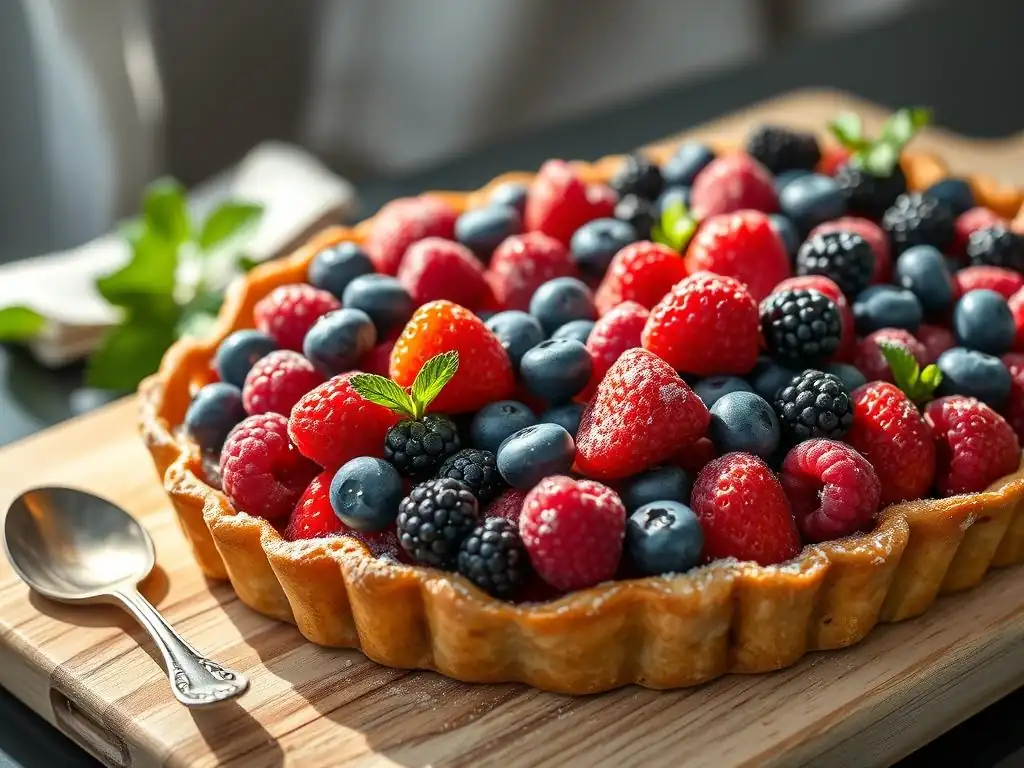
While lemon and raspberry is a classic pairing, feel free to experiment with other citrus fruits to give your easy springtime berry tart a unique twist. Lime and raspberry offer a similar bright, zesty profile with a slightly different aromatic quality. You could use lime juice and zest in place of or in combination with the lemon. A mix of 50% lemon and 50% lime juice provides a lovely complexity.
For a less intensely tart flavor, consider using orange or even grapefruit. Orange juice and zest paired with raspberries creates a sweeter, milder filling, perfect for those who find pure lemon too sharp. Blood oranges, available in late winter and early spring, would lend a beautiful pinkish hue to the cream and a distinct, slightly berry-like citrus flavor. Exploring these variations allows you to enjoy the core concept of a bright, easy springtime berry tart with different nuances.
Adding White Chocolate
Introducing white chocolate can add a layer of richness and sweetness that beautifully complements the tartness of the lemon and raspberries. One popular method is to brush a thin layer of melted white chocolate onto the inside of the blind-baked tart shell before adding the lemon cream. This not only adds a delicious element but also provides an extra barrier against moisture, further helping to prevent a soggy bottom. Use good quality white chocolate for the best flavor.
Alternatively, you can incorporate melted white chocolate directly into the warm lemon cream after it has thickened and been removed from the heat. Whisk in about 2-3 ounces of finely chopped white chocolate until it's completely smooth. This will make the lemon cream slightly sweeter and richer, creating a delightful contrast with the tart berries. This addition transforms the easy springtime berry tart into a more decadent dessert.
Exploring Gluten-Free Options
Making this lemon raspberry tart gluten-free is certainly achievable, allowing more people to enjoy this spring treat. The most common approach is to substitute the all-purpose flour in the crust with a gluten-free all-purpose flour blend. Be aware that GF dough can sometimes be more delicate and crumbly; chilling the dough for a longer period (at least 1 hour) and rolling it carefully between two sheets of parchment paper can help. Some GF blends contain xanthan gum, which aids in structure.
Another option is to create a gluten-free crust using crushed gluten-free cookies (like shortbread or graham crackers) mixed with melted butter. This type of crust is often pressed into the pan and baked briefly or just chilled. The lemon cream filling itself is naturally gluten-free, relying on eggs and butter for thickening, so no adjustments are needed there. Exploring these crust options ensures you can create a delicious, easy springtime berry tart that caters to dietary needs.
Serving and Storing Your Homemade Tart
Serving Suggestions
Your finished lemon raspberry tart is a stunning dessert that can be enjoyed in various ways. It is perfectly delightful served chilled on its own, allowing the bright flavors of the lemon and raspberry to shine through. For added indulgence, consider serving slices with a dollop of freshly whipped cream, a spoonful of crème fraîche, or a scoop of good quality vanilla ice cream.
Garnishes can enhance both the visual appeal and flavor. A sprinkle of powdered sugar over the top, a few fresh mint leaves, or a scattering of extra raspberries around the plate can add a touch of elegance. For the most refreshing experience, serve the tart chilled or slightly cooler than room temperature. This keeps the lemon cream firm and highlights the tartness, making it a perfect conclusion to a springtime meal.
Proper Storage
Due to its creamy filling and fresh berries, the lemon raspberry tart must be stored in the refrigerator. To keep it fresh, cover the leftover tart loosely with plastic wrap or aluminum foil. If you've already cut into it, storing individual slices in an airtight container is an excellent way to maintain freshness and prevent the crust from drying out or absorbing odors from the fridge.
When stored properly in the refrigerator, your homemade lemon raspberry tart will keep well for about 3-4 days. While the flavors often meld beautifully on the second day, the crust may lose some of its crispness over time as it sits in contact with the moist filling. Freezing an assembled fruit tart like this is generally not recommended, as the texture of both the lemon cream and the fresh berries can degrade upon thawing. Enjoy your delicious, easy springtime berry tart within a few days of making it for the best quality.
Enjoying Your Lemon Raspberry Tart
Finally, the most important step: enjoying the fruits of your labor! This bright and refreshing lemon raspberry tart is a celebration of springtime flavors, offering a delightful treat for any occasion. Slice, serve, and savor the combination of the crisp, buttery crust, the smooth, tangy lemon cream, and the burst of fresh raspberry goodness.
Frequently Asked Questions
What makes this Springtime Berry Tart recipe "easy"?
This recipe prioritizes simple ingredients and straightforward instructions, making it manageable even for beginner bakers. We focus on techniques that are easy to master.
What kind of berries are best to use in this tart?
The best berries are ones that are fresh and in season during springtime! Think strawberries, raspberries, blueberries, and blackberries.
Can I use a store-bought crust to save time?
Absolutely! Using a pre-made crust is a great shortcut. Just be sure to choose one that is high-quality and fits your tart pan.
What's the best way to prevent the tart crust from getting soggy?
Blind baking the crust before adding the filling is crucial to prevent sogginess. Also, a thin layer of melted chocolate can help.
How long will the Springtime Berry Tart last?
The tart is best enjoyed within 2-3 days when stored in the refrigerator. This helps maintain the freshness of the berries and the crispness of the crust.
Final Reflection: The Sweetness of Simple Spring
The ease of crafting a delicious springtime berry tart mirrors the ease with which we can find joy in the simple things. This recipe, designed for accessibility and delightful results, isn't just about baking; it's about embracing the season's bounty and savoring the moments of creation. The vibrant colors and fresh flavors are a testament to the beauty found in simplicity.
The enduring appeal of baking, particularly during springtime, lies in its ability to connect us to nature and to each other. The act of sharing a homemade tart, whether with loved ones or enjoyed in quiet solitude, fosters a sense of connection and contentment that transcends the culinary experience itself. The best things in life are the simple things.
This sentiment rings true when considering the profound satisfaction derived from a recipe as straightforward and rewarding as this berry tart.
Now, I invite you to consider the parallels between this recipe and your own life. What simple joys are you overlooking? What moments of creation and connection are waiting to be embraced? Take the time to appreciate the small, sweet things—the vibrant colors of a spring day, the warmth of shared moments, the satisfaction of creating something beautiful with your own hands. Let the spirit of this springtime berry tart inspire you to find your own simple, sweet victories.
Unleash Your Inner Pastry Chef!
Thanks for joining us on this delicious journey into springtime baking! We hope you've gained some inspiration and confidence to tackle this delightful berry tart. Ready to bring those sweet flavors to life?
- Bake your own masterpiece! Gather your ingredients and follow our recipe to create a stunning, melt-in-your-mouth berry tart. Let the sweet aroma fill your kitchen!
- Share your creation: Tag us on social media with your baking triumphs using #BakeWithEaseBerryTart – we’d love to see your beautiful tarts!
- Explore other seasonal recipes: Dive into our collection of springtime delights on BakeWithEase.com to find your next baking adventure.
What’s your favorite springtime berry to bake with, and what other flavors would you like to experiment with in this recipe? Let’s chat in the comments!