
Layer Cake Assembly & Decoration: Your Complete Guide

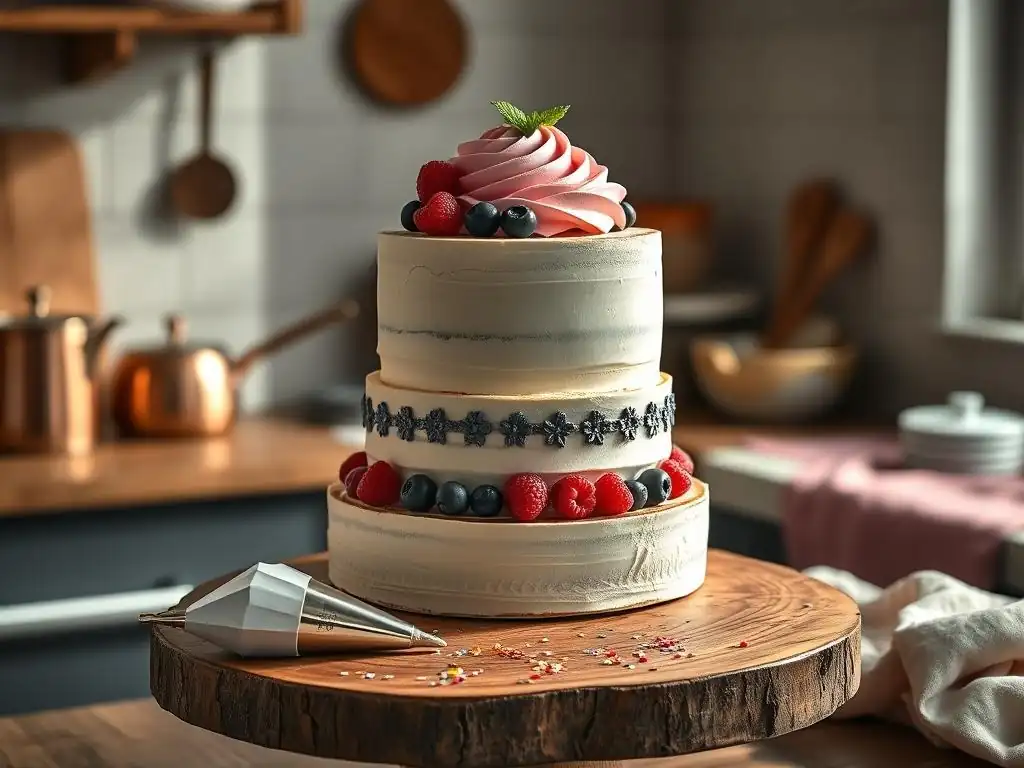
Welcome to BakeWithEase, your haven for all things baking! Ever dream of creating a stunning layer cake that looks as good as it tastes? This guide unlocks the secrets to easy layer cake decorating, transforming even the most novice baker into a cake artist. Discover the simple steps and expert tips you need to assemble and decorate your dream cake, leaving your guests wondering where you learned such masterful skills. Intrigued? Read on to begin your cake decorating journey!
- Layer Cake Assembly & Decoration: A Comprehensive Guide
- Baking Bliss' Guide to Perfect Layer Cakes
- Preparing for Layer Cake Assembly: Building a Solid Foundation
- Layer Cake Assembly: Step-by-Step for Impressive Results
- Layer Cake Decorating Techniques: From Simple to Stunning
- Advanced Layer Cake Decorating: Elevating Your Skills
- Troubleshooting Layer Cake Challenges: Solutions for Success
- Layer Cake Inspiration: Ideas for Your Next Masterpiece
- Storing Your Decorated Layer Cake: Maintaining Freshness
- Conclusion: Mastering the Art of Layer Cake Decoration
-
Frequently Asked Questions
- How do I ensure my layer cake is level before decorating?
- What's the best type of frosting for easy layer cake decorating?
- What's the easiest way to apply frosting smoothly to a layer cake?
- What are some simple decorating techniques for beginners?
- How can I prevent my layer cake from sliding or collapsing?
- Final Reflection: The Sweetness of Simplicity in Cake Decorating
- Unleash Your Inner Cake Artist!
Layer Cake Assembly & Decoration: A Comprehensive Guide
Baking Bliss' Guide to Perfect Layer Cakes
Welcome to the wonderful world of layer cakes! There's something truly special about presenting a beautifully assembled and decorated layer cake. Whether you're aiming for a simple, elegant design or something more elaborate, the process of building and finishing a cake can be incredibly rewarding. This guide is designed to walk you through every step, making layer cake assembly and easy layer cake decorating accessible and enjoyable for bakers of all skill levels.
From baking perfectly flat layers to mastering the crumb coat and adding those final decorative touches, we'll cover the techniques that professional bakers use. Our goal is to equip you with the knowledge and confidence to create stunning cakes that taste as good as they look, turning potential challenges into simple steps towards a showstopping dessert. Let's get started on building your next edible masterpiece!
Preparing for Layer Cake Assembly: Building a Solid Foundation
Before you even think about frosting, the success of your layer cake starts with excellent cake layers. Baking even, moist, and stable layers is the critical first step. This section covers the foundational techniques needed right after your cakes come out of the oven, setting you up for smooth assembly and beautiful easy layer cake decorating later on.
Baking Even Cake Layers: Temperature and Technique
Achieving flat, even cake layers is key to a stable and professional-looking finished product. One common issue is a dome shape in the center, often caused by the edges baking and setting faster than the middle. To combat this, ensure your oven temperature is accurate – using an oven thermometer is highly recommended, as many ovens can be off by 25-50°F (approx. 15-30°C). Baking at the correct temperature, often around 325-350°F (160-175°C) for many cake recipes, allows the cake to rise more evenly.
Another technique is using cake strips, which are damp fabric bands wrapped around the outside of the cake pan. These insulate the edges, causing the cake to bake more slowly and evenly across the surface. Alternatively, some bakers slightly reduce the oven temperature and increase the baking time, or use a heating core in larger cakes, though for typical 8-inch or 9-inch layers, temperature control and strips are often sufficient for achieving those coveted flat tops essential for easy layer cake decorating.
Cooling and Leveling Cake Layers: Ensuring a Professional Finish
Once your cake layers are baked, proper cooling is crucial. Allow the cakes to cool in their pans on a wire rack for about 10-15 minutes. This allows the structure to set slightly, reducing the risk of breakage when you invert them. After this initial cooling, carefully invert the cakes onto the wire rack to cool completely. They must be fully cool before you attempt to level or frost them – warm cakes will cause frosting to melt and slide. This cooling process can take 1-2 hours depending on the size and density of the cake.
Leveling involves trimming off any remaining dome or unevenness from the top of the cake layer using a serrated knife or a cake leveler. Hold the knife parallel to the counter and use a gentle sawing motion, rotating the cake as you go, to slice off the excess. Aim for a flat, even surface on all layers. These trimmed pieces, often called "cake scraps," are perfect for making cake pops or just enjoying as a baker's treat! A level surface is paramount for stable stacking and achieving a smooth finish during easy layer cake decorating.
Crafting the Ideal Frosting: Flavor, Texture, and Stability
Your frosting is the glue that holds your layer cake together and provides the canvas for easy layer cake decorating. The ideal frosting should have excellent flavor, a smooth texture, and sufficient stability to support the layers and hold its shape when piped. Buttercream is a popular choice, but there are many variations like American buttercream, Swiss meringue buttercream, Italian meringue buttercream, and French buttercream, each offering different levels of sweetness and richness.
For stability, especially in warmer environments or for taller cakes, using a recipe that incorporates a good ratio of fat to sugar is important, or opting for meringue-based buttercreams which are generally more stable than American buttercream. Ensure your butter is at the correct temperature (often room temperature, about 68-70°F or 20-21°C, but check your recipe) for proper emulsification. If your frosting seems too soft, chilling it in the refrigerator for 15-30 minutes and then re-whipping can help. For easier layer cake decorating, a frosting that pipes smoothly without breaking is essential.
Simple Syrup Infusion: Enhancing Moisture and Flavor
Simple syrup is a baker's secret weapon for adding moisture and boosting flavor in cake layers, especially those that might lean towards the drier side, like vanilla or white cakes. It's made by heating equal parts sugar and water until the sugar dissolves (e.g., 1 cup sugar to 1 cup water). You can infuse it with flavorings like vanilla extract, citrus zest, coffee, or liqueurs once it has cooled slightly.
To apply, brush or drizzle the cooled simple syrup generously over the cut side of each cake layer after it has been leveled and is completely cool. The cake will absorb the liquid, making it incredibly moist and flavorful. Use about 2-3 tablespoons of syrup per 8-inch layer, adjusting based on the cake's density and your preference. This step not only improves texture but also helps keep the cake fresh longer, contributing to a successful and easy layer cake decorating experience.
Layer Cake Assembly: Step-by-Step for Impressive Results
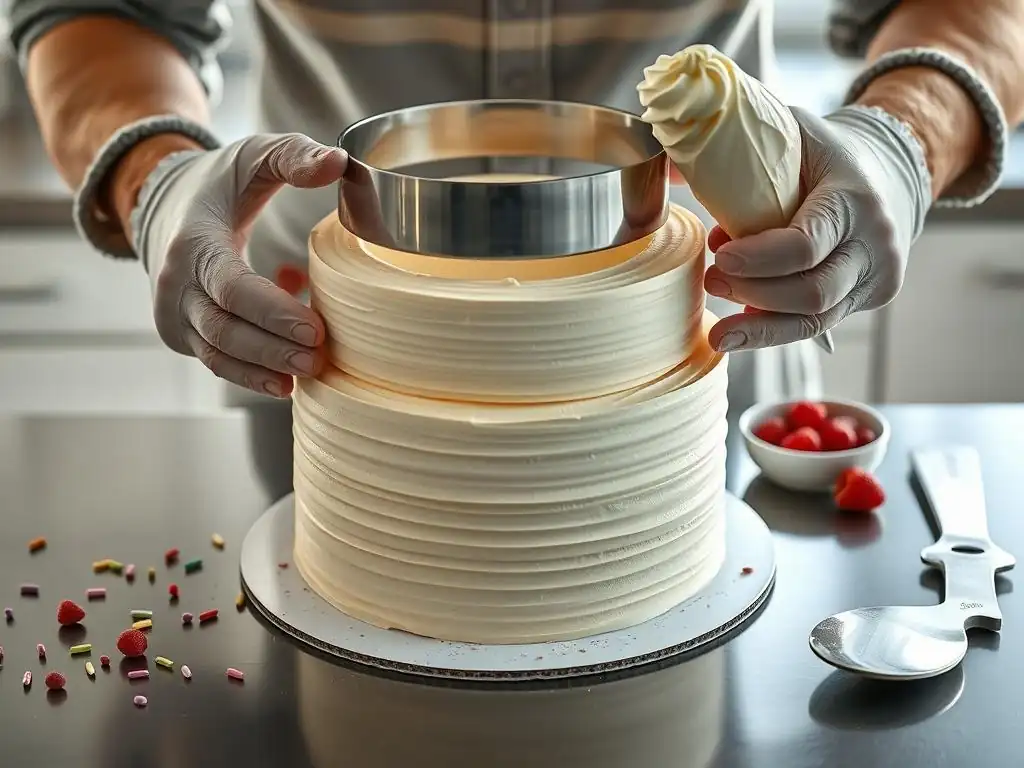
With your cake layers cooled, leveled, and potentially moistened with simple syrup, and your frosting ready, it's time for the exciting part: assembly! Following a systematic approach ensures your cake is stable, straight, and ready for beautiful easy layer cake decorating.
Securing the First Layer: Preventing Movement
The very first step in building a stable layer cake is securing the bottom layer to your cake board or serving plate. Place a small dollop of frosting (about 1-2 tablespoons) in the center of the board or plate where you intend to place the cake. This acts as an adhesive, preventing the cake from sliding around as you stack and frost it.
Carefully place your first cake layer (usually the bottom layer of the original cake, which might be slightly flatter) centered on top of the frosting dollop. Press down gently to secure it. This simple step is surprisingly effective in preventing frustrating movement during the rest of the assembly and easy layer cake decorating process.
Filling the Layers: Balancing Flavors and Textures
Now it's time to add the delicious filling between your cake layers. This can be more of your prepared frosting, or a different filling like fruit curd, jam, ganache, or pastry cream. Apply a generous, even layer of your chosen filling over the secured bottom cake layer, spreading it almost to the edge. Leaving a small border (about 1/4 inch) can help prevent the filling from squeezing out the sides when you add the next layer.
If you're using a softer filling like jam or curd, it's a good idea to pipe a border of firmer frosting around the perimeter of the layer first. This creates a dam that contains the softer filling and adds stability. Aim for about 1/2 to 3/4 inch thickness for your filling layer, depending on the overall height you desire and the stability of the filling.
Stacking for Stability: Preventing Tilting and Sliding
Carefully lift your next cake layer and place it directly on top of the filled first layer, aligning the edges as precisely as possible. Use your hands to gently press down and ensure it's level. Repeat the process: add filling to the second layer, then carefully place the third layer on top, again aligning and pressing gently.
For taller cakes (three layers or more), or cakes with softer fillings, consider using dowels or cake supports for added stability. Insert food-safe dowels (cut to the height of the stacked layers minus the top layer) into the bottom layers, strategically placed to support the layers above. This is especially important if the cake will be transported or sit out for an extended period, ensuring your easy layer cake decorating efforts don't end in a lean.
Crumb Coating: Creating a Smooth Canvas
The crumb coat is a thin layer of frosting applied to the entire exterior of the cake after stacking. Its primary purpose is to trap any loose crumbs, preventing them from showing up in your final layer of frosting. This step is absolutely essential for achieving a smooth, clean finish for easy layer cake decorating.
Apply a thin, even layer of frosting using an offset spatula, covering the top and sides of the cake. Don't worry about perfection at this stage; the goal is just to seal in the crumbs. Use your spatula or a bench scraper held vertically against the side of the cake while rotating it on a turntable to smooth the sides.
Chilling the Crumb Coat: Setting the Frosting
Once the crumb coat is applied, place the cake in the refrigerator to chill for at least 30 minutes, or until the frosting is firm to the touch. This chilling time allows the crumb coat to set completely, locking in those pesky crumbs and creating a stable base for your final layer of frosting.
- Place cake on turntable.
- Apply thin layer of crumb coat frosting.
- Smooth sides and top with spatula/scraper.
- Refrigerate for 30-60 minutes.
This firm surface makes applying the final, thicker layer of frosting much easier and cleaner, which is a crucial step towards easy layer cake decorating with a professional look.
Layer Cake Decorating Techniques: From Simple to Stunning
With your cake assembled and crumb-coated, you have a perfect canvas for creativity! This section explores various techniques, starting with the basics that are key to easy layer cake decorating and moving towards more intricate designs.
Achieving a Smooth Frosting Finish: Essential Techniques
Applying the final layer of frosting smoothly is fundamental to many easy layer cake decorating styles. Apply a generous amount of your final frosting to the top and sides of the chilled, crumb-coated cake using an offset spatula. Don't be shy with the frosting; using enough makes it easier to get a smooth finish.
Once the cake is covered, use a large offset spatula or a bench scraper to smooth the sides. Hold the scraper vertically against the side of the cake, keeping it still while rotating the turntable. Scrape off excess frosting and reapply where needed. For the top, use an offset spatula to pull the excess frosting from the edge towards the center, smoothing as you go. Dip your scraper or spatula in hot water and wipe it dry for an extra smooth finish. This technique is the foundation for many simple layer cake decoration styles.
Mastering Basic Piping: Creating Elegant Designs
Piping frosting using pastry bags and tips is a versatile skill that allows for endless easy layer cake decorating possibilities, from simple dots to intricate borders. Start with basic piping tips like a round tip (e.g., Ateco 805) or a star tip (e.g., Wilton 1M). Fill a piping bag fitted with your chosen tip about half to two-thirds full with frosting. Twist the top of the bag to seal it and apply even pressure from the top down.
Practice piping lines, dots, and swirls on parchment paper first to get a feel for the pressure needed and the movement required. For simple layer cake decoration, mastering just a few basic shapes can dramatically enhance the look of your cake. Clean, consistent piping is key to a polished finish.
Piping Borders: Adding Definition and Style
Borders are a classic and easy layer cake decorating technique that adds a finished look to the base of the cake or around the top edge. A simple shell border using a star tip is a great starting point. Hold the piping bag at a 45-degree angle to the cake surface. Apply pressure, letting the frosting fan out slightly, then release pressure and pull the tip away, creating a tail. Overlap the tail of the first shell with the start of the next one to create a continuous border.
Other easy borders include simple dots, ropes (using a round tip), or zigzags (using a star tip). Practice maintaining consistent pressure and size for an even border. Piping a border is one of the quickest ways to elevate a simply frosted cake and is a staple technique in easy layer cake decorating.
Creating Rosettes and Swirls: Simple Floral Accents
Rosettes and swirls are beautiful and relatively easy to pipe, adding elegant floral accents to your cake. Using an open star tip (like Wilton 1M or 2D), hold the bag perpendicular to the cake surface. Start in the center, apply pressure, and move the tip in a circular motion outwards, then release pressure when you reach the desired size. This creates a classic rosette.
For a simpler swirl on top of cupcakes or a small cake, start piping from the center and move outwards in a spiral pattern, pulling up slightly at the end to create a peak. These techniques are fantastic for easy layer cake decorating on the top of the cake or covering the entire surface for a textured look.
Sprinkle Application: Adding Color and Texture
Sprinkles are a fun and straightforward way to add color, texture, and festivity to your easy layer cake decorating. Jimmies, nonpareils, sanding sugar, and edible glitter are just a few options. For applying sprinkles to the sides of a frosted cake, hold the cake over a tray or large bowl to catch the excess. Gently press sprinkles onto the sides of the cake with your hand or an offset spatula, rotating the cake as you go.
For the top, you can sprinkle them randomly, create patterns, or use stencils. A simple band of sprinkles around the base or top edge of the cake adds a pop of color with minimal effort, making it a perfect technique for beginner layer cake decorating. About 1/2 cup of sprinkles is usually sufficient for decorating an 8-inch round cake's sides and top, depending on coverage.
Chocolate Ganache Drip: A Decadent Touch
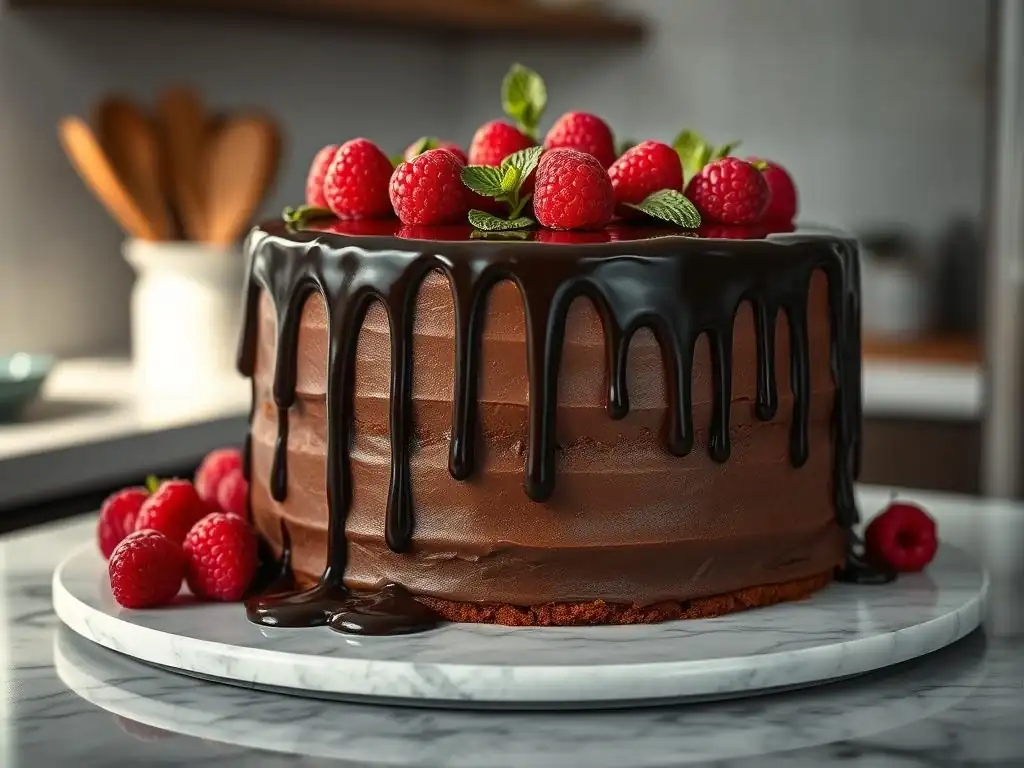
A chocolate ganache drip is a popular and relatively easy way to add a sophisticated and decadent look to a layer cake. Ganache is typically made with equal parts (by weight) of chocolate and hot heavy cream. For a thicker drip, use slightly less cream (e.g., 1:0.8 chocolate to cream ratio); for a thinner drip, use slightly more cream (e.g., 1:1.2 chocolate to cream ratio). Pour the warm, but not hot, ganache into a squeeze bottle or piping bag.
Ensure your cake is chilled and firm. Starting at the top edge, gently squeeze the ganache, allowing it to drip down the sides. Vary the amount squeezed at different points to create drips of varying lengths. Once the edge is done, fill in the top of the cake with the remaining ganache and spread smoothly. Chill the cake again to set the ganache. This technique adds a touch of elegance to easy layer cake decorating.
Stencil Designs: Creating Intricate Patterns with Ease
Stencils allow you to transfer intricate patterns onto your cake surface with relative ease, making complex designs achievable even for beginners. Cake stencils are available in countless patterns, from geometric shapes to floral motifs. Ensure your cake is smoothly frosted and chilled until firm.
Place the stencil gently against the side or top of the cake, holding it securely. Apply a thin layer of frosting (often buttercream or royal icing) over the stencil using an offset spatula or scraper, pressing it through the openings. Carefully peel the stencil away to reveal the design. Clean the stencil between uses for crisp results. This is a fantastic tool for easy layer cake decorating that looks highly professional.
Advanced Layer Cake Decorating: Elevating Your Skills
Ready to take your easy layer cake decorating skills to the next level? These techniques require a bit more practice and patience but open up a world of creative possibilities for stunning cakes.
Working with Fondant: Covering and Sculpting
Fondant is a pliable, dough-like icing made primarily from sugar, water, and gelatin or glycerin. It provides a perfectly smooth finish and can be rolled thin and draped over a cake for a flawless look. Knead the fondant until pliable, then roll it out on a surface dusted with powdered sugar or cornstarch to about 1/8 inch thickness. Carefully lift the rolled fondant and drape it over a crumb-coated cake, smoothing it down the sides and trimming the excess with a sharp knife or pizza cutter.
Fondant can also be colored and used for sculpting figures, cutting out shapes, or creating decorative elements like bows and ribbons. While covering a cake smoothly with fondant takes practice to avoid wrinkles and tears, it offers unparalleled precision for clean, modern designs.
Creating Buttercream Flowers: Realistic Floral Designs
Piping realistic-looking buttercream flowers like roses, peonies, or hydrangeas is a beautiful skill that adds a touch of artistry to your layer cake decoration. This typically involves using specific piping tips (like petal tips, leaf tips, and star tips) and often requires a flower nail – a small flat surface on a stick that you rotate while piping petals.
Buttercream consistency is key for piping flowers; it needs to be firm enough to hold its shape but soft enough to pipe smoothly. Swiss or Italian meringue buttercreams are often preferred for their stability and smooth texture. Learning a few basic flower types can transform your cake into a floral masterpiece.
Airbrushing Techniques: Adding Depth and Dimension
Airbrushing involves using a small air compressor and airbrush gun to spray edible food coloring onto the cake surface. This technique allows for smooth color gradients, shading, and creating realistic effects like skies, water, or metallic finishes that are difficult to achieve with traditional frosting methods.
Practice controlling the air pressure and paint flow on parchment paper before working on your cake. You can use stencils with airbrushing to create sharp designs or freehand for more artistic effects. Airbrushing adds a professional level of depth and dimension, enhancing your layer cake decoration.
Geometric Cake Designs: Modern and Striking
Geometric cake designs are modern, clean, and visually striking. These often involve using sharp edges, bold lines, and sometimes contrasting textures or colors. Techniques include achieving perfectly smooth, sharp edges on your frosting (often with ganache under buttercream), using rulers and templates to mark out patterns, or applying geometric shapes cut from fondant or chocolate.
Masking areas with parchment paper or stencils while applying different colors or textures (like sprinkles or edible paint) can also create precise geometric patterns. These designs showcase precision and clean lines, resulting in a sophisticated layer cake decoration.
Troubleshooting Layer Cake Challenges: Solutions for Success
Even experienced bakers encounter issues during layer cake assembly and decoration. Knowing how to troubleshoot common problems can save your cake and your sanity, ensuring your easy layer cake decorating efforts pay off.
Cake Layer Slippage: Ensuring Stability
If your cake layers are sliding or leaning during assembly, it's likely due to insufficient support or a soft filling/frosting. Ensure you've secured the bottom layer to the board with frosting. If using a soft filling like jam, always pipe a firm frosting dam around the edge first.
For taller cakes (3+ layers), inserting food-safe dowels or supports through the bottom layers is essential for stability. Make sure the dowels are cut precisely to the height of the stacked layers (excluding the top layer). Chill the cake between steps (after crumb coating, before final frosting) to firm everything up and prevent movement.
Frosting Melt: Maintaining Temperature
Frosting melt is a common issue, especially with buttercream, particularly in warm environments. If your frosting is becoming too soft or greasy while you're working, it's a sign it's too warm.
If this happens, stop working and pop the cake back into the refrigerator for 15-20 minutes to firm up the frosting. You can also refrigerate your bowl of frosting for a few minutes if needed. Ensure your kitchen isn't excessively warm. Using a more stable frosting recipe (like meringue-based buttercreams) can also help prevent melting during easy layer cake decorating, especially for outdoor events.
Uneven Frosting: Achieving a Smooth Finish
Achieving a perfectly smooth final layer of frosting can be tricky. Unevenness often results from not applying enough frosting initially, impatience during smoothing, or inconsistent pressure.
After applying a generous amount of frosting, use a bench scraper held vertically against the side of the cake while rotating it on a turntable. Apply consistent, light pressure. For the top, use an offset spatula, pulling frosting from the edge towards the center. For extra smoothness, dip your scraper or spatula in hot water, wipe it dry, and use the warm surface to smooth the frosting. Chilling the crumb coat first provides a much better base for achieving a smooth finish, making easy layer cake decorating much more achievable.
Preventing Air Bubbles: Smooth and Professional Results
Air bubbles in your frosting, especially when piping or trying to achieve a smooth finish, can be frustrating. They often occur from over-whipping the frosting or incorporating air during mixing.
After making your frosting, gently stir it by hand with a spatula for a few minutes to push out trapped air bubbles. When filling a piping bag, push the frosting down towards the tip, squeezing out any air pockets at the top before twisting the bag closed. For smooth frosting, applying a generous amount and then using a scraper helps to smooth out any small bubbles on the surface. Degassing your frosting is a simple step that leads to much smoother results for easy layer cake decorating.
Layer Cake Inspiration: Ideas for Your Next Masterpiece
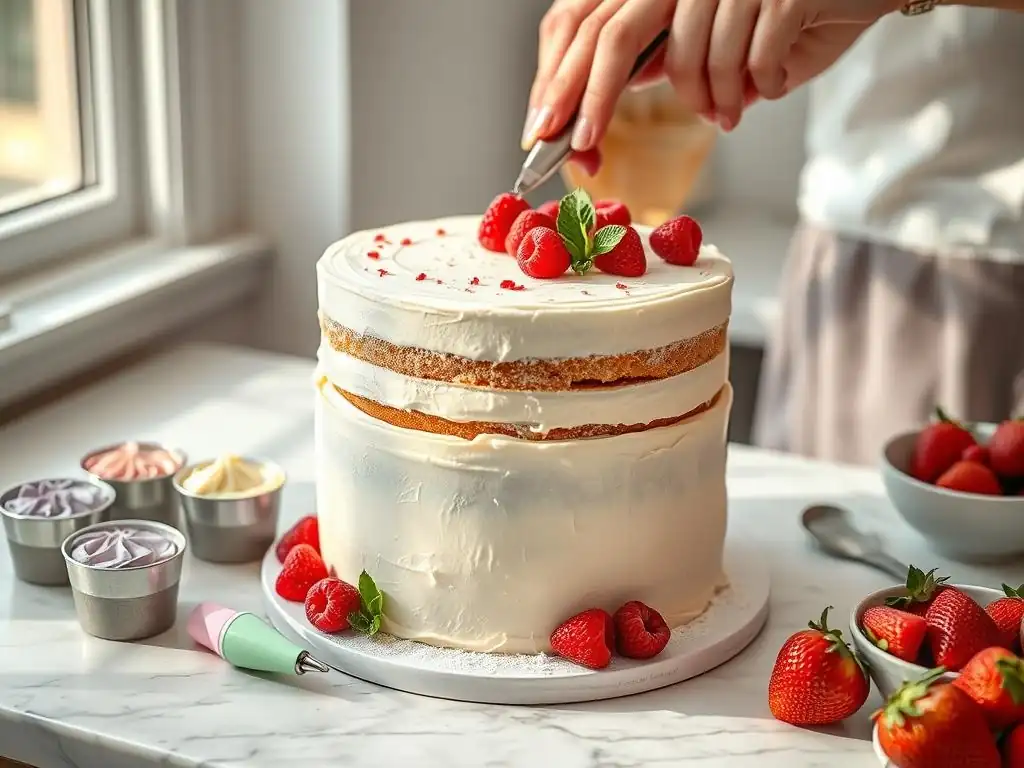
Looking for ideas for your next baking project? Here are a few classic and delicious layer cake combinations that are perfect canvases for practicing your easy layer cake decorating skills.
Red Velvet Cake with Cream Cheese Frosting
A timeless favorite, Red Velvet cake offers a beautiful deep red hue that contrasts wonderfully with bright white cream cheese frosting. The slight tang of the cream cheese balances the sweetness of the cake.
Decorate with simple swirls of cream cheese frosting on top using a star tip, or cover the sides with a smooth finish and press red velvet cake crumbs onto the base for a classic look. This pairing is inherently elegant and lends itself well to easy layer cake decorating techniques like simple piping or a smooth finish.
Carrot Cake with Walnuts and Cream Cheese Frosting
Moist and flavorful, Carrot Cake is often studded with walnuts, raisins, or pecans, adding delightful texture. It pairs exceptionally well with a rich and tangy cream cheese frosting.
Consider leaving the sides "naked" or semi-naked, where some cake layers peek through a thin layer of frosting, highlighting the texture of the cake itself. Top with simple swirls of frosting and sprinkle chopped walnuts or candied carrots on top. This combination is forgiving and perfect for practicing rustic or easy layer cake decorating styles.
Chocolate Cake with Raspberry Filling and Chocolate Ganache
For the chocolate lovers, a decadent Chocolate Cake filled with bright, slightly tart raspberry filling and finished with rich chocolate ganache is a dream. The combination of intense chocolate and fresh fruit is divine.
A chocolate ganache drip paired with fresh raspberries and perhaps a few chocolate curls on top makes for a sophisticated yet relatively easy layer cake decoration. You can also use a dark chocolate buttercream for a smooth finish, or pipe simple chocolate stars or swirls.
Storing Your Decorated Layer Cake: Maintaining Freshness
After all your hard work assembling and applying easy layer cake decorating techniques, proper storage is crucial to keep your masterpiece fresh and delicious.
Proper Storage Techniques: Protecting Flavor and Texture
Most frosted layer cakes should be stored in an airtight container at room temperature if they contain fillings or frostings that are stable at room temperature (like American buttercream made with butter and powdered sugar). Place the cake in a cake carrier or cover it loosely with plastic wrap, then place it under a cake dome. Stored this way, many cakes will stay fresh for 2-3 days.
Cakes with fillings or frostings containing dairy (like cream cheese frosting, whipped cream, or pastry cream), fresh fruit, or unstable ingredients must be refrigerated. Ensure the cake is covered to prevent it from drying out or absorbing odors from the refrigerator. Let refrigerated cakes sit at room temperature for 30-60 minutes before serving for the best texture and flavor.
Freezing Layer Cake: Preserving for Later
If you won't be eating the entire cake within a few days, freezing is an excellent way to preserve it. For best results, freeze the cake after it's been crumb-coated but before the final layer of frosting or extensive easy layer cake decorating. Place the crumb-coated cake on a freezer-safe plate or board and freeze until firm (about 1-2 hours).
Once firm, wrap the cake tightly in several layers of plastic wrap, followed by a layer of aluminum foil or a freezer bag. Label with the date. Frozen cake layers or crumb-coated cakes can last 2-3 months. Thaw overnight in the refrigerator before applying the final frosting and decorations. You can also freeze individual slices of decorated cake, wrapped tightly.
Conclusion: Mastering the Art of Layer Cake Decoration
As you can see, creating a beautiful layer cake is a process built on foundational techniques, from careful baking and cooling to precise assembly and thoughtful decoration. Whether you're just starting with simple layer cake decoration like smooth frosting and basic piping, or venturing into more advanced skills like fondant or airbrushing, each step offers an opportunity to learn and improve.
By mastering these techniques, troubleshooting common issues, and finding inspiration in classic and creative designs, you'll be well on your way to creating stunning, delicious layer cakes that impress everyone. So gather your ingredients, preheat your oven, and enjoy the sweet journey of layer cake assembly and easy layer cake decorating!
Frequently Asked Questions
How do I ensure my layer cake is level before decorating?
Leveling your cake layers is crucial for a professional finish. Use a serrated knife to trim any domes, creating flat, even surfaces for stacking. A cake leveler can also achieve this with precision.
What's the best type of frosting for easy layer cake decorating?
A stable and forgiving frosting like American buttercream or a simple chocolate ganache is ideal. These frostings are easy to work with and hold their shape well, making decorating easier.
What's the easiest way to apply frosting smoothly to a layer cake?
The crumb coat is your friend! Apply a thin layer of frosting to seal in crumbs before the final frosting layer. Use an offset spatula and a cake turntable for a smooth, even finish.
What are some simple decorating techniques for beginners?
Start with techniques like piping simple borders, using sprinkles, or creating a naked cake effect (minimal frosting). These are effective and require minimal skill.
How can I prevent my layer cake from sliding or collapsing?
Use a small amount of frosting between each layer to act as "glue." Consider using cake dowels for added support, especially for taller or heavier cakes.
Final Reflection: The Sweetness of Simplicity in Cake Decorating
Mastering the art of layer cake assembly and decoration doesn't require years of culinary school; it's about embracing the joy of the process and celebrating the simple elegance of a perfectly frosted cake. This guide has explored the fundamental techniques, from achieving flawlessly level layers to creating stunning buttercream finishes, proving that even beginners can achieve professional-looking results. The ease of these methods makes baking a truly accessible and rewarding experience for everyone.
The enduring appeal of layer cakes lies not just in their deliciousness, but in their capacity to bring people together. They are the centerpiece of celebrations, a symbol of joy and shared moments. The act of creating a beautiful cake, from carefully layering the sponge to the final flourish of a decorative element, is a deeply satisfying one. A cake is a celebration of life, a symbol of joy, and a delicious way to share happiness.
This sentiment resonates deeply, highlighting the emotional connection we forge with the cakes we bake and share.
Now, it's your turn. Don't be intimidated by the seemingly complex world of cake decorating. Pick a recipe, gather your tools, and embrace the creative process. Experiment with different frostings, fillings, and decorations. Most importantly, have fun! The beauty of baking lies in the journey, the satisfaction of creating something beautiful and delicious with your own hands, and the joy of sharing it with those you love. Let this guide be your springboard to a world of sweet possibilities.
Unleash Your Inner Cake Artist!
Thanks for joining us on this delicious journey into cake creation! We hope you’ve gained the confidence and skills to bake stunning layer cakes. Ready to take your baking to the next level?
- Craft your masterpiece: Use the techniques you've learned to bake your dream layer cake – don't be afraid to experiment with flavors and designs! This is your time to shine!
- Share your creation: Post a picture of your finished cake on social media using #BakeWithEase and tag us – we'd love to see your beautiful work!
- Explore our other recipes: Dive into our extensive recipe library for more baking inspiration and tutorials. You might discover your new favorite dessert!
What unique flavor combination will you create for your next layer cake masterpiece? Let us know in the comments!