
Troubleshooting Classic Cookies: Essential Tips for Beginners


Welcome to BakeWithEase, your trusted guide to baking bliss! Ever wondered why your cookies spread too thin, crumble at the touch, or stubbornly refuse to bake evenly? You're not alone! Dive into "Troubleshooting Classic Cookies: Essential Tips for Beginners" and unlock the secrets to fixing classic cookie problems, transforming your baking mishaps into magnificent masterpieces. Get ready to bake with confidence and finally achieve that perfect cookie every time!
- Troubleshooting Classic Cookies: Essential Tips for Beginners - BakeWithEase
- Introduction to Fixing Classic Cookie Problems at BakeWithEase
- Common Cookie Baking Problems and How to Fix Them
- Specific Cookie Type Troubleshooting
- Essential Baking Tools for Cookie Troubleshooting
- Advanced Cookie Troubleshooting Techniques
- Prevention is Key: Best Practices for Avoiding Cookie Problems
- Conclusion: Mastering Cookie Baking Through Troubleshooting
-
Frequently Asked Questions
- What are some common reasons why cookies spread too thin during baking?
- My cookies are always dry and crumbly. What am I doing wrong?
- Why do my cookies always burn on the bottom before they are cooked through?
- How can I prevent my cookies from becoming hard after they cool?
- What if my cookie dough is too sticky to work with?
- Final Reflection: The Sweet Science of Cookie Success
- Unleash Your Inner Baker: Master Cookie Perfection!
Welcome to BakeWithEase! We understand that diving into the world of baking, especially classic cookies, can sometimes feel like navigating a minefield of potential problems. Your dough might spread too much, the cookies could turn out hard as rocks, or perhaps the bottoms get burnt while the tops are still pale.
Don't worry, these are incredibly common hurdles for new bakers, and they are all solvable. This guide is designed specifically for you, the beginner baker, to help you confidently tackle and overcome these challenges, transforming those frustrating baking moments into successful, delicious outcomes.
We'll walk you through the most frequent issues you'll encounter when baking favorites like chocolate chip or sugar cookies, offering practical advice and simple fixes to get you back on track. Our goal is to equip you with the knowledge to not just follow a recipe, but to understand why things happen in the oven, making you a more intuitive and successful baker.
Fixing classic cookie problems is a skill every baker develops over time, and it often involves a bit of detective work. Is the issue related to your ingredients, your mixing technique, your oven, or even the weather? We'll explore these possibilities together. For instance, did you know that the temperature of your butter can significantly impact how much your cookies spread?
Or that simply chilling your dough can prevent a multitude of sins? We'll delve into these specifics, providing clear explanations and actionable steps. Think of this as your friendly guide to navigating the bumps in the road of cookie baking. By the end of this article, you'll have a solid understanding of how to identify common cookie woes and, more importantly, how to fix them, leading to consistently delightful results every time you bake.
For beginners, encountering problems like flat, dry, or burnt cookies can be incredibly discouraging. It might even make you question your baking abilities or give up entirely. This is precisely why learning how to troubleshoot is so vital. It shifts your perspective from feeling defeated by a failed batch to viewing it as a learning opportunity.
Understanding why something went wrong empowers you to adjust and improve for the next attempt. It's not about being perfect from the start, but about learning from mistakes and building confidence with each bake. Developing troubleshooting skills early on lays a strong foundation for tackling more complex recipes in the future. When you can identify that your cookies are spreading too much because your butter was too soft or your baking sheet too hot, you gain control over the process.
Consider the sheer variety of classic cookie recipes out there – from chewy chocolate chip to crisp shortbread and soft sugar cookies. Each type has its own unique requirements and potential pitfalls. A sugar cookie that spreads too much loses its decorative shape, while a chocolate chip cookie that doesn't spread enough can be dense and cakey.
Learning to troubleshoot means you can adapt recipes and techniques to achieve the desired texture and appearance for any cookie type you attempt. It's about gaining a deeper understanding of the science behind baking – how ingredients interact, how heat affects dough, and how small adjustments can lead to vastly different outcomes. This knowledge is invaluable for fixing classic cookie problems and mastering the art of cookie baking.
Why Your Cookies Spread Too Thin: Common Causes
Excessive cookie spread is one of the most frequent complaints from beginner bakers, resulting in thin, often crispy, or even lacy cookies instead of the desired plump, chewy ones. Several factors contribute to this. One major culprit is the state of your butter.
Using butter that is too soft (melted or very warm) causes the dough to melt faster in the oven before the structure can set, leading to significant spread. Another factor is the ratio of ingredients; too much sugar, especially granulated sugar which melts readily at baking temperatures, or too little flour can upset the balance and encourage spreading.
For instance, a ratio of 1 part butter to 1 part granulated sugar is common, but slightly increasing the flour or decreasing the sugar can help control spread. Furthermore, using too much leavening agent (baking soda or baking powder) can cause cookies to rise rapidly and then collapse, leading to a flat shape.
The temperature of your baking sheet also plays a role. Placing dough onto a hot baking sheet causes the butter to melt instantly, promoting excessive spread before the dough has a chance to set. Similarly, using dark-colored baking sheets can lead to more heat absorption, contributing to faster spread and potentially burnt bottoms.
Even seemingly minor details like using a greasy baking sheet (if not using parchment) can cause the dough to slip and spread more than intended. Understanding these common causes is the first step in fixing classic cookie problems related to spread. It's often a combination of these factors, rather than a single issue, that results in those frustratingly flat cookies.
Solutions for Preventing Flat Cookies: Baking Techniques and Ingredient Adjustments
Preventing flat cookies often involves controlling the fat and sugar in the dough and managing temperature. Start by ensuring your butter is properly softened, not melted. It should be pliable but still hold its shape, around 65-70°F (18-21°C).
Over-creaming butter and sugar can also incorporate too much air, contributing to spread; cream them just until light and fluffy, not excessively long. Adjusting the sugar type can help; using more brown sugar (which contains molasses and holds moisture) relative to granulated sugar can result in thicker, chewier cookies that spread less. Consider slightly reducing the amount of leavening agent called for in the recipe if excessive spread is a persistent issue, or ensure you are measuring it precisely.
Perhaps the most effective technique for preventing flat cookies is chilling the dough before baking. Refrigerating the dough for at least 30 minutes, or even up to 2-3 days, allows the fat to re-solidify. When chilled dough hits the hot oven, the butter melts more slowly, giving the cookie structure time to set before spreading too much. For particularly problematic doughs, you can even freeze the dough balls for 10-15 minutes before baking.
Always place dough onto cool baking sheets; if baking multiple batches, run your baking sheets under cold water and dry them thoroughly between uses. Using parchment paper also helps regulate heat transfer and prevents sticking, contributing to more predictable spread. Implementing these techniques is key for fixing classic cookie problems and achieving that desirable thickness.
Causes of Dry Cookies: Overbaking and Incorrect Ratios
Dry, crumbly cookies are often the result of moisture loss during baking, primarily due to overbaking. When cookies bake for too long or at too high a temperature, the water content evaporates excessively, leaving behind a dry texture that easily falls apart. Even a minute or two past the optimal baking time can turn a perfectly soft cookie into a hard, crumbly one.
Another significant factor is an incorrect ratio of dry ingredients (flour) to wet ingredients (butter, sugar, eggs, liquids). Too much flour or too little fat or liquid will result in a dough that is inherently dry, leading to dry cookies regardless of baking time. Accurate measurement, especially of flour, is crucial; scooping flour directly from the bag can result in significantly more flour than intended due to compaction, sometimes adding 20-30% extra flour compared to spooning it lightly into the measuring cup.
The type of sugar used can also influence moisture. Granulated sugar contributes less moisture than brown sugar, which contains molasses. Recipes relying heavily on granulated sugar might be more prone to dryness if not balanced with sufficient fat and liquid. Similarly, using low-fat substitutes or reducing the amount of fat in a recipe will almost always result in a drier cookie, as fat contributes significantly to moisture retention and tenderness. Understanding these causes – primarily overbaking and ingredient imbalance – is essential for fixing classic cookie problems related to dryness.
Tips for Moist Cookies: Hydration and Baking Time Adjustments
To combat dry cookies, focus on proper hydration and precise baking time. First and foremost, avoid overbaking. Cookies are often done when the edges are set and lightly golden, but the centers still look slightly soft or underbaked. They will continue to cook and set on the hot baking sheet after being removed from the oven.
For many classic drop cookies baked at 350°F (175°C), this might be anywhere from 8 to 12 minutes, depending on size and thickness. Start checking at the lower end of the time range specified in your recipe. Using an oven thermometer to ensure your oven temperature is accurate is also vital, as an oven running too hot will accelerate drying.
Ensure accurate measurement of ingredients, especially flour. Use the spoon-and-level method: lightly spoon flour into your dry measuring cup and level off the excess with a straight edge, rather than scooping directly from the bag. Consider adding an extra egg yolk to your dough; egg yolks are rich in fat and emulsifiers, adding moisture and tenderness without significantly altering the structure.
If a recipe seems consistently dry, you might try reducing the flour by a tablespoon or two, or adding a tablespoon of milk or cream. Using a higher proportion of brown sugar to granulated sugar can also enhance moisture and chewiness. By paying close attention to baking time and ingredient balance, you can successfully achieve moist, tender cookies, effectively fixing classic cookie problems related to dryness.
Understanding Cookie Texture: The Science Behind Soft Cookies
The texture of a cookie is a complex interplay of ingredients, mixing methods, and baking conditions. Hard or overly crunchy cookies, when softness was desired, often result from factors that promote gluten development or sugar crystallization. Flour contains proteins that, when mixed with liquid and agitated (like during mixing), develop gluten. Overmixing cookie dough allows excessive gluten strands to form, leading to a tough, hard texture, similar to kneading bread dough too much.
Sugar also plays a role; as cookies bake and cool, sugar can crystallize. While this contributes to crispness, excessive crystallization can lead to hardness. Using granulated sugar tends to produce crispier cookies than brown sugar, which contains molasses and remains more amorphous, contributing to chewiness and softness.
The amount and type of fat are also critical. Butter contributes to spread and crispness as it melts, but also tenderness. Shortening, which has a higher melting point than butter, results in less spread and often a softer, more cake-like texture.
Cookies with a higher fat-to-sugar ratio tend to be more tender. Furthermore, the degree of leavening affects texture; baking soda reacts with acidic ingredients (like brown sugar or buttermilk) to produce carbon dioxide, contributing to rise and a tender crumb, whereas baking powder provides lift but doesn't react with acids in the same way. Understanding how these elements interact helps in fixing classic cookie problems related to texture.
Techniques for Softening Cookies: Ingredient Choices and Baking Methods
To achieve soft cookies, focus on minimizing gluten development and maximizing moisture retention. When mixing dry ingredients into wet, mix only until just combined – stop as soon as you no longer see streaks of dry flour. Overmixing is a primary cause of hardness. As mentioned, using a higher proportion of brown sugar to granulated sugar will contribute to a softer, chewier texture due to the molasses. You can experiment with replacing some granulated sugar with brown sugar, perhaps starting with a 50/50 split if the recipe calls for all granulated.
Baking method is also key. Baking cookies for a shorter time at a slightly lower temperature can help them retain moisture and prevent excessive crisping. Aim for cookies that look slightly underbaked in the center when you remove them from the oven, as they will continue to set.
For example, if a recipe calls for 12 minutes at 375°F, try 10 minutes at 350°F and see if that yields a softer result. Some bakers swear by adding an extra egg yolk or a tablespoon of milk or cornstarch to the dough to promote tenderness.
Storing cookies properly after baking can also help maintain softness; keep them in an airtight container, perhaps with a slice of bread (though be careful, this can transfer moisture and potentially make them soggy if left too long). Employing these techniques is effective for fixing classic cookie problems and ensuring your cookies have the soft texture you desire.
Preventing Burnt Cookies: Oven Temperature and Baking Sheets
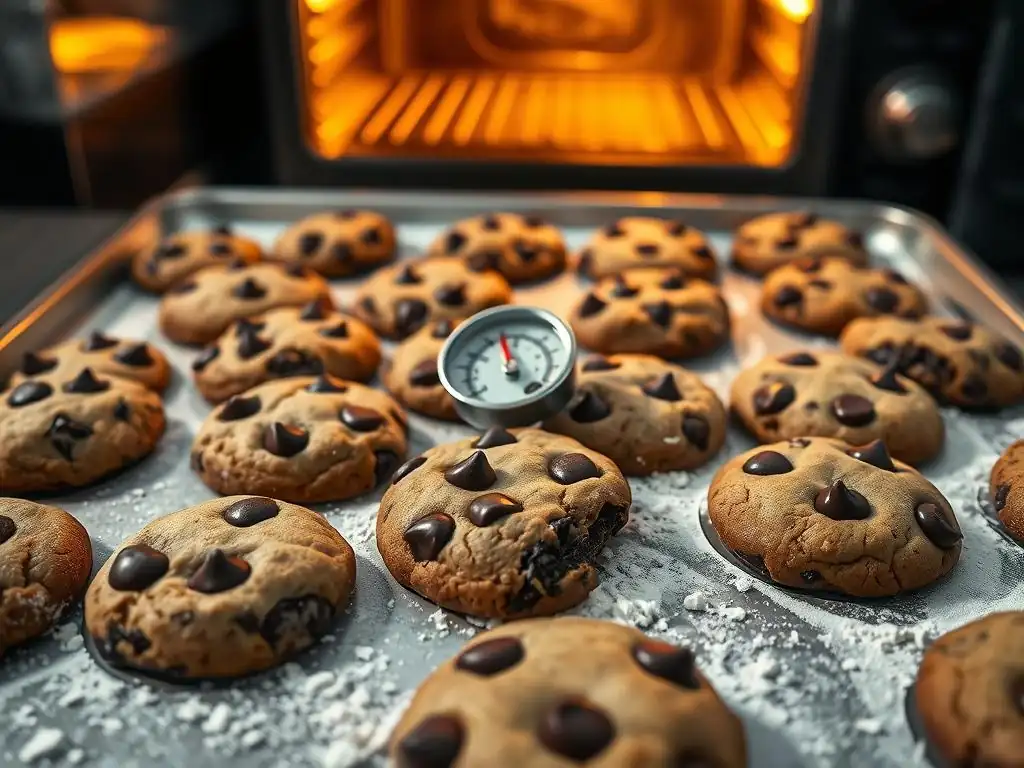
Burnt cookie bottoms are a common frustration, often occurring while the tops and centers are perfectly baked. This issue is primarily related to heat management within your oven and the type of baking sheet you use. Ovens often have "hot spots," areas where the temperature is significantly higher than the setting, and the bottom element is usually the source of heat, making the bottom of the oven the hottest zone.
Placing cookies on a rack too close to the bottom element can lead to scorched bottoms before the rest of the cookie is done. For instance, if your oven rack is only 2 inches from the bottom, you're much more likely to burn the bottoms than if it's in the middle position, typically 5-7 inches from the bottom element.
The type and color of your baking sheet also heavily influence how quickly the bottoms cook. Dark-colored or non-stick baking sheets absorb and transfer heat much more efficiently than shiny, light-colored aluminum sheets. While this can be beneficial for achieving a crisp bottom, it also increases the risk of burning, especially if combined with a hot oven or low rack position. Thin baking sheets can also heat up too quickly and unevenly. Understanding how heat behaves in your oven and how your baking sheets conduct heat is crucial for fixing classic cookie problems like burnt bottoms.
Solutions: Using Parchment Paper and Adjusting Rack Position
The simplest and most effective solution for preventing burnt cookie bottoms is to use parchment paper. Placing a sheet of parchment paper between the cookie dough and the baking sheet creates a barrier that helps regulate heat transfer, preventing the bottom from cooking too quickly or burning. This is an inexpensive tool that makes a significant difference. Always use parchment paper, especially if you have dark or thin baking sheets.
Adjusting your oven rack position is also critical. For most cookies, the middle rack is the ideal spot. This position allows for even heat circulation around the cookies, ensuring the tops, bottoms, and centers bake at a relatively similar rate. If you find your bottoms are still burning even on the middle rack, your oven might have a particularly strong bottom element, or you might need to use two baking sheets stacked on top of each other (an "insulated" baking sheet) for extra protection.
Finally, ensure your oven temperature is accurate using an external oven thermometer. If your oven runs hot, especially on the bottom, you might need to slightly reduce the baking temperature (e.g., bake at 340°F instead of 350°F) or shorten the baking time to prevent scorching. These steps are key for fixing classic cookie problems and achieving evenly baked cookies.
Troubleshooting Uneven Baking: Oven Calibration and Cookie Placement
Unevenly baked cookies, where some are perfectly golden while others are still pale or already overdone, are a common sign of inconsistent heat within your oven. As mentioned, ovens often have hot spots, meaning different areas of the oven cavity maintain different temperatures. This can be due to the placement of heating elements, poor insulation, or even the convection fan (if you have one).
Without even heat distribution, cookies on one side of the baking sheet or in a particular area of the oven will bake faster than others. A difference of even 15-20°F (around 8-11°C) within the oven can lead to noticeable variations in baking time and doneness across a single batch.
Another contributing factor is inconsistent cookie placement on the baking sheet or using multiple sheets that crowd the oven. Placing cookies too close together can inhibit proper air circulation around them, leading to uneven baking. Overcrowding the oven with too many baking sheets at once can also disrupt airflow and temperature, causing some cookies to bake faster than others. Fixing classic cookie problems like uneven baking requires addressing both the oven's heat distribution and how you utilize the space within it.
Tips for Uniform Cookies: Cookie Size and Dough Consistency
To achieve uniformly baked cookies, start by understanding your oven's quirks. Using an oven thermometer placed in different spots on your oven racks can help you identify hot spots. Once you know where they are, you can avoid placing cookies directly in those areas or plan to rotate your baking sheet accordingly. A crucial technique is rotating your baking sheet halfway through the baking time. If you're baking at 350°F for 10 minutes, rotate the sheet 180 degrees after 5 minutes. This ensures that all cookies spend equal time in the different temperature zones of your oven.
Ensuring consistency in your cookie dough itself is also vital. Make sure all your cookie dough balls are roughly the same size and thickness. Using a cookie scoop (like a 1.5-inch or 2-inch scoop) is an excellent way to achieve uniform size, leading to uniform baking times. If you're rolling and cutting cookies, try to maintain a consistent thickness across all shapes.
If using multiple baking sheets, bake one sheet at a time in the center of the oven whenever possible to ensure optimal heat distribution and airflow. If you must bake two sheets at once, place them on different racks (e.g., middle and upper-middle) and swap their positions when you rotate them halfway through baking. By controlling cookie size, dough consistency, and managing heat flow in your oven, you can significantly improve the uniformity of your baked cookies, effectively fixing classic cookie problems related to uneven results.
Chocolate chip cookies are a classic, but achieving that perfect balance of crisp edges and a chewy center can be tricky. Common issues include cookies that spread too much and are too thin, or those that are too thick, cakey, or dense. As discussed earlier, excessive spread often comes from using melted or overly soft butter, too much granulated sugar, or not chilling the dough.
For a thicker, chewier cookie, ensure your butter is just softened, use a higher ratio of brown sugar to granulated sugar (many popular recipes use a 1:1 or even higher brown sugar ratio), and definitely chill the dough for at least 30 minutes before baking. Some recipes even benefit from chilling for 24-48 hours, allowing the flavors to meld and the dough to firm up considerably, resulting in less spread and a richer taste.
Conversely, if your chocolate chip cookies are too thick or cakey, you might have used too much flour, not enough butter, or overmixed the dough, developing too much gluten. Ensure you're measuring flour correctly (spooned and leveled). If your recipe calls for creaming butter and sugar until very light and fluffy, this incorporates a lot of air, which can contribute to a cake-like texture. For a chewier cookie, cream butter and sugar just until combined and lightened, not excessively.
Baking time is also crucial; remove chocolate chip cookies when the edges are golden and the centers still look slightly soft and puffy. They will sink slightly and finish cooking as they cool on the baking sheet, developing that coveted chewy texture. Fixing classic cookie problems with chocolate chip cookies often boils down to controlling spread and moisture through ingredient ratios and chilling.
Common Chocolate Chip Cookie Issues and Solutions
- Issue: Cookies are too thin and crispy.
- Solution: Use softened, not melted, butter. Increase brown sugar vs. granulated sugar. Chill the dough for at least 30 minutes. Use a cooler baking sheet.
- Issue: Cookies are too thick and cakey.
- Solution: Ensure accurate flour measurement (spooned and leveled). Do not overmix the dough after adding dry ingredients. Cream butter and sugar less vigorously/for less time. Ensure oven temperature is accurate; baking at too low a temperature can prevent proper spread.
- Issue: Chocolate chips sink to the bottom.
- Solution: Toss chocolate chips with a tablespoon of flour before adding them to the dough. Ensure your dough isn't too warm or wet.
- Issue: Cookies don't spread at all.
- Solution: Your butter might have been too cold. Ensure oven temperature is accurate (too low a temp can hinder spread). Dough might be too dry (too much flour).
Sugar cookies, especially cut-out ones, rely heavily on maintaining their shape during baking. The most common problem is excessive spreading, which distorts the shapes and makes decorations difficult. This is often caused by the same factors that cause other cookies to spread: warm butter, too much leavening, or insufficient flour. However, sugar cookies are particularly sensitive because their structure is less forgiving than, say, a drop cookie. A standard sugar cookie recipe often has a higher ratio of flour to butter compared to a chocolate chip cookie, specifically to create a dough firm enough to roll and cut.
The temperature of the dough is paramount for sugar cookies. If the dough is too warm when you roll and cut it, the butter is soft, and the shapes are prone to spreading immediately in the oven. Furthermore, transferring warm, cut-out shapes from the counter to the baking sheet can easily distort them.
Using too much flour when rolling can also affect the final texture, making the cookies dry and tough, while using too little flour can make the dough sticky and difficult to handle without spreading. Fixing classic cookie problems with sugar cookies is largely about temperature control and precise handling.
Sugar Cookie Problems and Troubleshooting Techniques
- Issue: Cut-out shapes spread and lose definition.
- Solution: Chill the dough thoroughly before rolling (at least 1 hour, ideally longer). Roll the dough on a lightly floured surface or between two sheets of parchment paper. Chill the cut-out shapes on the baking sheet for 10-15 minutes before baking. Ensure your oven temperature is accurate; baking at the correct temperature helps the cookie set quickly. Ensure baking powder/soda is measured accurately; too much causes excessive rise and spread.
- Issue: Dough is too sticky to roll.
- Solution: Chill the dough longer. Add a tablespoon or two of flour until it's manageable, but be cautious not to add too much as it can make cookies tough. Roll between parchment paper to minimize the need for extra flour.
- Issue: Cookies are hard or tough.
- Solution: Avoid overmixing the dough after adding dry ingredients. Do not add too much extra flour when rolling. Bake just until the edges are lightly golden or the centers look set, not browned.
- Issue: Cookies are dry.
- Solution: Ensure accurate ingredient measurements. Do not overbake; sugar cookies bake relatively quickly (often 8-11 minutes at 350°F).
Peanut butter cookies, with their distinctive criss-cross pattern, are beloved for their rich flavor, but they can sometimes turn out dry and crumbly. This is often exacerbated by the nature of peanut butter itself, which contains oils but can also be quite dense and low in moisture compared to butter or other fats used in baking. Overbaking is, once again, a primary culprit.
Because of their density and fat content, peanut butter cookies don't always show the same visual cues of doneness as other cookies; they might not turn golden brown around the edges as readily. Baking them until they look fully "done" can easily lead to dryness.
The type of peanut butter used can also influence the outcome. Natural peanut butter, which separates and needs stirring, can sometimes result in a drier cookie if not mixed thoroughly or if the oil has been drained off. Processed peanut butter, with added sugars and stabilizers, tends to be more consistent but can also contribute to dryness if not balanced with other ingredients. Ensuring the correct balance of fat, sugar, and flour in the recipe is key to fixing classic cookie problems like dryness in peanut butter cookies.
Peanut Butter Cookie Troubleshooting: Moisture and Texture Tips
- Issue: Cookies are dry and crumbly.
- Solution: Do not overbake! Peanut butter cookies are often done when the edges are set and the center still looks soft, perhaps even slightly cracked but not fully firm. They will set up significantly as they cool. For many standard recipes, this might be 10-12 minutes at 375°F (190°C). Try reducing the baking time by a minute or two. Ensure accurate measurement of flour and sugar. If using natural peanut butter, make sure it is thoroughly stirred to incorporate the oil before measuring.
- Issue: Criss-cross pattern cracks excessively or is difficult to make.
- Solution: If the dough is too dry, the pattern will crack. Ensure the dough is moist enough (check ingredient ratios). Dip the fork in granulated sugar between pressing each cookie; this prevents sticking and helps create a cleaner pattern. Ensure cookie dough balls are rolled smoothly before pressing.
- Issue: Cookies spread too much.
- Solution: Ensure butter and peanut butter are at the correct temperature (softened, not melted). Chill the dough briefly before baking. Ensure accurate flour measurement.
The Importance of Accurate Measuring Tools
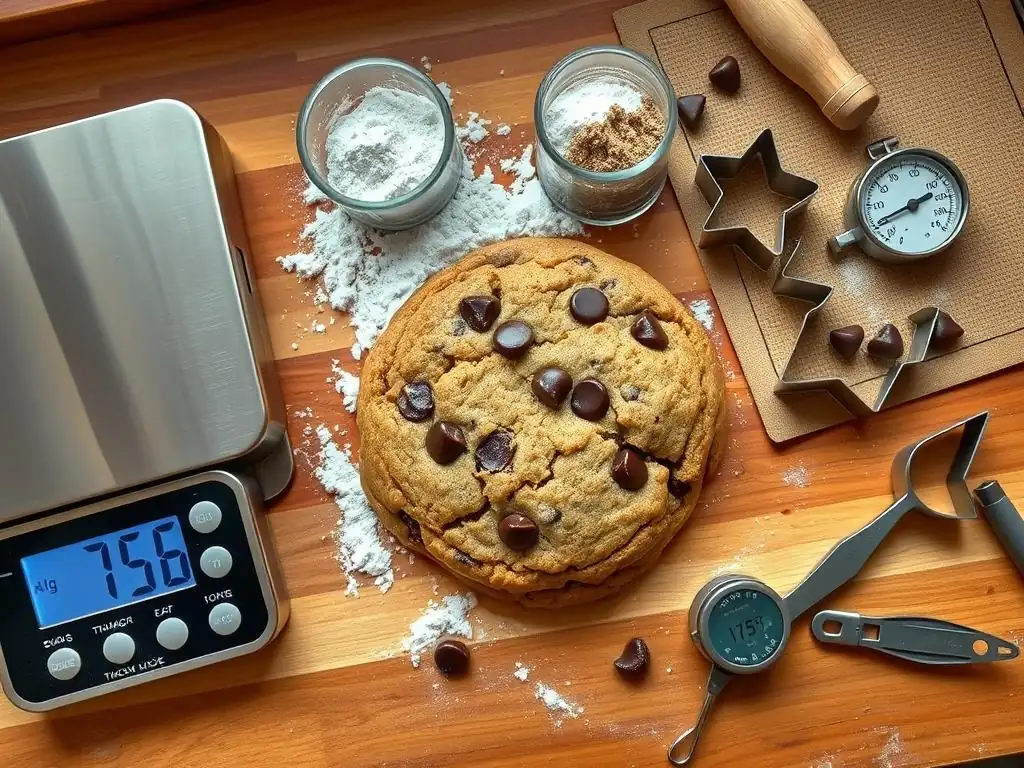
One of the most common underlying causes of cookie problems, which necessitates fixing classic cookie problems later, is inaccurate ingredient measurement. Baking is a science, and while some recipes are forgiving, most classic cookie recipes rely on precise ratios of flour, fat, sugar, and leavening agents. Using liquid measuring cups for dry ingredients, or vice versa, will lead to inaccuracies.
For instance, liquid measuring cups have a spout and markings up the side, designed to be filled to the line on a flat surface. Dry measuring cups are designed to be filled to the brim and leveled off. Using a liquid cup for flour will almost certainly result in too little flour.
Furthermore, how you fill dry measuring cups matters. Simply scooping flour directly from the bag packs it down, resulting in significantly more flour by weight than if you spoon it lightly into the cup and level it off. This excess flour is a major contributor to dry or tough cookies.
Similarly, packing brown sugar correctly (firmly into the cup) versus incorrectly (loosely) changes the amount dramatically. Ensuring you have a good set of both dry and liquid measuring cups and understanding how to use them correctly according to standard baking practices is a fundamental step in preventing many common cookie issues.
Using a Kitchen Scale for Consistent Results
While measuring cups are standard, a kitchen scale offers a much higher level of accuracy and consistency, which is invaluable for fixing classic cookie problems proactively. Recipes that provide ingredient weights (e.g., 120 grams all-purpose flour) are significantly more reliable than volume measurements (e.g., 1 cup all-purpose flour). The weight of 1 cup of flour can vary by as much as 20-30% depending on how it's measured using the volume method. However, 120 grams is always 120 grams.
Using a kitchen scale eliminates the variability associated with volume measurement techniques. You simply place your mixing bowl on the scale, tare it (set it to zero), and add ingredients to the specified weight. This ensures you are using the exact amount of each ingredient intended by the recipe developer, leading to more predictable and consistent results batch after batch. While not strictly necessary for every beginner, investing in an affordable digital kitchen scale is one of the best steps you can take towards mastering cookie baking and minimizing the need for troubleshooting.
Your oven's internal thermostat might not be telling you the truth. It's incredibly common for home ovens to be off by as much as 25-50°F (around 14-28°C) from the temperature you set. An oven running too hot can lead to burnt bottoms, excessive spread, and dry cookies due to rapid moisture loss. An oven running too cool can result in cookies that don't spread enough, are pale, or take much longer to bake, potentially becoming tough.
An inexpensive oven thermometer that hangs or stands on the oven rack is an essential tool for accurate baking. Place it in your oven and let the oven preheat for at least 15-20 minutes. Check the thermometer reading against your set temperature.
If your oven is consistently off, you can adjust your baking temperature accordingly (e.g., if it reads 325°F when set to 350°F, you know to set it to 375°F next time to aim for 350°F). Knowing your oven's true temperature is vital for fixing classic cookie problems related to baking time, spread, and texture, ensuring your cookies bake correctly according to the recipe's specifications.
While gluten is essential for the structure of bread, excessive gluten development is often detrimental to cookie texture, leading to hardness or toughness. Flour contains gliadin and glutenin proteins. When liquid is added and the dough is mixed, these proteins link together to form gluten strands. The more you mix, the more these strands develop, creating a strong, elastic network. For cookies, we generally want minimal gluten development to ensure a tender crumb.
This is why most cookie recipes instruct you to add dry ingredients and mix only "until just combined" or "until no streaks of flour remain." Overmixing at this stage activates gluten development, resulting in tough cookies. The type of flour also matters; all-purpose flour has a moderate protein content, while cake flour has less protein, leading to less gluten development and a more tender, cake-like crumb. Understanding the role of gluten helps you make informed decisions about mixing time and flour type when fixing classic cookie problems related to texture.
Adjusting Recipes for Different Elevations
Baking at high altitudes (typically above 3,000 feet or about 900 meters) presents unique challenges that can significantly impact cookie results, often requiring recipe adjustments. At higher elevations, atmospheric pressure is lower. This has several effects:
- Leavening gases expand more rapidly: Cookies rise faster and higher, but can then collapse, leading to flat or coarse-textured cookies.
- Liquids evaporate faster: Doughs can become drier, and cookies can bake faster, increasing the risk of dryness or burning.
- Water boils at a lower temperature: This affects how ingredients cook and interact.
These factors can cause cookies to spread excessively, become too dry, or have an undesirable texture. Standard recipes developed at sea level often need modification. Common high-altitude adjustments for cookies include slightly increasing the flour (by 1-3 tablespoons per cup) to strengthen the structure, slightly decreasing the leavening agent (baking soda/powder by 1/8 to 1/4 teaspoon), slightly decreasing sugar (by 1-2 tablespoons) to reduce spread, and slightly increasing liquid (1-2 tablespoons milk or egg).
Baking temperature might also need to be increased slightly (by 15-25°F or 8-14°C) to help the structure set faster before excessive spreading or drying occurs, while baking time might be slightly reduced. Researching specific high-altitude baking charts or recipes is recommended for fixing classic cookie problems when baking above sea level.
Experimenting with Different Flours and Sugars
Understanding how different types of flour and sugar behave can significantly enhance your ability to troubleshoot and modify cookie recipes.
- Flour: All-purpose flour is standard. Cake flour (lower protein) yields a more tender, cakey cookie. Bread flour (higher protein) results in chewier, sometimes tougher cookies due to increased gluten potential. Whole wheat flour adds density and absorbs more liquid, often requiring recipe adjustments.
- Sugar: Granulated sugar contributes to spread and crispness as it melts and crystallizes. Brown sugar (light or dark) contains molasses, adds moisture, contributes to chewiness, and has a slightly acidic pH which reacts with baking soda for lift. Powdered sugar (confectioners' sugar) contains cornstarch and dissolves easily, leading to a tender, sometimes crumbly texture (like in shortbread). Liquid sugars like honey or corn syrup add moisture and chewiness but can also cause more spread and browning.
Experimenting with substituting small amounts of one type of flour or sugar for another (e.g., replacing some granulated sugar with brown sugar for chewiness, or using a mix of all-purpose and cake flour for tenderness) can dramatically alter texture and spread. This knowledge is powerful for fixing classic cookie problems and customizing recipes to your desired outcome. Always make changes incrementally, perhaps replacing only 10-20% of the original ingredient, to see how it affects the final cookie.

Properly Measuring Ingredients for Consistent Results
As highlighted earlier, accurate measurement is the cornerstone of successful cookie baking and the first line of defense in fixing classic cookie problems before they even happen. Always use dry measuring cups for flour, sugar, and leavening agents, and liquid measuring cups for milk, extracts, and melted butter (if the recipe specifies melted). For dry ingredients like flour, spoon the flour lightly into the measuring cup until it overflows, then level it off with a straight edge (like the back of a knife).
Do not scoop directly from the bag. Pack brown sugar firmly into the cup. Use measuring spoons for smaller quantities like salt, baking powder, and baking soda, ensuring they are level.
For the most consistent results, especially when dealing with sensitive recipes or trying to replicate a favorite cookie perfectly, using a kitchen scale to weigh ingredients is highly recommended. This eliminates the variability of volume measurements and ensures precision every time. By developing meticulous measuring habits, you dramatically reduce the likelihood of encountering common issues like excessive spread, dryness, or toughness.
Chilling cookie dough is a simple yet incredibly effective technique for preventing many common cookie problems, particularly excessive spread and lack of flavor depth. Refrigerating the dough causes the fat (butter, shortening) to solidify. When these cold dough balls hit a hot oven, the fat melts more slowly than if it were already soft or melted.
This slow melting process allows the edges of the cookie to set and the structure to build before the entire cookie spreads into a thin disc. Chilling dough for at least 30 minutes is beneficial, but longer chilling times (24-48 hours or even up to 4 days) can result in cookies with significantly better texture and more developed flavors as the ingredients meld.
Chilling also makes the dough easier to handle, especially for rolling and cutting sugar cookies. It prevents the dough from becoming too sticky and reduces the need for excess flour during handling, which can lead to dry cookies. For drop cookies, chilling helps them hold their shape better on the baking sheet. Make chilling a standard practice in your cookie baking routine; it's a crucial step in fixing classic cookie problems proactively and improving both the texture and flavor of your cookies.
Mastering Oven Temperature and Baking Time
Having an accurate oven temperature and paying close attention to baking time are perhaps the most critical factors in achieving perfectly baked cookies. As discussed, use an oven thermometer to verify your oven's temperature. Preheat your oven for a full 15-20 minutes after it indicates it's reached the set temperature, as the internal thermostat often signals readiness before the oven is uniformly heated. Knowing your oven's true temperature allows you to make adjustments to the dial or baking time as needed.
Baking time is equally important. Always use the time range provided in a recipe as a guideline, not a strict rule. Start checking your cookies at the minimum recommended time. Look for visual cues specific to the cookie type: set edges, slight golden color, or centers that still look a little soft. Remember that cookies continue to bake on the hot baking sheet after being removed from the oven.
Removing them when they are just done, or even slightly underdone in the center, is key to achieving the desired texture (chewy, soft, etc.) and preventing dryness or burning. Don't be afraid to pull a test cookie from the oven, let it cool for a minute, and break it open to check for doneness. Mastering the relationship between oven temperature, baking time, and visual cues is fundamental to fixing classic cookie problems and consistently producing great cookies.
We've covered the most frequent issues beginner bakers face when tackling classic cookies: excessive spread leading to flat cookies, dryness and crumbliness, undesirable hardness or crunchiness, frustratingly burnt bottoms, and uneven baking. We've explored the common causes for each, ranging from ingredient temperature and ratios to mixing techniques, oven performance, and baking sheets. More importantly, we've provided actionable solutions for fixing classic cookie problems, emphasizing techniques like accurate measurement, chilling dough, using parchment paper, rotating baking sheets, understanding oven temperature with a thermometer, and recognizing doneness cues.
Remember that baking is a journey of learning and experimentation. Every batch, whether perfect or problematic, offers insights. Don't be discouraged by a less-than-ideal outcome. Instead, view it as a puzzle to solve. Was the butter too soft? Was the oven too hot? Was the dough chilled long enough? By systematically considering the potential causes and applying the troubleshooting tips discussed here, you'll gain a deeper understanding of the baking process and develop the skills to predict and prevent issues in the future.
At BakeWithEase, we are dedicated to making baking accessible and enjoyable for everyone, regardless of your experience level. We believe that understanding why things happen in the oven is just as important as following a recipe correctly. By providing detailed guides like this one on fixing classic cookie problems, we aim to build your confidence and empower you in the kitchen. Our simple recipes and technique breakdowns are designed to minimize frustration and maximize success.
Whether you're attempting your first batch of chocolate chip cookies or perfecting a classic sugar cookie, we're here to support you. Refer back to this guide whenever you encounter a problem, or explore our extensive collection of beginner-friendly recipes and tips. With practice and the right knowledge, you'll be baking perfect classic cookies with ease in no time. Happy Baking!
Frequently Asked Questions
Cookies often spread too thin due to too much butter or sugar in the dough. Also, using warm butter instead of properly softened butter contributes to excessive spreading. Finally, ensure you're using the correct oven temperature.
Dry cookies are often the result of over-baking or using too much flour. Make sure to measure your flour accurately and monitor the cookies closely while they bake. Consider adding a bit more fat, like butter, in the next batch.
This often indicates your oven temperature is too high, or that the baking sheet is too thin. Use an oven thermometer to verify the correct temperature and use a thicker baking sheet or line it with parchment paper.
Hard cookies can be caused by over-baking or using too little fat or moisture. Store your cookies in an airtight container immediately after cooling to help retain moisture.
Sticky dough usually means there's too much liquid or not enough flour. Try chilling the dough for at least 30 minutes to firm it up. If it's still too sticky, gradually add a small amount of flour until it's manageable.
The seemingly simple act of baking a classic cookie is, in reality, a delicate dance of ingredients and technique. A perfectly crisp edge, a chewy center, and a delightful aroma – these are the hallmarks of success, but even the most experienced bakers face occasional setbacks. This article has explored the common pitfalls encountered when baking classic cookies, offering solutions to ensure consistently delicious results.
The journey of mastering cookie baking is a deeply personal one, mirroring life's own trials and triumphs. Each failed batch, each slightly burnt edge, teaches a valuable lesson. It's a process of experimentation, adaptation, and ultimately, the satisfaction of creating something beautiful and delicious from simple ingredients. As Julia Child wisely said, A party without cake is just a meeting.
Similarly, a life without the occasional (successful!) batch of cookies feels somehow incomplete. The pursuit of the perfect cookie, therefore, is more than just baking; it's a metaphor for the persistent pursuit of excellence in any endeavor.
Now, armed with these troubleshooting tips, I invite you to embark on your own cookie-baking adventures. Don't be afraid to experiment, to embrace the occasional mishap, and to savor the sweet rewards of your efforts. Remember, the journey is as important as the destination, and the taste of a perfectly baked cookie, born from your own hands, is a truly unforgettable experience. So, preheat your oven, gather your ingredients, and let the baking begin!
Thanks for joining us on this delicious journey into the world of cookies! We hope you’ve gained some invaluable tips and tricks to elevate your baking game. Now it's time to put your newfound knowledge into practice.
- Bake your dream cookies today! Try out one of the troubleshooting techniques we discussed – you'll be amazed at the difference. Remember, even small adjustments can lead to big flavor improvements.
- Share your baking triumphs (and challenges!) on social media. Use #BakeWithEase and tag us – we’d love to see your creations and celebrate your successes!
- Explore our other baking guides for even more delicious inspiration and helpful advice.
Ready to transform your baking from good to great? What delicious cookie creation will you tackle first?