
Conquer Croissants: Master Lamination with StepbyStep Online Classes


Welcome to BakeWithEase, your guide to unlocking baking brilliance! Ever dreamt of flaky, buttery croissants? Dive into our easy laminated croissant recipe tutorial and discover the secrets to perfect lamination. Uncover the art of crafting these delicate pastries from scratch and elevate your baking skills today! Ready to conquer croissants?
- Conquer Croissants: Master Lamination with Step-by-Step Online Classes (Easy Laminated Croissant Recipe Tutorial)
- Introduction: Unlock the Secrets to Perfect Croissants with BakeWithEase
- Why Online Classes are Your Best Bet for Mastering the Easy Laminated Croissant Recipe
- Step 1: Gathering Your Essential Croissant Baking Tools and Ingredients
- Step 2: Mastering the Dough: The Foundation of the Easy Laminated Croissant Recipe
- Step 3: The Art of Lamination: Creating Those Signature Layers
- Step 4: Shaping and Proofing Your Croissants
- Step 5: Baking Your Croissants to Golden Perfection
- Troubleshooting Common Croissant Problems
- Conclusion: Enjoy Your Homemade Croissant Masterpiece!
-
Frequently Asked Questions
- What is lamination in baking, and why is it important for croissants?
- Does BakeWithEase offer resources specifically for beginners wanting to learn how to make laminated croissants?
- What makes the "Conquer Croissants" online classes different from other croissant recipes I can find online?
- What types of pastries, besides croissants, does BakeWithEase cover in its baking tutorials?
- Where can I find the "Easy laminated croissant recipe tutorial" and other baking resources on BakeWithEase?
- Final Reflection: The Sweet Success of Mastering Lamination
- Unlock Your Inner Pastry Chef: Master the Art of Croissant Lamination!
Conquer Croissants: Master Lamination with Step-by-Step Online Classes (Easy Laminated Croissant Recipe Tutorial)
Introduction: Unlock the Secrets to Perfect Croissants with BakeWithEase
Dreaming of biting into a warm, flaky croissant, with its countless buttery layers shattering delicately? For many home bakers, the thought of making croissants from scratch feels daunting, primarily because of the lamination process – the technique of folding butter into dough to create those signature layers. But what if mastering this technique was within reach?
At BakeWithEase, we believe that with the right guidance, anyone can learn to create these pastry masterpieces. This article, combined with focused online classes, serves as your ultimate guide to unlocking the secrets of successful lamination and creating delicious croissants right in your own kitchen. We'll walk you through the essential steps, highlighting how a comprehensive easy laminated croissant recipe tutorial can transform your baking skills.
Why Online Classes are Your Best Bet for Mastering the Easy Laminated Croissant Recipe
Learning to make croissants involves more than just following a list of ingredients and steps; it requires understanding the why behind each action. The temperature of your butter, the consistency of your dough, the pressure of your rolling pin – these nuances are critical to achieving perfect lamination. While cookbooks and static online recipes provide foundational knowledge, an online class offers a dynamic, visual, and interactive learning experience.
You can see the techniques demonstrated in real-time, pause and rewind, and often get personalized feedback or have questions answered. This makes tackling a complex process like lamination significantly easier and more effective than relying solely on text. An online easy laminated croissant recipe tutorial provides the comprehensive support needed to build confidence and avoid common pitfalls, making your journey to flaky perfection smoother.
Step 1: Gathering Your Essential Croissant Baking Tools and Ingredients
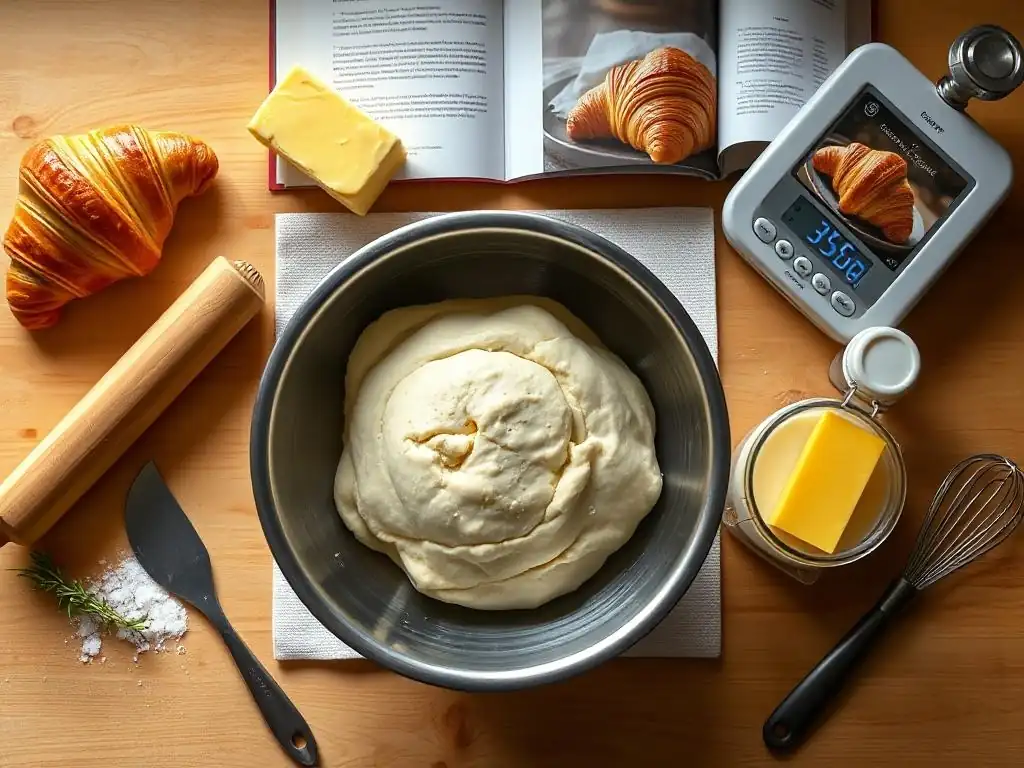
Embarking on your croissant-making journey requires gathering the right materials. Think of your tools and ingredients as your allies in achieving those delicate, buttery layers. Using high-quality ingredients specifically suited for laminated dough is non-negotiable, and having the correct tools makes the precise measurements and handling required for an easy laminated croissant recipe tutorial much more manageable. Don't underestimate the impact of ingredient quality; it's fundamental to the final taste and texture of your croissants.
High-Quality Flour for Laminated Dough: The Foundation of a Perfect Croissant
The type of flour you choose significantly impacts the structure and texture of your finished croissant. For laminated dough, a strong bread flour or a high-quality all-purpose flour with a protein content typically ranging from 11% to 13% is recommended. This protein level is crucial because it allows for sufficient gluten development, which provides the necessary elasticity and strength for the dough to withstand the repeated rolling and folding during lamination without tearing.
Using flour with adequate gluten ensures that the dough can stretch thinly around the butter block during the turns, creating distinct, separate layers rather than a fused mass. Flours with lower protein might result in a weaker dough that is difficult to handle and prone to breaking, leading to less defined layers. Conversely, overly strong flour could make the dough too elastic and resistant to rolling, requiring excessive force that might warm the butter prematurely. Selecting a reputable brand known for consistent quality is also key.
The Importance of European-Style Butter in Easy Laminated Croissant Recipes
Butter is not just an ingredient; it's a structural component in croissants, responsible for creating the flaky layers. European-style butter, which typically has a higher butterfat content (around 82% or more) and lower water content compared to standard American butter (around 80% butterfat), is highly preferred. This higher fat percentage means the butter is firmer and more pliable at cold temperatures, which is essential for creating a solid, yet flexible, butter block for lamination.
During the lamination process, the goal is to keep the butter cold and distinct within the dough layers. Butter with a lower melting point or higher water content is more likely to soften or melt into the dough during rolling and folding, especially in warmer kitchens. High-fat, European-style butter maintains its integrity, ensuring that the layers of dough are separated by thin sheets of butter.
As the croissants bake, the water in the butter turns to steam, pushing the layers apart and creating that characteristic airy, flaky texture. For a truly successful easy laminated croissant recipe tutorial outcome, invest in the best quality high-fat butter you can find.
Essential Baking Tools for Easy Lamination
Having the right tools makes the precise work of lamination much simpler and more consistent. A large, sturdy rolling pin is fundamental; ideally, one that is heavy and smooth, allowing for even pressure across the dough. A marble or granite rolling pin can help keep the dough and butter cool.
Other vital tools include a sharp bench scraper or knife for clean cuts, a ruler or measuring tape for ensuring accurate dimensions during rolling and folding, and pastry brushes for egg washes. A digital scale is also indispensable for precise ingredient measurements, especially for flour and butter, as volume measurements can be inconsistent. Finally, a large, flat surface for rolling – ideally a cool countertop or a large pastry mat – provides the space needed to work with the dough effectively throughout the lamination process.
Step 2: Mastering the Dough: The Foundation of the Easy Laminated Croissant Recipe
Before you even think about adding butter, you need a well-developed, elastic dough. This dough serves as the framework that will hold the delicate butter layers. Getting the dough consistency right is a critical first step in any easy laminated croissant recipe tutorial. It needs to be strong enough to handle the stretching and folding but pliable enough to work with.
Online Class Focus: Mastering the Croissant Dough Mixing Technique (CPC & Affiliate)
A dedicated online class section on dough mixing delves deeply into the nuances of developing the perfect dough. This often includes visual guidance on achieving the correct gluten development without overmixing. Topics covered typically involve understanding hydration levels (e.g., dough hydration often around 55-65% relative to flour weight), mixing times and speeds to reach the 'windowpane test' stage, and controlling dough temperature (aiming for a final dough temperature usually between 20-24°C after mixing).
These classes emphasize techniques like autolyse, where flour and water are mixed and rested before yeast and salt are added, promoting easier gluten development. They also focus on cold mixing methods or incorporating chilled ingredients to keep the dough temperature low, which is essential for the subsequent chilling periods and handling during lamination. Seeing these techniques demonstrated ensures you develop the tactile understanding needed to produce a consistent, workable dough every time.
Alternative Dough Recipe (For Those Not Taking the Class Yet)
For those not yet ready for a full class, a basic dough involves combining flour, water, milk (often used for richness), sugar, yeast, and salt. A common ratio might be around 500g strong bread flour, 150g cold water, 150g cold milk, 50g sugar, 10g salt, and 10g instant dry yeast.
Mix the dry ingredients (except perhaps salt initially if doing an autolyse) with the cold liquids until a shaggy dough forms. Knead, either by hand or mixer, until the dough is smooth and elastic, passing the windowpane test (a small piece of dough can be stretched thin enough to see light through it without tearing). Incorporate the salt during the later stages of kneading.
The key is to keep the dough cool throughout mixing. After mixing, the dough typically undergoes a bulk fermentation, often for 1-2 hours at cool room temperature, followed by a significant chilling period in the refrigerator (at least 4-8 hours, sometimes up to 12-18 hours) until it is very cold and firm – usually around 4-5°C internally – before lamination begins.
Step 3: The Art of Lamination: Creating Those Signature Layers
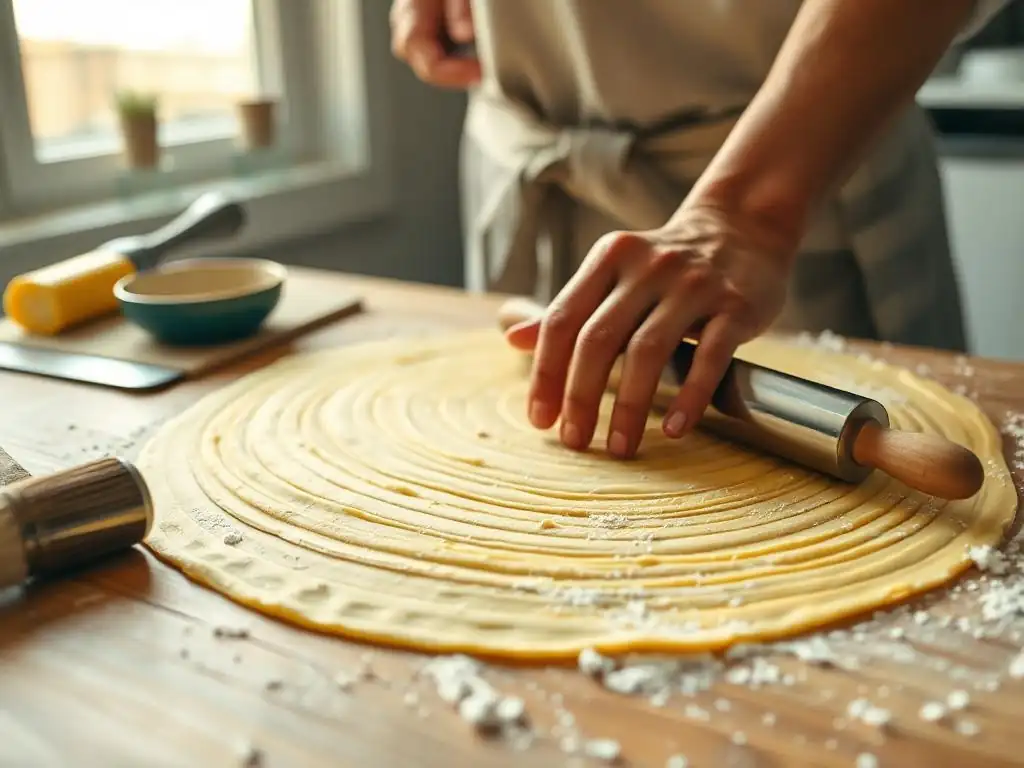
Lamination is the heart of the croissant. It's the process of enclosing a block of cold butter within the dough and repeatedly rolling and folding the dough to create alternating layers of dough and butter. This is where the magic happens, transforming simple dough into a multi-layered wonder. Mastering this step is central to any successful easy laminated croissant recipe tutorial.
Online Class Focus: Lamination Techniques for the Easy Laminated Croissant Recipe (CPC & Affiliate)
Online classes dedicated to lamination offer invaluable visual instruction on crucial techniques. They demonstrate how to prepare the butter block (often 25-35% of the dough weight), ensuring it's pliable but cold, and how to enclose it seamlessly within the dough. The focus is on executing "turns" – the specific rolling and folding sequences – with precision. Common turns include the single fold (folding the dough into thirds like a letter) and the double fold (folding both ends towards the center, then folding in half).
Classes emphasize maintaining consistent dough and butter temperature throughout the process, often recommending chilling periods of 30-60 minutes between each turn to prevent the butter from melting and to allow the gluten to relax. They teach how to roll evenly to achieve consistent thickness (e.g., aiming for 1-1.5 cm thick dough before folding) and how to handle the dough gently to avoid tearing the layers. Visual demonstrations of these techniques are far more instructive than descriptions, making the process less intimidating.
Detailed Lamination Steps (Brief Overview)
- Prepare Butter Block: Shape cold butter into a rectangular block, often slightly less wide than your dough when rolled out. The butter should be pliable, not hard and brittle.
- Enclose Butter: Roll the chilled dough into a rectangle about twice the length of your butter block. Place the butter block on one half of the dough and fold the other half over it, sealing the edges to completely encase the butter.
- First Turn (Single or Double): Roll the dough-butter packet into a long rectangle. Perform either a single fold (fold into thirds) or a double fold (fold ends to center, then fold in half).
- Chill: Wrap the folded dough tightly and refrigerate for at least 30-60 minutes to allow the butter to firm up and the gluten to relax.
- Subsequent Turns: Repeat the rolling and folding process (Steps 3 & 4) typically 2-3 more times, depending on the desired number of layers. A standard croissant often uses a total of 3-4 turns (e.g., 3 single turns or 1 double + 2 single, yielding hundreds of layers). Always rotate the dough 90 degrees before each turn to ensure even layering.
Step 4: Shaping and Proofing Your Croissants
Once lamination is complete and the dough is well-chilled, it's time to shape the iconic croissant form and allow them to proof. Shaping requires careful handling to maintain the layers, and proper proofing is essential for achieving a light, airy texture. These steps are crucial finishing touches on your easy laminated croissant recipe tutorial journey.
Online Class Focus: Shaping and Proofing Techniques for the Easy Laminated Croissant Recipe (CPC & Affiliate)
Online classes provide detailed visual guides on how to correctly cut and shape the dough without crushing the precious layers. They demonstrate how to roll the dough to the final required thickness (often 3-4 mm), how to cut even triangles (typical dimensions might be an 8-10 cm base and 20-25 cm length), and the specific technique for rolling the triangle from the base to the tip to create the crescent shape. Emphasis is placed on rolling firmly enough to create tension but not so tightly that the layers are compressed.
Crucially, classes cover the science of proofing laminated dough. They explain the ideal temperature range (typically 24-27°C) and humidity levels (around 75-80%) required for the yeast to become active and the dough to expand while the butter remains cool enough not to melt out. Visual cues for readiness are highlighted, such as the "jiggle test" (the croissant should jiggle slightly when gently shaken) and observing a significant increase in volume (often doubling in size). Over- or under-proofing can ruin the texture, and seeing these stages demonstrated is incredibly helpful.
Shaping Tutorial (Simplified)
- Roll the final laminated dough sheet to the target thickness (e.g., 3-4 mm). Ensure it's an even rectangle.
- Trim the edges to create clean lines – this helps layers open up.
- Cut the dough into triangles using a ruler and sharp knife or pizza cutter. For classic croissants, the base of the triangle might be about 9 cm wide and the length around 22 cm.
- Make a small notch or slit (about 1-2 cm) in the center of the base of each triangle.
- Starting from the base, gently stretch the triangle slightly as you roll it up towards the tip, creating tension.
- Finish rolling, ensuring the tip is tucked underneath. Curve the ends inward to form the crescent shape.
Step 5: Baking Your Croissants to Golden Perfection
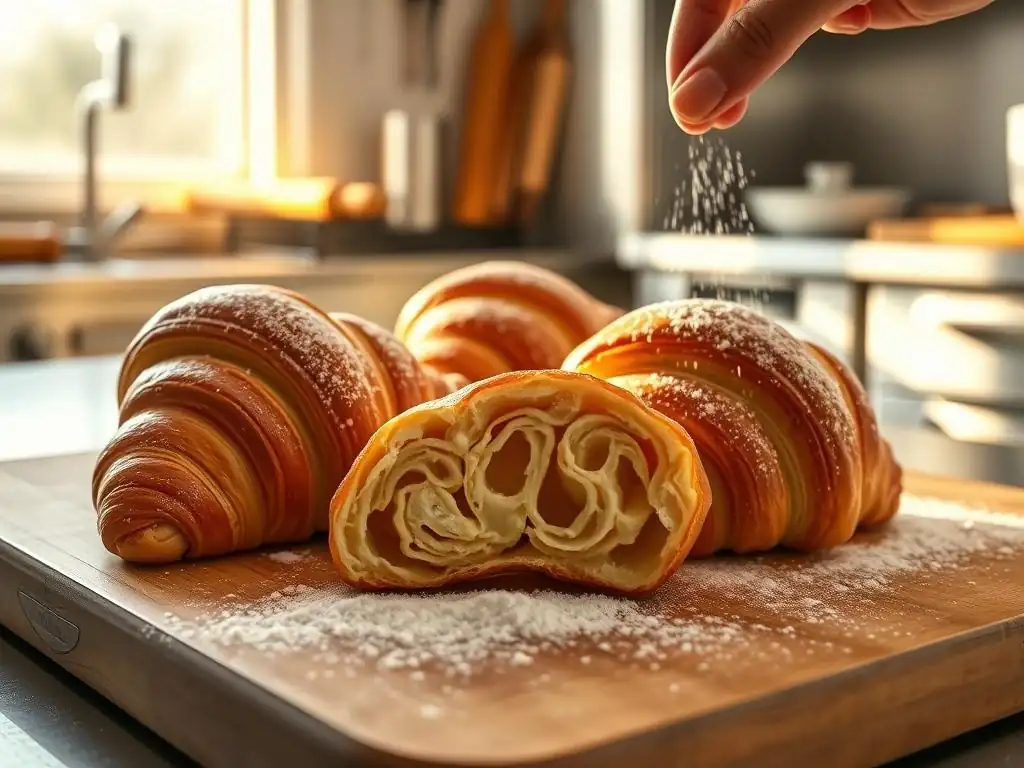
The final step is transforming your proofed dough shapes into golden, flaky croissants in the oven. The right baking temperature and time are vital to ensure the layers puff up beautifully and the interior is cooked through while the exterior achieves a perfect crispness and color. Baking is the grand finale for your easy laminated croissant recipe tutorial efforts.
Online Class Focus: Baking Techniques for the Easy Laminated Croissant Recipe (CPC & Affiliate)
Online baking classes dedicated to croissants often provide specific guidance on oven setup and temperature management. They might recommend preheating the oven to a high temperature (e.g., 220°C) and then reducing it slightly (e.g., to 190-200°C) immediately after the croissants are placed inside. This initial blast of heat helps the layers spring open rapidly before the butter melts completely.
Classes also cover the application of egg wash (typically a mixture of egg and milk or cream) for that characteristic golden-brown, shiny crust. They show the correct technique for applying the wash without dripping down the sides and sealing the layers. Visual cues for doneness are emphasized, such as achieving a deep golden-brown color all over, including the sides, and ensuring the base is also browned and firm. Understanding how your specific oven behaves is also discussed, as oven calibration can significantly impact baking results.
Baking Tips for Golden Croissants
- Preheat Thoroughly: Ensure your oven is fully preheated to the correct temperature before baking. An oven stone or steel can help maintain consistent heat.
- Egg Wash: Apply a thin, even layer of egg wash just before baking. Be careful not to let it pool at the base or sides, which can glue the layers together. Some bakers apply a second thin wash partway through baking.
- Temperature and Time: Bake typically at 190-200°C for 15-20 minutes, or until deeply golden brown and puffed. The exact time will vary based on your oven and the size of your croissants.
- Look for Color: Don't pull them out too early! A rich golden-brown color indicates they are cooked through and the layers are fully set. Pale croissants are likely underbaked and will be doughy inside.
- Cooling: Allow croissants to cool on a wire rack for at least 15-20 minutes before eating. This allows the interior to set properly.
Troubleshooting Common Croissant Problems
Even with a great easy laminated croissant recipe tutorial, challenges can arise. Laminated dough is sensitive to temperature and handling. Understanding common issues and how to address them is part of the learning process.
Addressing Issues with Lamination: Dough Too Warm, Butter Melting
One of the most frequent problems is the butter melting into the dough during lamination, resulting in greasy, dense croissants rather than flaky ones. This usually happens because the dough or butter is too warm, or the chilling time between turns is insufficient.
- Problem: Butter squeezing out or melting during rolling.
- Cause: Dough/butter too warm, insufficient chilling, rolling too hard.
- Solution: Ensure butter block is pliable but cold. Keep dough chilled between turns (at least 30-60 minutes). Work quickly and roll with even, firm pressure, not excessive force. If the butter starts to squeeze out, stop, wrap the dough, and chill immediately for a longer period (e.g., 1-2 hours).
- Problem: Dough tearing during rolling.
- Cause: Insufficient gluten development, dough not relaxed enough, rolling too thin too quickly.
- Solution: Ensure initial dough mixing develops adequate gluten. Allow sufficient chilling time between turns for the gluten to relax (at least 30-60 minutes). Roll gradually, allowing the dough to rest for a few minutes if it springs back excessively.
Dealing with Dense or Flat Croissants: Proofing and Baking Issues
If your croissants come out dense, flat, or heavy, the issue often lies in the proofing or baking stages.
- Problem: Croissants are dense and heavy, not airy.
- Cause: Under-proofing, layers glued together (from poor lamination or egg wash), oven not hot enough.
- Solution: Ensure croissants are fully proofed – they should feel significantly lighter and jiggle when gently shaken. This can take 2-3 hours or more depending on temperature/humidity. Revisit lamination technique to ensure distinct layers. Make sure egg wash doesn't seal layers. Ensure oven is properly preheated and hot enough initially.
- Problem: Croissants spread flat instead of puffing up.
- Cause: Over-proofing, butter melted out during proofing, oven not hot enough.
- Solution: Proof in a controlled environment; if it's too warm, the butter can melt. The dough should be expanded but still have some structure. Ensure oven is hot from the start to set the layers quickly. If butter melted out during proofing, the structure is compromised.
Conclusion: Enjoy Your Homemade Croissant Masterpiece!
Making croissants is a journey that teaches patience, precision, and the rewarding results of mastering technique. While it might seem challenging at first, following a structured easy laminated croissant recipe tutorial, especially through a visual online class, breaks down the process into manageable steps. From selecting the right flour and butter to perfecting your lamination turns, shaping, proofing, and baking, each stage contributes to the final flaky, buttery result.
Don't be discouraged by initial imperfections; every attempt builds skill and understanding. With practice and the right guidance from resources like BakeWithEase, you'll soon be enjoying warm, homemade croissants, a testament to your newfound baking prowess. Happy baking!
Frequently Asked Questions
What is lamination in baking, and why is it important for croissants?
Lamination is the process of creating alternating layers of dough and butter in a pastry. It's crucial for croissants because it creates the flaky texture they are known for, due to steam separating the layers during baking.
Does BakeWithEase offer resources specifically for beginners wanting to learn how to make laminated croissants?
Yes, BakeWithEase provides step-by-step guides and online classes designed for all skill levels, including beginners. Our tutorials focus on easy-to-find ingredients and simple techniques.
What makes the "Conquer Croissants" online classes different from other croissant recipes I can find online?
Our classes provide a structured learning experience, focusing on mastering the lamination technique. We offer personalized feedback and troubleshooting tips not typically found in standard recipes.
What types of pastries, besides croissants, does BakeWithEase cover in its baking tutorials?
BakeWithEase covers a wide range of pastries, including breads, cakes, cookies, and more. We offer tutorials on everything from simple cakes to complex pastries.
Where can I find the "Easy laminated croissant recipe tutorial" and other baking resources on BakeWithEase?
You can find the "Easy laminated croissant recipe tutorial" and other resources directly on our website, BakeWithEase.com. Navigate to the pastries section or use the search bar for specific recipes.
Final Reflection: The Sweet Success of Mastering Lamination
The accessibility of online learning has democratized culinary skills, making the once-intimidating art of croissant-making achievable for everyone. Learning to create these delicate, flaky pastries is no longer the exclusive domain of professional bakers; with the right guidance, anyone can experience the joy of crafting perfect croissants at home.
The impact of readily available online tutorials extends beyond simply acquiring a new recipe. It fosters a sense of community among home bakers, connecting individuals through a shared passion for culinary exploration. This shared experience transcends geographical boundaries, uniting people in their pursuit of mastering a challenging yet rewarding skill. The best things in life are worth the effort,
and the satisfaction of biting into a self-made, perfectly laminated croissant is a testament to that truth.
Now, it's your turn. Don't let the perceived complexity of laminated dough hold you back. Take the leap, embrace the challenge, and discover the immense satisfaction of creating something beautiful and delicious with your own hands. The journey to mastering the croissant is a rewarding one, filled with learning, experimentation, and ultimately, the sweet taste of success. So, roll up your sleeves, gather your ingredients, and embark on your own croissant adventure. You might just surprise yourself with what you can achieve.
Unlock Your Inner Pastry Chef: Master the Art of Croissant Lamination!
Thanks for taking the time to explore the world of croissant lamination with us! We hope you gained valuable insights and are ready to elevate your baking skills. Now it's time to put your knowledge into practice!
- Enroll in our comprehensive online croissant course: Dive deeper into the techniques and secrets behind perfectly layered croissants. This course provides detailed video tutorials, printable recipes, and expert support to guide you every step of the way.
- Share your baking journey: Post pictures of your croissant creations on social media using #BakeWithEaseCroissants and inspire others to join the fun!
- Challenge yourself: Try adapting the techniques you've learned to other laminated pastries. What delicious possibilities await?
Ready to transform your kitchen into a Parisian patisserie?