
How to Bake FunShaped Treats Kids Will Love (Easily!)


Welcome to BakeWithEase, where the joy of baking meets effortless execution! Are you ready to create whimsical, delicious treats that will captivate little hearts? Discover the secrets to baking easy shaped cookies kids will adore, transforming ordinary afternoons into delightful baking adventures. Keep reading to unlock our simple steps and get ready to see smiles bloom with every bite!
- How to Bake Fun-Shaped Treats Kids Will Love (Easily!) - BakeWithEase.com
- Introduction: Sparking Joy with Easy Shaped Cookies for Kids
- Choosing Your Fun Cookie Shapes: A Guide for Kids' Baking
- The Easiest Cookie Dough Recipe for Shaped Cookies
- Baking Your Fun-Shaped Cookies to Perfection
- Decorating Your Easy Shaped Cookies: Unleash Your Creativity
- Making Shaped Cookies with Kids: A Step-by-Step Guide
- Storing Your Fun-Shaped Cookies: Keeping Them Fresh
- Troubleshooting Your Shaped Cookie Baking
- Conclusion: Enjoying the Sweet Success of Easy Shaped Cookies
-
Frequently Asked Questions
- How can I make cookie dough that's easy for kids to handle?
- What are some simple cookie shapes kids can easily create?
- What are some safe and kid-friendly decorating options for shaped cookies?
- What kind of cookie cutters are best for younger children?
- How can I make the baking process more engaging and less stressful for kids?
- Final Reflection: The Sweetness of Shared Creation
- Unleash Your Inner Baker: Create Magical Treats!
How to Bake Fun-Shaped Treats Kids Will Love (Easily!) - BakeWithEase.com
Baking with children is one of life's simple pleasures, offering a wonderful way to bond, teach basic kitchen skills, and, of course, create delicious treats. Among the myriad of baking projects, making easy shaped cookies for kids stands out as a favorite. It’s an activity that captures their imagination from start to finish, from pressing out fun shapes to decorating their edible creations. At BakeWithEase, we believe that baking joy should be accessible to everyone, regardless of skill level, and this is especially true when involving little hands.
This guide is designed to make baking fun-shaped treats with children as simple and enjoyable as possible. We'll walk you through choosing the best shapes, mastering a foolproof dough recipe, baking them to perfection, and unleashing creativity with decorations. Our focus is on creating easy shaped cookies that kids will not only love to eat but also love to help make. Get ready to transform simple ingredients into delightful, memorable moments and delicious, kid-approved cookies.
BakeWithEase Presents: Fun & Easy Baking for Kids' Parties
Planning a kids' party often involves a search for engaging activities and delightful snacks. Baking fun-shaped cookies offers a fantastic solution that combines both. It’s an activity that can entertain a small group or be a special project for the birthday child and a few friends, resulting in personalized party favors or a sweet treat to share. The process of making easy shaped cookies for kids’ parties is remarkably adaptable, suitable for various themes, from animal safaris to superhero adventures.
Consider a recent party where parents and children gathered to bake. Using simple star and circle cutters, they created a "galaxy" of cookies, decorating them with blue icing and silver sprinkles. The mess was minimal, the engagement was high, and the result was a tray of unique, tasty cookies that the children proudly showed off. This demonstrates how easy shaped cookies can become a focal point of a party, fostering creativity and providing a tangible, edible reward for their efforts.
Shaped cookies hold a special appeal for children that goes beyond just the taste. The novelty of eating a cookie shaped like their favorite animal, a familiar object, or a whimsical character adds an element of playfulness to snack time. It turns a simple cookie into a story or a mini-adventure, sparking conversations and imaginative play. This visual appeal is a significant reason why easy shaped cookies are consistently a hit with the younger crowd, making them ideal for snacks, lunchbox surprises, or special occasions.
Furthermore, the act of shaping cookies is incredibly tactile and engaging for children. They love pressing the cutters into the dough or rolling and molding it with their hands. This hands-on involvement makes them feel like active participants in the baking process, increasing their sense of accomplishment and enjoyment. Compared to drop cookies or bar cookies, shaped cookies offer a unique opportunity for personalization and creative expression, making them a truly perfect and easy shaped treat for kids.
Selecting the right shapes is half the fun when making easy shaped cookies for kids. The options are vast and can cater to any interest, theme, or level of dexterity. The key is to choose shapes that are easily recognizable and appealing to children, while also being practical for cutting and handling with little hands. Simple shapes often work best, especially for younger bakers, as intricate designs can be more challenging to transfer from the counter to the baking sheet without distorting.
Think about the children you're baking with or for. Are they obsessed with dinosaurs, farm animals, or vehicles? Do they love simple geometric shapes like stars and hearts? Matching the shapes to their current interests will significantly increase their excitement and engagement in the baking process. Having a variety of options available, from classic shapes to more unique ones, allows for spontaneity and creativity during the shaping stage, making the experience of creating easy shaped cookies even more enjoyable.
Cookie cutters are the most straightforward way to create consistent, fun shapes. Animal shapes are perennial favorites; think elephants, bears, dogs, cats, and dinosaurs. A set of basic animal cutters can provide hours of entertainment. Other popular choices include transportation (cars, trains, airplanes), holidays (Christmas trees, pumpkins, hearts, stars), and simple geometric shapes like circles, squares, and triangles. A typical set of 10-12 varied cutters might cost around $10-20 and offer a wide range of options.
Consider a set of large, chunky plastic cutters for very young children. These are easier for small hands to grip and press firmly into the dough. For slightly older kids, metal cutters offer sharper edges for cleaner cuts, resulting in more defined shapes. Having a mix of sizes and styles can be beneficial. For instance, using both large and small star cutters allows kids to create a 'family' of stars. These readily available tools make crafting easy shaped cookies for kids incredibly accessible.
You don't always need a specialized cutter to make fun shapes. Simple household items can be incredibly effective. For example, the rim of a glass or a small bowl can create perfect circles. A pizza cutter or a blunt knife (with adult supervision) can be used to cut dough into squares, rectangles, or strips. These strips can then be twisted or braided into fun patterns. Rolling dough into ropes and then shaping them into letters of the alphabet or numbers is another simple yet highly engaging activity.
Another creative technique involves using cookie stamps or textured rolling pins. These tools press patterns directly into the dough sheet before cutting or baking, adding an extra layer of visual interest. For example, a rolling pin with a floral pattern can transform a simple circle cookie into something more elaborate. Using these methods allows for unique, easy shaped cookies without relying solely on traditional cutters, fostering ingenuity and resourcefulness in the kitchen.
Safety First: Kid-Friendly Shaping Tools & Techniques
When baking with children, safety is paramount, especially during the shaping process. Always supervise children closely, particularly when using any cutting tools. Opt for tools specifically designed for children, such as plastic cookie cutters with rounded edges, or nylon knives designed for cutting dough or soft foods. If using metal cutters, ensure children understand they are sharp and require careful handling.
Teach children the correct way to press down on cookie cutters – firmly and evenly. Show them how to gently lift the cutter straight up to avoid distorting the shape. When using knives or pizza cutters, an adult should always handle the sharp part, allowing the child to guide the tool with their hand placed safely on top of the adult's. Using a lightly floured surface or parchment paper also helps prevent dough from sticking, reducing frustration and the need for excessive handling, making the process of making easy shaped cookies safer and smoother.
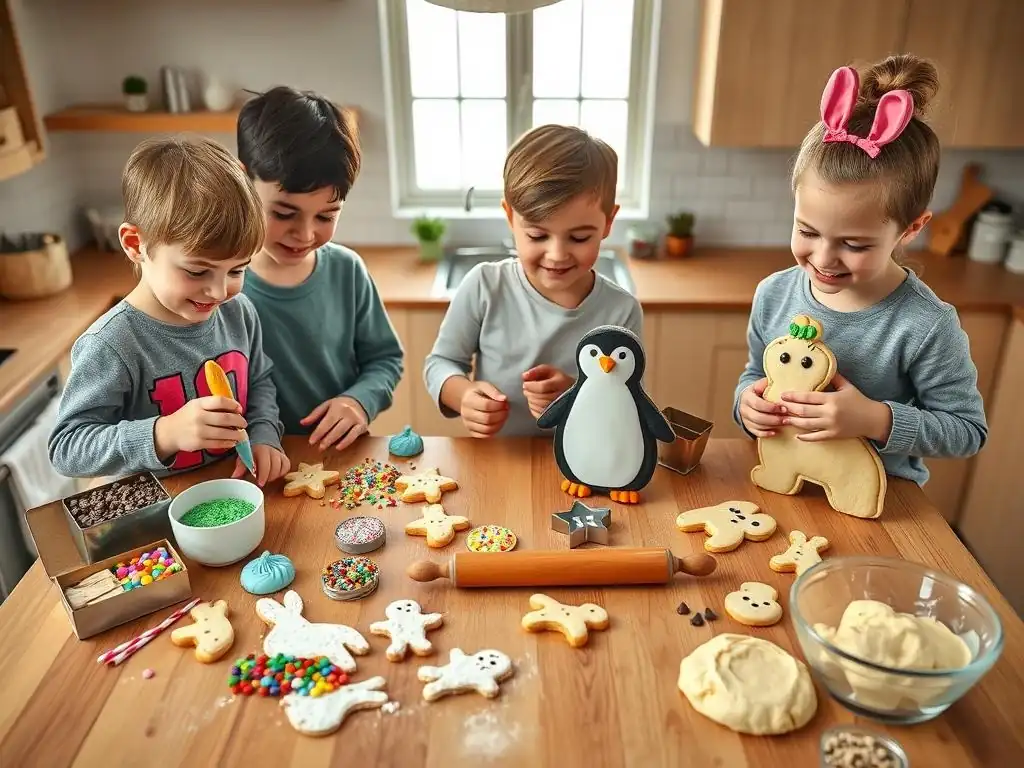
Creating a cookie dough that is easy to handle, holds its shape well during baking, and tastes delicious is key to successful easy shaped cookies for kids. A basic sugar cookie or shortbread-style dough is ideal because it rolls out smoothly and doesn't spread excessively in the oven. This ensures that the fun shapes you've worked hard to create remain recognizable after baking.
Our go-to recipe is simple, uses common pantry ingredients, and is designed to be forgiving for beginner bakers. The texture of the dough is crucial; it should be firm enough to cut cleanly but soft enough to roll without cracking. Achieving this balance makes the shaping process much less frustrating for both kids and adults, guaranteeing a positive baking experience centered around making easy shaped cookies.
Here are the essential ingredients for a reliable batch of dough perfect for shaped cookies:
- 1 cup (2 sticks) unsalted butter, softened
- 1 ½ cups granulated sugar
- 2 large eggs
- 1 teaspoon vanilla extract
- 3 cups all-purpose flour
- 1 teaspoon baking powder
- ½ teaspoon salt
This combination provides a stable dough that holds shapes well. Using softened butter is critical for creaming properly with the sugar, which incorporates air and contributes to the cookie's texture. The ratio of flour to wet ingredients ensures the dough isn't too sticky, a common issue when making easy shaped cookies with children.
Follow these simple steps to create your dough:
- In a large bowl, cream together the softened butter and granulated sugar until light and fluffy. This usually takes about 3-5 minutes with an electric mixer.
- Beat in the eggs one at a time, mixing well after each addition. Stir in the vanilla extract.
- In a separate medium bowl, whisk together the flour, baking powder, and salt.
- Gradually add the dry ingredients to the wet ingredients, mixing on low speed until just combined. Be careful not to overmix, as this can result in tough cookies.
- Divide the dough into two equal portions, flatten each into a disk, wrap tightly in plastic wrap, and chill in the refrigerator for at least 1 hour. Chilling is essential for making easy shaped cookies, as it firms the dough and prevents excessive spreading.
This process is straightforward and can involve children in various stages, such as measuring ingredients or helping to wrap the dough disks.
Sticky dough is a common challenge when making shaped cookies, especially for kids, as it makes rolling and cutting difficult. The primary reason for stickiness is often the dough being too warm or having too much liquid relative to the flour. Ensuring your butter is softened but not melted is the first step.
Chilling the dough thoroughly for at least an hour, or even longer (up to 2-3 days), is the most effective way to prevent stickiness. Cold dough is much firmer and easier to roll and cut cleanly. When rolling, work with one portion of dough at a time, keeping the rest chilled. Lightly flour your work surface, rolling pin, and cookie cutters.
Use just enough flour to prevent sticking – too much can make the cookies dry. If the dough starts to become sticky as you work, pop it back into the refrigerator for 10-15 minutes to firm up again. These simple techniques make creating easy shaped cookies a much cleaner and more enjoyable process.
Baking shaped cookies requires attention to detail to ensure they hold their form and bake evenly without burning. The goal is a cookie that is set and lightly golden around the edges, maintaining the integrity of the fun shapes you've created. Over-baking can lead to hard, brittle cookies, while under-baking results in soft, fragile ones that break easily, neither of which is ideal for easy shaped cookies kids love.
Understanding your oven and monitoring the cookies closely are key steps. Different ovens can have hot spots, affecting how evenly cookies bake. Rotating your baking sheets halfway through the baking time can help achieve uniform results. With the right temperature and timing, you'll produce perfectly baked, delightful easy shaped cookies ready for decorating.
A standard temperature for baking most shaped cookies is 350°F (175°C). This moderate heat allows the cookies to bake through without browning too quickly on the edges. The baking time will vary depending on the thickness and size of your cookies, as well as your specific oven.
For cookies rolled to about ¼ inch thickness, the baking time typically ranges from 8 to 12 minutes. Thicker cookies will require a minute or two longer, while thinner cookies might be done in as little as 7 minutes. A good indicator of doneness is when the edges of the cookies appear lightly golden brown. Always start checking at the lower end of the time range to avoid over-baking. For instance, if baking ¼-inch thick cookies, look at them around the 8-minute mark.
To prevent the edges of your easy shaped cookies from burning while the centers remain underdone, ensure your oven temperature is accurate. An oven thermometer can help verify this. Placing baking sheets on the middle racks of the oven provides the most even heat distribution.
Using parchment paper or silicone baking mats on your baking sheets is highly recommended. These prevent sticking and also help insulate the bottom of the cookies slightly, reducing the risk of burned bottoms. Avoid using dark-colored baking sheets, as they absorb more heat and can cause the bottoms to brown too quickly. If you only have dark sheets, you might need to reduce the oven temperature by 25°F (about 15°C) and/or shorten the baking time slightly.
Achieving perfectly even baking requires a few consistent practices. First, ensure your oven is fully preheated before putting cookies in. A fluctuating temperature can lead to uneven results. Second, as mentioned, rotate your baking sheets halfway through the baking time. If you're baking multiple sheets at once, swap their positions on the racks (move the top sheet to the bottom rack and vice versa).
Allowing adequate space between cookies on the baking sheet is also important. Overcrowding can hinder hot air circulation, leading to uneven baking. Leave about 1-2 inches between each cookie. Finally, ensure all cookies on a single sheet are roughly the same thickness. If you have a mix of very thick and very thin cookies on the same tray, they will not bake at the same rate. These steps ensure your easy shaped cookies bake uniformly, resulting in a consistent texture and appearance.

Once your fun-shaped cookies have cooled completely, it's time for the most exciting part for most kids: decorating! This is where their creativity can truly shine. Keep the decorating process simple and fun, focusing on materials that are easy for small hands to manage and don't require intricate techniques. The goal is to add color and flair while keeping the process enjoyable and accessible for making easy shaped cookies.
Have a variety of colorful options available, such as different colored icings, sprinkles, and edible embellishments. Cover your workspace with newspaper or a disposable tablecloth for easy cleanup. This stage is less about perfection and more about expression, allowing children to personalize their easy shaped cookies in unique ways.
A simple glaze or thin royal icing is perfect for flooding the surface of cookies with color. A basic glaze can be made by mixing powdered sugar with a small amount of milk or water until it reaches a pourable consistency. This can be tinted with food coloring. Kids can easily spread this over the cookie surface with a small spoon or butter knife.
For slightly more control, a thicker icing can be used in squeeze bottles or piping bags with large, round tips. This allows children to outline shapes or draw simple designs. Even just dipping a portion of the cookie into icing is a simple and effective technique. For example, dipping the top of a star cookie in yellow icing creates a sunny effect. Using multiple colors in small bowls allows kids to choose their favorites for their easy shaped cookies.
Kid-Friendly Sprinkles & Edible Decorations
Sprinkles are a must-have for decorating easy shaped cookies for kids! Offer a variety of types: jimmies, nonpareils, sparkling sugar, and edible glitter. Small bowls or shakers make it easy for kids to apply them. Provide plenty of each color and type, as they are always a popular choice.
Beyond sprinkles, consider other edible decorations like mini chocolate chips, small candies (like M&Ms or gummy bears), edible googly eyes, or small candies shaped like stars or hearts. These items are easy for little fingers to pick up and place on the wet icing. Edible markers can also be fun for drawing faces or simple patterns on dry icing. These additions turn simple iced cookies into characterful, easy shaped cookies.
Encourage creativity by suggesting ideas based on the cookie shapes. A circle can become a face, a ball, or a planet. A star can be decorated as a twinkling night sky or a superhero emblem. An animal shape can be given features using icing or candies – edible eyes are perfect for this!
For example, if you've made dinosaur shapes, kids can use green icing and add sprinkles for scales. A heart shape could be decorated with pink or red icing and covered in love-heart sprinkles. Providing a few prompts can help spark their imagination, but also allow them the freedom to decorate their easy shaped cookies however they like. The process of decorating is often more important than the final appearance, focusing on fun and self-expression.
Baking easy shaped cookies with children is a process best approached with patience and enthusiasm. Breaking it down into manageable steps allows kids to participate fully and feel a sense of ownership over the project. The key is to involve them in as many stages as appropriate for their age and skill level, turning the task into a collaborative adventure.
From preparing the workspace to the final decorating touches, each step offers an opportunity for learning and fun. This hands-on experience is incredibly valuable, teaching children about following instructions, measuring, and the transformation of ingredients through baking. It’s about creating memories as much as it is about making delicious easy shaped cookies.
Prepare Your Baking Station Together
Start by setting up a dedicated baking area. Clear a large counter space or table. Cover it with an old tablecloth, newspaper, or a disposable plastic cover for easy cleanup. Gather all the necessary ingredients and tools and place them within easy reach.
Assign simple tasks to the children based on their age. Younger children can help wash hands, gather tools like cookie cutters, or pour pre-measured ingredients into a bowl. Older children can help measure ingredients, crack eggs (with supervision), or mix the dough. Having everything ready before you begin minimizes interruptions and keeps the focus on the fun of making easy shaped cookies.
Once the dough is chilled and ready, the shaping begins. Roll out a portion of the dough on a lightly floured surface to an even thickness (around ¼ inch is standard). Show children how to press the cookie cutters firmly into the dough, making sure they go all the way through.
Teach them how to carefully lift the cutter and then gently transfer the shaped dough onto a baking sheet lined with parchment paper. This is where the fun shapes truly come to life! Let them choose which cutters they want to use and where to place them on the dough. Expect some imperfect shapes – that's part of the charm of homemade, easy shaped cookies made by kids.
Decorating Together: A Collaborative Baking Experience
After the cookies have cooled completely on a wire rack, set up the decorating station. Arrange different colored icings, sprinkles, and decorations in separate bowls or containers. Provide small spoons, butter knives, or squeeze bottles for applying icing.
Let each child decorate their own cookies, or work together on a few. Encourage them to experiment with different colors and sprinkle combinations. This is the stage where personalities truly shine through in the easy shaped cookies. Celebrate their unique designs and focus on the joy of creation rather than the neatness of the finished product. This shared activity strengthens bonds and creates lasting, sweet memories.

After all the effort and fun of baking and decorating easy shaped cookies with kids, you'll want to make sure they stay fresh and delicious. Proper storage is essential to maintain their texture and flavor. Storing them correctly also ensures they can be enjoyed over several days, extending the enjoyment of your baking project.
The method of storage depends on whether the cookies are iced or not, and how long you plan to keep them. Generally, airtight containers are your best friend for keeping homemade cookies at their peak freshness. Keeping them away from direct sunlight and heat sources also helps maintain quality.
For plain, un-iced easy shaped cookies, an airtight container stored at room temperature is ideal. A cookie tin or a plastic container with a tight-fitting lid works well. Place the cookies in a single layer if possible, or separate layers with parchment paper to prevent them from sticking together or breaking, especially if they are fragile.
If your cookies are iced, particularly with a glaze or royal icing that hardens, wait until the icing is completely set before storing them. Stacking iced cookies before the icing is dry will result in smudged decorations. Once dry, they can be stored in an airtight container, again with layers separated by parchment paper if needed. Store iced cookies at room temperature unless the icing contains ingredients that require refrigeration (like cream cheese frosting).
Properly stored, plain or glazed easy shaped cookies typically stay fresh at room temperature for about 5-7 days. Their texture might change slightly over time, becoming softer, but they should remain perfectly edible and tasty. Cookies decorated with butter-based frostings should generally be consumed within 2-3 days or stored in the refrigerator to extend their life.
If you bake a large batch of easy shaped cookies, consider freezing some. Baked cookies can be frozen in airtight containers or freezer bags for up to 3-4 months. Thaw them at room temperature before enjoying. This allows you to enjoy the fruits of your baking labor long after the initial baking day.
One of the best ways to make future baking sessions even easier is to freeze portions of your cookie dough. This is particularly helpful for easy shaped cookies, as you can have dough ready to go whenever the mood strikes or a sudden playdate occurs.
After making the dough and chilling it for the initial hour, you can wrap individual portions (disks) tightly in plastic wrap and then place them in a freezer-safe bag or container. Label and date the package. Dough can be frozen for up to 2-3 months. When you want to bake, simply transfer a disk of dough to the refrigerator and let it thaw overnight, or leave it at room temperature for about an hour until it's pliable enough to roll. This preparation makes impromptu easy shaped cookies for kids a reality!
Even with a great recipe and careful steps, baking can sometimes present challenges. Don't worry if your first batch of easy shaped cookies isn't absolutely perfect. Troubleshooting common issues is part of the learning process. Understanding why something went wrong can help you adjust your technique for future baking success.
Common problems include cookies spreading too much, ending up too hard or too soft, or issues with icing consistency. Most of these can be easily remedied with minor adjustments to ingredients, technique, or temperature. Here are some solutions to common shaped cookie dilemmas.
Excessive spreading is a frequent issue with shaped cookies, causing them to lose their defined forms. The primary culprit is usually butter that is too soft or melted, or dough that wasn't chilled enough (or at all). Overmixing the dough can also contribute by developing the gluten too much.
To fix this, ensure your butter is only softened, not liquid. Always chill your dough thoroughly for at least 1 hour before rolling and cutting – 2 hours is even better. If your kitchen is warm, chill the cut-out shapes on the baking sheet for 10-15 minutes before baking. You can also slightly increase the amount of flour (by 1-2 tablespoons per batch) if the dough still seems too soft after chilling. Baking on parchment paper can also help contain spread slightly. These steps will help your easy shaped cookies keep their intended forms.
The texture of your cookies is largely determined by baking time and temperature. If your cookies are too hard or brittle, they were likely over-baked. This happens when they are left in the oven for too long, causing too much moisture to evaporate.
If your cookies are too soft or crumbly (and not intentionally soft-baked), they might be under-baked. This means they didn't spend enough time in the oven to set properly. Ensure your oven temperature is accurate and bake for the recommended time range, checking for those lightly golden edges.
If you find your cookies are consistently too hard with your standard recipe and time, try reducing the baking time by 1-2 minutes. If they are too soft, add an extra 1-2 minutes. The thickness of the cookies also plays a role; thinner cookies will bake and harden faster than thicker ones.
My Icing is Too Runny/Thick! Solution Guide
Icing consistency is key to successful cookie decorating. If your icing is too runny, it will drip off the cookies and won't hold any shape or design. If it's too thick, it will be difficult to spread or pipe smoothly.
To thicken runny icing, gradually whisk in more powdered sugar, one tablespoon at a time, until the desired consistency is reached. For a glaze, you want it pourable but not watery. For piping, you want it thick enough to hold a line but still flow smoothly. To thin thick icing, add a very small amount of liquid (milk, water, or lemon juice), about half a teaspoon at a time, mixing thoroughly after each addition, until it reaches the right consistency. These simple adjustments ensure your easy shaped cookies look as good as they taste.
Baking fun-shaped treats is a rewarding activity that brings smiles to faces, especially when those treats are easy shaped cookies kids helped create. From the simple joy of pressing out shapes to the colorful explosion of sprinkles during decoration, the process is filled with opportunities for bonding, learning, and creative expression. At BakeWithEase, we hope this guide has demystified the process and empowered you to embark on this sweet adventure with confidence.
Remember, the goal is not perfection, but participation and enjoyment. Embrace the flour dust, the colorful smudges, and the uniquely decorated cookies that result from little hands at work. These easy shaped cookies are more than just a snack; they are edible tokens of shared moments and happy memories. So gather your ingredients, pick your favorite shapes, and get ready to bake some joy. The sweet success of your easy shaped cookies awaits!
Frequently Asked Questions
Use a recipe that doesn't require chilling or needs minimal chilling. Opt for a dough that's less sticky and more pliable, like a basic sugar cookie dough with a good balance of butter and flour.
Focus on basic geometric shapes like circles, squares, and triangles using cookie cutters. Alternatively, simple roll-and-cut shapes like snakes or swirls are also fun and easy for little hands to manage.
Use sprinkles, edible glitter, and pre-made icing tubes. Avoid sharp tools and opt for soft-tipped decorating tools that are easy for kids to grip and control.
Choose large, easy-to-grip cookie cutters with rounded edges for safety. Avoid intricate designs that are difficult to cut around. Consider plastic cookie cutters over metal ones.
How can I make the baking process more engaging and less stressful for kids?
Prepare all the ingredients beforehand and set up a dedicated baking station. Focus on the fun aspects of baking and allow for imperfections. Keep it simple and celebrate the process, not just the perfect cookie!
The simple act of baking fun-shaped treats with your children is more than just a recipe; it's a powerful tool for connection and joy. In a world increasingly dominated by screens and schedules, the shared experience of creating something delicious and beautiful together offers a vital counterpoint, fostering creativity, patience, and lasting memories. These aren't just cookies; they're moments.
The influence of shared culinary experiences extends far beyond the kitchen table. It's a tradition passed down through generations, a way to bond and build confidence. The messy flour dusting, the excited squeals over perfectly cut shapes, the pride in a finished product – these are the ingredients of childhood magic. The best things in life are the people we love, the places we've been, and the memories we've made along the way.
This quote perfectly encapsulates the lasting impact of these simple baking projects.
So, I invite you to roll up your sleeves, gather your little helpers, and embark on a baking adventure. Don't be afraid to get messy, to experiment with shapes and flavors, and most importantly, to savor the joy of creating something special together. Let the aroma of freshly baked cookies fill your home, not just with sweetness, but with the warmth of shared connection and the enduring power of simple pleasures. The memories you create will be far more delicious than any cookie recipe.
Unleash Your Inner Baker: Create Magical Treats!
Thanks for joining us on this baking adventure! We hope you've gained some fun and easy ideas to create delicious treats your kids will adore. Ready to get baking?
- Whip up your first fun-shaped creation: Grab those cookie cutters and get baking! Let your creativity flow – the possibilities are endless!
- Share your baking masterpieces: Show off your amazing creations on social media using #BakeWithEaseKids. Let's inspire each other!
- Explore more kid-friendly recipes: Dive deeper into our recipe collection for even more inspiration and delightful surprises.
What fun shape will you bake first? Let us know in the comments below!