
StepbyStep: Baking & Decorating Themed Party Cookies


Welcome to BakeWithEase, your kitchen companion for unleashing your inner baker! Ever dreamt of wowing your guests with perfectly decorated treats? Get ready to unlock the secrets to creating stunning Easy themed party cookies that will be the talk of your next gathering. Explore our guide and discover simple techniques, foolproof recipes, and creative decorating tips to transform ordinary cookies into extraordinary edible art. Intrigued? Let's get baking!
- Introduction to Easy Themed Party Cookies for Kids' Parties
- Step 1: Selecting the Perfect Cookie Dough for Themed Party Cookies
- Step 2: Planning Your Cookie Theme for Kids' Parties
- Step 3: Baking Easy Themed Party Cookies – A Step-by-Step Guide
- Step 4: Decorating Techniques for Themed Party Cookies
- Step 5: Creative Ideas for Decorating Easy Themed Cookies
- Step 6: Storing and Presenting Your Themed Party Cookies
- Troubleshooting Common Issues with Easy Themed Party Cookies
- Conclusion: Mastering Easy Themed Party Cookies for Unforgettable Kids’ Celebrations
- Additional Resources for Baking Themed Party Cookies at BakeWithEase
-
Frequently Asked Questions
- ### What are the easiest types of themed party cookies to bake for a beginner?
- ### What are some tips for ensuring my themed party cookies maintain their shape during baking?
- ### How can I create vibrant and visually appealing decorations for my themed party cookies without advanced skills?
- ### What are some common mistakes to avoid when baking and decorating themed party cookies?
- ### Where can I find easy-to-find ingredients for baking and decorating themed party cookies?
- Final Reflection: The Sweet Success of Themed Party Cookies
- Unleash Your Inner Cookie Artist!
Throwing a memorable kids' party often involves delightful treats that capture the imagination and tie into the chosen theme. While elaborate cakes can be challenging, easy themed party cookies offer a fantastic, manageable way to add a personal and fun touch to any celebration. They are not only delicious but also serve as edible decorations, bringing joy to guests of all ages.
Creating these special cookies doesn't require advanced baking skills. With the right approach, selecting a reliable recipe, and using simple decorating techniques, anyone can bake and decorate charming cookies that perfectly match their party's theme. This guide will walk you through each step, making the process enjoyable and the results impressive.
Choosing to bake easy themed party cookies for a child's party offers numerous benefits, extending beyond just providing a sweet treat. These personalized cookies act as miniature canvases that bring the party's theme to life in a tangible, edible form.
Imagine a dinosaur-themed party where each child receives a perfectly shaped and simply decorated dinosaur cookie, or an under-the-sea adventure featuring colorful fish and starfish. This level of detail can significantly enhance the party atmosphere and create lasting memories, often at a lower cost than purchasing custom-made cookies, which can range from $3 to $8 or more per cookie depending on complexity.
Furthermore, the process of baking and decorating can be a wonderful activity in itself, potentially involving the birthday child or siblings in the preparation. It’s a chance to spend quality time together, teaching basic baking skills and fostering creativity. The sense of accomplishment from creating something handmade and seeing the delight on guests' faces is incredibly rewarding. Unlike large cakes that require precise slicing, individual cookies are easy to serve and manage, making them practical for busy party settings.
Successfully creating easy themed party cookies involves a series of steps, each building upon the last, from preparing the dough to the final decorative touches. The journey begins with selecting a suitable cookie dough that holds its shape well during baking, ensuring your carefully cut dinosaurs or stars don't turn into amorphous blobs. Proper dough preparation, including adequate chilling time, is crucial for achieving crisp edges and a smooth surface ideal for decoration.
Once the dough is ready, the fun of planning the theme truly kicks in, involving choosing shapes and colors that resonate with the party's overall concept. The baking itself requires attention to temperature and time to ensure cookies are perfectly cooked – not burnt, but firm enough to handle decorating.
Finally, decorating transforms the simple cookie shapes into thematic masterpieces using various icings, sprinkles, and techniques that can be as simple or detailed as you like. This step-by-step approach makes the entire process approachable, even for those new to cookie decorating, ensuring that your easy themed party cookies are both beautiful and delicious.
The foundation of any great cut-out cookie is the dough itself. For easy themed party cookies, you need a dough that is not only delicious but also stable enough to maintain its shape through rolling, cutting, and baking. Choosing the right dough type is the critical first step to ensure your intricate shapes don't spread or distort in the oven.
Different doughs have varying characteristics due to their ingredient ratios. A dough with a higher proportion of butter and sugar compared to flour might be very tender and tasty, but it could spread excessively when baked, blurring the edges of your shapes. Conversely, a dough too low in fat might be tough. Finding the right balance is key for cookies intended for cutting and decorating.
Sugar cookie dough is perhaps the most popular and versatile choice for cut-out easy themed party cookies. A classic sugar cookie recipe typically contains butter, sugar, eggs, flour, and vanilla extract. The relatively high flour-to-fat ratio, especially when combined with proper chilling, helps the cookies retain their shape beautifully during baking. Sugar cookies also provide a smooth, neutral-flavored canvas that pairs well with various icings and decorations. They bake up relatively flat, which is ideal for applying royal icing or other flat decorations.
Another excellent option is a simple butter cookie or shortbread-style dough. These doughs often have a higher butter content than typical sugar cookies but rely on minimal leavening (sometimes none) to prevent excessive spread. Shortbread, with its crumbly texture, is delightful to eat, though it can be slightly more delicate to handle than sugar cookies.
Gingerbread dough is also a fantastic choice, particularly for holiday or specific themes, offering a distinct flavor and robust structure that holds intricate shapes well, especially if the recipe is formulated for cut-outs. For reliably easy themed party cookies, a no-spread sugar cookie recipe is often the go-to.
Tips for Preparing Dough Suitable for Decorating
Proper preparation of your chosen dough is just as important as selecting the right type. The single most crucial step is chilling the dough thoroughly before rolling and cutting. Warm dough is soft and pliable, making it difficult to roll evenly and prone to sticking.
More importantly, the fat in warm dough melts faster in the oven, causing the cookies to spread significantly. Chilling the dough in the refrigerator for at least 1-2 hours, or even up to two days, solidifies the fat, which then melts more slowly in the oven, allowing the cookie to set before it spreads too much. For best results, wrap the dough tightly in plastic wrap before chilling.
When you're ready to roll, take out only the amount of dough you plan to work with immediately, keeping the rest chilled. Roll the dough to a consistent thickness, typically about 1/4 inch (approximately 6mm). Uniform thickness ensures that all cookies on a baking sheet bake evenly; thinner cookies will bake faster and potentially burn before thicker ones are done.
Use a light dusting of flour on your work surface and rolling pin to prevent sticking, but avoid adding too much extra flour, which can make the cookies tough. Rolling between two sheets of parchment paper is an excellent technique that requires almost no extra flour and makes transferring cut shapes to the baking sheet effortless, helping to keep your easy themed party cookies perfectly shaped.
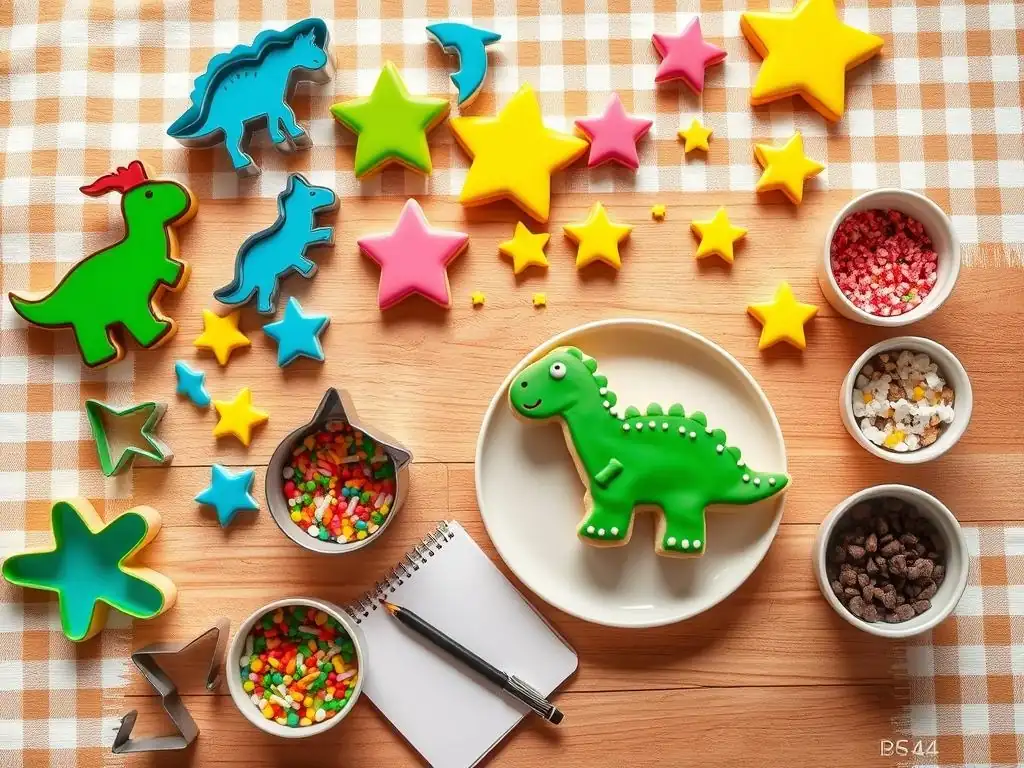
With your dough ready, the next exciting step is deciding on the theme for your easy themed party cookies. This is where you connect your baking project directly to the celebration, making the cookies a true highlight of the party. Planning the theme involves choosing concepts that are appealing to kids and translating them into edible designs using shapes, colors, and simple decorations.
The key is to select a theme that is both fun and achievable with cookie shapes and basic decorating techniques. Overly complex themes might require advanced skills or tools, defeating the purpose of making easy themed party cookies. Think about the party's overall theme, the birthday child's favorite characters, animals, or hobbies, and how these can be represented in simple cookie form.
Many popular kids' party themes lend themselves beautifully to easy themed party cookies. Animal themes are always a hit, allowing for a variety of animal-shaped cutters like bears, cats, dogs, or even dinosaurs. A simple outline and a few dots for eyes and a nose are often all that's needed. For a princess or knight party, think crowns, castles, or star shapes decorated with edible glitter or pearl candies. Superhero parties can feature shield shapes, stars, or lightning bolts in bold primary colors.
Other easy and popular themes include outer space (stars, moons, rockets), under the sea (fish, starfish, shells), transportation (cars, trains, planes), or even simple shapes like circles and squares transformed into faces, balls, or building blocks. For example, a circle cookie can easily become a ladybug with red icing and black dots, or a planet with blue icing and green continents. Choosing a theme with readily available cookie cutters or shapes that are easy to freehand cut (like simple geometric shapes) makes the process of creating easy themed party cookies much smoother.
Once you have your theme, selecting the right cookie shapes and planning the basic designs is crucial for creating cohesive easy themed party cookies. Cookie cutters are your best friends here. Invest in a few basic sets (circles, squares, stars, hearts) and perhaps a few specific to popular themes (animals, dinosaurs). Remember that even basic shapes can be adapted – a star cutter can be used for a superhero theme, a magic wand theme, or an outer space theme, simply by changing the icing colors and decorations.
Consider how you will decorate each shape to fit the theme. For a simple approach, plan to use just one or two colors of icing per cookie and perhaps some sprinkles or candies. For example, for a farm animal theme, you might use a pig cutter and flood it with pink icing, adding two small pink circles for a snout and black dots for eyes.
For easy themed party cookies, less is often more; a few well-placed details can be more effective and easier to execute than trying to recreate intricate characters. Sketching out your cookie designs beforehand can help visualize the final product and ensure you have the necessary cutters and decorating supplies on hand.
Successfully baking your easy themed party cookies involves careful execution of a few key steps. This stage is where your chilled dough is transformed into sturdy, ready-to-decorate cookie canvases. Paying attention to detail during baking ensures your cookies have the right texture and structure to hold icing and maintain their shape.
This step covers everything from setting up your workspace to the actual time the cookies spend in the oven. Precise temperature and timing are vital for achieving perfect results, preventing issues like spreading, burning, or uneven baking.
Preparing Your Baking Space and Tools
Before you even take your dough out of the refrigerator, it's essential to prepare your baking space and gather all necessary tools. Start by preheating your oven to the correct temperature, typically 350°F (175°C) for most cut-out cookie recipes. Accurate oven temperature is critical for even baking and preventing spread, so using an oven thermometer can be helpful. Ensure your baking sheets are clean and ready.
Line your baking sheets with parchment paper or silicone baking mats. This prevents the cookies from sticking, makes cleanup significantly easier, and helps the bottoms of the cookies bake evenly without burning. Gather your rolling pin, cookie cutters, a thin spatula or offset spatula for transferring cut dough shapes, and wire cooling racks. Having everything within reach before you start rolling the dough minimizes interruptions and ensures a smooth workflow, which is key for creating easy themed party cookies efficiently.
Take a portion of your chilled dough from the refrigerator. If it's too hard to roll immediately, let it sit at room temperature for just a few minutes until it's slightly more pliable but still cool. Lightly flour your clean work surface and your rolling pin, or use the parchment paper method mentioned earlier. Roll the dough to a consistent thickness, aiming for about 1/4 inch (6mm). Uniform thickness is paramount for consistent baking results across your batch of easy themed party cookies.
Press your cookie cutters firmly into the dough, trying to get cuts as close together as possible to minimize scraps (which can become tough if re-rolled too many times). For detailed cutters, give the cutter a slight wiggle before lifting. Carefully transfer the cut dough shapes to your prepared baking sheets using a thin spatula.
Place the cookies about 1-2 inches (2-4 cm) apart to allow for slight spreading and ensure hot air circulates evenly around them. Place the baking sheet with the cut-out cookies back in the refrigerator for 10-15 minutes before baking; this quick chill helps the cookies hold their shape even better in the hot oven.
Baking time is a crucial variable and depends on your oven, the exact dough recipe, and the size and thickness of your cookies. For cookies rolled to 1/4 inch thickness and baked at 350°F (175°C), a typical baking time is between 8 and 12 minutes. Smaller or thinner cookies will bake faster, while larger or thicker ones will take longer.
Keep a close eye on your cookies as they bake. You'll know they are done when the edges are lightly golden brown and the centers look set, no longer wet or shiny. Avoid overbaking if you prefer a softer cookie; bake until just set for a tender result.
For crispier cookies, you can bake them a minute or two longer until the golden edges are more pronounced. Rotate your baking sheets halfway through the baking time, especially if your oven tends to bake unevenly, to ensure all your easy themed party cookies bake uniformly. Let the cookies cool on the baking sheet for 5-10 minutes before carefully transferring them to a wire rack to cool completely before decorating.
Once your easy themed party cookies are baked and completely cooled, it's time for the most creative and fun part: decorating them to match your party theme! There are various icing types and decorating techniques available, ranging from super simple to slightly more involved. The key is to choose methods that align with your skill level and the desired look for your easy themed party cookies.
The right icing provides a smooth base for colors and additional decorations, while sprinkles, candies, and other edible elements add texture and visual appeal. Mastering a few basic techniques can help you transform simple cookie shapes into thematic works of art that kids will adore.
Choosing Icing and Frosting for Easy Decorating
Several types of icing and frosting are suitable for decorating easy themed party cookies, each with different properties. Royal icing is a popular choice for cut-out cookies because it dries hard and smooth, allowing for stacking and intricate details. It's made from powdered sugar, meringue powder (or egg whites), and water, and can be thinned to different consistencies for outlining and flooding. While it offers precision, royal icing can be sensitive to humidity and requires several hours to dry completely (typically 6-12 hours, sometimes longer).
A simple glaze icing, made from powdered sugar and a liquid like milk, lemon juice, or water, is often easier for beginners. It dries to a firm, slightly shiny finish but not as hard as royal icing, making it less ideal for stacking but great for flooding large areas with color. Buttercream frosting, made from butter, powdered sugar, and milk/cream, is delicious and easy to make, but it stays soft.
It's excellent for piping swirls or covering the entire cookie with a fluffy layer, but less suitable for fine line work or designs that require a dry, hard surface. For truly easy themed party cookies, a basic glaze or a slightly thinned buttercream might be the simplest starting point.
Edible decorations are a fantastic way to add color, texture, and sparkle to your easy themed party cookies with minimal effort. Sprinkles are perhaps the easiest and most versatile option, available in countless colors, shapes (jimmies, nonpareils, sanding sugar, confetti), and themed mixes. Simply apply them generously onto wet icing or frosting. Sanding sugar adds a beautiful sparkle, while nonpareils create a dotted texture.
Other easy edible additions include small candies like mini chocolate chips (for eyes or spots), edible pearls, or pre-made sugar shapes (like flowers, stars, or hearts). Edible glitter or luster dust can add shimmer, applied with a small brush onto dry or slightly damp icing. For slightly more detail without complex piping, consider edible markers to draw designs or outlines onto dry royal icing. These simple decorations can quickly elevate the look of your easy themed party cookies and tie them into your party theme.
If you choose to use royal icing for your easy themed party cookies, the basic technique involves two main steps: outlining and flooding. First, prepare your royal icing to two consistencies: a thicker consistency (like toothpaste) for outlining and a thinner consistency (like honey or syrup) for flooding. Place the thicker icing in a piping bag fitted with a small round tip (like a #1 or #2) or a squeeze bottle with a fine tip. Pipe an outline around the edge of your cookie shape, creating a dam to hold the thinner icing.
Once the outline is piped, immediately fill the enclosed area with the thinner "flood" consistency icing. You can use a squeeze bottle, a piping bag with the tip snipped off, or even a spoon. Gently spread the icing to the edges using the tip of your bottle/bag or a scribe tool/toothpick.
Use the scribe tool to pop any air bubbles and ensure the icing fills the space smoothly. Allow the flooded base layer to dry completely (again, this can take 6-12+ hours depending on humidity) before adding any detailed piping or decorations on top. This layered approach allows you to create clean designs on your easy themed party cookies.
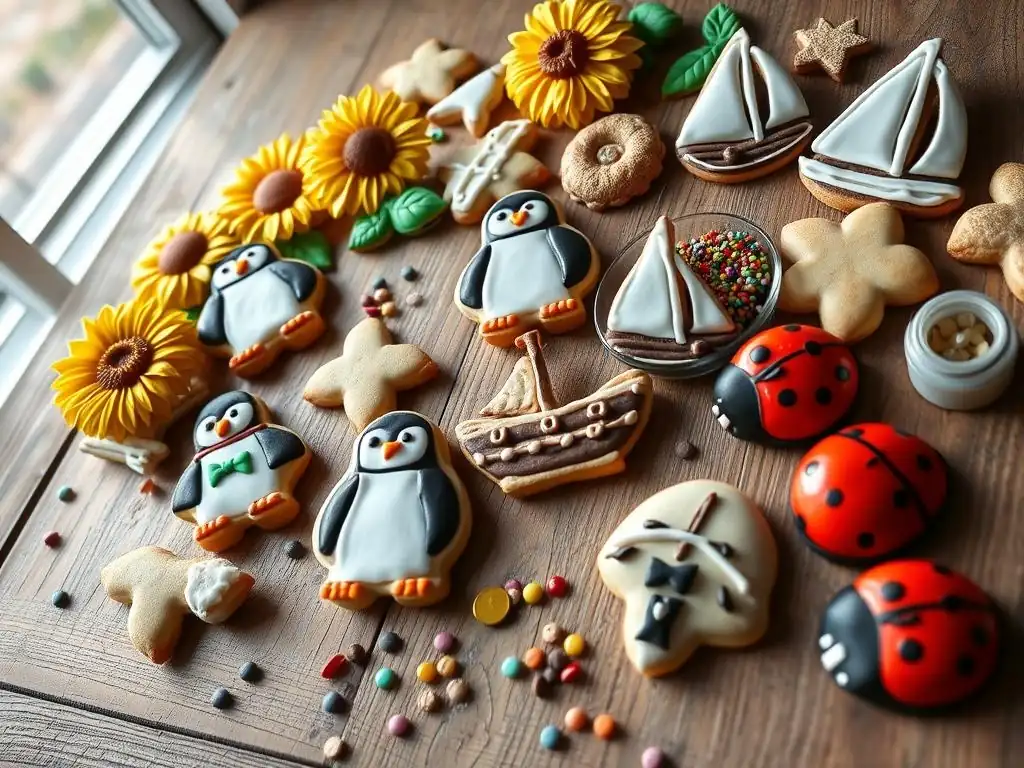
Decorating easy themed party cookies is where your creativity can shine! You don't need to be a professional decorator to make stunning cookies. Focusing on simple techniques and smart use of colors and edible decorations can yield impressive results that perfectly fit your party theme and delight the kids.
This section explores ideas ranging from techniques perfect for absolute beginners to slightly more advanced tips for those wanting to try a few extra details. The goal is to provide inspiration for making your easy themed party cookies both beautiful and achievable.
Simple Yet Stunning Decorating Ideas for Beginners
For beginners, focus on techniques that require minimal fine motor control and produce quick, impactful results. One of the easiest methods is dipping: dip the entire cookie, or just half, into melted candy melts or chocolate in colors matching your theme. Before the coating sets, cover it with sprinkles or sanding sugar. For example, dip star cookies in yellow candy melts and add gold sanding sugar for a space theme.
Another simple approach is using just one color of flood icing and adding decorations onto the wet surface. For animal cookies, flood with the main color (e.g., brown for a bear) and immediately add two small circles of a contrasting color (like tan) for the snout before the brown icing sets. You can then add sprinkle eyes or candy noses.
Using stencils is also incredibly easy: place a stencil over an unfrosted cookie or a cookie with dry icing, and lightly dust over it with powdered sugar, cocoa powder, or edible glitter. These methods ensure your easy themed party cookies look great without needing intricate piping skills.
If you're feeling a bit more confident and want to add more detail to your easy themed party cookies, you can explore techniques like the wet-on-wet method with royal icing. This involves dropping dots or drawing lines with wet royal icing onto a base layer of royal icing that is still wet. Then, use a scribe tool or toothpick to drag through the wet icing, creating marbled effects, spiderwebs (great for a spooky theme), or simple floral patterns. The key is that both layers of icing are wet, allowing them to meld smoothly.
Layering royal icing designs is another way to add depth. After your first layer of flood icing is completely dry (this is crucial! ), you can pipe additional details on top using a thicker consistency icing.
For example, flood a superhero shield cookie with red, let it dry, then pipe a blue circle on top, let that dry, and finally add a white star. While this takes more time due to drying, it allows for clean, defined layers. Using finer piping tips (like #00 or #0) allows for very thin lines, perfect for outlining shapes or adding small details like eyelashes or stitches on your easy themed party cookies.
After all your hard work baking and decorating, you want to ensure your easy themed party cookies stay fresh and look their best until party time. Proper storage is key to maintaining their texture and preventing damage to the decorations. Presentation is the final touch that makes your cookies shine on the party table.
Thinking ahead about how you will store and display your cookies helps avoid last-minute stress and ensures they are enjoyed just as you intended.
The most important step before storing decorated cookies is to ensure the icing is completely dry. Royal icing, in particular, needs significant time to harden – often 6 to 12 hours, or even longer in humid conditions. Rushing this step will result in smudged or damaged decorations when you stack or pack the cookies. Once fully dry, store your easy themed party cookies in an airtight container at room temperature.
If you need to stack layers of cookies in the container, place a sheet of parchment paper or wax paper between each layer to prevent them from sticking together or the decorations from rubbing off. Avoid refrigerating or freezing decorated cookies, especially those with royal icing, as condensation can form when they return to room temperature, potentially causing colors to bleed or the icing to become sticky. Undecorated cookies can typically be stored for up to a week, while decorated cookies are best enjoyed within 3-5 days for optimal freshness and appearance.
How you present your easy themed party cookies at the party can be just as impactful as the cookies themselves. Instead of just placing them on a plain plate, consider display methods that enhance your party theme. Arrange cookies on colorful platters that match your theme's color scheme. Use a multi-tiered cake stand to create a visually appealing focal point, arranging different cookie designs on each level.
Individually bagging decorated cookies in clear cellophane bags tied with a ribbon is a popular option, serving as both a display item and a party favor for guests to take home. You can place these bags in a basket or jar near the party exit. Another idea is to create a dedicated "cookie station" where kids can admire (and then eat!)
the array of easy themed party cookies. If you have different flavors or designs, arranging them by type or creating small labels can add a professional touch. Consider incorporating other thematic elements, like small toys or confetti, onto the display table around the cookies.
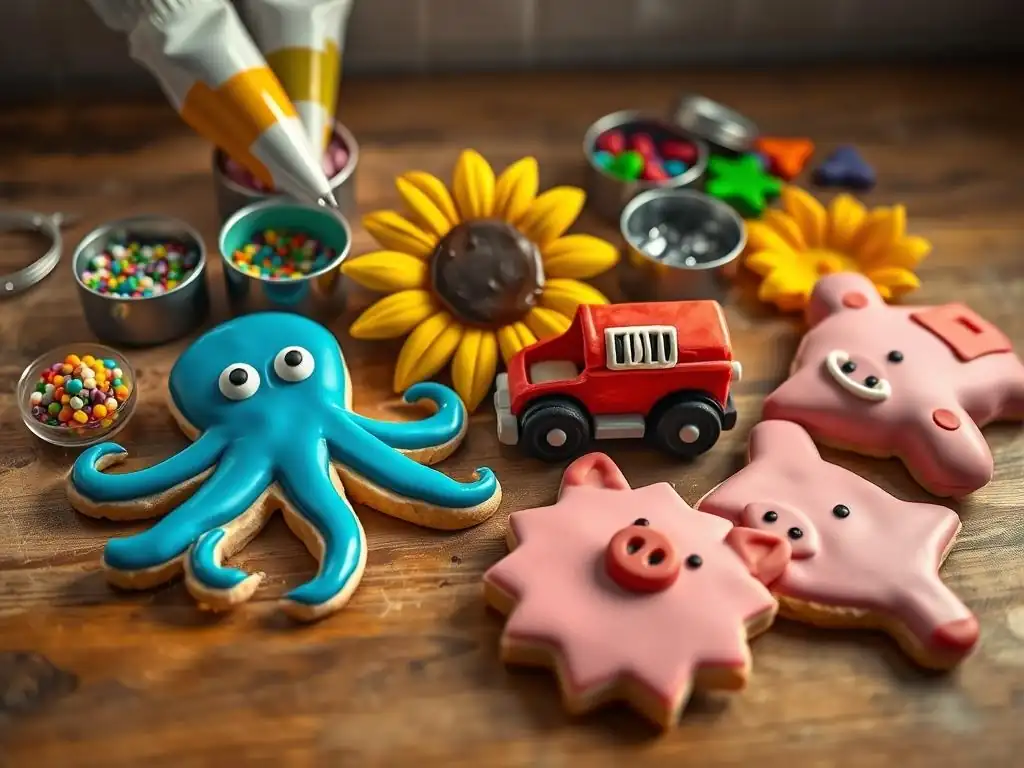
Even when following a great recipe and guide, sometimes things don't go exactly as planned. Issues like cookies cracking or icing smudging can be frustrating, but often there are ways to mitigate or fix these problems. Knowing how to troubleshoot common issues can save your batch of easy themed party cookies and reduce waste.
This section addresses a couple of frequent problems bakers encounter and offers practical tips for handling them, or preventing them in the first place.
Cracked cookies often occur due to handling while still warm, or sometimes if the dough is too dry. If a cookie cracks slightly after baking but before decorating, you might be able to "glue" it back together using a little bit of thick icing before you apply the main decoration. Often, the icing can help conceal minor cracks, especially if you plan to cover the entire surface. For severely cracked or broken cookies, decorating might not be feasible, but they are still perfectly edible! Consider crumbling them over ice cream or using them as a base for mini cheesecakes.
Overbaked cookies are typically dry and hard, and while the texture isn't ideal for a soft bite, the flavor is usually fine. Unfortunately, you can't really "fix" an overbaked texture. Prevention is key here: always bake a test cookie first if you're unsure about timing, and check cookies at the earlier end of the recommended baking time range (e.g., at 8 minutes if the range is 8-12).
If a batch does come out too crisp, they can still be used – perhaps crumbled for a topping or served with a dip. For future batches of easy themed party cookies, ensure dough thickness is uniform and oven temperature is accurate.
How to Rescue Icing Mistakes and Smudges
Icing mistakes happen to everyone! If you're working with wet royal icing and make a smudge or pipe in the wrong place, you might be able to gently lift the wet icing using a toothpick or the corner of a paper towel if it's a small error. If it's a larger area or the icing has started to crust over, trying to remove it can make it worse.
For royal icing that has dried, small mistakes can sometimes be carefully scraped away using a very sharp, fine blade (like an Exacto knife, used with extreme caution!) and then re-piped, but this requires a steady hand and might not be invisible.
For larger mistakes on wet icing, the easiest solution is often to carefully scrape all the wet icing off the cookie and start that cookie's decoration over. It's better to lose one layer of icing than to have a visibly messy cookie. If you're using a softer frosting like buttercream, smudges are easier to smooth out before the frosting sets. Remember, for easy themed party cookies, perfection isn't the goal – fun and flavor are! Sometimes a strategically placed sprinkle or candy can hide a minor smudge effectively.
Baking and decorating easy themed party cookies for kids' parties is a truly rewarding experience. It offers a wonderful opportunity to add a personal, creative, and delicious touch that guests, especially the children, will remember and appreciate. From selecting the right dough to adding those final decorative flourishes, each step contributes to creating edible art that enhances the party's theme and brings smiles to faces.
While the process involves several steps, none are overly complicated, making themed cookies an accessible project for bakers of all levels. The joy derived from seeing your carefully crafted cookies displayed and enjoyed is immense, making the effort well worth it.
Encouragement to Experiment with Baking and Decorating
Don't be intimidated if your first batch of easy themed party cookies isn't picture-perfect. Baking and decorating are skills that improve with practice. Each cookie you make is a chance to learn and refine your techniques. Start with simple shapes and basic decorating methods, and gradually try more detailed designs as you gain confidence. Embrace the imperfections – they often add character and show that the cookies were lovingly homemade.
The most important ingredient in making easy themed party cookies is enthusiasm! Experiment with different dough recipes, explore various icing types, and play with colors and decorations. The process should be enjoyable, a creative outlet that adds to the excitement of party planning. The kids will likely be thrilled with any cookie that's shaped like their favorite character or animal, regardless of minor cosmetic flaws.
To ensure success with your easy themed party cookies, keep these key tips in mind: Always chill your dough thoroughly before rolling and cutting to prevent spreading. Bake cookies until just done, typically 8-12 minutes at 350°F (175°C), to maintain a good texture for decorating. Allow cookies to cool completely on a wire rack before you even think about icing them. If using royal icing, be patient and allow each layer of icing to dry fully (6-12+ hours) before adding more details or stacking.
Plan your decorating steps and gather all your supplies before you begin. Keep your chosen party theme in mind throughout the process, letting it guide your shape and color choices. Most importantly, remember that these are easy themed party cookies intended for a kids' party – focus on the fun, the flavor, and the joy they bring, rather than striving for unattainable perfection. Enjoy the process, and celebrate your success!
Mastering easy themed party cookies is a skill that can be continuously developed and expanded upon. Exploring the right tools, understanding key ingredients, and accessing helpful guides can significantly enhance your baking and decorating journey.
At BakeWithEase.com, we offer a wealth of information and resources designed to support bakers of all levels in creating delicious and beautiful treats, including themed cookies perfect for any celebration.
Having the right equipment and quality ingredients makes a big difference when baking easy themed party cookies. Essential tools include sturdy metal baking sheets, parchment paper or silicone baking mats, a good quality rolling pin (adjustable ones help with uniform thickness), and a set of various-sized cookie cutters (basic shapes like circles, squares, stars, and hearts are invaluable). For decorating, you'll need piping bags or squeeze bottles, a set of piping tips (especially small round ones like #1, #2, #3), and a scribe tool or toothpick for manipulating icing.
Key ingredients include all-purpose flour, granulated sugar, unsalted butter, eggs, vanilla extract, powdered sugar (confectioners' sugar), and food coloring (gel colors are recommended for vibrant shades without adding excess liquid). If you plan to use royal icing, meringue powder is a crucial ingredient. Having these items on hand ensures you're ready to tackle any themed cookie project. For consistently great results with easy themed party cookies, invest in quality butter and fresh ingredients.
(Please note: As per instructions, I cannot include actual links here. This section describes the type of content that would typically be linked on the website.)
To further assist you in your themed cookie baking adventures, BakeWithEase.com provides a variety of helpful resources. You would find links to our core recipes, such as our reliable no-spread sugar cookie recipe, which is perfect for cut-outs. There would also be detailed tutorials on making and working with different types of icing, including a step-by-step guide to royal icing and a simpler method for glaze icing.
Additionally, you could explore articles offering more specific decorating ideas for popular themes, guides on using various edible decorations like sprinkles and edible markers, and tips for troubleshooting common baking and decorating challenges. These resources are designed to complement this article, providing you with all the knowledge and inspiration needed to confidently create fantastic easy themed party cookies for any kids' celebration.
Frequently Asked Questions
The easiest themed cookies for beginners often involve simple shapes like circles or squares. Consider using pre-made cookie dough or recipes with minimal ingredients and straightforward instructions, focusing on basic decorating techniques.
To prevent cookies from spreading, chill the dough for at least 30 minutes before baking. Use parchment paper on your baking sheet and avoid over-mixing the dough. Accurate oven temperature is also crucial for preventing shape distortion.
Use royal icing tinted with gel food coloring for vibrant colors. Simple techniques like outlining and flooding, along with sprinkles and edible markers, can create impressive results. Stencils can also help create professional-looking designs.
Avoid over-baking the cookies, which can lead to dryness. Allow the cookies to cool completely before decorating to prevent the icing from melting. Don't overcrowd the baking sheet. Patience is key - allowing icing to fully dry between layers prevents smudging.
Most ingredients, such as flour, sugar, butter, eggs, and food coloring, are readily available at local grocery stores. Specialized items like edible glitter or specific sprinkles can be found at baking supply stores or online retailers.
The art of baking themed party cookies isn't just about creating delicious treats; it's about crafting joyful memories. These simple, step-by-step instructions empower anyone, regardless of baking experience, to bring a touch of personalized magic to any celebration. From birthdays to holidays, the possibilities are as endless as your imagination.
The impact of themed cookies extends far beyond the simple act of eating them. They represent a tangible expression of care and creativity, a symbol of celebration shared with loved ones. The best things in life are the people we love, the places we've been, and the memories we've made along the way.
This quote perfectly encapsulates the enduring power of these small, sweet gestures, transforming ordinary gatherings into cherished moments. The act of creating them, whether alone or with others, fosters a sense of accomplishment and connection, adding another layer of sweetness to the experience.
Now, it's your turn. Don't just passively consume; actively create! Pick a theme, gather your ingredients, and let your creativity flow. Imagine the smiles on the faces of your friends and family as they bite into a cookie you've lovingly crafted. Remember the joy of the process, the satisfaction of creation, and the lasting memories you'll build. The world needs more sweetness, and you have the power to bake it.
Thanks for joining us on this sweet journey into themed party cookies! We hope you've gained the confidence to create truly memorable treats. Ready to take your baking skills to the next level?
- Dive right in and bake your first themed batch! Use the techniques we shared to create cookies for your next gathering – the possibilities are endless!
- Share your creations with us! We'd love to see your cookie masterpieces on social media using #BakeWithEasePartyCookies.
- Experiment with different themes and designs. What unique party cookie idea will you try next?
Ready to transform your baking game? What delicious theme will you tackle first?