
The Easiest Way to Bake Perfect Scones


Welcome to BakeWithEase, your kitchen companion for unlocking baking brilliance! Ever dreamt of effortlessly creating melt-in-your-mouth scones? Our easy perfect scone recipe is your starting point. Discover the secrets behind light, fluffy scones and learn how to avoid common baking pitfalls – all with ingredients you likely already have. Intrigued? Let's get baking!
- The Easiest Way to Bake Perfect Cheddar and Chive Scones: Baking Bliss Guide
- Introduction: Mastering the Easy Cheddar and Chive Scone Recipe
- What Makes a Scone Perfect? Key Elements for Success
-
Step-by-Step: The Easiest Scone Recipe You'll Ever Make
- Step 1: Gathering Your Ingredients - Cheddar and Chive Scone Recipe Essentials
- Step 2: Combining Dry Ingredients - The Foundation of a Perfect Savory Scone
- Step 3: Adding Cold Butter - The Key to Flaky Scones
- Step 4: Incorporating Wet Ingredients - Achieving the Right Dough Consistency
- Step 5: Adding Cheese and Chives - Distributing Flavor Evenly
- Step 6: Shaping the Scones - Tips for Uniform Size and Appearance
- Step 7: Baking Your Scones - Achieving Golden Perfection
- Step 8: Cooling and Serving - Enjoying Your Homemade Scones
- Variations on the Classic Cheddar and Chive Scone Recipe
- Troubleshooting Your Scones: Common Problems and Solutions
- Tips and Tricks for Effortless Scone Baking
- Conclusion: Enjoy Baking Easy Cheddar and Chive Scones with Baking Bliss
-
Frequently Asked Questions
- What makes this scone recipe "easy"?
- What are some common mistakes people make when baking scones, and how does this recipe avoid them?
- Can I substitute any ingredients in this scone recipe, and if so, what are some recommended substitutions?
- How do I ensure my scones are evenly baked and golden brown?
- How long will the scones stay fresh, and how should they be stored?
- Final Reflection: The Enduring Allure of the Perfect Scone
- Unlock Your Inner Baker: Perfect Scones Await!
The Easiest Way to Bake Perfect Cheddar and Chive Scones: Baking Bliss Guide
Introduction: Mastering the Easy Cheddar and Chive Scone Recipe
Baking Bliss Presents: Your Guide to Effortless Savory Scones
Welcome to BakeWithEase, where we believe that delicious baking should be accessible to everyone, regardless of experience level. Today, we're diving into the world of savory treats with a truly game-changing recipe: the easy cheddar and chive scone recipe. Forget complicated techniques and endless steps; this guide is designed to help you bake perfect scones with minimal fuss, resulting in flaky, flavorful delights that are ideal for breakfast, brunch, or a satisfying snack.
Our goal with this guide is to demystify the scone-making process. Many bakers are intimidated by scones, fearing a dry or dense outcome. However, by following a few simple principles and using our step-by-step method, you'll find that creating light and airy scones is well within your reach. This easy scone recipe focuses on efficiency and proven techniques to ensure your success from the very first batch.
Why This Cheddar and Chive Scone Recipe is a Game Changer for Weekday Breakfasts
Mornings can be hectic, and finding time to bake something fresh feels like a luxury. This easy cheddar and chive scone recipe changes that narrative. With ingredients you likely have on hand and a process that takes less than 30 minutes from mixing bowl to oven, these savory scones are a practical and delightful alternative to store-bought options. Imagine starting your day with a warm, cheesy scone straight from your own kitchen!
Beyond speed, the combination of sharp cheddar and fresh chives offers a sophisticated yet comforting flavor profile that's far more exciting than your average pastry. These scones pair wonderfully with eggs, bacon, or simply a smear of butter. The ease of preparation combined with the incredible taste makes this an easy perfect scone recipe you'll turn to again and again, making even the busiest weekday feel a little more special.
What Makes a Scone Perfect? Key Elements for Success
Achieving the Ideal Scone Texture: Light, Fluffy, and Slightly Crumbly
The hallmark of a truly perfect scone is its texture. It should be light and fluffy on the inside, with a tender crumb that isn't overly dense or cakey. There should also be a slight crumbliness, indicating a well-developed structure without being dry. This texture is primarily achieved by careful ingredient ratios, proper fat incorporation, and minimal handling of the dough. Overworking the dough develops gluten, which is great for bread but leads to tough scones.
To get this coveted texture in your easy cheddar and chive scones, pay close attention to how you mix the dry and wet ingredients. The goal is to bring the dough together just until it holds, leaving some dry bits visible is often a good sign you haven't overmixed. The pockets of cold butter melting during baking also create steam, which is crucial for that signature flakiness and lift, contributing significantly to the light and fluffy result.
Essential Ingredients for the Best Scones: A Baking Bliss Breakdown
While the process is key, starting with the right ingredients is fundamental to any easy perfect scone recipe. You'll need standard all-purpose flour, a leavening agent (typically baking powder, and sometimes a touch of baking soda), salt, and sugar (though less is used in savory scones). For the fat, unsalted butter is preferred, and it absolutely must be cold and cut into small pieces or grated. This is non-negotiable for achieving flakiness.
For our easy cheddar and chive scones, you'll also need buttermilk or milk mixed with a little vinegar or lemon juice as the liquid component. Buttermilk adds tenderness and reacts with the baking powder for extra lift. And, of course, generous amounts of shredded sharp cheddar cheese and finely chopped fresh chives are essential for flavor. Using fresh chives provides a brighter, more aromatic taste than dried.
The Secret to Golden Brown Scones: Baking Time and Egg Wash
Achieving that beautiful golden-brown exterior on your easy perfect scones is the final touch that signals they are perfectly baked. This color indicates that the sugars in the dough have caramelized and the surface has developed a slight crispness, contrasting wonderfully with the soft interior. The oven temperature plays a critical role here; a hot oven (around 400°F or 200°C) helps the scones rise quickly and brown evenly.
Applying an egg wash or a milk wash to the tops of the scones just before baking is the key to that rich, golden hue and glossy finish. An egg wash (a beaten egg mixed with a tablespoon of water or milk) provides the most color and shine. A simple milk wash offers a slightly softer brown. Baking time is also crucial; typically, scones bake for 15-20 minutes. They should be well-risen and deeply golden brown on top and around the edges when done.
Step-by-Step: The Easiest Scone Recipe You'll Ever Make
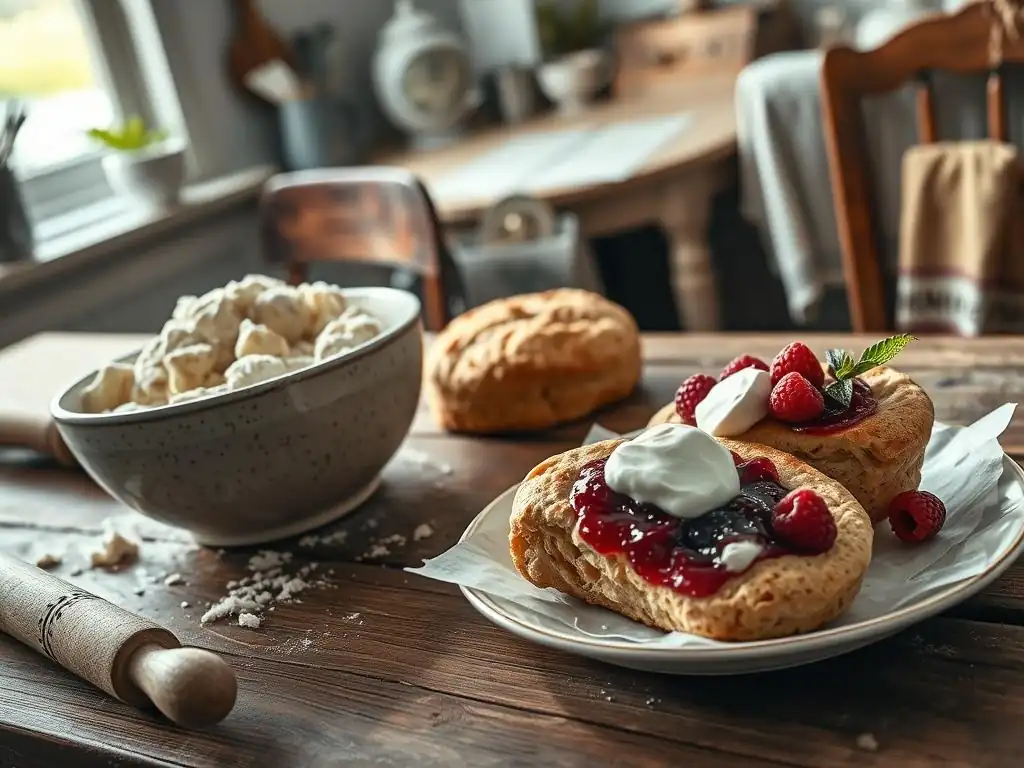
Step 1: Gathering Your Ingredients - Cheddar and Chive Scone Recipe Essentials
Before you begin, ensure you have all your ingredients measured out and ready. This makes the process smooth and prevents you from scrambling mid-recipe, which is crucial for maintaining the cold temperature of your butter. For a standard batch of about 8-10 scones, you'll typically need around 2 cups of all-purpose flour, 2 teaspoons of baking powder, 1/2 teaspoon of baking soda (optional but recommended for tenderness), 1/2 teaspoon of salt, and perhaps a pinch of sugar.
You'll also need 6 tablespoons of very cold unsalted butter, cut into small cubes or grated. Have about 3/4 cup of shredded sharp cheddar cheese and 2-3 tablespoons of finely chopped fresh chives ready. Finally, measure out about 3/4 cup of cold buttermilk (or milk with 1 tsp vinegar/lemon juice mixed in and left for 5 minutes). Don't forget the egg or milk for the wash! Having everything prepped ensures you can move quickly through the mixing steps.
Step 2: Combining Dry Ingredients - The Foundation of a Perfect Savory Scone
In a large mixing bowl, whisk together your dry ingredients: the flour, baking powder, baking soda (if using), salt, and sugar (if using a pinch). Whisking helps to aerate the flour and evenly distribute the leavening agents, which is vital for an even rise. Make sure there are no clumps of baking powder, as this can lead to bitter spots in your finished scones.
Using a large bowl gives you plenty of space to work, especially when incorporating the butter in the next step. Some recipes suggest sifting the dry ingredients, but a thorough whisking is usually sufficient for this easy scone recipe and saves an extra step. Ensure everything is well combined before moving on, as this sets the foundation for the texture of your easy perfect scones.
Step 3: Adding Cold Butter - The Key to Flaky Scones
Now it's time for the star ingredient (after the cheese and chives, perhaps! ): the cold butter. Add your cold butter cubes or grated butter directly into the bowl with the dry ingredients. The goal is to cut the butter into the flour mixture until it resembles coarse crumbs or small peas. You can use a pastry blender, your fingertips, or even a food processor for this step.
If using your fingertips, work quickly and lightly to avoid melting the butter with the heat of your hands. The small pieces of cold butter coated in flour are what create those wonderful pockets of steam during baking, resulting in flaky layers. You should still see visible pieces of butter, ranging in size from small lentils to split peas. Don't overwork it into a fine powder; chunkier pieces are better for flakiness.
Step 4: Incorporating Wet Ingredients - Achieving the Right Dough Consistency
Make a well in the center of the dry ingredients and butter mixture. Pour in the cold buttermilk (or acidified milk). Using cold liquid is just as important as using cold butter, as it helps keep the fat solid until baking. Use a fork or a rubber spatula to gently mix the wet ingredients into the dry.
Mix just until the ingredients are just combined and a shaggy dough forms. It's okay if there are still some dry spots or flour at the bottom of the bowl. Do not overmix! Overmixing develops gluten and will result in tough, hockey-puck-like scones instead of easy perfect scones. The dough will be quite wet and sticky at this stage, which is normal and contributes to a tender scone.
Step 5: Adding Cheese and Chives - Distributing Flavor Evenly
Once the wet and dry ingredients are mostly combined, gently fold in the shredded cheddar cheese and chopped fresh chives. Be careful not to overwork the dough during this step. Use your spatula or hands to lightly incorporate the cheese and chives until they are relatively evenly distributed throughout the shaggy dough.
This step is purely about flavor distribution. The cheese will melt into delicious pockets, and the chives will infuse their mild oniony flavor throughout. Avoid the temptation to knead the dough to make it smooth; the less you handle it, the more tender your easy cheddar and chive scones will be.
Step 6: Shaping the Scones - Tips for Uniform Size and Appearance
Turn the shaggy dough out onto a lightly floured surface. Bring the dough together gently with your hands a couple of times, just enough to form a cohesive mass. Pat the dough into a circle or rectangle about 1/2 to 3/4 inch thick. Avoid rolling it too thin. The thickness of the dough directly impacts how high your scones will rise.
From this disc or rectangle, you can cut your scones. The easiest way is to use a sharp knife or bench scraper to cut the circle into wedges (like a pizza) or the rectangle into squares or rectangles. For uniform round scones, you can use a biscuit cutter, but do not twist the cutter, as this seals the edges and can prevent a good rise. Simply press straight down. Place the cut scones onto a baking sheet lined with parchment paper, leaving about an inch between them.
Step 7: Baking Your Scones - Achieving Golden Perfection
Preheat your oven to a hot temperature, typically around 400°F (200°C). A hot oven is crucial for a good rise and golden crust. While the oven preheats, brush the tops of your shaped scones with an egg wash (for maximum color) or milk wash. This helps them brown beautifully in the oven.
Bake the scones for 15-20 minutes, or until they are well-risen and deeply golden brown on top and the edges. The exact time will vary depending on your oven and the size of your scones. You can check for doneness by inserting a toothpick into the center of a scone; it should come out clean, although melted cheese might make this test tricky. Look for the color and the firm feel of the scone.
Step 8: Cooling and Serving - Enjoying Your Homemade Scones
Once your easy perfect scones are baked to golden perfection, remove the baking sheet from the oven. Let the scones cool on the baking sheet for just a few minutes before transferring them to a wire rack to cool slightly further. Serving scones warm is highly recommended, especially these savory cheddar and chive ones.
While they are best enjoyed warm from the oven, allow them to cool enough so the cheese isn't molten hot. Serve them as they are, or with a dollop of butter. These easy cheddar and chive scones are fantastic alongside soup, chili, or as a standalone snack. Enjoy the fruits of your simple labor!
Variations on the Classic Cheddar and Chive Scone Recipe

Adding Bacon: Enhancing the Savory Profile
One fantastic way to elevate the savory flavor of your easy perfect scones is by adding crispy bacon. Cook 2-3 strips of bacon until crispy, then crumble them into small pieces. Allow the bacon to cool completely before gently folding it into the dough along with the cheese and chives in Step 5.
The salty, smoky flavor of the bacon pairs wonderfully with the sharp cheddar and fresh chives. Ensure the bacon is very dry and crispy before adding it to prevent adding excess moisture to the dough, which could affect the texture of your easy scone recipe. Start with a small amount, perhaps 1/4 cup of crumbled bacon, and adjust in future batches based on your preference.
Using Different Cheeses: Exploring Gruyere, Parmesan and More
While sharp cheddar is a classic choice for this easy cheddar and chive scone recipe, don't hesitate to experiment with other cheeses to change the flavor profile. Gruyere, with its nutty and slightly sweet notes, melts beautifully and adds sophistication. Parmesan offers a salty, umami depth.
You could also use a mix of cheeses, perhaps combining cheddar with a bit of Monterey Jack for extra gooeyness, or adding a touch of smoked gouda for a different dimension. Aim for about the same quantity of cheese as the recipe calls for (around 3/4 cup) to maintain the right balance of wet and dry ingredients. Shredding the cheese yourself from a block often results in better melting than pre-shredded cheese.
Adding Herbs: Rosemary, Thyme, and Other Aromatic Options
Fresh chives provide a delicate onion flavor, but other herbs can introduce different aromatic notes to your easy perfect scones. Finely chopped fresh rosemary or thyme, added along with the chives and cheese, can give the scones a more earthy or woodsy flavor.
About 1-2 teaspoons of finely chopped fresh herbs are usually sufficient, as dried herbs are more potent and should be used sparingly (around half the amount). Consider combinations like cheddar and rosemary, or a blend of cheddar, chives, and thyme. These simple additions allow you to customize your easy scone recipe to suit different meals or preferences.
Troubleshooting Your Scones: Common Problems and Solutions
Scones Too Dry? Tips for Adding Moisture
If your easy cheddar and chive scones turned out dry, the most common culprit is using too much flour or not enough liquid. When measuring flour, spoon it lightly into your measuring cup and level it off; scooping directly from the bag can compact the flour, leading to excess. Ensure you used the full amount of cold buttermilk specified in the recipe.
Another factor could be overmixing the dough, which develops gluten and makes the final product tough and dry. Next time, mix just until the dough comes together. If your dough feels too dry before baking, you can add an extra tablespoon or two of cold buttermilk, mixing just until incorporated, but be cautious not to make it too wet. The dough should be shaggy and a bit sticky.
Scones Not Rising? Troubleshooting Baking Powder and Oven Temperature
Scones that don't rise properly are often due to inactive baking powder or an oven that isn't hot enough. Baking powder loses its potency over time, especially if exposed to moisture. Check the expiration date on your baking powder and ensure it's relatively fresh. You can test it by adding a teaspoon to a small amount of hot water; it should bubble vigorously.
An oven that isn't preheated sufficiently or doesn't maintain the correct temperature will hinder the rapid rise needed for flaky scones. Ensure your oven is fully preheated to 400°F (200°C) before putting the scones in. Using an oven thermometer can help verify your oven's accuracy. The initial blast of heat is crucial for activating the leavening and creating steam from the cold butter.
Scones Too Dense? Avoiding Overmixing
Dense scones are almost always a result of overmixing the dough. When you mix flour and liquid, gluten begins to develop. While essential for bread structure, too much gluten in scones makes them tough and heavy instead of light and tender. Remember, the goal is to mix just until the ingredients are combined and a shaggy dough forms.
Avoid the temptation to knead the dough until it's smooth. Handle the dough as little as possible when bringing it together and shaping it. If you're using a stand mixer, be extra careful and mix on the lowest speed for the shortest time necessary. Hand mixing is often preferred for scones to prevent overworking. By being gentle and brief, you ensure your easy perfect scones remain tender and light.
Tips and Tricks for Effortless Scone Baking

The Importance of Cold Butter for Perfect Scones
We've mentioned it before, but it bears repeating: using very cold butter is perhaps the single most important tip for achieving flaky, light scones. The small pieces of cold butter melt in the hot oven, creating steam pockets within the dough. These steam pockets are what push the layers apart, resulting in that wonderful flakiness.
If your butter starts to soften while you're working with it, pop the bowl (or the shaped scones) into the refrigerator or freezer for 10-15 minutes before baking. This ensures the butter is firm when it hits the hot oven. Some bakers even freeze their butter and grate it directly into the flour mixture for maximum coldness and even distribution.
Working Quickly: Minimizing Gluten Development
Speed is your friend when making scones. The less time you spend mixing and handling the dough, the less gluten will develop. Work efficiently through the steps of combining dry ingredients, cutting in the butter, adding the liquid, and bringing the dough together.
Once the wet ingredients are added, aim to have the dough shaped and on the baking sheet within a few minutes. This quick handling, combined with using cold ingredients, keeps the butter solid and minimizes gluten formation, ensuring your easy perfect scones are tender and light.
Baking Sheet Placement: Ensuring Even Baking
Where you place your baking sheet in the oven can impact how your easy cheddar and chive scones bake. For most ovens, the middle rack provides the most even heat circulation, ensuring the bottoms don't burn before the tops are golden.
If you are baking multiple batches or using multiple sheets, avoid crowding the oven, as this can lower the temperature and lead to uneven baking. It's better to bake in batches if necessary. Rotate the baking sheet halfway through the baking time if you notice uneven browning, though this is often unnecessary if using the middle rack and a properly preheated oven.
Storing Your Scones: Keeping Them Fresh
Easy perfect scones are definitely best enjoyed warm from the oven. However, if you have leftovers, store them correctly to maintain as much freshness as possible. Once completely cooled, store scones in an airtight container at room temperature for up to 2-3 days.
To reheat, place them on a baking sheet in a preheated oven at 300°F (150°C) for 5-10 minutes until warmed through. Avoid microwaving, as this can make them tough. You can also freeze baked scones for longer storage. Once cooled, wrap them individually in plastic wrap and then place them in a freezer bag. Thaw at room temperature and reheat as desired.
Conclusion: Enjoy Baking Easy Cheddar and Chive Scones with Baking Bliss
You've Mastered the Easy Scone Recipe! What's Next?
Congratulations! You've successfully baked a batch of delicious, easy perfect scones using our straightforward cheddar and chive scone recipe. You've learned the importance of cold ingredients, minimal handling, and proper baking techniques. This experience should give you the confidence to tackle other scone variations and baking projects.
Now that you've mastered this easy scone recipe, consider trying the variations we suggested or experimenting with your own flavor combinations. Perhaps a sweet scone next? The fundamental principles you've learned here apply to many scone recipes, making you well-equipped to explore further in the world of baking.
We love seeing what our community is baking! Your success with this easy perfect scone recipe is our success. We encourage you to share photos of your beautiful cheddar and chive scones and tell us about your baking experience.
Join the conversation, ask questions, and get inspiration from other bakers. Sharing your creations is a great way to celebrate your baking achievements and connect with fellow enthusiasts on their journey to bake perfect scones and other delightful treats.
Frequently Asked Questions
What makes this scone recipe "easy"?
This recipe emphasizes simple steps and easily accessible ingredients. It avoids complex techniques to ensure even beginner bakers can achieve success.
What are some common mistakes people make when baking scones, and how does this recipe avoid them?
Common mistakes include overmixing and using warm ingredients. This recipe stresses gentle mixing and cold ingredients for a light and fluffy texture.
Can I substitute any ingredients in this scone recipe, and if so, what are some recommended substitutions?
While substitutions are possible, they may affect the final result. You can substitute milk with cream for a richer flavor, or use gluten-free flour but adjust the liquid accordingly.
How do I ensure my scones are evenly baked and golden brown?
Ensure your oven is properly preheated and that scones are placed evenly on the baking sheet. Brushing with egg wash promotes even browning and a beautiful sheen.
How long will the scones stay fresh, and how should they be stored?
Scones are best enjoyed fresh. Store them in an airtight container at room temperature for up to two days, or freeze for longer storage.
Final Reflection: The Enduring Allure of the Perfect Scone
The seemingly simple act of baking a perfect scone speaks volumes about our desire for comfort, tradition, and a touch of effortless elegance in our daily lives. From humble beginnings, the scone has evolved into a beloved treat, enjoyed across cultures and generations. Its enduring popularity is a testament to the joy found in simple pleasures, perfectly executed.
The journey to mastering the perfect scone, as detailed in this article, is more than just a recipe; it's a reflection of our relationship with food and the satisfaction derived from creating something delicious from scratch. It's about the quiet moments spent measuring ingredients, the gentle folding of the dough, and the anticipation of that first, warm bite. The best things in life are simple,
a sentiment perfectly embodied by the humble scone. This simple act of baking connects us to a culinary heritage, reminding us of the importance of slowing down and savoring the process.
Now, I invite you to take what you've learned and embark on your own scone-baking adventure. Don't be afraid to experiment, to tweak the recipe to your liking, and to share the joy of perfectly baked scones with those you love. Remember the feeling of accomplishment, the aroma filling your kitchen, and the sheer delight of that first bite. The perfect scone awaits – go forth and bake!
Unlock Your Inner Baker: Perfect Scones Await!
Thanks for taking the time to explore the art of perfect scones with us! We hope you’ve gained valuable insights and feel confident in tackling your next baking adventure. Ready to put your new skills to the test?
- Bake a batch of scones today! Use your newfound knowledge to create a delicious treat – experiment with different flavors and share your creations!
- Share your scone journey! Snap a picture of your baking masterpiece and post it on social media, tagging us—we’d love to see your results.
- Explore other BakeWithEase recipes: Discover a world of simple, delicious recipes designed to make baking fun and easy.
So, what incredible scone flavor will you conquer first?