
NoFail Basic Scone Recipe


Welcome to BakeWithEase, your kitchen companion for all things baking! Ever dreamed of creating perfectly golden, melt-in-your-mouth scones, but felt intimidated? Fear no more! Dive in and discover our NoFail Basic Scone Recipe, a foolproof guide designed for even the most novice baker. Ready to unlock the secrets to light, fluffy scones every single time? Let's get baking!
- Classic Buttermilk Scone Recipe: A Beginner's Guide
- Introduction to Easy Scones: Your Classic Recipe Starts Here
- Gathering Your Ingredients for Classic Buttermilk Scones
- Step-by-Step Guide to Making Classic Buttermilk Scones
- Baking Variations: Elevating Your Scone Recipe
- Troubleshooting Common Scone Baking Problems
- Storing and Enjoying Your Homemade Scones
- Frequently Asked Questions
- Final Reflection: The Enduring Power of a Perfect Scone
- Unlock Your Inner Baker: Make Perfect Scones Today!
Classic Buttermilk Scone Recipe: A Beginner's Guide
Introduction to Easy Scones: Your Classic Recipe Starts Here
Welcome to the wonderful world of baking! If you're looking for a simple yet satisfying project, learning how to make classic buttermilk scones is an excellent starting point. This recipe is designed with beginners in mind, focusing on straightforward techniques and common ingredients to help you achieve delicious results on your first try. Forget complicated steps or elusive ingredients; we're breaking it down to basics to build your baking confidence.
Scones are a delightful treat, perfect for breakfast, brunch, or an afternoon pick-me-up with tea or coffee. They offer a delicate balance of a slightly crisp exterior and a tender, flaky interior. Mastering a nofail basic scone recipe like this one will give you a versatile foundation that you can later adapt with various flavors and additions, truly making it your own.
Why This Is a Great Scone Recipe for Beginners
This classic buttermilk scone recipe stands out as ideal for those new to baking primarily because it relies on simple, accessible techniques and common pantry staples. Unlike some pastries that require complex folding or chilling processes, making scones involves minimal handling of the dough, which is key to their tender texture. The steps are logical and easy to follow, reducing the likelihood of common mistakes that can lead to tough or flat scones.
Furthermore, using buttermilk is a secret weapon in this nofail basic scone recipe. The acidity in buttermilk reacts with the leavening agents (like baking powder and baking soda) to create a lighter, fluffier scone. It also helps to break down gluten strands, ensuring a more tender crumb. We'll walk you through each step clearly, from mixing the dry ingredients to achieving that perfect golden-brown crust, making this a genuinely achievable baking success for anyone.
Simple Ingredients, Perfect Scones
One of the best aspects of this classic buttermilk scone recipe is its reliance on just a handful of basic ingredients that you likely already have or can easily find at any grocery store. You'll need flour, sugar, baking powder, baking soda, salt, cold butter, and buttermilk. That's it for the core recipe! The quality of these simple ingredients does play a role, so using fresh buttermilk and good quality butter is recommended for the best flavor and texture.
The magic happens when these simple components are combined correctly. The ratio of dry to wet ingredients is crucial for achieving the right dough consistency – not too wet, not too dry. By using precise measurements (we recommend using a kitchen scale for accuracy, but volume measurements work too, just be careful not to pack the flour), you're setting yourself up for success with this nofail basic scone recipe. We'll discuss specific quantities in the next section.
Gathering Your Ingredients for Classic Buttermilk Scones
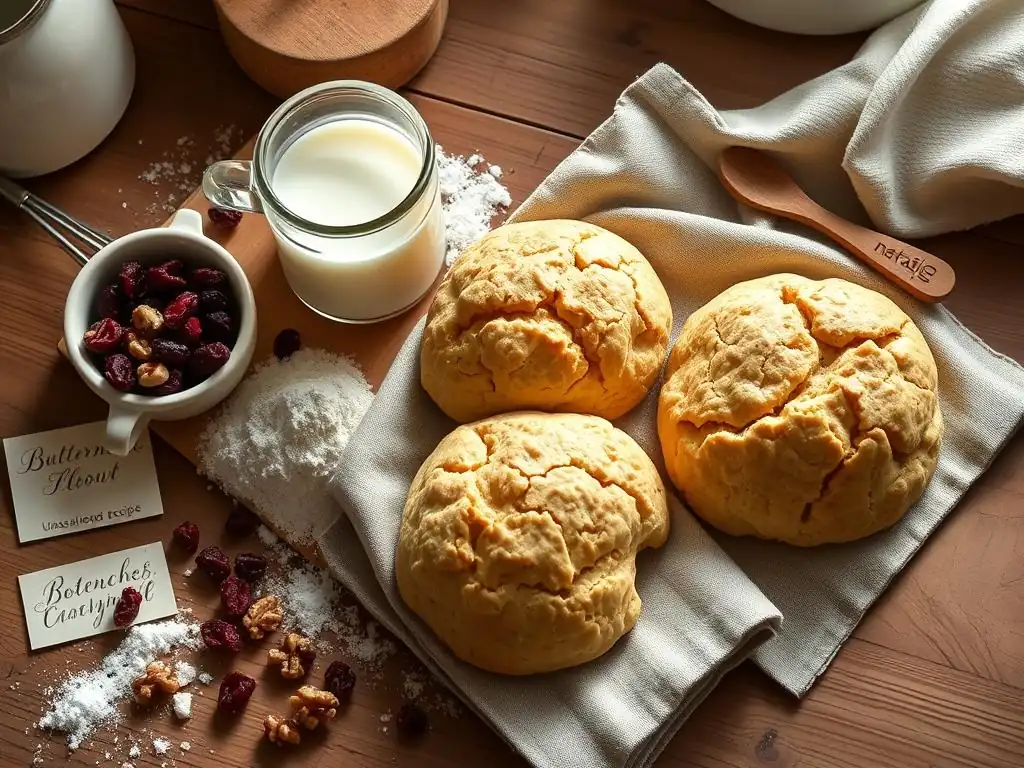
Having all your ingredients measured and ready before you start mixing is a practice known as "mise en place" in the culinary world, and it's incredibly helpful for baking. It ensures you don't forget anything and makes the process flow smoothly. For this classic buttermilk scone recipe, we'll break down the essential components you'll need.
Remember, using cold ingredients, especially the butter and buttermilk, is vital for creating those desirable flaky layers. Plan ahead and make sure your butter is straight from the refrigerator and your buttermilk is chilled. This small step makes a big difference in the final outcome of your nofail basic scone recipe.
Essential Dry Ingredients
The foundation of our classic buttermilk scones lies in the dry ingredients. You'll need all-purpose flour, which provides the structure. Approximately 2 cups (about 240-250 grams) is a standard amount for a batch producing about 8-10 scones, though exact yield depends on how you cut them. Granulated sugar adds a touch of sweetness; around 1/4 cup (50 grams) is usually sufficient for a classic scone that isn't overly sweet.
Leavening is critical for achieving a light and airy texture. This recipe calls for a combination of baking powder and baking soda. A typical ratio might be 1 tablespoon of baking powder to 1/2 teaspoon of baking soda. Salt is also essential, typically 1/2 teaspoon, as it balances the sweetness and enhances the overall flavor profile. Whisking these dry ingredients together ensures they are evenly distributed before the wet ingredients are added.
Key Wet Ingredients
The primary wet ingredient that gives these scones their characteristic tenderness and tang is buttermilk. You'll need approximately 3/4 cup (180 ml) of cold buttermilk. If you don't have buttermilk, you can make a substitute by adding 1 tablespoon of white vinegar or lemon juice to 3/4 cup of milk (preferably whole milk) and letting it sit for 5-10 minutes until it curdles slightly. While the substitute works, real buttermilk provides the best flavor and texture for this classic buttermilk scone recipe.
The other critical "wet" component, though solid at room temperature, is butter. You'll need about 1/2 cup (1 stick, or 113 grams) of very cold, unsalted butter. We'll discuss how to incorporate this properly in the steps section, as it's key to the flakiness. Some recipes also call for an egg, but this nofail basic scone recipe keeps it simple by relying solely on buttermilk and butter for moisture and richness.
Optional Add-Ins to Customize Your Scones [Example: Dried Cranberries, Orange Zest]
Once you've mastered the nofail basic scone recipe, you can easily customize your batch with various additions to suit your taste. These are mixed in with the dry ingredients before the butter is added. For a sweet twist, consider adding about 1/2 cup of dried cranberries or blueberries, or 1/4 cup of chocolate chips. These add bursts of flavor and texture.
Another popular sweet variation involves citrus zest. Adding the zest of one orange or one lemon (about 1-2 tablespoons) to the dry ingredients infuses the scones with a bright, fragrant note. For a savory option, you could incorporate 1/2 cup of shredded cheddar cheese and 2 tablespoons of finely chopped chives. Experimenting with these simple additions is a fun way to make this classic buttermilk scone recipe your own!
Step-by-Step Guide to Making Classic Buttermilk Scones
Making scones is a relatively quick process, from start to finish often taking less than an hour. Following these steps carefully will help ensure you achieve that perfect, tender crumb and golden exterior that makes this a truly nofail basic scone recipe. Remember to work efficiently but gently with the dough.
The key to success lies in minimal handling and keeping ingredients cold. Resist the urge to overwork the dough, as this develops gluten and can result in tough scones. Trust the process, and you'll be rewarded with delicious, homemade classic buttermilk scones.
Step 1: Preparing the Dry Ingredients
Begin by whisking together all your dry ingredients in a large mixing bowl. This includes the all-purpose flour, granulated sugar, baking powder, baking soda, and salt. Using a whisk helps to evenly distribute the leavening agents and salt throughout the flour, which is essential for uniform rising and flavor in your nofail basic scone recipe.
If you are using any optional dry add-ins like dried fruit, nuts, or citrus zest, now is the time to stir them into the whisked dry ingredients. Ensure they are well distributed so that each scone gets a fair share of the additions. This initial mixing step is simple but important for the overall success of the recipe.
Step 2: Incorporating the Butter
This step is crucial for achieving flaky scones. You need to cut the very cold butter into the dry ingredients until the mixture resembles coarse crumbs or small peas. There are a few ways to do this: you can use a pastry blender, two forks, or even your fingertips. If using your fingertips, work quickly to avoid melting the butter with the heat of your hands.
The goal is to have small, distinct pieces of butter coated in flour. As the scones bake, these butter pieces will melt, creating steam that pushes the layers of dough apart, resulting in a light, flaky texture. Avoid overmixing here; leaving some slightly larger pieces (up to the size of small peas) is actually beneficial for flakiness in your nofail basic scone recipe.
Tips for Working with Cold Butter
- Keep it chilled: The colder the butter, the better. Some bakers even recommend freezing the butter for 10-15 minutes before cutting it in. You can also grate frozen butter directly into the flour mixture using a box grater.
- Work quickly: Whether using your hands or a pastry blender, try to work as quickly as possible to prevent the butter from softening. If the butter starts to feel warm or greasy, pop the bowl into the refrigerator for 5-10 minutes to chill it down before continuing.
- Size matters: Aim for pieces ranging from the size of coarse sand to small peas. Uniformity isn't strictly necessary, but having a mix of sizes helps create varied layers and pockets of flakiness throughout your classic buttermilk scones.
Step 3: Adding the Buttermilk and Forming the Dough
Make a well in the center of your dry ingredients/butter mixture. Pour the cold buttermilk into the well. Use a fork or a rubber spatula to gently mix the wet and dry ingredients together until they are just combined. Be careful not to overmix; the dough will look shaggy and slightly dry in places, and that's perfectly fine.
Once the majority of the dry ingredients are moistened, turn the dough out onto a lightly floured surface. Gently bring the dough together with your hands just until it forms a cohesive mass. Avoid kneading it like bread dough. A minute or two of gentle pressing and folding is usually sufficient to make it stick together without developing too much gluten. This minimal handling is key to a tender nofail basic scone recipe.
Step 4: Shaping and Cutting Your Scones
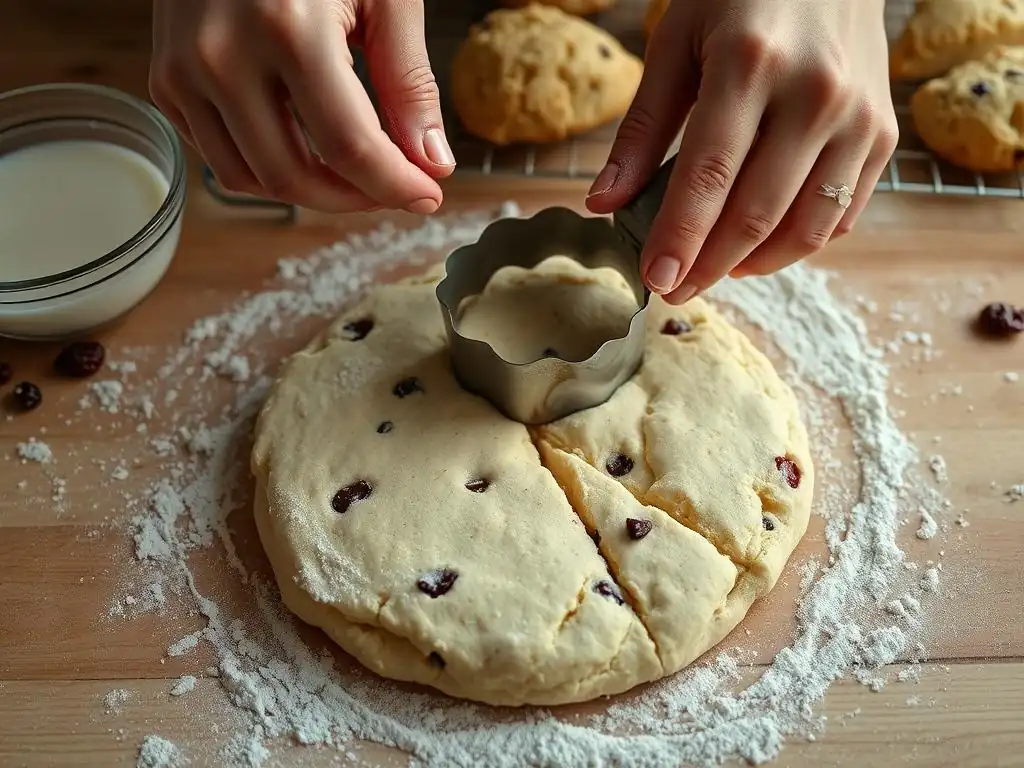
Once the dough is just combined, pat it gently into a circle or rectangle about 3/4 inch to 1 inch thick. You can do this directly on your lightly floured surface or on a piece of parchment paper, which makes transferring the scones to the baking sheet easier. Avoid using a rolling pin, as this can compress the dough and prevent it from rising properly.
Using a sharp knife, a bench scraper, or a round biscuit cutter, cut the dough into your desired shapes. Triangles (cut the circle/rectangle into wedges) are classic and easy, producing minimal scraps. If using a cutter, press straight down without twisting to get clean edges, which helps the scones rise evenly. Arrange the cut scones on a baking sheet lined with parchment paper, leaving about an inch between them.
Achieving Uniform Shapes for Even Baking
While rustic shapes are charming, aiming for relatively uniform size and thickness is important for ensuring all your classic buttermilk scones bake evenly. If some are significantly thicker or thinner than others, you'll end up with some that are overdone while others are underbaked.
If you're using a biscuit cutter and have scraps, gently press the scraps together and pat them out again to cut more scones. However, handle these scraps as little as possible, as reprocessing them can make the resulting scones slightly tougher than the first cuts. For the most uniform results with a nofail basic scone recipe, cutting wedges from a patted-out circle is often the easiest method for beginners.
Step 5: Baking Your Scones to Golden Perfection
Before baking, you can brush the tops of the scones with a little extra buttermilk, milk, or even an egg wash (egg whisked with a tablespoon of water or milk). This helps them achieve a beautiful golden-brown color and a slightly crisp top crust. A sprinkle of coarse sugar on top can also add sparkle and a touch of sweetness.
Preheat your oven to a relatively high temperature, typically between 375°F and 400°F (190°C to 200°C). The higher heat helps the scones rise quickly and set their shape before the butter melts completely, contributing to flakiness. Place the baking sheet in the preheated oven and bake for approximately 12 to 18 minutes, depending on their size and your oven.
Oven Temperature and Baking Time
The exact baking time for your nofail basic scone recipe will vary based on your oven's calibration and the thickness of your scones. Start checking around the 12-minute mark. Scones are done when they are well-risen, the tops are golden brown, and a wooden skewer or toothpick inserted into the center comes out clean.
Baking at 400°F (200°C) typically results in a faster bake (around 12-15 minutes) and a slightly crisper exterior, while 375°F (190°C) might take a few minutes longer (15-18 minutes) and produce a slightly softer crust. Keep an eye on them during the last few minutes to prevent burning. Don't be afraid to rotate the baking sheet halfway through for more even browning.
Baking Variations: Elevating Your Scone Recipe
Once you feel confident with the nofail basic scone recipe, you're ready to explore the exciting world of variations! The beauty of this classic buttermilk scone recipe is how easily it can be adapted to create a wide range of flavors, from sweet treats to savory delights, and even adjusted for different dietary needs.
Think of the basic dough as a blank canvas. By simply adding ingredients like fruits, chocolate, cheese, herbs, or spices, you can transform a simple scone into something entirely new and exciting. This section provides ideas to inspire your next baking adventure, building upon the foundational skills you've just learned.
Sweet Scone Variations: From Lemon Poppy Seed to Chocolate Chip
Sweet variations are incredibly popular and easy to make by incorporating additions into your nofail basic scone recipe dough. For a bright, zesty flavor, add the zest of one lemon and 1-2 tablespoons of poppy seeds to the dry ingredients. This creates delicious Lemon Poppy Seed scones.
Chocolate lovers can stir in about 1/2 cup of chocolate chips (milk, dark, or white) along with the dry ingredients. For fruitier options, dried cranberries, blueberries, currants, or chopped dried apricots (about 1/2 cup) work wonderfully. Ensure dried fruits are not too sticky; tossing them with a tiny bit of flour can help prevent them from clumping together in the dough.
Savory Scone Variations: Cheddar and Chive, Rosemary and Parmesan
Scones aren't just for sweet occasions! Savory scones make a fantastic accompaniment to soups, stews, or even as a simple snack. To make Cheddar and Chive scones from your nofail basic scone recipe, add about 1/2 to 3/4 cup of shredded sharp cheddar cheese and 2-3 tablespoons of finely chopped fresh chives to the dry ingredients.
Another delightful savory option is Rosemary and Parmesan. Incorporate about 1/2 cup of grated Parmesan cheese and 1-2 tablespoons of finely chopped fresh rosemary into the dry mix. You can also experiment with other herbs like thyme, dill, or even spices like black pepper or a pinch of cayenne for a little heat. Savory additions open up a whole new dimension for your classic buttermilk scone recipe.
Adjusting the Recipe for Dietary Needs [Example: Gluten-Free, Dairy-Free]
Adapting your nofail basic scone recipe for dietary restrictions is possible with some simple substitutions. For a gluten-free version, you can typically substitute the all-purpose flour with a good quality gluten-free all-purpose flour blend. Look for blends that contain xanthan gum, which helps provide structure in the absence of gluten. You might need to adjust the amount of liquid slightly, as gluten-free flours can absorb moisture differently.
To make dairy-free scones, substitute the buttermilk with a dairy-free alternative like almond milk, soy milk, or oat milk mixed with a tablespoon of vinegar or lemon juice to curdle it. Replace the butter with a solid, non-hydrogenated dairy-free butter substitute. Ensure all other ingredients like sugar and leavening agents are also dairy-free. These adjustments allow more people to enjoy your delicious, adapted classic buttermilk scone recipe.
Troubleshooting Common Scone Baking Problems
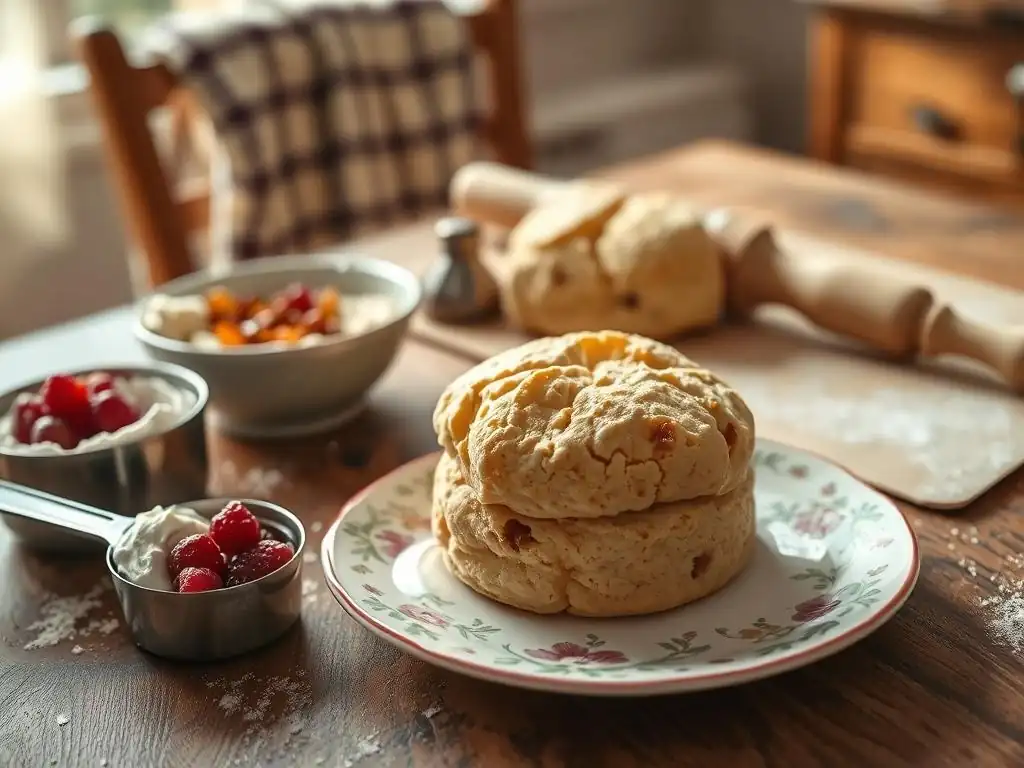
Even with a nofail basic scone recipe, sometimes things don't go exactly as planned, especially when you're starting out. Understanding common issues and how to fix or prevent them will make you a more confident baker. Don't be discouraged if your first batch isn't perfect; each attempt is a learning experience.
Most scone problems stem from issues with ingredients (temperature, measurement) or technique (overmixing, handling). Let's look at some of the most frequent questions and how to address them to ensure your next batch of classic buttermilk scones is a complete success.
Why Are My Scones Flat?
Flat scones are a common issue and usually indicate a problem with leavening or dough handling. Ensure your baking powder and baking soda are fresh; expired leavening agents won't provide the necessary lift. Check the expiration dates on the containers – leavening can lose potency over time, especially if stored improperly.
Another major culprit is overworking the dough. Too much mixing develops gluten, which makes the dough elastic and prevents it from rising high. Also, warm butter that melts into the dough before baking won't create those steam pockets needed for lift. Make sure your butter is very cold and incorporated properly, and handle the dough minimally when bringing it together and shaping. Patting the dough too thin (less than 3/4 inch) will also result in flatter scones from your nofail basic scone recipe.
Why Are My Scones Dry?
Dry, crumbly scones are often the result of too much flour or not enough liquid. Ensure you are measuring your flour correctly – spooning flour directly from the bag into a measuring cup can result in significantly more flour than scooping and leveling. Using a kitchen scale (measuring 240-250g for 2 cups) is the most accurate method.
The amount of buttermilk needed can vary slightly depending on the humidity and the flour used. If your dough feels excessively dry and won't come together easily, you may need to add a tiny bit more buttermilk, a tablespoon at a time, until the dough just holds together. Conversely, if you accidentally added too much flour, the liquid won't be sufficient. Stick closely to the specified amounts in the nofail basic scone recipe structure, and adjust only if the dough is clearly too dry to form.
Achieving the Perfect Golden-Brown Crust
A beautiful golden-brown crust makes scones look as good as they taste. If your scones are pale after the recommended baking time, they likely need a few more minutes in the oven. Ensure your oven is accurately preheated to the correct temperature; an oven thermometer can help verify this.
Brushing the tops of the scones before baking is the most effective way to achieve a nice color. A simple wash of milk or buttermilk will help the tops brown gently. For a deeper golden color and a slightly richer finish, use an egg wash (one egg whisked with a tablespoon of water or milk). Baking at a slightly higher temperature (like 400°F/200°C) can also promote quicker browning and a crispier crust on your classic buttermilk scones.
Storing and Enjoying Your Homemade Scones
Freshly baked scones are undeniably best enjoyed warm from the oven, perhaps split and slathered with butter, jam, or clotted cream. However, it's useful to know how to store them properly to maintain their quality for as long as possible and how to reheat them to bring back some of that fresh-baked goodness.
Proper storage techniques help prevent your delicious nofail basic scone recipe creations from becoming stale or dry too quickly. Knowing how to store and reheat means you can enjoy the fruits of your baking labor over a couple of days.
Best Practices for Keeping Scones Fresh
Once your classic buttermilk scones have cooled completely on a wire rack, the best way to store them for short-term use (1-2 days) is in an airtight container at room temperature. Placing a piece of parchment paper between layers can prevent them from sticking if you stack them. Avoid storing them in the refrigerator, as this can actually dry them out and make them tough.
For longer storage, scones freeze exceptionally well. Once cooled, place them in a single layer on a baking sheet and freeze until solid (about 1-2 hours). Then, transfer the frozen scones to a freezer-safe bag or container, removing as much air as possible. Frozen scones can be stored for up to 2-3 months without significant loss of quality, allowing you to enjoy your nofail basic scone recipe anytime.
Reheating Tips
To enjoy scones stored at room temperature, you can simply warm them gently in a toaster oven or conventional oven. Preheat the oven to about 300°F (150°C) and warm the scones for 5-10 minutes, or until heated through. This helps to crisp up the exterior slightly and warm the interior.
If reheating frozen scones, you can bake them directly from frozen. Place them on a baking sheet and bake in a preheated oven at 300-325°F (150-160°C) for about 20-30 minutes, or until heated through and the tops are re-crisped. Reheating brings back some of that lovely texture and warmth, making your stored nofail basic scone recipe taste almost fresh.
Serving Suggestions: Pairings and Toppings
Classic buttermilk scones are incredibly versatile and pair beautifully with a variety of toppings and accompaniments. The traditional pairing is with clotted cream and jam, often strawberry or raspberry. This is a truly indulgent way to enjoy the tender crumb of your nofail basic scone recipe.
Other popular toppings include softened butter, honey, or various fruit curds (like lemon curd). For a simple yet delicious experience, enjoy them warm with just a generous slathering of good quality butter that melts into the crevices. If you made savory scones, serve them with extra butter, alongside a meal, or even split and used for mini sandwiches. Enjoy your homemade classic buttermilk scones!
Frequently Asked Questions
What makes this scone recipe "NoFail"?
This recipe is "NoFail" because it focuses on precise measurements and gentle handling of the dough, minimizing the risk of dry or tough scones. It uses readily available ingredients and clear instructions.
What are the key ingredients for a basic scone recipe?
The key ingredients typically include flour, butter (cold!), baking powder, sugar, and milk or cream. These create the structure, leavening, sweetness, and moisture needed for a perfect scone.
What is the most important technique for making light and fluffy scones?
The most important technique is to avoid overmixing the dough. Overmixing develops gluten, resulting in tough, less fluffy scones.
Can I add different flavors or ingredients to this basic scone recipe?
Yes, absolutely! This recipe is a great base for experimentation. You can add berries, chocolate chips, dried fruit, or even savory ingredients like cheese and herbs.
How should I store leftover scones to keep them fresh?
Store leftover scones in an airtight container at room temperature. They're best enjoyed within 1-2 days, but can also be frozen for longer storage.
Final Reflection: The Enduring Power of a Perfect Scone
The seemingly simple act of baking a scone holds a surprising power; it's a gateway to comfort, connection, and the joy of creating something delicious from scratch. This recipe, designed to be foolproof, aims to democratize this pleasure, ensuring everyone can experience the satisfaction of a perfectly golden, crumbly scone. It's more than just a recipe; it's a promise of success.
The influence of baking, and specifically the comforting ritual of making scones, transcends mere culinary skill. It's a tradition passed down through generations, a symbol of home, and a potent reminder of simpler times. Baking is at once child's play and adult joy. And love, of course.
This quote perfectly encapsulates the emotional resonance of baking, and scones, with their inherent simplicity, embody this sentiment beautifully. The act of sharing these homemade treats further strengthens bonds and creates lasting memories.
Now, I invite you to roll up your sleeves, gather your ingredients, and embark on your own scone-baking adventure. Don't be intimidated by the process; embrace the opportunity to create something delicious and share the joy with those you love. Remember the feeling of that first perfect bite, the warmth spreading through you, and the satisfaction of a job well done. Let this recipe be your starting point, your springboard to culinary confidence, and a reminder that even the simplest things can bring immense pleasure.
Unlock Your Inner Baker: Make Perfect Scones Today!
Thanks for taking the time to explore our foolproof scone recipe! We hope you gained the confidence to tackle this classic bake. Now it’s time to put your new skills to the test!
- Bake a batch of scones today! Use the recipe as your guide, and don't be afraid to experiment with your favorite add-ins.
- Share your baking journey! Snap a photo of your finished scones and tag us on social media – we'd love to see your creations!
- Challenge yourself: Try adapting this recipe to make savory scones next time. What unique flavors will you try?
What creative twist will you add to your perfect scones? Let us know in the comments below!