
Perfectly Uniform Classic Cookies: Beginner Scooping Tips

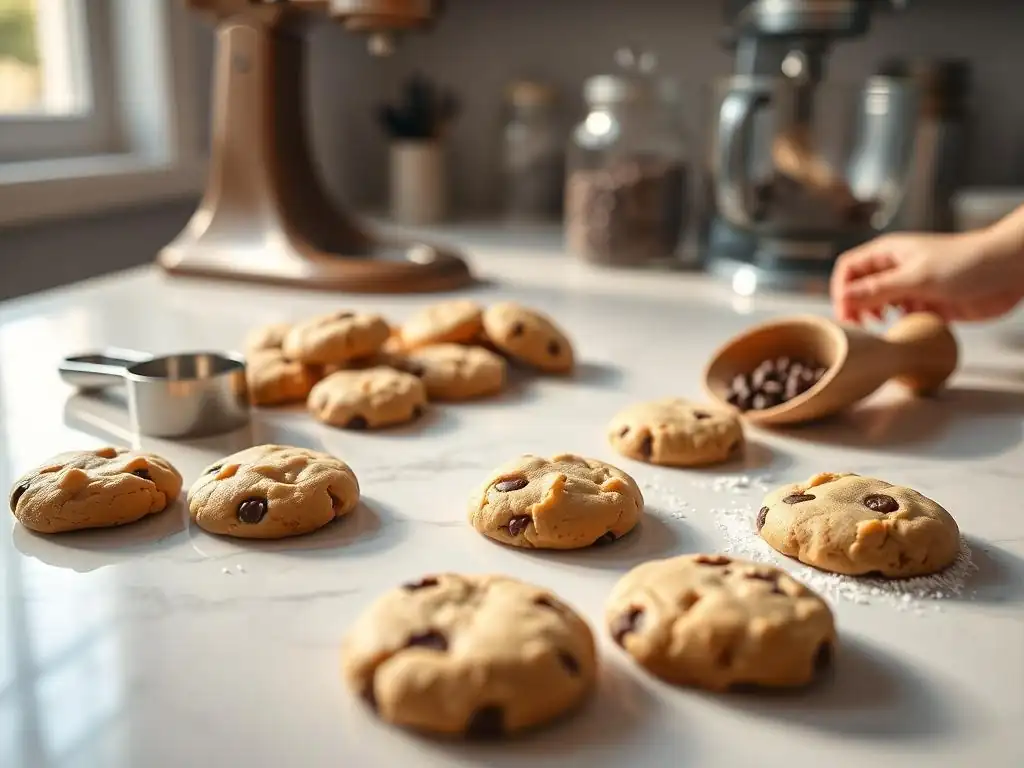
Welcome to BakeWithEase, where your baking journey begins! Whether you're just starting or refining your skills, our resource hub is designed to make baking as enjoyable as it is rewarding. In today's feature, we're diving into the world of Beginner cookie scooping techniques—an essential skill for creating perfectly uniform classic cookies that will impress everyone. Are you ready to elevate your baking game? Let’s explore the simple tips and tricks that will have you scooping like a pro in no time!
- Bake Uniform Cookies: Mastering Cookie Scooping Techniques
- Why Uniform Cookie Scoops Matter for Perfect Baking
- Essential Tools for Cookie Scooping
- Step-by-Step Guide to Perfect Cookie Scooping
- Troubleshooting Common Cookie Scooping Problems
- Advanced Cookie Scooping Techniques for Uniformity
- Baking Tips for Even Results
- Perfectly Uniform Chocolate Chip Cookies: Recap of Scooping Tips
-
Frequently Asked Questions
- How important is using a cookie scoop for uniform cookies?
- What size cookie scoop should I use for standard-sized cookies?
- Can I use a spoon instead of a cookie scoop?
- What are some common mistakes beginners make when scooping cookie dough?
- How do I prevent cookie dough from sticking to the cookie scoop?
- Final Reflection: The Sweet Science of Consistent Cookies
- Unleash Your Inner Cookie Pro!
Are you tired of baking batches of cookies where some are perfectly golden and others are pale or even burnt? One of the most overlooked yet crucial steps in achieving baking consistency, especially for classic treats like chocolate chip cookies, is mastering the art of cookie scooping. For beginner bakers, developing solid beginner cookie scooping techniques is fundamental to success. It's not just about getting dough from the bowl to the baking sheet; it's about ensuring each portion is the same size, leading to predictable baking results and beautiful cookies every time.
This guide delves into the essential beginner cookie scooping techniques that will transform your baking from haphazard to consistently excellent. We'll explore why uniformity matters, the tools you need, step-by-step methods, troubleshooting common issues, and even touch on more advanced tips. By implementing these simple strategies, your classic cookies will bake evenly, look professional, and taste their absolute best. Let's get scooping!
Consistent cookie size is paramount for even baking. When cookies on the same baking sheet vary significantly in size, they will bake at different rates. Smaller cookies will finish baking much faster than larger ones.
This often results in a frustrating scenario where you either pull the tray too early, leaving the larger cookies underbaked and potentially raw in the center, or you leave them in longer to cook the larger ones, inevitably burning the edges of the smaller cookies. For instance, a 1-inch diameter cookie might bake in 8 minutes, while a 2-inch diameter cookie from the same dough could take 12 minutes or more. Without uniform sizes, achieving that perfect golden-brown edge and soft, slightly gooey center becomes a matter of luck, not skill.
Mastering beginner cookie scooping techniques directly addresses this issue. Using a consistent method and tool ensures that each portion of dough weighs roughly the same and has a similar volume. This uniformity means that when placed in the oven, all cookies on the tray will receive the same amount of heat energy and should reach the desired level of doneness simultaneously.
Imagine baking a batch of classic chocolate chip cookies; with uniform scoops, you can confidently set a timer for, say, 10 minutes, knowing that all cookies will be perfectly baked when the timer goes off. This precision is a hallmark of good baking and starts with consistent scooping.
Beyond the functional aspect of even baking, uniform cookie scoops significantly impact the visual appeal of your baked goods. Whether you're baking for a bake sale, a party, or just for your family, a tray of consistently sized cookies looks incredibly professional and inviting. It demonstrates care and precision in your baking process. Think about the difference between a plate of cookies that are all roughly the same shape and size versus a plate where each cookie is dramatically different – some large and lumpy, others small and flat. The uniform batch simply looks more appetizing and well-executed.
Achieving this polished look is a direct benefit of focusing on beginner cookie scooping techniques. Using a scoop helps create a relatively round, tidy portion of dough that holds its shape better during baking. While some cookies naturally spread or change shape, starting with a uniform sphere or mound sets the stage for a more consistent final product. This attention to detail in presentation is especially important if you ever plan to gift or sell your baked goods, as visual appeal is often the first impression.
Portion Control: Managing Serving Sizes with Precise Scoops
Using a cookie scoop also provides excellent portion control, which can be beneficial for managing serving sizes and calorie counts, if that's a consideration. When you scoop consistently, you know approximately how many cookies a batch of dough will yield and the relative size of each serving. This is much more difficult to estimate if you're simply dropping dough by spoonfuls of varying sizes. For recipes that specify a yield (e.g., "makes 24 cookies"), using a specific size scoop is often implied to achieve that yield and the intended cookie size.
Furthermore, consistent portioning is helpful for recipe development or scaling. If you want to double a recipe or know how many batches you need for an event requiring a specific number of cookies, precise scooping allows for accurate planning and execution. For beginner bakers learning to follow recipes, using a scoop provides a tangible way to measure and reproduce results reliably, adding another layer of control to the baking process.

When it comes to dedicated cookie scooping tools, metal disher scoops are generally considered the gold standard, especially for mastering beginner cookie scooping techniques. These are the scoops with a spring-loaded handle and a blade that sweeps across the bowl to release the dough cleanly. They come in various sizes, typically measured in ounces or by the number of scoops it takes to fill a quart (e.g., a #40 scoop means 40 scoops per quart). Common sizes for standard cookies range from #50 (about 1.2 tablespoons) to #20 (about 3.2 tablespoons or 1/4 cup).
A popular size for classic cookies like chocolate chip is often a #40 (approx. 1.6 tablespoons or 3 teaspoons) or #30 (approx. 2 tablespoons).
These metal scoops offer several advantages: they create perfectly uniform, round portions; the spring-loaded mechanism makes releasing sticky dough easy; and they are durable. Different sizes allow you to bake anything from small tea cookies to large bakery-style treats. When choosing one, look for stainless steel construction for durability and ease of cleaning, and ensure the spring mechanism feels sturdy. While they represent a small investment, a good set of cookie scoops in a couple of key sizes (#40 and #20, for instance) will last for years and significantly improve your cookie baking consistency.
While a dedicated cookie scoop is ideal, you can still achieve decent uniformity using common kitchen tools like spoons or measuring cups, which is helpful when starting out with beginner cookie scooping techniques. A regular tablespoon or teaspoon can be used to portion dough, though it requires more manual effort to shape the dough into a ball and ensure consistency. The trick is to use the same spoon and fill it to the same level for each cookie. You might even use a second spoon or a rubber spatula to help push the dough off cleanly.
Measuring cups, particularly the dry measuring cup variety (like 1/4 cup or 1/8 cup), can also work, especially for larger cookies. Simply scoop dough into the measuring cup and level it off with a straight edge (like a knife or bench scraper). Then, invert the cup over the baking sheet and gently tap or use a spoon to release the dough.
While these methods require more practice to achieve the same level of uniformity as a disher scoop, they are perfectly viable alternatives and a great way to start practicing consistent portioning before investing in specialized tools. The key is consistency in how you fill and shape the dough with whichever tool you choose.
Proper cleaning and storage are essential for maintaining your cookie scoops, whether they are metal disher scoops or simply spoons and measuring cups used for dough. For metal disher scoops, it's best to wash them immediately after use, especially if working with sticky dough or dough containing ingredients like butter and sugar that can harden. Warm, soapy water is usually sufficient.
Pay attention to the area around the blade and spring mechanism where dough can get trapped. Using a small brush might be helpful. Rinse thoroughly and dry completely to prevent rust, especially if the scoop isn't made entirely of stainless steel.
Storing scoops properly prevents damage and keeps them ready for your next baking session. Avoid tossing them loosely into a drawer where the blades or mechanisms could be bent or damaged by other utensils. Consider using a utensil crock or a drawer organizer that keeps them separated. For spoons and measuring cups, standard dishwashing practices apply. Ensuring all tools are clean and dry before storage prolongs their life and, importantly, maintains food safety in your kitchen, supporting good beginner cookie scooping techniques from start to finish.
The temperature and consistency of your cookie dough are critical precursors to successful scooping and achieving uniform cookies. Most classic cookie recipes, like chocolate chip, benefit from being chilled before scooping. Chilling solidifies the fats (like butter), which makes the dough firmer and less sticky, significantly easier to scoop cleanly with a uniform shape. Dough that is too warm or soft will likely just smear in the scoop or stick excessively, resulting in misshapen and inconsistent portions.
A chilling time of at least 30 minutes, or even several hours for some recipes, is often recommended. The ideal temperature range for scooping chilled dough is typically between 35°F and 45°F (approx. 2°C to 7°C).
Before you begin scooping, take the chilled dough out of the refrigerator and let it sit at room temperature for just a few minutes (5-10 minutes typically) if it's very hard. This slight softening makes it scoopable without being sticky. The dough should be firm enough to hold its shape but not so hard that you have to strain to get the scoop through it.
If your dough is too crumbly after chilling, it might need a few minutes longer out of the fridge or perhaps wasn't mixed quite enough initially. If it's too sticky, a bit more chilling time is necessary. Getting the dough to the right scoopable consistency is a key part of mastering beginner cookie scooping techniques.
Selecting the correct size scoop is essential and usually depends on the recipe you are using and your desired cookie size. Recipes often specify a scoop size (e.g., "use a 1.5-tablespoon scoop") or describe the intended size of the final cookie (e.g., "makes 2 dozen 3-inch cookies"). If the recipe doesn't specify, consider the typical size of the cookie.
A standard chocolate chip cookie is often made with a scoop ranging from 1.5 to 2 tablespoons (which corresponds roughly to a #40 or #30 disher scoop). Smaller cookies might use a 1-tablespoon scoop (#50 or #60), while large bakery-style cookies could use a 3-tablespoon or even 1/4 cup scoop (#20 or #16).
Using the right scoop size ensures you get the expected yield from the recipe and that the baking time suggested in the recipe is likely to be accurate. If a recipe calls for a 2-tablespoon scoop and you use a 1-tablespoon scoop, you'll end up with twice as many smaller cookies, which will bake faster. Conversely, using a larger scoop will yield fewer, larger cookies that require a longer baking time.
Matching the scoop size to the recipe's intention is a fundamental beginner cookie scooping technique for consistent results. If unsure, a 1.5 or 2-tablespoon scoop is a versatile choice for many classic cookie recipes.
The Correct Scooping Technique: A Visual Guide
Mastering the physical act of scooping is where uniformity is truly born. Holding the scoop comfortably in your dominant hand, plunge it into the dough, ideally against the side of the bowl. Use a firm, steady motion to scoop up the dough. The goal is to fill the scoop completely and evenly in one smooth motion. Avoid just scraping the surface; dig deep enough to get a full scoop.
Once the scoop is full, lift it out of the dough. You should have a mound of dough slightly overflowing the scoop. This is where the next step comes in to ensure perfect portion size and shape, a critical step in beginner cookie scooping techniques.
Leveling the Dough in the Scoop: Achieving Accuracy
To achieve a perfectly uniform portion, the dough in the scoop needs to be leveled. The easiest way to do this is to scrape the excess dough off against the rim of the bowl or use a flat edge, such as a butter knife, offset spatula, or even your finger (if working with non-sticky dough and clean hands). Scrape away the excess dough so that the top surface is flush with the rim of the scoop. This ensures that each scoop contains precisely the same volume of dough, leading to consistent size and weight, and ultimately, even baking.
Some bakers prefer a slightly mounded scoop for certain cookie types, but for standard, consistently sized cookies, leveling is the most reliable method. This simple action transforms a potentially uneven blob into a precise, measurable portion. Practicing this leveling step is key to developing reliable beginner cookie scooping techniques.
Releasing the Dough: Preventing Sticking
Releasing the dough cleanly from the scoop is just as important as scooping it. With a metal disher scoop, simply squeeze the handle, and the internal blade will sweep through the scoop, pushing the dough out onto the baking sheet. This mechanism is designed for easy release, even with relatively sticky doughs.
If you are using alternative tools like spoons or measuring cups, releasing the dough requires a different approach. For spoons, you might need to use a second spoon or your finger to gently push the dough off. For measuring cups, inverting the cup and tapping it gently usually works, though sometimes you might need to run a knife around the edge or use a small spatula to help it release.
If dough is consistently sticking regardless of the tool, ensure your dough is properly chilled, as warm, soft dough is much more likely to adhere to the scoop. A little bit of non-stick spray lightly applied to the scoop (and wiped mostly off) can sometimes help with very sticky doughs, but chilling is usually the better first solution.
Consistent Placement on the Baking Sheet: Spacing for Even Baking
Once you have perfectly scooped dough portions, consistent placement on the baking sheet is the final step before baking. Arrange the scooped dough balls in a grid pattern, ensuring there is adequate space between each one. As cookies bake, they spread. If placed too close together, they will run into each other, creating irregularly shaped cookies and potentially hindering even heat circulation around each cookie, leading to uneven baking.
The amount of space needed depends on the recipe and how much the cookies are expected to spread. A general rule of thumb for standard cookies is to place them about 2 inches apart. Larger cookies may require 3-4 inches of space. Using the same number of cookies per sheet for each batch (e.g., typically 12 cookies on a standard half-sheet pan) also contributes to consistent baking across multiple trays. Consistent placement is a simple but vital beginner cookie scooping technique that complements your careful portioning.

Dough Sticking to the Scoop: Solutions and Prevention
One of the most common frustrations when using beginner cookie scooping techniques is dough sticking stubbornly to the scoop. This usually results in misshapen cookies and a messy process. The primary cause is often dough that is too warm or soft. Prevention starts with ensuring your cookie dough is properly chilled before scooping.
Aim for a temperature where the dough is firm but still scoopable, typically between 35°F and 45°F (approx. 2°C to 7°C). If your kitchen is warm, the dough can soften quickly as you work, so consider scooping in batches, returning the rest of the dough to the fridge.
If sticking persists even with chilled dough, there are a few troubleshooting steps. For metal disher scoops, ensure the blade mechanism is clean and moving freely. Sometimes a tiny bit of flour or cocoa powder (if using chocolate dough) can be lightly dusted inside the scoop, or you can dip the scoop briefly in warm water and shake off the excess before scooping (though this can introduce moisture).
As a last resort, a very light application of cooking spray on the scoop can help, but use sparingly as too much can affect cookie texture. Ultimately, the best solution is proper dough temperature and consistency.
Despite using a scoop, you might find that some cookies are still noticeably larger or smaller than others. This indicates that your beginner cookie scooping techniques need refinement in the scooping or leveling process. The issue is likely that you are not filling the scoop completely and consistently each time, or you are not leveling the dough accurately.
To correct this, focus on the scooping motion: plunge the scoop firmly into the dough to ensure it is fully packed. Then, be meticulous about the leveling step. Scrape off all excess dough against the bowl's edge or with a flat tool so the top of the dough is perfectly flush with the scoop rim.
Practice this motion until it feels natural and consistent. If using alternative tools like spoons, try weighing a few portions to get a feel for the correct amount of dough that equals your desired size, and then visually replicate that amount consistently for each cookie. With practice, your scoops will become uniformly sized.
Sometimes, even if the size is consistent, the scooped dough portions might not be perfectly round or might bake into irregular shapes. This can happen if the dough is too warm and soft, causing it to lose shape quickly, or if the scooping or release technique is not clean. If using a disher scoop, ensure the blade sweeps cleanly through the dough and releases the portion without distortion. If the dough sticks and comes out in pieces or smears, refer to the sticking solutions mentioned above.
For perfectly round cookies after scooping, especially with chilled dough, you can gently roll the scooped dough ball between your palms before placing it on the baking sheet. This creates a smooth, round sphere that is more likely to bake into a nice circular shape. This extra step is particularly useful for beginner cookie scooping techniques as it helps correct any slight imperfections from the scoop itself. Also, ensure you are giving adequate space between cookies on the sheet; overcrowding can force cookies into irregular shapes as they spread into each other.
For the utmost precision in achieving uniform cookie sizes, especially in professional settings or when testing recipes meticulously, weighing each cookie dough portion is the gold standard. While using a scoop provides consistent volume, dough density can vary slightly within a batch. Weighing guarantees that each cookie has the exact same amount of dough by weight. This takes beginner cookie scooping techniques to an advanced level of accuracy.
To do this, you'll need a digital kitchen scale. Place your baking sheet (or a piece of parchment paper) on the scale and tare it to zero. Scoop a portion of dough with your usual scoop or a spoon. Place the dough onto the scale and note its weight. If it's slightly over or under your target weight (e.g., 40 grams per cookie), add or remove a tiny amount of dough until it's precise.
Once you have the correct weight, roll the dough into a ball and place it on the baking sheet. Repeat for every cookie. This method is more time-consuming than simply scooping, but it eliminates size variation almost entirely, leading to unparalleled baking consistency. Many professional recipes will specify dough portion weights rather than scoop sizes for this very reason.
After scooping, chilling the formed cookie dough balls on the baking sheet before baking is an excellent advanced technique to further control spread and promote even baking, building upon good beginner cookie scooping techniques. Once you've scooped all the dough onto lined baking sheets, place the entire sheet (or sheets) into the refrigerator for at least 15-30 minutes, or even the freezer for 10-15 minutes.
This second chilling step ensures the butter and other fats are very firm just before entering the hot oven. When the cold dough hits the heat, the outside edges will set slightly before the fat fully melts and the cookie begins to spread. This controlled melting results in cookies that spread less and thicker centers, often with a more desirable texture and less likelihood of the edges burning before the center is cooked. It's particularly useful for doughs prone to excessive spreading. Chilling scooped dough also allows you to prepare trays in advance and bake them as needed.
To ensure not only uniform size but also perfectly consistent spacing and alignment on the baking sheet, an advanced technique is to use a template. This is often seen in bakeries for perfect presentation. You can create your own template by marking circles or dots on a piece of parchment paper, spaced appropriately for your cookie size (e.g., 2-3 inches apart). Place this template underneath the parchment paper you will bake on.
Then, simply place your scooped dough balls directly on top of the marks on the template, visible through the top layer of parchment. This guarantees that every cookie is placed in the exact same spot on the sheet relative to the others, ensuring consistent airflow and heat distribution during baking.
After placing the dough, you can remove the template before baking if desired, though leaving it underneath the baking parchment is usually fine. This technique, combined with precise scooping (or weighing), results in trays of cookies that are visually identical, a sign of truly mastered baking skills beyond just beginner cookie scooping techniques.
Baking Tips for Even Results
Baking Sheet Preparation: Lining for Easy Removal
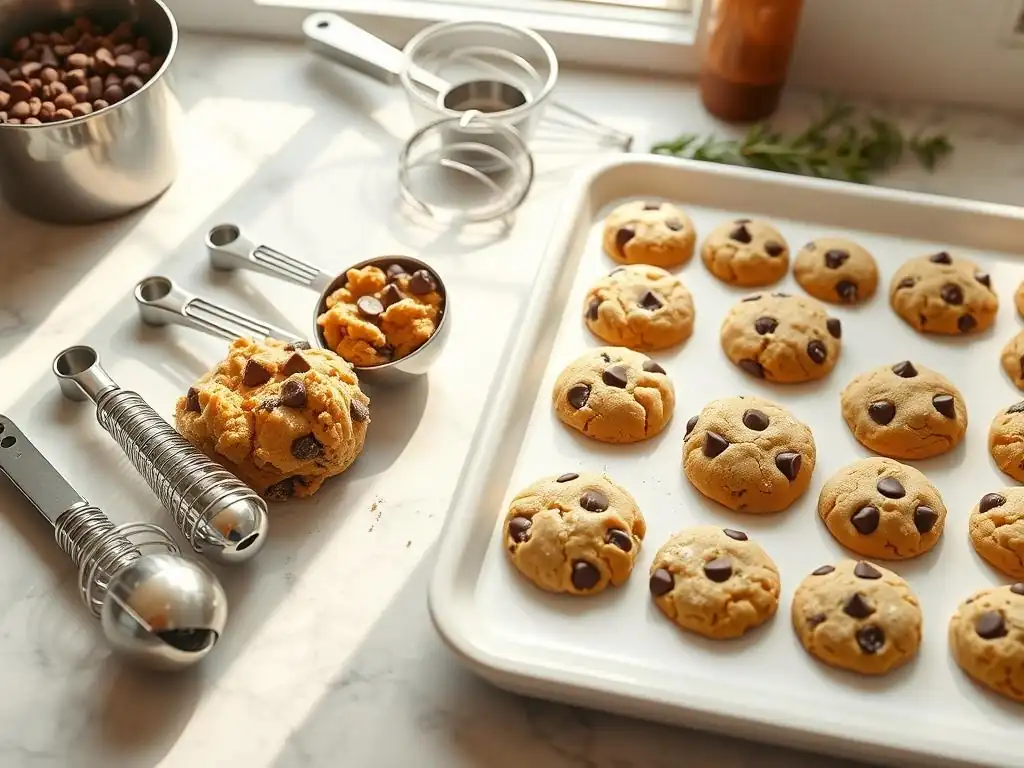
Properly preparing your baking sheets is a foundational step for successful cookie baking and complements your beginner cookie scooping techniques. Most cookie recipes recommend lining your baking sheets. Parchment paper is a popular choice; it prevents cookies from sticking, makes cleanup incredibly easy, and promotes even heat distribution. Silicone baking mats (like Silpat) are also excellent, offering a reusable, non-stick surface. Avoid simply greasing the pan with butter or cooking spray for most cookie types, as this can sometimes cause cookies to spread too much or brown unevenly on the bottom.
Using parchment paper or a silicone mat ensures that your carefully scooped, uniform cookie dough portions slide off the sheet easily once baked and cooled slightly. It also protects your baking sheets from residue and wear. Always use cool baking sheets; placing dough on a hot sheet will cause the cookies to start spreading immediately before they even get into the oven, potentially leading to thin, overly spread cookies. If baking multiple batches, allow sheets to cool between uses, or use multiple sheets.
Oven Temperature Accuracy: Using an Oven Thermometer
Even with perfect beginner cookie scooping techniques and consistent dough, an inaccurate oven temperature can sabotage your results. Many home ovens are not calibrated precisely and can be off by as much as 25-50°F (approx. 15-30°C) from the temperature they are set to. An oven that runs too hot can cause cookies to burn on the edges or bottom while remaining raw in the center. An oven that runs too cool can lead to excessive spreading, pale cookies, and longer baking times.
Investing in an inexpensive oven thermometer is highly recommended for any baker. Place it inside your oven to monitor the actual temperature. If your oven consistently runs hot or cold, you can adjust the dial accordingly (e.g., if it reads 375°F when set to 350°F, set it to 325°F). Preheat your oven with the thermometer inside and wait until it reaches the target temperature before putting in your cookies. Accurate oven temperature is crucial for the consistent baking of your uniformly scooped dough portions.
Rotating Baking Sheets: Promoting Even Baking
Even in a seemingly well-calibrated oven, hot spots can exist. Heat distribution is rarely perfectly uniform. To compensate for this and ensure all cookies on the sheet bake evenly, rotate your baking sheet halfway through the baking time. For example, if a recipe calls for 10-12 minutes of baking, rotate the sheet at the 5 or 6-minute mark.
Rotating involves turning the sheet 180 degrees (front to back). This helps expose all cookies to roughly the same amount of heat over the entire baking cycle. Cookies on the side of the sheet closest to the oven's heat source (often the back) tend to bake faster, so rotating ensures the cookies that were at the back are now at the front, and vice-versa.
This simple step, combined with uniform scooping and placement, significantly contributes to a batch of cookies where every single one is baked to perfection. It's a valuable tip for any baker, especially when applying beginner cookie scooping techniques to achieve consistent results.
Mastering beginner cookie scooping techniques is a fundamental step towards baking perfectly uniform cookies, especially classics like chocolate chip. The key takeaways are:
- Chill Your Dough: Properly chilled dough (around 35-45°F or 2-7°C) is firmer, less sticky, and easier to scoop cleanly into uniform portions.
- Use the Right Tool: While spoons work, a dedicated metal disher scoop in the appropriate size (e.g., 1.5 to 2 tablespoons for standard cookies) provides the most consistent results.
- Scoop and Level: Plunge the scoop firmly into the dough to fill it completely, then level off the excess dough against the bowl or with a flat edge.
- Release Cleanly: Use the scoop's mechanism or alternative methods to release the dough neatly onto the baking sheet.
- Space Evenly: Place scooped dough portions 2-4 inches apart on a lined baking sheet to allow for even spreading and heat circulation.
- Consider Chilling Scooped Dough: For extra control over spread, chill the formed dough balls on the sheet before baking.
- Bake Consistently: Use a lined baking sheet, check your oven temperature with a thermometer, and rotate sheets halfway through baking for even results.
By focusing on these simple yet effective beginner cookie scooping techniques, you'll dramatically improve the consistency of your cookie batches, leading to beautifully baked, uniform treats every time.
Now that you're equipped with essential beginner cookie scooping techniques, it's time to put them into practice! A classic chocolate chip cookie recipe is an excellent starting point. Look for recipes that specifically mention using a scoop or give a target cookie size. Many reliable recipes, like the widely popular New York Times chocolate chip cookie recipe or classic Toll House variations, work wonderfully with precise scooping.
Consider starting with a well-tested recipe that calls for chilling the dough, as this will make practicing your scooping much easier. As you become more comfortable, you can apply these techniques to other drop cookies, like oatmeal raisin or peanut butter. Remember, consistent scooping is a skill that improves with practice, so don't be discouraged if your first batch isn't absolutely perfect. Keep practicing these beginner cookie scooping techniques, and you'll be baking perfectly uniform cookies in no time! Happy baking!
Frequently Asked Questions
Using a cookie scoop is highly recommended for achieving uniform cookies. This ensures even baking and a professional look.
A medium-sized cookie scoop, often a #40 or #50, is generally ideal. This creates cookies that are approximately 2-3 inches in diameter after baking.
Yes, you can use a spoon, but it's more challenging to achieve uniformity. Try to use the spoon to get consistent amounts of dough each time.
Overfilling or underfilling the scoop is a common mistake. Also, not scraping off the excess dough leads to inconsistent cookie sizes.
Dipping the scoop in water or lightly coating it with cooking spray can help. Ensure the scoop is clean and dry between uses to minimize sticking.
The seemingly simple act of scooping cookie dough holds the key to baking perfection, a truth that resonates far beyond the kitchen. Mastering this technique, as explored in this article, isn't just about achieving uniform cookies; it's about understanding precision, control, and the satisfying predictability of a well-executed recipe. This translates to more than just aesthetically pleasing treats; it's about building confidence in the kitchen and experiencing the joy of consistent results.
The impact of consistent baking extends beyond the individual baker. It fosters a sense of accomplishment and encourages experimentation. The ability to confidently replicate a successful recipe opens doors to culinary creativity and the sharing of delicious treats with loved ones. As Julia Child wisely said, Find something you're passionate about and keep tremendously interested in it.
This passion, nurtured through mastering even the seemingly small details like cookie scooping, can transform a simple activity into a deeply rewarding experience.
Now, consider your own baking journey. What other seemingly insignificant techniques could you refine to elevate your culinary skills? Perhaps it's mastering the perfect knife cut, achieving consistent bread rise, or understanding the nuances of temperature control. Take this newfound appreciation for precision and apply it to your next baking adventure. Embrace the challenge, celebrate the small victories, and savor the sweet rewards of consistent, perfectly uniform cookies – and everything else you bake.
Thanks for taking the time to perfect your cookie-scooping technique! We hope you now feel confident in creating those perfectly uniform, bakery-style cookies. Ready to put your new skills to the test?
- Bake a batch of your favorite cookies using your newfound scooping precision. Watch them bake to golden perfection!
- Share your cookie creations on social media using #BakeWithEasePerfectScoops – let's see those beautiful, even cookies!
- Consider experimenting with different dough recipes and cookie sizes to further refine your skills.
Ready to take your baking game to the next level? What delicious cookie recipe will you tackle next?