
Secrets to a Perfect Basic Pie Crust

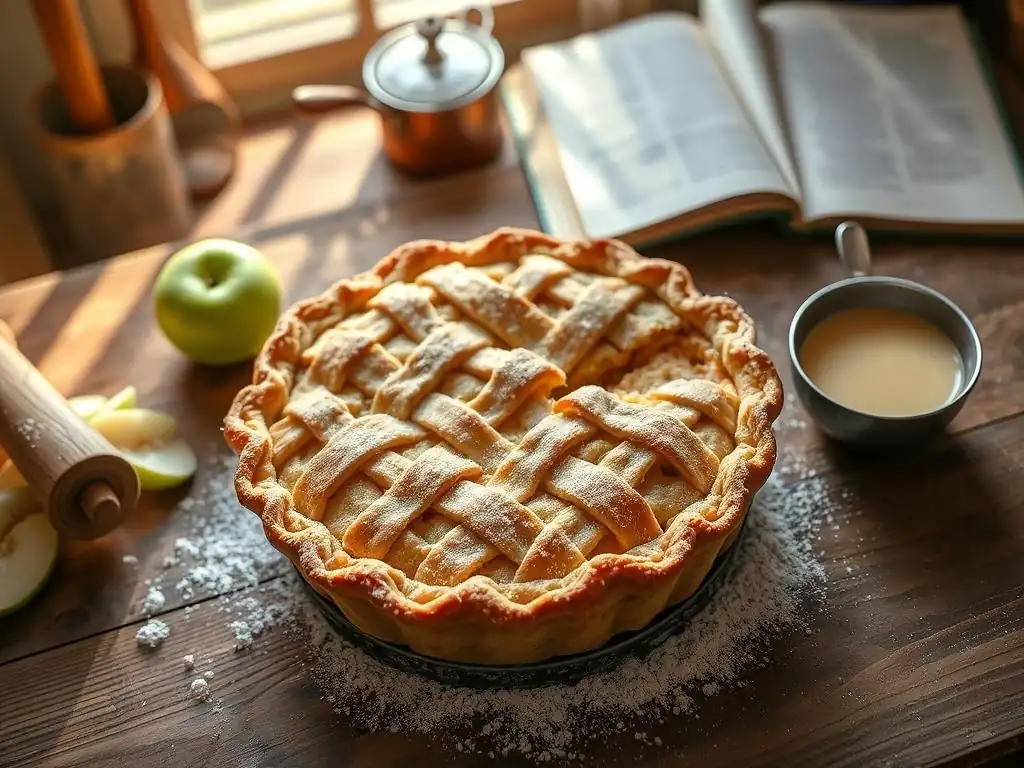
Welcome to BakeWithEase, where baking dreams become a reality! Ever wonder what secrets lie behind that flaky, golden-brown pie crust you see in magazines? Well, wonder no more! Dive into our Perfect Basic Pie Crust Recipe and unlock the techniques that will transform your pies from ordinary to extraordinary. Curious about achieving that perfect texture? Let's get baking!
- Secrets to a Perfect Basic Pie Crust: BakeWithEase Guide
- Introduction to the Perfect Basic Pie Crust Recipe
- Understanding the Key Ingredients for a Flaky Pie Crust
-
Step-by-Step Guide to Making the Perfect Basic Pie Crust
- Step 1: Preparing the Dry Ingredients for Your Pie Crust
- Step 2: Cutting in the Fat: Achieving the Perfect Crumble
- Step 3: Adding the Water: Hydrating the Dough Correctly
- Step 4: Forming the Dough: Gentle Handling is Key
- Step 5: Chilling the Dough: Essential for Gluten Relaxation
- Step 6: Rolling Out the Pie Crust: Achieving Uniform Thickness
- Step 7: Transferring the Crust to the Pie Plate: Preventing Tears and Cracks
- Step 8: Crimping the Edges: Creating a Decorative and Functional Seal
- Baking Your Perfect Basic Pie Crust: Blind Baking and Beyond
- Troubleshooting Common Pie Crust Problems
- Tips and Tricks for an Even Better Pie Crust
- Variations on the Basic Pie Crust Recipe
- Storing Your Pie Crust for Future Baking Adventures
- Perfect Basic Pie Crust Recipe: Conclusion and Next Steps
- Frequently Asked Questions
- Final Reflection: The Enduring Allure of the Perfect Crust
- Unlock Your Inner Pastry Chef!
Secrets to a Perfect Basic Pie Crust: BakeWithEase Guide
Introduction to the Perfect Basic Pie Crust Recipe
Why Mastering the Basic Pie Crust is Essential for Baking
A truly perfect basic pie crust recipe is the foundation of countless delicious desserts and savory bakes. Think of it as the canvas upon which you paint your culinary masterpiece. Without a reliable, flaky crust, even the most exquisite filling can fall flat. Mastering this fundamental skill unlocks a world of possibilities, from classic apple pie and quiches to delicate tarts and hand pies. It's a skill that separates good bakers from great ones and builds confidence in the kitchen.
Learning to make a basic pie crust from scratch gives you complete control over the ingredients and texture, allowing you to avoid the pitfalls often associated with pre-made options, such as a dry, crumbly, or flavorless result. It's a rewarding process that yields a superior product – one that is incredibly flaky, tender, and full of buttery flavor. This foundational knowledge is transferable to other pastry types, enhancing your overall baking repertoire.
BakeWithEase' Promise: A Fail-Proof Pie Crust Recipe for Beginners
At BakeWithEase, we believe that making a perfect basic pie crust shouldn't be intimidating, even for beginners. Our promise to you is to provide a clear, step-by-step guide that demystifies the process and leads you to consistent success. This isn't just a basic pie crust recipe; it's the perfect basic pie crust recipe designed with simplicity and reliability in mind. We've broken down each stage, explaining the 'why' behind the techniques, so you understand the science as well as the art of pie making.
We'll walk you through selecting the right ingredients, mastering the crucial 'cutting in' technique, and handling the dough with care to ensure that coveted flaky texture. Our method minimizes common mistakes and maximizes your chances of achieving a golden, tender, and delicious crust every time. Get ready to bake with confidence and impress yourself and others with your newfound pie-making skills using this perfect basic pie crust recipe.
Understanding the Key Ingredients for a Flaky Pie Crust
The Importance of Flour for Pie Crust Texture
Flour is the primary structural component of any perfect basic pie crust recipe. Its main role is to provide the framework that holds the fat and water together. All-purpose flour is typically recommended for pie crusts because it has a moderate protein content, usually ranging from 10% to 12%. This amount of protein allows for some gluten development, which gives the crust structure, but not so much that it becomes tough. Too much gluten development, which happens when flour is mixed with water and kneaded, is the enemy of a tender, flaky crust.
Using a flour with a lower protein content, like pastry flour (around 8-9%), can result in a more tender crust, but it might be more challenging to handle and roll out without tearing. Conversely, bread flour (12-14% protein) is generally unsuitable as it promotes excessive gluten formation, leading to a tough, chewy crust.
For a reliable perfect basic pie crust recipe, all-purpose flour is your best bet, offering a good balance of structure and tenderness. Measuring your flour correctly, preferably by weight (using a kitchen scale), is crucial for consistent results; a slight excess of flour can make your dough dry and difficult to work with.
Choosing the Right Fat: Butter, Shortening, or Lard for Pie Crust
The type of fat you use is arguably the most critical factor in achieving a flaky perfect basic pie crust recipe. Fat coats the flour particles, preventing them from forming too much gluten when water is added. As the crust bakes, the fat melts, creating steam that pushes apart the layers of dough, resulting in flakiness. Each type of fat brings different qualities to the table. Butter provides exceptional flavor and contributes to flakiness, but it melts at a lower temperature, making the dough slightly trickier to handle. Using cold butter, cut into small pieces, is essential.
Shortening, a hydrogenated vegetable oil, has a higher melting point than butter. This means it stays solid longer in the dough, creating larger pockets of fat that result in very pronounced flakiness. It's also easier to work with than butter, producing a tender and consistent crust. However, it lacks the rich flavor of butter.
Lard, rendered pork fat, traditionally yields the flakiest crust of all due to its unique crystalline structure and high melting point. It also adds a subtle savory flavor. Many bakers prefer a combination of fats, such as half butter for flavor and half shortening or lard for maximum flakiness and ease of handling, for their perfect basic pie crust recipe.
Water: The Secret Weapon for Binding and Flakiness
Water's role in a perfect basic pie crust recipe is twofold: it hydrates the flour to allow some gluten development (just enough for structure) and, crucially, it turns into steam during baking, contributing significantly to flakiness. However, using too much water is a common mistake that leads to a tough crust, as it encourages excessive gluten formation. The key is to use just enough water to bring the dough together, and it must be ice-cold.
Ice-cold water helps keep the fat solid in the dough. When the cold fat hits the hot oven, it melts slowly, creating those desirable steam pockets that lift the layers. Using warm water would melt the fat prematurely, resulting in a greasy, less flaky crust. You typically only need a small amount of water, often just a few tablespoons, for a standard two-crust pie recipe. It's best to add it gradually, a tablespoon at a time, mixing gently until the dough just comes together, rather than adding it all at once.
Salt and Sugar: Enhancing Flavor and Structure in Your Pie Crust
While fat and flour are the main players, salt and sugar play important supporting roles in a perfect basic pie crust recipe. Salt is essential for enhancing the overall flavor of the crust, balancing the richness of the fat and preventing the crust from tasting bland. Even in a sweet pie, a pinch of salt in the crust makes a noticeable difference in the finished product. It helps to bring out the subtle flavors of the flour and fat.
Sugar, while optional in savory crusts, is often included in sweet pie recipes. A small amount of sugar (usually just 1-2 tablespoons per crust) contributes to the crust's browning, resulting in a beautiful golden color. It also adds a touch of sweetness that complements sweet fillings. Too much sugar can make the dough crumbly and difficult to roll out because sugar competes with flour for water, inhibiting gluten development. It can also cause the crust to brown too quickly. Therefore, moderation is key when adding sugar to your perfect basic pie crust recipe.
Step-by-Step Guide to Making the Perfect Basic Pie Crust
Step 1: Preparing the Dry Ingredients for Your Pie Crust
The first step in creating a perfect basic pie crust recipe is to prepare your dry ingredients. This typically involves measuring your flour, salt, and any sugar you might be using. It's highly recommended to weigh your flour for accuracy, but if using volume measurements, lightly spoon the flour into your measuring cup and level it off with a straight edge to avoid compacting it, which can lead to using too much flour. For a standard double-crust pie, you might start with around 2 ½ cups (about 315 grams) of all-purpose flour.
Once measured, combine the flour, salt (usually ½ to 1 teaspoon), and sugar (if using, often 1-2 tablespoons) in a large mixing bowl. Whisk them together briefly. This ensures that the salt and sugar are evenly distributed throughout the flour. An even distribution of salt is important for consistent flavor, and even sugar helps with uniform browning. This simple step sets the stage for the crucial process of incorporating the fat.
Step 2: Cutting in the Fat: Achieving the Perfect Crumble
Cutting in the fat is arguably the most critical step for achieving a flaky perfect basic pie crust recipe. The goal is to break the cold fat (butter, shortening, or lard) into varying sizes within the flour mixture. You want some pieces to be pea-sized, some a bit larger like small beans, and some smaller, like coarse meal. These different sizes of fat will melt at different rates during baking, creating distinct layers and pockets of flakiness. Use very cold fat, cut into small cubes (about ½ inch).
There are several methods for cutting in fat. You can use a pastry blender, working the fat into the flour until the desired texture is reached. Alternatively, you can use your fingertips, quickly rubbing the cold fat into the flour until the mixture resembles coarse crumbs with some larger pieces.
A food processor is the fastest method; pulse the dry ingredients with the cold fat a few times until the mixture resembles coarse meal with visible pea-sized pieces of fat. Whichever method you choose, work quickly to prevent the fat from warming up too much from the heat of your hands or the room temperature.
Step 3: Adding the Water: Hydrating the Dough Correctly
Adding the water requires a delicate touch to ensure a perfect basic pie crust recipe that is tender, not tough. Remember, the water must be ice-cold. Fill a cup with ice and water, and let it sit for a few minutes before measuring out the required amount. For a double crust, you might start with ¼ cup (about 60 ml) of ice water. Add this initial amount to the flour and fat mixture.
Using a fork or your hands, gently mix the water into the dry ingredients until the dough just begins to come together. The mixture will look shaggy and dry in places. Add more ice water, one tablespoon at a time, mixing gently after each addition, only until the dough forms large clumps and holds together when you squeeze a piece.
Avoid adding too much water; it's better to have a slightly dry dough that you can work with than a sticky, wet one that will become tough. You might end up using anywhere from ¼ cup to ½ cup (60-120 ml) of water depending on the flour and humidity.
Step 4: Forming the Dough: Gentle Handling is Key
Once the water has been added and the dough has just come together in shaggy clumps, it's time to form the dough. Turn the mixture out onto a clean, lightly floured surface. Gather the dough gently and press it together just until it forms a cohesive mass. Do not knead the dough! Kneading develops gluten, which is undesirable for a flaky pie crust. You are simply bringing the clumps together.
For a double-crust pie, divide the dough in half. Gently pat each half into a flat disc, about 1 inch thick. Forming discs makes the dough easier to roll out later. Wrap each disc tightly in plastic wrap. Handle the dough as little as possible to keep the fat cold and prevent gluten development. A perfectly handled dough for a perfect basic pie crust recipe should still show visible flecks of fat.
Step 5: Chilling the Dough: Essential for Gluten Relaxation
Chilling the dough is a non-negotiable step for a perfect basic pie crust recipe. Once you have formed and wrapped the dough discs, they need to chill in the refrigerator for at least 30 minutes, and preferably 1 to 2 hours. This chilling period serves two crucial purposes: it allows the gluten that did develop during mixing to relax, which makes the dough more tender and less likely to shrink when baked, and it firms up the fat.
Firm fat is essential for creating those flaky layers. When the dough is rolled and then bakes, the cold, solid fat pieces melt slowly, creating steam that separates the dough into distinct layers. If the fat is warm and soft, it will just melt into the flour, resulting in a dense, greasy crust rather than a flaky one. You can even chill the dough for up to 2-3 days, or freeze it for longer storage (see storing section). Don't skip this step!
Step 6: Rolling Out the Pie Crust: Achieving Uniform Thickness
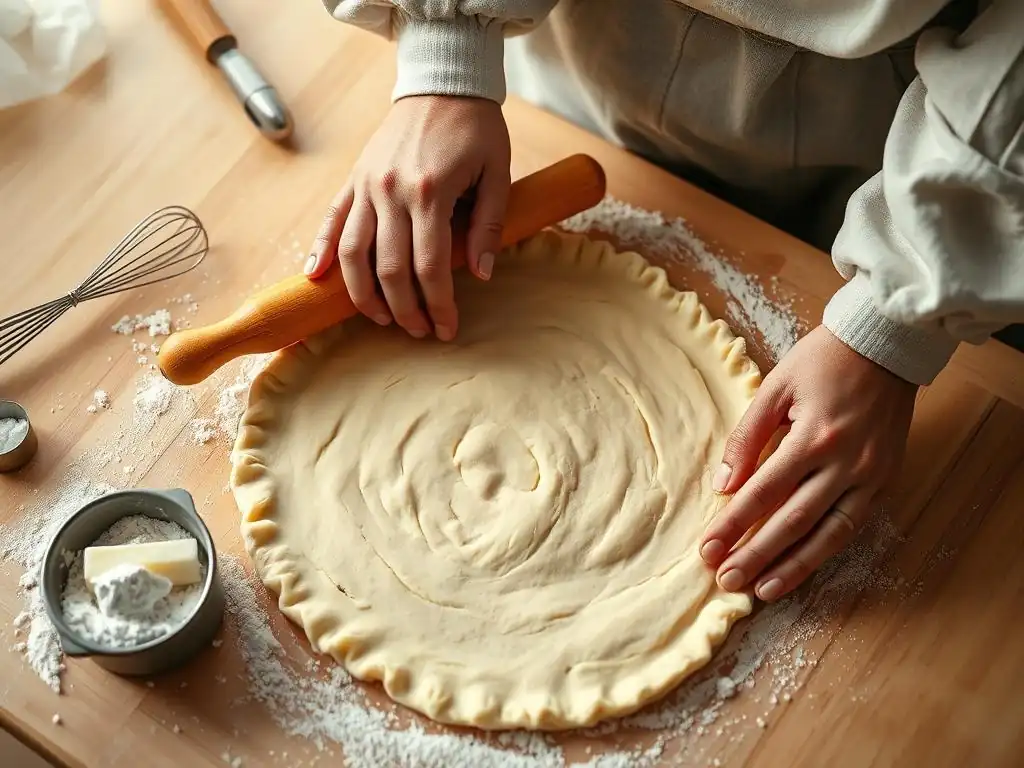
Rolling out the dough is the next step towards your perfect basic pie crust recipe. Remove one disc of chilled dough from the refrigerator. If it's been chilling for more than a couple of hours, let it sit at room temperature for 5-10 minutes to soften slightly, making it easier to roll without cracking. Lightly flour your work surface and rolling pin. Place the dough disc in the center and begin rolling from the center outwards, rotating the dough occasionally to prevent sticking and to maintain a circular shape.
Aim for a uniform thickness, ideally about ⅛ inch (3 mm). Uneven thickness can lead to uneven baking, with thin spots burning and thick spots remaining doughy. Roll the dough into a circle large enough to fit your pie plate with an overhang of about 1-2 inches (2.5-5 cm) for crimping.
For a standard 9-inch pie plate, you'll need a circle approximately 12-13 inches in diameter. If the dough starts to crack, you can gently pinch the cracks together. If it's sticking, add a little more flour to your surface and rolling pin, but use flour sparingly to avoid making the crust tough.
Step 7: Transferring the Crust to the Pie Plate: Preventing Tears and Cracks
Transferring the rolled-out dough to the pie plate can feel tricky, but there are simple methods to prevent tears and cracks in your perfect basic pie crust recipe. One common technique is to lightly roll the dough around your rolling pin. Gently lift the rolling pin and unroll the dough over your pie plate, centering it as you go. This method supports the dough and minimizes stretching.
Alternatively, you can fold the dough in half or quarters and then carefully unfold it in the pie plate. Once the dough is in the plate, gently ease it into the bottom and up the sides, pressing it against the contours of the plate without stretching it. Stretching the dough will cause it to shrink back during baking. Trim the excess dough, leaving about 1-2 inches of overhang around the edge, which will be used for crimping.
Step 8: Crimping the Edges: Creating a Decorative and Functional Seal
Crimping the edges of your perfect basic pie crust recipe serves both aesthetic and functional purposes. The overhang of dough provides material to create a decorative border, but more importantly, it seals the edges of the pie plate. This seal prevents the filling from bubbling out during baking (for filled pies) and helps the crust maintain its shape. There are many ways to crimp, from simple fork marks to elaborate fluted edges.
To create a classic fluted edge, fold the excess dough under itself so it sits on the rim of the pie plate. Then, use the thumb and index finger of one hand to push the dough inwards while using the index finger of your other hand to push outwards from the inside, creating a scalloped pattern. For a simpler edge, press the tines of a fork around the edge of the dough.
Whichever method you choose, ensure the edges are well-sealed to the rim of the plate. For a double-crust pie, the bottom and top crust edges are typically sealed together and then crimped.
Baking Your Perfect Basic Pie Crust: Blind Baking and Beyond
Blind Baking: When and Why You Need It
Blind baking, or pre-baking, the perfect basic pie crust recipe is a technique used when the filling requires little to no baking (like pudding or fresh fruit fillings) or when you want to prevent a soggy bottom crust with very wet fillings (like quiches or custard pies). The process involves partially or fully baking the empty pie shell before adding the filling. This gives the crust a head start and ensures it is cooked through and crisp.
To blind bake, line the prepared, chilled pie crust with parchment paper or foil, pressing it gently into the sides. Fill the lined crust with pie weights, dried beans, or uncooked rice. These weights prevent the crust from puffing up or shrinking during baking. Bake in a preheated oven (often around 375-400°F or 190-200°C) until the edges are set and lightly golden (partial bake, about 15-20 minutes). Remove the weights and liner, then continue baking until the bottom is set and lightly colored (full bake, another 10-15 minutes).
Preventing Shrinkage: Tips for a Perfectly Shaped Pie Crust
Shrinkage is a common issue when baking a perfect basic pie crust recipe, often resulting in a crust that pulls away from the sides of the pie plate. The primary cause is insufficient chilling and overworking or stretching the dough during rolling and transferring. Gluten develops when flour is mixed with water and worked; if the gluten isn't allowed to relax through chilling, it contracts when heated in the oven, causing the crust to shrink.
To prevent shrinkage:
- Ensure all ingredients, especially the fat and water, are very cold.
- Handle the dough gently; do not knead it.
- Chill the dough discs for at least 30-60 minutes before rolling.
- When rolling, apply even pressure and rotate the dough instead of stretching it.
- When transferring to the pie plate, ease it in without stretching.
- Chill the formed crust in the pie plate for another 15-30 minutes before baking, especially if blind baking. This final chill helps the fat firm up again and the gluten relax further.
Baking with Filling: Adjusting Baking Times for Different Pies
When baking a perfect basic pie crust recipe with a filling, the baking time and temperature will vary significantly depending on the type of pie. Fruit pies, for instance, often start at a higher temperature (like 425°F or 220°C) for the first 15-20 minutes to set the crust and create steam, then the temperature is reduced (to 375°F or 190°C) to finish baking the filling and prevent the crust from burning. Custard or single-crust pies might bake at a consistent moderate temperature.
The key is to bake until the filling is set and the crust is golden brown and cooked through, both on the bottom and the edges. If the edges start browning too quickly, you can cover them loosely with foil or a pie crust shield. A common indicator for fruit pies is when the filling is visibly bubbling in the center.
For custard pies, a slight wobble in the center is usually okay; it will set as it cools. Always refer to the specific recipe for the filling you are using, but understanding the basic principles of crust baking will help you make adjustments as needed.
Troubleshooting Common Pie Crust Problems
Why is My Pie Crust Tough? Avoiding Overmixing
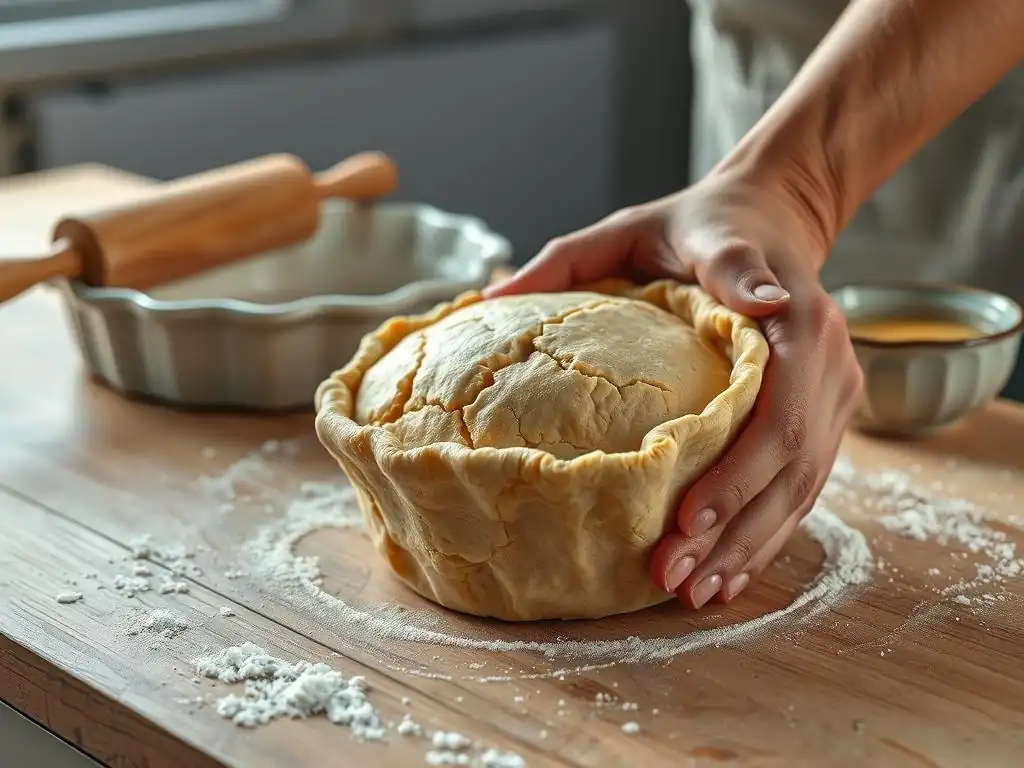
A tough perfect basic pie crust recipe is most often caused by overmixing or using too much water. When flour and water combine, gluten begins to develop. The more the dough is mixed or kneaded after the water is added, the stronger and more elastic the gluten network becomes, resulting in a chewy, tough crust rather than a tender, flaky one. Using too much water exacerbates this, as more water facilitates more gluten development.
To avoid toughness:
- Use ice-cold water and add it sparingly, only until the dough just comes together in shaggy clumps.
- Handle the dough gently; do not knead it. Simply press the clumps together to form discs.
- Chill the dough adequately (at least 30-60 minutes) to allow any developed gluten to relax.
- Avoid overworking the dough when rolling it out.
[ ] Check water temperature (must be ice-cold)
[ ] Add water gradually
[ ] Avoid kneading dough
[ ] Ensure adequate chilling time
Why is My Pie Crust Soggy? Preventing a Soggy Bottom
A soggy bottom crust is a common frustration, particularly with wet fillings like fruit pies or quiches. It happens when moisture from the filling seeps into the bottom crust before it has a chance to set and crisp up in the oven. While achieving a perfect basic pie crust recipe involves creating flakiness, a soggy bottom negates all that effort.
To prevent a soggy bottom:
- Blind bake the crust (partially or fully) before adding wet fillings. This gives the bottom crust a head start in cooking.
- Ensure your oven is preheated to the correct temperature. A hot oven helps set the crust quickly.
- Place the pie on a preheated baking sheet or pizza stone in the oven. The direct heat helps cook the bottom crust faster.
- For fruit pies, consider adding a thickener (like cornstarch, flour, or tapioca) to the filling to absorb excess liquid.
- Some recipes suggest brushing the bottom crust with a thin layer of egg white or melted butter before adding the filling to create a barrier.
Why is My Pie Crust Cracking? Hydration and Temperature Control
Cracking dough when rolling out a perfect basic pie crust recipe is usually a sign that the dough is too dry or too cold. If not enough water was added during mixing, the dough won't be cohesive enough to roll smoothly. If the dough is taken directly from the refrigerator after a long chill and rolled immediately, the fat and gluten are too firm, making the dough brittle.
To prevent cracking:
- Ensure you've added enough water during mixing; the dough should just hold together when squeezed, not be crumbly.
- Allow dough chilled for more than an hour or two to sit at room temperature for 5-10 minutes before rolling to make it more pliable.
- Roll from the center outwards, applying even pressure.
- If cracks appear, gently pinch them together with your fingers before continuing to roll.
Why is My Pie Crust Shrinking? Dough Relaxation Techniques
Shrinkage during baking, where the crust pulls away from the edges of the pie plate, is primarily caused by the dough not being adequately relaxed before baking. This happens when the gluten network, tightened by mixing or stretching, contracts in the heat of the oven.
To prevent shrinkage:
- Do not stretch the dough when rolling or transferring it to the pie plate. Ease it in gently.
- Chill the dough discs thoroughly (at least 30-60 minutes) before rolling.
- Crucially, chill the formed crust in the pie plate for another 15-30 minutes before baking (especially before blind baking). This second chill allows the dough to fully relax into the shape of the plate.
Tips and Tricks for an Even Better Pie Crust
Using Cold Ingredients: The Foundation for Flakiness
We've mentioned it before, but it bears repeating: using cold ingredients is fundamental to a perfect basic pie crust recipe. Cold fat is essential for creating flaky layers, and cold water helps keep the fat solid and minimizes gluten development. Ensure your butter, shortening, or lard is well-chilled, ideally straight from the refrigerator. Cut it into small pieces and, if your kitchen is warm, you can even pop the cut fat back into the fridge for a few minutes before adding it to the flour.
Your water should be ice-cold. Using ice water ensures the fat stays solid as you mix and form the dough. Some bakers even go as far as chilling their flour and mixing bowl, though the fat and water are the most critical components to keep cold. The contrast between the cold fat and the hot oven is what generates the steam needed for beautiful, airy layers.
The Importance of a Cold Work Surface
Working on a cold surface can significantly help in keeping your fat cold while rolling out your perfect basic pie crust recipe. If you have a marble or granite countertop, these are naturally cool surfaces that are ideal for pastry work. If not, you can chill a large baking sheet in the refrigerator or freezer and roll your dough on that.
Alternatively, some people place a bag of ice on their work surface for a few minutes to cool it down before dusting it with flour and rolling the dough. Keeping the dough and the fat within it as cold as possible during the rolling process is key to preventing the fat from melting prematurely and ensures those distinct pockets of fat remain intact, ready to create flakiness in the oven.
Adding a Touch of Vinegar or Vodka: Enhancing Flakiness
Here's a slightly more advanced tip for a truly exceptional perfect basic pie crust recipe: adding a small amount of acid, like vinegar, or alcohol, like vodka, to the ice water. A teaspoon of distilled white vinegar or apple cider vinegar per crust can help tenderize the dough by inhibiting gluten development without affecting the taste.
Vodka works even better for flakiness. Water causes gluten to develop, but alcohol does not. By replacing some of the water with vodka (e.g., using a 50/50 mix of ice water and ice-cold vodka), you can achieve a dough that is easier to work with (due to more liquid overall) but develops less gluten, resulting in a more tender and potentially flakier crust. The alcohol evaporates completely during baking, leaving no residual flavor. For a double crust, you might use ¼ cup ice water mixed with ¼ cup ice-cold vodka.
Pre-Baking the Crust for Extra Crispness
Even when a full blind bake isn't required, giving your perfect basic pie crust recipe a short pre-bake can help ensure a crisp bottom, especially if your filling is moderately moist or requires a longer baking time. After preparing the crust in the pie plate and crimping the edges, chill it for 15-30 minutes. Then, prick the bottom and sides all over with a fork (this is called docking) to allow steam to escape and prevent the crust from puffing up.
Bake the docked crust in a preheated oven (around 375-400°F or 190-200°C) for about 10-15 minutes, or until the surface looks dry and slightly set, but not necessarily browned. This par-baking step gives the bottom crust a head start on cooking and creates a firmer structure less susceptible to becoming soggy once the filling is added. Then, add your filling and continue baking as the recipe directs.
Variations on the Basic Pie Crust Recipe
Sweet Pie Crust: Adding Sugar and Flavorings
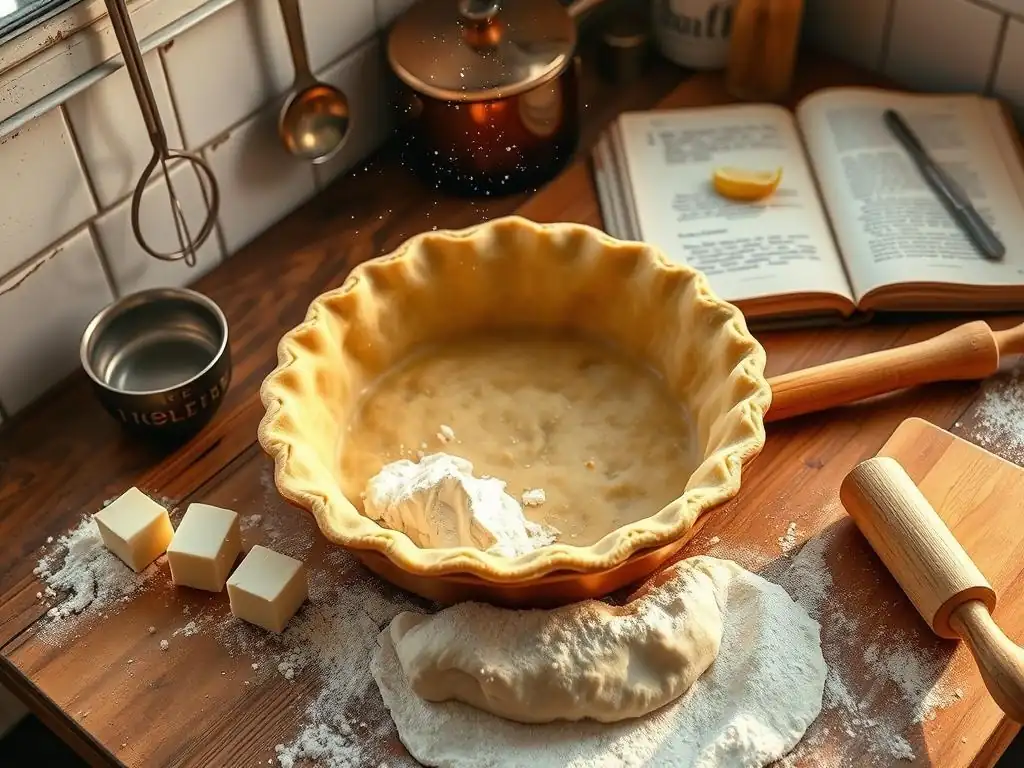
A perfect basic pie crust recipe can easily be adapted for sweet applications. The most common modification is adding sugar to the dry ingredients. As mentioned earlier, 1-2 tablespoons of granulated sugar per single crust is usually sufficient to add a touch of sweetness and promote browning without making the dough difficult to handle. For a richer flavor, you could use superfine sugar.
Beyond sugar, you can incorporate other flavorings. A teaspoon of vanilla extract can be added to the ice water for a subtle sweetness boost. Citrus zest (lemon or orange) can add a bright note, or spices like cinnamon, nutmeg, or cardamom can be mixed into the dry ingredients to complement the filling. For a chocolate crust, replace a small amount of flour (e.g., 2-3 tablespoons per crust) with unsweetened cocoa powder. These simple additions can transform a basic crust into something special for your sweet pies.
Savory Pie Crust: Herbs and Spices for a Delicious Twist
Adapting the perfect basic pie crust recipe for savory dishes like quiches, pot pies, or tarts is straightforward and opens up many flavor possibilities. The main difference is often omitting the sugar or reducing it significantly (maybe just a teaspoon for browning). Salt, however, is crucial for flavor balance in savory crusts.
You can incorporate dried herbs like thyme, rosemary, or chives into the dry ingredients before cutting in the fat. About 1-2 teaspoons of dried herbs per crust adds a lovely aromatic quality. Spices like black pepper, paprika, or a pinch of cayenne can also be added for a bit of warmth or heat. For an even richer savory flavor, consider using a combination of butter and lard, or even adding a tablespoon or two of grated hard cheese like Parmesan or cheddar to the dry ingredients before adding the fat.
Gluten-Free Pie Crust: Adapting the Recipe for Dietary Needs
Creating a perfect basic pie crust recipe for those with gluten sensitivities requires replacing the wheat flour with a gluten-free flour blend. Many commercially available gluten-free all-purpose flour blends work well for pie crusts. These blends typically contain a mix of flours like rice flour, sorghum flour, and tapioca starch, often with the addition of xanthan gum to provide structure that gluten would normally provide.
When using a gluten-free blend, the process is similar: cut in cold fat, add ice water gradually. However, gluten-free dough can sometimes be more delicate and prone to cracking. You might need slightly more liquid, or the dough might be easier to roll out between two sheets of parchment paper. Some gluten-free recipes specifically designed for pie crusts might use alternative ingredients like almond flour or oat flour in combination with starches. Look for a reputable gluten-free perfect basic pie crust recipe tailored for flakiness.
Storing Your Pie Crust for Future Baking Adventures
How to Store Unbaked Pie Crust Dough
Having unbaked perfect basic pie crust recipe dough ready to go is incredibly convenient for spontaneous baking. Once you've prepared the dough and formed it into discs as described in Step 4, wrap each disc tightly in plastic wrap. Ensure there are no air pockets, as air can dry out the dough.
Properly wrapped dough discs can be stored in the refrigerator for up to 2-3 days. If you plan to store it longer, the freezer is your friend. Wrap the plastic-wrapped discs again in aluminum foil or place them in a freezer-safe bag to prevent freezer burn. Frozen dough can be stored for up to 6 months. To use frozen dough, transfer it to the refrigerator the day before you plan to bake to allow it to thaw gradually. Then, let it sit at room temperature for 10-15 minutes before rolling, as needed.
How to Store Baked Pie Crusts
Sometimes you might have leftover baked perfect basic pie crust recipe shells from blind baking, or perhaps you've baked a few shells in advance for future use. Baked pie crusts need to be cooled completely on a wire rack before storing. Once cool, they are quite fragile, so handle them carefully.
To store a baked pie crust shell, you can leave it in its pie plate. Wrap the entire plate and crust tightly in plastic wrap, followed by a layer of aluminum foil, or place the wrapped plate inside a large freezer bag.
Stored this way, a baked crust can last at room temperature for a day or two, in the refrigerator for 2-3 days, or in the freezer for up to 1-2 months. To reheat a frozen baked crust, you can place it directly from the freezer into a preheated oven (around 350°F or 175°C) for 5-10 minutes, or until crisp.
Perfect Basic Pie Crust Recipe: Conclusion and Next Steps
Celebrate Your Baking Success with BakeWithEase
Congratulations! By following these steps, you've likely created a beautiful, flaky, perfect basic pie crust recipe from scratch. This foundational skill is a significant achievement in your baking journey. Take a moment to appreciate the golden color, the tender texture, and the wonderful aroma of your homemade crust. You've mastered the secrets to handling dough, incorporating fat, and achieving that coveted flakiness. This perfect basic pie crust recipe is now yours to recreate and adapt.
Remember the key takeaways: cold ingredients, gentle handling, minimal water, and proper chilling. These principles are your allies in consistent pie-making success. Don't be discouraged if your first attempt isn't absolutely perfect; like any skill, practice makes perfect. Each pie you bake will teach you something new about dough temperature, hydration, and your own kitchen environment.
Explore More Basic Pie and Tart Recipes on BakeWithEase.com
Now that you've conquered the perfect basic pie crust recipe, a world of delicious possibilities awaits! This versatile crust is the starting point for countless sweet and savory creations. Whether you're craving a classic fruit pie, a rich quiche, or an elegant tart, your reliable homemade crust is ready.
We encourage you to explore the wide variety of fillings and techniques available on BakeWithEase.com. From seasonal fruit fillings and creamy custards to savory vegetable or meat mixtures, you'll find inspiration for every occasion. Try our guides on specific pie fillings or explore variations like lattice tops and decorative cutouts. Your perfect basic pie crust recipe is just the beginning of many delightful baking adventures!
Frequently Asked Questions
What are the essential ingredients for a perfect basic pie crust?
To achieve a perfect basic pie crust, you'll need flour, fat (like butter or shortening), salt, and cold water. These ingredients create the right texture and flavor for your crust.
How do I ensure my pie crust doesn’t shrink while baking?
To prevent shrinkage during baking, make sure to chill the dough before rolling it out and avoid overworking the dough. This helps maintain its structure and prevents it from contracting.
Can I make my pie crust in advance?
Yes, you can prepare your pie crust in advance! Wrap it tightly in plastic wrap and store it in the refrigerator for up to three days or in the freezer for longer storage. Thaw it before use.
What is the best method for rolling out pie crust?
When rolling out your pie crust, use a light dusting of flour on your surface and rolling pin. Roll from the center outward, turning the dough occasionally to maintain an even thickness.
How can I tell when my pie crust is fully baked?
A fully baked pie crust should be golden brown and firm to the touch. If you're using it for a custard pie, it should be baked until set, while a fruit pie should be bubbly with a nicely browned crust.
Final Reflection: The Enduring Allure of the Perfect Crust
The pursuit of the perfect pie crust transcends mere culinary skill; it's a journey into the heart of home baking, a testament to patience, precision, and the simple joy of creating something beautiful from humble ingredients. In a world of instant gratification, taking the time to master this fundamental technique offers a profound sense of accomplishment and a connection to generations of bakers past. The seemingly simple act of blending flour, fat, and water becomes a meditative practice, a reminder to slow down and appreciate the process.
The influence of a perfectly flaky, golden crust extends far beyond the plate. It's a symbol of comfort, tradition, and the love poured into homemade treats. It evokes memories of family gatherings, holiday celebrations, and the comforting aroma of baking filling a home. As Julia Child wisely said, A good pie crust is like a good marriage – it takes time, patience, and the right ingredients.
This quote perfectly encapsulates the dedication and care required, and the rewarding outcome that awaits. The enduring appeal of the perfect pie crust lies in its ability to connect us to something larger than ourselves, something timeless and deeply satisfying.
Now, I invite you to take what you've learned and embark on your own journey to pie crust perfection. Don't be afraid to experiment, to embrace the occasional imperfection, and to savor the process. The true reward isn't just in the final product, but in the journey itself – the feel of the dough between your fingers, the satisfying crackle of the crust as it bakes, and the sheer delight of sharing your creation with loved ones. So, gather your ingredients, embrace the challenge, and discover the magic of the perfect basic pie crust.
Unlock Your Inner Pastry Chef!
Thanks for taking the time to explore the secrets to a perfect basic pie crust! We hope you now feel confident in tackling this classic baking challenge. Ready to put your new skills to the test?
- Bake your dream pie: Use this newfound knowledge to create your favorite pie – from apple to pumpkin, the possibilities are endless! Let your creativity shine!
- Share your success: Post a picture of your masterpiece on social media and tag us @BakeWithEase – we'd love to see your creation!
- Experiment with variations: Try adding different flavors or textures to your crust. What unique twist will you discover?
What incredible pie flavor combination will you create first?