
SliceandBake Chocolate Chip Cookies: A Beginner's Dream Recipe

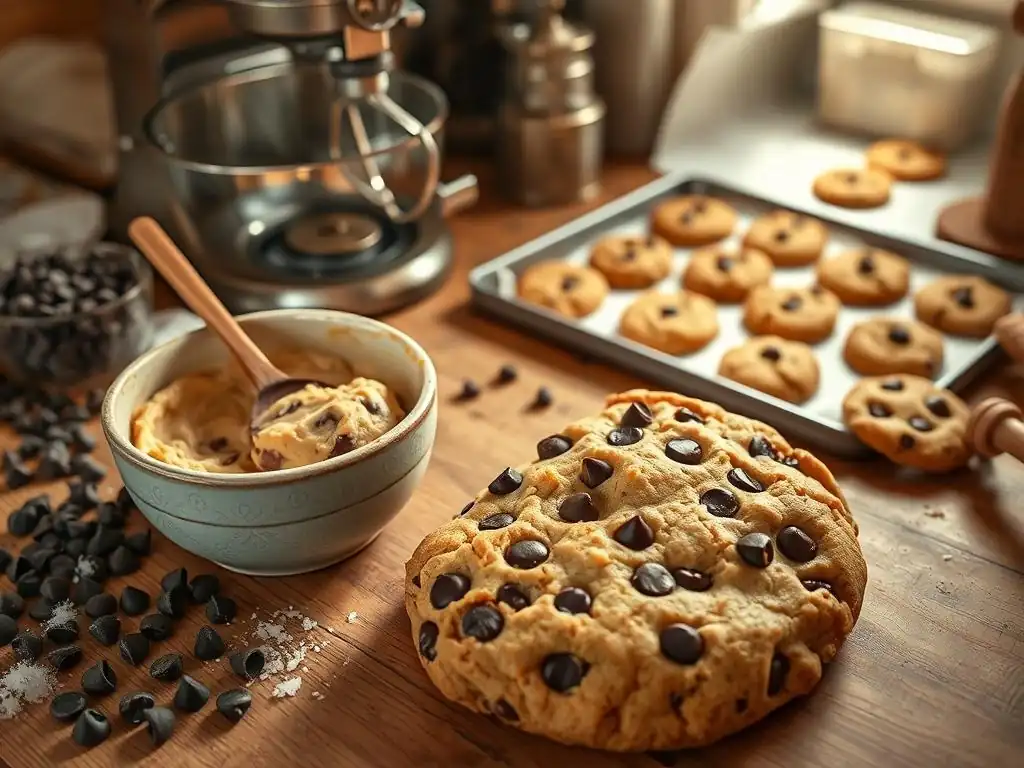
Welcome to BakeWithEase, where conquering the kitchen one delectable treat at a time is our mission! Ever dreamed of whipping up perfect cookies without the stress? Our easy chocolate chip cookie recipe is your starting point. Imagine warm, gooey goodness melting in your mouth. Ready to unlock the secrets to a truly effortless baking experience? Let's get started!
- BakeWithEase Presents: The Easiest Chocolate Chip Cookie Recipe Ever!
- Mastering the Easy Chocolate Chip Cookie Recipe: A Step-by-Step Guide
- Preparing the Dough: The Heart of Your Easy Chocolate Chip Cookies
- Shaping and Chilling the Dough: Getting Ready to Bake
- Baking Your Slice-and-Bake Chocolate Chip Cookies
- Cooling and Storing Your Delicious Homemade Cookies
- Troubleshooting Your Easy Cookie Recipe
- Variations on the Easy Chocolate Chip Cookie Recipe
- Enjoy Your Effortless and Delicious Chocolate Chip Cookies!
-
Frequently Asked Questions
- What makes this chocolate chip cookie recipe "easy," especially for beginners?
- Can I substitute any ingredients in this slice-and-bake chocolate chip cookie recipe?
- How long can I store the sliced chocolate chip cookie dough in the refrigerator?
- What's the best way to ensure the cookies bake evenly?
- Can I freeze the chocolate chip cookie dough for later use?
- Final Reflection: The Enduring Allure of the Perfect Chocolate Chip Cookie
- Unleash Your Inner Baker: Craft Delicious Cookies Today!
Welcome to BakeWithEase, where we believe that everyone can experience the joy of baking, regardless of skill level. Today, we're diving into the wonderful world of slice-and-bake chocolate chip cookies. This easy chocolate chip cookie recipe is designed with the beginner in mind, offering a simple path to warm, delicious, homemade cookies without the fuss often associated with traditional cookie dough. Forget sticky fingers and complicated techniques; we're making it straightforward and fun!
This particular method simplifies several steps, making it incredibly forgiving. Unlike recipes that require chilling dough in a large bowl and then scooping, the slice-and-bake approach involves forming the dough into logs before chilling, which makes portioning a breeze. It's perfect for busy schedules, allowing you to prepare the dough ahead of time and bake fresh cookies whenever the craving strikes – whether that's a few today and more tomorrow. This method truly embodies the 'easy' in easy chocolate chip cookie recipe, giving you confidence and delicious results right from your first attempt.
Imagine having homemade chocolate chip cookies ready to bake at a moment's notice. That's the promise of the slice-and-bake method. It's a revolutionary concept for home bakers, particularly those just starting out, as it removes the pressure of baking an entire batch at once. You create the dough, shape it into logs, chill it, and then simply slice off rounds and bake as few or as many as you want. This flexibility makes it an ideal beginner cookie recipe.
This technique isn't just about convenience; it also contributes to the cookie's texture. Chilling the dough allows the fats to solidify, which helps the cookies maintain their shape better during baking and prevents excessive spreading. Furthermore, the flavors in the dough have time to meld and deepen, potentially leading to a richer taste. Many experienced bakers even prefer the texture and flavor profile of cookies made from well-chilled dough, sometimes chilling for 24-48 hours for optimal results. For a quick bake, even 30 minutes makes a significant difference in the final cookie structure.
Why Slice-and-Bake is Perfect for Beginner Bakers
The slice-and-bake method significantly reduces common pitfalls faced by new bakers. Portioning cookies evenly can be tricky when scooping soft dough, leading to some cookies burning while others are underbaked. With slice-and-bake, once your log is uniform, each slice will be roughly the same size and thickness, ensuring consistent baking results across the tray. This consistency is key to building confidence when learning to bake.
Moreover, the ability to bake small batches means less waste and less pressure. If your first few cookies aren't perfect, you haven't committed an entire batch of dough. You can adjust the baking time or temperature for the next small batch. This iterative process is fantastic for learning. Plus, having ready-to-bake dough in the fridge (it typically lasts for 3-5 days, sometimes longer if well-wrapped) or freezer (up to 2-3 months) means you're always just minutes away from warm, gooey simple chocolate chip cookies, making you the hero of impromptu snack times.
Crafting the perfect easy chocolate chip cookie recipe starts with understanding the role of each ingredient. While simple, the quality and temperature of your ingredients can impact the final cookie significantly. We'll focus on standard pantry staples readily available at any grocery store, ensuring this recipe is accessible to everyone.
Our recipe typically calls for basic ingredients like all-purpose flour, granulated sugar, brown sugar, butter, eggs, vanilla extract, baking soda, salt, and of course, chocolate chips. Using room temperature butter and eggs is crucial for proper creaming and dough consistency. Cold ingredients don't emulsify correctly, leading to a potentially greasy or uneven dough. Aim for butter that gives slightly when pressed but isn't melted, ideally around 65-70°F (18-21°C).
The Best Chocolate for Chocolate Chip Cookies
The type of chocolate you choose can dramatically alter the flavor and texture of your easy chocolate chip cookie recipe. While classic semi-sweet chocolate chips (often around 40-50% cacao) are the standard and melt reliably, don't be afraid to experiment. Milk chocolate (typically 30-40% cacao) offers a sweeter, creamier bite, while dark chocolate (60% cacao or higher) provides a richer, slightly bitter contrast that balances the sweetness of the dough.
For a truly decadent cookie, consider using chopped chocolate bars instead of chips. Chocolate chips contain stabilizers to help them hold their shape during baking, resulting in distinct pockets of chocolate. Chopped chocolate bars, however, melt more fully and create pools of glorious, melted chocolate throughout the cookie. A mix of different types of chocolate chips or chopped bars can add complexity and visual appeal to your simple chocolate chip cookies. A common ratio is 1.5 to 2 cups of chocolate per batch, but feel free to adjust based on your preference!
Key Ingredients for Perfect Dough
Beyond the chocolate, the balance of sugars is vital for texture and flavor in your easy chocolate chip cookie recipe. Granulated sugar contributes to crispness and spread, while brown sugar adds moisture, chewiness, and a subtle caramel note due to its molasses content. Using a mix, like a 1:1 ratio of granulated to brown sugar, is common for achieving a balance between crisp edges and a soft center.
Baking soda is the primary leavener in most chocolate chip cookie recipes. When combined with an acidic ingredient (like the brown sugar or residual acidity in butter), it produces carbon dioxide gas, causing the cookies to rise and spread. Ensuring your baking soda is fresh (test a pinch in vinegar – it should fizz vigorously) is important for proper leavening. Salt is also crucial; it doesn't just add saltiness but enhances the overall flavor profile, balancing the sweetness of the sugars and chocolate.
Equipment You'll Need for Baking Success
You don't need a professional kitchen to bake delicious easy chocolate chip cookies. This recipe is designed to be accessible, requiring only a few basic tools likely already in your kitchen. Having the right equipment, however, makes the process smoother and helps ensure consistent results, which is especially helpful for a beginner baker.
The most essential items include measuring cups and spoons (for accuracy), a large mixing bowl, a hand mixer or stand mixer (while you can cream butter and sugar by hand, a mixer makes it much easier and more effective), and a sturdy spatula or wooden spoon for mixing in dry ingredients and chocolate chips. You'll also need parchment paper or silicone baking mats to line your baking sheets, preventing sticking and ensuring even browning.
Essential Baking Tools for Novices
For this specific beginner cookie recipe, a few items are particularly helpful for the slice-and-bake method. A sharp knife is necessary for cleanly slicing the chilled dough logs. A ruler can be useful for ensuring your dough logs are uniform in diameter and for measuring consistent slice thickness (aiming for about 1/2 inch or 1.2 cm thick slices is a good starting point).
You'll also need one or two baking sheets (standard half-sheet pans, roughly 13x18 inches or 33x46 cm, are ideal) and a wire cooling rack. Using multiple baking sheets allows you to prepare one batch while another is baking or cooling. A wire rack is essential for allowing air circulation around the cookies as they cool, preventing the bottoms from becoming soggy from residual heat. These simple tools are investments that will serve you well in many future baking adventures beyond just this simple chocolate chip cookie recipe.
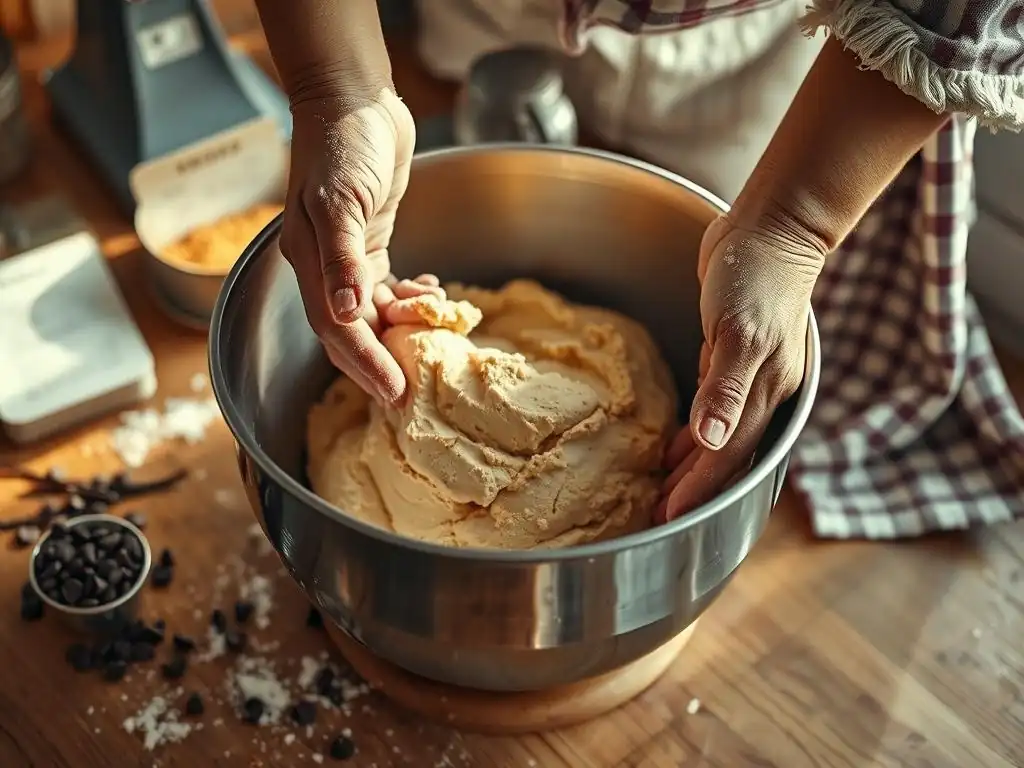
Making the dough for your easy chocolate chip cookie recipe is a straightforward process involving a few key steps. Each step plays a role in developing the texture and flavor of the final cookie. Don't rush through these stages; taking your time ensures all ingredients are properly incorporated.
The process typically follows a standard cookie method: creaming butter and sugar, adding wet ingredients, then incorporating dry ingredients, and finally, mixing in your delicious chocolate chips. This structured approach makes it easy to follow along, even if you've never made cookie dough before. Pay attention to the visual cues described in each step to know you're on the right track.
Step 1: Creaming Butter and Sugar for the Perfect Texture
Creaming is arguably the most important step for achieving light and tender cookies. This involves beating softened butter with the sugars until the mixture becomes pale yellow, light, and fluffy. As you beat, tiny air pockets are incorporated into the butter. These air pockets expand in the oven, contributing to the cookie's rise and texture.
Using a stand mixer with the paddle attachment or a hand mixer, beat the softened butter and both sugars on medium speed for about 3-5 minutes. You'll notice the color lighten and the volume increase slightly. Scrape down the sides and bottom of the bowl periodically to ensure everything is evenly mixed. You are aiming for a texture similar to whipped frosting, though maybe slightly less airy. Don't shortcut this step; insufficient creaming is a common reason cookies turn out flat or dense.
Step 2: Adding Eggs and Vanilla Extract for Flavor
Once your butter and sugar mixture is light and fluffy, it's time to add the wet ingredients: the eggs and vanilla extract. Eggs provide structure, richness, and act as a binder, holding the cookie together. Vanilla extract enhances the overall sweetness and adds depth of flavor, complementing the chocolate beautifully.
Add the eggs one at a time, beating on low speed until each egg is fully incorporated before adding the next. This helps create a stable emulsion. Then, beat in the vanilla extract. The mixture might look slightly curdled at this stage, which is normal. Continue mixing on low speed just until everything is combined. Overmixing after adding eggs can develop too much gluten in the flour later, potentially leading to tougher cookies, so mix only until the egg streaks disappear.
Step 3: Combining Dry Ingredients for a Uniform Dough
In a separate medium bowl, whisk together your dry ingredients: the all-purpose flour, baking soda, and salt. Whisking not only combines them thoroughly but also helps to aerate the flour slightly and removes any lumps. This ensures that the leavening and salt are evenly distributed throughout the dough, which is crucial for consistent results in your easy chocolate chip cookie recipe.
Gradually add the dry ingredients to the wet ingredients, mixing on low speed just until barely combined. Stop mixing when you still see a few streaks of flour. Overmixing the dough once the flour is added develops gluten, which is great for bread but results in tough, dry cookies. Use a spatula to gently fold in any remaining flour streaks by hand. The dough will be soft but should come together.
Step 4: Incorporating Chocolate Chips (and Optional Mix-ins)
The final step in preparing the dough is adding the star ingredient: the chocolate chips! This is also the time to include any optional mix-ins you desire, such as nuts or other types of chocolate. For a standard batch using about 1.5 cups of flour, adding 1.5 to 2 cups of chocolate chips provides a generous amount of chocolate in every bite.
Add the chocolate chips (and any other additions like chopped nuts) to the dough. Use a sturdy spatula or wooden spoon to fold them in by hand until they are evenly distributed throughout the dough. This prevents the dough from becoming overworked by the mixer. Be sure to scrape the bottom and sides of the bowl to ensure the mix-ins are thoroughly incorporated into all parts of the dough. Your simple chocolate chip cookie dough is now ready for shaping!
Shaping and Chilling the Dough: Getting Ready to Bake
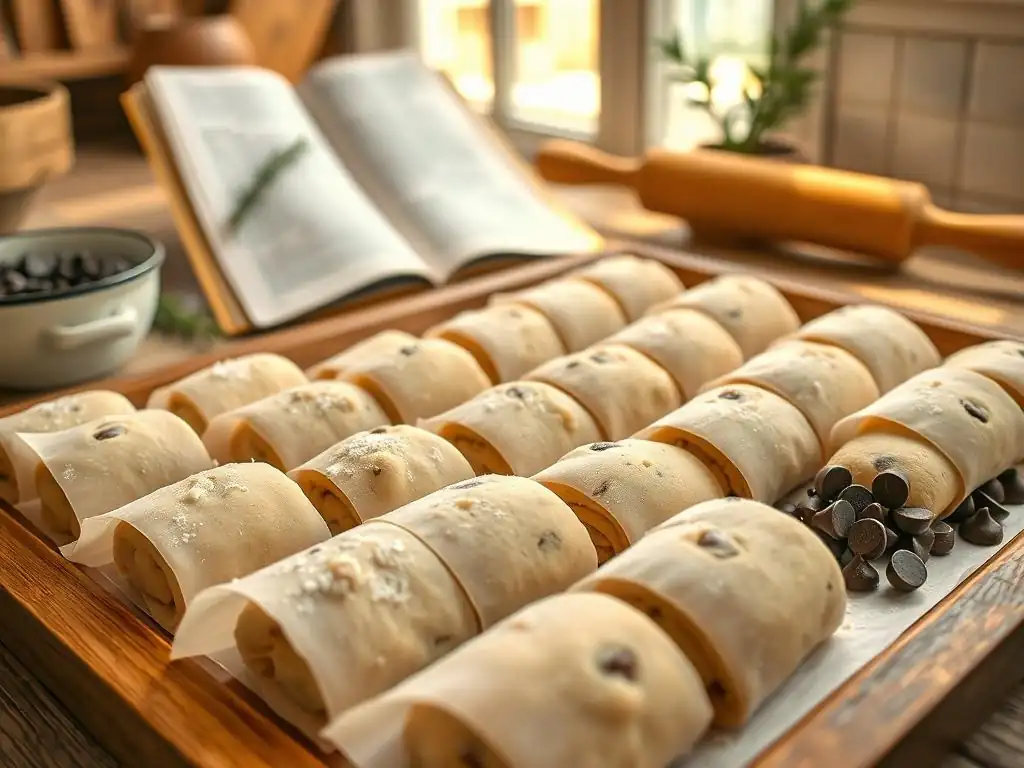
This is where the slice-and-bake method diverges from traditional drop cookies and gets its name. Shaping the dough into logs before chilling is the key step that makes slicing and baking so convenient. Proper chilling is equally important for achieving the desired texture and preventing excessive spread during baking.
Take your time shaping the logs neatly; a uniform diameter is crucial for consistently sized cookies. Chilling is non-negotiable for slice-and-bake; it solidifies the fat and makes the dough firm enough to slice cleanly. Don't skip this step, or you'll end up with flat, shapeless blobs instead of beautiful, round cookies.
Forming the Dough Log: Tips and Tricks
Divide the cookie dough in half (or into thirds, depending on how long you want your logs). On a piece of parchment paper or plastic wrap, shape each portion into a log about 1.5 to 2 inches (approx. 4-5 cm) in diameter. Aim for a consistent thickness along the entire length of the log. This ensures all your cookies will be roughly the same size when sliced.
To get a nice, round log, you can gently roll the dough back and forth, using the parchment or wrap to help guide and tighten it. If the dough is too soft to handle easily, you can chill it for 15-20 minutes first, then shape it. Once shaped, wrap each log tightly in parchment paper, then again in plastic wrap to prevent drying out and absorbing odors from the refrigerator. You can gently press the log into a square shape if you prefer square cookies, or even a triangular shape for wedge-shaped cookies!
Chilling the Dough: Why It's Crucial for Slice-and-Bake
Chilling the dough is a critical step for several reasons when making this easy chocolate chip cookie recipe. First and foremost, it solidifies the butter, making the dough firm enough to slice cleanly with minimal distortion. Trying to slice warm or soft dough will result in squished, misshapen cookies. For clean slices, the dough needs to be quite firm, almost like cold butter.
Secondly, chilling allows the flavors to meld and deepen. The dry ingredients, particularly the flour, absorb moisture from the wet ingredients over time, which helps create a more uniform texture and prevents a raw flour taste. This also slightly reduces the dough's spread during baking, resulting in thicker cookies.
While a minimum of 30 minutes is necessary for slicing, chilling for 2 hours or even overnight (up to 2-3 days is fine) often yields cookies with superior flavor and texture. For longer storage, the logs can be frozen for up to 2-3 months; just let them sit at room temperature for 10-15 minutes before slicing.
You've made the dough, chilled it perfectly, and now comes the most rewarding part: baking! This step is quick and fills your home with that irresistible aroma of warm chocolate chip cookies. Precision in temperature and timing is key to achieving that coveted balance of crispy edges and a soft, slightly gooey center.
Remember that oven temperatures can vary, so using an oven thermometer is a great way to ensure accuracy. Keep a close eye on your cookies, especially towards the end of the baking time, as they can go from perfectly golden to overdone very quickly. Baking just one tray at a time is also recommended for best results, as crowding the oven can affect air circulation and temperature consistency.
Preheating Your Oven: The Right Temperature for Success
Proper oven temperature is fundamental to baking success. For most chocolate chip cookie recipes, including this easy chocolate chip cookie recipe, a temperature of 350°F (175°C) is standard. This temperature is hot enough to set the edges and promote browning while allowing the center to cook through without drying out.
Always preheat your oven fully before putting in the cookies. This usually takes at least 10-15 minutes, even after the oven indicates it has reached the set temperature. Using an oven thermometer is highly recommended, as many ovens are calibrated incorrectly and can be off by 25°F (approx. 15°C) or more. Baking in an oven that isn't fully preheated or is running at the wrong temperature can lead to uneven baking and disappointing results like excessive spreading or pale, undercooked cookies.
Once the dough log is sufficiently chilled and firm, place it on a cutting board. Use a sharp knife to slice the log into rounds about 1/2 inch (approx. 1.2 cm) thick. Try to make your slices as consistent in thickness as possible. Uniform slices will bake at the same rate, ensuring all cookies on the tray are done at the same time.
If the dough log feels too hard to slice easily right out of the fridge, let it sit at room temperature for 5-10 minutes to soften just slightly. Rotate the log as you slice to maintain a round shape. If any pieces seem slightly misshapen, you can gently reshape them with your fingers before placing them on the baking sheet. Place the sliced rounds about 2 inches (approx. 5 cm) apart on your baking sheet lined with parchment paper or a silicone mat. They will spread slightly as they bake.
Baking Time: Knowing When They're Done
The baking time for slice-and-bake chocolate chip cookies typically ranges from 8 to 12 minutes, depending on their thickness, size, your oven, and your desired level of doneness. For cookies sliced about 1/2 inch thick, start checking around the 8-minute mark. You are looking for specific visual cues rather than strictly adhering to a timer.
Cookies continue to cook slightly from residual heat after being removed from the oven, so it's often better to err on the side of slightly underbaking than overbaking, especially if you prefer a chewier center. Overbaked cookies will be hard and dry throughout. Learning to read the visual cues is a key skill for any baker mastering an easy chocolate chip cookie recipe.
The Perfect Golden Brown: Visual Cues for Doneness
Look for the edges of the cookies to be set and lightly golden brown. The centers should still look slightly soft and perhaps a little puffy. If the centers look completely set and opaque, they are likely overdone. The surface of the cookie should have small cracks and appear slightly matte, not wet or shiny.
If you gently touch the edge of a cookie, it should feel firm enough to hold its shape but the center should yield slightly. Cookies baked on parchment paper often brown a little differently than those on silicone mats; parchment can sometimes lead to slightly crispier bottoms. Once you remove the tray from the oven, let the cookies sit on the hot baking sheet for 2-5 minutes before transferring them to a wire rack. This allows them to finish setting without breaking.
You've done it! You've successfully baked a batch of delicious easy chocolate chip cookies using the slice-and-bake method. While the temptation to devour them all immediately is strong (and perfectly understandable! ), proper cooling and storage are important steps to ensure they maintain their texture and freshness.
Cooling cookies correctly prevents them from becoming soggy and allows their structure to fully set. Storing them properly keeps them fresh for as long as possible, preserving that wonderful homemade taste and texture. This is particularly important if you've baked a larger batch or plan to enjoy your cookies over several days.
Cooling Rack Essentials
After letting your cookies set on the hot baking sheet for a few minutes (typically 2-5 minutes), carefully transfer them to a wire cooling rack using a spatula. Cooling cookies on a wire rack allows air to circulate freely around them, cooling them quickly and preventing condensation from forming on the bottom, which can make them soggy.
Allow the cookies to cool completely on the rack before storing them. Storing warm cookies in a container will trap steam, leading to a soft, potentially wet texture and a shorter shelf life. Complete cooling might take 20-30 minutes, depending on the size and thickness of your cookies and the ambient temperature. Patience here pays off in the long run!
Once completely cool, store your simple chocolate chip cookies in an airtight container at room temperature. A cookie jar with a tight-fitting lid, a plastic food storage container, or even a zip-top bag works well. Ensure the container is truly airtight to prevent the cookies from drying out and becoming stale.
Properly stored, your homemade chocolate chip cookies should stay fresh and delicious for 3-5 days at room temperature. For longer storage, you can freeze baked cookies for up to 2-3 months. Place cooled cookies in a single layer on a baking sheet until frozen solid, then transfer them to a freezer-safe airtight container or bag, separating layers with parchment paper if needed. Thaw frozen cookies at room temperature or warm them gently in a low oven (around 275°F or 135°C) for a few minutes for that fresh-baked experience.

Even with an easy chocolate chip cookie recipe, sometimes things don't go exactly as planned. Don't get discouraged! Baking is a science, and understanding common issues helps you learn and improve. Most problems with cookies are related to ingredients, mixing, temperature, or baking time.
We'll cover a couple of the most frequent problems beginner bakers encounter with this type of recipe and offer simple solutions. Remember that practice makes perfect, and even experienced bakers have off days. Learning to identify and fix issues is a valuable part of your baking journey.
Common Mistakes and How to Avoid Them
One of the most common issues is cookies spreading too much during baking, resulting in thin, crispy (and sometimes greasy) discs instead of chewy rounds. Another is the dough being too dry or crumbly, making it difficult to form logs or resulting in dry cookies. Both issues can often be traced back to ingredient measurements or temperature.
Using too much butter or sugar, or not chilling the dough sufficiently, are primary culprits for excessive spreading. Conversely, using too much flour or too little liquid (like egg or vanilla) can lead to dry dough. Ensuring accurate measurements using the correct tools (dry ingredients in dry measuring cups, liquids in liquid measuring cups) and techniques (leveling flour properly) is fundamental to avoiding these pitfalls in your beginner cookie recipe.
Dough Too Dry?
If your cookie dough seems too dry and crumbly after mixing in the dry ingredients, it might be due to inaccurate flour measurement (too much flour) or ingredients being too cold. Flour can compact in the bag, so scooping directly from the bag with a measuring cup can result in significantly more flour than intended. The best practice is to lightly spoon the flour into the measuring cup and level it off with a straight edge.
If the dough is just slightly dry, you can try adding milk or cream, a teaspoon at a time, mixing gently until the dough comes together. Be cautious not to add too much liquid, as this can also affect the cookie's texture. Ensure your butter and eggs were at the correct room temperature before starting, as cold ingredients don't emulsify properly and can make the dough seem drier than it is.
Cookies Spreading Too Thin?
Excessive cookie spread is often caused by butter that is too soft or melted, insufficient chilling time, or an oven temperature that is too low. If your butter was very soft or partially melted when creaming, the air pockets won't hold up as well. If you didn't chill the dough logs for the recommended time, the butter won't be solid enough to resist spreading in the warm oven.
Double-check your oven temperature with an oven thermometer; if it's too low, the cookies heat up gradually, giving the butter more time to melt before the dough sets. If your cookies spread too much, try ensuring your butter is properly softened (not melted), chilling the logs for a longer period (at least 2 hours, ideally), and verifying your oven temperature is accurate. You can also try adding a tablespoon or two more flour to the dough next time, which can help absorb excess moisture and reduce spread.
Mastering the perfect cookie texture – that delightful contrast between a slightly crisp edge and a soft, chewy center – is the goal of many bakers. For this easy chocolate chip cookie recipe, achieving this consistently involves controlling a few key factors. It's a balance of ingredients, technique, and baking time.
Using a mix of granulated and brown sugar contributes to texture; more brown sugar yields a chewier cookie, while more granulated sugar results in a crispier one. Not overmixing the dough after adding flour prevents toughness. Most importantly, the baking time is crucial. Pulling the cookies out when the edges are set but the centers still look slightly underbaked is key to that soft middle. They will continue to set as they cool on the baking sheet. Experimenting with bake times in 1-minute increments can help you find your personal preference for the perfect texture.
One of the joys of mastering a basic recipe like this easy chocolate chip cookie recipe is the ability to easily adapt it and create your own variations. The slice-and-bake method is incredibly versatile, allowing you to add different mix-ins or flavorings to customize your cookies.
Think of the basic dough as your canvas. While classic semi-sweet chips are wonderful, you can easily swap them out or add other ingredients to create unique flavor profiles. This encourages creativity in the kitchen and means you can make a variety of delicious cookies from essentially the same simple dough base.
Adding Nuts for Extra Crunch
Adding chopped nuts is a classic variation to the simple chocolate chip cookie. Walnuts and pecans are the most popular choices, offering a pleasant crunch and earthy flavor that complements the sweet chocolate and rich dough. Aim for about 1 cup of chopped nuts per batch, folding them in at the same time as the chocolate chips.
Toasting the nuts lightly before adding them can enhance their flavor significantly. Spread them on a baking sheet and bake at 300°F (150°C) for 8-10 minutes, or until fragrant. Let them cool completely before chopping and adding to the dough. This simple step adds another layer of flavor to your beginner cookie recipe.
Experimenting with Different Chocolate Types
As mentioned earlier, the type of chocolate has a big impact. Instead of just semi-sweet, try using all milk chocolate for a sweeter cookie, or all dark chocolate for a more intense, less sweet experience. White chocolate chips (technically not chocolate, but a confection made with cocoa butter) can be added alongside or instead of traditional chips for a different kind of sweetness.
Mixing chocolate types is also a great idea. A combination of semi-sweet and dark chocolate chips, or semi-sweet chips and white chocolate chips, creates a more complex flavor profile. You can also chop up your favorite chocolate bars – from high-quality dark chocolate to milk chocolate with caramel or sea salt inclusions – and fold those into the dough for truly unique easy chocolate chip cookies.
Creating Unique Flavors with Extracts and Spices
Beyond chocolate and nuts, you can easily add other flavorings to your easy chocolate chip cookie recipe. Extracts are the simplest way to do this. While vanilla is standard, consider adding almond extract for a nutty hint, a touch of peppermint extract (use sparingly!) for a holiday twist, or even a bit of orange extract to complement the chocolate.
Spices can also add wonderful depth. A pinch of cinnamon or nutmeg folded into the dry ingredients pairs beautifully with the brown sugar and chocolate. For a more adventurous flavor, try adding a dash of chili powder or cayenne pepper for a subtle kick that enhances the chocolate flavor. Start with small amounts (e.g., 1/4 teaspoon of spice) and adjust to your taste in future batches.
Congratulations! You've successfully navigated making easy chocolate chip cookies using the incredibly convenient slice-and-bake method. Whether you baked a whole batch or just a few, you now have warm, homemade treats ready to enjoy. This recipe proves that you don't need years of experience to bake something truly delicious.
Take a moment to appreciate your accomplishment. The aroma, the taste, the satisfaction of creating something wonderful from scratch – these are the simple joys of baking. Share them with friends and family, or keep them all to yourself (we won't tell!). You've mastered a fantastic beginner cookie recipe and opened the door to many more baking adventures.
We love seeing what our community bakes! If you made these simple chocolate chip cookies, we'd be thrilled to hear about it. What variations did you try? Did you find the slice-and-bake method as easy as we promised?
Your experiences and tips are invaluable to other beginner bakers. Baking is a journey, and we're here to support you every step of the way. Keep baking, keep exploring, and most importantly, keep enjoying the process!
Frequently Asked Questions
This recipe is designed for ease because it uses a slice-and-bake method, eliminating the need to individually scoop cookies. The ingredients are also easily accessible and the instructions are straightforward.
While substitutions are possible, they may affect the final result. It's best to stick to the recipe for the best beginner experience. You could try different types of chocolate chips.
The sliced dough can typically be stored in the refrigerator for up to 3-5 days. Make sure to wrap it tightly to prevent it from drying out.
Ensure even baking by slicing the dough into uniform thicknesses and placing the cookies an equal distance apart on the baking sheet. Rotate the baking sheet halfway through.
Yes, freezing the dough is a great option! Wrap the log tightly in plastic wrap and then in foil, and it can be frozen for up to 2-3 months for baking later.
The simple act of baking a chocolate chip cookie remains a powerful source of comfort and joy, a testament to the enduring appeal of uncomplicated pleasures. Even in our fast-paced, technology-driven world, the desire for a warm, gooey, perfectly browned cookie persists, a craving that transcends generations and cultures. This recipe, designed for the beginner baker, aims to unlock that joy for everyone.
The influence of a simple, well-executed recipe like this extends far beyond the kitchen. It fosters a sense of accomplishment, a connection to tradition, and a shared experience that brings people together. The aroma alone evokes feelings of nostalgia and warmth, reminding us of home, family, and simpler times. Baking is at once child's play and adult joy. And love, of course.
– Alma Flor Ada. This quote perfectly encapsulates the magic of baking, especially when it comes to something as universally loved as the chocolate chip cookie.
Now, I invite you to roll up your sleeves, gather your ingredients, and embark on this delicious journey. Don't be intimidated by the seemingly simple task; embrace the process, savor the aroma, and relish the satisfaction of creating something delicious from scratch. The perfect chocolate chip cookie is within your reach, and the joy it brings is immeasurable. Share your creations, share your experiences, and most importantly, share the love.
Thanks for taking the time to explore our simple chocolate chip cookie recipe! We hope you gained the confidence to tackle baking, even if you're a complete beginner. Now, it's time to put your new skills to the test!
- Bake a batch of these incredible cookies! Follow the recipe, tweak it to your liking, and enjoy the delicious results. This is your chance to impress yourself (and maybe some friends! ).
- Share your cookie creations! Snap a picture and post it on social media using #BakeWithEase and tag us – we’d love to see your baking journey!
- Consider experimenting with different variations: add nuts, dried fruit, or even a sprinkle of sea salt – the possibilities are endless!
Ready to transform your kitchen into a chocolate chip cookie paradise? What's your favorite cookie addition that you'll experiment with first?