
Troubleshooting Quick Breads: Fixing Common Beginner Mistakes

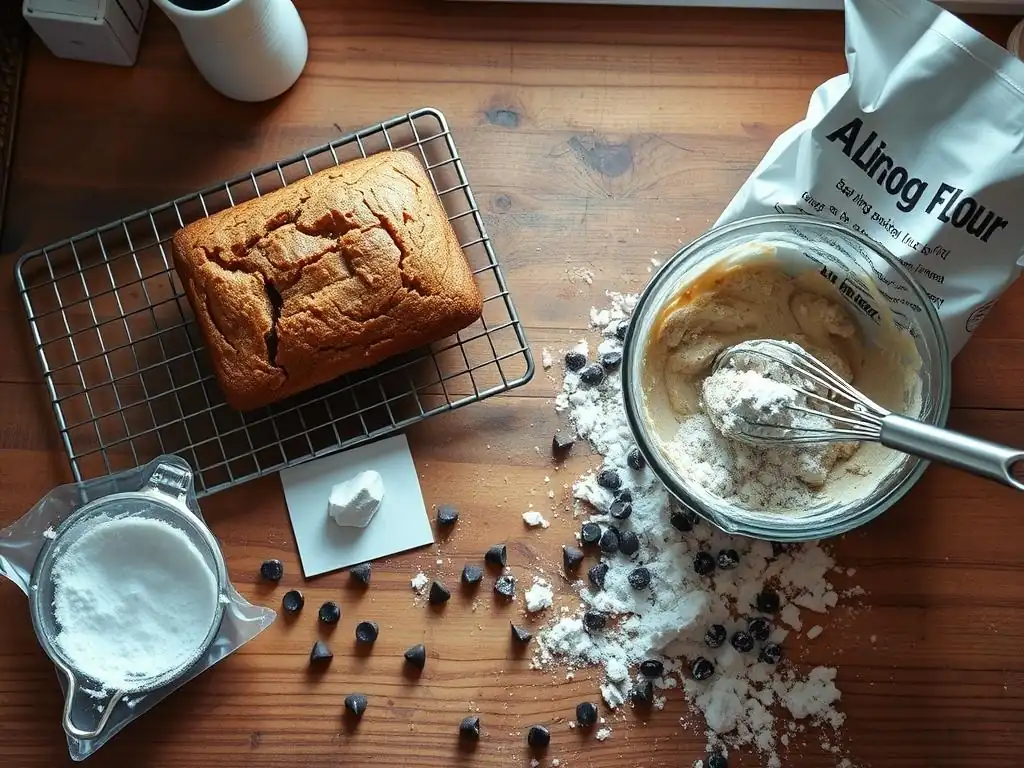
Welcome to BakeWithEase, your trusted guide to the delightful world of baking!
Are you ready to conquer Quick Bread Beginner Baking Problems? From dense loaves to sinking middles, we've all been there. This article dives deep into the most common pitfalls faced by novice bakers when making quick breads, offering simple solutions and expert tips to ensure every bake is a success. Unlock the secrets to perfect texture and flavor – your baking journey starts now!
- Troubleshooting Quick Breads: Fixing Common Beginner Mistakes - BakeWithEase
- Quick Bread Baking Problems for Beginners: A Comprehensive Guide
- Common Quick Bread Mistakes and How to Avoid Them
- Problem: Dry and Crumbly Quick Bread
- Problem: Dense and Heavy Quick Bread
- Problem: Quick Bread Sinking in the Middle
- Problem: Uneven Baking and Dark Crust
- Problem: Quick Bread is Too Sweet or Not Sweet Enough
- Problem: Sticky or Gummy Texture in Quick Bread
- Quick Bread Baking Tips and Tricks for Beginners
- Mastering Quick Bread Baking: Achieving Baking Success
-
Frequently Asked Questions
- What are the most common beginner baking problems when making quick breads?
- Why is my quick bread so dense and heavy?
- My quick bread is dry and crumbly; what went wrong?
- How can I prevent my quick bread from sinking in the middle?
- My quick bread is browning too quickly on the outside but is still raw inside; what should I do?
- Final Reflection: The Sweet Taste of Baking Triumph
- Unleash Your Inner Baker: Master Quick Bread Perfection!
Troubleshooting Quick Breads: Fixing Common Beginner Mistakes - BakeWithEase
Quick Bread Baking Problems for Beginners: A Comprehensive Guide
Embarking on your quick bread baking journey is exciting! Quick breads, like muffins, scones, and loaf cakes, are fantastic because they don't require yeast or lengthy proofing times. They rely on chemical leaveners, making them, well, quick! However, even these seemingly simple bakes can present challenges. Many beginner bakers encounter common quick bread problems that can turn a potentially delicious loaf into a dense brick or a dry crumb. This guide is designed to help you identify, understand, and fix those frustrating quick bread beginner baking problems, transforming your baking mishaps into successes.
Understanding the science behind quick breads is the first step to avoiding pitfalls. Unlike yeast breads where gluten development is crucial, quick breads thrive on minimal mixing to keep them tender. The leavening agents, typically baking powder and/or baking soda, create air bubbles that give the bread its light texture. mastering the balance of ingredients, temperature, and technique is key to overcoming common quick bread beginner baking problems and achieving that perfect, moist crumb every time. Let's dive into the specific issues you might face and how to troubleshoot them effectively.
Common Quick Bread Mistakes and How to Avoid Them
Quick breads are designed for speed and simplicity, making them a popular starting point for new bakers. Yet, despite their name, they aren't entirely foolproof. Small errors in technique or ingredient handling can lead to frustrating results. From loaves that are too dense to those that sink in the middle, these common quick bread problems are often easily fixable once you understand the underlying cause. Addressing these quick bread beginner baking problems head-on will significantly improve your results and boost your confidence in the kitchen.
Many quick bread beginner baking problems stem from just a few key areas: ingredient measurement, mixing technique, oven temperature, and baking time. By paying close attention to these fundamental aspects, you can prevent the most frequent issues. We'll explore each major problem area, break down the specific reasons it might be happening, and provide actionable steps to correct it. Getting these basics right is essential for consistently successful quick bread baking.
Understanding the Basics of Quick Bread Baking
Quick breads rely on chemical leaveners such as baking powder and baking soda to rise. These leaveners react with moisture, and sometimes acid and heat, to produce carbon dioxide gas. This gas gets trapped within the batter, causing it to expand and lift during baking. The key difference from yeast breads is that this leavening happens rapidly, and extensive gluten development, which gives yeast bread its chewy structure, is generally undesirable in quick breads. Too much mixing can overdevelop gluten, leading to a tough texture, a common quick bread beginner baking problem.
The standard ratio for many quick breads involves balancing dry ingredients (flour, sugar, leavener, salt) with wet ingredients (eggs, milk, oil/melted butter, flavorings). Fat plays a crucial role in tenderness and moisture. Eggs provide structure and richness. Liquid activates leaveners and hydrates the dry ingredients.
Sugar sweetens, tenderizes, and contributes to browning. Understanding how these components interact is fundamental to troubleshooting quick bread beginner baking problems. For example, a typical muffin recipe might use a ratio of roughly 2 parts flour to 1 part liquid and 1 part fat, alongside leavening appropriate for the acidity of the liquid (e.g., baking soda with buttermilk, baking powder with milk).
Identifying Potential Issues in Your Quick Bread Recipe
Before you even start mixing, reviewing your recipe and ingredients can help prevent quick bread beginner baking problems. Look for specific instructions regarding mixing (e.g., "mix until just combined"), temperature (e.g., "room temperature eggs"), and pan preparation. Ensure you have the correct type and amount of leavener specified; substituting baking soda for baking powder without accounting for acid can lead to failure. Check the expiration dates on your leaveners – old leaveners are a frequent culprit behind dense quick breads.
Consider the environment you're baking in. High altitude baking, for instance, requires adjustments to leavening, sugar, and liquid due to lower atmospheric pressure causing batters to rise faster and moisture to evaporate quicker. Even the humidity in your kitchen can slightly affect flour absorption. While these factors might seem minor, they can contribute to common quick bread problems. Paying attention to these details and understanding how they might impact your specific recipe is a proactive step in mastering quick bread baking.
Problem: Dry and Crumbly Quick Bread
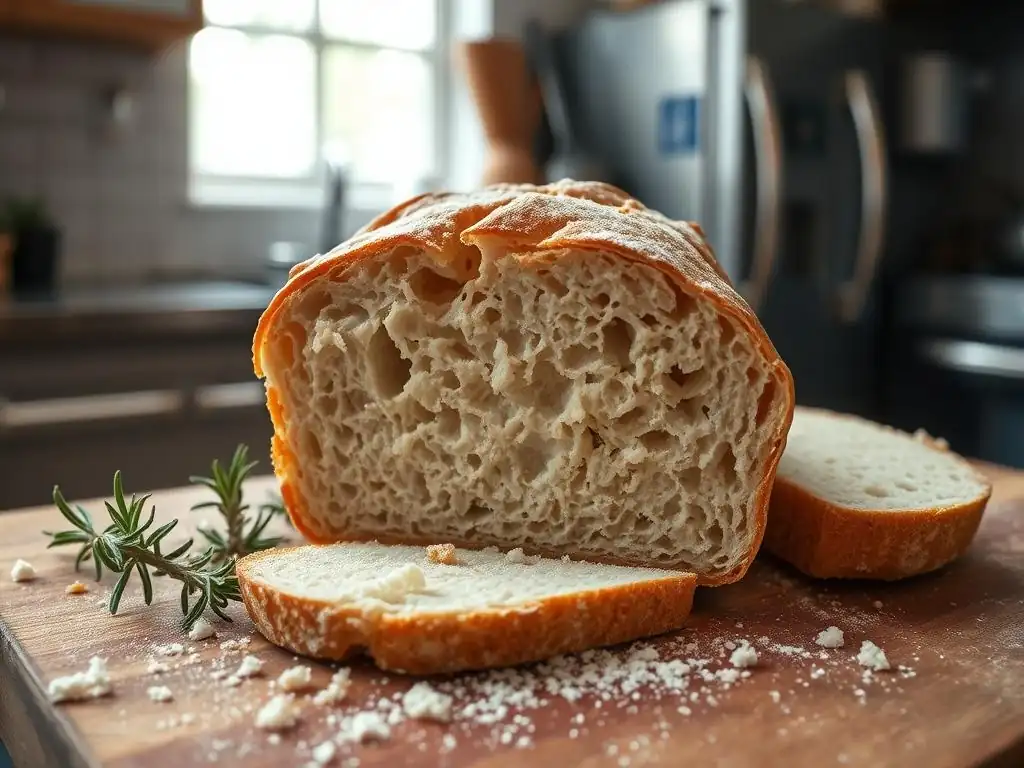
One of the most disappointing quick bread beginner baking problems is a loaf that crumbles apart instead of slicing cleanly, or tastes dry and dusty. This is a common issue that can be traced back to several factors related to ingredient ratios, mixing, and baking time.
Reason 1: Overmixing the Batter - The Gluten Factor
Overmixing is a primary cause of dry, tough, or crumbly quick bread. Flour contains proteins, glutenin and gliadin, which form gluten when mixed with liquid. While gluten is essential for the structure of yeast breads, in quick breads, too much gluten development creates a tough, elastic network. This network holds onto moisture less effectively than a tender crumb, resulting in dryness. Imagine mixing pancake batter – you stop when the lumps are mostly gone, not when it's perfectly smooth, to keep the pancakes tender. The same principle applies to quick breads.
When you mix quick bread batter, especially once the wet and dry ingredients are combined, you should stop as soon as no dry streaks of flour are visible. Even a few extra stirs can activate enough gluten to negatively impact the final texture. For instance, if a recipe calls for adding blueberries and you stir them in vigorously for 30 seconds instead of gently folding for 10 seconds, you could be overmixing. This over-agitation develops gluten, leading to a less tender, potentially dry result – a classic quick bread beginner baking problem.
Reason 2: Using Too Much Flour - Measuring Matters
Incorrectly measuring flour is perhaps the most frequent cause of dry quick breads. Flour compacts easily in its bag or container. If you scoop flour directly from the bag using your measuring cup, you can pack in significantly more flour than the recipe intends – sometimes up to 25% more by weight. This excess flour absorbs more liquid, leaving less moisture available for a tender crumb and leading to a dry, heavy texture, a common quick bread beginner baking problem.
The standard method for measuring flour by volume is the "spoon and level" method. Gently spoon the flour into your dry measuring cup until it's overflowing, then level off the excess with a straight edge (like the back of a knife) without tapping or shaking the cup. For best accuracy, especially with quick breads, measure by weight using a kitchen scale. A standard U.S. cup of all-purpose flour weighs approximately 120-125 grams when spooned and leveled. Comparing your cup measure weight to this standard can reveal if you're consistently adding too much flour.
Reason 3: Overbaking - Watch the Clock and the Internal Temperature
Leaving a quick bread in the oven for too long is a surefire way to dry it out. As the bread bakes, moisture evaporates. While some evaporation is necessary for structure, excessive baking time removes too much water, resulting in a dry, sometimes hard, crust and crumb. Oven temperatures can also vary, meaning the baking time specified in a recipe is often a guideline, not an absolute rule.
Always start checking for doneness a few minutes before the minimum bake time given in the recipe. Use a toothpick or cake tester inserted into the center of the loaf (avoiding any additions like chocolate chips or fruit) – it should come out with moist crumbs attached, but not wet batter. For ultimate precision, use an instant-read thermometer; most quick breads are done when the internal temperature in the center reaches between 200°F and 210°F (93°C to 99°C). Relying solely on visual cues like a golden-brown crust can be misleading and contribute to quick bread beginner baking problems.
Reason 4: Insufficient Fat - The Role of Butter, Oil, or Shortening
Fat plays a vital role in quick bread tenderness and moisture retention. Butter, oil, or shortening coats the flour particles, inhibiting gluten development and creating a softer, more delicate crumb. Fat also helps the bread stay moist for longer after baking. If a recipe calls for a specific amount of fat and you reduce it significantly, or if the fat isn't evenly distributed, the resulting bread is likely to be dry and less tender.
Ensure you measure fats accurately, just like flour. If using melted butter or oil, incorporate it thoroughly but gently into the wet ingredients before combining with the dry. If using solid fat like softened butter or shortening (less common in standard quick loaves but used in scones), ensure it's properly cut into the flour until the desired texture (like coarse crumbs) is achieved before adding liquid. Using too little fat or failing to incorporate it correctly is a straightforward path to dry quick bread beginner baking problems.
Problem: Dense and Heavy Quick Bread
A quick bread should be tender and light, not feel like a brick. Density is another common quick bread beginner baking problem, often related to issues with leavening or mixing technique.
Reason 1: Not Enough Leavening Agent - Baking Powder and Baking Soda Explained
Quick breads rely on chemical leaveners like baking powder and baking soda to create lift. Baking soda (sodium bicarbonate) requires an acidic ingredient (like buttermilk, yogurt, brown sugar, molasses, or cocoa powder) to produce carbon dioxide gas. Baking powder, on the other hand, is a complete leavening system containing both an acid and a base; most are double-acting, meaning they produce some gas when mixed with liquid and more gas when heated in the oven. Using too little of the specified leavener means insufficient gas production to lift the batter, resulting in a dense quick bread.
Recipes are carefully balanced to match the leavener to the other ingredients, especially the acidic ones. For instance, a recipe using buttermilk will likely call for baking soda, possibly in combination with baking powder. If you substitute regular milk for buttermilk without adjusting the leavener (adding baking powder or swapping baking soda for baking powder), you won't have enough acid to activate the baking soda, leading to poor rise. Always use the exact type and amount of leavener specified.
Reason 2: Expired Leavening Agent - Check the Expiration Date!
Even if you use the correct amount of leavener, if it's old and inactive, it won't produce the necessary gas. Baking powder and baking soda lose their potency over time, especially if exposed to moisture or air. Using expired leaveners is a very common, yet often overlooked, cause of dense quick bread beginner baking problems.
Check the expiration date on your baking powder and baking soda containers. If there's no date, or if you suspect they might be old, you can test their freshness. To test baking soda, put a teaspoon in a small bowl and pour a few tablespoons of vinegar or lemon juice over it; it should fizz vigorously. To test baking powder, put a teaspoon in hot water; it should also fizz noticeably. If the reaction is weak or nonexistent, it's time to buy new leaveners. Storing them in airtight containers in a cool, dry place helps maintain their freshness.
Reason 3: Incorrect Measuring of Leavening - Precision is Key
Just as with flour, inaccurate measurement of leavening agents can lead to problems. Using too little baking powder or baking soda will result in insufficient lift and a dense texture. While using too much can cause a quick bread to rise too quickly and then collapse (a different problem! ), using too little is a direct path to density.
Always use dry measuring spoons for leaveners, and level them off carefully with a straight edge. Do not scoop directly from the container with the measuring spoon, as this can compact the powder/soda and result in using more than intended, or vice-versa depending on how you scoop. Precision is key with potent ingredients like leaveners. A difference of even half a teaspoon can impact the outcome of a typical loaf-sized quick bread recipe.
Reason 4: Overmixing (Again!) - Develop Gluten Less
Overmixing isn't just a cause of dryness; it also contributes significantly to density. As discussed earlier, overmixing develops gluten. A strong gluten network makes the batter elastic and tough. This toughness resists the expansion caused by the leavening gases. The gas bubbles struggle to push through the rigid structure, resulting in smaller, uneven holes and a dense, heavy texture instead of a light, airy one.
Remember the rule: mix until just combined. This means stopping as soon as you no longer see dry streaks of flour. Lumps are okay! In fact, a slightly lumpy quick bread batter is often a sign that you haven't overmixed, and those lumps will usually disappear during baking. Gentle folding, especially when adding mix-ins like fruit or nuts, is preferable to vigorous stirring. Mastering this gentle touch is crucial for avoiding dense quick bread beginner baking problems.
Problem: Quick Bread Sinking in the Middle
Watching your beautiful quick bread puff up in the oven only to collapse in the center is disheartening. This quick bread beginner baking problem indicates that the structure wasn't strong enough to support the rise, often due to issues with temperature, moisture, or baking time.
Reason 1: Oven Temperature Too Low - Calibrate Your Oven
If your oven temperature is significantly lower than what the recipe calls for, the quick bread will take longer to bake. While it might still rise initially, the structure won't set properly before the leavening gases escape or the center remains underbaked. This lack of structural integrity causes the center to sink as it cools. An oven that is too cool is a frequent, invisible culprit behind many baking failures, including quick bread beginner baking problems.
Invest in an inexpensive oven thermometer to check the accuracy of your oven's thermostat. Many ovens can be off by 25-50°F (15-30°C) or more. If your oven runs cool, you'll need to set the temperature higher than the recipe indicates, or bake for longer. Conversely, an oven that's too hot can cause the outside to set too quickly while the inside remains raw, also leading to a sink, though often accompanied by a very dark crust.
Reason 2: Too Much Liquid - Recipe Ratios and Consistency
An excess of liquid in the batter can weaken the structure of the quick bread. If there's too much moisture relative to the dry ingredients and leavening, the batter will be too wet and heavy for the leavening agents to fully lift and support throughout the baking process. This can result in a loaf that rises but doesn't have the internal scaffolding to hold its shape, causing it to sink as it cools.
Ensure you are measuring liquids accurately using liquid measuring cups (clear cups with a spout, designed to be read at eye level on a flat surface). Avoid substituting ingredients unless the recipe provides guidance, as different ingredients have different moisture levels (e.g., swapping sour cream for yogurt). If you're adjusting a recipe, be mindful of the overall hydration level. A batter that looks too thin and runny compared to typical quick bread batter consistency (usually thick but pourable) might have too much liquid.
Reason 3: Underbaking - Ensure a Fully Baked Center
Similar to an oven that's too cool, simply not baking the quick bread long enough means the interior doesn't have sufficient time to cook and set. The outside might look done and golden brown, but the center is still raw batter. As the bread cools, the uncooked center collapses under its own weight. This is a very common quick bread beginner baking problem.
Always use the toothpick test or an internal thermometer to check for doneness in the very center of the loaf. A toothpick should come out with moist crumbs, not wet batter. The internal temperature should be between 200°F and 210°F (93°C to 99°C). If the top or edges are browning too quickly while the center is still raw, you can loosely tent the top of the quick bread with aluminum foil for the remaining baking time to prevent further browning.
Reason 4: Opening the Oven Door Too Early - Resist the Temptation!
During the initial stages of baking, quick breads are delicate structures. The leavening gases are expanding, and the batter is setting. Opening the oven door, especially in the first 20-25 minutes of baking a standard loaf, causes a sudden drop in temperature. This cold draft can shock the rising bread, causing the partially set structure to deflate before it has a chance to fully stabilize.
Resist the urge to peek! Only open the oven door when it's time to check for doneness, typically after the minimum baking time specified in the recipe has passed. Use the oven light to observe the bread's progress from the outside. Maintaining a consistent internal oven temperature is crucial for proper rise and structure, preventing this specific quick bread beginner baking problem.
Problem: Uneven Baking and Dark Crust
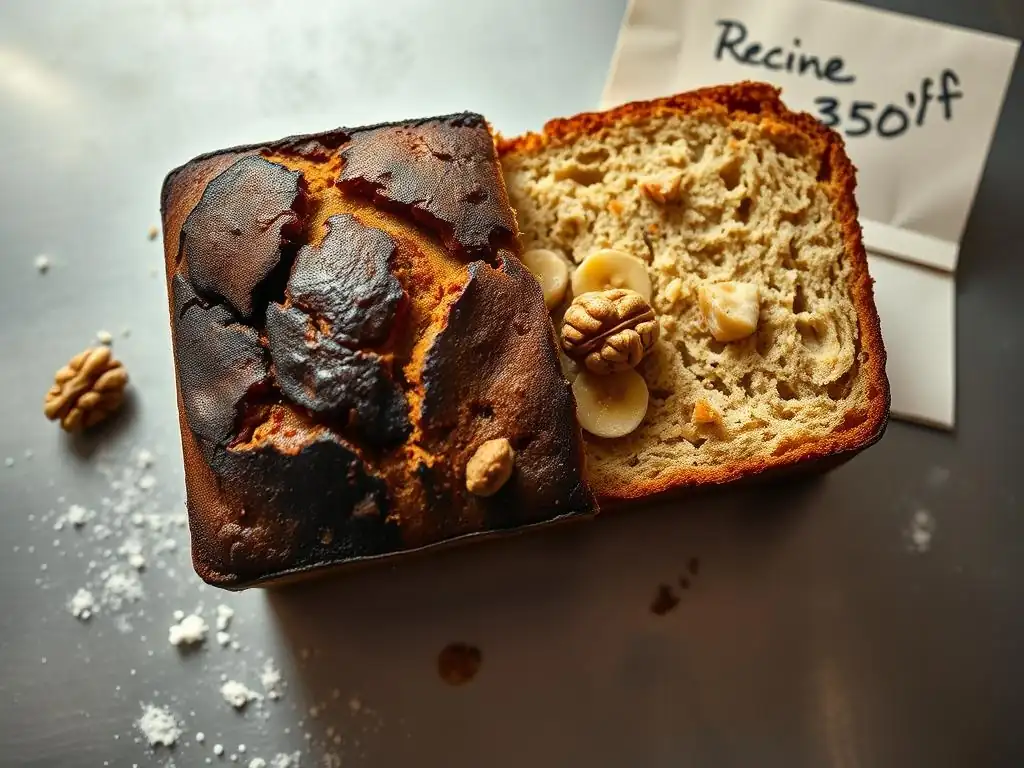
Sometimes a quick bread bakes unevenly – one side is darker or more cooked than the other, or the bottom is too dark while the top is pale. This indicates issues with heat distribution, either from your oven or your baking pan.
Reason 1: Uneven Oven Temperature - Rotating the Bread
Ovens often have hot spots. Heat elements might be on the bottom or top, or the fan in a convection oven might create uneven air circulation. This leads to different parts of the quick bread baking at different rates, resulting in uneven browning and doneness. This is a frequent contributor to quick bread beginner baking problems related to appearance and texture.
If you suspect your oven bakes unevenly, try rotating the pan halfway through the baking time. For a loaf pan, this means turning it 180 degrees. This helps ensure that all sides of the quick bread are exposed to similar temperatures for similar amounts of time, promoting more even baking and browning. Use an oven thermometer to identify if specific racks or areas in your oven are consistently hotter or cooler.
Reason 2: Placement in the Oven - Optimal Rack Position
The position of the quick bread pan within the oven also affects how it bakes. Generally, the middle rack is the ideal position for baking quick breads and most other baked goods. This position allows for the most even heat circulation around the pan, away from the direct heat of the elements (usually on the bottom and sometimes the top).
Baking too close to the bottom element can result in a burnt or excessively dark bottom crust before the top is adequately browned or the center is cooked. Baking too close to the top element can cause the top crust to brown too quickly while the rest of the bread is still baking. Stick to the middle rack unless the recipe specifically instructs otherwise to avoid this quick bread beginner baking problem.
Reason 3: Using the Wrong Pan - Pan Material and Size
The material and color of your baking pan significantly impact how heat is transferred to the quick bread. Dark metal pans absorb and transfer heat more quickly than light-colored metal or glass pans. Using a dark metal pan might cause the crust (especially the bottom and sides) to darken or even burn before the interior is fully baked, leading to uneven results. Glass pans also retain heat well and can sometimes lead to darker bottoms.
For consistent results with most quick bread recipes, a light-colored metal pan is often recommended. If using a dark metal or glass pan, you might need to reduce the oven temperature by about 25°F (15°C) and/or shorten the baking time to prevent overbrowning or burning.
The size of the pan also matters; using a pan that is too large will result in a flatter, potentially drier quick bread, while a pan that is too small can cause the batter to overflow or the center to remain underbaked. Always use the pan size specified in the recipe to mitigate quick bread beginner baking problems related to pan choice.
Problem: Quick Bread is Too Sweet or Not Sweet Enough
Achieving the right balance of sweetness is key to a delicious quick bread. If your bake tastes overwhelmingly sweet or surprisingly bland, it's likely an issue with how you handled the sugar.
Reason 1: Incorrect Sugar Measurement - Follow the Recipe
Just like flour and leaveners, sugar needs to be measured accurately. Using too much sugar can make the quick bread excessively sweet and can also affect the texture, sometimes making it too moist or dense if the liquid ratios aren't balanced for the extra sugar. Using too little sugar will result in a less sweet, potentially blander quick bread with a paler crust (sugar contributes to browning).
Use dry measuring cups for granulated or brown sugar, and level them off. Brown sugar should be packed firmly into the cup. Again, measuring by weight is the most accurate method if the recipe provides gram measurements. For example, a cup of granulated sugar weighs approximately 200-205 grams, while a cup of packed brown sugar weighs around 210-220 grams. Verify your measurements if you suspect this is the source of your quick bread beginner baking problems.
Reason 2: Using the Wrong Type of Sugar - Granulated vs. Brown Sugar
Recipes specify the type of sugar for a reason. Granulated sugar provides sweetness and contributes to a crispier edge and top crust. Brown sugar (light or dark) contains molasses, which adds moisture, a distinct flavor, and results in a softer, chewier texture and a deeper brown color. Substituting one for the other in equal amounts can significantly change the outcome.
If a recipe calls for brown sugar and you use granulated, your quick bread might be drier, less flavorful, and have a lighter color. If you use brown sugar instead of granulated, it might be too moist, dense, or have an overpowering molasses flavor. Stick to the sugar type specified in the recipe unless you understand the impact of the substitution and are prepared for the change in texture and flavor.
Reason 3: Sugar Substitutes - Adjusting for Sweetness Levels
Using artificial sweeteners or natural sugar substitutes (like honey, maple syrup, or alternative granulated sweeteners) in quick bread recipes requires careful consideration. These substitutes often have different sweetness levels, moisture content, and reactions to heat compared to granulated or brown sugar. A 1:1 substitution of a zero-calorie sweetener for sugar will result in a lack of sweetness and impact texture and browning. Substituting liquid sweeteners like honey for granulated sugar adds significant moisture, requiring adjustments to other liquid ingredients.
If you must use a sugar substitute, look for recipes specifically developed for that substitute or consult reliable conversion charts. Be aware that the texture and appearance of the quick bread may still differ from one made with traditional sugar. Experimenting with sugar substitutes is often necessary to find what works best, and it can certainly be a source of quick bread beginner baking problems if not approached carefully.
Problem: Sticky or Gummy Texture in Quick Bread
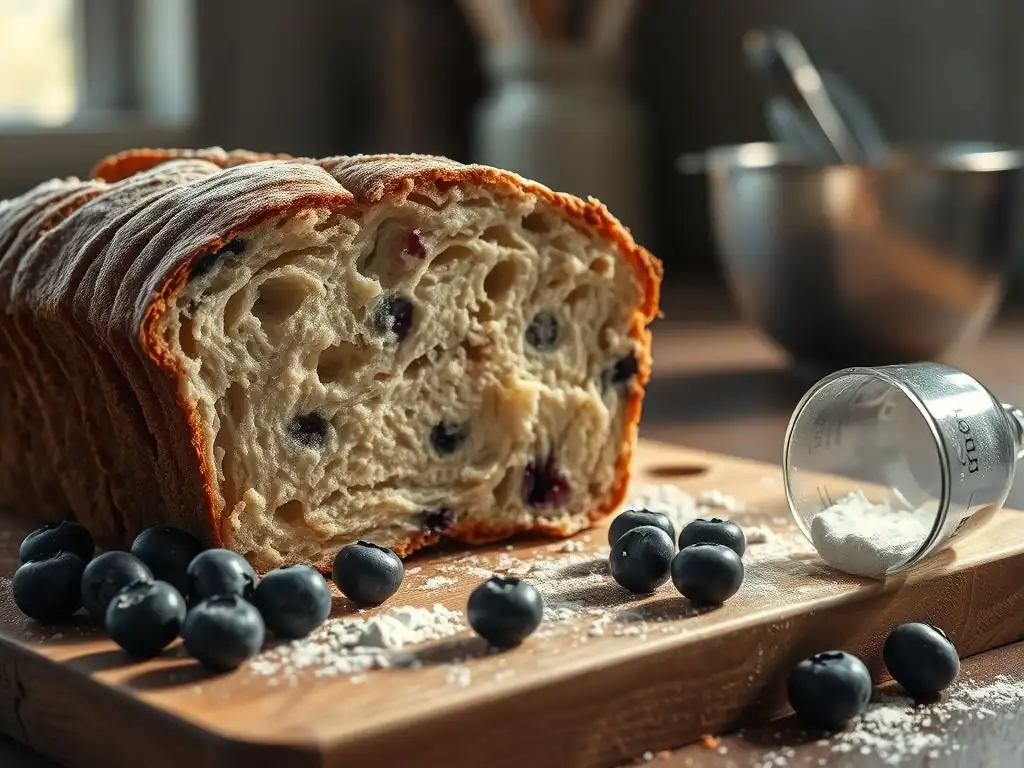
A quick bread should have a tender, moist crumb, but not be wet, sticky, or gummy. This unpleasant texture is usually a sign that something went wrong with baking time, moisture balance, or cooling.
Reason 1: Underbaking (Revisited) - Don't Rush the Process
One of the most common reasons for a gummy or sticky interior is simply underbaking. If the center of the quick bread doesn't reach a high enough internal temperature for the starches and proteins to set properly, it will remain doughy and sticky. Even if the outside looks done, the uncooked interior will have a gummy texture. This is a prime example of a quick bread beginner baking problem that stems from impatience.
Ensure you are baking for the full recommended time, or until the toothpick test comes out with moist crumbs (not wet batter) and the internal temperature is between 200°F and 210°F (93°C to 99°C) in the deepest part of the loaf. If the top is browning too much, tent it loosely with foil. If you've already taken it out and sliced into a gummy center, you might be able to salvage it by returning it to a moderate oven (around 325°F / 160°C) for another 10-20 minutes, loosely tented, although the texture won't be perfect.
Reason 2: Too Much Moisture - Adjust Liquid Ingredients
While insufficient fat or overbaking can lead to dryness, too much liquid can result in a quick bread that is overly moist, dense, and gummy. This can happen if liquid ingredients were measured incorrectly, if you added extra wet ingredients (like too many wet berries that burst), or if you substituted ingredients without adjusting the liquid ratio.
Ensure accurate measurement of all liquids using a liquid measuring cup. If adding wet mix-ins, consider tossing them with a tablespoon or two of the dry flour mixture before adding them to the batter; this helps prevent them from sinking and can absorb some surface moisture. If you're adjusting a recipe or adding significantly moist ingredients, you might need to slightly reduce the primary liquid (like milk or buttermilk) to maintain the correct batter consistency.
Reason 3: Improper Cooling - Let it Cool Completely
Allowing a quick bread to cool properly is just as important as the baking process itself. When quick bread comes out of the oven, it's still cooking internally, and the structure is setting as moisture redistributes. If you slice into a hot quick bread, steam escapes rapidly, and the internal structure hasn't fully set, often resulting in a gummy or doughy texture.
Let the quick bread cool in its pan on a wire rack for the amount of time specified in the recipe (usually 10-20 minutes). This allows it to finish setting and prevents the bottom from getting soggy from trapped steam. Then, invert it onto the wire rack to cool completely before slicing. Cooling on a wire rack allows air circulation on all sides. Resist the urge to slice too early – patience is key to avoiding this specific quick bread beginner baking problem and achieving the perfect texture!
Quick Bread Baking Tips and Tricks for Beginners
Beyond troubleshooting specific quick bread beginner baking problems, incorporating good habits into your baking process can prevent many issues before they start.
Measuring Ingredients Accurately: Weight vs. Volume
Accuracy in measuring is foundational to successful baking. While volume measurements (cups and spoons) are common in many home recipes, they are prone to inconsistency, especially with dry ingredients like flour. Scooping flour can add significantly more than spooning and leveling.
Using a digital kitchen scale to measure ingredients by weight (grams or ounces) is the most accurate method and highly recommended for consistent results. Many recipes now include weight measurements. If your recipe only has volume, consider finding reliable weight conversions online. For instance, 1 cup of all-purpose flour is typically 120-125g, 1 cup of granulated sugar is about 200-205g, and 1 cup of milk is about 237g. Investing in a scale is a small step that can dramatically reduce quick bread beginner baking problems caused by inaccurate measurements.
The Importance of Room Temperature Ingredients
Many quick bread recipes call for ingredients like eggs, milk, and butter to be at room temperature. This isn't just a suggestion; it affects the outcome. Room temperature ingredients emulsify more easily, meaning they combine more smoothly and evenly with each other. This creates a more uniform batter.
Cold eggs, for example, don't incorporate as well, potentially leading to a less cohesive batter and affecting the rise. Cold butter will result in a different texture than softened or melted butter, depending on how it's meant to be incorporated (e.g., creaming softened butter and sugar). Plan ahead and take perishable ingredients out of the refrigerator 30-60 minutes before you plan to start mixing. This simple step can prevent uneven mixing and contribute to a better crumb texture.
Mixing Techniques: Folding vs. Stirring
The method you use to combine ingredients, particularly after adding the dry to the wet, makes a significant difference in quick breads. Vigorous stirring activates gluten, which we want to avoid. The goal is to mix just enough to hydrate the dry ingredients and distribute the leaveners and mix-ins.
Use a gentle folding motion rather than aggressive stirring, especially when incorporating the last bit of flour or adding delicate mix-ins like berries. A rubber spatula is often the best tool for this. Fold from the bottom of the bowl up and over, rotating the bowl as you go, until just combined. A few small lumps of flour are acceptable and often disappear during baking. Overmixing is a persistent quick bread beginner baking problem, and gentle technique is the cure.
Testing for Doneness: The Toothpick Test
Relying solely on the baking time listed in a recipe or the appearance of the crust can lead to underbaked or overbaked quick breads. Ovens vary, and even small differences in batter consistency or pan material can affect baking time.
The toothpick test is a classic, reliable method for checking if a quick bread is done. Insert a wooden toothpick or a metal cake tester into the deepest part of the center of the loaf (avoiding any fruit or chocolate chunks). If it comes out clean or with just a few moist crumbs attached, the quick bread is done.
If it comes out with wet batter, it needs more time. For ultimate accuracy, use an instant-read thermometer; the internal temperature should be between 200°F and 210°F (93°C to 99°C). This simple test helps prevent the gummy centers that are a common quick bread beginner baking problem.
Mastering Quick Bread Baking: Achieving Baking Success
Overcoming quick bread beginner baking problems is a journey, not a race. Each bake offers a learning opportunity. By understanding the common pitfalls and the science behind quick breads, you're well on your way to consistent success.
Practice Makes Perfect: Experiment and Learn
Baking is a skill that improves with practice. Don't be discouraged by a less-than-perfect quick bread. Analyze what might have gone wrong based on the problems discussed (was it dry? dense? sunken?). Keep notes if it helps. Try baking the same recipe again, focusing on correcting the suspected error, whether it was measuring flour differently, being gentler with mixing, or checking the oven temperature.
Experimenting with different recipes also helps you understand how variations in ingredients and ratios affect the final outcome. Bake a simple banana bread one week, then try a zucchini bread the next. Each quick bread presents slightly different challenges and techniques. Embracing the learning process is key to mastering quick bread baking and moving past beginner quick bread issues.
Don't Be Afraid to Adjust Recipes: Personalize Your Bakes
Once you gain confidence and understand the basics of quick bread structure and leavening, you can start to make small adjustments to recipes. Maybe you prefer a little less sugar, or want to add different spices or mix-ins. Knowing how ingredients function allows you to make informed changes.
For example, if you want to add extra berries to a muffin recipe, you'll know to toss them in flour first to prevent sinking and maybe slightly reduce the liquid. If you want to use whole wheat flour, you'll know it absorbs more liquid and develops gluten differently, requiring adjustments (often using a portion of whole wheat and a portion of all-purpose flour, or adding slightly more liquid). Learning to adapt recipes is a rewarding part of moving beyond beginner quick bread problems.
Celebrating Your Baking Achievements: Enjoy Your Homemade Quick Bread!
Finally, and most importantly, remember to enjoy the process and the delicious results! Whether it's a perfectly risen loaf of pumpkin bread or a batch of tender blueberry muffins, there's immense satisfaction in creating something delicious from scratch. Share your quick breads with friends and family.
Even if a quick bread isn't absolutely perfect, it's still homemade and likely tastes better than anything store-bought. A slightly dense loaf can still be delicious toasted, and a slightly dry one makes excellent bread pudding. Celebrate your progress, learn from any quick bread beginner baking problems you encounter, and savor the fruits of your labor. Happy baking!
Frequently Asked Questions
What are the most common beginner baking problems when making quick breads?
The most common issues are overmixing the batter, leading to tough breads, using expired baking powder which affects rising, and incorrect oven temperature, resulting in uneven baking.
Why is my quick bread so dense and heavy?
Density is usually caused by overmixing the batter, developing too much gluten. Also, insufficient leavening, like old baking powder, can prevent proper rising.
My quick bread is dry and crumbly; what went wrong?
Dryness can be caused by overbaking the bread, or using too much flour in the recipe. Also, insufficient fat or liquid can contribute to a dry texture.
How can I prevent my quick bread from sinking in the middle?
Sinking often happens due to underbaking or opening the oven door too frequently during baking. Excessive leavening can also cause a temporary rise followed by a collapse.
My quick bread is browning too quickly on the outside but is still raw inside; what should I do?
This indicates the oven temperature is too high. Try lowering the oven temperature by 25 degrees and tenting the bread with aluminum foil to prevent further browning while the inside finishes baking.
Final Reflection: The Sweet Taste of Baking Triumph
Mastering quick bread baking isn't just about following a recipe; it's about understanding the fundamental principles that transform simple ingredients into delicious, golden loaves. The seemingly straightforward nature of quick breads often masks subtle nuances that can lead to disappointment for beginner bakers. This article highlighted common pitfalls, from overmixing to improper leavening, and offered solutions to help you achieve consistent success.
The journey of learning to bake quick breads is a deeply personal one. It's about embracing the imperfections, celebrating the small victories, and ultimately, finding joy in the process. The best bakers are those who are not afraid to experiment and learn from their mistakes.
This quote resonates deeply because baking, like life, is a continuous process of learning and refining. The satisfaction of transforming flour, sugar, and eggs into a warm, comforting loaf is a testament to the power of patience and attention to detail. The impact of this knowledge extends beyond the kitchen; it fosters a sense of accomplishment and encourages a growth mindset applicable to many aspects of life.
Now, it's your turn. Take what you've learned here, experiment with different recipes, and don't be afraid to get your hands a little messy. Each loaf you bake, whether perfectly risen or slightly imperfect, represents a step forward on your baking journey. Embrace the challenges, celebrate the successes, and most importantly, enjoy the delicious rewards of your efforts. The world of quick breads awaits – go forth and bake!
Unleash Your Inner Baker: Master Quick Bread Perfection!
Thanks for taking the time to explore the world of quick breads with us! We hope you've gained valuable insights and confidence to tackle those baking challenges head-on. Ready to put your newfound knowledge into practice?
- Bake your dream loaf today! Experiment with a new recipe, focusing on the techniques you learned to avoid common pitfalls. Remember, even small adjustments can make a big difference.
- Share your baking journey! Post a picture of your creation on social media and tag #BakeWithEase – we'd love to see your results!
- Explore our other resources: Dive deeper into specific quick bread techniques with our extensive recipe library (available on bakewithease.com – although you don't need to click a link! ).
What delicious quick bread masterpiece will you create next?