
Achieving Perfect Chocolate Dipping Consistency

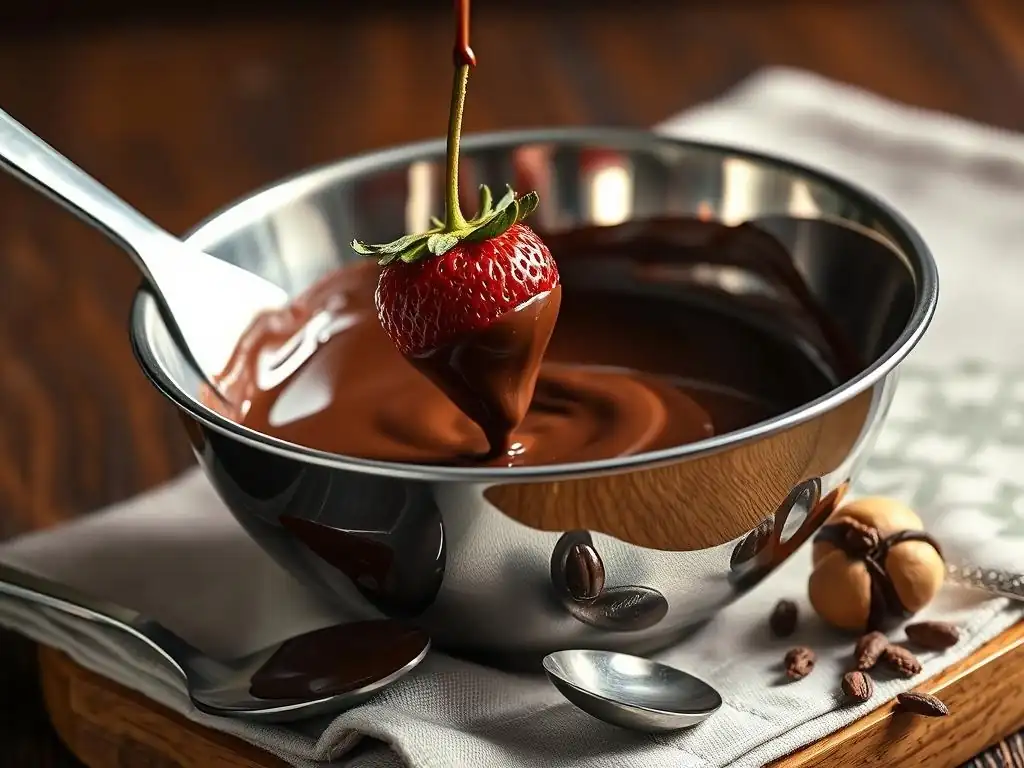
Welcome to BakeWithEase, where we unlock the secrets to baking brilliance! Have you ever struggled to achieve that perfect sheen when dipping your treats in chocolate? This week, we're diving deep into the art of achieving perfect chocolate dipping consistency, exploring the techniques and insights you need for flawless results. But what exactly makes chocolate behave the way it does, and how can you guarantee a smooth, even coating every time? Let's find out!
Why Chocolate Dipping Consistency Matters for Perfect Baked Goods
Achieving the perfect chocolate dipping consistency is arguably the most critical factor in creating professional-looking and tasting chocolate-coated treats. If your chocolate is too thick, you'll end up with an uneven, heavy coating that obscures the delicate flavors of your baked good. Imagine trying to dip a light, airy madeleine in chocolate that's as thick as peanut butter – the result would be clunky and unappealing.
Conversely, chocolate that's too thin might not provide sufficient coverage, leaving translucent patches or dripping excessively, leading to waste and mess. The ideal consistency allows for a smooth, even coat that hardens beautifully, providing a satisfying snap without being overly thick.
Beyond aesthetics, the right consistency directly impacts the texture and mouthfeel of your finished product. A flawless, thin layer of chocolate complements the texture of a cookie, cake pop, or strawberry, adding richness without overwhelming the palate. When the consistency is just right, the chocolate sets quickly and firmly, preventing smudging and making the treats easy to handle and store. Mastering this aspect is a cornerstone for anyone looking to elevate their chocolate-dipped creations from homemade to bakery-quality, ensuring every bite is a delightful experience.
BakeWithEase's Guide to Flawless Chocolate Dipping
At BakeWithEase, we understand that achieving that glossy, smooth finish on your chocolate-dipped treats can feel like a mystery. Our goal is to demystify the process and provide you with actionable tips for perfect chocolate dipping consistency every time. We'll walk you through everything from selecting the right chocolate type to mastering melting techniques and troubleshooting common issues. Whether you're coating simple cookies or intricate cake pops, the principles remain the same, and we're here to guide you through them.
This guide is designed to be your comprehensive resource, covering the essential factors that influence how your chocolate behaves when melted and dipped. We'll explore the science behind cocoa butter content, the impact of temperature and humidity, and the best practices for handling melted chocolate. By following our step-by-step instructions and incorporating our expert advice, you'll gain the confidence to tackle any chocolate dipping project, ensuring your baked goods look as incredible as they taste.
Different Chocolate Varieties: From Dark to White
The world of chocolate is vast, and not all chocolate is created equal when it comes to dipping. Understanding the different types is the first step towards achieving the right consistency. Dark chocolate, for instance, typically contains a higher percentage of cocoa solids and cocoa butter, often ranging from 50% to over 80%. This higher cocoa butter content generally makes dark chocolate melt smoothly and set firmly, making it an excellent choice for dipping. Semi-sweet and bittersweet chocolates fall under this category, with varying levels of sweetness and cocoa content.
Milk chocolate contains cocoa solids, cocoa butter, sugar, and milk powder or condensed milk. It has a lower percentage of cocoa solids compared to dark chocolate (often between 10% and 50%) and a higher sugar and milk content. This composition results in a sweeter, creamier chocolate that is softer when set than dark chocolate.
White chocolate, strictly speaking, isn't "chocolate" in the traditional sense as it contains no cocoa solids, only cocoa butter, sugar, milk solids, and vanilla. Its high cocoa butter content means it melts very smoothly, but it is also more sensitive to heat and prone to scorching. Each type will behave differently when melted, influencing the final dipping consistency and set.
How Cocoa Butter Content Affects Chocolate Melt and Dip
Cocoa butter is the fat component derived from the cocoa bean, and its presence is fundamental to chocolate's unique melting properties and its ability to set. Chocolate is a suspension of cocoa solids and sugar crystals in cocoa butter. When chocolate melts, the cocoa butter changes from a solid crystalline structure to a liquid state, allowing the chocolate to flow. The percentage of cocoa butter in a chocolate dictates how fluid it becomes when melted and how hard it sets when cooled.
Chocolates with higher cocoa butter content, like many dark chocolates (some premium brands boast over 35% cocoa butter), will melt into a thinner, more fluid consistency, which is often ideal for dipping as it creates a thin, even coating. Chocolates with lower cocoa butter content, or those with added vegetable fats instead of cocoa butter (like many chocolate-flavored confectionery coatings), may be thicker when melted or require different handling to achieve a desirable dipping consistency. This is why understanding the composition of your chosen chocolate is crucial for predicting its behavior during the dipping process.
Choosing the Right Chocolate for Your Dipping Project
Selecting the appropriate chocolate is paramount for achieving the perfect chocolate dipping consistency. For general dipping, many bakers prefer using couverture chocolate, which is a high-quality chocolate containing a minimum of 35% total cocoa solids and at least 31% cocoa butter. This higher cocoa butter content makes it very fluid when melted and ideal for tempering, resulting in a beautiful glossy finish and a satisfying snap. Brands like Callebaut or Valrhona are popular choices among professionals for their consistent quality and high cocoa butter content.
If couverture chocolate isn't readily available or tempering seems daunting, high-quality baking chocolate bars or chips can also work well. Look for brands that list cocoa butter high up in the ingredient list.
Avoid using standard chocolate chips found in the baking aisle for dipping, as they often contain stabilizers to help them hold their shape during baking, which can result in a thicker, less fluid melt and a dull finish when cooled. For a balance of ease and quality, compound chocolate or confectionery coating (often found in candy-making supplies) is another option, as it contains vegetable fats instead of cocoa butter and doesn't require tempering, though it lacks the flavor complexity of real chocolate and can have a different texture.
Temperature Control: The Secret to Smooth Chocolate
Temperature is perhaps the single most critical factor influencing chocolate dipping consistency. Chocolate is incredibly sensitive to heat. Melting chocolate too quickly or at too high a temperature can cause it to seize (become thick and lumpy) or burn, rendering it unusable for dipping.
The goal is to melt the chocolate gently and gradually, allowing the cocoa butter crystals to transition smoothly to a liquid state. For most dark chocolates, the melting point is around 86-90°F (30-32°C), milk chocolate around 84-88°F (29-31°C), and white chocolate around 82-86°F (28-30°C). However, these are just melting points; the ideal working temperature for dipping, especially if you are tempering, will be slightly different.
Maintaining the correct working temperature throughout the dipping process is essential for a consistent coating and proper setting. If the chocolate cools too much, it will thicken, making it difficult to dip evenly. If it gets too warm, it can lose its temper (if you've tempered it), resulting in a dull, streaky finish.
Using a thermometer is highly recommended, especially when tempering. Keeping the melted chocolate warm over a very gentle heat source or in a warming bath (like a slow cooker on the lowest setting or a dedicated chocolate warmer) can help maintain the ideal fluid consistency for dipping.
Humidity's Role in Chocolate Melting and Dipping
Humidity is the hidden enemy of melted chocolate. Chocolate is hygroscopic, meaning it readily absorbs moisture from the air. Even a tiny amount of water or steam introduced during the melting process or present in the environment can cause chocolate to seize instantly. This happens because the sugar particles in the chocolate attract and dissolve in the water, creating a syrup that coats the cocoa solids and prevents them from dispersing smoothly in the cocoa butter. The result is a thick, grainy, and unworkable mass.
To avoid humidity-related issues, ensure all your equipment (bowls, spatulas, etc.) is completely dry before it touches the chocolate. When using a double boiler, make sure the water level is low enough that the bottom of the chocolate bowl does not touch the simmering water, and prevent any steam from escaping into the chocolate. On particularly humid days (say, above 60% humidity), working with chocolate can be challenging. If you must work in a humid environment, consider using a dehumidifier in your workspace if possible, or work in a cooler, less humid part of your home.
The Importance of Proper Melting Techniques
Employing the correct melting technique is fundamental to achieving a smooth, dippable chocolate consistency. The two most common methods are using a double boiler and the microwave. Both require care and attention to prevent overheating. For the double boiler method, place finely chopped chocolate in a heatproof bowl set over a pot of gently simmering water. Ensure the water does not touch the bottom of the bowl. Stir the chocolate gently as it melts, removing it from the heat just before it's completely melted and stirring until smooth using the residual heat.
When using the microwave, place finely chopped chocolate in a microwave-safe bowl and heat in short intervals, typically 30 seconds at a time, stirring thoroughly after each interval. Lower the intervals to 15 or even 10 seconds as the chocolate begins to melt. Stirring is crucial as it distributes the heat evenly and helps the chocolate melt from residual warmth. Stop heating when there are still a few small lumps remaining and stir until completely smooth. Overheating in the microwave is very easy and can quickly lead to scorched or seized chocolate, so patience and short bursts are key.
Step 1: Finely Chop Your Chocolate
The first crucial step towards achieving the perfect chocolate dipping consistency begins before any heat is applied. Finely chopping your chocolate ensures that it melts evenly and quickly. Large chunks or blocks of chocolate will melt at different rates, leading to hot spots and increasing the risk of scorching or uneven melting. Aim for pieces that are roughly the size of chocolate chips or even smaller. Using a sharp knife and a sturdy cutting board works well.
Breaking chocolate bars into smaller pieces or using callets (small drops of chocolate specifically designed for melting) are also effective ways to prepare your chocolate. The increased surface area of smaller pieces allows the heat to penetrate more uniformly, resulting in a smoother, more predictable melt. This preparation step is simple but significantly impacts the ease and success of the subsequent melting process, setting you up for achieving that ideal consistency for dipping.
Step 2: Gentle Melting Methods: Double Boiler vs. Microwave
As discussed earlier, the method you choose for melting your chocolate plays a significant role in its final consistency. The double boiler method is often preferred by professionals and serious home bakers because it provides a more controlled and gentle heat source. The indirect heat from the steam or hot water ensures that the chocolate melts gradually without direct contact with the heat source, significantly reducing the risk of burning or seizing.
The microwave method is faster and more convenient for smaller quantities of chocolate but requires more vigilance. Heating in short bursts and stirring frequently is non-negotiable to prevent overheating. Regardless of the method, the key is low heat and patience. Never try to rush the melting process by turning up the heat or microwaving for too long. Gentle, gradual melting is the secret to unlocking that smooth, fluid chocolate consistency ideal for dipping.
Step 3: Stirring Techniques for Even Melting
Proper stirring is essential during the melting process to ensure that the chocolate heats evenly and melts into a smooth, consistent liquid. When using a double boiler, stir the chocolate gently and periodically as it melts. This helps distribute the heat throughout the mass and ensures that all the chocolate is exposed to the warmth. Use a heatproof rubber spatula or spoon for stirring.
In the microwave method, stirring between each short heating interval is critical. The chocolate will often hold its shape even after it has begun to melt internally. Stirring helps break up the solid pieces and allows the residual heat to melt them completely. It also prevents hot spots from developing, which can lead to scorching. Continue stirring until the chocolate is entirely smooth and free of lumps, relying on the residual heat to finish the melting process once most of the chocolate is liquid.
Step 4: Testing the Chocolate's Consistency
Once your chocolate is melted, it's important to test its consistency before you begin dipping. The ideal consistency for dipping should be smooth, fluid, and drip easily from a spoon or fork in a thin, continuous stream. It should coat the back of a spoon evenly without being too thick or leaving translucent patches. A simple test is to dip a piece of parchment paper or a small piece of the baked good you intend to coat into the chocolate.
Observe how the chocolate adheres. Does it coat smoothly and evenly? Is the layer too thick or too thin? Does it set relatively quickly? Practice and observation are key here. You'll begin to recognize the visual cue of the perfect chocolate dipping consistency – a state where it flows beautifully but still has enough body to coat your item without dripping excessively. If the consistency isn't quite right, you may need to troubleshoot using the methods outlined in the next section.
Chocolate is Too Thick: Solutions for a Smoother Dip
If your melted chocolate is too thick for dipping, it's likely either slightly too cool, hasn't been melted properly, or perhaps you've used a chocolate with lower cocoa butter content. The simplest solution is often to gently warm the chocolate slightly. Place it back over the double boiler (off the heat, using the residual warmth) or in the microwave for a very short burst (5-10 seconds), then stir vigorously. Often, just a few degrees difference can dramatically improve fluidity.
If gentle warming doesn't suffice, you can try adding a very small amount of a neutral, flavorless fat. A teaspoon of cocoa butter, vegetable oil, or clarified butter per cup of melted chocolate can help thin it out. Add it gradually, stirring constantly until the desired consistency is reached. Be cautious not to add too much, as this can affect the chocolate's setting properties and flavor. For compound coatings, a bit of vegetable shortening can also be used to thin.
Chocolate is Too Thin: How to Thicken Your Dipping Chocolate
Chocolate that is too thin can result in a very light, almost translucent coating that may not provide enough coverage or set properly. This can happen if the chocolate got too warm, or if you inadvertently added too much thinning agent (like oil or cream). Thicken melted chocolate can be tricky, as simply cooling it may cause it to start setting unevenly.
One method is to add more solid chocolate and stir it into the melted chocolate. The solid chocolate will melt into the liquid, adding more bulk and potentially helping to cool the overall mixture slightly, thus thickening it. Use finely chopped chocolate for this. Alternatively, if you are working with real chocolate (not compound coating) and are planning to temper it, bringing the temperature down and working through the tempering process can help achieve the correct viscosity. For compound coatings, adding more solid coating and melting it in might be the only effective solution.
Seized Chocolate: Preventing and Fixing Chocolate Seizing
Seized chocolate is perhaps the most frustrating problem when dipping. It instantly transforms from a smooth liquid into a thick, lumpy, unworkable paste. This usually happens when even a tiny amount of water or steam comes into contact with melted chocolate, or if the chocolate is overheated. Preventing seizing is far easier than fixing it. Always ensure your equipment is bone dry and be extremely careful to avoid any contact with water or steam during melting. Melting gently and gradually also helps prevent overheating, a common cause of seizing.
If your chocolate does seize, don't despair immediately, especially if it was due to a small amount of liquid. You might be able to rescue it by stirring in a tablespoon or two of hot (not boiling) liquid – either hot water, milk, or cream – per cup of seized chocolate. Stir vigorously and continuously until the chocolate smooths out.
Be aware that adding liquid will result in a ganache-like consistency and the chocolate will not set hard with a snap. This rescued chocolate is best used in recipes where a soft set is acceptable, like truffle fillings or sauces, rather than for dipping items that require a firm coating.
Adding Ingredients to Adjust Consistency: Cream, Oil, or Shortening
Beyond just adjusting temperature, certain ingredients can be added to melted chocolate to modify its consistency for dipping. Adding a small amount of cream creates a ganache, which is smoother and more fluid than plain melted chocolate but will result in a softer set coating. A ratio of about 2 parts chocolate to 1 part warm cream is a common starting point for a pourable ganache suitable for glazes or softer dips.
As mentioned in troubleshooting, adding a neutral oil (like vegetable or canola oil) or melted shortening (for compound coatings) can thin out chocolate that is too thick. Start with a very small amount, say 1 teaspoon per cup of chocolate, and stir well before adding more. This method is effective for achieving a thinner coating that sets smoothly, but using too much oil can make the chocolate greasy and prevent it from hardening properly. Cocoa butter is the ideal addition for thinning real chocolate while maintaining its setting properties, but it needs to be melted separately and added carefully.
Achieving a Glossy Finish: Tempering Techniques (optional)
For a truly professional, glossy finish that sets firmly and has a satisfying snap, tempering your chocolate is essential. Tempering involves melting chocolate and then cooling and reheating it to specific temperatures to stabilize the cocoa butter crystals. This process ensures that the cocoa butter solidifies into the most stable crystalline form, resulting in a smooth, shiny appearance and a firm texture that resists melting at room temperature and prevents bloom (those grayish streaks).
While tempering adds an extra step and requires a thermometer, it's the key to achieving that beautiful, crackly shell often seen on high-end confections. There are several methods, including the seeding method (adding solid tempered chocolate to melted chocolate) and the tabling method (spreading melted chocolate on a cool surface). Each chocolate type (dark, milk, white) has slightly different temperature ranges for tempering. Mastering tempering significantly elevates your chocolate dipping game, giving your treats that irresistible sheen and snap.
Maintaining the Perfect Temperature During Dipping
Once you've achieved the ideal chocolate dipping consistency, maintaining its temperature throughout the process is crucial. As you dip item after item, the chocolate will naturally cool down, causing it to thicken. Working efficiently helps, but for larger batches, you'll need a way to keep the chocolate warm without overheating it.
A simple method is to place the bowl of melted chocolate over a very gently warm water bath (double boiler style, but with the heat off, just using warm water) or in a warming tray designed for chocolate. Alternatively, a slow cooker on its lowest "warm" setting can keep chocolate at a consistent low temperature. Stir the chocolate periodically to ensure even heating and check the consistency. If it starts to thicken, a quick, gentle warming boost might be needed. Consistency in temperature equals consistency in your dipping results.
Dipping cookies requires techniques that ensure full, even coverage without breaking the cookie or creating excess drips. For flat cookies, holding the cookie with tongs or a dipping fork and immersing it fully in the chocolate is effective. Lift the cookie out, allowing excess chocolate to drip back into the bowl. You can gently tap the fork or tongs against the side of the bowl to encourage drips to fall off, smoothing the surface.
For cookies with intricate shapes or edges, you might prefer to partially dip them or use a spoon to drizzle chocolate over them. Placing the dipped cookie on parchment paper to set is standard practice. If you want a wavy edge, you can gently slide the dipped cookie off the fork onto the parchment paper with a slight back-and-forth motion. Ensure the chocolate is at the perfect chocolate dipping consistency – not too thick to weigh down the cookie, and not too thin to run everywhere.
Dipping Cake Pops: Preventing Cracking and Crumbling
Dipping cake pops presents unique challenges, primarily preventing the cake ball from falling off the stick and achieving a smooth, crack-free coating. Ensure your cake balls are well-chilled and firmly attached to the stick (a dab of melted chocolate on the stick before inserting helps). The melted chocolate for cake pops should be fluid enough to coat quickly and evenly but not so thin that it drips excessively or requires multiple dips, which can cause the cake to warm and crumble.
Dip the cake pop straight down into a deep container of melted chocolate, rotating it slowly to coat completely. Lift it straight up, allowing excess chocolate to drip off while gently rotating the pop. Avoid tapping vigorously, as this can cause the cake ball to loosen. If cracks appear as the chocolate sets, it's often because the cake ball was too cold relative to the chocolate temperature, causing it to contract. Using cake balls that are chilled but not frozen can help prevent this.
Dipping Strawberries: Tips for Adhesion and Presentation
Dipping strawberries is a classic application for melted chocolate, requiring a consistency that adheres well and sets beautifully. Ensure your strawberries are completely dry before dipping; any moisture will cause the chocolate to seize or fail to adhere. Hold the strawberry by the stem or hull and dip it into the melted chocolate, rotating to coat as much or as little of the berry as desired.
Lift the strawberry out, allowing the excess chocolate to drip off. Gently scrape the bottom edge against the rim of the bowl to remove any large drips, which helps create a clean finish. Place the dipped strawberries on parchment paper to set. For decorative drizzles or toppings, wait until the first layer of chocolate is nearly set but still slightly tacky. The perfect chocolate dipping consistency for strawberries is fluid enough for a smooth coat but thick enough to cling to the berry without pooling excessively at the bottom.
Proper Cooling and Setting Procedures
Once your treats are dipped, proper cooling and setting are crucial for achieving a firm, non-sticky finish. Place dipped items on parchment paper or a silicone mat on a baking sheet. For items like cake pops or strawberries on sticks, you can stand them upright in a foam block or a tall glass filled with rice or sugar to prevent flat spots.
Allow the chocolate to set completely at room temperature if the ambient temperature is cool (around 68-72°F or 20-22°C). Avoid the temptation to put them in the refrigerator immediately, especially if you've tempered the chocolate, as rapid cooling can sometimes cause condensation or affect the temper. However, if your environment is warm or humid, or if you're using compound coating, briefly chilling in the refrigerator (10-15 minutes) might be necessary to help them set.
Preventing Bloom (White Streaks) on Dipped Chocolate
Chocolate bloom refers to the grayish-white streaks or spots that can appear on the surface of chocolate. There are two types: sugar bloom (caused by moisture) and fat bloom (caused by improper melting/cooling or temperature fluctuations). Preventing bloom is key to maintaining the visual appeal of your dipped treats. Sugar bloom is prevented by avoiding moisture contact and storing chocolate in a dry environment.
Fat bloom is often prevented by proper tempering, which stabilizes the cocoa butter crystals. If you are not tempering, try to melt the chocolate gently and avoid overheating. Store finished dipped goods at a consistent, cool room temperature (ideally between 65-70°F or 18-21°C) away from direct sunlight or significant temperature swings. Rapid changes in temperature, such as moving items from a warm room to a cold refrigerator repeatedly, can also encourage bloom.
Storage Solutions to Maintain Quality
Storing your perfectly dipped chocolate treats correctly will help maintain their quality, appearance, and taste. Once the chocolate has fully set, store the items in an airtight container at a cool, dry room temperature. Layering items with parchment paper can prevent them from sticking to each other.
Avoid storing chocolate-dipped goods in the refrigerator for extended periods unless absolutely necessary, as this can cause condensation (leading to sugar bloom) and dull the finish. If refrigeration is required due to fillings or ambient temperature, place the container in the warmest part of the fridge (like the door) and allow the container to come to room temperature before opening it to minimize condensation. Proper storage ensures that the perfect chocolate dipping consistency you achieved translates into delicious treats that stay beautiful.
Recap of Key Chocolate Dipping Consistency Tips
Mastering the perfect chocolate dipping consistency is a skill that significantly elevates your baking results. We've covered the importance of choosing the right chocolate based on its cocoa butter content, controlling temperature with gentle melting methods like the double boiler or careful microwaving, and understanding the detrimental effects of humidity. Key techniques include finely chopping chocolate for even melting and stirring properly.
We also explored troubleshooting common issues like chocolate being too thick or too thin, and how to handle the dreaded seized chocolate. Refining your technique involves knowing when and how to add thinning agents if needed, the benefits of tempering for a glossy finish, and maintaining the chocolate's temperature during dipping. Applying specific techniques for different items like cookies, cake pops, and strawberries, combined with proper cooling and storage, ensures your dipped creations are both beautiful and delicious.
Further Baking Resources from BakeWithEase
Achieving perfect chocolate dipping consistency is just one step on your baking journey, and BakeWithEase is here to support you every step of the way. Explore our extensive collection of recipes featuring chocolate, from decadent cakes and brownies to delicate pastries and confections. Find step-by-step guides on our website for various baking techniques, including tempering chocolate in more detail, making ganache, and working with different types of chocolate.
Our ingredient deep dives offer more information on the science behind baking ingredients, helping you understand how they behave and how to get the best results. Whether you're a beginner looking for simple recipes or an experienced baker honing your skills, BakeWithEase.com provides the resources, tips, and friendly guidance you need to bake with ease and confidence. Keep practicing your perfect chocolate dipping consistency tips, and enjoy the delicious rewards!
- Why Chocolate Dipping Consistency Matters for Perfect Baked Goods
- BakeWithEase's Guide to Flawless Chocolate Dipping
- Different Chocolate Varieties: From Dark to White
- How Cocoa Butter Content Affects Chocolate Melt and Dip
- Choosing the Right Chocolate for Your Dipping Project
- Temperature Control: The Secret to Smooth Chocolate
- Humidity's Role in Chocolate Melting and Dipping
- The Importance of Proper Melting Techniques
- Step 1: Finely Chop Your Chocolate
- Step 2: Gentle Melting Methods: Double Boiler vs. Microwave
- Step 3: Stirring Techniques for Even Melting
- Step 4: Testing the Chocolate's Consistency
- Chocolate is Too Thick: Solutions for a Smoother Dip
- Chocolate is Too Thin: How to Thicken Your Dipping Chocolate
- Seized Chocolate: Preventing and Fixing Chocolate Seizing
- Adding Ingredients to Adjust Consistency: Cream, Oil, or Shortening
- Achieving a Glossy Finish: Tempering Techniques (optional)
- Maintaining the Perfect Temperature During Dipping
- Dipping Cookies: Techniques for Even Coating
- Dipping Cake Pops: Preventing Cracking and Crumbling
- Dipping Strawberries: Tips for Adhesion and Presentation
- Proper Cooling and Setting Procedures
- Preventing Bloom (White Streaks) on Dipped Chocolate
- Storage Solutions to Maintain Quality
- Recap of Key Chocolate Dipping Consistency Tips
- Further Baking Resources from BakeWithEase
- What is the ideal chocolate dipping consistency, and why is it important?
- What are some common problems that can lead to poor chocolate dipping consistency?
- What are some key tips for achieving the perfect chocolate dipping consistency?
- How can I thin chocolate that's too thick for dipping?
- What are some common items that are great for chocolate dipping?
Frequently Asked Questions
What is the ideal chocolate dipping consistency, and why is it important?
The ideal consistency is smooth, fluid, and coats items thinly and evenly. This ensures a beautiful presentation and prevents a thick, clumpy coating that can be unappealing.
What are some common problems that can lead to poor chocolate dipping consistency?
Overheating the chocolate can cause it to seize and become grainy. Also, introducing even a tiny amount of water can ruin the texture and prevent it from being smooth.
What are some key tips for achieving the perfect chocolate dipping consistency?
Use high-quality chocolate and melt it slowly over a double boiler or in the microwave in short intervals. Adding a small amount of vegetable shortening or cocoa butter can also improve fluidity.
How can I thin chocolate that's too thick for dipping?
Carefully add a tiny amount of vegetable oil or melted cocoa butter, stirring thoroughly between additions. Avoid water at all costs, as this can cause the chocolate to seize.
What are some common items that are great for chocolate dipping?
Popular choices include strawberries, pretzels, marshmallows, and cookies. Ensure the items are completely dry before dipping for optimal chocolate adhesion.
Final Reflection: The Enduring Pursuit of Perfect Chocolate Dipping
The quest for flawlessly dipped treats isn't merely a culinary pursuit; it's a testament to precision, patience, and the undeniable joy of perfectly coated confections. From the initial melt to the final, satisfying drip, the process reveals a surprising depth, impacting everything from the aesthetic appeal of our creations to the overall enjoyment of the experience. This journey into the art of chocolate dipping highlights the importance of seemingly small details, proving that even the simplest tasks can yield extraordinary results with careful attention.
The impact of achieving that perfect dip extends beyond the individual creation. It's a reflection of our dedication to craftsmanship, a subtle yet powerful expression of care and intention. The satisfaction derived from a perfectly dipped strawberry, a flawlessly coated truffle, or even a beautifully decorated cookie transcends the simple act of dipping itself. It speaks to a larger cultural appreciation for detail and the beauty found in mastering a seemingly simple skill. Perfection is not attainable, but if we chase perfection we can catch excellence.
– Vince Lombardi. This quote, while not directly about chocolate dipping, perfectly encapsulates the spirit of striving for excellence in any endeavor, even the seemingly mundane.
Consider the lessons learned within these pages. Think about the temperature of your chocolate, the consistency of your dipping tool, and the importance of a steady hand. Now, take that knowledge and apply it to your next culinary adventure. Whether it's perfecting your chocolate dipping technique or tackling a more ambitious project, remember the power of attention to detail and the immense satisfaction that comes from achieving excellence. Embrace the process, celebrate the small victories, and savor the sweet reward of your perfectly dipped creations.
Unlock Your Inner Chocolate Master!
Thanks for joining us on this delicious journey into the world of perfect chocolate dipping! We hope you gained valuable insights into achieving that flawlessly smooth, glossy finish. Now it’s time to put your newfound knowledge into practice!
- Dive straight into dipping: Try out your new techniques with your favorite treats – fruit, pretzels, marshmallows— the possibilities are endless! Remember those temperature tips!
- Share your creations: Show off your perfectly dipped masterpieces on social media and tag us! We love seeing your baking adventures! (#BakeWithEaseDipping)
- Experiment with flavors: Don't be afraid to get creative! Try adding spices, extracts, or even sea salt to your melted chocolate for unique flavor combinations. What unexpected flavor profile will you try next?
Ready to transform your dipping game? What's your favorite treat to dip in chocolate?