
Working with Enriched Dough: A Sweet Roll Skill Builder

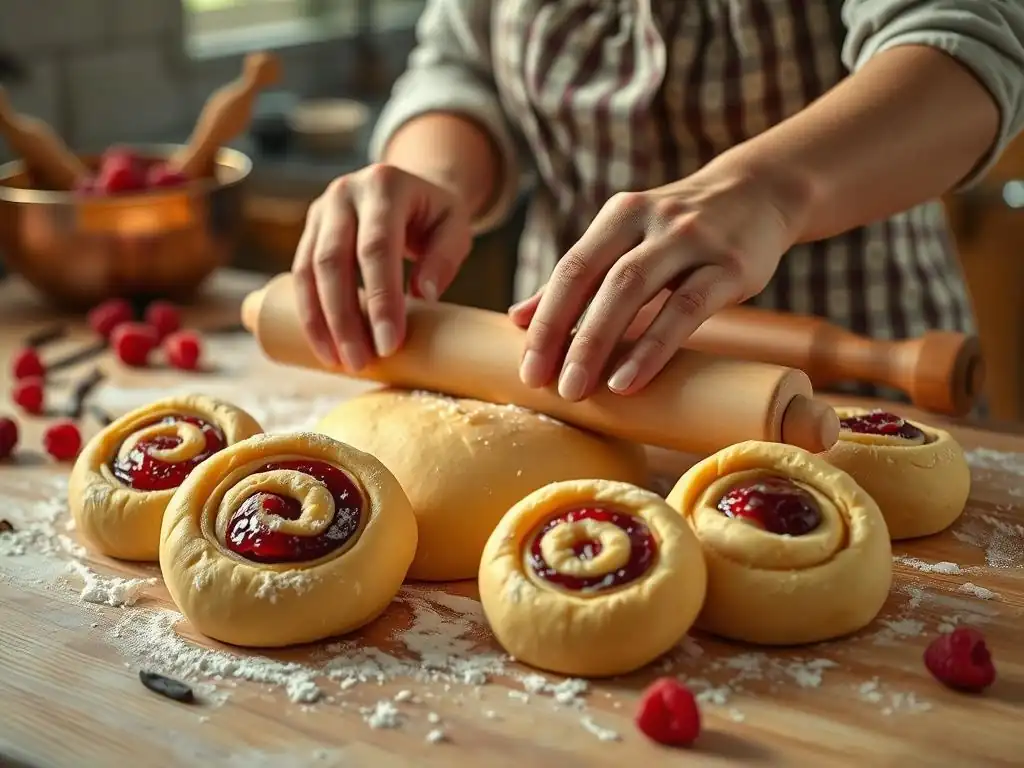
Welcome to BakeWithEase, where baking dreams become delicious realities! Ever wondered how to create those irresistibly soft and flavorful sweet rolls you see in bakeries? This week, we're diving deep into the world of enriched dough, a baker's secret weapon for creating incredible treats. Get ready to unlock the secrets of working with enriched dough and elevate your baking game with our guide to crafting easy enriched dough sweet rolls – a skill builder that will transform your baking skills. Are you ready to embark on this sweet journey?
- Baking Brioche: A Journey into Rich Dough Mastery
- Introduction to Brioche Baking
- Essential Ingredients for Brioche Dough
- Mastering the Brioche Dough Process: A Detailed Guide
- Troubleshooting Common Brioche Baking Issues
- Flavor Variations for Brioche
- Tips and Tricks for Perfect Brioche
- Conclusion: Savoring Your Brioche Baking Achievement
-
Frequently Asked Questions
- What exactly is enriched dough, and why is it used for sweet rolls?
- What are some common problems bakers face when working with enriched dough?
- What type of flour is best for making enriched dough sweet rolls?
- Can I substitute ingredients in an enriched dough recipe to make it healthier?
- How do I prevent my enriched dough sweet rolls from drying out after baking?
- Final Reflection: The Sweetness of Mastery, One Roll at a Time
- Unleash Your Inner Baker: Master the Art of Enriched Dough!
Baking Brioche: A Journey into Rich Dough Mastery
Introduction to Brioche Baking
What is Brioche and Why Bake It?
Brioche is a classic French bread renowned for its incredibly rich, soft, and tender crumb. Unlike lean doughs used for baguettes or rustic loaves, brioche belongs to the family of enriched doughs, meaning it incorporates a significant amount of fat (butter), eggs, and sometimes sugar and milk.
This enrichment process results in a bread that is more cake-like than traditional bread, with a beautiful golden color and a luxurious texture. Learning to bake brioche is a fundamental skill for any baker looking to expand their repertoire beyond basic bread, opening doors to a world of delicious pastries and sweet treats, including many types of easy enriched dough sweet rolls.
Baking brioche is a rewarding experience that teaches patience and precision. While it might seem intimidating at first due to its high fat content and potentially sticky nature, mastering the technique allows you to create something truly special.
The effort put into kneading the dough and allowing it to develop properly is directly proportional to the incredible flavor and texture you achieve in the final product. Think of it as a foundational skill – once you understand how this rich dough behaves, you can adapt it for countless applications, from elegant braided loaves to individual rolls, and yes, even those delightful easy enriched dough sweet rolls you've been wanting to make.
Advantages of Homemade Brioche
Creating brioche at home offers numerous benefits that far outweigh the convenience of store-bought versions. Firstly, the quality of ingredients you use directly impacts the final taste and texture. Using high-quality butter and fresh eggs results in a depth of flavor that mass-produced brioche simply cannot replicate. You also have complete control over the ingredients, which is particularly appealing for those with dietary considerations or a preference for organic products. A typical brioche recipe might use over 50% butter by weight of flour, a richness level hard to find in commercial products.
Beyond ingredient control, the sensory experience of baking brioche is unmatched. The aroma of the dough as it rises, the satisfying feel of the smooth, elastic dough after proper kneading, and the incredible smell filling your kitchen as it bakes are all part of the joy. Furthermore, fresh brioche is simply superior.
Its delicate crumb is at its best when just baked, or within a day or two. While commercial brioche is often made for longer shelf life, the homemade version offers unparalleled freshness and a genuinely melt-in-your-mouth quality. Mastering this enriched dough is a stepping stone to creating many other delightful baked goods, making it a valuable skill for crafting easy enriched dough sweet rolls and more.
Essential Ingredients for Brioche Dough
Flour Selection for Brioche
The choice of flour is crucial for brioche dough, as it needs enough protein to develop a strong gluten structure capable of supporting the high fat content. All-purpose flour is a common and accessible choice for many home bakers. Look for one with a protein content around 10-12%. This level provides a good balance, allowing for sufficient gluten development without making the dough too tough. For a slightly richer result, some bakers prefer using bread flour, which typically has a higher protein content (12-14%), resulting in a chewier texture.
Using the correct flour weight is also critical. A digital scale is indispensable in baking, especially when working with enriched doughs like brioche. Measuring flour by volume (cups) can lead to significant variations, potentially throwing off the delicate balance of the recipe. For instance, one cup of all-purpose flour can weigh anywhere from 120 to 140 grams depending on how it's scooped and leveled. Using a scale ensures consistency, which is key to reliably achieving the desired texture and rise for your brioche, and subsequently, for making consistently delightful easy enriched dough sweet rolls.
Yeast's Role in Brioche's Rise
Yeast is the leavening agent responsible for giving brioche its light and airy texture. Active dry yeast and instant yeast are the most common types used by home bakers. Active dry yeast requires proofing in warm liquid (typically around 105-115°F or 40-46°C) before being added to the other ingredients, to ensure it's alive and active. Instant yeast, on the other hand, can usually be mixed directly with the dry ingredients, simplifying the process slightly. Both types work well for brioche, though instant yeast might provide a slightly faster rise.
The amount of yeast used and the fermentation time significantly impact the flavor and texture of the brioche. A longer, slower rise (especially in a cold environment like the refrigerator) allows for more complex flavors to develop.
While a typical recipe might call for 7-10 grams of yeast per 500 grams of flour for a standard rise, reducing the yeast slightly and opting for a cold fermentation (perhaps 1-2 grams per 500g flour for an overnight rise) can yield a brioche with a richer, more nuanced taste. Proper yeast activation and controlled fermentation are vital steps towards creating a beautifully risen dough perfect for easy enriched dough sweet rolls.
Sugar's Influence on Brioche's Character
Sugar in brioche serves multiple purposes beyond just sweetness. It provides food for the yeast, helping it activate and produce carbon dioxide, which makes the dough rise. It also contributes to the browning of the crust during baking through caramelization and the Maillard reaction. Furthermore, sugar helps tenderize the crumb, contributing to brioche's signature soft texture. The amount of sugar varies, but a typical brioche might contain anywhere from 5% to 15% sugar by weight of flour.
While some recipes use granulated sugar, superfine or caster sugar dissolves more easily, which can be beneficial in rich doughs where hydration is carefully controlled. The level of sweetness can be adjusted based on how you plan to use the brioche. A less sweet dough is perfect for savory applications, while a sweeter version is ideal for desserts or, indeed, as the base for easy enriched dough sweet rolls. Balancing the sugar content is key to achieving the desired flavor profile without making the dough too sticky or inhibiting gluten development.
Butter: The Key to Brioche's Richness
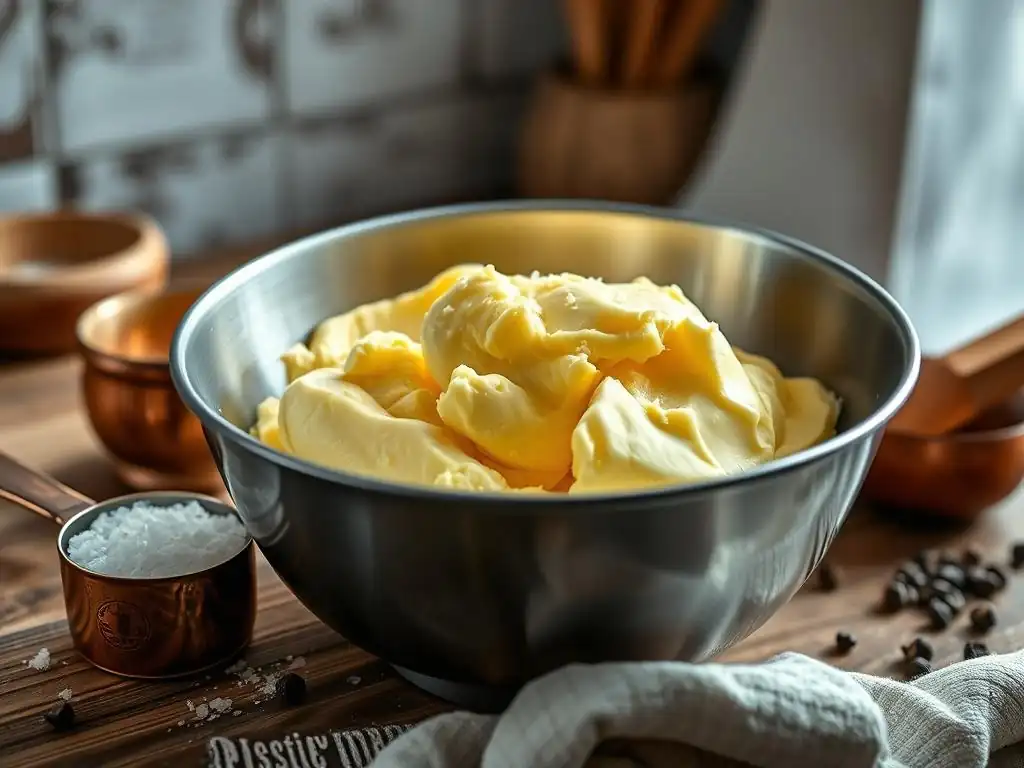
Butter is arguably the most defining ingredient in brioche, contributing significantly to its richness, flavor, and tender texture. High-fat butter (European-style butter often has a higher butterfat percentage, around 82-84%, compared to American butter, around 80%) is often preferred for its superior flavor and how it integrates into the dough. The amount of butter in brioche is substantial, often equalling or even exceeding the weight of the flour, making it a highly enriched dough. This high fat content is what gives brioche its distinctive soft, almost cake-like crumb.
Adding butter correctly is crucial. It's typically added gradually to the dough after gluten development has begun. This process is known as the "enriched dough method." The butter should be soft but not melted, often at cool room temperature (around 60-65°F or 15-18°C). Incorporating it slowly allows the gluten network to remain intact while the fat coats the strands, preventing them from sticking together tightly. This coating is what inhibits excessive gluten development, resulting in a tender crumb rather than a chewy one, perfect for a luxurious brioche or the base of easy enriched dough sweet rolls.
Liquid Choices: Milk and Cream
While some brioche recipes use water, milk is a more common liquid ingredient, and sometimes cream is incorporated for extra richness. Milk contains fats and sugars that contribute to the dough's tenderness, flavor, and browning. Whole milk is often preferred for its higher fat content, which further enhances the richness of the brioche.
Using milk also results in a softer crust compared to using water. The temperature of the milk is important, especially when activating yeast; it should be lukewarm (around 105-115°F or 40-46°C) if proofing active dry yeast, or room temperature if using instant yeast mixed with dry ingredients.
Substituting some or all of the milk with heavy cream (typically around 35-40% fat) will yield an even richer, more decadent brioche. However, this also increases the total fat content, which can make the dough more challenging to handle. The liquid content in brioche is relatively low compared to lean doughs, as much of the hydration comes from the eggs and butter. The careful balance of liquids, eggs, and fat is what creates the unique texture of this enriched dough, making it adaptable for various shapes and uses, including delightful easy enriched dough sweet rolls.
Eggs: Enriching and Stabilizing Brioche
Eggs play a vital multifaceted role in brioche dough. They contribute significantly to the richness, color, and flavor of the bread. The yolks add fat and lecithin, which act as emulsifiers, helping to create a smooth, cohesive dough and contributing to the tender crumb. The whites provide protein, which adds structure and helps the dough rise. Eggs also contribute liquid, helping to hydrate the flour and activate the yeast. A typical brioche dough might include 3-6 eggs per 500 grams of flour, sometimes even more in very rich versions.
Beyond their contribution to richness and structure, eggs also help stabilize the dough. The proteins in eggs coagulate during baking, setting the structure and contributing to the bread's final shape and volume. Using room-temperature eggs is generally recommended as they incorporate more easily into the dough than cold eggs. The number of eggs used directly impacts the dough's consistency and the final product's texture, ranging from a moderately rich bread to a very soft, almost cake-like loaf, forming an excellent base for easy enriched dough sweet rolls.
Mastering the Brioche Dough Process: A Detailed Guide
Step 1: Preparing the Yeast
If you are using active dry yeast, this is where you awaken it. Measure the lukewarm liquid (milk or water, typically around 105-115°F or 40-46°C) specified in your recipe into a small bowl or measuring cup. Sprinkle the active dry yeast over the surface of the liquid. You can add a pinch of sugar from the recipe amount here to give the yeast some food.
Stir gently and let it sit for 5-10 minutes. You should see a foamy layer develop on the surface, indicating the yeast is alive and active. If no foam appears, your yeast may be dead, or the liquid was too hot or cold, and you'll need to start this step over with fresh yeast.
If your recipe calls for instant yeast, you can often skip this separate proofing step. Instant yeast is designed to be mixed directly with the dry ingredients. Simply add the specified amount of instant yeast to your flour mixture in the mixing bowl. However, even with instant yeast, ensuring your liquid ingredients (milk, eggs) are not ice-cold will help the yeast become active more quickly once everything is combined. Proper yeast preparation is the first critical step to ensure your rich dough rises beautifully, leading to perfect brioche loaves or fluffy easy enriched dough sweet rolls.
Step 2: Combining Dry Ingredients
In a large mixing bowl (preferably the bowl of your stand mixer if using one), combine the flour, sugar, and salt. If using instant yeast, add it now. Whisk these dry ingredients together briefly to ensure they are evenly distributed. Salt is essential for flavor but should not come into direct contact with the yeast for extended periods before mixing, as it can inhibit yeast activity. Ensuring the salt is dispersed throughout the flour before adding the wet ingredients prevents this issue.
The amount of flour will be the base weight of your dough. A typical recipe might start with 500 grams of flour. The sugar content might range from 25-75 grams depending on desired sweetness, and salt is usually around 8-10 grams per 500 grams of flour. Accuracy in weighing these ingredients is important for the final texture and flavor profile of your brioche dough, setting the stage for successful baking, whether you're making a loaf or shaping easy enriched dough sweet rolls.
Step 3: Incorporating Wet Ingredients
Now it's time to bring the dough together. Add the prepared yeast mixture (if using active dry) or the liquids (milk/cream) and room-temperature eggs to the bowl with the dry ingredients. If your recipe includes any flavorings like vanilla extract or citrus zest (which are excellent for easy enriched dough sweet rolls), add them now. Begin mixing on a low speed with a stand mixer fitted with a dough hook, or start mixing with a wooden spoon if kneading by hand.
Mix until the ingredients just come together into a shaggy, somewhat sticky mass. At this point, it won't look smooth or elastic – that comes with kneading. The dough will be quite soft due to the high proportion of wet ingredients and eventually, the butter. Avoid overmixing at this stage; you just want to ensure all the dry bits of flour are hydrated before moving on to the crucial kneading phase. This initial mix sets the stage for developing the strong gluten network needed to support the rich additions to come.
Step 4: Kneading for Brioche's Signature Texture
Kneading is perhaps the most critical step in brioche making. Unlike lean doughs that require moderate kneading, brioche needs extensive kneading to develop a strong gluten network before the butter is added. This network is necessary to encapsulate the large amount of fat and create the characteristic light, airy, and tender crumb. The dough will start very sticky and gradually become smoother and more elastic as you knead.
The goal is to reach the "windowpane test." To perform this test, pinch off a small piece of dough (about the size of a golf ball). Gently stretch it between your fingers.
If you can stretch it thinly enough to see light through it without it tearing (like a windowpane), the gluten is well-developed. This typically takes 10-15 minutes of vigorous hand kneading or 5-8 minutes in a stand mixer on medium speed before adding butter. Achieving this gluten structure is key to ensuring your enriched dough rises properly and yields soft, fluffy results, perfect for shaping into easy enriched dough sweet rolls.
Hand Kneading Techniques for Brioche
Kneading brioche by hand is a workout, but entirely achievable. Start by scraping the shaggy dough onto a clean, lightly floured surface. Be prepared for it to be quite sticky initially. Use a bench scraper to help manage the stickiness. Knead the dough by pushing it away from you with the heels of your hands, then folding it back towards you. Rotate the dough as you go. Resist the urge to add excessive flour, as this will make the brioche dry. Use the bench scraper to gather the dough frequently.
Continue kneading for 10-15 minutes, or until the dough becomes smoother, less sticky, and passes the windowpane test. It will still be soft, but it should be elastic and cohesive. This physical process helps align the gluten strands. Once the initial kneading is done and the windowpane is achieved, you are ready to start incorporating the softened butter gradually. This step is vital for developing the structure that supports the richness, making the dough pliable enough to shape for loaves or easy enriched dough sweet rolls.
Using a Stand Mixer for Brioche Dough
A stand mixer with a dough hook is the easiest and most common way to knead brioche, especially given its high fat content which makes it very sticky initially. Place the shaggy dough from Step 3 into the mixer bowl. Start mixing on low speed for a minute or two to hydrate everything, then increase the speed to medium (usually speed 3 or 4 on most mixers). Let the mixer knead for 5-8 minutes. The dough will likely stick to the bottom of the bowl initially but should eventually start pulling away from the sides, cleaning the bowl somewhat.
Check the dough periodically for the windowpane test. Once it passes, reduce the mixer speed to low. Now, begin adding the softened butter, a tablespoon or two at a time. Wait until each addition of butter is almost fully incorporated before adding the next. This process is slow, taking another 5-10 minutes.
The dough will look like it's breaking apart and becoming greasy, but keep mixing. Eventually, it will come back together, becoming very smooth, shiny, and elastic. The total kneading time with butter can be 10-20 minutes. This thorough mixing is what creates the luxurious texture of this enriched dough, ideal for easy enriched dough sweet rolls.
Step 5: The First Rise: Developing Flavor
After kneading and incorporating the butter, the dough needs time to ferment and develop flavor. Shape the dough into a smooth ball and place it in a clean, lightly oiled bowl. Cover the bowl tightly with plastic wrap or a damp kitchen towel. The first rise, also known as bulk fermentation, can happen at room temperature or in the refrigerator. A room temperature rise (typically 1-2 hours at 70-75°F or 21-24°C) is faster, but a cold fermentation in the refrigerator (8-12 hours or even up to 24 hours at 38-40°F or 3-4°C) is highly recommended for superior flavor development.
During the first rise, the yeast produces carbon dioxide, causing the dough to expand, and also produces organic acids and alcohols that contribute to the complex flavor profile. The dough should roughly double in size. For cold fermentation, the rise will be slower, but the longer fermentation time allows enzymes to break down starches into sugars, enhancing sweetness and browning, and allows yeast byproducts to build flavor. This slow rise is crucial for creating a rich, flavorful dough base, perfect for incredibly delicious easy enriched dough sweet rolls.
Step 6: Shaping Brioche
Once the first rise is complete, gently deflate the dough by turning it out onto a lightly floured surface and pressing out the air. At this point, the dough is ready to be shaped into various forms. Brioche dough is versatile and can be made into loaves, individual rolls, braided breads, or used as the base for fillings in pastries like danishes or easy enriched dough sweet rolls. The way you shape depends on the final product you desire.
Divide the dough into the required portions using a scale for accuracy if making multiple pieces of the same size (e.g., 60-80g for individual rolls). Handle the dough gently to avoid losing too much of the gas built up during fermentation. Proper shaping creates tension on the surface of the dough, which helps it hold its structure during the second rise and baking. Two classic brioche shapes are Brioche à Tête and Brioche Nanterre.
Brioche à Tête (Brioche with a Head)
This is the iconic brioche shape, often baked in fluted molds. To create this shape, take a portion of dough and divide it into two pieces, one large (about 80% of the total weight) and one small (about 20%). Shape the large piece into a smooth ball and place it in a buttered and floured brioche mold. Use your finger to make a deep indentation in the center of the large ball. Shape the small piece into a ball and elongate one end slightly to form a tear-drop or pear shape.
Carefully place the pointed end of the small piece into the indentation of the large piece. This creates the characteristic "head." The small piece should rest securely in the indentation. This shape allows for a beautiful presentation and ensures even baking in the mold. Mastering this classic shape is a mark of skill when working with rich dough, applicable to more than just brioche loaves, though perhaps less common for standard easy enriched dough sweet rolls.
Brioche Nanterre
Brioche Nanterre is a loaf shape baked in a standard rectangular loaf pan. It's created by arranging several small balls of dough side-by-side in the pan. To make this shape, divide the dough into equal portions (typically 6 to 8 portions for a standard 9x5 inch loaf pan). Shape each portion into a smooth, tight ball.
Arrange the balls in a single layer in a buttered and floured loaf pan. They should touch each other. As the dough rises and bakes, the balls will expand and merge, creating a loaf that is easy to pull apart into individual sections. This is a popular shape because it bakes evenly and is simple to slice or serve. This method of portioning and arranging balls is also often used as a base structure for certain types of easy enriched dough sweet rolls, where the dough balls might be coated in cinnamon sugar and layered.
Step 7: The Second Rise: Achieving Lightness
After shaping, the dough needs a second rise, also called proofing. This rise allows the dough to lighten up and increase in volume before baking. Place the shaped brioche (whether in molds, pans, or on a baking sheet) in a warm, draft-free place. Cover it loosely with plastic wrap or a light kitchen towel to prevent a skin from forming. The ideal temperature for proofing is around 75-80°F (24-27°C).
The duration of the second rise depends on the temperature and the amount of yeast used, but it typically takes 1-2 hours. The dough should become noticeably puffy and almost double in size again. Be careful not to over-proof, as this can lead to the dough collapsing in the oven or having a poor texture. To test if it's ready, gently press a finger into the dough; if the indentation slowly springs back halfway, it's ready.
If it springs back completely, it needs more time. If it stays indented, it's over-proofed. Proper proofing ensures your rich dough yields a light and airy final product, crucial for both brioche loaves and fluffy easy enriched dough sweet rolls.
Step 8: Baking Your Brioche
Baking is the final step where the magic happens. Preheat your oven well in advance to the correct temperature. Brioche is typically baked at a moderate temperature to ensure the rich dough cooks through without burning the high-fat crust. Temperatures often range from 350°F to 375°F (175°C to 190°C). Using an oven thermometer is highly recommended to ensure your oven is accurately preheated.
Just before baking, the brioche is often brushed with an egg wash (a mixture of beaten egg and sometimes milk or water) to give it a beautiful golden-brown, shiny crust. Bake the brioche until it is deeply golden brown on top and the internal temperature reaches 190-200°F (88-93°C) when tested with an instant-read thermometer inserted into the center of the loaf. The baking time will vary significantly depending on the size and shape of the brioche, from 20-30 minutes for small rolls to 35-45 minutes for a large loaf.
Optimal Oven Temperature and Baking Time
Finding the perfect balance of oven temperature and baking time is key to a successful brioche. A temperature that is too high can result in a burned crust before the inside is cooked through, while a temperature too low might lead to a pale crust and a dense interior. For standard loaves or larger shapes, starting at 375°F (190°C) for the first 15-20 minutes and then reducing to 350°F (175°C) can help achieve a good balance of crust development and even cooking.
For smaller items like individual rolls or easy enriched dough sweet rolls, a slightly higher temperature of 375°F (190°C) for a shorter period (20-25 minutes) is often appropriate. Always rely on visual cues (deep golden brown color) and an internal thermometer for doneness. A toothpick inserted into the center should also come out clean. Baking thoroughly ensures the rich dough structure is set and the crumb is cooked perfectly.
Achieving a Deep Golden Crust
A signature of beautiful brioche is its rich, deep golden-brown crust. This color is primarily achieved through the Maillard reaction and caramelization of sugars on the surface during baking, enhanced by the egg wash. Applying an even layer of egg wash just before baking is crucial. A simple egg wash can be one whole egg beaten with a tablespoon of milk or water. For a shinier, darker crust, use only the egg yolk mixed with a little milk or cream.
Baking temperature and time play a significant role. If the crust is browning too quickly before the interior is done, you can loosely tent the brioche with aluminum foil for the remainder of the baking time. Conversely, if the crust is too pale, you might need to increase the oven temperature slightly towards the end of baking (monitoring closely) or ensure you used an effective egg wash. A well-browned crust not only looks appealing but also contributes to the overall flavor and texture of the brioche, including easy enriched dough sweet rolls made from this dough.
Troubleshooting Common Brioche Baking Issues
Dough Not Rising: Identifying and Solving the Problem
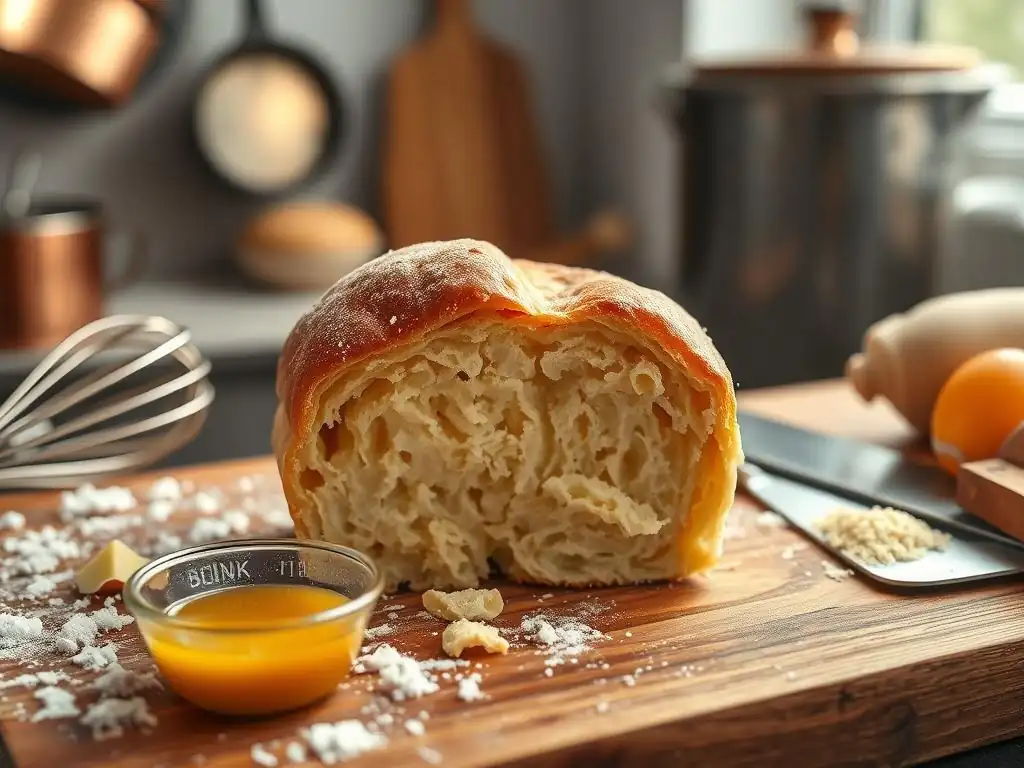
One of the most frustrating issues with any yeast dough, especially a rich one like brioche, is when it doesn't rise properly. Several factors can cause this. The most common culprit is inactive yeast. Ensure your yeast is fresh (check the expiration date) and, if using active dry, that it proofs correctly in lukewarm liquid (105-115°F). Water or milk that is too hot will kill the yeast, while liquid that is too cold will not activate it. If your yeast doesn't foam, discard and start with fresh yeast.
Other factors include the temperature of your kitchen; yeast is most active in warm environments (75-80°F). If your kitchen is cold, find a warmer spot or create a proofing environment (like a slightly warm oven that's been turned off). Too much salt can also inhibit yeast activity if mixed directly together initially. Finally, insufficient kneading can prevent proper gluten development, which the yeast needs to create structure for the rise. Ensure you kneaded until the dough passed the windowpane test before the first rise. Troubleshooting the rise is key to fluffy brioche and successful easy enriched dough sweet rolls.
Dough Too Sticky: Adjusting the Hydration
Brioche dough is inherently soft and sticky due to its high fat and egg content, especially before the butter is fully incorporated. However, if it remains excessively sticky and difficult to handle even after adequate kneading and butter addition, the hydration might be too high. This could be due to inaccurate ingredient measurements (using too much liquid or not enough flour) or variations in flour absorption rates. Different flours absorb liquid differently.
If the dough is too sticky to handle during kneading, you can add flour very sparingly, a tablespoon at a time, until it becomes manageable. Avoid adding large amounts, as this can alter the final texture. Ensure your butter was added at the correct temperature (soft, not melted), as melted butter can make the dough greasy and harder to manage. If the dough is sticky after the first rise, chilling it in the refrigerator for 30-60 minutes before shaping can make it much easier to handle, a useful tip when shaping easy enriched dough sweet rolls.
Dense and Heavy Brioche: Addressing Texture Issues
A dense or heavy crumb in brioche, instead of the desired light and airy texture, is often the result of issues during fermentation or baking. Overworking the dough after the first rise or during shaping can knock out too much of the gas bubbles created by the yeast, leading to a dense result. Gentle handling is crucial once the dough has risen.
Under-proofing during the second rise is another common cause. If the dough hasn't had enough time to lighten up before baking, it won't achieve its full volume in the oven. Ensure your proofing environment is warm enough and allow sufficient time for the dough to become puffy. Conversely, over-proofing can also lead to a dense crumb if the gluten structure collapses.
Finally, baking at too low a temperature or for too short a time can prevent the dough from setting properly and achieving a light structure. Ensure your oven temperature is accurate and bake until the internal temperature is reached. Achieving the right texture is paramount for both classic brioche and tender easy enriched dough sweet rolls.
Uneven Baking: Achieving Uniform Results
Uneven baking can result in parts of the brioche being over-browned or dry while other parts are undercooked. This is often caused by hot spots in your oven. Most ovens have variations in temperature distribution. To mitigate this, try rotating the brioche halfway through the baking time. If baking multiple items (like easy enriched dough sweet rolls on a baking sheet), arrange them with space between them to allow for even heat circulation.
Using the correct pan or mold size is also important. If a pan is too small, the dough might overflow or bake unevenly. If it's too large, the dough might spread too thin. Ensure your oven rack is placed in the correct position, usually the middle or slightly lower, for even heat exposure to the top and bottom of the loaf or rolls. Using an oven thermometer helps verify the overall oven temperature is correct, reducing the risk of baking issues.
Flavor Variations for Brioche
Brioche's rich, slightly sweet base makes it incredibly versatile for incorporating various flavors, transforming it from a classic bread into a decadent treat or a savory accompaniment. The beauty of mastering this enriched dough lies in its adaptability. Once you have a reliable brioche recipe, the possibilities for customization are nearly endless, perfect for creating a wide range of easy enriched dough sweet rolls or other flavored breads.
These variations can involve adding ingredients directly into the dough during the kneading phase, incorporating fillings during shaping, or applying toppings before or after baking. Experimenting with different flavors allows you to tailor your brioche to specific meals, holidays, or personal preferences. From sweet to savory, brioche dough provides a perfect canvas for culinary creativity.
Classic Brioche Nature
The "nature" or plain brioche is a masterpiece in itself, showcasing the pure flavors of butter, eggs, and flour. This classic version is typically subtly sweet, allowing its rich, tender crumb to be the star. It is the foundational recipe from which all other variations stem. A well-made classic brioche should have a beautiful golden crust and a soft, airy interior with a distinct eggy, buttery flavor.
This plain version is incredibly versatile. It can be enjoyed simply sliced and served with butter or jam, used for French toast (it makes the best French toast! ), or as the base for elegant sandwiches. Mastering the classic brioche nature is essential before venturing into more complex variations, as it teaches you the fundamental techniques for handling this rich dough. It serves as the perfect starting point for understanding the base texture needed for successful easy enriched dough sweet rolls.
Chocolate Chip Brioche
Adding chocolate chips is a popular and delicious way to enhance brioche. The melting chocolate creates pockets of gooey sweetness within the rich dough. Chocolate chips, chunks, or even chopped chocolate bars can be incorporated. Dark, milk, or white chocolate can be used depending on preference. A common ratio is to add 100-150 grams of chocolate chips per 500 grams of flour.
The chocolate should be added towards the end of the kneading process, after the butter is fully incorporated and the dough is smooth and elastic. This prevents the chocolate from being broken down too much by the mixer or hand kneading. Chocolate chip brioche is wonderful for breakfast or as a snack, often baked as a loaf or individual rolls. Adding chocolate chips is a simple way to turn a classic enriched dough into a delightful sweet treat, perfect for making easy enriched dough sweet rolls with a chocolatey twist.
Citrus-Infused Brioche (Orange, Lemon)
Citrus zest adds a bright, fragrant counterpoint to the richness of brioche dough. Orange or lemon zest are particularly popular choices. The oils in the zest infuse the dough with a wonderful aroma and a subtle tangy flavor that cuts through the richness. Use the zest of one or two large oranges or lemons per 500 grams of flour, depending on how intense you want the citrus flavor.
Add the finely grated zest along with the other wet ingredients or dry ingredients at the beginning of the mixing process. Ensure you only grate the colored part of the peel and avoid the bitter white pith. Citrus-infused brioche is lovely on its own, toasted, or used for French toast. It pairs wonderfully with fruit toppings or glazes. Incorporating citrus zest is a fantastic way to elevate the flavor profile of this enriched dough, making it suitable for uniquely flavored easy enriched dough sweet rolls.
Herb and Cheese Brioche
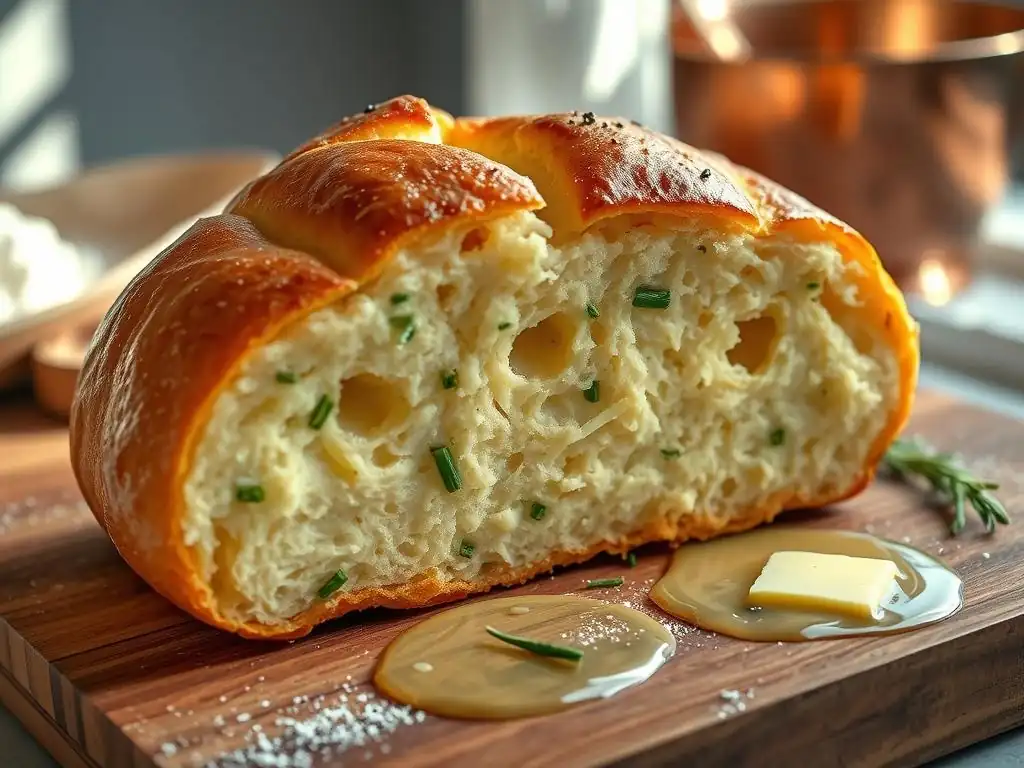
Brioche isn't just for sweet applications; it makes a fantastic savory bread as well. Adding herbs and cheese creates a flavorful loaf perfect for accompanying meals or serving on a cheese board. Fresh or dried herbs can be used, such as rosemary, thyme, chives, or parsley. Cheeses like Gruyère, cheddar, Parmesan, or even a blend work well. A typical addition might be 2-3 tablespoons of chopped fresh herbs and 100-150 grams of shredded cheese per 500 grams of flour.
Like chocolate chips, herbs and cheese should generally be added towards the end of kneading, after the dough is developed and the butter is in. This prevents the herbs from being pulverized and the cheese from melting into the dough during mixing. Savory brioche is often baked as a loaf or individual rolls and can be enjoyed warm with butter or used for sandwiches. While less common for typical easy enriched dough sweet rolls, this variation highlights the versatility of brioche enriched dough.
Toppings and Glazes for Brioche
Beyond mixing ingredients into the dough, various toppings and glazes can enhance the appearance, flavor, and texture of baked brioche. These can be applied before or after baking, adding moisture, sweetness, shine, or crunch. The choice of topping often depends on whether the brioche is sweet or savory and how it will be served. Many of these are perfect for adding the final flourish to easy enriched dough sweet rolls.
Common options include simple egg washes for shine, streusel toppings for crunch, or sweet glazes for extra sweetness and moisture. Each topping contributes a different element to the finished product, allowing for further customization of your homemade brioche.
Egg Wash for Shine
As mentioned earlier, an egg wash is the most common topping for brioche before baking. It gives the crust a beautiful golden color and a glossy finish. A basic egg wash is a whole egg whisked with a tablespoon of liquid (milk, water, or cream). For a deeper color and more shine, use only the egg yolk mixed with liquid. For a lighter color and less shine, use only egg white mixed with liquid.
Apply the egg wash gently with a pastry brush to the surface of the proofed dough just before it goes into the oven. Be careful not to let the wash pool in any crevices or drip down the sides, as this can create an uneven crust or stick the dough to the pan. A second coat applied partway through baking can sometimes enhance the shine. This simple step dramatically improves the visual appeal of your brioche and is standard practice for many easy enriched dough sweet rolls.
Simple Syrup for Moisture
Applying a simple syrup glaze after baking adds moisture and sweetness to the crust, keeping it soft and flavorful. A simple syrup is made by dissolving equal parts sugar and water in a saucepan over medium heat, then simmering until the sugar is fully dissolved (e.g., 100g sugar to 100g water). You can also infuse the syrup with flavors like vanilla, citrus zest, or spices.
Brush the warm simple syrup over the hot brioche immediately after it comes out of the oven. The heat of the bread will help the syrup soak into the crust slightly. This is particularly effective for sweet brioche variations or easy enriched dough sweet rolls, adding an extra layer of sweetness and preventing the crust from drying out as it cools.
Streusel Topping
Streusel, a crumbly topping made from flour, sugar, butter, and sometimes spices, adds a delightful crunch and sweetness to brioche. It's particularly popular for sweet rolls and coffee cakes. A basic streusel ratio might be 1 part flour, 1 part sugar, and 0.5 parts cold butter, cut together until crumbly. Spices like cinnamon or nutmeg can be added.
Sprinkle the streusel generously over the egg-washed brioche dough just before baking. As the brioche bakes, the streusel will brown and crisp up, creating a lovely textural contrast with the soft, rich dough underneath. This is a fantastic topping choice for easy enriched dough sweet rolls, adding flavor, texture, and visual appeal.
Tips and Tricks for Perfect Brioche
Achieving perfect brioche consistently requires attention to detail and understanding how this rich dough behaves. Over the years, bakers have developed several tips and tricks that can help ensure success, from controlling fermentation to handling the finished product. These techniques are valuable for mastering brioche and applying your knowledge to create other delicious items like easy enriched dough sweet rolls.
Focusing on temperature control, gentle handling, and proper storage will elevate your brioche baking from good to exceptional. Don't be discouraged if your first attempt isn't perfect; practice and patience are key to mastering any enriched dough.
Using a Thermometer for Accuracy
Accuracy in baking, especially with temperature-sensitive ingredients like yeast and butter, is paramount. Using a thermometer removes guesswork and increases reliability. An instant-read thermometer is invaluable for checking the temperature of liquids when proofing active dry yeast (aim for 105-115°F or 40-46°C). It's also essential for verifying the internal temperature of the baked brioche to ensure it's fully cooked (target 190-200°F or 88-93°C).
An oven thermometer is also highly recommended to check the accuracy of your oven's thermostat. Many home ovens can be off by 25°F or more, which significantly impacts baking time and results. Knowing your oven's true temperature allows you to make necessary adjustments. Using a scale to weigh ingredients is another form of accuracy that greatly improves consistency when working with enriched doughs like brioche, leading to better easy enriched dough sweet rolls.
Cold Fermentation for Flavor Development
While room temperature fermentation is faster, cold fermentation in the refrigerator is a technique widely used by professional bakers and enthusiasts alike to enhance the flavor and texture of rich doughs like brioche. Allowing the dough to rise slowly in a cold environment (38-40°F or 3-4°C) for 8-24 hours or even longer develops more complex flavors through slower yeast activity and enzymatic breakdown of starches.
Cold fermentation also makes the dough much easier to handle because the butter solidifies, making the dough less sticky and more firm. This is particularly helpful when shaping intricate forms or rolling out dough for fillings, such as when preparing easy enriched dough sweet rolls. The extended cold rest also contributes to a finer, more even crumb structure. Simply cover the dough tightly and place it in the refrigerator for the first rise. Punch it down gently the next day and proceed with shaping and the second rise.
Freezing and Reheating Brioche
Brioche freezes exceptionally well, allowing you to bake ahead or store leftovers. It's best to freeze brioche once it has completely cooled after baking. Wrap the loaf or individual rolls tightly in plastic wrap, then place them in a freezer bag or wrap in aluminum foil. This double layer of protection helps prevent freezer burn. Properly wrapped brioche can be frozen for up to 2-3 months.
To reheat, thaw the brioche overnight in the refrigerator or at room temperature. For best results, warm the thawed brioche gently in a preheated oven at 300-325°F (150-160°C) for 10-15 minutes for rolls or 15-20 minutes for a loaf, until warmed through. Avoid microwaving, as it can make the brioche tough. Freezing is a great way to manage baking schedules, especially if you've made a large batch of easy enriched dough sweet rolls.
Storing Baked Brioche for Optimal Freshness
Baked brioche is best enjoyed fresh, ideally within 1-2 days. Due to its high moisture and fat content, it tends to stale more quickly than lean bread. Store cooled brioche at room temperature in an airtight container or a bread bag to maintain its softness. Avoid storing it in the refrigerator, as this can actually cause bread to stale faster due to a process called retrogradation of starches.
If you won't consume the brioche within a couple of days, freezing is the best option for longer storage. For slightly stale brioche, it can be revived by gently warming it in the oven or used to make delicious French toast, bread pudding, or croutons. Proper storage ensures that the wonderful texture and flavor of your rich dough creation, whether a loaf or easy enriched dough sweet rolls, are preserved for as long as possible.
Conclusion: Savoring Your Brioche Baking Achievement
Mastering brioche baking is a significant achievement for any home baker. It involves understanding the nuances of working with an enriched dough, from precise ingredient measurements and thorough kneading to controlled fermentation and careful baking. The result is a bread that is truly special – incredibly rich, tender, and flavorful, a testament to your skill and patience in the kitchen.
This journey into rich dough mastery opens up a world of possibilities. The techniques learned while baking brioche are directly applicable to other enriched doughs and pastries. You've gained valuable experience that will serve you well in future baking endeavors, including making beautiful and delicious easy enriched dough sweet rolls.
The best part of baking brioche is sharing the finished product. Whether you've made a classic loaf, individual rolls, or customized variations like chocolate chip or citrus-infused brioche, homemade brioche is always a welcome treat. Serve it warm with butter and jam, use it to elevate your French toast, or enjoy it as a side with a meal.
Share your baking journey and the delicious results with friends and family. There's immense satisfaction in seeing others enjoy something you've created from scratch with such care. Celebrate your success in mastering this rich dough, and look forward to applying your newfound skills to explore the vast and delicious world of enriched dough baking, including countless variations of easy enriched dough sweet rolls.
Frequently Asked Questions
What exactly is enriched dough, and why is it used for sweet rolls?
Enriched dough is a dough that contains added fats and sugars, such as butter, eggs, and milk. This makes the dough richer in flavor and texture, resulting in softer and more flavorful sweet rolls.
What are some common problems bakers face when working with enriched dough?
Common problems include the dough being too sticky to handle, difficulties with rising due to the extra weight from the enrichments, and over-browning during baking because of the sugar content.
What type of flour is best for making enriched dough sweet rolls?
Bread flour is generally recommended because it has a higher gluten content, which helps to provide the necessary structure and strength to support the rich ingredients in the dough.
Can I substitute ingredients in an enriched dough recipe to make it healthier?
While you can make substitutions, be aware that this will affect the final texture and flavor. You might substitute some butter with applesauce, but too many substitutions can impact the rise and softness of the sweet rolls.
How do I prevent my enriched dough sweet rolls from drying out after baking?
To prevent drying, ensure the rolls are baked until just cooked through, not overbaked. Also, consider brushing them with melted butter or a simple syrup immediately after removing them from the oven to add moisture.
Final Reflection: The Sweetness of Mastery, One Roll at a Time
Working with enriched dough isn't just about baking delicious sweet rolls; it's about mastering a fundamental skill that unlocks a world of baking possibilities. The seemingly simple act of creating a tender, flaky, and flavorful enriched dough opens doors to countless variations, from cinnamon rolls to croissants, and even brioche. This isn't just a recipe; it's a key to unlocking your inner baker.
The journey of learning to work with enriched dough is a testament to the patience and precision required in baking, mirroring life's own challenges. The subtle nuances of hydration, fermentation, and kneading—each step a lesson in itself—teach us the importance of attention to detail. As we carefully nurture the dough, we witness the transformative power of time and process. The best things in life are worth waiting for,
and this certainly holds true for the perfectly risen, golden-brown sweet rolls that reward our efforts.
Now, consider your own journey. What seemingly daunting task have you been putting off? What skill, once mastered, could unlock new levels of creativity and satisfaction in your life? Take the lessons learned from working with enriched dough—patience, precision, and the rewarding feeling of creation—and apply them to your own pursuits. Embrace the challenge, savor the process, and enjoy the sweet rewards of your hard work. You might be surprised at what you can achieve.
Unleash Your Inner Baker: Master the Art of Enriched Dough!
Thanks for joining us on this delicious journey into the world of enriched doughs! We hope you gained valuable insights and feel more confident in tackling those sweet roll recipes. Now it's time to put your newfound knowledge to the test.
- Bake your own masterpiece: Try a simple enriched dough recipe—maybe cinnamon rolls or even croissants—and experience the difference firsthand! Don't be afraid to experiment with flavors and fillings.
- Share your creations: Show off your baking prowess on social media using #BakeWithEaseEnrichedDough – we’d love to see your results!
- Discover more enriching techniques: Explore our other articles on advanced baking techniques for even more delicious possibilities.
What unique twist will you add to your next enriched dough creation? Let us know in the comments below!