
How to Bake Perfect Hot Cross Buns Every Time

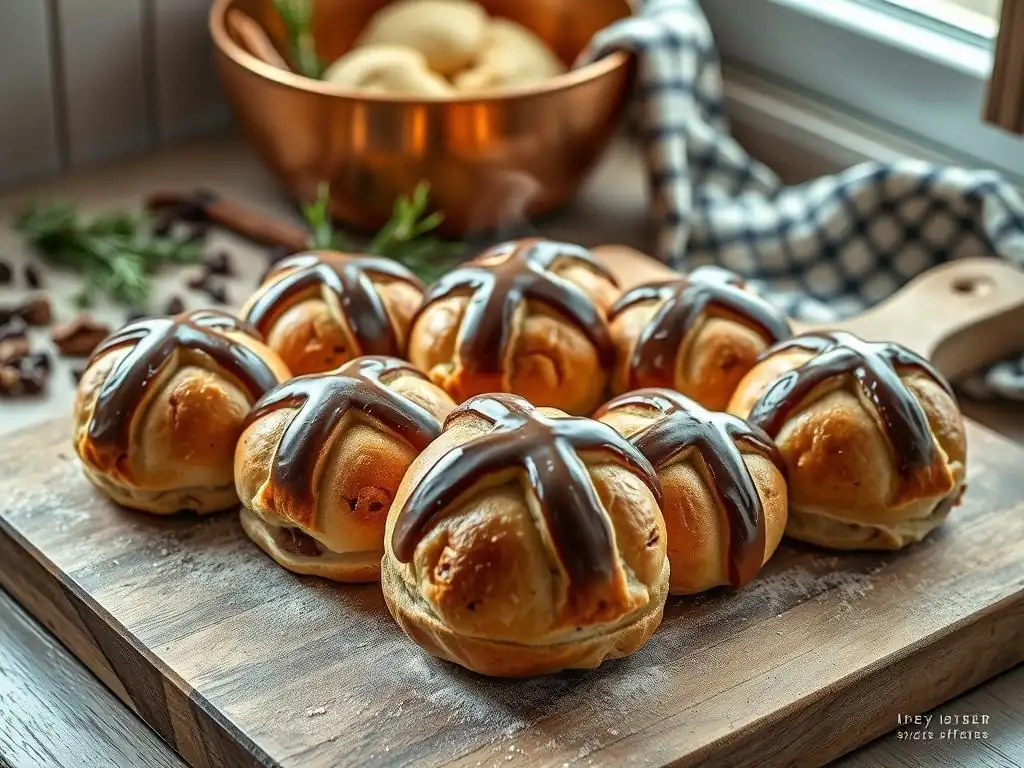
Welcome to BakeWithEase, your kitchen companion for creating delightful baked goods! Are you ready to unlock the secrets to irresistibly soft and flavorful pastries? This week, we're diving deep into a timeless Easter treat. Curious about achieving that perfect, bakery-quality finish? Read on to discover our perfect hot cross buns recipe and learn how to bake them every time, with simple steps and tips that will elevate your baking game. Let's get started!
- How to Bake Perfect Hot Cross Buns Every Time: The BakeWithEase Guide
- BakeWithEase Presents: Mastering the Perfect Hot Cross Buns Recipe
- Why This Hot Cross Buns Recipe Guarantees Success
-
Step-by-Step Guide to Baking the Best Hot Cross Buns
- Gathering Your Ingredients for the Perfect Hot Cross Buns
- Preparing the Dough: The Foundation of Delicious Hot Cross Buns
- Shaping and Proofing Your Hot Cross Buns
- Creating the Signature Crosses: A Simple Technique
- Baking Your Hot Cross Buns to Golden Perfection
- The Finishing Touch: Glazing for Shine and Flavor
- Tips and Tricks for Exceptional Hot Cross Buns
- Troubleshooting Your Hot Cross Buns: Common Problems and Solutions
- Make This Easter Special with the Perfect Hot Cross Buns
- Frequently Asked Questions
- Final Reflection: The Enduring Magic of a Perfect Hot Cross Bun
- Unlock Your Inner Baker: Perfect Hot Cross Buns Await!
How to Bake Perfect Hot Cross Buns Every Time: The BakeWithEase Guide
BakeWithEase Presents: Mastering the Perfect Hot Cross Buns Recipe
Hot cross buns are a beloved Easter tradition, their sweet, spiced aroma filling kitchens around the world. Achieving that ideal fluffy texture, rich flavor, and picture-perfect cross can seem daunting, but with the right approach, it's entirely within reach for bakers of all levels. This guide from BakeWithEase breaks down the process, offering clear steps and expert tips to help you bake perfect hot cross buns every single time.
Forget dense, dry results; get ready for soft, fragrant buns that will become a highlight of your holiday table. We'll walk you through everything from selecting the best ingredients to the final glazing, ensuring your journey to the perfect hot cross buns recipe is smooth and successful.
Whether you're a seasoned baker looking to perfect your technique or a beginner tackling yeast dough for the first time, this comprehensive guide is designed for you. We'll demystify the science behind yeast activation, explain why certain ingredients are crucial, and provide troubleshooting tips for common issues.
By the end of this article, you'll feel confident in your ability to bake a batch of hot cross buns that are not just good, but truly exceptional. Get ready to fill your home with the irresistible scent of Easter baking and share these delightful treats with family and friends, all thanks to mastering the perfect hot cross buns recipe.
Why This Hot Cross Buns Recipe Guarantees Success
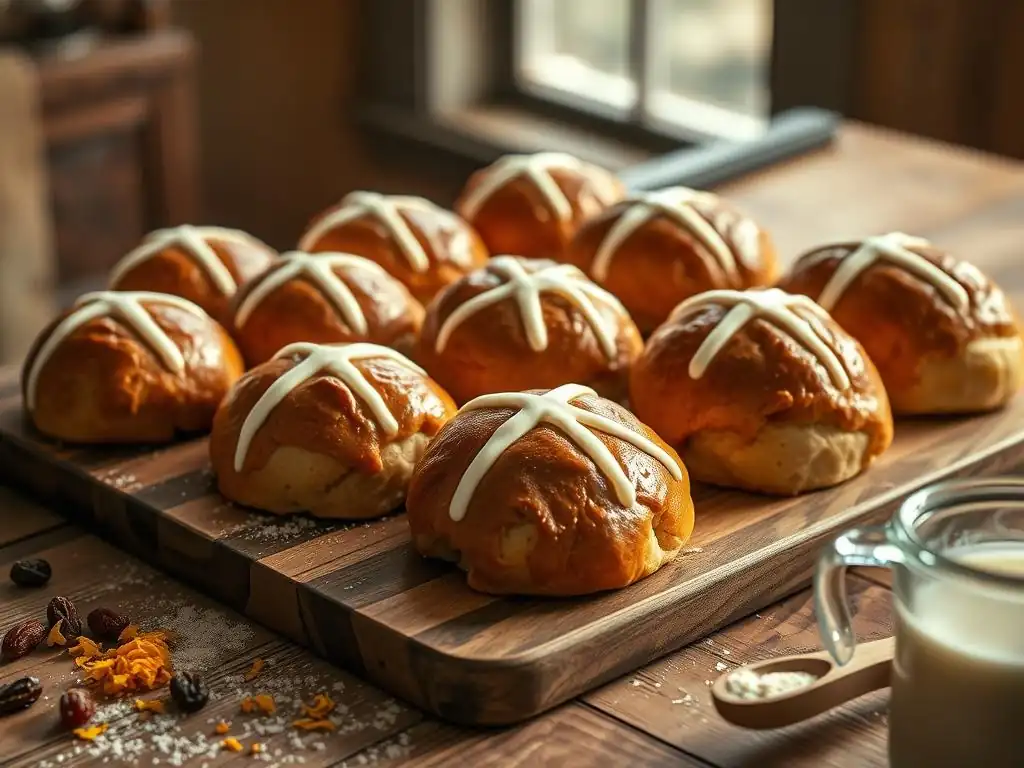
Our approach focuses on understanding the 'why' behind each step, not just the 'how'. Many recipes give instructions, but knowing why you're doing something, like kneading for a specific time or proofing at a certain temperature, empowers you to adjust and succeed even if conditions aren't exactly ideal. This recipe is built on principles that ensure optimal dough development, flavor infusion, and consistent baking results.
We prioritize quality ingredients and explain how they contribute to the final product, making the process intuitive and less like simply following a list of commands. This foundational knowledge is key to consistently baking perfect hot cross buns.
Success in baking, especially with yeast doughs like hot cross buns, often comes down to managing variables like temperature, time, and ingredient quality. Our guide provides specific indicators to look for at each stage – for example, how the dough should feel after kneading or what the buns should look like after the second rise. Instead of relying solely on timers, we encourage you to use your senses. This hands-on approach, combined with our detailed instructions, significantly increases your chances of achieving light, airy, and perfectly spiced hot cross buns. It's a recipe designed for learning and guaranteed success.
Understanding the Key to Fluffy Hot Cross Buns
The secret to incredibly fluffy hot cross buns lies primarily in two areas: proper gluten development during kneading and sufficient rising (proofing) time. Gluten, a protein network formed when flour and liquid combine and are kneaded, provides the structure that traps the carbon dioxide gas produced by the yeast. Think of it like tiny balloons inflating within the dough – a strong, elastic gluten network is needed to hold this gas effectively, resulting in a light and airy texture.
Kneading for the correct amount of time, typically around 8-10 minutes by hand or 5-7 minutes with a stand mixer using a dough hook on medium speed, is crucial for developing this structure without overworking the dough. A well-kneaded dough should be smooth, elastic, and pass the "windowpane test," where a small piece can be stretched thinly without tearing.
Equally vital are the two rising periods. The first rise, often called bulk fermentation, allows the yeast to produce a significant amount of gas and, importantly, develop flavor compounds. Letting the dough double in size, usually taking 1-2 hours in a warm place (around 75-80°F or 24-27°C), ensures a good initial lift. The second rise, after shaping the buns, is called proofing.
This final rise is critical for the buns' shape and texture before baking. Proper proofing means the buns have increased significantly in size, appearing puffy and light. If they are under-proofed, they will be dense; if over-proofed, they may collapse in the oven.
A good indicator of proper proofing is the "poke test": gently press a finger into a bun; if the indentation springs back slowly, leaving a slight mark, it's ready. If it springs back immediately, it needs more time; if it stays indented completely, it's likely over-proofed. Mastering these steps is fundamental to achieving that coveted light and fluffy texture in your perfect hot cross buns recipe.
Common Hot Cross Buns Baking Mistakes (and How to Avoid Them)
One frequent mistake when baking hot cross buns is using ingredients that are too cold, particularly the milk and eggs. Yeast is a living organism that is highly sensitive to temperature. Using cold liquids can shock the yeast, slowing down or even preventing activation and fermentation. Ideally, milk should be warmed to a lukewarm temperature, between 105-115°F (40-46°C), which is the optimal range for active dry or instant yeast.
Eggs should be brought to room temperature before mixing into the dough. Cold dough also ferments slower, potentially leading to insufficient rising and a dense final product. Ensuring all wet ingredients are at the correct temperature is a simple but effective step to guarantee active yeast and proper dough development, essential for a perfect hot cross buns recipe.
Another common pitfall is adding too much flour during the kneading process. While it's tempting to keep adding flour to a sticky dough, this can result in heavy, dry buns. A slightly sticky dough is often desirable for soft bread. Instead of adding more flour, try kneading for longer; as gluten develops, the dough will become less sticky and more manageable.
If kneading by hand, lightly flour your hands and the work surface rather than incorporating large amounts of flour into the dough. For stand mixers, resist the urge to add extra flour unless the dough is excessively wet and not coming together after several minutes of kneading. Learning to work with a slightly sticky dough is a skill that pays off with significantly lighter and softer perfect hot cross buns.
Step-by-Step Guide to Baking the Best Hot Cross Buns
Gathering Your Ingredients for the Perfect Hot Cross Buns
Having all your ingredients measured and ready before you start is a fundamental step in baking success, often referred to as "mise en place." This prevents frantic searching mid-recipe and ensures accuracy.
For hot cross buns, this means weighing your flour (which is more accurate than using volume measurements), measuring your milk, melting your butter, cracking your eggs, and preparing your spices and dried fruit. Even small details like zesting your orange or lemon ahead of time make the process smoother.
A typical batch yielding about 12-15 buns might require around 500-600 grams of strong bread flour, 300-350ml of milk, 75-100 grams of butter, 1-2 eggs, 75-100 grams of sugar, 1-2 teaspoons of salt, 7-10 grams of dried yeast, generous amounts of mixed spice (perhaps 2-3 teaspoons), and 150-200 grams of dried fruit like currants, raisins, or mixed peel. Having these quantities laid out before you begin ensures you don't miss anything vital for your perfect hot cross buns recipe.
Beyond just having them ready, ensuring your ingredients are at the correct temperature is vital, as mentioned earlier. Milk should be lukewarm, butter melted but not hot, and eggs at room temperature. Dried fruit can benefit from being soaked in hot water or tea for about 10-15 minutes and then drained thoroughly before adding to the dough; this plumps them up and prevents them from absorbing moisture from the dough during baking, which can lead to dry spots.
Using fresh spices also makes a noticeable difference in flavor; ground spices lose potency over time, so check the dates on your jars. Gathering fresh, correctly prepared ingredients is the first concrete step towards achieving truly exceptional perfect hot cross buns.
Essential Ingredients Checklist
- [ ] Strong Bread Flour (approx. 500-600g)
- [ ] Milk (approx. 300-350ml, lukewarm)
- [ ] Butter (approx. 75-100g, melted)
- [ ] Eggs (1-2, room temperature)
- [ ] Granulated Sugar (approx. 75-100g)
- [ ] Salt (approx. 1-2 tsp)
- [ ] Dried Yeast (approx. 7-10g, active dry or instant)
- [ ] Mixed Spice (approx. 2-3 tsp, or combination of cinnamon, nutmeg, cloves)
- [ ] Dried Fruit (approx. 150-200g, currants, raisins, mixed peel)
- [ ] Orange or Lemon Zest (from 1 fruit)
- [ ] Flour (approx. 50-75g for crosses)
- [ ] Water (approx. 50-75ml for crosses)
- [ ] Apricot Jam (for glaze)
Choosing the Right Flour for Hot Cross Buns
Using strong bread flour is highly recommended for baking perfect hot cross buns. This type of flour has a higher protein content (typically 12-14%) compared to all-purpose flour (around 10-12%). The higher protein level means more gluten can develop when the flour is mixed with liquid and kneaded.
As discussed earlier, a strong gluten network is essential for trapping the gases produced by the yeast, allowing the buns to rise high and achieve that characteristic light and fluffy texture. While you can technically make hot cross buns with all-purpose flour, the resulting texture will likely be denser and less airy.
The quality of the flour also matters. Look for reputable brands known for consistent protein levels. Ensure the flour is fresh and stored properly in a cool, dry place. If using different types of flour (e.g., whole wheat or spelt for variation), be aware that they absorb liquid differently and may require adjustments to the hydration level of the dough. For your first attempt at a perfect hot cross buns recipe, sticking to a good quality strong bread flour is your best bet for ensuring excellent structure and a tender crumb.
The Importance of Fresh Yeast
Yeast is the leavening agent that makes hot cross buns rise, so using fresh, active yeast is absolutely critical. Yeast is a living microorganism, and like any living thing, it has a shelf life. Using expired or inactive yeast will result in dough that doesn't rise, leading to dense, heavy buns.
There are generally two main types of dried yeast available: active dry yeast and instant yeast. Active dry yeast typically requires activation in warm liquid before being added to the dry ingredients, while instant yeast can often be mixed directly with the flour. Check the expiration date on the package, or if using yeast from a larger container, ensure it hasn't been open for too long.
If you're unsure about the freshness of your active dry yeast, you can perform a simple proofing test. Mix the recommended amount of yeast with the specified amount of lukewarm liquid (usually milk or water) and a pinch of sugar. Let it sit for 5-10 minutes.
If the mixture becomes foamy and bubbly, the yeast is active and ready to use. If nothing happens, the yeast is likely dead and should be discarded. This quick test is a simple way to prevent the disappointment of a failed rise and ensure your journey to the perfect hot cross buns recipe starts on the right foot with vigorous, healthy yeast.
Preparing the Dough: The Foundation of Delicious Hot Cross Buns
The dough is the heart of your hot cross buns. Getting this step right is paramount to achieving the desired texture and flavor. It involves activating the yeast (if using active dry), combining ingredients, kneading to develop gluten, and allowing the dough to rise. Each stage requires attention to detail and understanding the signs of a healthy, well-developed dough. The aroma of the dough as it develops is also a good indicator of fermentation progress.
Working with yeast dough can seem intimidating, but it's a rewarding process. The transformation from a shaggy mixture to a smooth, elastic ball is fascinating. Patience is key, especially during the rising times. Rushing the process will result in underdeveloped dough and ultimately, less than perfect hot cross buns. Trust the process, pay attention to the dough's cues, and you'll build a strong foundation for your baking success.
Activating the Yeast: A Crucial First Step
If you are using active dry yeast, activation is a non-negotiable first step. In a small bowl, combine the specified amount of lukewarm milk (around 105-115°F or 40-46°C) with a pinch of sugar. Sprinkle the active dry yeast over the surface of the milk. Do not stir immediately; let it sit for 5 minutes to allow the yeast granules to absorb the liquid.
After 5 minutes, gently stir. Within another 5-10 minutes, the mixture should become foamy and bubbly, indicating the yeast is alive and active. This foam is carbon dioxide being produced by the yeast as it consumes the sugar.
If you are using instant yeast, this activation step is often not required as instant yeast is processed differently and can be added directly to the dry ingredients. However, some bakers still prefer to proof instant yeast to be certain of its viability, although it is less critical than with active dry yeast.
If you skip the proofing step for instant yeast, ensure your liquid is still lukewarm to encourage rapid activity once combined with the flour. Verifying yeast activity is a simple insurance policy against a failed batch and ensures your perfect hot cross buns recipe gets off to a strong start.
Kneading the Dough: Achieving the Perfect Texture
Kneading is the process of developing the gluten network in the dough. This can be done by hand or using a stand mixer with a dough hook. By hand, turn the dough out onto a lightly floured surface, fold the far edge towards you, press down with the heel of your hand, and push the dough away. Rotate the dough slightly and repeat. Continue this motion for about 8-10 minutes. The dough will initially be sticky and shaggy but will gradually become smoother, more elastic, and less sticky as the gluten develops.
Using a stand mixer is faster and less labor-intensive. Attach the dough hook and knead on medium speed for about 5-7 minutes. Watch the dough; it should pull away from the sides of the bowl and form a ball around the hook.
It might still stick slightly to the bottom. The dough is ready when it is smooth, elastic, and passes the windowpane test: pinch off a small piece, stretch it gently with your fingers; if you can stretch it thinly enough to see light through it without it tearing, the gluten is well developed. Proper kneading is vital for the light and airy texture of your perfect hot cross buns.
First Rise: Allowing the Dough to Develop Flavor
The first rise, or bulk fermentation, is where the yeast really gets to work, producing carbon dioxide to leaven the dough and, crucially, developing flavor compounds through fermentation. After kneading, place the dough in a lightly oiled bowl, turning to coat the surface. Cover the bowl tightly with plastic wrap or a damp cloth to prevent a skin from forming. Place the bowl in a warm, draft-free place. An oven with the light on is often a good spot, maintaining a temperature around 75-80°F (24-27°C).
The dough should double in size during this rise, which typically takes 1 to 2 hours, depending on the temperature and the activity of your yeast. Don't rely solely on the clock; observe the dough's volume. Once doubled, gently punch down the dough to release the gases. This redistributes the yeast and nutrients, ensuring an even texture. This slow, patient rise contributes significantly to the depth of flavor in your perfect hot cross buns.
Shaping and Proofing Your Hot Cross Buns
Once the dough has completed its first rise and been punched down, it's ready to be divided and shaped into individual buns. Uniformity in size is important here to ensure the buns bake evenly. The second rise, or proofing, is the final crucial step before baking, allowing the shaped buns to lighten up and increase in volume.
This stage requires a gentle touch. Overhandling the dough can knock out the precious air bubbles created during the first rise. Shaping them carefully and allowing adequate time for the second rise will result in beautifully rounded and tender buns that are ready for their signature crosses and the oven.
Dividing the Dough: Creating Uniform Buns
After punching down the dough, turn it out onto a lightly floured surface. Gently shape it into a rough log. The goal is to divide this log into equal portions. For a standard batch yielding 12-15 buns, each portion should weigh approximately 70-80 grams. Using a kitchen scale is the most accurate way to ensure consistent size, leading to even baking. Cut the log into the required number of pieces using a sharp knife or dough scraper.
Weighing each piece might seem meticulous, but it makes a significant difference in the final appearance and texture of your perfect hot cross buns. If some buns are much larger than others, they will require longer baking time, potentially leading to smaller buns becoming overbaked and dry. Take the extra few minutes to weigh each portion for optimal results.
Shaping the Buns: Achieving a Round and Appealing Form
Once divided, take each portion of dough and shape it into a smooth, round ball. The technique for shaping involves taking the piece of dough and tucking the edges underneath, creating tension on the surface. You can also cup your hand over the dough on a lightly floured surface and move your hand in a circular motion, allowing the dough to gather underneath and form a taut sphere. The goal is to create a smooth, tight surface on top and a seam underneath.
Place the shaped buns seam-side down on a baking sheet lined with parchment paper. Leave ample space between the buns (about 1-2 inches or 3-5 cm) as they will expand significantly during the second rise and baking. Placing them relatively close together, though, allows them to touch slightly as they bake, resulting in soft sides, which is traditional for perfect hot cross buns.
Second Rise: Preparing for Baking
The second rise, or proofing, is essential for the final lift and texture of the buns. Cover the baking sheet loosely with plastic wrap or a light kitchen towel to prevent the buns from drying out. Place the sheet in a warm, draft-free place for the second rise. Again, an oven with the light on works well. This rise is typically shorter than the first, usually taking 45-60 minutes.
The buns should increase significantly in size, becoming visibly puffy and soft. They should look light and airy. Perform the poke test mentioned earlier: a gentle press should leave an indentation that springs back slowly. If they spring back immediately, they need more time. If they deflate or stay completely indented, they may be over-proofed. Proper proofing is key to preventing dense buns and ensuring a beautiful shape in your perfect hot cross buns.
Creating the Signature Crosses: A Simple Technique
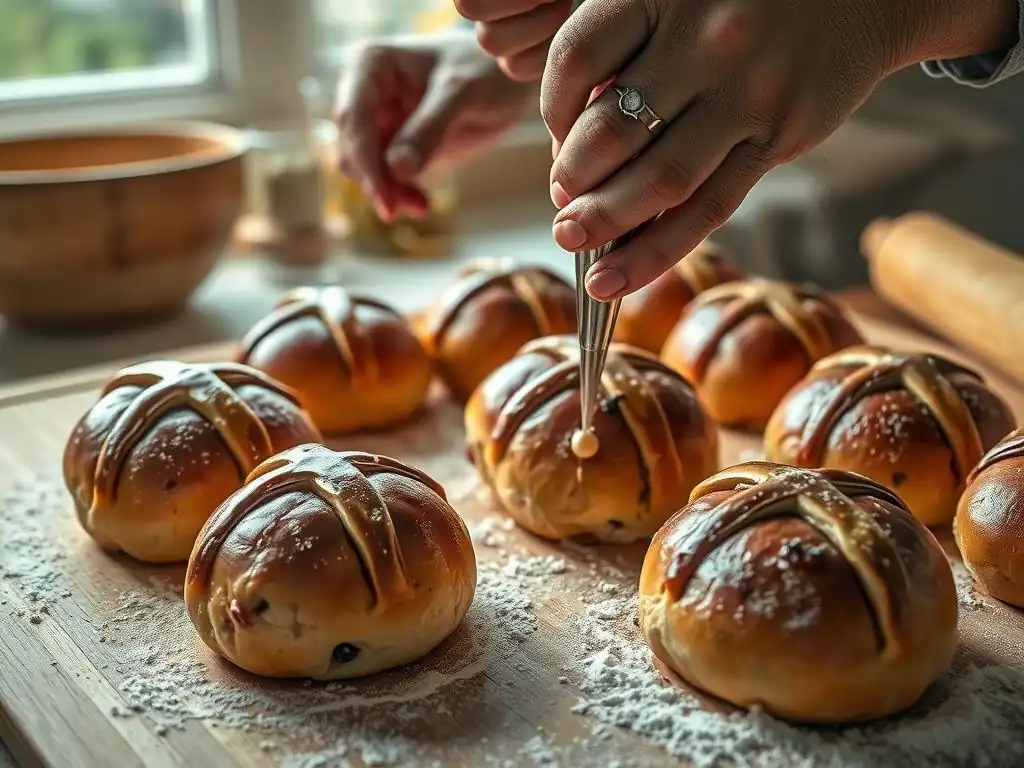
The iconic cross on hot cross buns is not just for decoration; it's traditionally made from a simple flour and water paste applied just before baking. This paste bakes into a firm, white cross that stands out against the golden bun. Getting the consistency of the paste right and applying it neatly is straightforward but adds that essential visual element to your perfect hot cross buns.
While some recipes use icing applied after baking, the traditional method uses a paste applied before. This method gives the cross a distinct texture and appearance that is characteristic of authentic hot cross buns. It's a simple step that elevates the final product significantly.
Making the Paste for the Crosses
The paste for the crosses is incredibly simple: equal parts flour and water. For a batch of 12-15 buns, start with about 50-75 grams of all-purpose flour and 50-75 ml of water. Whisk them together in a small bowl until you have a smooth, thick paste. The consistency should be like thick toothpaste – firm enough to hold its shape when piped, but not so stiff that it's difficult to work with.
If the paste is too thin, add a little more flour; if too thick, add water a teaspoon at a time. Ensure there are no lumps. This simple paste is all you need to create the traditional crosses on your perfect hot cross buns.
Applying the Crosses: Achieving a Clean Finish
Transfer the cross paste into a piping bag fitted with a small, plain round tip, or simply snip a small corner off a plastic zip-top bag. Once the buns have finished their second rise, gently pipe a line across the center of each bun, then pipe another line perpendicular to the first, forming a cross. Try to make the lines neat and centered on each bun.
Work carefully so as not to deflate the proofed buns. If you don't have a piping bag, you can use a spoon and carefully drizzle the paste, though a piping bag offers more control for a cleaner look. Applying the crosses just before they go into the oven ensures they bake properly onto the surface of your perfect hot cross buns.
Baking Your Hot Cross Buns to Golden Perfection
Baking is the final stage where your carefully prepared dough transforms into fragrant, golden-brown buns. Correct oven temperature and baking time are crucial for achieving a perfectly cooked interior and a beautiful exterior crust. Even baking is also important, so knowing how to manage your oven's hot spots is helpful.
This is the moment your kitchen will fill with the irresistible aroma of spices and sweet bread. Watching the buns rise further in the oven and turn a lovely golden color is one of the most satisfying parts of baking perfect hot cross buns.
Oven Temperature and Baking Time
Preheat your oven to the correct temperature well in advance to ensure it's stable. A common temperature for baking hot cross buns is around 375°F (190°C) or 350°F (175°C) if using a fan/convection oven. Baking time typically ranges from 15 to 20 minutes, depending on the size of your buns and your oven.
The buns are ready when they are golden brown on top and sound hollow when tapped on the bottom. If you have a probe thermometer, the internal temperature should register around 190-200°F (88-93°C). Baking at the right temperature for the right duration ensures the buns are cooked through without drying out, leading to perfectly baked perfect hot cross buns.
Achieving Even Baking: Tips and Tricks
Ovens often have hot spots, which can lead to some buns browning faster than others. To promote even baking, rotate the baking sheet halfway through the baking time. For example, if you're baking for 18 minutes, rotate the tray after 9 minutes. This helps ensure all the buns receive equal heat exposure.
If you notice the tops are browning too quickly but the buns aren't fully cooked, you can loosely tent the baking sheet with aluminum foil for the remaining baking time. This protects the tops from further browning while the insides finish cooking. These simple adjustments help guarantee that every single bun in your batch of perfect hot cross buns is evenly baked.
The Finishing Touch: Glazing for Shine and Flavor
The glaze is the final touch that gives hot cross buns their characteristic shine and adds an extra layer of sweetness and flavor. A simple apricot glaze is traditional and works beautifully, providing a lovely sheen and a subtle fruity note that complements the spices.
Applying the glaze while the buns are still warm ensures it is absorbed slightly and creates that desirable glossy finish. This step not only enhances the appearance but also adds to the overall deliciousness of your perfect hot cross buns.
Preparing the Apricot Glaze
The most common and easiest glaze is made from apricot jam. Simply heat about 2-3 tablespoons of apricot jam in a small saucepan over low heat, or in the microwave, until it becomes liquid and pourable. You can strain the jam through a fine-mesh sieve to remove any fruit chunks if you prefer a perfectly smooth glaze, although leaving the small pieces adds a rustic touch.
If the jam is very thick, you can add a teaspoon or two of hot water or orange juice to thin it slightly. Stir until smooth. This warmed, liquid jam is ready to be brushed generously over your baked perfect hot cross buns.
Applying the Glaze: Enhancing the Appearance and Taste
As soon as the hot cross buns come out of the oven, place them on a wire rack. While they are still warm, brush the prepared apricot glaze generously over the top of each bun using a pastry brush. The warmth of the buns helps the glaze melt and spread evenly, creating a beautiful glossy finish.
Allow the glaze to set for a few minutes. The glaze not only makes the buns look appealing but also adds moisture and a hint of sweet, fruity flavor. This final step is essential for achieving that classic look and taste of perfect hot cross buns. Let the buns cool completely on the wire rack before serving, though warm buns with butter are also a treat!
Tips and Tricks for Exceptional Hot Cross Buns
Beyond the basic steps, a few extra tips can elevate your hot cross buns from good to truly exceptional. Experimenting with flavor variations allows you to customize the recipe to your liking, while knowing how to properly store and reheat them ensures you can enjoy them at their best for days.
These little insights can make a big difference, helping you refine your technique and make your perfect hot cross buns even more special. Don't be afraid to try variations once you've mastered the basic recipe.
Adding Variations: Exploring Flavors and Ingredients
Once you're comfortable with the classic perfect hot cross buns recipe, don't hesitate to experiment with different flavors and ingredients. The basic dough is a fantastic canvas for creativity. You can swap out or add different types of dried fruit, introduce chocolate, or incorporate citrus flavors in new ways.
Consider adding chopped nuts like pecans or walnuts for crunch, or different spices like cardamom or ginger for a unique twist. These variations allow you to tailor the recipe to your personal preferences and keep your baking exciting.
Chocolate Chip Hot Cross Buns
A popular modern twist is to replace the traditional dried fruit with chocolate chips or chunks. Use about 150-200 grams of good quality chocolate chips (dark, milk, or a mix). Add them to the dough at the same stage you would add the dried fruit, usually after the initial kneading.
Be mindful that chocolate chips can melt slightly during kneading, but this is fine. The result is a rich, decadent hot cross bun with pockets of melted chocolate throughout. This variation is particularly appealing to those who aren't keen on dried fruit but still want to enjoy a sweet, spiced bun. The baking process and cross application remain the same as the classic perfect hot cross buns.
Orange and Cranberry Hot Cross Buns
For a brighter, tangier flavor profile, try an orange and cranberry variation. Use dried cranberries instead of or in addition to other dried fruits, and incorporate the zest of a whole orange into the dough along with the spices. You can also use fresh orange juice as part of the liquid component, adjusting the total liquid amount accordingly.
Consider adding a splash of orange extract for an extra burst of citrus flavor. The combination of tart cranberries and fragrant orange pairs wonderfully with the warm spices, offering a refreshing alternative to the traditional perfect hot cross buns.
Storing and Reheating Your Baked Hot Cross Buns
Proper storage is key to keeping your hot cross buns fresh and delicious. While they are best enjoyed on the day they are baked, they can be stored and enjoyed later if kept correctly. Reheating them can bring back some of that fresh-baked warmth and softness.
Avoid refrigerating hot cross buns, as this can actually dry them out faster. Room temperature or freezing are the preferred methods for storage.
Keeping Your Buns Fresh
Once cooled, store hot cross buns in an airtight container or a large resealable plastic bag at room temperature. They will stay fresh and soft for 2-3 days. For longer storage, hot cross buns freeze exceptionally well. Wrap individual buns or the whole batch tightly in plastic wrap, then place them in a freezer-safe bag or container.
Frozen hot cross buns can be stored for up to 2-3 months. Thaw frozen buns overnight in the refrigerator or at room temperature. Proper storage ensures you can savor your perfect hot cross buns beyond Easter weekend.
Reheating for Optimal Taste and Texture
To enjoy leftover or thawed hot cross buns at their best, reheating is recommended. For a single bun, a quick zap in the microwave for 15-30 seconds can warm it through and soften it nicely. Be careful not to overheat, as this can make them tough.
Alternatively, you can reheat them in a preheated oven at 300°F (150°C) for 5-10 minutes, or until warmed through. Toaster ovens also work well. Reheating brings back some of the lovely aroma and soft texture, making your stored perfect hot cross buns almost as good as fresh. Serve warm with butter, of course!
Troubleshooting Your Hot Cross Buns: Common Problems and Solutions
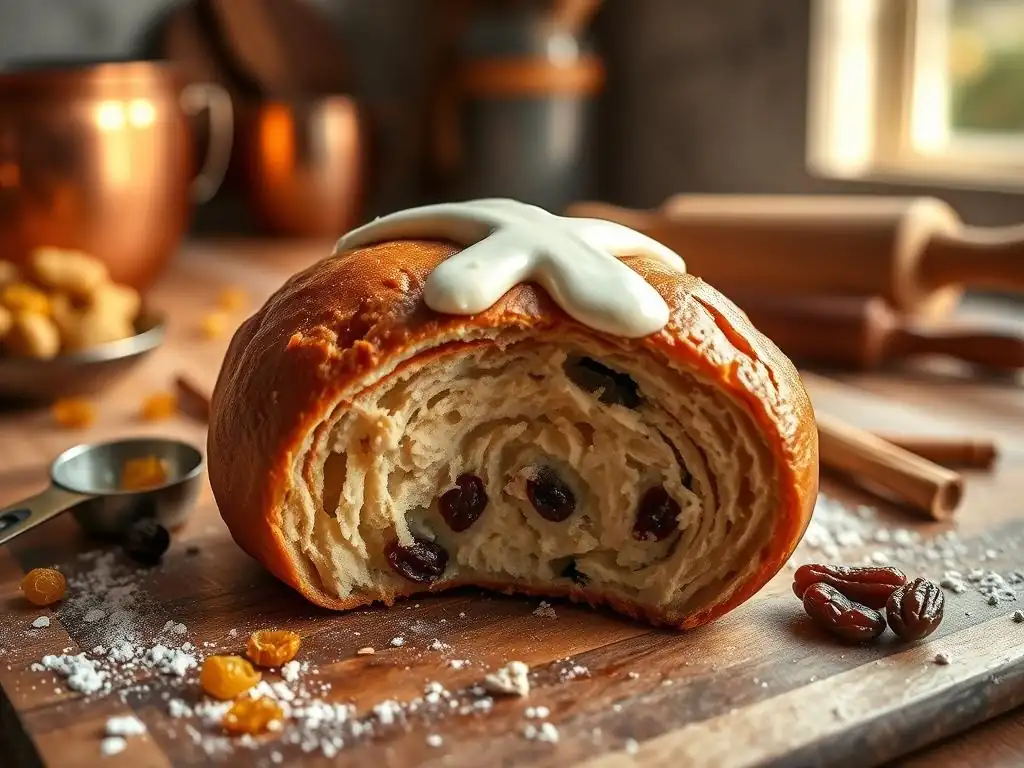
Even with the best recipe, baking can sometimes present challenges. Knowing how to identify common problems and what caused them can help you fix issues in future batches and understand the baking process better. Don't be discouraged by a less-than-perfect result; view it as a learning opportunity.
Here are some common issues bakers face when making hot cross buns and how to address them. Understanding these potential pitfalls is part of mastering the perfect hot cross buns recipe.
Dough Not Rising?
If your dough hasn't risen, or has risen very little, the most likely culprit is inactive yeast. This could be due to using expired yeast, using liquid that was too hot (which killed the yeast), or using liquid that was too cold (which inhibited yeast activity).
- Solution: Check the expiration date on your yeast. If using active dry yeast, always proof it in lukewarm liquid with a pinch of sugar first to ensure it's active before adding it to the flour. Ensure your liquids are at the correct temperature (105-115°F for active dry, up to 120°F for instant). If the yeast mixture didn't foam, discard it and start again with fresh yeast. Also, ensure your rising environment is warm and draft-free.
Buns Too Dense?
Dense buns can result from several factors, including insufficient kneading, under-proofing, or adding too much flour. Gluten development during kneading is crucial for a light texture, and proper rising allows the dough to become airy.
- Solution: Ensure you are kneading the dough for the recommended time until it passes the windowpane test. Use a kitchen scale to measure flour accurately, avoiding adding too much during kneading. Allow the dough to complete both the first and second rises fully; the dough should double in the first rise, and the shaped buns should become significantly puffy in the second. Ensure your yeast is active, as inactive yeast will also lead to dense buns.
Crosses Disappearing During Baking?
If your flour and water crosses seem to melt or disappear into the bun during baking, the paste was likely too thin. A thin paste will simply spread out or be absorbed into the dough as it bakes and expands.
- Solution: The paste for the crosses needs to be quite thick, like toothpaste. Ensure you use equal parts flour and water, or slightly more flour than water if needed, to achieve a pipeable but firm consistency. Test a small amount before piping onto all the buns. If the paste is too thin, whisk in a little more flour until the desired consistency is reached. Applying the paste just before baking is also important.
Make This Easter Special with the Perfect Hot Cross Buns
Baking perfect hot cross buns is a rewarding experience that fills your home with wonderful aromas and your table with delicious, festive treats. By following this BakeWithEase guide, understanding the key steps, and avoiding common pitfalls, you are well-equipped to bake buns that are light, fluffy, perfectly spiced, and topped with that iconic cross.
This perfect hot cross buns recipe is more than just a set of instructions; it's a journey into the heart of traditional Easter baking. Share the process and the delicious results with loved ones, creating cherished memories around this special holiday bake. Happy baking!
Frequently Asked Questions
What makes BakeWithEase's hot cross bun recipe "perfect"?
Our recipe focuses on easy-to-follow instructions and readily available ingredients, ensuring success for bakers of all skill levels. We provide tips for achieving the perfect texture and flavor.
Can I substitute any ingredients in the hot cross bun recipe?
While we recommend sticking to the recipe for the best results, you can often substitute dried fruits based on your preferences. However, changing the flour type might affect the texture.
How do I ensure my hot cross buns are evenly baked?
Ensure your oven is properly preheated and rotate the baking sheet halfway through baking. Use an oven thermometer to verify the temperature.
What's the best way to store hot cross buns after baking?
Store them in an airtight container at room temperature for up to 2-3 days. You can also freeze them for longer storage, wrapped individually.
My hot cross buns turned out dry. What could I have done wrong?
Overbaking is a common cause of dry buns. Also, be sure to measure the ingredients accurately, particularly the flour and liquids, as imbalances can affect the final product.
Final Reflection: The Enduring Magic of a Perfect Hot Cross Bun
The pursuit of the perfect hot cross bun is more than just a culinary quest; it's a journey into the heart of tradition and the comforting embrace of familiar flavors. This article has explored the nuances of achieving that perfect rise, that ideal spice balance, and that satisfyingly crisp cross. But beyond the precise measurements and techniques, it highlights the enduring appeal of a simple, yet deeply satisfying baked good.
The hot cross bun's influence transcends mere sustenance; it's woven into the fabric of springtime celebrations and cherished family memories. The aroma alone evokes feelings of warmth and togetherness, a testament to the power of food to connect us across generations. Baking is at once child's play and adult joy. And love, of course.
– Paul Hollywood. This quote perfectly encapsulates the essence of the hot cross bun experience – a simple pleasure that brings immense joy.
Now, I invite you to take what you've learned and embark on your own baking adventure. Don't be afraid to experiment, to adjust the spices to your liking, and to share the delicious results with loved ones. The perfect hot cross bun isn't just a recipe to follow; it's a tradition to embrace, a skill to hone, and a delicious memory to create. So, gather your ingredients, preheat your oven, and let the magic begin. The reward? A taste of perfection, and the satisfaction of creating something truly special.
Unlock Your Inner Baker: Perfect Hot Cross Buns Await!
Thanks for joining us on this delicious journey to baking perfection! You've just learned the secrets to achieving those perfectly spiced, fluffy Hot Cross Buns. Ready to put your new skills to the test?
- Bake a batch today! Use the recipe and tips from this article to create your own amazing Hot Cross Buns. Impress your friends and family with your newfound expertise!
- Share your baking triumph! Post a picture of your buns on social media and tag us – we'd love to see your creations!
- Experiment with variations: Try adding different spices, fruits, or glazes to personalize your buns. Let your creativity flow!
What unique twist will you add to your next batch of Hot Cross Buns?