
Bake a Perfect Vanilla Sheet Cake for Any Occasion

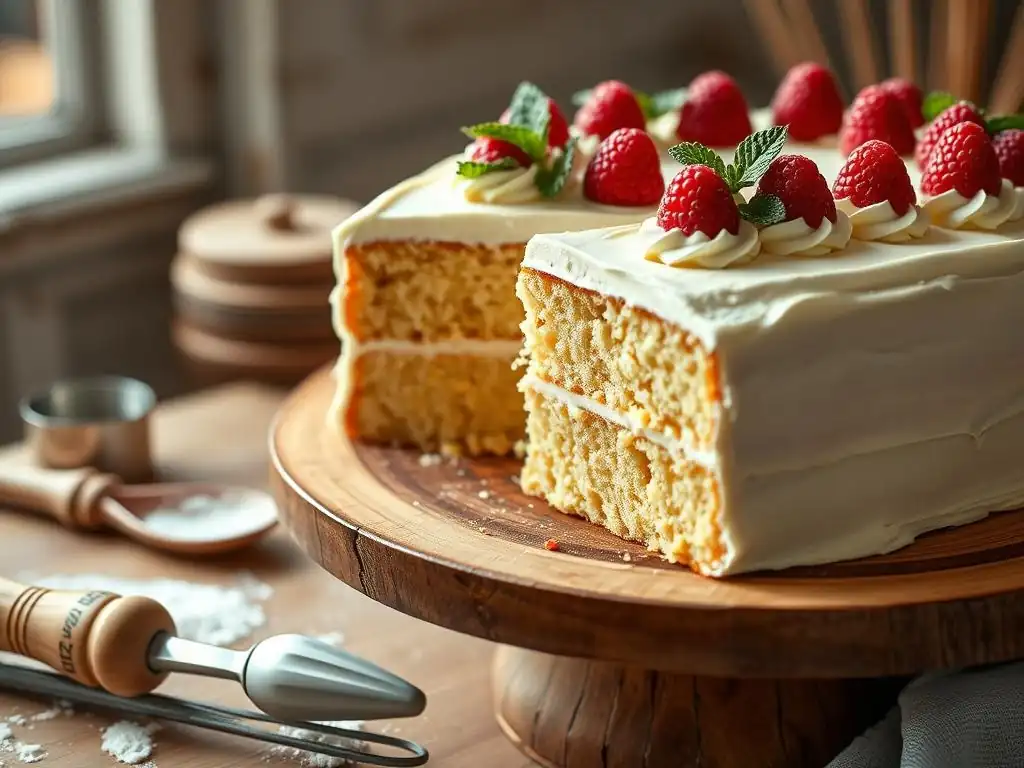
Welcome to BakeWithEase, your haven for unlocking baking brilliance! Ever dream of effortlessly whipping up a show-stopping dessert? Then you're in the right place. Dive in as we demystify the secrets to baking, starting with a timeless classic. Today, we're diving deep into the art of creating the perfect vanilla sheet cake recipe. But what makes this sheet cake truly special? Discover the answer, and get ready to bake a cake that will impress everyone!
- Introduction: The Ultimate Vanilla Sheet Cake Recipe for Every Celebration
- Achieving Vanilla Sheet Cake Perfection: Key Ingredients and Their Role
-
Step-by-Step Guide to Baking Your Perfect Vanilla Sheet Cake
- Step 1: Preparing Your Baking Pan and Ingredients
- Step 2: Creaming Butter and Sugar to Perfection
- Step 3: Incorporating Eggs for Structure and Richness
- Step 4: Mixing Dry and Wet Ingredients for a Smooth Batter
- Step 5: Baking Your Vanilla Sheet Cake to Golden Perfection
- Step 6: Cooling Your Cake for Optimal Frosting
- Making the Perfect Vanilla Frosting: A Complement to Your Cake
- Assembling and Decorating Your Vanilla Sheet Cake
- Tips and Tricks for a Moist and Flavorful Vanilla Sheet Cake
- Storing Your Vanilla Sheet Cake: Keeping it Fresh
- Troubleshooting Common Vanilla Sheet Cake Problems
- Variations on the Perfect Vanilla Sheet Cake Recipe
- Enjoy Your Delicious and Easy Vanilla Sheet Cake!
- Frequently Asked Questions
- Final Reflection: The Enduring Allure of the Perfect Vanilla Sheet Cake
- Unleash Your Inner Baker: Vanilla Perfection Awaits!
Introduction: The Ultimate Vanilla Sheet Cake Recipe for Every Celebration
Welcome to BakeWithEase, where we believe that baking a perfect vanilla sheet cake should be a joyful and effortless experience. This classic dessert, with its simple elegance and comforting flavor, is a staple for countless celebrations, from casual gatherings to milestone birthdays. Our goal with this guide is to demystify the process and equip you with the knowledge to create a truly exceptional cake that will impress everyone.
This specific perfect vanilla sheet cake recipe is designed for reliability and deliciousness. We've fine-tuned the proportions and techniques to ensure a moist crumb, a rich vanilla flavor, and a cake that's easy to handle and decorate. Whether you're a seasoned baker or just starting out, you'll find this recipe approachable and forgiving, promising a delightful result every time you bake a vanilla sheet cake.
The beauty of a vanilla sheet cake lies in its incredible versatility. It serves as the ideal canvas for various frostings and decorations, making it perfect for any event. Need a quick dessert for a potluck? This recipe is your answer. Planning a birthday party? It scales up beautifully. Or perhaps you just crave a simple, comforting treat with your afternoon tea? This vanilla sheet cake perfection is within your reach, ready to be enjoyed for any occasion.
Achieving Vanilla Sheet Cake Perfection: Key Ingredients and Their Role
The Importance of High-Quality Vanilla Extract for Flavor
Vanilla extract is the soul of a perfect vanilla sheet cake recipe. Its complex aromatic compounds provide the signature sweet, creamy flavor that makes vanilla cakes so beloved. Using a high-quality pure vanilla extract, ideally made from Bourbon or Tahitian vanilla beans, makes a significant difference compared to imitation vanilla.
Pure extract contains hundreds of flavor compounds, offering depth and richness that imitation vanilla, primarily vanillin, simply cannot replicate. A good extract can cost anywhere from $0.50 to $2.00 per ounce, but the impact on flavor is well worth the investment, often requiring just 1 to 2 teaspoons for a standard sheet cake recipe to impart noticeable flavor.
The concentration and extraction method also play a role. Look for extracts labeled "pure vanilla extract" rather than "vanilla flavor." The alcohol content in the extract helps to carry and distribute the vanilla flavor throughout the batter as it bakes. Adding vanilla at the right stage, usually with the wet ingredients, ensures the flavor is evenly dispersed. Some bakers even add a touch more right at the end of mixing or into the frosting to boost the aromatic qualities, truly elevating the perfect vanilla sheet cake to new heights of flavor.
Flour Power: Choosing the Right Flour for a Tender Crumb
The choice of flour is fundamental to achieving the desired texture in your perfect vanilla sheet cake. Cake flour, with its lower protein content (typically 8-10%), is often recommended for a very tender and fine crumb. Less protein means less gluten development when mixed, resulting in a softer, lighter cake structure. Using cake flour often requires sifting to aerate it and remove clumps, ensuring it incorporates smoothly into the batter.
All-purpose flour, with a slightly higher protein content (typically 10-12%), can also be used successfully, and it's more readily available in most kitchens. While it might produce a slightly less delicate crumb than cake flour, it still works well for a sturdy yet moist sheet cake.
If using all-purpose flour for this perfect vanilla sheet cake recipe, measuring correctly (spooning into the measuring cup and leveling) is crucial to avoid adding too much flour, which can lead to a dry or tough cake. Some recipes even suggest substituting a small amount of cornstarch for some of the all-purpose flour (e.g., replacing 2 tablespoons per cup) to mimic cake flour's lower protein profile.
Sugar and Sweetness: Balancing the Vanilla Flavor
Granulated sugar serves multiple purposes in a perfect vanilla sheet cake recipe beyond just sweetness. It tenderizes the cake structure by interfering with gluten development and also helps retain moisture, contributing to a moist crumb. During the creaming process with butter, the sharp edges of sugar crystals cut into the fat, creating tiny air pockets that expand during baking, contributing to the cake's rise and light texture. The amount of sugar in a typical cake recipe is often close to or equal to the weight of the flour.
Balancing the sugar level is key to allowing the delicate vanilla flavor to shine. Too much sugar can overpower the vanilla, while too little might result in a dry or dense cake. The specific ratio in a well-tested perfect vanilla sheet cake recipe ensures optimal sweetness, moisture retention, and structure. Using superfine or caster sugar can sometimes lead to a slightly finer crumb due to the smaller crystal size, which dissolves more easily and creates more numerous, smaller air pockets during creaming compared to standard granulated sugar.
Fats and Moisture: Creating a Moist and Delicious Cake
Fats, primarily butter and sometimes oil, are essential for moisture, tenderness, and flavor in a perfect vanilla sheet cake. Butter contributes rich flavor and helps create a tender crumb by coating flour particles and preventing excessive gluten development. It also aids in leavening when creamed with sugar, incorporating air. Using unsalted butter is recommended as it gives you control over the salt content in the recipe; standard recipes often call for 1/2 to 1 teaspoon of salt to balance sweetness and enhance other flavors.
Oil, if used, adds significant moisture because it is liquid at room temperature and coats flour particles more effectively than solid butter. While butter provides flavor, oil ensures moisture, especially important for cakes that need to stay fresh for a couple of days.
Many perfect vanilla sheet cake recipes use a combination of butter and oil to get the best of both worlds: flavor from butter and guaranteed moisture from oil. The amount of fat typically ranges from 1/2 to 3/4 the weight of the flour in a standard cake recipe, contributing significantly to the cake's luxurious texture and preventing it from drying out quickly.
Step-by-Step Guide to Baking Your Perfect Vanilla Sheet Cake
Step 1: Preparing Your Baking Pan and Ingredients
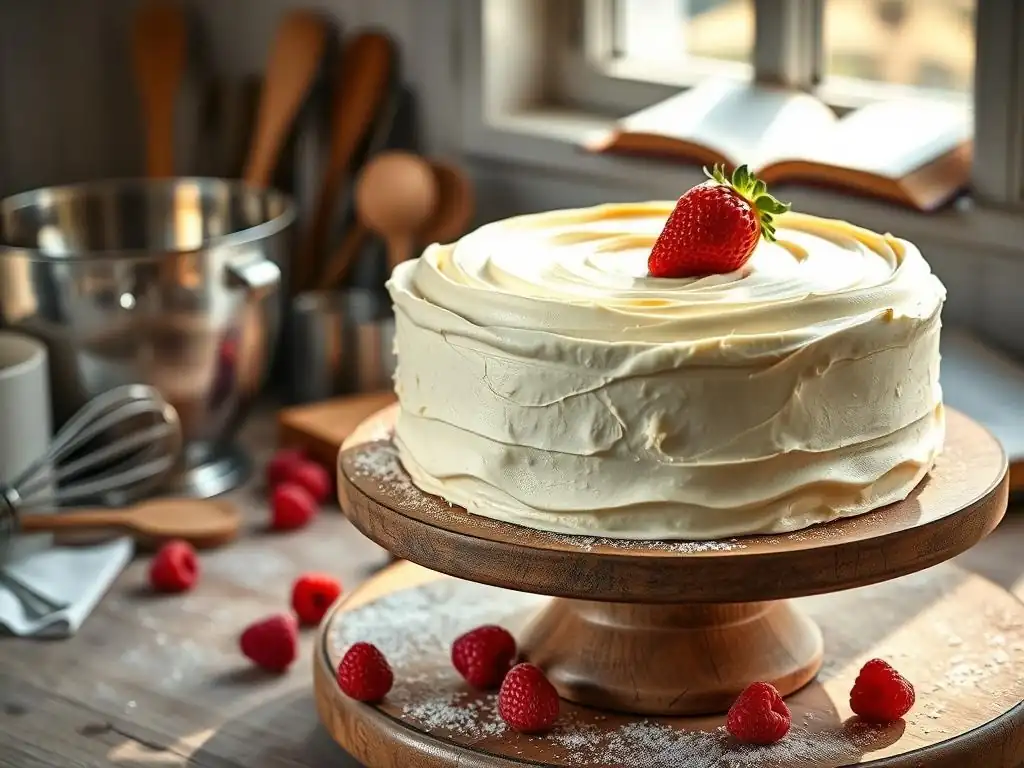
Preparation is the cornerstone of baking success, especially when aiming for a perfect vanilla sheet cake. Start by preparing your sheet cake pan. A standard half-sheet pan measures approximately 18x13 inches, while a quarter-sheet pan is about 9x13 inches. For this recipe, let's assume a 9x13 inch pan.
Grease the pan thoroughly with butter or baking spray, ensuring all corners and sides are covered. Then, line the bottom with parchment paper, letting it hang over the sides for easy removal. Greasing the parchment paper too helps prevent sticking. This step is critical to ensure your beautiful vanilla sheet cake doesn't stick to the pan.
Next, gather and measure all your ingredients precisely. Baking is a science, and accuracy matters. Use kitchen scales for flour and sugar if possible, as volume measurements can vary. Ensure all cold ingredients, like butter, eggs, and buttermilk (if using), are at room temperature. Room temperature butter creams better, incorporating more air, and room temperature eggs emulsify more easily into the batter, resulting in a smoother, more uniform texture for your perfect vanilla sheet cake. This might mean taking them out of the refrigerator an hour or two before you plan to bake.
Step 2: Creaming Butter and Sugar to Perfection
Creaming butter and sugar is a vital step that incorporates air into the batter, contributing to the cake's lift and tender crumb. In a large bowl, combine the softened, room-temperature butter and the granulated sugar. Use an electric mixer (stand mixer or hand mixer) on medium speed to beat them together. Initially, the mixture will look coarse and sandy.
Continue beating for 3 to 5 minutes, scraping down the sides of the bowl occasionally. The mixture should become light, fluffy, and pale yellow in color. This is when the sugar crystals are cutting into the butter, creating those essential air pockets. Proper creaming is non-negotiable for a light and airy perfect vanilla sheet cake texture; under-creaming will result in a denser cake. You should see a significant increase in volume and a texture resembling whipped cream.
Step 3: Incorporating Eggs for Structure and Richness
Eggs play several crucial roles in a perfect vanilla sheet cake recipe: they provide structure through their protein, richness and moisture through their fat, and aid in leavening. Ensure your eggs are at room temperature; this allows them to emulsify smoothly with the creamed butter and sugar mixture, preventing separation or curdling of the batter.
Add the eggs one at a time to the creamed butter and sugar, beating well after each addition until fully incorporated before adding the next. This gradual addition ensures proper emulsification. If adding vanilla extract at this stage, beat it in with the last egg.
The mixture might look slightly curdled after adding the first egg, but it should smooth out as you add the subsequent eggs and continue beating. Beat for about 30 seconds after the last egg is added to ensure everything is well combined and aerated, setting the stage for a successful bake of your perfect vanilla sheet cake.
Step 4: Mixing Dry and Wet Ingredients for a Smooth Batter
This step involves alternating the addition of dry ingredients (flour, baking powder, salt, etc.) and wet ingredients (milk, buttermilk, sour cream, etc.) to the creamed mixture. This method helps to create a tender crumb by controlling gluten development. In a separate bowl, whisk together your sifted dry ingredients. In another bowl or measuring cup, combine your liquid ingredients, including the vanilla extract if not added with the eggs.
Begin by adding about one-third of the dry ingredients to the creamed mixture and mixing on low speed just until combined. Then, add half of the wet ingredients and mix until just incorporated. Repeat, adding another third of the dry ingredients, followed by the remaining wet ingredients, and finally the last third of the dry ingredients. Crucially, mix only until no dry streaks of flour are visible.
Overmixing develops too much gluten, leading to a tough perfect vanilla sheet cake. Stop the mixer and scrape down the sides and bottom of the bowl with a spatula to ensure everything is evenly combined. A few gentle folds with the spatula at the end can catch any hidden pockets of dry ingredients.
Step 5: Baking Your Vanilla Sheet Cake to Golden Perfection
Preheat your oven to the temperature specified in the perfect vanilla sheet cake recipe, typically around 350°F (175°C). Ensure the oven is fully preheated before placing the cake inside; an oven thermometer can verify accuracy. Pour the batter evenly into your prepared sheet pan and spread it gently to the edges with a spatula, ensuring the top is relatively level for even baking.
Bake the cake on the center rack of the preheated oven. The baking time will vary depending on your oven and the specific dimensions of the pan used, but for a 9x13 inch pan, it's often between 25 and 35 minutes. The cake is done when the edges are lightly golden, the center springs back when gently touched, and a wooden skewer or toothpick inserted into the center comes out clean or with a few moist crumbs attached. Avoid opening the oven door too early, especially in the first 20 minutes, as this can cause the cake to sink.
Step 6: Cooling Your Cake for Optimal Frosting
Once your perfect vanilla sheet cake is baked, remove it from the oven and place the pan on a wire rack. Let the cake cool in the pan for about 10-15 minutes. This initial cooling period allows the cake structure to set properly and prevents it from breaking when you attempt to remove it. Trying to remove a hot cake from the pan is a common mistake that can lead to crumbling.
After the initial cooling in the pan, invert the cake onto the wire rack to cool completely. If you used parchment paper overhang, you can use it to gently lift the cake out. Peel off the parchment paper. Allowing the cake to cool completely on a wire rack ensures air circulation all around it, preventing condensation which can make the bottom soggy.
It's absolutely essential that the cake is entirely cool before you attempt to frost it. Frosting a warm cake will result in melted frosting and a messy finish, ruining the appearance of your perfect vanilla sheet cake. This cooling process can take 1-2 hours, depending on the ambient temperature.
Making the Perfect Vanilla Frosting: A Complement to Your Cake
Choosing Your Frosting: Classic Vanilla Buttercream vs. Cream Cheese Frosting
When it comes to topping your perfect vanilla sheet cake, the frosting is just as important as the cake itself. Two popular and delicious choices are classic vanilla buttercream and tangy cream cheese frosting. Classic vanilla buttercream is made primarily from butter, powdered sugar, milk or cream, and vanilla extract. It's known for its smooth texture and rich, sweet flavor that perfectly complements the vanilla cake. It's also very versatile for decorating, holding shapes well.
Cream cheese frosting, on the other hand, offers a delightful contrast with its slight tanginess from the cream cheese. It's typically made with cream cheese, butter, powdered sugar, and vanilla. While often associated with red velvet or carrot cakes, its creamy texture and slightly less sweet profile pair beautifully with a perfect vanilla sheet cake, adding another layer of flavor complexity. It tends to be softer than traditional buttercream, which can affect intricate piping, but it's fantastic for spreading smoothly over a sheet cake. The choice often comes down to personal preference for sweetness and tang.
Vanilla Buttercream Frosting Recipe: A Simple and Delicious Option
A simple and reliable vanilla buttercream is a fantastic choice for your perfect vanilla sheet cake. Here's a basic recipe outline:
- 1 cup (2 sticks) unsalted butter, softened
- 4 cups (about 1 lb) powdered sugar, sifted
- 1/4 cup milk or heavy cream
- 1-2 teaspoons pure vanilla extract
- Pinch of salt (optional, balances sweetness)
In a large bowl, beat the softened butter with an electric mixer until creamy, about 2 minutes. Gradually add the sifted powdered sugar, about a cup at a time, mixing on low speed until incorporated, then increasing speed to medium. The mixture will be quite thick. Add the milk or cream and vanilla extract, and salt if using.
Beat on medium-high speed for 3-5 minutes, scraping down the sides, until the frosting is light, fluffy, and smooth. If it's too thick, add another tablespoon of milk or cream; if too thin, add a little more sifted powdered sugar. This recipe yields enough frosting for a generous layer on a 9x13 inch perfect vanilla sheet cake.
Tips for Achieving a Smooth and Creamy Frosting
Achieving silky-smooth frosting is key to a professional-looking perfect vanilla sheet cake. First, ensure your butter is truly softened but not melted; it should yield easily to pressure but still hold its shape. Cold butter won't cream properly, and melted butter will result in a greasy frosting. Sifting your powdered sugar is also crucial to remove lumps and ensure a smooth texture; don't skip this step, as powdered sugar often clumps in the box.
Beat the frosting for the recommended time (3-5 minutes after adding liquids) on medium-high speed. This incorporates air, making the frosting light and fluffy. If your frosting seems too stiff, add liquid (milk, cream, or even a splash of water or clear extract) one teaspoon at a time until the desired consistency is reached.
If it's too soft, add more sifted powdered sugar a tablespoon at a time. For an extra smooth finish, especially with buttercream, some bakers like to switch to a paddle attachment on a stand mixer and beat on low speed for an additional few minutes to remove excess air bubbles. This helps when you're aiming for that perfect vanilla sheet cake aesthetic.
Assembling and Decorating Your Vanilla Sheet Cake
Frosting Techniques for a Professional Finish
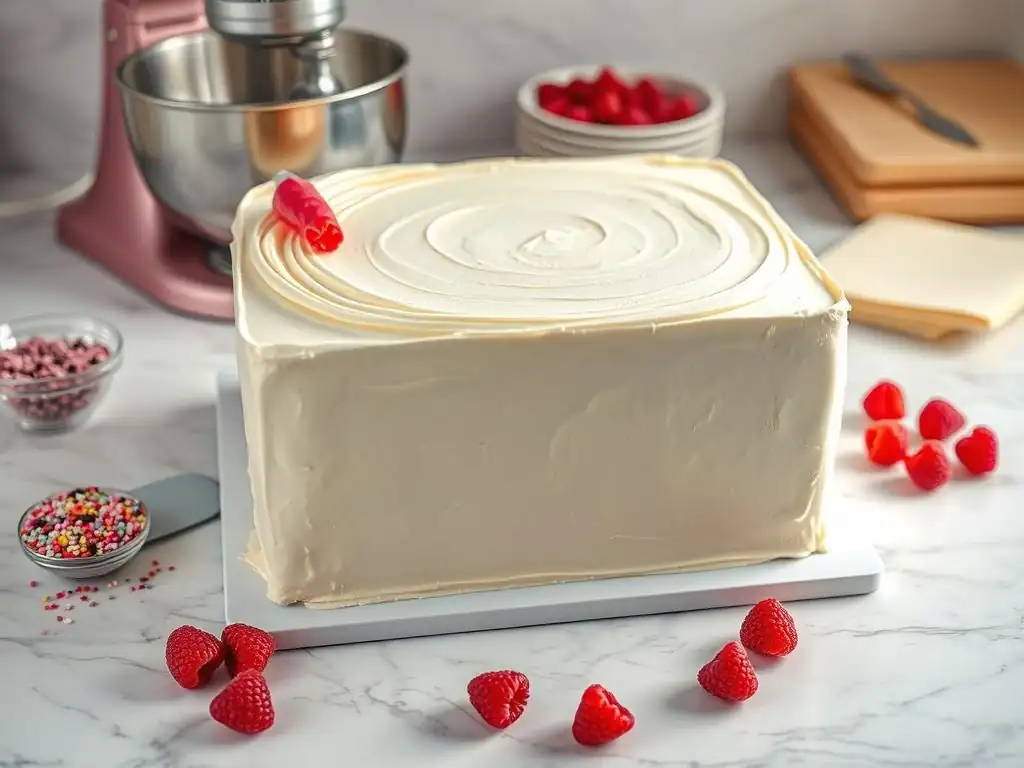
Once your perfect vanilla sheet cake is completely cooled, it's time to frost it. For a smooth finish, start by applying a generous dollop of frosting to the center of the cake. Use an offset spatula to spread the frosting outwards towards the edges. Don't press down too hard; let the frosting spread naturally. For the sides, push frosting over the edge and then smooth it downwards.
To achieve a perfectly smooth top, use a large offset spatula or a bench scraper. Hold the tool at a slight angle to the cake surface and gently glide it across the top, removing excess frosting. For the sides, hold the bench scraper vertically against the side of the cake and rotate the cake (if on a turntable) or move the scraper along the edge.
This takes a little practice, but starting with enough frosting is key – too little makes it hard to smooth. For a more rustic look, you can simply swirl the frosting with the back of a spoon or the spatula. These techniques help elevate the presentation of your perfect vanilla sheet cake.
Simple Decoration Ideas: Sprinkles, Fruit, and More
Decorating a perfect vanilla sheet cake doesn't have to be complicated to be beautiful. Sprinkles are a classic choice and instantly add a festive touch. Jimmies, nonpareils, or even a mix of colors can be scattered over the frosting. For neater application, you can press sprinkles onto the sides of the cake after frosting.
Fresh fruit offers a simple yet elegant decoration. Sliced strawberries, raspberries, blueberries, or even citrus zest can add color and a burst of fresh flavor that pairs well with vanilla. Arrange fruit artfully on top of the frosting. Other simple ideas include:
- Chocolate shavings or curls
- Toasted coconut flakes
- Chopped nuts (pecans, walnuts, almonds)
- Edible flowers
- A simple dusting of powdered sugar (applied just before serving)
These simple additions can transform your perfect vanilla sheet cake into a visually appealing centerpiece for any occasion.
Leveling the Cake and Adding the Crumb Coat
Before frosting, check if your perfect vanilla sheet cake has a dome. If it does, use a serrated knife or a cake leveler to carefully slice off the top, making the surface flat. A level cake is much easier to frost smoothly and stack if you were making layers (though less critical for a single sheet). Ensure the cake is completely cooled before attempting to level it; a warm cake will crumble.
Applying a crumb coat is a crucial step for a clean, professional-looking final frosting layer. A crumb coat is a very thin layer of frosting applied to the cake to trap any loose crumbs. Apply a thin layer of frosting all over the top and sides of the leveled cake using an offset spatula.
Don't worry about making it perfect, just cover the surface. Chill the cake in the refrigerator for 15-30 minutes until the crumb coat is firm to the touch. This locks the crumbs in place, allowing you to apply the final, thicker layer of frosting smoothly without crumbs getting into it, ensuring your perfect vanilla sheet cake looks pristine.
Tips and Tricks for a Moist and Flavorful Vanilla Sheet Cake
Preventing a Dry Cake: Key Baking Techniques
A dry perfect vanilla sheet cake is a common baking disappointment, but easily preventable with a few key techniques. Firstly, precise measurement of ingredients, particularly flour, is paramount. Too much flour is a leading cause of dryness. Use the spoon and level method or, ideally, weigh your flour using a kitchen scale (1 cup all-purpose flour is approximately 120-130 grams). Overmixing the batter after adding the flour also develops excessive gluten, which can make the cake tough and dry; mix only until the flour streaks disappear.
Baking temperature and time are also critical. Overbaking is another major culprit for dryness. Always bake your perfect vanilla sheet cake for the minimum time specified in the recipe and start checking for doneness using a toothpick test. Ovens can vary significantly, so trusting your oven thermometer and visual cues (light golden edges, center springs back) is more reliable than strictly following the recipe's maximum bake time. Cooling the cake properly, as mentioned earlier, also helps retain moisture.
Enhancing the Vanilla Flavor: Extracts, Beans, and Paste
To truly make your perfect vanilla sheet cake sing with vanilla flavor, consider going beyond standard extract. Using pure vanilla extract is the first step, as discussed earlier. For a more intense and complex flavor, try using vanilla bean paste. Paste contains the tiny seeds from the vanilla bean along with a concentrated extract, offering a richer flavor and visible flecks of vanilla seeds throughout the cake and frosting, indicating high-quality ingredients. A typical substitution is 1:1 for extract, but the flavor is more potent.
For the ultimate vanilla experience, you can scrape the seeds from a whole vanilla bean and add them directly to the wet ingredients or the sugar before creaming. One vanilla bean is roughly equivalent to 2-3 teaspoons of extract or paste, but the flavor is unparalleled. You can also make your own vanilla sugar by burying a spent vanilla bean pod in a jar of granulated sugar for a week or two, infusing the sugar with subtle vanilla aroma, which can be used in the perfect vanilla sheet cake recipe for an extra layer of flavor.
Adjusting the Recipe for Different Pan Sizes
This perfect vanilla sheet cake recipe is typically written for a specific pan size, like a 9x13 inch (quarter sheet). If you want to bake it in a different size pan, you'll need to adjust the ingredient quantities and baking time. For example, doubling a recipe designed for a 9x13 inch pan will generally fill a standard 18x13 inch half-sheet pan. Baking time will likely increase slightly for larger pans and decrease for smaller pans or cupcakes.
Using a calculator or online resource specifically designed for cake pan conversions can help you scale the ingredients accurately based on the volume of your desired pan compared to the recipe's original pan. Remember that depth also matters; a shallower cake will bake faster than a deeper one of the same volume. Always monitor the cake closely when baking in a different pan size, checking for doneness with the toothpick test starting several minutes before the original recipe's suggested time, to ensure you don't overbake your perfect vanilla sheet cake.
Storing Your Vanilla Sheet Cake: Keeping it Fresh
Proper Storage Techniques to Maintain Moisture
Proper storage is crucial for keeping your perfect vanilla sheet cake moist and delicious for as long as possible. Once the cake is frosted and cooled, the best way to store it at room temperature is in an airtight container. If the cake is too large for a container, cover it tightly with plastic wrap, ensuring the wrap touches the surface of any cut edges to prevent them from drying out. A frosted sheet cake can typically be stored at cool room temperature (around 70°F or 21°C) for 2-3 days.
Avoid refrigerating a perfect vanilla sheet cake unless it has a filling or frosting that requires refrigeration (like cream cheese frosting or fresh fruit toppings). Refrigeration tends to dry out cake due to the low humidity environment. If refrigeration is necessary, place the cake in an airtight container first to minimize moisture loss. Before serving, let the refrigerated cake sit at room temperature for 30-60 minutes to allow the frosting and cake to soften slightly, improving texture and flavor.
Freezing Vanilla Sheet Cake for Future Enjoyment
Freezing is an excellent option if you need to store your perfect vanilla sheet cake for a longer period or want to bake ahead. You can freeze the cake unfrosted or frosted. For unfrosted cake, ensure it is completely cool. Wrap the entire cake or individual slices tightly first in plastic wrap, then in a layer of aluminum foil. This double layer protects against freezer burn.
Frozen unfrosted perfect vanilla sheet cake can last for up to 2-3 months. To thaw, unwrap it and let it sit at room temperature for several hours or overnight before frosting. If freezing a frosted cake, freeze it uncovered on a baking sheet until the frosting is firm, then wrap it tightly as described above. Frosted cake can be frozen for about 1 month. Thaw frosted cake in the refrigerator overnight, then let it sit at room temperature briefly before serving. Freezing allows you to enjoy your delicious perfect vanilla sheet cake much later!
Troubleshooting Common Vanilla Sheet Cake Problems
Dealing with a Sunken Cake
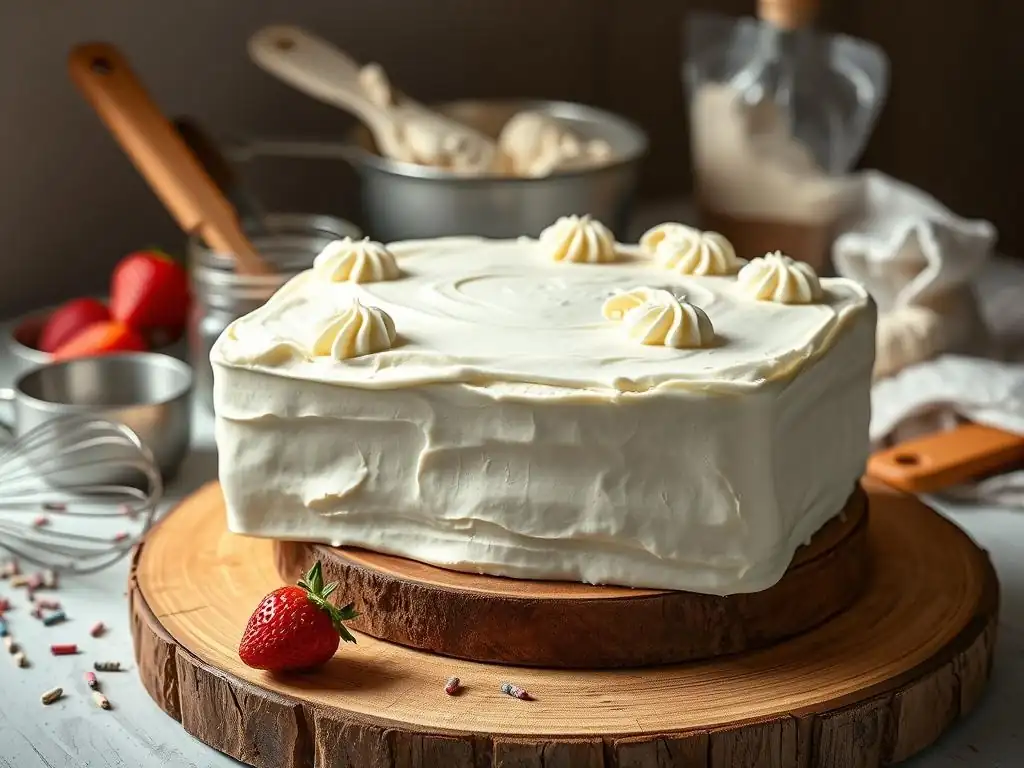
A sunken center is a frustrating issue when baking a perfect vanilla sheet cake. This can happen for several reasons. One common cause is opening the oven door too early during baking, especially in the first two-thirds of the bake time, which allows cool air in and can cause the cake's structure to collapse before it's set. Ensure your oven temperature is accurate; an oven that is too cool can also lead to a sunken cake because the cake doesn't set properly before the leavening agents lose their power.
Other culprits include using too much leavening (baking powder or baking soda), which causes the cake to rise too quickly and then fall, or underbaking the cake. Check for doneness using the toothpick test at the minimum bake time specified in the perfect vanilla sheet cake recipe. If your cake repeatedly sinks despite following the recipe, check the freshness of your leavening agents – they lose potency over time, typically after 6-12 months once opened.
Avoiding a Dry or Crumbly Texture
As mentioned earlier, dry or crumbly texture is often linked to ingredient measurement and baking time. To avoid this in your perfect vanilla sheet cake, measure flour accurately, preferably by weight. Do not overmix the batter once the dry ingredients are added; mix only until just combined. Overmixing develops gluten, leading to a tough texture that can also feel dry.
Ensure you are using the correct amount of fat and liquid specified in the perfect vanilla sheet cake recipe. Using ingredients at room temperature helps them emulsify properly, contributing to a moist crumb. Finally, prevent overbaking at all costs. Use visual cues and the toothpick test; err on the side of slightly underbaked rather than overbaked, as the cake continues to cook slightly from residual heat after removal from the oven. Proper cooling on a wire rack is also important for moisture retention.
Fixing a Lopsided Cake
A lopsided perfect vanilla sheet cake can occur due to uneven heat distribution in the oven or an uneven batter in the pan. Ensure your oven rack is level and the oven is properly preheated with an accurate temperature. If you suspect your oven has hot spots, rotate the cake halfway through the baking time.
When pouring the batter into the prepared pan, spread it evenly to the edges, ensuring the top is as level as possible before placing it in the oven. If the cake still bakes with a slight dome or lopsidedness, you can easily level it after cooling using a serrated knife before frosting. For severe lopsidedness, ensure your baking pan isn't warped and that your oven is heating evenly. Investing in an oven thermometer is a simple step that can help troubleshoot many baking issues, including uneven baking for your perfect vanilla sheet cake.
Variations on the Perfect Vanilla Sheet Cake Recipe
Chocolate Chip Vanilla Sheet Cake
Adding chocolate chips is a simple yet delightful way to transform your perfect vanilla sheet cake. The little pockets of melted chocolate add bursts of rich flavor and a different texture. Simply fold about 1 to 1.5 cups of mini or regular chocolate chips into the batter during the final step of mixing, after combining wet and dry ingredients. Toss the chocolate chips with a tablespoon of flour before adding them to the batter; this helps prevent them from sinking to the bottom of the cake during baking.
You can use milk chocolate, semi-sweet, or dark chocolate chips depending on your preference. White chocolate chips also make a lovely variation, adding extra sweetness and a creamy flavor that pairs exceptionally well with vanilla. The baking time might increase slightly due to the added mass, so check for doneness carefully. A chocolate chip perfect vanilla sheet cake is always a crowd-pleaser.
Lemon Vanilla Sheet Cake
Introducing lemon adds a bright, zesty counterpoint to the sweet, creamy vanilla flavor in a perfect vanilla sheet cake. You can incorporate lemon in several ways. Add the zest of one or two lemons to the sugar during the creaming step; rubbing the zest into the sugar helps release its oils and infuse the flavor throughout the cake. You can also substitute a few tablespoons of lemon juice for some of the liquid (milk, buttermilk) in the recipe, though be mindful that acidity can interact with leavening.
Another popular method is to create a simple lemon glaze or drizzle to go over the cooled, frosted perfect vanilla sheet cake. A glaze made from powdered sugar and lemon juice provides a tangy punch. For a stronger flavor, infuse the milk or cream called for in the recipe with lemon zest by gently heating them together, letting them steep, and then straining before cooling and adding to the batter. This creates a subtle, aromatic lemon-vanilla combination.
Funfetti Vanilla Sheet Cake
Make your perfect vanilla sheet cake instantly festive by turning it into a funfetti cake! This is incredibly simple: just fold sprinkles into the batter. Use jimmies-style sprinkles (the rod-shaped ones) rather than nonpareils (the tiny round ones), as nonpareils tend to dissolve and bleed color into the batter during mixing and baking.
Gently fold about 1/2 cup to 3/4 cup of rainbow jimmies into the batter just before pouring it into the pan. Avoid overmixing, which can cause the colors to bleed slightly. The sprinkles melt slightly during baking, creating colorful speckles throughout the cake's crumb. Top your funfetti perfect vanilla sheet cake with classic vanilla buttercream and more sprinkles for a truly celebratory dessert that's perfect for birthdays and parties.
Enjoy Your Delicious and Easy Vanilla Sheet Cake!
You've successfully baked a perfect vanilla sheet cake! This versatile and delicious treat is ready to be sliced and enjoyed. Whether you've frosted it simply or decorated it elaborately, the comforting flavor of homemade vanilla cake is unmatched.
We love seeing your baking triumphs! Share photos of your perfect vanilla sheet cake creations on social media and tag BakeWithEase. We're always inspired by our community's culinary endeavors.
Now that you've mastered this perfect vanilla sheet cake recipe, don't forget to let us know what you think! Rate and review the recipe on our website to help other bakers discover the joy of making this classic cake. Happy Baking!
Frequently Asked Questions
How do I ensure my vanilla sheet cake is moist?
To achieve a moist cake, don't overbake it. Also, adding buttermilk or sour cream to the batter helps retain moisture, creating a tender crumb.
What's the best type of vanilla extract to use for a strong vanilla flavor?
For a robust vanilla flavor, opt for pure vanilla extract rather than imitation. Vanilla bean paste is also a great choice, adding visible vanilla specks.
Can I use different types of flour for this recipe?
While all-purpose flour is recommended for its versatility, you can substitute with cake flour for a lighter, more delicate texture. Be mindful that adjustments to liquid may be needed.
What's the secret to a perfectly even vanilla sheet cake?
Use a kitchen scale to precisely measure ingredients. Level the batter in the pan before baking. Consider using baking strips to ensure even heat distribution.
How long can I store a vanilla sheet cake?
A properly stored vanilla sheet cake can last for up to 3 days at room temperature. Wrap it tightly in plastic wrap or store it in an airtight container to prevent it from drying out. Refrigerating will extend its shelf life further.
Final Reflection: The Enduring Allure of the Perfect Vanilla Sheet Cake
The seemingly simple vanilla sheet cake transcends mere dessert; it's a canvas for celebration, a symbol of comfort, and a testament to the power of baking's fundamental joys. Its enduring popularity, as evidenced by countless online searches for the "perfect" recipe, speaks to a deeper human need for simple pleasures and shared experiences. This recipe, meticulously crafted and tested, aims to provide just that – a reliable foundation for countless joyful occasions.
The vanilla sheet cake's influence extends far beyond the kitchen table. It's a nostalgic link to childhood memories, birthdays, and family gatherings. It's the unpretentious hero of potlucks and bake sales, a universally loved treat that unites people across generations and backgrounds. A cake is a celebration of life, a symbol of joy, and a delicious way to share happiness.
This simple truth resonates deeply with the enduring appeal of this classic dessert. The act of baking itself, the careful measuring and mixing, becomes a meditative process, a way to connect with something larger than ourselves.
Now, consider your own connection to vanilla sheet cake. What memories does it evoke? What occasions does it enhance? I encourage you to bake this recipe, not just to create a delicious cake, but to experience the process, to share the joy, and to create your own lasting memories around this timeless treat. Let the simple act of baking become a source of connection, comfort, and celebration in your own life.
Unleash Your Inner Baker: Vanilla Perfection Awaits!
Thanks for taking the time to explore the art of baking the perfect vanilla sheet cake! We hope you've gained valuable tips and tricks to create a truly delightful dessert. Now it's time to put your new knowledge into action.
- Bake your own masterpiece! Grab your apron and ingredients – let's make that stunning vanilla sheet cake a reality. Don't forget to experiment with your favorite frosting!
- Share your baking journey! Post a picture of your creation on social media and tag us – we'd love to see your results!
- Explore other delicious recipes on BakeWithEase.com (this will be linked on the actual website). We have tons of inspiring ideas to continue your baking adventures.
What unique twist will you add to your vanilla sheet cake to make it truly your own?