
Beginner's Guide to Baking Your First Thanksgiving Pie Successfully

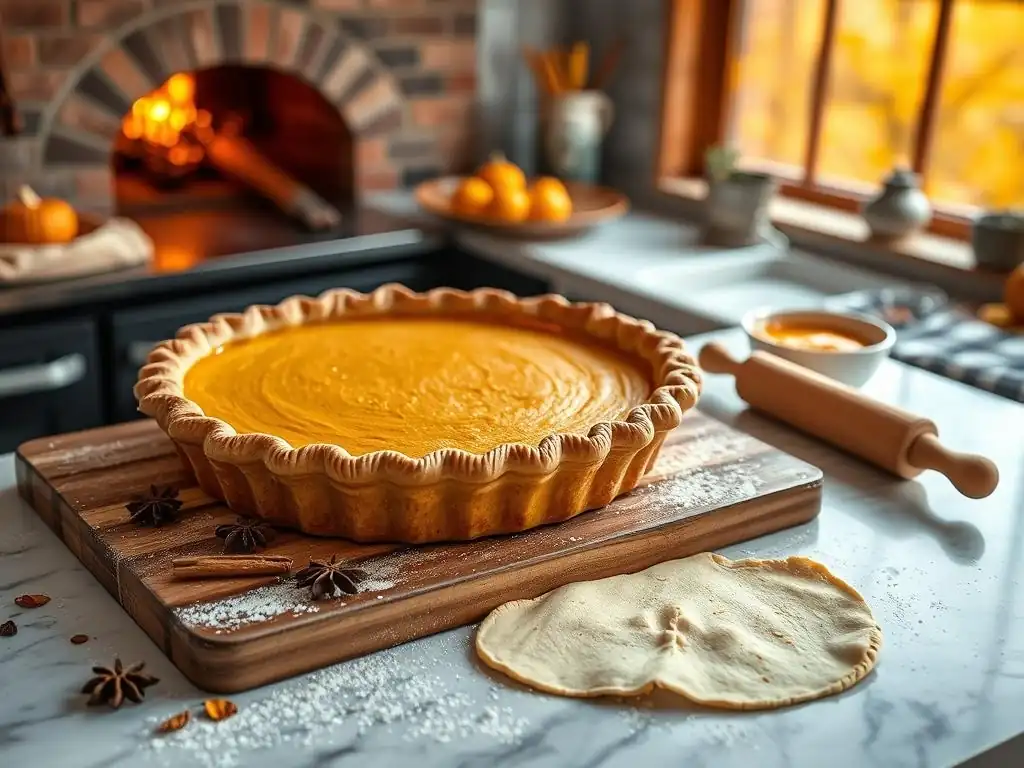
Welcome to BakeWithEase, where delicious baking adventures begin! Are you ready to impress your guests this Thanksgiving? This year, ditch the store-bought and embrace the joy of homemade. We're demystifying the art of pie crust with our Beginner's Guide to Baking Your First Thanksgiving Pie Successfully. Wondering how to achieve that perfectly flaky crust? Keep reading, because our Thanksgiving pie crust recipe is about to change your baking game forever...
- Beginner's Guide to Baking a Pumpkin Pie for Thanksgiving
- Introduction to Thanksgiving Pie Baking
- Mastering the Pumpkin Pie Crust Recipe for Beginners
- Choosing Your Pumpkin Pie Filling
- Assembling Your Pumpkin Pie: A Visual Guide
- Baking Your Pumpkin Pie to Perfection
- Troubleshooting Common Pumpkin Pie Baking Problems
- Serving and Storing Your Pumpkin Pie
- Conclusion: You've Baked Your First Pumpkin Pie!
-
Frequently Asked Questions
- What makes a good Thanksgiving pie crust?
- What ingredients are essential for a Thanksgiving pie crust recipe?
- What's the biggest mistake beginners make when baking a Thanksgiving pie crust?
- How can I prevent my Thanksgiving pie crust from shrinking during baking?
- Can I prepare my Thanksgiving pie crust ahead of time?
- Final Reflection: The Sweet Success of Thanksgiving Pie
- Unlock Your Inner Pie Master!
Beginner's Guide to Baking a Pumpkin Pie for Thanksgiving
Introduction to Thanksgiving Pie Baking
Welcome to the World of Homemade Pumpkin Pies
Stepping into the kitchen to bake your very first Thanksgiving pie is a wonderful and rewarding experience. For many, Thanksgiving isn't complete without that iconic slice of pumpkin pie, warm with spices and topped perhaps with a dollop of whipped cream. While it might seem daunting at first, especially tackling something like a homemade Thanksgiving pie crust recipe, breaking it down into simple steps makes it entirely achievable for beginners. This guide is designed to walk you through each stage, from selecting your ingredients to pulling that golden-brown masterpiece from the oven.
Baking is a science with a touch of art, and pie baking is a perfect example. Understanding the basic principles behind the ingredients and techniques is key to success. For instance, the temperature of your butter significantly impacts the flakiness of your crust, and the balance of spices defines the comforting flavor of the filling. Don't worry about perfection on your first try; the joy is in the process and the delicious result, no matter how it looks. You're about to create something special for your holiday table, a treat made with your own hands.
Why Baking Your Own Pie is a Thanksgiving Tradition
Baking a pie for Thanksgiving is more than just preparing a dessert; it's a cherished tradition that connects generations. The aroma of cinnamon, nutmeg, and pumpkin filling the house evokes feelings of warmth, comfort, and togetherness that are central to the holiday. It's a way to contribute to the festive meal, offering a personal touch that store-bought pies simply can't replicate. Many families have passed down their favorite Thanksgiving pie crust recipe or filling secrets, making it a culinary legacy.
Furthermore, the act of baking itself can be a mindful and enjoyable process. Kneading dough, measuring spices, and watching the pie transform in the oven can be incredibly satisfying. It provides a sense of accomplishment and allows you to put love and care into the food you share with loved ones. This deep connection to the food and the people you share it with is at the heart of why baking your own pie remains a beloved Thanksgiving custom year after year.
Mastering the Pumpkin Pie Crust Recipe for Beginners
Essential Ingredients for a Perfect Pumpkin Pie Crust
Crafting a delicious, flaky crust for your Thanksgiving pie starts with selecting the right ingredients. While a basic pie crust recipe seems simple – flour, fat, liquid, salt – the quality and type of each component make a significant difference in the final texture and flavor. For a classic Thanksgiving pie crust, you'll typically need all-purpose flour, a solid fat (like butter or shortening), ice water, and salt. Some recipes might also include a touch of sugar for flavor or vinegar to help tenderize the dough.
The key to a successful, flaky Thanksgiving pie crust recipe lies in the fat distribution. Small pieces of cold fat coated in flour create steam pockets during baking, which push apart the layers of dough, resulting in flakiness. Using cold ingredients and minimizing handling are crucial steps. For example, butter should be cut into small cubes and kept cold, ideally around 35-40°F (2-4°C), until it's time to incorporate it into the flour. This ensures it doesn't melt into the flour prematurely, which would lead to a tough crust.
Flour Selection for Pie Crust: All-Purpose vs. Pastry Flour
Choosing the right flour is fundamental to achieving the desired texture in your Thanksgiving pie crust. All-purpose flour is the most common choice for beginners, offering a good balance of protein content (typically around 10-12%). This protein develops gluten when mixed with liquid, providing structure to the crust. Using a standard unbleached all-purpose flour often yields reliable results, providing enough structure to hold the filling without becoming excessively tough if handled correctly. For instance, a popular brand like King Arthur Baking Company's All-Purpose Flour has a protein content of 11.7%, which is well-suited for pie crusts.
Pastry flour, on the other hand, has a lower protein content (usually around 8-9%). This results in less gluten development, leading to a more tender and delicate crust. While it can produce a wonderfully soft texture, it requires more careful handling as it can be more fragile than dough made with all-purpose flour. A blend of all-purpose and pastry flour is sometimes used to strike a balance between flakiness and tenderness. For a beginner making their first Thanksgiving pie crust recipe, starting with a reliable all-purpose flour is often recommended for its ease of use and consistent results.
The Role of Fat: Butter vs. Shortening in Pie Crust
Fat is arguably the most critical ingredient for creating a flaky Thanksgiving pie crust. As mentioned, when cold fat melts in the oven, it creates steam that separates the layers of dough. Unsalted butter is a popular choice among bakers because it provides excellent flavor and contributes to flakiness. High-quality butter typically contains around 80-82% fat and about 16-17% water. When butter is cut into small pieces and kept cold, these pieces create distinct layers of fat within the dough. As the pie bakes, the water in the butter turns to steam, puffing up those layers.
Vegetable shortening, like Crisco, is 100% fat and has a higher melting point than butter. This makes it easier to work with, especially for beginners, as it stays solid longer at room temperature. Shortening tends to produce a very tender and flaky crust, often considered more flaky than an all-butter crust because it doesn't spread as much during baking, maintaining those distinct layers.
However, shortening lacks the rich flavor that butter imparts. Many bakers opt for a combination of butter and shortening to get the best of both worlds: the flakiness of shortening and the flavor of butter. A common ratio might be half butter and half shortening by weight.
Liquid Binding: Water vs. Vinegar for Pie Crust
The liquid in a pie crust recipe serves to bind the dry ingredients together, forming a cohesive dough. Ice water is the standard choice because its cold temperature helps keep the fat solid, which is essential for flakiness. The amount of water needed can vary depending on the humidity and the type of flour used, but it's generally added gradually, just until the dough comes together.
Too little water results in a dry, crumbly dough that's hard to roll, while too much water develops too much gluten, leading to a tough crust. For a typical single crust using 1.5 cups of flour, you might need approximately 4-6 tablespoons of ice water.
Some Thanksgiving pie crust recipes include a small amount of vinegar (like white vinegar or apple cider vinegar) in the liquid. The acidity of the vinegar is believed to inhibit gluten development, resulting in a more tender crust. While the effect is subtle, it can be a helpful trick, especially for beginners who might be prone to overworking the dough. The vinegar also doesn't affect the flavor of the baked crust. For instance, adding 1 teaspoon of vinegar to your ice water might provide that extra bit of tenderness without any noticeable taste difference.
Step-by-Step Pumpkin Pie Crust Recipe
Creating your own Thanksgiving pie crust recipe from scratch is a rewarding part of the baking process. Follow these steps carefully to ensure a flaky and tender base for your pumpkin filling. Remember to keep your ingredients cold and handle the dough minimally.
A classic recipe for a single 9-inch pie crust might call for:
- 1 ½ cups all-purpose flour
- ½ teaspoon salt
- ½ cup (1 stick) unsalted butter, very cold, cut into ½-inch cubes
- ¼ cup vegetable shortening, very cold, cut into ½-inch cubes (optional, can use all butter)
- 4-6 tablespoons ice water (or ice water mixed with 1 tsp vinegar)
Ingredients Checklist:
- [ ] All-purpose flour
- [ ] Salt
- [ ] Cold unsalted butter
- [ ] Cold vegetable shortening (optional)
- [ ] Ice water
- [ ] Vinegar (optional)
Combining Dry Ingredients: Flour, Salt, and Sugar
The first step in most Thanksgiving pie crust recipes is to whisk together your dry ingredients. This ensures that the salt (and any sugar if your recipe includes it) is evenly distributed throughout the flour. Using a medium-sized bowl, measure your flour precisely – spooning it into the measuring cup and leveling it off, rather than scooping directly from the bag, which can compact the flour and lead to using too much.
Add the salt to the flour. If your recipe calls for sugar (some add a teaspoon or two for flavor, though it's not strictly necessary for structure), add it now as well.
Using a whisk, gently combine the ingredients. This step takes only a few seconds but is important for consistent seasoning in every bite of your crust. For example, for a typical 1 ½ cup flour recipe, you'd add ½ teaspoon of salt and whisk until no clumps of salt are visible. This simple initial step sets the stage for incorporating the fat evenly in the next phase.
Cutting in the Fat: Achieving the Right Texture
This is perhaps the most crucial step in creating a flaky Thanksgiving pie crust. The goal is to cut the cold fat (butter and/or shortening) into the dry ingredients until the mixture resembles coarse crumbs with some larger, pea-sized pieces of fat still visible. These larger pieces are what create those coveted flaky layers. You can do this using a pastry blender, two forks, or even your fingertips (working quickly to avoid warming the fat). A food processor can also be used, but pulses must be very short to avoid over-processing.
For a typical recipe using 1 cup of fat (like ½ cup butter and ¼ cup shortening), you would add the cold, cubed fat to the flour mixture. Work the fat into the flour until most of the mixture looks like coarse sand, but you should still see distinct pieces of fat ranging from the size of small peas to lima beans. This distribution of fat is key; if the fat is too finely incorporated, the crust will be tender but not flaky; if the pieces are too large, it might be difficult to roll.
Adding the Liquid: Forming the Dough
Once the fat is cut into the dry ingredients, it's time to add the ice water. This step binds everything together to form a dough. Add the ice water (or water/vinegar mixture) gradually, a tablespoon at a time, sprinkling it over the flour mixture. Use a fork or your hands to gently bring the mixture together after each addition. You need just enough water for the dough to barely hold together when you squeeze a small portion.
For a recipe using 1.5 cups of flour, you might start with 4 tablespoons of ice water and add up to 2 more tablespoons if needed. Stop adding water as soon as the dough comes together. It should look shaggy and not be sticky or wet. Over-mixing or adding too much water will develop too much gluten, resulting in a tough crust. The goal is to hydrate the flour just enough to form a cohesive dough that can be rolled out.
Chilling the Dough: An Important Step for Flaky Crust
After the dough has just come together, gather it gently and form it into a disc. Do not knead it like bread dough; this will overdevelop the gluten. Wrap the disc tightly in plastic wrap. Chilling the dough is a non-negotiable step for a flaky and manageable Thanksgiving pie crust. This allows the gluten to relax (preventing toughness) and firms up the fat, making the dough easier to roll out without sticking.
The dough should be chilled for at least 30 minutes, but preferably for 1-2 hours in the refrigerator. Some bakers even chill it overnight. A well-chilled dough is less sticky and holds its shape better when rolled. If you're making a double-crust pie, divide the dough in half before chilling and form two discs. Proper chilling prevents shrinkage during baking and ensures that the fat remains solid until it hits the hot oven, maximizing flakiness.
Choosing Your Pumpkin Pie Filling
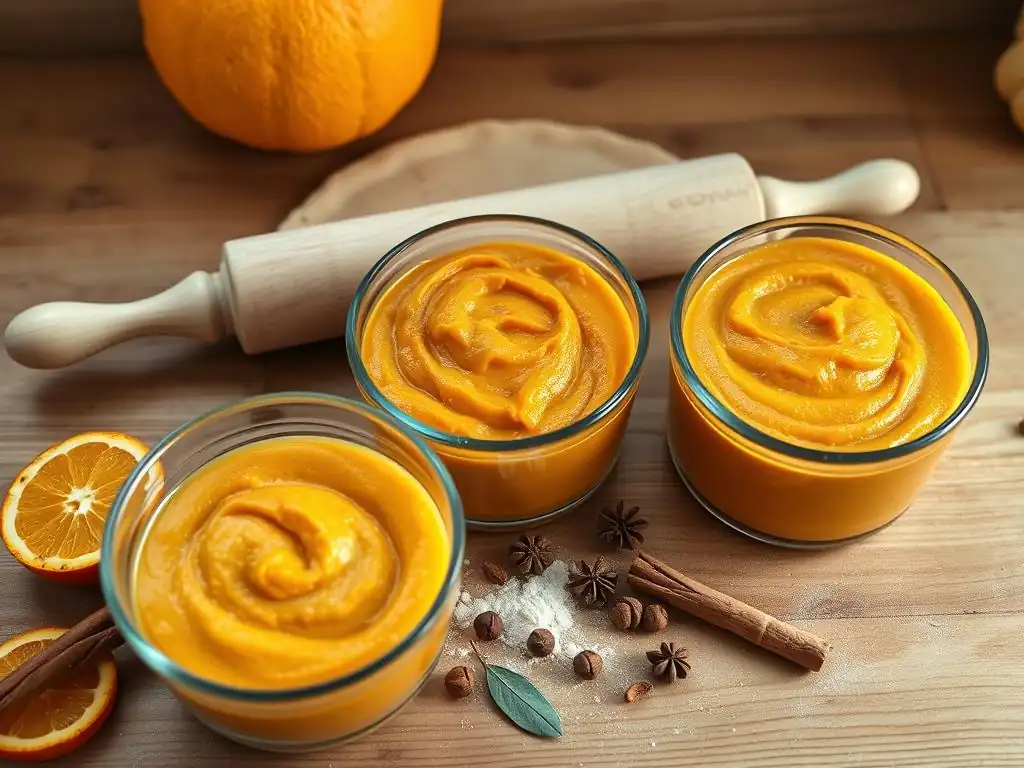
Classic Pumpkin Pie Filling: A Beginner's Guide
Once your Thanksgiving pie crust dough is chilling, it's time to think about the star: the pumpkin pie filling. A classic pumpkin pie filling is rich, creamy, and infused with the warm spices of autumn. The base is typically pumpkin puree, combined with eggs, sweetener, milk or cream, and a blend of spices. For beginners, following a reliable recipe is key to achieving the right texture – not too runny, not too dense.
The consistency of the filling is largely determined by the ratio of eggs and liquid to the pumpkin puree. Too few eggs or too much liquid can result in a filling that doesn't set properly, leading to a wobbly or liquid center. Too many eggs can make the filling rubbery. A standard recipe for a 9-inch pie often uses 2-3 large eggs and about 1.5 cups of dairy (milk, evaporated milk, or heavy cream) combined with about 15 ounces of pumpkin puree. Achieving the perfect custard-like texture is the goal.
Homemade vs. Canned Pumpkin Puree
For most home bakers, especially beginners, using canned pumpkin puree is the most convenient and reliable option for Thanksgiving pie. Canned puree (not pumpkin pie filling, which is already spiced and sweetened) is made from specific varieties of pumpkin or squash, like Dickinson squash, which have a consistent texture and moisture level ideal for baking. A standard 15-ounce can provides approximately 1 ¾ cups of smooth, ready-to-use puree, enough for one standard pie. Using canned puree ensures consistent results in terms of moisture and sweetness compared to the variability of fresh pumpkins.
While making pumpkin puree from scratch is possible, it requires selecting the right type of pumpkin (sugar pumpkins or pie pumpkins, not carving pumpkins), roasting it, and then processing it. This process can be time-consuming, and the moisture content can vary significantly, potentially affecting the pie's texture. For your first Thanksgiving pie, relying on canned pumpkin puree eliminates a variable and helps ensure your filling sets correctly. Look for cans labeled "100% Pure Pumpkin" or "Pumpkin Puree."
Spice Blends: Cinnamon, Ginger, Nutmeg, and Cloves
The signature flavor of pumpkin pie comes from its distinctive spice blend. The traditional "pumpkin pie spice" mix usually includes cinnamon, ginger, nutmeg, and cloves. Cinnamon is typically the most prominent spice, providing warmth and sweetness. Ground ginger adds a bit of heat and depth, while nutmeg contributes a warm, slightly sweet, and woody note. Cloves, used sparingly, add a pungent, intense warmth. Some recipes also include a pinch of allspice.
You can buy pre-mixed pumpkin pie spice, which is convenient, or blend your own using individual ground spices. Blending your own allows you to adjust the ratios to your preference; for example, some people prefer more ginger, while others like a stronger clove presence. A common ratio for a single pie might be 1-2 teaspoons of cinnamon, ½ teaspoon of ginger, ½ teaspoon of nutmeg, and ¼ teaspoon of cloves. Ensure your spices are fresh for the best flavor; ground spices lose potency over time, typically within 6-12 months. Old spices can result in a bland filling.
Sweeteners: Sugar, Brown Sugar, and Molasses
Sweetness is essential to balance the earthy flavor of the pumpkin and the warmth of the spices. Most classic Thanksgiving pumpkin pie recipes use a combination of granulated sugar and brown sugar. Granulated sugar provides clean sweetness, while brown sugar adds moisture and a subtle molasses flavor that complements the spices beautifully. The amount of sugar can vary, but a typical recipe for a 15-ounce can of pumpkin might use ¾ to 1 cup of total sugar.
Some recipes also call for a tablespoon or two of molasses itself. Molasses adds a deeper, more complex, and slightly smoky sweetness, enhancing the overall richness of the pie. Dark brown sugar contains more molasses than light brown sugar, so using dark brown sugar can provide a similar effect. Experimenting with the balance of sweeteners can customize the pie to your taste, but starting with a standard recipe's recommendation (often using light brown sugar) is a good approach for your first pie.
Easy Pumpkin Pie Filling Recipe
Making the pumpkin pie filling is generally less complex than mastering the Thanksgiving pie crust recipe. It primarily involves whisking ingredients together in the correct order.
Here's a straightforward recipe for a single 9-inch pie filling:
- 1 can (15 ounces) pure pumpkin puree
- ¾ cup granulated sugar
- ½ cup packed light brown sugar
- 1 teaspoon ground cinnamon
- ½ teaspoon ground ginger
- ½ teaspoon ground nutmeg
- ¼ teaspoon ground cloves (or a pinch of allspice)
- ½ teaspoon salt
- 2 large eggs, lightly beaten
- 1 ½ cups evaporated milk or heavy cream
Filling Ingredients Checklist:
- [ ] Pure pumpkin puree (canned)
- [ ] Granulated sugar
- [ ] Light brown sugar
- [ ] Ground cinnamon
- [ ] Ground ginger
- [ ] Ground nutmeg
- [ ] Ground cloves (or allspice)
- [ ] Salt
- [ ] Large eggs
- [ ] Evaporated milk or heavy cream
Combining Pumpkin Puree, Spices, and Sweetener
Start by combining the wet and dry ingredients that form the base of the filling's flavor. In a large bowl, whisk together the pure pumpkin puree, granulated sugar, brown sugar, and all the spices (cinnamon, ginger, nutmeg, cloves/allspice), and salt. Whisk until everything is thoroughly combined and the sugars are starting to dissolve into the pumpkin. This ensures that the spices and sweetness are evenly distributed throughout the filling.
Ensure you are using pure pumpkin puree and not canned pumpkin pie mix, which already contains sugar and spices. Mixing the dry ingredients (sugars, spices, salt) into the pumpkin first helps to dissolve them more effectively before adding the liquid components. Continue whisking for about 1-2 minutes until the mixture is smooth and uniform in color.
Adding Eggs and Cream for a Smooth Texture
The final step in preparing the filling is incorporating the eggs and dairy. Gently whisk the lightly beaten eggs into the pumpkin mixture until just combined. Beating the eggs too vigorously beforehand can incorporate too much air, which might cause the filling to crack during baking. After the eggs are mixed in, gradually whisk in the evaporated milk or heavy cream. Evaporated milk is a classic choice as it provides a rich, creamy texture without adding excess moisture. Heavy cream yields an even richer filling.
Whisk the mixture until it is completely smooth and homogenous. Strain the filling through a fine-mesh sieve into a clean bowl before pouring it into the pie crust. This step is optional but highly recommended as it removes any potential lumps or stringy bits from the pumpkin puree or egg whites, resulting in an incredibly smooth and silky filling texture after baking.
Assembling Your Pumpkin Pie: A Visual Guide
Rolling Out the Pie Crust: Tips and Tricks for Even Thickness
Once your Thanksgiving pie crust dough is properly chilled (at least 30 minutes), it's time to roll it out. Lightly flour a clean, cool surface (like a countertop or a large pastry mat) and your rolling pin. Take the chilled dough disc from the refrigerator and place it on the floured surface. Begin rolling from the center outwards, rotating the dough frequently and adding just a little more flour underneath and on top if needed to prevent sticking. Aim for a circle about 12-13 inches in diameter for a standard 9-inch pie plate.
The key to even baking is even thickness. Try to maintain a uniform thickness of about ⅛ inch throughout the dough. If the dough cracks at the edges, you can gently pinch it back together. If it becomes too warm and sticky, pop it back into the refrigerator for 10-15 minutes to firm up. Rolling dough can be tricky at first, but practice makes perfect. A consistent thickness ensures the crust bakes through evenly without some parts burning while others remain doughy.
Transferring the Crust to the Pie Plate: Avoiding Tears and Cracks
Transferring the rolled-out Thanksgiving pie crust from the counter to the pie plate can be nerve-wracking for beginners, as tears and cracks are common pitfalls. A simple technique is to gently roll the dough loosely around your rolling pin. Position the rolling pin over one edge of your pie plate and then unroll the dough carefully into the plate, allowing it to settle into the bottom and up the sides.
Alternatively, you can gently fold the dough in half or quarters and then unfold it into the pie plate. Once the dough is in the plate, gently press it into the corners and up the sides, ensuring there are no air pockets underneath. Be careful not to stretch the dough, as this can cause it to shrink back during baking. If a tear occurs, simply patch it with a piece of scrap dough, moistening the edges slightly with water to help it adhere. Trim the excess dough, leaving about a 1-inch overhang.
Adding the Filling: Achieving the Perfect Level
With the Thanksgiving pie crust settled in the pie plate, it's time to add the prepared pumpkin filling. Place the pie plate on a sturdy, flat surface, preferably on a baking sheet (this makes it easier to transfer to the oven and catches any potential spills). Carefully pour the strained pumpkin filling into the unbaked pie crust.
Pour the filling until it reaches just below the top edge of the crust. The filling will expand slightly as it bakes, and you don't want it to overflow. For a standard 9-inch pie plate and a recipe yielding about 3-4 cups of filling, this usually means filling it about ¾ to ? of the way up the sides of the crust. Pouring the filling into the crust after the crust is in the pie plate, rather than before transferring, helps prevent spills during the transfer process.
Crimp or Flute the Edges: Adding a Decorative Touch
The edge of your Thanksgiving pie crust serves both a functional and decorative purpose. Crimping or fluting the edges seals the filling inside the crust and adds a beautiful, finished look to your pie. With the 1-inch overhang of dough, you have plenty of material to work with.
A simple crimp involves using your thumb and forefinger of one hand to pinch the edge of the dough against the thumb and forefinger of your other hand (or against the edge of the pie plate), working your way around the perimeter. Another common method, fluting, involves using the index finger of one hand to push the dough edge inwards between the thumb and index finger of the other hand, creating a wavy pattern.
Practice a few times on a scrap piece of dough if you're unsure. This step takes a few minutes but elevates the look of your homemade Thanksgiving pie crust significantly.
Baking Your Pumpkin Pie to Perfection
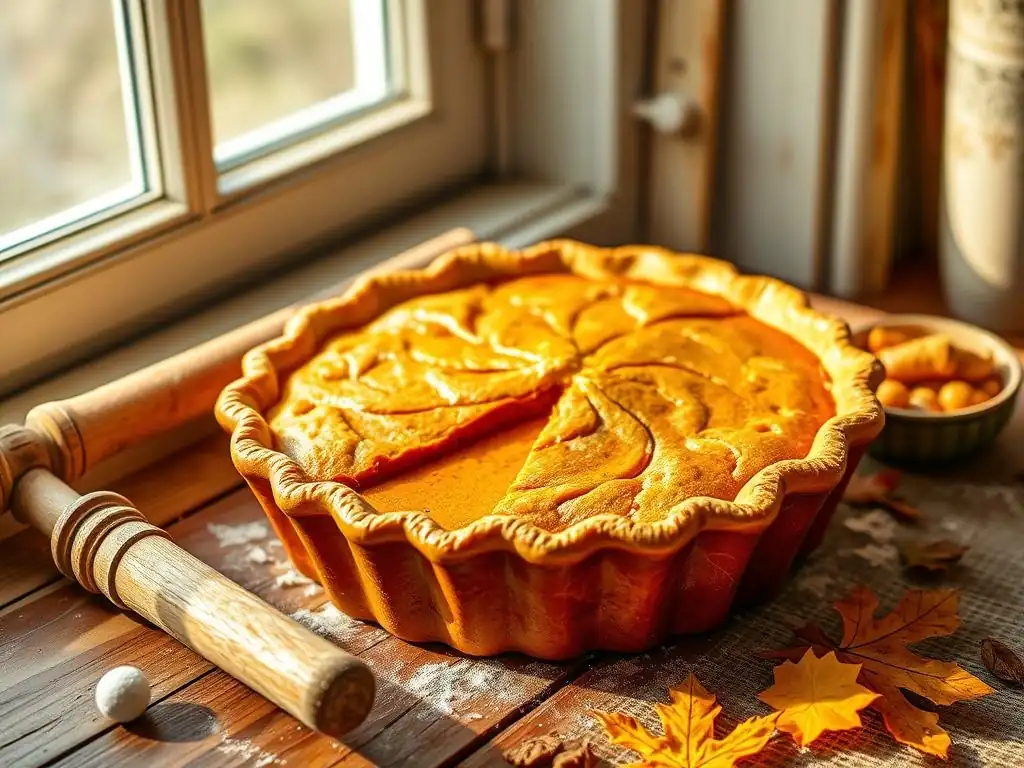
Oven Temperature and Baking Time: A Crucial Guide
Baking a pumpkin pie correctly involves managing oven temperature and time to ensure both the filling and the crust cook through evenly. Many pumpkin pie recipes, including those using a Thanksgiving pie crust recipe from scratch, recommend starting at a higher temperature for the first 10-15 minutes, then reducing the heat for the remainder of the baking time. This initial burst of high heat helps to set the bottom crust quickly, preventing sogginess (a common issue! ).
A typical baking plan for a 9-inch pumpkin pie might be to bake at 425°F (220°C) for 15 minutes, then reduce the oven temperature to 350°F (175°C) and continue baking for another 35-45 minutes. Total baking time is usually around 50-60 minutes, though this can vary depending on your oven and the depth of the filling. Always use an oven thermometer to verify your oven's actual temperature, as they can often be off by 25-50°F.
Preventing a Soggy Bottom Crust: Baking Techniques
A soggy bottom crust is one of the most frustrating issues when baking a pumpkin pie, especially for a beginner working with a homemade Thanksgiving pie crust recipe. Fortunately, there are several techniques to help prevent this. As mentioned, starting the pie at a higher oven temperature for the first 10-15 minutes helps to partially bake the bottom crust before the liquid filling has time to soak into it.
Another effective method is blind baking the crust. This involves partially baking the empty pie crust before adding the filling. To blind bake, line the chilled, unbaked crust with parchment paper or foil and fill it with pie weights, dried beans, or rice. Bake at 400°F (200°C) for about 15-20 minutes, then remove the weights and parchment/foil and bake for another 5-10 minutes until the bottom is lightly golden. Let it cool slightly before adding the filling and proceeding with the main bake. While it adds a step, blind baking is highly effective against sogginess.
Achieving a Golden-Brown Crust: Monitoring and Adjusting
While the filling bakes, you also need to keep an eye on your Thanksgiving pie crust to ensure it achieves a beautiful golden-brown color without burning, particularly the delicate crimped edges. Pie crust edges tend to brown faster than the rest of the pie because they are thinner and more exposed.
If you notice the edges of your crust browning too quickly during the bake, you can shield them. This is easily done by creating a "crust shield" using aluminum foil. Tear off a piece of foil and fold or cut it into a ring that fits snugly over the crimped edge of the pie, covering it completely while leaving the rest of the pie exposed. Place the foil shield over the pie edges about halfway through the baking time, or as soon as they reach your desired level of brownness. This protects the edges from further direct heat.
Checking for Doneness: Visual Cues and Temperature Readings
Determining when a pumpkin pie is perfectly baked is crucial for a properly set filling. The edges of the filling should appear set and slightly puffed, while the center (about 2-3 inches in diameter) should still look slightly soft or jiggly. The pie should not ripple or slosh significantly when gently nudged. Overbaking can lead to a cracked or rubbery filling.
A reliable way to check for doneness is using an instant-read thermometer. Insert the thermometer into the filling about one inch from the edge of the pie. The filling is done when it reaches an internal temperature of 175°F (80°C). The very center might register slightly lower, which is fine as it will continue to set as it cools. Another old-school method is inserting a knife near the center; it should come out mostly clean, although a little bit of moisture is okay.
Troubleshooting Common Pumpkin Pie Baking Problems
Dealing with a Tough Pie Crust: Tips and Solutions
A tough Thanksgiving pie crust is often the result of overdeveloping the gluten in the dough. This usually happens from adding too much water, overworking the dough when mixing, or kneading it too much when forming the disc. Gluten develops when flour and water are mixed and then agitated. Using too much flour when rolling can also contribute to toughness.
If your crust turns out tough, don't despair! For your next attempt at a Thanksgiving pie crust recipe, focus on these preventative measures: use ice water and add it sparingly, just until the dough comes together. Mix the dough only until it's shaggy and cohesive, not smooth. Form the dough into a disc gently, without kneading. Ensure your fat is very cold. Also, avoid adding excessive flour when rolling; use just enough to prevent sticking. If it sticks, chill the dough again.
Preventing a Shrinking Pie Crust: Best Practices
Pie crusts that shrink significantly away from the sides of the pie plate during baking are usually a result of not chilling the dough sufficiently or stretching it when placing it into the plate. When dough is warm or stretched, the gluten is elastic and wants to spring back to its original shape during baking.
To prevent shrinkage with your Thanksgiving pie crust recipe, make sure the dough is well-chilled (at least 1-2 hours, or even overnight) before rolling. When transferring the rolled dough to the pie plate, gently ease it into the contours of the plate without stretching it. Let the dough relax in the plate for another 15-30 minutes in the refrigerator before trimming the edges and adding the filling. This second chilling step helps the dough hold its shape better during baking.
Fixing a Cracked Pie Filling: Quick Remedies
Cracks in the surface of a pumpkin pie filling are a common cosmetic issue, often caused by overbaking or cooling too quickly. When the filling bakes for too long, the edges set completely while the center is still liquid. As the center finishes setting and shrinks slightly, the already-set outer edges crack. Cooling the pie in a drafty spot or transferring it from a hot oven directly to a cold counter can also shock the filling and cause cracking.
While a cracked filling doesn't affect the taste, you can minimize the risk by not overbaking (check for doneness at 175°F internal temperature) and allowing the pie to cool gradually. Turn off the oven and leave the pie inside with the door ajar for 30-60 minutes before transferring it to a wire rack to cool completely. If a crack does appear, you can often mask it with whipped cream or a dusting of powdered sugar before serving.
Avoiding a Burnt Crust: Shielding and Adjusting Baking Time
A burnt crust, especially around the edges, is another common issue when baking pumpkin pie. This happens because the edges are thinner and exposed, causing them to brown faster than the center crust or the filling. While your Thanksgiving pie crust recipe might bake perfectly in other pies, the longer baking time required for a custard filling can lead to this problem.
The best way to avoid a burnt crust is to shield the edges with aluminum foil as soon as they reach the desired golden-brown color. This usually occurs about halfway through the baking time, often after the initial high-temperature phase. Create a foil ring that covers just the crimped edge. If the bottom crust is browning too quickly while the top is okay, you can also try placing the pie plate on a baking sheet on a lower oven rack to reduce direct heat to the bottom.
Serving and Storing Your Pumpkin Pie
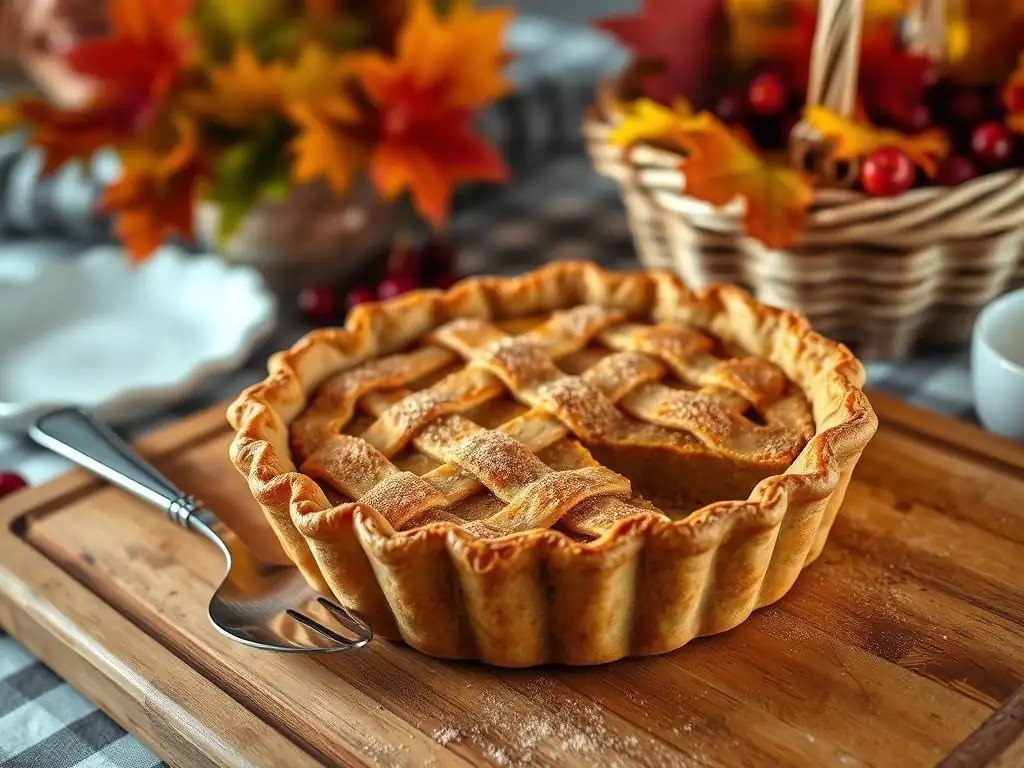
Cooling the Pie: Allowing the Filling to Set
Patience is key after your beautiful Thanksgiving pie comes out of the oven. It is absolutely essential to let the pumpkin pie cool completely before slicing. The custard filling continues to set as it cools, transitioning from a delicate, slightly wobbly state to a firm, sliceable consistency. Trying to slice a warm or hot pumpkin pie will result in a messy, runny filling.
Allow the pie to cool on a wire rack at room temperature for at least 2-3 hours, and ideally 4 hours, or until it is no longer warm to the touch. During this cooling period, the internal temperature drops, and the protein structure within the filling solidifies. For best results, some people even refrigerate the pie for an hour or two after it has cooled down at room temperature before slicing, as this ensures the firmest set.
Slicing and Serving: Presentation Tips
Once your Thanksgiving pie is completely cooled and set, it's ready to be sliced and served. For clean slices, use a sharp knife. Wipe the knife blade clean with a damp cloth between each slice to prevent the filling from sticking and dragging. Start by cutting the pie in half, then quarters, and then cut each quarter into the desired number of slices (usually 2 or 3, yielding 8 or 12 slices total).
Pumpkin pie is traditionally served slightly chilled or at room temperature. It is classic to serve it with a generous dollop of whipped cream. You can make fresh whipped cream by whipping cold heavy cream with a little sugar and vanilla extract until soft or stiff peaks form. A sprinkle of cinnamon or nutmeg on top of the whipped cream adds a nice touch. For an extra flourish, you could drizzle a little caramel or maple syrup over the slice.
Storing Leftover Pie: Maintaining Freshness
Any leftover Thanksgiving pumpkin pie needs to be stored properly to maintain its freshness and safety. Because pumpkin pie filling is a custard based on eggs and dairy, it is perishable and must be refrigerated.
Cover the leftover pie loosely with plastic wrap or aluminum foil, or transfer individual slices to an airtight container. Store the covered pie in the refrigerator. Properly stored pumpkin pie will keep in the refrigerator for about 3-4 days. For longer storage, you can freeze leftover slices (wrap tightly in plastic wrap, then foil, or place in a freezer-safe container) for up to 1-2 months, though the texture of the filling and crust may change slightly upon thawing. Thaw frozen pie in the refrigerator overnight.
Conclusion: You've Baked Your First Pumpkin Pie!
Celebrating Your Baking Success
Congratulations! You've successfully navigated the steps to bake your very first Thanksgiving pumpkin pie, complete with a homemade Thanksgiving pie crust recipe. Take a moment to appreciate your accomplishment. From mastering the flaky crust to creating a smooth, spiced filling, you've tackled a classic holiday challenge and created something delicious and beautiful. The smell of warm spices filling your home is a testament to your hard work and dedication.
Sharing this pie with your family and friends at Thanksgiving is a wonderful way to celebrate your baking journey. Don't worry if it's not absolutely perfect; the effort and love you put into it are what truly matter. Every baker starts somewhere, and each pie you bake will teach you something new. This first pie is a significant milestone!
Encouragement for Future Baking Adventures
Baking is a skill that improves with practice. Now that you've successfully baked a pumpkin pie, you have a solid foundation for tackling other pie recipes and baking projects. You've learned about working with dough, managing oven temperatures, and creating delicious fillings. This Thanksgiving pie crust recipe knowledge is transferable to countless other sweet and savory pies.
Consider trying different variations next time, like a streusel topping, or experimenting with different spices or sweeteners in the filling. Don't be afraid to try other holiday baked goods, like apple pie, pecan pie, or even festive cookies. The BakeWithEase website is full of resources to help you continue your baking adventures. Embrace the process, learn from each bake, and most importantly, have fun creating delicious treats for yourself and those you love!
Frequently Asked Questions
What makes a good Thanksgiving pie crust?
A good Thanksgiving pie crust is flaky and tender. It should also be able to hold its shape without becoming soggy from the filling. A subtle buttery flavor enhances the overall taste.
What ingredients are essential for a Thanksgiving pie crust recipe?
The core ingredients are flour, fat (usually butter or shortening), cold water, and salt. The ratio of fat to flour is crucial for achieving the desired texture.
What's the biggest mistake beginners make when baking a Thanksgiving pie crust?
Overworking the dough is a common pitfall. This develops gluten, resulting in a tough, less tender crust. It's crucial to handle the dough gently.
How can I prevent my Thanksgiving pie crust from shrinking during baking?
Chill the dough thoroughly before baking. Also, docking the crust (piercing it with a fork) allows steam to escape, preventing it from puffing up and shrinking.
Can I prepare my Thanksgiving pie crust ahead of time?
Yes, you can! You can make the dough and store it in the refrigerator for a few days or in the freezer for longer storage. Just be sure to wrap it tightly to prevent drying out.
Final Reflection: The Sweet Success of Thanksgiving Pie
The art of crafting the perfect Thanksgiving pie crust isn't just about following a recipe; it's about embracing the tradition and creating a cherished memory. This guide aimed to demystify the process, providing a clear path for even the most novice bakers to achieve a flaky, golden-brown crust worthy of the holiday table. The demand for simple, reliable Thanksgiving pie crust recipes remains high, highlighting the enduring appeal of this classic dessert.
The journey of baking, especially when it involves a beloved family tradition like Thanksgiving pie, is more than just the final product; it's about the process itself. The aroma of warm spices, the gentle kneading of the dough, the satisfying crackle of the crust in the oven – these are the sensory experiences that create lasting memories. As someone who's spent countless Thanksgivings perfecting my own pie crust, I understand the importance of this ritual. Baking is at once child's play and adult joy. And love, of course.
– Alma Flor Ada. This quote perfectly captures the essence of baking, and particularly the joy of sharing a homemade pie with loved ones.
Now, it's your turn. Don't be intimidated by the prospect of making your own Thanksgiving pie crust. This year, take the leap, follow the steps outlined in this guide, and experience the satisfaction of creating something delicious and meaningful from scratch. The result will be more than just a pie; it will be a testament to your own culinary creativity and a delicious centerpiece for your Thanksgiving celebration. So, gather your ingredients, roll up your sleeves, and let the baking begin!
Unlock Your Inner Pie Master!
Thanks for joining us on this delicious journey into the world of Thanksgiving pies! We hope you've gained the confidence to tackle your first pie this year. Now, let's put that knowledge into action.
- Bake your masterpiece! Use the techniques we've shared to create a pie you'll be proud of. Remember, even small successes are victories in the kitchen!
- Share your creation! Post a picture of your pie on social media and tag us – we'd love to see your baking triumph!
- Why not try experimenting with different spices or fruit fillings next year? Let's see what culinary wonders you uncover!
Ready to share your pie-baking journey and inspire others? What unique twist will you add to your next Thanksgiving pie?