
Master the Lattice Top: An Easy Pie Crust Technique

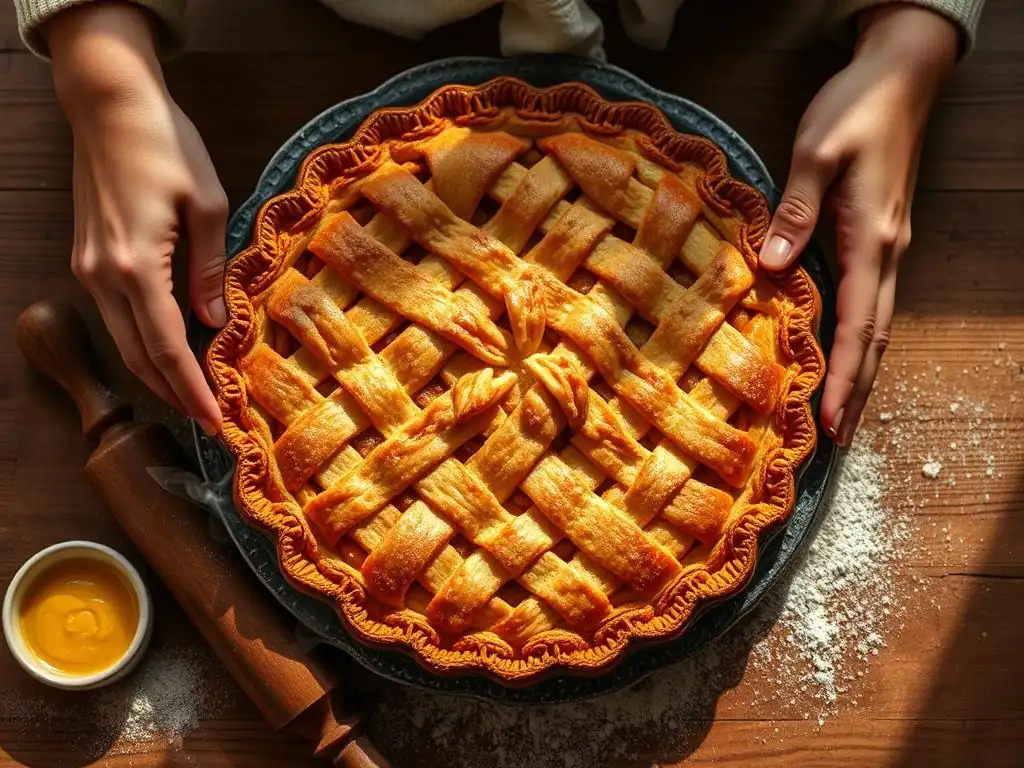
Welcome to BakeWithEase, where baking dreams become delicious realities! Ever wished you could create a picture-perfect pie with that stunning lattice top? You're in the right place. Dive into our Easy Lattice Pie Crust Tutorial and unlock the secrets to crafting bakery-worthy pies in your own kitchen. Get ready to impress – let's bake with ease!
- Mastering the Lattice Top: An Easy Pie Crust Technique for Stunning Pies
- Introduction to the Lattice Pie Crust Tutorial
- Preparing for Your Lattice Pie Crust
-
Step-by-Step: Mastering the Lattice Pie Crust Weave
- Step 1: Rolling Out Your Pie Dough for the Bottom Crust
- Step 2: Preparing the Apple Pie Filling
- Step 3: Rolling Out the Dough for the Lattice Strips
- Step 4: Cutting Perfect Lattice Strips for Your Pie
- Step 5: Weaving the Lattice Pie Crust: A Simple Method
- Step 6: Securing and Crimping the Lattice Pie Crust Edge
- Baking Your Beautiful Lattice Topped Pie
- Troubleshooting Your Lattice Pie Crust
- Beyond the Basics: Lattice Pie Variations
- Storing Your Lattice Pie for Optimal Freshness
- Conclusion: Enjoy Your Effortlessly Elegant Lattice Pie
- Frequently Asked Questions
- Final Reflection: Weaving a Legacy of Deliciousness, One Lattice Square at a Time
- Unleash Your Inner Pie Master!
Mastering the Lattice Top: An Easy Pie Crust Technique for Stunning Pies
Introduction to the Lattice Pie Crust Tutorial
Why Learn the Lattice Pie Crust Technique?
Learning the lattice pie crust technique is a fantastic way to elevate your homemade pies from delicious to absolutely stunning. It's not just about aesthetics; a lattice top allows steam from the filling to escape during baking, which helps prevent a soggy bottom crust and ensures your filling sets properly. This simple technique, once mastered, opens up a world of possibilities for beautiful fruit pies and tarts, making your baking creations the star of any table.
Beyond functionality, the visual appeal of a well-executed lattice is undeniable. It shows care and attention to detail, transforming a humble pie into a work of art. Following an easy lattice pie crust tutorial like this one will give you the confidence to tackle this classic design, making your pies look professionally made even if you're a beginner baker. It's a rewarding skill that adds a touch of elegance to any dessert.
BakeWithEase's Guide to Perfect Lattice Pie Crusts
Welcome to BakeWithEase's comprehensive guide on creating the perfect lattice pie crust! We believe that beautiful baking should also be accessible, and this tutorial is designed to make the lattice technique simple and achievable for everyone. We'll walk you through each step, from preparing your dough to weaving the iconic pattern, providing tips and tricks learned from years of baking experience.
Our goal is to demystify the process and show you that crafting a gorgeous lattice top is well within your reach. By following this easy lattice pie crust tutorial, you'll gain the confidence to create pies that are as delightful to look at as they are to eat. Let's get started on your journey to mastering this classic pie decoration!
Preparing for Your Lattice Pie Crust
Essential Ingredients for a Flaky Pie Crust
A truly excellent lattice pie crust starts with quality ingredients. For a standard double-crust pie (which requires enough dough for both the bottom crust and the lattice top), you'll typically need about 2.5 cups of all-purpose flour. The fat is crucial for flakiness; cold, unsalted butter is the gold standard. You'll need roughly 1 cup (two sticks, or about 225 grams) of very cold butter, cut into small cubes or pieces. Some bakers also like to incorporate a few tablespoons of cold shortening for added tenderness and ease of handling, though all butter yields superior flavor.
Cold liquid, usually ice water, is the final key ingredient. You'll need about 1/2 to 3/4 cup, added gradually. The cold temperature of the water helps keep the fat solid, which creates steam pockets during baking, resulting in those coveted flaky layers. Don't forget a pinch of salt (about 1 teaspoon) to enhance the flavor of your crust. Using these simple ingredients, handled correctly, is the foundation for a successful and easy lattice pie crust tutorial experience.
Tools You'll Need: Lattice Pie Crust Essentials
Having the right tools makes the process of creating an easy lattice pie crust much smoother. You'll definitely need a sturdy rolling pin to roll out your dough evenly. A pastry blender, fork, or food processor is essential for cutting the cold butter or fat into the flour until it resembles coarse crumbs or small peas – this step is critical for flakiness.
Other helpful tools include measuring cups and spoons, a large mixing bowl, and a surface for rolling dough (a lightly floured countertop or a pastry mat works well). To cut your lattice strips, a sharp knife or a pastry wheel (plain or fluted) will give you clean edges. A ruler can be useful for ensuring your strips are uniform in width. Finally, a pie plate (a standard 9-inch dish is common) is, of course, necessary for assembling and baking your beautiful lattice topped pie.
Step-by-Step: Mastering the Lattice Pie Crust Weave
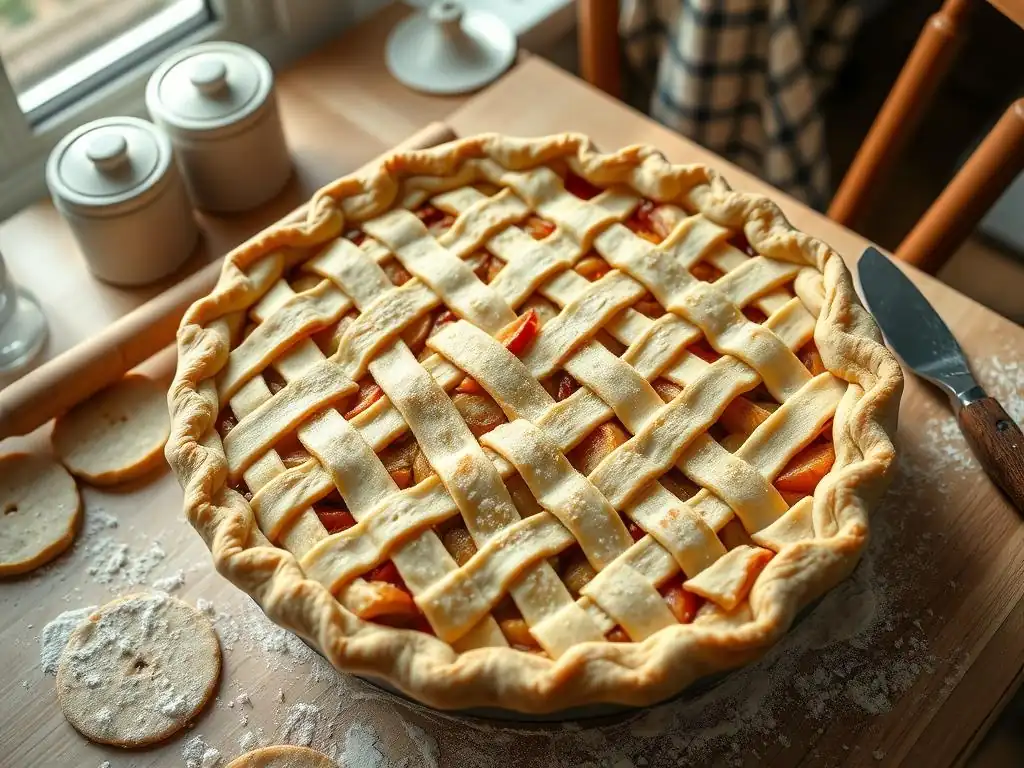
Step 1: Rolling Out Your Pie Dough for the Bottom Crust
Once your pie dough is made and chilled, it's time to roll out the bottom crust. On a lightly floured surface, take half of your dough and roll it from the center outwards, rotating the dough frequently to prevent sticking and ensure an even thickness. Aim for a circle about 12 inches in diameter, which is typically sufficient to fit a standard 9-inch pie plate with some overhang.
The dough should be about 1/8 inch thick. Carefully transfer the rolled dough to your pie plate. The easiest way is to gently roll the dough around your rolling pin and then unroll it over the dish. Press the dough gently into the bottom and up the sides of the plate, ensuring there are no air pockets. Trim any excess dough, leaving about a 1-inch overhang around the edge, which you'll use later to connect the lattice top.
Step 2: Preparing the Apple Pie Filling
While your bottom crust is resting in the pie plate, prepare your delicious filling. For a classic apple pie to go with your easy lattice pie crust tutorial, you'll need about 6-8 medium apples, peeled, cored, and sliced about 1/4 inch thick. Firm, slightly tart apples like Granny Smith, Honeycrisp, or a mix work best as they hold their shape during baking.
In a large bowl, gently toss the apple slices with about 1/2 to 3/4 cup of granulated sugar (adjusting based on the sweetness of your apples), 2 tablespoons of all-purpose flour or cornstarch (to help thicken the juices), 1 teaspoon of ground cinnamon, 1/4 teaspoon of ground nutmeg, a pinch of salt, and a tablespoon of lemon juice (optional, but brightens the flavor). Mix everything until the apple slices are evenly coated. Pour this filling into your prepared bottom pie crust, mounding it slightly in the center.
Step 3: Rolling Out the Dough for the Lattice Strips
Now it's time to prepare the dough for your lattice top. Take the second half of your chilled pie dough. Again, on a lightly floured surface, roll out this portion of dough into a circle or rectangle, aiming for roughly the same diameter as your bottom crust (about 12 inches) and the same thickness (about 1/8 inch). Try to keep the shape relatively uniform, as this will make cutting strips easier.
Ensure the dough is cold and firm; if it has softened too much, pop it back into the refrigerator for 10-15 minutes. Working with cold dough is key to getting clean cuts and preventing the strips from stretching or tearing when you handle them. This step is crucial for a neat and easy lattice pie crust result.
Step 4: Cutting Perfect Lattice Strips for Your Pie
Once your dough for the top crust is rolled out, it's time to cut the strips for your lattice. Using a sharp knife or pastry wheel, cut the dough into even strips. The width of the strips is a matter of preference, but typical widths range from 1/2 inch to 1 inch. For a standard 9-inch pie, you'll likely need about 8-12 strips of dough.
Cut the strips neatly and carefully. For a traditional lattice, you'll want strips of roughly equal length and width. If you're aiming for a specific pattern, you might cut some strips wider than others or cut them diagonally. Gently transfer the cut strips onto a baking sheet lined with parchment paper and chill them in the refrigerator for another 10-15 minutes. Cold strips are much easier to handle and weave without stretching or breaking.
Step 5: Weaving the Lattice Pie Crust: A Simple Method
Weaving is the signature step of this easy lattice pie crust tutorial. With your prepared pie filling in the bottom crust and your chilled strips ready, you're set to begin. There are a couple of common methods, but the core principle involves layering strips in an over-under pattern.
Option 1: The Traditional Over-Under Weave
Start by laying 4-6 strips parallel to each other across the top of your pie, spaced about 1/2 to 1 inch apart. Don't worry about the ends yet; let them hang over the edge. Now, take the center strip that is running horizontally and fold it back onto itself, halfway. Take a new strip and lay it perpendicularly over the unfolded horizontal strips and against the folded horizontal strip. Unfold the horizontal strip back over the new perpendicular strip.
Next, take the adjacent horizontal strip and fold it back. Lay another perpendicular strip alongside the first one, and unfold the horizontal strip back over it. Continue this pattern, alternating which horizontal strips you fold back, as you lay down perpendicular strips. Remember: over, then lift every other strip, lay the cross strip under, then lay the lifted strips over. Repeat until your lattice is complete.
Option 2: The Diagonal Lattice Design
For a slightly different look, you can create a diagonal lattice. Start by laying 4-6 strips diagonally across the pie in one direction. Then, starting from the center, lift every other diagonal strip and lay a new strip perpendicularly (at a 90-degree angle) to the first set. Lower the lifted strips.
Now, lift the other set of diagonal strips (the ones you didn't lift the first time) and lay another perpendicular strip. Continue this over-under process, working outwards from the center, until the pie top is covered in a diagonal grid pattern. This method also relies on the principle of lifting alternate strips to weave new ones underneath, resulting in a beautiful geometric design.
Step 6: Securing and Crimping the Lattice Pie Crust Edge
Once your lattice weave is complete, it's time to secure the edges and make them look neat. Gather the overhanging strips from the lattice top and the excess dough from the bottom crust edge. Trim any excess dough, leaving about a 1/2 inch to 1 inch border of both layers combined.
Fold the top lattice strips underneath the bottom crust overhang. Then, press the folded edge firmly against the rim of the pie plate to seal the two layers together. You can then crimp the edges using your fingers or a fork to create a decorative finish. Ensure the seal is tight to prevent the filling from bubbling out during baking. For an extra touch, you can brush the lattice strips with an egg wash (one egg beaten with a tablespoon of water) and sprinkle with sugar before baking for a golden, slightly sweet crust.
Baking Your Beautiful Lattice Topped Pie
Oven Temperature and Baking Time Recommendations
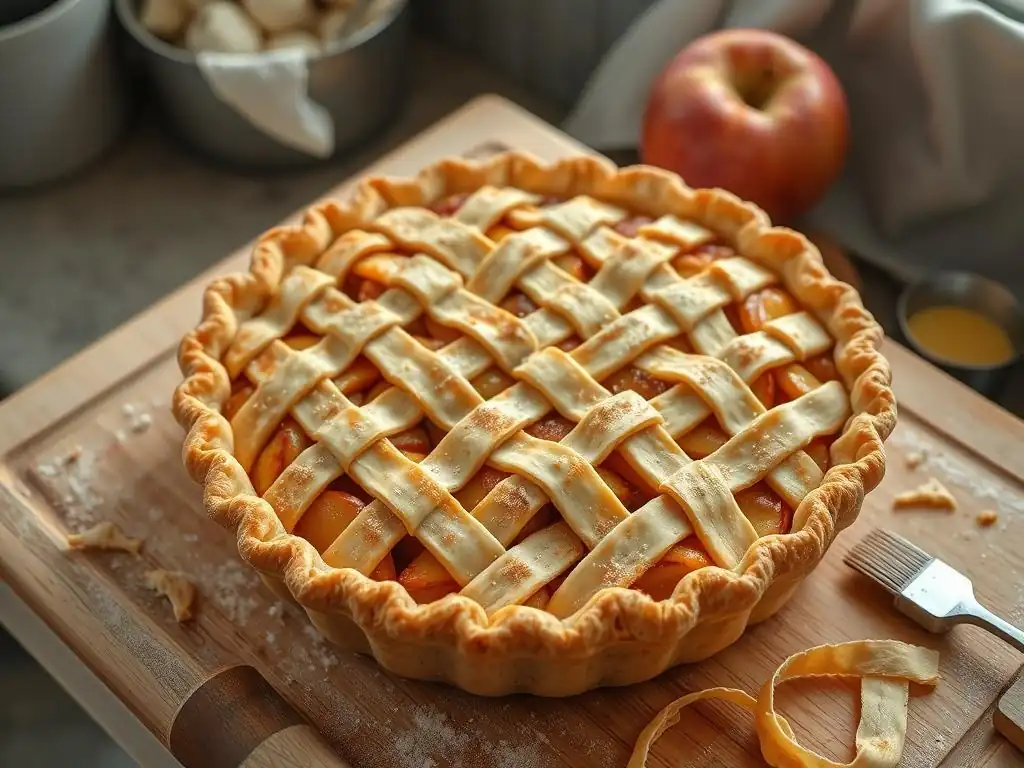
Baking your lattice topped pie correctly is just as important as the weaving itself for achieving that perfect golden-brown finish and bubbly filling. A common recommendation for baking fruit pies is to start at a higher temperature and then reduce it. For example, preheat your oven to 400°F (about 200°C). This initial burst of heat helps set the bottom crust and encourages flaking.
After about 15-20 minutes at the higher temperature, reduce the oven temperature to 375°F (about 190°C) for the remainder of the baking time. The total baking time for a standard apple pie with a lattice top is typically between 45 and 60 minutes, though this can vary significantly depending on your oven and the type of fruit filling. You'll know it's done when the crust is deeply golden brown and the filling is bubbling vigorously through the lattice openings.
Achieving a Golden-Brown Lattice Crust
The hallmark of a perfectly baked lattice pie is a beautiful, even golden-brown crust. The egg wash mentioned in Step 6 (one egg beaten with a tablespoon of water or milk) is your best friend here. Brushing it over the lattice strips before baking helps them achieve a lovely sheen and rich color. Sprinkling sugar over the wash adds a sweet crunch and enhances browning.
Monitor your pie as it bakes, especially during the last 20 minutes. If you notice the lattice strips or the edge of the crust browning too quickly while the rest of the pie isn't ready, it's time to take action. This is a common challenge, particularly with the delicate lattice strips.
Preventing Over-Browning: Pie Shield Tips
Preventing the edges and the lattice strips from burning before the pie is fully baked is a common issue. The best solution is to use a pie shield. These can be silicone rings specifically designed for pie crusts, or you can easily make your own using aluminum foil.
Around 20-30 minutes into baking, or when the edges of your crust begin to look golden, carefully remove the pie from the oven (using oven mitts!). Gently place the pie shield or a ring of aluminum foil around the outer edge of the crust, covering just the crimped border and the first row of lattice strips. If the center lattice strips are browning too fast, you can loosely tent the entire pie with foil.
Return the pie to the oven and continue baking until the filling is bubbly and the exposed lattice is golden brown. Removing the shield for the last 5-10 minutes can help ensure the outer edge is also perfectly browned.
Troubleshooting Your Lattice Pie Crust
Common Problems and Solutions: Soggy Crusts, Uneven Baking
Even with an easy lattice pie crust tutorial, you might encounter some common issues. A soggy bottom crust is perhaps the most frustrating. This often happens when the pie isn't baked long enough or hot enough, or if the filling is too wet. To combat this, ensure your oven is fully preheated, bake on the bottom rack (sometimes on a preheated baking sheet), and ensure the filling has a thickener like flour or cornstarch. Baking at a slightly higher temperature initially also helps.
Uneven baking or browning is another frequent problem. This can be due to hot spots in your oven or inconsistent dough thickness. Rotating your pie halfway through the baking time can help promote even cooking. As discussed, using a pie shield is essential for preventing the edges and lattice from burning before the center is done. If the lattice itself is browning unevenly, try a loose foil tent over the whole pie.
Tips for a Picture-Perfect Lattice Every Time
Achieving a consistently picture-perfect lattice comes with practice and a few key tips. Always start with cold dough. Cold butter creates steam pockets, resulting in flakiness, and cold dough is easier to handle and cut cleanly. Chill your cut strips before weaving; this prevents stretching.
When weaving, don't rush. Work gently and methodically. Ensure your strips are of relatively uniform width for a classic look. If a strip breaks, you can often 'glue' it back together by moistening the ends slightly with water and pressing them together, or simply overlap a new piece neatly. Finally, don't skip the egg wash and sugar; it adds both visual appeal and delicious flavor to your finished, easy lattice pie crust.
Beyond the Basics: Lattice Pie Variations
Exploring Different Weave Patterns
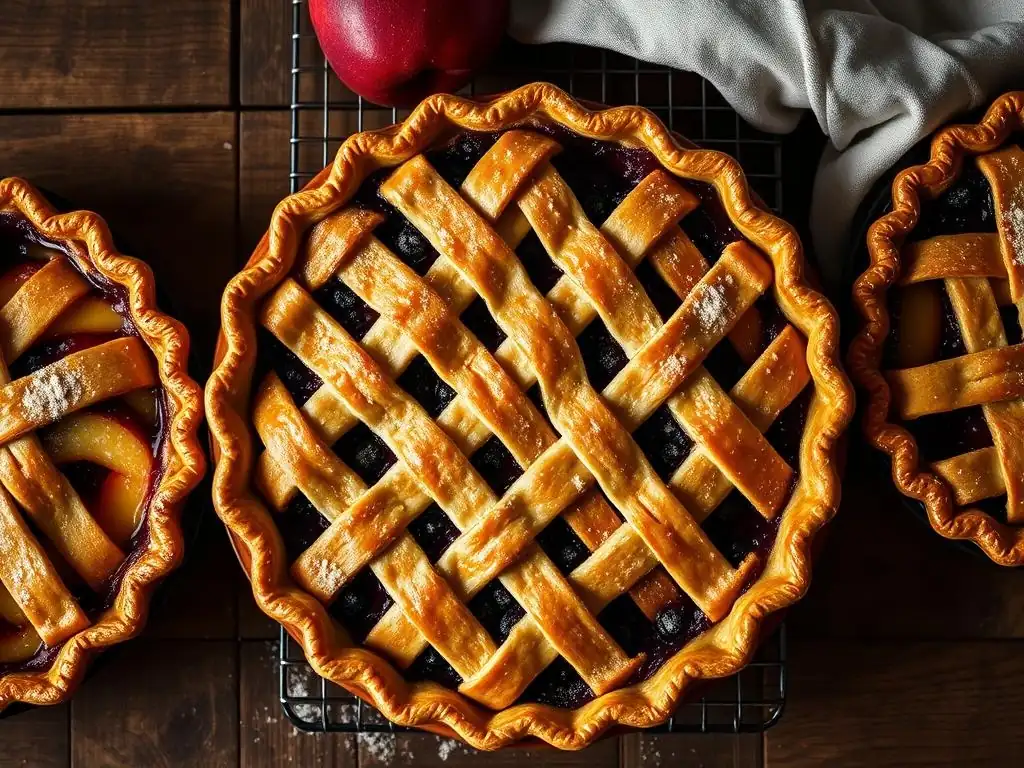
Once you've mastered the basic over-under weave from this easy lattice pie crust tutorial, you can explore countless variations to make your pies even more unique. Instead of cutting uniform strips, try cutting some wider and some narrower for a varied look. You can also twist the strips before laying them down for a rope-like effect.
More complex weaves involve laying down strips closer together and lifting multiple strips at once in different patterns. For instance, a herringbone pattern requires careful spacing and lifting sequences. While these require a bit more patience, the principle remains the same: lifting alternate strips to weave others underneath. Experimentation is key to finding patterns you enjoy creating!
Adding Flavor to Your Lattice Strips: Cinnamon Sugar
Enhancing the flavor of your lattice strips is a simple way to add an extra layer of deliciousness to your pie. A popular choice is a cinnamon sugar topping. After brushing your lattice with egg wash, generously sprinkle a mixture of granulated sugar and ground cinnamon (a ratio of about 3 parts sugar to 1 part cinnamon works well) over the strips before baking.
This adds a sweet, spiced crunch to the crust that complements most fruit fillings beautifully, especially apple or pear. You could also experiment with other spices like nutmeg, cardamom, or even a pinch of ginger mixed with the sugar. For chocolate lovers, a light sprinkle of cocoa powder mixed with sugar could work with certain fillings. These small additions can significantly elevate the flavor profile of your easy lattice pie crust.
Storing Your Lattice Pie for Optimal Freshness
Proper Storage Techniques for Leftover Pie
Properly storing your beautiful lattice topped pie ensures that leftovers remain delicious and safe to eat. Fruit pies baked with a lattice top can typically be stored at room temperature for up to 24 hours, loosely covered with plastic wrap or foil. This is because the high sugar content and acidity in most fruit fillings act as natural preservatives.
However, for longer storage or in warmer climates, it's best to refrigerate the pie. Cover the cooled pie tightly with plastic wrap or place it in an airtight container. Refrigerated fruit pie will usually keep for 3-5 days. For best texture when serving refrigerated pie, you can gently warm individual slices in a microwave or oven.
Conclusion: Enjoy Your Effortlessly Elegant Lattice Pie
Celebrate Your Baking Success with BakeWithEase
Congratulations! You've successfully navigated this easy lattice pie crust tutorial and created a stunning, delicious pie with a beautiful lattice top. This technique, while seemingly complex, is entirely achievable with a little practice and patience, as you've just proven. The combination of a flaky crust, a flavorful filling, and that elegant woven top makes for a truly satisfying baking achievement.
At BakeWithEase, we're thrilled to have been part of your baking journey. Mastering the lattice is a significant step for any home baker, adding a touch of artistry to your repertoire. We encourage you to share your creations and continue exploring new techniques. Keep baking, keep experimenting, and most importantly, keep enjoying the process and the delicious results!
Frequently Asked Questions
What is a lattice pie crust and why is it used?
A lattice pie crust is a decorative pie crust made by weaving strips of dough over the filling. It's used for both visual appeal and to allow steam to escape during baking, preventing a soggy crust.
Is making a lattice pie crust difficult?
While it may look intricate, making a lattice pie crust is surprisingly easy with the right technique. BakeWithEase.com provides a step-by-step tutorial to guide you through the process.
What type of pie filling works best with a lattice crust?
Fruit pies, such as apple, berry, or cherry, are ideal for lattice crusts. The open top allows the filling to bubble and caramelize beautifully, enhancing the flavor.
What are some tips for preventing the lattice crust from sticking or burning?
Ensure your dough is well-chilled before weaving. Brushing the crust with an egg wash or milk before baking promotes browning. You can also use pie shields to protect the edges from burning.
Can I make a lattice pie crust ahead of time?
Yes, you can prepare the lattice crust ahead of time. After weaving, chill the pie completely before baking. You can also freeze the unbaked pie for longer storage.
Final Reflection: Weaving a Legacy of Deliciousness, One Lattice Square at a Time
Mastering the lattice top isn't just about creating a beautiful pie; it's about embracing a timeless tradition and adding your own personal touch to a classic. This seemingly simple technique unlocks a world of creative possibilities, transforming an ordinary pie into a showstopper that delights both the eyes and the palate. The ease with which you can achieve this elegant design makes it accessible to bakers of all skill levels, proving that impressive results don't require years of experience.
The lattice top, in its simplicity, represents a connection to generations of bakers who have perfected this craft. It's a visual testament to the enduring power of tradition, a symbol of care and attention to detail that elevates the humble pie to an art form. Baking is at once child's play and adult joy. And love, of course.
– Alma Flor Ada. This quote perfectly encapsulates the joy and satisfaction found in mastering techniques like the lattice top, transforming a simple act into an expression of love and care.
Now, I invite you to step away from the screen, gather your ingredients, and try your hand at creating your own lattice masterpiece. Don't be afraid to experiment, to personalize the design, to let your creativity flow. Remember the joy of the process, the satisfaction of creating something beautiful and delicious, and the pride you'll feel sharing your creation with loved ones. The lattice top is more than just a technique; it's a gateway to unlocking your inner baker and sharing the sweet rewards of your labor.
Unleash Your Inner Pie Master!
Thanks for taking the time to learn about the lattice top technique! You've just unlocked a new level of pie-making artistry. Ready to put your skills to the test?
- Bake your masterpiece! Try making a lattice-topped pie today – the recipe you just learned is a perfect starting point. Don't be afraid to experiment with different fillings!
- Share your creation! Post a picture of your beautiful lattice pie on social media and tag us – we'd love to see your results!
- Explore more pie-making tips on our blog for even more delicious inspiration.
What exciting flavor combination will you try for your next lattice-topped pie?