
Mastering Baked Desserts: Techniques Every Baker Needs

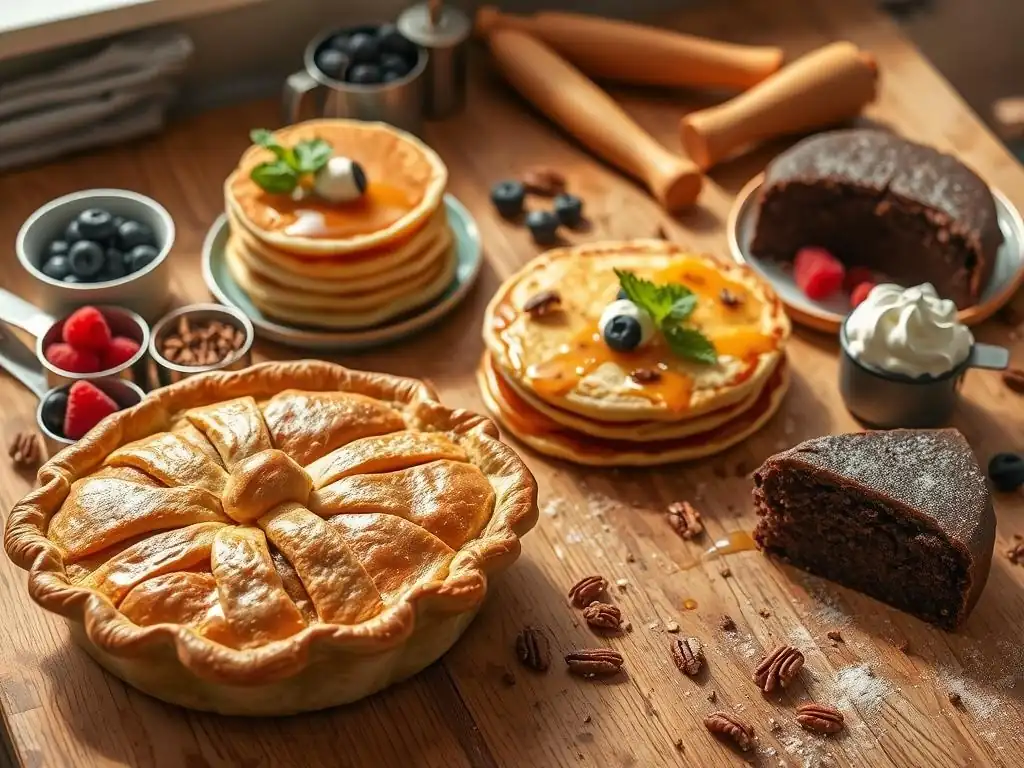
Welcome to BakeWithEase, your trusted guide to unlocking the sweet secrets of the baking world! Are you ready to elevate your dessert game and discover easy baked dessert techniques that will impress your family and friends? Dive in to explore our collection of pastry and dessert recipes, and learn how to achieve bakery-worthy results from the comfort of your own kitchen. What essential skills are you missing that could transform your baking? Let's find out!
Why Mastering Baked Desserts is Essential for Every Baker
Mastering the fundamental techniques behind baked desserts is truly the cornerstone of successful baking, transforming potential frustration into consistent delight. Think of it as building a strong foundation before constructing a beautiful house.
Without a solid understanding of how ingredients interact and how heat behaves, even the simplest cookie recipe can yield unexpected results – perhaps flat and greasy instead of perfectly chewy, or a cake that sinks dramatically in the center. Studies and countless home baking experiences show that a significant portion of baking mishaps, estimated by some to be around 30-40%, stem from not fully grasping core techniques like proper mixing, accurate measurement, or oven management.
By focusing on these easy baked dessert techniques, you gain the confidence to tackle any recipe, adapt it, and consistently produce delicious outcomes. It's not about being a professional chef; it's about understanding the why behind each step, making your baking journey more predictable and infinitely more rewarding.
Furthermore, developing proficiency in core techniques empowers you to troubleshoot when things don't go exactly as planned. Did your meringue weep? Was your pie crust tough? Knowing the underlying principles of aeration, gluten development, or moisture control allows you to identify the likely culprit and correct it next time.
This knowledge also opens the door to creativity. Once you understand how different techniques impact texture and structure, you can confidently experiment with variations, create your own recipes, and personalize classic desserts. It’s the difference between following a recipe robotically and truly understanding the craft, allowing you to bake with ease and elevate your desserts from good to truly exceptional, making every baked treat a testament to your growing skill.
A Guide to Flawless Baked Treats
Achieving flawless baked treats consistently is the goal of every home baker, and this guide is designed to illuminate the path using simple, effective techniques. We believe baking should be enjoyable and accessible, not intimidating. Often, the difference between a mediocre dessert and a truly spectacular one lies not in secret ingredients, but in the execution of fundamental steps.
This article breaks down these essential techniques, offering clear explanations and practical tips that you can immediately apply in your kitchen. We'll cover everything from the critical first steps like understanding your oven and measuring correctly, to specific methods for achieving desired textures in popular desserts, ensuring your easy baked dessert techniques lead to perfect results every time.
Throughout this guide, we will delve into the science behind common baking processes in an easy-to-understand way. For instance, we'll explore why the temperature of your butter matters when creaming it with sugar, or how gently folding dry ingredients prevents tough textures. We aim to demystify common challenges, providing actionable advice based on principles that apply across a wide range of recipes.
By focusing on these core skills, you'll build a reliable toolkit that reduces guesswork and increases your success rate. Whether you're aiming for perfectly chewy cookies, a tender cake, or a flaky pie crust, mastering these techniques will empower you to create delicious, visually appealing desserts with confidence and ease.
- What are some easy baked dessert techniques a beginner baker can start with?
- How can I improve the texture of my baked desserts using easy baked dessert techniques?
- What are some common mistakes made when baking, and how can easy baked dessert techniques help avoid them?
- How can I adapt recipes to make them healthier while still utilizing easy baked dessert techniques?
- Where can I find reliable resources for learning more about easy baked dessert techniques?
Essential Baking Techniques for Perfect Desserts
Understanding Oven Temperatures and Their Impact on Baking
The oven is arguably the most critical piece of equipment in baking, and understanding its temperature dynamics is paramount for successful results. Ovens are notoriously inconsistent; the temperature displayed on the dial or digital screen can often be significantly different from the actual temperature inside, sometimes by as much as 50°F (about 28°C). These variations, along with uneven heating or "hot spots," can drastically impact your baked goods. For example, a cake baked in an oven that's too hot might develop a dark, crusty exterior before the inside is fully cooked, leading to a dry texture and potentially a sunken center. Conversely, an oven that's too cool will cause items like cookies to spread excessively or cakes to rise improperly and have a pale crust. Using an inexpensive oven thermometer is the most straightforward way to verify your oven's true temperature and identify any discrepancies, allowing you to adjust accordingly.
Beyond just the set temperature, understanding how heat transfers within the oven is also vital. Conventional ovens use radiant heat, while convection ovens circulate hot air. Convection heat is typically more even and can cook items faster, often requiring a temperature reduction (usually by about 25°F or 15°C) and reduced baking time compared to conventional baking.
For instance, baking cookies in a convection oven might take 8-10 minutes at 325°F (160°C), whereas a conventional oven might require 10-12 minutes at 350°F (175°C). Knowing whether your recipe is calibrated for conventional or convection heat, and how to adapt, is a key easy baked dessert technique that prevents burning or underbaking and helps you achieve perfect browning and texture.
Measuring Ingredients Accurately: Weight vs. Volume
Accuracy in measuring ingredients is fundamental to reliable baking outcomes, and the method you use can make a significant difference. While volume measurements (using cups and spoons) are common in many home recipes, they are inherently less precise than measuring by weight (using a kitchen scale). This is particularly true for dry ingredients like flour, cocoa powder, and powdered sugar, which can settle and compact.
For example, scooping flour directly from the bag and leveling it can pack in considerably more flour than lightly spooning it into a cup and leveling. It's widely cited that measuring flour by volume can result in up to 20% more flour than measuring the same amount by weight, which translates directly to drier, tougher baked goods. Using a scale ensures you have the exact amount specified in the recipe, regardless of how packed or fluffy the ingredient is.
For liquids, volume measurements using clear liquid measuring cups (placed on a flat surface for an accurate reading) are generally reliable. However, even for liquids, weighing can sometimes offer greater precision, especially for large quantities or viscous liquids like honey or syrup.
For smaller amounts of dry ingredients like baking powder or salt, measuring spoons are usually sufficient, but ensure you level them correctly. The key takeaway for easy baked dessert techniques is that for critical ingredients like flour, sugar, and fats, weighing provides the most consistent results, eliminating a major variable in baking success and ensuring your proportions are correct for the desired texture and rise.
The Importance of Creaming, Folding, and Whisking Techniques
Mixing techniques are not just about combining ingredients; they are about incorporating air, developing structure, and ensuring even distribution, each playing a distinct role in the final texture of your baked goods. Creaming, typically done with butter and sugar, involves beating them together until light and fluffy. This process incorporates tiny air pockets into the fat, which expand during baking, contributing significantly to the cake's or cookie's rise and tender texture.
Insufficient creaming can lead to dense, heavy results, while over-creaming can sometimes cause issues like tunneling in cakes. A good creaming process might take 3-5 minutes with an electric mixer, resulting in a visibly lighter color and fluffy consistency.
Folding is a gentle technique used to combine delicate ingredients, such as whipped egg whites or whipped cream, into a heavier mixture like batter or custard, without deflating the air that has been incorporated. It involves using a spatula to cut down through the center of the mixture, scoop up from the bottom, and fold it over the top, rotating the bowl as you go.
This preserves the airy structure essential for light and fluffy outcomes like soufflés, mousses, or angel food cake. In contrast, whisking is primarily used to incorporate air into liquids (like egg whites or cream) or to combine dry ingredients thoroughly.
Vigorously whisking egg whites can increase their volume by 6-8 times as air is trapped within the protein matrix, forming stable peaks. Each technique serves a specific purpose, and mastering when and how to apply creaming, folding, and whisking is a fundamental easy baked dessert technique that dictates the texture and lightness of your final product.
Mastering Classic Baked Dessert Recipes
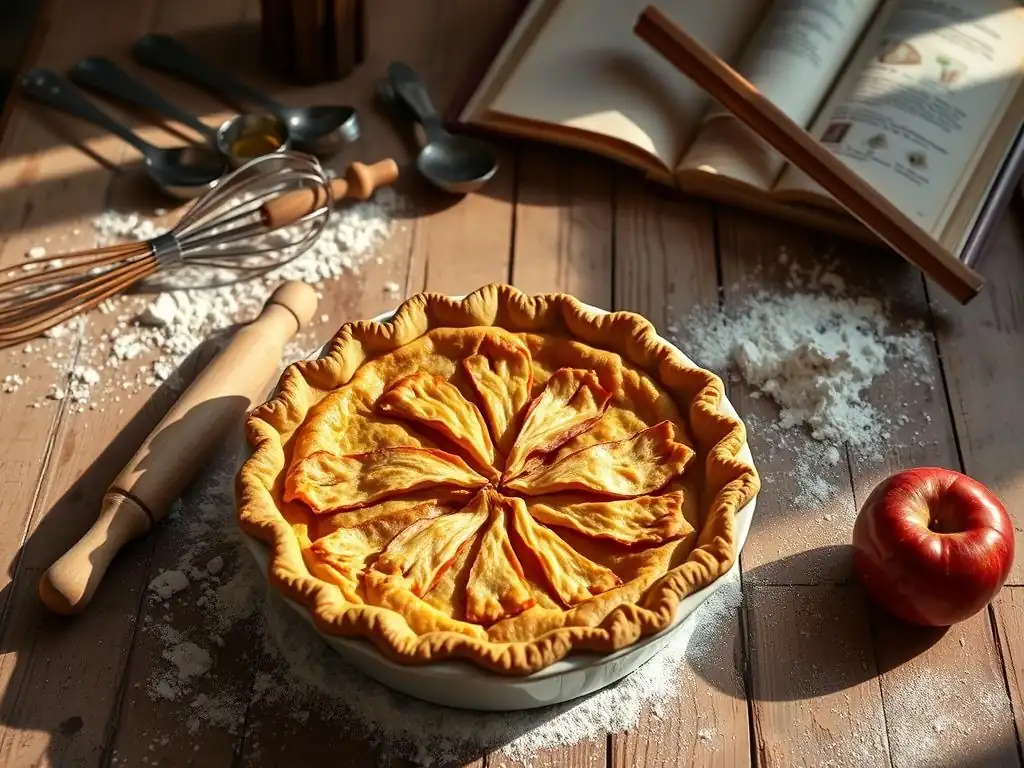
Classic baked desserts like chocolate chip cookies, apple pies, and brownies are staples for a reason – they are beloved comfort foods. Mastering these recipes provides a solid foundation in easy baked dessert techniques that are transferable to countless other sweet treats. While seemingly simple, each of these classics presents unique challenges and opportunities to perfect key baking skills. Understanding the nuances of ingredients and techniques within these familiar contexts makes learning more intuitive and rewarding.
For instance, perfecting a chocolate chip cookie teaches you about the role of fats and sugars in texture and spread. Crafting an apple pie hones your skills in pastry making and fruit filling preparation. Baking brownies highlights the delicate balance between structure and fudginess. By focusing on these popular examples, we can illustrate how fundamental techniques apply in real-world scenarios, helping you build confidence and achieve consistently delicious results in your home kitchen.
Achieving the "perfect" chocolate chip cookie is a matter of personal preference, but mastering the techniques allows you to reliably produce your desired texture, whether that's chewy, crispy, or somewhere in between. The ratio of ingredients, particularly the types of sugar and fat used, plays a critical role. Using more brown sugar relative to white sugar tends to result in a chewier cookie due to brown sugar's moisture content and molasses.
Melted butter often yields a chewier, denser cookie with more spread, while using softened butter (creamed with sugar) results in a puffier cookie with less spread, incorporating more air during the creaming process. Chilling the dough for at least 24 hours is a widely recommended easy baked dessert technique for cookies; this allows the flavors to meld and the fats to firm up, which reduces spread during baking and concentrates flavor, often leading to a richer, chewier cookie.
Furthermore, baking time and temperature are crucial. Baking at a higher temperature (like 375°F or 190°C) for a shorter time can result in crispier edges and a chewier center, while a lower temperature (like 350°F or 175°C) for a longer time tends to produce a more evenly baked, crispier cookie throughout. Don't overmix the dough once the flour is added, as this can develop gluten and lead to tougher cookies.
For uniform size and baking, use a cookie scoop. Pay close attention to visual cues during baking; cookies are often done when the edges are set and lightly golden, but the centers still look slightly soft. They will continue to set as they cool on the baking sheet for a few minutes before transferring them to a wire rack.
Achieving a Chewy or Crispy Texture
The secret to controlling cookie texture lies primarily in ingredient proportions, mixing method, and baking time/temperature. For a distinctly chewy cookie, prioritize using more brown sugar than white sugar, use melted or browned butter, and consider adding an extra egg yolk for richness and moisture. Baking at a slightly lower temperature (around 350°F/175°C) until the edges are set but the center is still soft, then letting them cool on the warm baking sheet, encourages chewiness. Techniques like chilling the dough also contribute significantly to a chewier outcome by limiting spread and concentrating moisture.
To achieve a crispy cookie, increase the proportion of white sugar relative to brown sugar and use softened butter creamed until very light and fluffy to incorporate more air. Some recipes call for less moisture (fewer eggs or no extra yolk). Baking at a slightly higher temperature (around 375°F/190°C) for a longer duration, until the cookies are golden brown throughout, promotes crispness. Using a convection setting can also enhance crisping. The key is to bake them long enough for moisture to evaporate, leading to that satisfying snap when cooled.
Variations: Double Chocolate, Peanut Butter, Oatmeal Raisin
Once you have a solid understanding of the basic chocolate chip cookie formula and how to manipulate texture, you can easily adapt it to create delicious variations. For Double Chocolate cookies, replace a portion of the all-purpose flour with cocoa powder (typically around 1/3 to 1/2 cup per standard batch) and add both chocolate chips and chunks. Ensure the cocoa powder is unsweetened natural or Dutch-process, depending on the recipe's leavening (natural cocoa works best with baking soda, Dutch-process with baking powder, though many recipes use a mix).
Peanut Butter cookies often involve reducing the butter slightly and incorporating peanut butter into the creaming step. The fat and protein content of peanut butter affects texture, often resulting in a slightly denser cookie. Classic peanut butter cookies are known for their simple ingredients and the signature fork crosshatch pattern pressed on top before baking. For Oatmeal Raisin cookies, oats absorb moisture and provide structure and chewiness.
Use old-fashioned rolled oats for better texture than quick oats. Raisins add moisture and sweetness; soaking them briefly in hot water or rum before adding can plump them up and prevent them from drying out during baking. These variations demonstrate how small ingredient swaps, while keeping core easy baked dessert techniques consistent, can yield vastly different but equally delightful results.
Crafting Delicious Apple Pies
Crafting a delicious apple pie involves mastering two main components: the crust and the filling. A truly great apple pie boasts a flaky, tender crust and a flavorful, perfectly cooked apple filling that isn't too watery or too dry. The crust requires careful handling of fat and flour to create those desirable layers, while the filling depends on choosing the right apples and balancing sweetness, spice, and thickening agents. This classic offers a fantastic opportunity to practice easy baked dessert techniques related to pastry making and fruit preparation.
Success with apple pie also depends on proper assembly and baking. Ensuring the bottom crust doesn't become soggy and the top crust browns beautifully requires attention to detail. Techniques like blind baking the bottom crust partially can help prevent sogginess, especially with a very juicy filling. Properly venting the top crust allows steam to escape, preventing bubbles and ensuring even baking. The aroma of a bubbling apple pie baking in the oven is one of baking's greatest rewards, a direct result of applying these fundamental techniques effectively.
Choosing the Right Apples for Your Pie
Selecting the appropriate apples is crucial for a successful apple pie filling. Different apple varieties have varying levels of sweetness, tartness, moisture, and firmness. Using a mix of apples often yields the best flavor complexity and texture. For instance, tart apples like Granny Smith hold their shape well when baked and provide a pleasant tang that balances sweetness. Sweeter, softer apples like Fuji or Gala can add sweetness but may break down more during baking.
Ideal pie apples are typically those labeled as "baking apples" because they retain their shape reasonably well and offer good flavor. Popular choices include Granny Smith, Honeycrisp, Braeburn, Fuji, Gala, and Northern Spy. Using only one type of apple, especially a very soft variety, can result in a mushy filling. A common and effective strategy is to use a blend, perhaps two-thirds firm, tart apples (like Granny Smith or Braeburn) and one-third slightly softer, sweeter apples (like Honeycriss or Gala), ensuring a filling that is both flavorful and holds its structure.
Crust Variations: All-Butter vs. Shortening
The type of fat used in pie crust significantly impacts its texture and flavor. The two most common fats are all-butter and shortening, each offering distinct advantages. An all-butter crust is celebrated for its rich, delicious flavor and beautiful golden color when baked.
Butter's relatively low melting point contributes to exceptional flakiness; as the butter melts in the oven, it creates steam pockets that separate the layers of dough. However, butter can be trickier to work with, as it melts quickly and requires careful handling to keep it cold. Overworking a butter dough can easily lead to a tough crust.
Shortening, on the other hand, is made from hydrogenated vegetable oil and has a higher melting point than butter. This higher melting point makes it easier to work with, less likely to melt during handling, and it creates even flakier crusts because it remains solid longer in the oven, producing larger steam pockets. Shortening also results in a very tender crust.
However, shortening lacks the rich flavor of butter. Many bakers prefer a combination crust, using both butter for flavor and shortening for tenderness and ease of handling, often in a 50/50 ratio. Mastering the technique of cutting cold fat into flour, whether butter, shortening, or a combination, is a key easy baked dessert technique for achieving a tender, flaky pie crust.
Baking Brownies with Confidence
Baking brownies with confidence means understanding how to control their texture, aiming for that perfect balance between a crackly top, fudgy interior, and chewy edge. Unlike cakes, brownies rely less on leavening and more on fat and sugar ratios for their structure and moisture. Overmixing after adding the flour is a common mistake that develops gluten, leading to a tougher, more cake-like texture instead of the desired fudgy density.
The quality of your chocolate or cocoa powder also significantly impacts the flavor. Using high-quality unsweetened cocoa powder or melted bittersweet/dark chocolate provides a deeper, richer chocolate flavor compared to using only milk chocolate or lower-quality cocoa.
The key to fudgy brownies often lies in a higher fat-to-flour ratio and a relatively short baking time. Many successful fudgy brownie recipes use melted butter or a combination of melted butter and oil. Baking temperature is also important; often, a moderate temperature (around 325-350°F or 160-175°C) is used. Perhaps the most critical easy baked dessert technique for brownies is knowing when they are done, as overbaking is the quickest way to turn fudgy into dry.
Achieving the Perfect Fudgy Texture
The perfect fudgy brownie texture is characterized by a dense, moist, almost truffle-like interior. This is primarily achieved through ingredient ratios: a higher proportion of fat (butter, oil) and sugar compared to flour, and often a higher egg-to-flour ratio as well. Recipes specifically designed for fudgy brownies will typically have less flour and baking powder than cakey versions. Using melted butter or a mix of melted butter and oil contributes to density and moisture.
Baking time is equally critical. Fudgy brownies are often slightly underbaked when they come out of the oven. A toothpick inserted into the center should come out with moist crumbs attached, not completely clean. If it comes out with wet batter, it's not done. If it comes out completely clean, it's likely overbaked. The residual heat in the pan will continue to cook the brownies as they cool, finishing the baking process and setting that fudgy texture. Cooling brownies completely in the pan before cutting also helps them firm up and achieve that desirable density.
Avoiding Over-Baking Brownies
Over-baking is the most common culprit behind dry, cakey brownies. Because brownies are relatively thin compared to cakes, they bake quickly, and the window between perfectly fudgy and overdone can be narrow, sometimes just a few minutes. Relying solely on the baking time listed in a recipe can be misleading due to oven variations. Instead, learn to recognize the visual cues of a nearly-done brownie.
Look for the edges to appear set and slightly pulled away from the sides of the pan. The center should look mostly set but still appear slightly soft or moist. As mentioned, the toothpick test is your best friend: insert it into the center (about an inch or two from the edge, avoiding any chocolate chips). If it comes out with moist crumbs, they are done.
If it comes out clean, they are likely overbaked. If it comes out with wet batter, give them a few more minutes. When in doubt, err on the side of slightly underbaking, as they will continue to cook and set as they cool. Removing them from the oven at the right moment is a key easy baked dessert technique for achieving that sought-after fudgy consistency.
Advanced Baked Dessert Techniques for Experienced Bakers
For those who have mastered the basics and are looking to expand their repertoire, advanced baked dessert techniques offer exciting new challenges and delicious rewards. These techniques often require more precision, patience, and a deeper understanding of ingredient science, but they unlock the ability to create sophisticated and impressive desserts. Moving beyond simple cookies and cakes, advanced methods introduce complexity in structure, flavor, and presentation.
Examples include the delicate art of macaron making, which relies heavily on meringue stability and precise baking conditions, or working with cooked sugars like caramel, which requires careful temperature control. Incorporating nuanced flavors using citrus zest or oils also elevates desserts to a new level. While these techniques may seem daunting at first, approaching them with the same methodical practice applied to basic skills makes them achievable and incredibly satisfying to master.
Mastering Macarons
Mastering macarons is often considered a benchmark in advanced baking due to their temperamental nature. These delicate almond meringue cookies require precision in measurement, careful technique in mixing, and specific baking conditions to achieve the characteristic smooth shell, ruffled "feet," and chewy interior. The process involves making a meringue (either French, Italian, or Swiss method), folding it into a mixture of finely ground almond flour and powdered sugar (known as the tant pour tant), piping the batter, and allowing the shells to dry before baking.
The most critical step is arguably the macaronage, the process of folding the meringue into the almond mixture. Undermixing results in lumpy, peaked shells without feet, while overmixing creates a runny batter that spreads too much and bakes into flat, fragile disks. The consistency should be like slow-moving lava or ribboning batter. After piping, the shells must sit out ("rest") until they develop a skin – you should be able to gently touch the surface without batter sticking to your finger.
This skin allows the shell to set while the bottom expands, creating the signature feet. Baking temperature and time are also crucial; too hot and they crack, too cool and they don't develop feet or set properly. It's a technique that often requires practice and patience to perfect, but the result is a truly elegant cookie.
Creating Stable Macaron Shells
Creating stable macaron shells starts with a properly made meringue. The Italian meringue method, where hot sugar syrup is poured into whipping egg whites, is often favored for its stability, producing more consistent results for beginners.
However, perfectly stable shells can be achieved with the French meringue (whipping sugar into raw egg whites) or Swiss meringue (warming egg whites and sugar over a water bath before whipping), provided the egg whites are whipped to the correct stiff peak stage. Using aged egg whites (separated a day or two in advance and kept in the fridge, then brought to room temperature) is believed by many bakers to improve stability.
Beyond the meringue, the macaronage is key. The folding process must be just right – folding until the batter flows like a ribbon when lifted with a spatula, but not so much that it becomes liquid. This ensures the air incorporated by the meringue isn't completely lost, providing structure, while the ingredients are fully combined for smooth shells.
Finally, the drying or resting phase is essential. Allowing the piped shells to sit uncovered at room temperature for 30-60 minutes (or longer, depending on humidity) forms a skin. This skin allows the shells to hold their shape and pushes the air downwards during baking, forcing the batter out the bottom to create the feet, contributing to a stable, well-formed shell.
Achieving Perfect Feet
The "feet" of a macaron are the ruffled base that lifts the smooth shell off the baking surface, a hallmark of a well-made macaron. Achieving perfect feet is a direct result of several factors working in harmony: proper macaronage, sufficient resting time, and correct oven conditions. If the macaronage is too stiff (undermixed), the batter won't spread correctly, and there will be no feet. If it's too loose (overmixed), the batter spreads too much, and the feet will be flat or non-existent.
The resting period is perhaps the most critical step for feet development. As the shell dries and forms a skin, it creates a barrier. When the macarons are placed in the oven, the heat causes the air inside the meringue to expand.
Because the top shell is sealed by the skin, the expanding air forces the batter outwards and upwards at the base, creating the characteristic feet. If the shells aren't rested long enough and lack a proper skin, the air will simply break through the top of the shell, causing cracks instead of feet. Baking temperature must also be precise; often a slightly lower temperature (around 300-325°F or 150-160°C) is used to allow the feet to develop gradually before the top sets completely.
Working with Caramel in Baked Desserts
Working with caramel adds a rich, complex flavor and luxurious texture to baked desserts, appearing in everything from tarts and cheesecakes to cookies and brownies. Caramel is essentially cooked sugar, but the process requires careful temperature control and attention to prevent burning. There are two main methods for making caramel from scratch: the dry method and the wet method. Both rely on heating sugar to different stages, resulting in varying colors and flavors, from pale golden and sweet to deep amber and slightly bitter.
Handling hot caramel requires caution due to its high temperature. Understanding the stages of sugar cooking – from thread to soft ball, firm ball, hard ball, soft crack, hard crack, and finally, caramel – is crucial for consistency and safety. Each stage corresponds to a specific temperature range and sugar concentration, impacting its final texture and use. For baked desserts, we are typically interested in the caramel stage (around 320-350°F or 160-175°C), where the sugar molecules break down and caramelize, developing complex flavors and that signature amber hue.
Making Caramel from Scratch
Making caramel from scratch can be done using either the dry method or the wet method. The dry method involves heating sugar alone in a heavy-bottomed saucepan over medium heat. The sugar will melt unevenly, first around the edges, then towards the center. You must watch it constantly, stirring gently only as it starts to melt to encourage even melting and prevent burning. This method is faster but also riskier, as sugar can burn very quickly once it starts to color.
The wet method involves dissolving sugar in water (and sometimes a bit of corn syrup to prevent crystallization) before heating. The water evaporates first, and then the sugar begins to caramelize. This method is more forgiving than the dry method because the water helps distribute heat evenly and slows down the cooking process, giving you more control.
Once the water has evaporated, you follow the same process of watching the color change, swirling the pan occasionally, but avoiding stirring to prevent crystallization. Regardless of the method, the key is to stop cooking the caramel at the desired color – usually a rich amber – before it turns too dark and bitter (burnt). Immediately remove it from the heat and carefully add any liquids (like cream or butter) to stop the cooking, being extremely cautious as it will bubble violently.
Salted Caramel Sauce Recipe
A simple and popular application of caramel technique is making salted caramel sauce, a versatile addition to many baked desserts. Here's a basic guideline:
- Start with 1 cup granulated sugar in a heavy-bottomed saucepan.
- Add 1/4 cup water (optional, for wet method) and a tablespoon of light corn syrup (optional, helps prevent crystallization).
- Heat over medium heat, swirling occasionally if using the wet method, or just watching carefully if using the dry method.
- Once the sugar melts and turns a beautiful amber color (around 320-350°F or 160-175°C), immediately remove from heat.
- Carefully whisk in 6 tablespoons unsalted butter, cut into pieces. Be very cautious, as it will bubble vigorously. Whisk until fully incorporated.
- Slowly pour in 1/2 cup warm heavy cream, whisking constantly. Again, it will bubble. Whisk until smooth.
- Stir in 1 teaspoon sea salt (or to taste).
Let the sauce cool slightly; it will thicken as it cools. This easy baked dessert technique for making sauce from scratch elevates brownies, cheesecakes, ice cream, and more. Store in an airtight container in the refrigerator; it will thicken further when cold and can be gently reheated.
Incorporating Citrus Zest and Juice for Enhanced Flavor
Citrus fruits are potent flavor enhancers in baked desserts, adding brightness, acidity, and aromatic notes that cut through richness and sweetness. Both the zest (the colored outer peel) and the juice contribute flavor, but in different ways. The zest contains concentrated oils that carry the primary aromatic compounds, providing intense floral and fruity notes. The juice provides acidity and liquid, balancing sweetness and sometimes aiding in leavening (when combined with baking soda).
Using citrus effectively involves understanding when and how to incorporate these elements to maximize their impact without adding bitterness or excessive liquid. This easy baked dessert technique is particularly useful for balancing rich flavors in cakes, tarts, glazes, and creams. Fresh citrus is always preferable to bottled juice or dried zest for the most vibrant flavor.
Understanding Citrus Varieties for Baking
Different citrus varieties offer unique flavor profiles suitable for various baked goods. Lemons are perhaps the most common, providing bright, sharp acidity and a clean, refreshing aroma from their zest. They are excellent in cheesecakes, tarts, glazes, and lemon-flavored cakes. Oranges (like Navel or Valencia) offer a sweeter, milder acidity and a warmer, slightly spicy aroma from their zest, pairing well with chocolate, spices, and other fruits.
Limes provide a distinct, sometimes more floral or herbal, acidity and zest, frequently used in tropical-flavored desserts, key lime pie being a prime example. Grapefruits offer a more bitter and tangy flavor, less commonly used in traditional baking but can add complexity to specific recipes. Less common varieties like Meyer lemons (a hybrid of lemon and mandarin orange) offer a sweeter, less acidic flavor with a more floral zest, wonderful in delicate pastries. Understanding these subtle differences allows you to choose the best citrus to complement the other flavors in your dessert.
Using Citrus Oils to Elevate Your Dessert
Citrus oils, found concentrated in the zest, are the source of much of the fruit's aroma and flavor. When incorporating citrus zest into a recipe, it's important to only grate the colored part of the peel, avoiding the bitter white pith underneath. Using a microplane zester is ideal for getting fine zest that distributes evenly and releases its oils effectively. Add zest towards the end of mixing batters or doughs to preserve its volatile oils, or infuse it into liquids like milk or cream that will be used in the recipe.
Citrus juice adds acidity and liquid. Be mindful of how much liquid you add, as too much can alter the consistency of your batter or dough. The acidity of citrus juice can react with baking soda to provide lift in certain recipes.
For glazes and icings, citrus juice provides both flavor and the necessary liquid to create the desired consistency. Combining both zest and juice often provides the most balanced and intense citrus flavor, marrying the bright aroma of the oils with the tangy acidity of the juice. This simple yet impactful easy baked dessert technique can transform a standard recipe into something truly special.
Troubleshooting Common Baked Dessert Problems
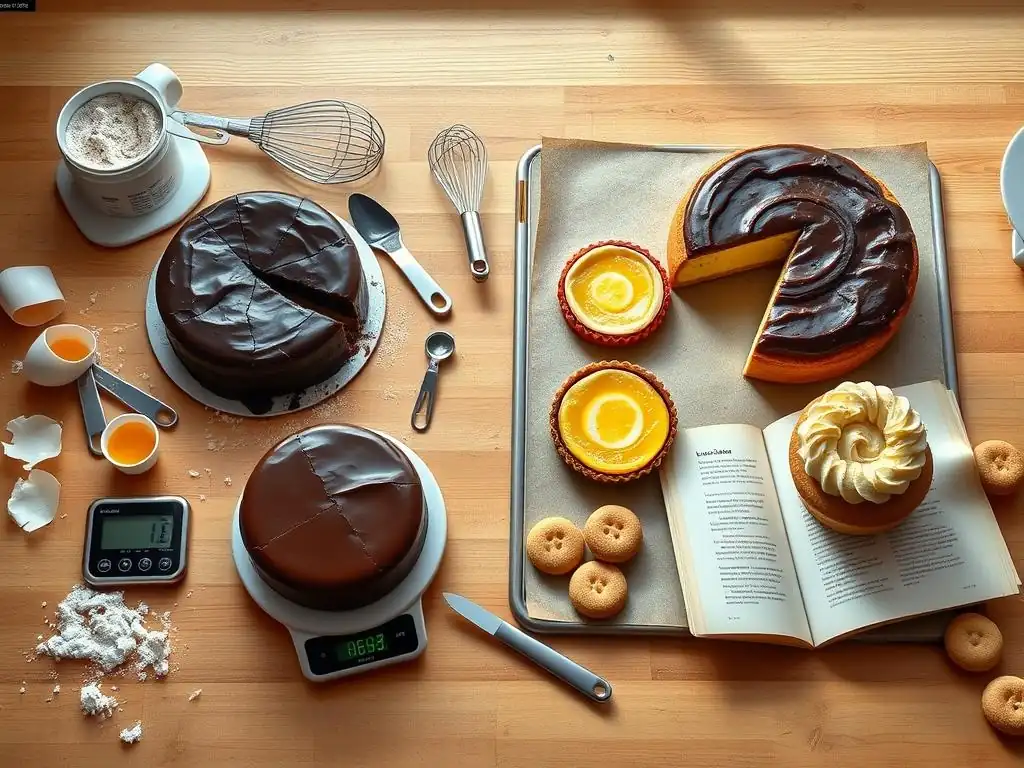
Even experienced bakers encounter issues sometimes. Cakes sink, cookies spread too much, or brownies turn out dry. Troubleshooting common baked dessert problems is a valuable skill that helps you learn from mistakes and improve your technique. Most issues can be traced back to a few core causes: incorrect ingredient measurements, improper mixing, inaccurate oven temperature, or incorrect baking time.
Approaching troubleshooting methodically involves considering what happened, when it happened (during mixing, baking, cooling? ), and what the likely culprits are based on fundamental baking principles. Keeping notes on failed attempts can also help you identify patterns specific to your oven or techniques. Don't be discouraged by setbacks; they are opportunities to refine your easy baked dessert techniques and deepen your understanding.
Dealing with Sinking Cakes and Underbaked Centers
A sinking cake or one with an underbaked center is a common and frustrating problem, typically indicating that the cake didn't finish cooking or set properly before being removed from the oven. One of the most frequent causes is opening the oven door too early during baking, especially in the first two-thirds of the baking time. The sudden drop in temperature can cause the fragile structure of the rising cake to collapse before it has set.
Similarly, an inaccurate oven temperature (often too high on the outside, leading to a set crust while the inside is still raw, or too low, preventing proper setting) can be the culprit. Using an oven thermometer is essential here.
Other causes include overmixing the batter (developing too much gluten, leading to a weak structure), using too much leavening (causes the cake to rise too quickly and then collapse), or using a pan size that is too small for the amount of batter (leading to overflow or underbaking in the dense center). Ensure your ingredients are at the correct temperature (usually room temperature for butter and eggs) as this affects emulsion and structure.
If a cake is browning too quickly but the center is still raw, loosely tenting it with foil can help slow down the crust development while the inside finishes baking. Always use the toothpick test in the center to confirm doneness before removing the cake from the oven.
Preventing Dryness in Baked Goods
Dryness in baked goods like cakes, muffins, or cookies is often a result of too little moisture or too much dry ingredient, or overbaking. The most common cause is inaccurate flour measurement, particularly when measuring by volume. As discussed earlier, packing too much flour into a measuring cup can lead to significantly more flour than intended, absorbing excess moisture during baking. Weighing flour is the most reliable way to prevent this.
Other factors contributing to dryness include using too little fat or sugar (both contribute moisture and tenderness), overmixing the batter (developing gluten which creates a tougher, drier texture), or simply baking for too long or at too high a temperature, causing too much moisture to evaporate. Ensure your leavening agents are fresh; expired baking powder or soda can result in poor rise and a dense, dry texture.
Using wet ingredients like buttermilk, sour cream, or yogurt instead of just milk can also add richness and moisture to batters. Pay close attention to visual cues and doneness tests (like the toothpick test for cakes or appearance for cookies) to avoid overbaking.
Fixing Cracking or Uneven Baking
Cracking on the surface of cakes or muffins, or uneven browning and baking, are often signs of temperature issues or improper batter handling. Surface cracking on cakes can occur if the oven temperature is too high, causing the outside to set and crust over before the inside has finished rising. As the inside continues to expand, it breaks through the set crust.
Baking at a slightly lower temperature or ensuring the batter isn't overmixed can help. For muffins, cracking is often expected and desirable, indicating a good rise, but excessive cracking might point to a very hot oven or a very thick batter.
Uneven baking, where one side or part of the baked good is darker or more cooked than another, is typically due to hot spots in your oven. Using an oven thermometer can confirm if your oven has significant temperature variations. Rotating your baking pan halfway through the baking time is the simplest and most effective way to combat hot spots and ensure even browning and cooking.
Also, ensure your baking pans are not touching each other or the sides of the oven, which can obstruct airflow and create uneven heat distribution. Using shiny metal pans tends to result in lighter, more even browning compared to dark metal pans, which absorb more heat and can lead to darker bottoms and edges.
Tips for Storing and Serving Baked Desserts
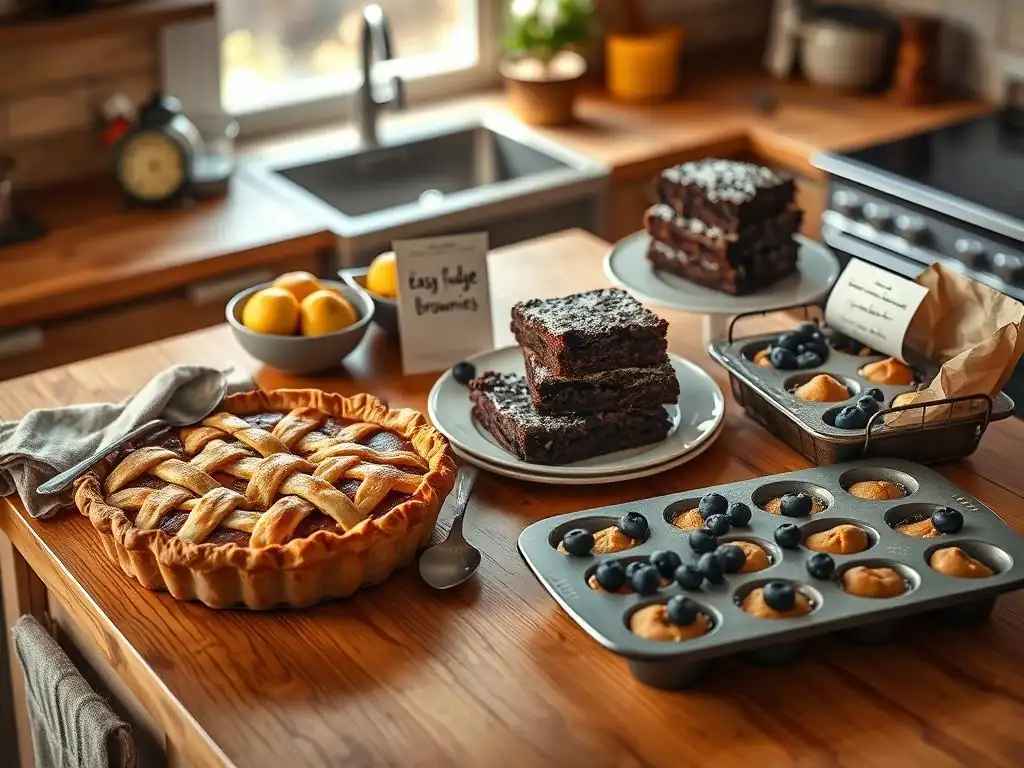
Successfully baking a delicious dessert is only part of the process; knowing how to properly store it ensures it remains fresh and enjoyable, and presenting it well enhances the overall experience. Different types of baked goods require different storage methods to maintain their texture and flavor. Proper storage prevents staleness, sogginess, or drying out, keeping your hard work tasting its best for as long as possible.
Presentation might seem secondary, but a beautifully presented dessert is more appealing and can elevate a simple treat into something special. Simple garnishes, thoughtful plating, and appropriate serving temperatures can make a significant difference in how your baked goods are perceived and enjoyed. These easy baked dessert techniques extend beyond the oven, ensuring your creations are enjoyed to their fullest.
Keeping Baked Desserts Fresh for Longer
The best way to store baked desserts depends on their ingredients and structure. Cookies, unless they contain moist fillings or are very soft, are generally best stored in an airtight container at room temperature. If you're storing different types of cookies together, keep strongly flavored ones separate (like gingerbread and sugar cookies) to prevent flavors from mingling. Adding a slice of bread to a container of firm cookies can help keep them soft by transferring moisture.
Cakes, especially those without perishable fillings or frostings, can often be stored at room temperature for 2-3 days, covered loosely to prevent the top from sticking but still protecting it from drying out (a cake keeper is ideal). Cakes with cream cheese frosting, whipped cream, or fruit fillings should be refrigerated. Cheesecakes must always be refrigerated. Breads and muffins can be stored at room temperature in an airtight container or bag, though they are often best eaten within a day or two.
For longer storage, many baked goods freeze well. Wrap them tightly in plastic wrap and then foil before freezing to prevent freezer burn. Proper storage is a simple easy baked dessert technique that significantly impacts the longevity and quality of your treats.
Presentation Tips for Impressive Dessert Displays
Presenting your baked desserts attractively doesn't require professional skills; simple touches can make a big impact. Consider the occasion and the dessert itself. For a simple cake or loaf, a dusting of powdered sugar, a drizzle of glaze, or a scattering of fresh berries can add color and elegance. Cookies can be arranged neatly on a platter or stacked charmingly. Cupcakes are easily dressed up with swirls of frosting and sprinkles or a single piece of fruit.
Consider the serving dish – a beautiful cake stand elevates a cake, while a rustic board can complement a tart or loaf. Garnishes should ideally relate to the dessert's flavors (e.g., lemon zest on a lemon cake, a sprinkle of cinnamon on apple pie).
Ensure desserts are served at the appropriate temperature – most cakes, cookies, and brownies are best at room temperature, while cheesecakes and fruit pies are often preferred slightly chilled or warmed, respectively. Taking a moment to plate individual servings thoughtfully, perhaps with a dollop of whipped cream or a sprig of mint, shows care and enhances the dining experience.
Conclusion: Elevate Your Baking with Essential Baked Dessert Techniques
Mastering baked desserts is an achievable goal for anyone with a passion for creating sweet treats. By focusing on essential techniques – from understanding your oven and measuring precisely to mastering mixing methods and recognizing doneness cues – you build a foundation for consistent success. We've explored how these core skills apply to classic recipes like cookies, pies, and brownies, and touched upon how they form the basis for more advanced endeavors like macarons and caramel. Baking is a blend of art and science, and a solid understanding of the science empowers your artistic expression.
Remember that every baking attempt, successful or not, is a learning opportunity. Embrace the process, practice these easy baked dessert techniques, and don't be afraid to experiment. With patience and attention to detail, you'll find yourself baking with greater confidence and ease, consistently producing delicious results that bring joy to yourself and those you share them with.
Your Partner in Baking Success
BakeWithEase.com is dedicated to being your trusted partner on your baking journey. We strive to demystify the baking process, breaking down techniques into understandable steps and providing reliable recipes. Our goal is to equip you with the knowledge and confidence to tackle any baked dessert, turning potential challenges into satisfying achievements. Whether you're a complete beginner or looking to refine your skills, we offer resources designed to help you bake with ease and elevate your creations. We believe that with the right guidance and practice, anyone can become a successful and confident baker.
We are constantly exploring new techniques, refining classic recipes, and sharing tips to make your baking experience smoother and more enjoyable. Our community of bakers provides inspiration and support. By focusing on fundamental easy baked dessert techniques and offering clear, practical advice, we aim to make mastering baked desserts accessible and rewarding for everyone. Let us help you discover the joy and satisfaction that comes from creating delicious baked goods from scratch.
Frequently Asked Questions
What are some easy baked dessert techniques a beginner baker can start with?
Beginners can start with basic mixing methods like the creaming or melting method. Focus on simple recipes like cookies or brownies that require minimal ingredients and straightforward instructions for quick success.
How can I improve the texture of my baked desserts using easy baked dessert techniques?
Pay attention to proper measuring of ingredients, especially flour. Avoid overmixing, which can lead to tough desserts. Employing techniques like resting dough or using the right pan can also significantly impact texture.
What are some common mistakes made when baking, and how can easy baked dessert techniques help avoid them?
Common mistakes include overbaking, undermixing, and inaccurate oven temperatures. Using a thermometer and following recipes precisely can help. Understanding basic baking science also helps in troubleshooting.
How can I adapt recipes to make them healthier while still utilizing easy baked dessert techniques?
Substitute refined sugar with natural sweeteners like honey or maple syrup in moderation. Use whole wheat flour instead of white flour, and replace some butter with applesauce or yogurt for lower-fat options. Small changes yield big results.
Where can I find reliable resources for learning more about easy baked dessert techniques?
Websites like BakeWithEase.com offer step-by-step guides and simple recipes tailored for bakers of all levels. Look for resources with clear instructions and visual aids to enhance your understanding.
Final Reflection: The Sweet Science of Simple Baking
Mastering even the most basic baked dessert techniques unlocks a world of culinary creativity, a world more accessible than many believe. The seemingly daunting task of baking becomes empowering when broken down into manageable, easily understood steps. This article has highlighted several key techniques – from proper creaming methods to understanding oven temperatures – proving that delicious, impressive baked goods are within everyone's reach.
The joy of baking, for me, has always been about more than just the final product; it's about the process, the subtle nuances, and the satisfaction of creating something beautiful and delicious from simple ingredients. Baking is a labor of love. It's about taking your time, paying attention to detail, and enjoying the process.
This sentiment perfectly captures the essence of what I hope this article conveyed: that baking, even at its most fundamental level, is a rewarding and accessible skill.
Now, I invite you to roll up your sleeves, gather your ingredients, and experiment! Don't be afraid to try a new technique, to adjust a recipe to your liking, or even to make a mistake – that's all part of the learning process. The journey of mastering baked desserts is a continuous one, filled with sweet successes and valuable lessons. Embrace the challenge, and you'll discover a world of delicious possibilities waiting to be explored.
Unlock Your Inner Pastry Chef: Take Your Baking to the Next Level!
Thanks for taking the time to explore the world of baked desserts with us! We hope you've gained valuable insights into mastering those perfect textures and flavors. Ready to put your newfound knowledge into practice?
- Try out one new technique: Choose your favorite from the article and bake something delicious! Experiment with different ingredients and share your creations.
- Share your baking journey: Tell us about your successes (and even your stumbles!) in the comments below – we love hearing from our baking community!
- Challenge a friend to a bake-off: Put your skills to the test and have some fun!
What's the first delicious treat you're going to bake with your new-found skills?