
How to Melt Chocolate Perfectly Every Single Time


Welcome to BakeWithEase, where we believe everyone can bake like a pro! Ever struggled to get that perfectly smooth, glossy finish when melting dark chocolate? You're not alone! Unlock the secrets to our Perfectly Melt Dark Chocolate Recipe and say goodbye to seizing and burning forever. Intrigued? Let's dive in and discover the easy steps to chocolate perfection, transforming your pastry and dessert creations!
- Introduction: The Importance of Tempered Chocolate
- Choosing the Right Chocolate for Tempering
- Tempering Methods: A Detailed Comparison
- Step-by-Step Guide: Tempering Dark Chocolate using the Seeding Method
- Tips and Tricks for Successful Chocolate Tempering
- Using Tempered Chocolate
- Storing Tempered Chocolate
- Troubleshooting Common Tempering Issues
- Conclusion: Achieving Perfect Temper Every Time
-
Frequently Asked Questions
- How does BakeWithEase help me melt dark chocolate perfectly?
- What are the key ingredients or tools needed for the Perfectly Melt Dark Chocolate Recipe?
- What common mistakes should I avoid when melting dark chocolate?
- Can I use any type of dark chocolate for the Perfectly Melt Dark Chocolate Recipe?
- How can I use perfectly melted dark chocolate from BakeWithEase's recipe?
- Final Reflection: The Enduring Allure of Perfectly Melted Chocolate
- Unlock Your Inner Chocolatier: Master the Art of Melting Chocolate!
Introduction: The Importance of Tempered Chocolate
Why Tempering is Crucial for Chocolate's Appearance and Texture
Tempering chocolate is far more than just melting it; it's a fundamental technique that dictates the final quality of your chocolate creations. Properly tempered chocolate boasts a beautiful, glossy surface that is instantly appealing. This desirable shine is a direct result of the stable crystal structure formed during the tempering process, reflecting light evenly across the surface. Without tempering, melted chocolate sets into a dull, matte finish, often with unattractive white or gray streaks known as "bloom."
Beyond aesthetics, tempering significantly impacts the texture and handling of chocolate. When tempered correctly, chocolate solidifies with a firm, crisp snap when broken, rather than crumbling or bending softly. It also melts smoothly and evenly on the tongue, providing a superior mouthfeel. Furthermore, tempered chocolate is more stable at room temperature, resists melting in your hands as readily, and has a longer shelf life, making it ideal for molding, coating, and creating decorations that hold their shape. Mastering this technique is key to achieving professional-looking and tasting results in your baking projects.
Understanding the Science Behind Chocolate Tempering
The science behind tempering lies in the behavior of cocoa butter crystals. Cocoa butter, the fat component of chocolate, can crystallize into several different forms depending on temperature and agitation. There are six known crystal forms, labeled Type I through Type VI, each melting at a different temperature. For chocolate tempering, the goal is to encourage the formation of Type V crystals.
Type V crystals are the most stable and desirable form for confectionery purposes. They melt around 31-34°C (88-93°F), which is just below body temperature, explaining why tempered chocolate melts so smoothly in your mouth but remains solid at room temperature.
Tempering involves carefully heating chocolate to melt all crystal forms, then cooling it while stirring to promote the formation of only Type V crystals, and finally, slightly reheating it to melt any unstable crystals, leaving behind a majority of the stable Type V form. This precise temperature control and agitation are what give tempered chocolate its snap, shine, and stability.
Choosing the Right Chocolate for Tempering
Dark Chocolate: Ideal for Tempering
Dark chocolate is often considered the easiest type of chocolate to temper, making it an excellent starting point for beginners learning how to perfectly melt dark chocolate recipe techniques. This is primarily due to its higher percentage of cocoa solids and, consequently, a higher proportion of cocoa butter compared to milk or white chocolate. A higher cocoa butter content means there are more fat crystals available to align correctly during the tempering process.
For best results, choose a high-quality dark chocolate with at least 60-70% cocoa solids. Couverture chocolate, which has a higher percentage of cocoa butter specifically for easier tempering and a smoother finish, is the professional's choice. However, you can achieve excellent results with good-quality bar chocolate (like baking bars), as long as it contains real cocoa butter and not just vegetable fats. Avoid chocolate chips, as they often contain stabilizers that prevent proper melting and tempering.
Milk Chocolate: Tempering Considerations
Tempering milk chocolate presents a slightly greater challenge than dark chocolate. Milk chocolate contains added milk solids and sugar, which dilute the proportion of cocoa butter. This lower cocoa butter content means there are fewer fat crystals to work with, requiring more precise temperature control to achieve a stable temper.
Milk chocolate also tempers at a lower temperature range than dark chocolate. Typically, milk chocolate is melted to about 40-45°C (104-113°F), cooled to around 27-28°C (81-82°F), and then warmed slightly to a working temperature of 29-30°C (84-86°F). The narrower temperature window demands careful monitoring with a reliable thermometer. Despite the extra care needed, successfully tempered milk chocolate will have a lovely shine and a pleasant snap, perfect for coatings and confections where a sweeter flavor is desired.
White Chocolate: Tempering Challenges
White chocolate is the most challenging type of chocolate to temper. Unlike dark and milk chocolate, white chocolate contains no cocoa solids; it is made from cocoa butter, milk solids, sugar, and vanilla. While it does contain cocoa butter, the high proportion of milk solids and sugar makes it particularly sensitive to heat and prone to seizing.
White chocolate tempers at the lowest temperature range of all chocolate types, typically melted to around 40-42°C (104-108°F), cooled to 26-27°C (79-81°F), and brought back up to a working temperature of 28-29°C (82-84°F). Overheating white chocolate, even slightly, can quickly cause it to become grainy or seize. Due to its delicate nature, working in a cool, dry environment and using a precise thermometer are absolutely critical for successful white chocolate tempering.
Tempering Methods: A Detailed Comparison
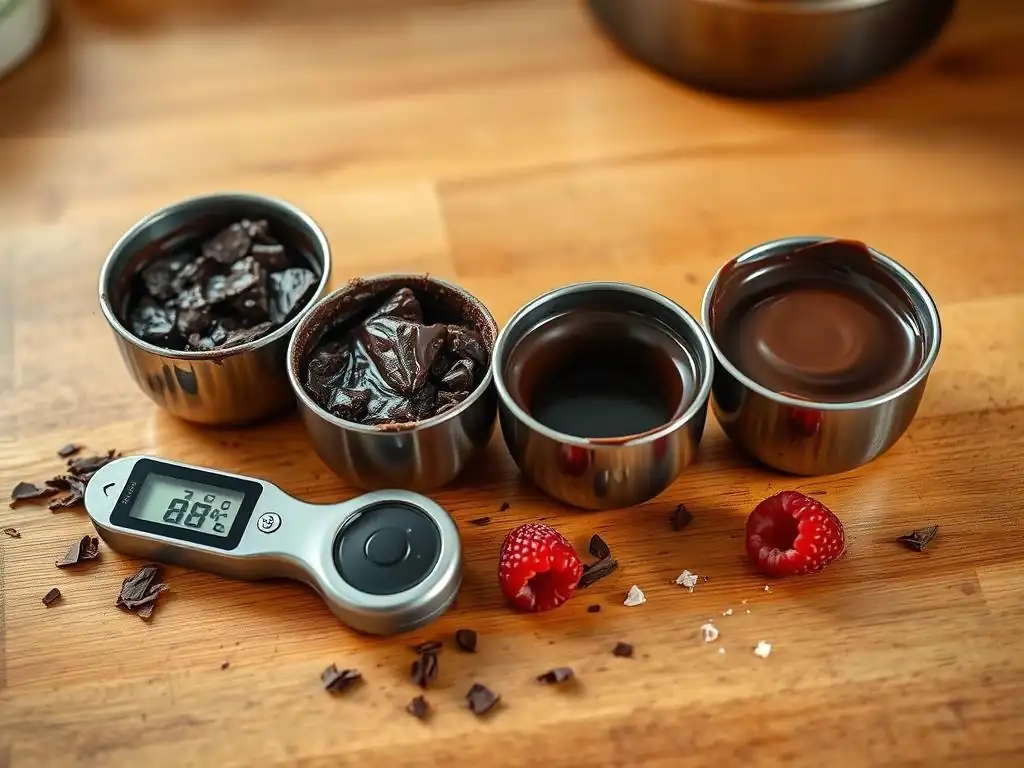
Seeding Method: A Popular and Reliable Technique
The seeding method is widely regarded as one of the most accessible and reliable ways to temper chocolate, especially for home bakers. It involves melting a portion of your chocolate completely and then adding finely chopped pieces of already tempered solid chocolate – the "seeds" – to the melted batch. These seeds contain stable Type V crystals, which act as templates, encouraging the liquid cocoa butter in the melted chocolate to crystallize into the desired stable form as the mixture cools.
This method is popular because it doesn't require specialized equipment like a marble slab, just a bowl, a heat source (like a double boiler or microwave), a spatula, and crucially, a thermometer. It's particularly effective when learning how to perfectly melt dark chocolate recipe styles, as dark chocolate is quite forgiving with this technique. The key is accurate temperature monitoring and sufficient stirring to ensure even cooling and crystal formation.
Preparing Chocolate Seeds
Properly preparing your chocolate seeds is a critical first step in the seeding method. You'll need about 25-30% of your total chocolate weight in the form of finely chopped, already tempered chocolate. This could be from a bar of good quality chocolate that you know is in temper, or even leftover tempered chocolate from a previous project. The finer you chop the chocolate, the better; small pieces melt more easily into the warm chocolate, facilitating quicker cooling and more efficient seeding of the stable crystals.
Using a sharp knife, carefully chop the chocolate into pieces roughly the size of chocolate chips or even smaller. If using a large bar, you might break it into smaller chunks first, then chop those chunks finely. Set these seeds aside in a bowl at room temperature, ready to be added to your melted chocolate once it reaches the appropriate initial melting temperature.
Monitoring Temperature with a Chocolate Thermometer
Accurate temperature monitoring is non-negotiable when using the seeding method (or any tempering method, for that matter). A reliable chocolate thermometer is your most important tool. You'll need to track the temperature as you first melt the chocolate, as you add the seeds and cool the mixture, and as you bring it back up to its working temperature.
For dark chocolate, you'll typically melt it to around 45-50°C (113-122°F) to ensure all crystal forms are melted. Then, you'll add the seeds and stir until the temperature drops to the tempering range, approximately 31-32°C (88-90°F). Maintaining the chocolate within this working temperature range while you use it is also crucial. An instant-read digital thermometer or an infrared thermometer provides quick, accurate readings, making the process much smoother.
Tabling Method: The Traditional Approach
The tabling method, also known as marbleing, is a classic technique used by professional chocolatiers. It involves melting all the chocolate completely, then pouring a significant portion (usually two-thirds) onto a cool, smooth surface, traditionally a marble slab. The chocolate is then worked back and forth using a spatula and scraper until it cools and starts to thicken, indicating that stable Type V crystals are forming.
Once the chocolate on the slab reaches the correct temperature and consistency, it is scraped up and returned to the remaining one-third of the melted chocolate in the bowl. The warmth of the chocolate in the bowl melts any unstable crystals that may have formed on the slab, leaving behind the desired stable crystals, which then seed the rest of the batch. This method requires practice and a suitable cool surface, but it can produce beautifully tempered chocolate with excellent shine and snap.
Working with Marble Slab
A marble or granite slab is the preferred surface for the tabling method due to its ability to stay cool and conduct heat away from the chocolate efficiently. Before you begin, ensure your slab is perfectly clean and completely dry, as any moisture can ruin the chocolate. Melt your chocolate fully over a double boiler or in a microwave to the appropriate initial temperature (e.g., 45-50°C for dark chocolate).
Pour about two-thirds of the melted chocolate onto the center of the cool slab. Using a metal scraper and a spatula, spread the chocolate out thinly, then scrape it back together, repeating this motion continuously. The goal is to cool the chocolate quickly while agitating it to encourage the formation of Type V crystals. Continue working the chocolate until it thickens slightly and reaches the correct temperature for your type of chocolate (e.g., 28-29°C for dark chocolate). It should look slightly pasty or thickened, but still fluid enough to work with.
Achieving Proper Crystal Formation
The continuous spreading and scraping motion on the cool marble slab are what promote the formation of the desired Type V crystals. As the chocolate cools rapidly, the agitation helps these specific crystals to align and grow. Once the chocolate on the slab has cooled to the target temperature and shows signs of thickening (a good visual cue is that it starts to hold its shape slightly when scraped), it contains a sufficient amount of stable crystals.
Gather the cooled chocolate from the slab using your scraper and return it to the bowl containing the remaining one-third of the warm, melted chocolate. Stir the mixture gently but thoroughly. The warmth from the reserved chocolate will melt any unstable crystals that might have formed on the slab, leaving the stable Type V crystals to seed the entire batch. Continue stirring until the mixture is uniform and reaches the correct working temperature (e.g., 31-32°C for dark chocolate).
Microwave Tempering: A Quick Option
Microwave tempering is a convenient method for tempering smaller quantities of chocolate, making it suitable for quick projects or when you need just a bit of tempered chocolate. While it can be faster than other methods, it requires careful attention to avoid overheating the chocolate, which can easily burn or scorch it and render it unusable for tempering.
This method relies on melting most of the chocolate and then relying on residual heat and stirring to melt the remaining solid pieces and bring the chocolate into temper. It's less precise than the seeding or tabling methods in terms of direct crystal seeding, but it can work if done correctly and carefully. It's particularly useful for getting a perfectly melt dark chocolate recipe ready for dipping or drizzling without setting up a full double boiler.
Controlled Heating and Stirring
Successful microwave tempering hinges on using low power settings and heating in very short intervals, combined with thorough stirring. Start by placing finely chopped chocolate in a microwave-safe bowl. Heat on 50% power for 30-second intervals. After each interval, remove the bowl and stir the chocolate vigorously with a spatula. Stirring is essential as it distributes the heat evenly throughout the chocolate and helps the solid pieces melt from the residual warmth.
Continue heating in short bursts and stirring until the chocolate is about 80-90% melted, with just a few small lumps remaining. Remove the chocolate from the microwave at this point and continue stirring. The heat retained in the melted chocolate should be sufficient to melt the remaining lumps and bring the chocolate to its working temperature. Avoid the temptation to fully melt the chocolate in the microwave, as this significantly increases the risk of overheating.
Checking for Proper Temper
Once you believe your chocolate is tempered using the microwave method, it's crucial to perform a quick test before using it for your project. Dip a small piece of parchment paper, the tip of a knife, or a spoon into the chocolate. Remove it and let it sit at room temperature (ideally around 20°C or 68°F).
A properly tempered chocolate sample should set quickly, within 3-5 minutes. It should solidify with a smooth, even surface and a distinct shine. When you break the parchment or sample, it should snap cleanly. If the chocolate remains soft, sticky, or develops dull streaks or spots as it sets, it is not properly tempered and will need to be melted down and re-tempered, perhaps using a more controlled method like seeding.
Step-by-Step Guide: Tempering Dark Chocolate using the Seeding Method
Tempering dark chocolate using the seeding method is a straightforward and effective process that yields beautiful, stable results. This guide will walk you through the steps to achieve a perfectly melt dark chocolate recipe ready for your baking needs.
Step 1: Melting the Chocolate
The first step is to gently melt the majority of your dark chocolate while preserving the temper in the remaining "seed" portion. Precision in this initial melting phase is crucial to avoid overheating, which would destroy all the beneficial cocoa butter crystals.
Controlled Melting Over a Double Boiler
The safest and most recommended way to melt chocolate for tempering is over a double boiler. Set a heatproof bowl containing about 70-75% of your finely chopped dark chocolate over a pot of simmering water. Ensure the bottom of the bowl does not touch the water. The steam from the simmering water provides gentle, even heat. Stir the chocolate occasionally as it melts.
Monitor the temperature with your thermometer. You want the dark chocolate to reach about 45-50°C (113-122°F) to ensure all the different types of cocoa butter crystals are fully melted. Once it reaches this temperature and is smooth and liquid, remove the bowl from the heat and wipe the bottom dry immediately to prevent any water from dripping into the chocolate.
Step 2: Cooling and Seeding
With the chocolate fully melted, the next step is to cool it down while introducing stable crystals. This is where the "seeding" comes into play.
Adding Chocolate Seeds to Lower Temperature
Immediately after removing the melted chocolate from the heat, add the reserved 25-30% of finely chopped, untouched tempered dark chocolate (your seeds) to the bowl. Begin stirring continuously with a spatula. The solid chocolate seeds will help cool the melted chocolate down. As they melt into the warm chocolate, they will release their stable Type V crystals, which will encourage the liquid cocoa butter in the batch to crystallize in the desired form.
Continue stirring until all the seed chocolate has melted and the temperature of the mixture drops to the working temperature for dark chocolate, which is typically around 31-32°C (88-90°F). The chocolate should be smooth and fluid at this temperature. If a few small pieces of seed chocolate haven't melted by the time the temperature is in the working range, you can remove them.
Step 3: Maintaining Temper
Once the chocolate is tempered and at its working temperature, you need to maintain it within that range while you are using it. If it cools too much, it will start to set prematurely; if it gets too warm, it will lose its temper.
Gentle Stirring and Temperature Control
Keep the tempered dark chocolate at its working temperature (approx. 31-32°C or 88-90°F) by stirring it gently and occasionally. This prevents it from cooling unevenly. If you are working for an extended period and the chocolate starts to cool below the working range and thicken significantly, you can gently warm it very slightly.
The best way is to place the bowl back over the warm (but not simmering) water of your double boiler for just a few seconds, stirring constantly, until it returns to the correct temperature. Alternatively, a heat gun on a low setting, aimed away from the chocolate and stirring continuously, can also work for small adjustments. Avoid letting it get hotter than the working temperature, or you'll have to re-temper.
Step 4: Testing the Temper
Before you commit your perfectly melt dark chocolate recipe to your final application, it's essential to test if it's truly in temper. This simple test confirms whether the cocoa butter crystals have formed correctly.
Evaluating the Snap and Shine
To test the temper, dip a small piece of parchment paper, the tip of a clean metal knife, or a spoon into the tempered dark chocolate. Remove it and let it sit at room temperature. Ideally, the room should be cool, around 20°C (68°F). A properly tempered sample should set quickly, typically within 3 to 5 minutes.
Once set, examine the sample. It should have a smooth, glossy surface free of streaks or dull patches. If you used a piece of parchment or a knife, break it. It should snap cleanly and crisply. If the chocolate is dull, streaky, soft, or melts easily to the touch, it is not properly tempered and will need to be melted down and tempered again from Step 1.
Tips and Tricks for Successful Chocolate Tempering
Using a Reliable Chocolate Thermometer
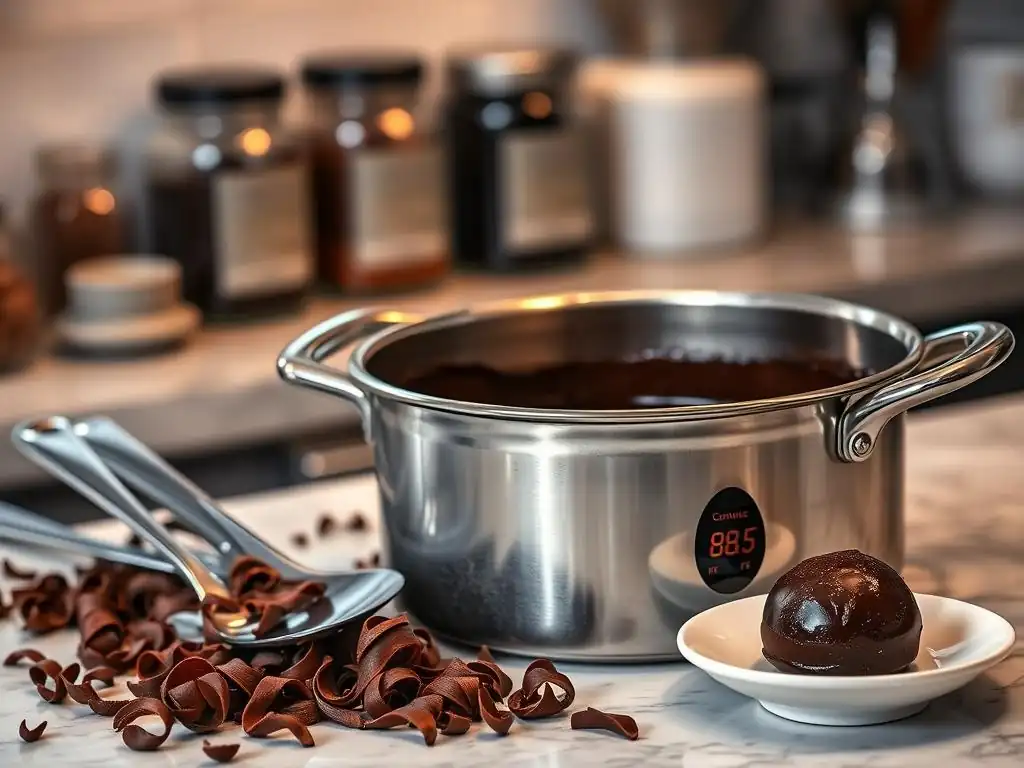
As highlighted throughout this guide, accurate temperature readings are paramount for successful chocolate tempering. Investing in a good quality, reliable chocolate thermometer is one of the best things you can do to improve your tempering success rate. Digital instant-read thermometers are excellent as they provide quick and precise readings, allowing you to react promptly to temperature changes.
Avoid relying on candy thermometers that clip to the side of the pot, as they often measure the temperature of the water or bowl rather than the chocolate itself. An infrared thermometer can also be useful as it measures surface temperature without needing to touch the chocolate, reducing the risk of contamination. Whatever type you choose, ensure it is calibrated correctly and designed for measuring temperatures in the range required for chocolate work.
Maintaining a Clean Workspace
A clean workspace is vital when working with chocolate, especially during tempering. Any tiny speck of food debris, crumb, or even a stray hair can disrupt the tempering process or mar the final appearance of your chocolate. Before you start, make sure your bowls, spatulas, thermometers, and any surfaces you'll be working on are spotlessly clean.
Furthermore, ensure all your equipment is completely dry. As we'll discuss next, moisture is the enemy of chocolate. A clean and organized workspace also makes the tempering process smoother and less stressful, allowing you to focus on the crucial steps and temperatures.
Working in a Cool Environment
The ambient temperature and humidity of your workspace significantly impact chocolate tempering. Chocolate tempers best in a cool, dry environment. An ideal room temperature is around 20°C (68°F), and humidity should be kept below 50%. If your kitchen is too warm or humid, the chocolate will be difficult to cool down to the correct temperatures, and it may take much longer to set, potentially leading to bloom.
If you live in a warm or humid climate, consider working in an air-conditioned room or choosing a cooler time of day. You might also need to adjust your technique slightly, perhaps working the chocolate on a cooler surface for longer or using ice baths carefully (ensuring no water splashes into the chocolate) to help bring the temperature down.
Avoiding Moisture Contamination
Moisture is the number one enemy of melted chocolate. Even a single drop of water or steam introduced into melted chocolate can cause it to "seize." Seized chocolate transforms instantly from a smooth, liquid state into a thick, lumpy, unusable mass. This happens because the sugar particles in the chocolate clump together when they come into contact with water.
To avoid moisture contamination, ensure all your equipment (bowls, spatulas, etc.) is perfectly dry before it touches the chocolate. When using a double boiler, make sure the simmering water does not splash into the bowl, and wipe the bottom of the bowl dry before removing it from the heat. Avoid covering the melting chocolate, as condensation can form and drip back into the bowl. Humidity in the air can also cause issues, reinforcing the need for a dry working environment.
Using Tempered Chocolate
Once you've successfully tempered your chocolate, a world of possibilities opens up! Perfectly tempered chocolate is essential for many professional-looking chocolate applications.
Molding Chocolate
Tempered chocolate is ideal for creating solid chocolate shapes using molds. Whether you're making chocolate bars, bonbons, or novelty shapes, tempered chocolate will fill molds smoothly, release easily once set, and result in pieces with a beautiful shine and a firm snap.
Simply pour or ladle the tempered chocolate into clean, dry molds (polycarbonate molds are excellent for achieving maximum shine). Tap the molds gently on your counter to remove any air bubbles trapped in the chocolate. Scrape off any excess chocolate from the top of the mold using a bench scraper or spatula. Allow the chocolate to set fully at room temperature (or in a cool, dry place), and then carefully unmold your shiny creations.
Coating Candies and Fruits
Dipping items like truffles, caramels, nuts, or fresh fruits (like strawberries) in tempered chocolate gives them a professional finish. The tempered chocolate coats the item smoothly and sets quickly, creating a hard, shiny shell that protects the filling and provides a satisfying crunch.
Hold the item with a dipping fork or skewer and immerse it fully in the bowl of tempered chocolate. Lift it out, tapping the fork gently against the side of the bowl to allow excess chocolate to drip off. Place the coated item onto parchment paper to set. The rapid setting time of tempered chocolate means you can often add decorative drizzles or toppings before the chocolate is fully hard.
Creating Decorations
Tempered chocolate is perfect for creating elegant and stable chocolate decorations for cakes, pastries, and desserts. Because it sets firmly and holds its shape, you can pipe intricate designs, create chocolate curls, shards, or fans.
Melted and tempered chocolate can be piped onto parchment paper or acetate sheets to create delicate patterns or shapes like leaves or geometric designs. For chocolate curls, spread a thin layer of tempered chocolate onto a clean surface (like the back of a baking sheet) and let it set slightly, then scrape it with a metal scraper at an angle. Once the tempered chocolate decorations are set, they can be carefully lifted and used to adorn your baked goods, adding a touch of professional flair.
Storing Tempered Chocolate
Proper storage is key to maintaining the quality and temper of your chocolate creations after all your hard work. While tempered chocolate is more stable than untempered chocolate, it still requires specific conditions to stay in perfect condition.
Proper Storage Conditions
Tempered chocolate, once fully set, should be stored in a cool, dry place, away from direct sunlight and strong odors. An ideal storage temperature is between 15-18°C (59-64°F). Storing tempered chocolate at temperatures that are too warm or fluctuate significantly can cause the cocoa butter crystals to rearrange over time, leading to fat bloom (the grayish streaks).
Avoid storing tempered chocolate in the refrigerator unless your environment is extremely hot and humid, and even then, place it in an airtight container to protect it from moisture and odors. Bring refrigerated chocolate back to room temperature slowly before using or serving. Properly stored tempered chocolate can last for several months, maintaining its snap and shine.
Reheating Tempered Chocolate (If Necessary)
Sometimes, while you're working with tempered chocolate, it may start to cool and thicken too much to be easily used. If this happens, it is possible to gently reheat it slightly to bring it back into its working temperature range without losing the temper.
Place the bowl of chocolate back over your warm (but not simmering) double boiler for just a few seconds, or use a heat gun on a very low setting, stirring constantly. The goal is to warm it just enough to restore its fluidity, typically bringing it back to the lower end of its working temperature range (e.g., 31-32°C for dark chocolate). Do not let it get hotter than the maximum working temperature, or you will melt the stable crystals and lose the temper, requiring you to start the tempering process over again.
Troubleshooting Common Tempering Issues
Even with careful attention, you might encounter issues when tempering chocolate. Understanding common problems and their causes can help you troubleshoot and improve your technique for a perfectly melt dark chocolate recipe every time.
Bloom: Identifying and Preventing
Bloom is a common issue characterized by a dull, grayish or whitish appearance on the surface of chocolate. There are two types: fat bloom and sugar bloom. Fat bloom appears as streaks or patches and is caused by improper tempering or poor storage conditions (like fluctuating temperatures). It happens when unstable cocoa butter crystals migrate to the surface and recrystallize in an undesirable form. Sugar bloom is a powdery surface texture caused by moisture dissolving sugar on the surface, which then recrystallizes as the moisture evaporates.
To prevent bloom, ensure your chocolate is correctly tempered before use. Once tempered and set, store it in a cool, dry place with a stable temperature, away from humidity. While bloomed chocolate is still safe to eat, its texture and appearance are compromised. It can often be melted down and re-tempered if it's fat bloom, but sugar bloomed chocolate is generally not suitable for re-tempering for coating or molding.
Over-Tempered Chocolate: Causes and Solutions
Over-tempered chocolate occurs when too many cocoa butter crystals (including some unstable ones) form, often because the chocolate was cooled too quickly or stirred too vigorously during the cooling phase of tempering. This results in chocolate that is too thick, sometimes lumpy, and may set almost instantly, making it difficult to work with for dipping or molding.
If your chocolate becomes over-tempered and thickens prematurely, you can try to gently warm it very slightly back into its working temperature range while stirring constantly. This gentle heat can help melt some of the excess or unstable crystals, restoring the chocolate's fluidity. However, be extremely cautious not to overheat it, or you will lose the temper entirely and have to start over. Sometimes, adding a tiny bit more melted, fully tempered chocolate can also help.
Improper Set: Addressing Soft or Sticky Chocolate
If your chocolate remains soft, sticky, or melts easily at room temperature after sufficient cooling time, it has not been properly tempered. This indicates that not enough stable Type V crystals were formed during the tempering process, or unstable crystals are dominant. The chocolate may also appear dull or streaky.
The solution for improperly set chocolate is straightforward but requires starting over: the chocolate needs to be melted down completely again, ensuring it reaches the initial melting temperature to destroy all existing crystal structures, and then re-tempered using your chosen method, paying extra attention to temperature control and agitation during the cooling phase. While frustrating, practice improves your ability to recognize the correct temperatures and consistency needed for a perfect temper.
Conclusion: Achieving Perfect Temper Every Time
Recap of Key Tempering Techniques
Mastering the art of tempering chocolate, whether you're aiming for a perfectly melt dark chocolate recipe or working with milk or white chocolate, is a rewarding skill for any baker. We've explored the science behind cocoa butter crystals and the importance of achieving the stable Type V form for that signature snap, shine, and smooth texture.
The seeding method offers a reliable approach for home bakers, relying on precise temperature control and the introduction of stable chocolate "seeds." The traditional tabling method, while requiring more space and specific equipment, is another effective way to cool and agitate chocolate for crystal formation. Even microwave tempering can work for small batches with careful heating. Regardless of the method, using a reliable thermometer, working in a cool, dry environment, and avoiding moisture are universal keys to success.
Further Resources for Chocolate Work
Achieving perfect temper every time takes practice and patience. Don't be discouraged if your first attempts aren't flawless; chocolate tempering is a skill that improves with experience. Pay close attention to your chocolate's texture and how it sets during the test phase, as these are excellent indicators of success.
There are many resources available to deepen your understanding of chocolate work. Continue experimenting with different types of chocolate and techniques. With dedication and attention to detail, you'll soon be creating beautiful, professional-quality chocolate confections with ease.
Frequently Asked Questions
How does BakeWithEase help me melt dark chocolate perfectly?
BakeWithEase provides simple recipes and techniques tailored to beginners. We focus on step-by-step guides ensuring you achieve perfectly melted dark chocolate every time.
What are the key ingredients or tools needed for the Perfectly Melt Dark Chocolate Recipe?
While specific ingredients depend on your recipe, the core requirements are high-quality dark chocolate and a double boiler or microwave-safe bowl. Proper temperature control is crucial.
What common mistakes should I avoid when melting dark chocolate?
Avoid overheating, which can cause the chocolate to seize and become grainy. Also, ensure no water or steam comes into contact with the chocolate, as this can also ruin the texture.
Can I use any type of dark chocolate for the Perfectly Melt Dark Chocolate Recipe?
While you can use any type, higher-quality chocolate with a higher cocoa butter content will melt smoother and more evenly. Look for chocolate with at least 60% cacao.
How can I use perfectly melted dark chocolate from BakeWithEase's recipe?
Perfectly melted dark chocolate is incredibly versatile! Use it for dipping fruits or pretzels, creating ganache for cakes, or incorporating it into delicious chocolate desserts.
Final Reflection: The Enduring Allure of Perfectly Melted Chocolate
The pursuit of flawlessly melted chocolate transcends mere culinary technique; it's a journey into the heart of indulgence and precision. From the initial shimmer of the cocoa butter to the final, glossy sheen, the process reveals a profound connection between patience, understanding, and the creation of something truly exquisite. This isn't just about following a recipe; it's about mastering a craft.
The impact of perfectly melted chocolate extends far beyond the individual experience. It's the foundation of countless desserts, from elegant ganaches to decadent truffles, shaping our cultural landscape of sweet treats. It's a testament to the power of simple ingredients, transformed by careful technique into something magical. The simplest things are often the most beautiful.
This sentiment rings true when considering the transformative power of melting chocolate correctly. The subtle nuances in texture and flavor, achieved through mindful attention to detail, elevate the experience to an art form.
Now, consider your own culinary journey. What other seemingly simple tasks hold a similar potential for perfection? I encourage you to approach your next chocolate-melting endeavor with a newfound appreciation for the process, embracing the nuances and celebrating the achievement of that perfect, glossy melt. The reward? Not just a delicious treat, but a deeper understanding of the artistry involved in creating something truly special.
Unlock Your Inner Chocolatier: Master the Art of Melting Chocolate!
Thanks for joining us on this chocolatey adventure! You've now got the tools to melt chocolate like a pro, achieving that flawlessly smooth texture every time. Ready to put your new skills to the test?
- Whip up your dream dessert: Use your newfound knowledge to create the decadent chocolate treat you've always wanted – brownies, ganache, or even a simple chocolate bark!
- Share your chocolate creations: Snap a picture of your masterpiece and post it on social media with #BakeWithEaseChocolate. Let's see those stunning results!
- Experiment with different chocolates: Try melting dark, milk, and white chocolate – explore the unique textures and flavors each one offers!
What incredible chocolate creation will you make first? Let us know in the comments below!