
Ultimate Dark Chocolate Layer Cake Recipe

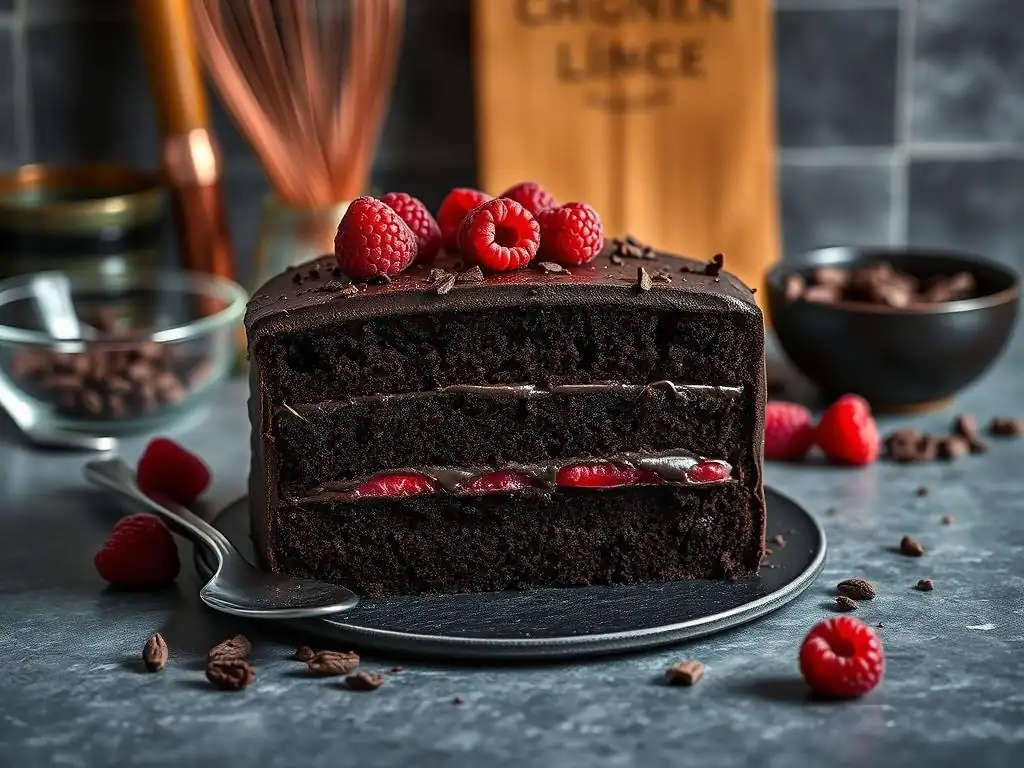
Welcome to BakeWithEase, your guide to baking bliss! Ever dream of creating a decadent masterpiece that will leave everyone speechless? Prepare to unlock the secrets to our Ultimate Dark Chocolate Layer Cake Recipe, a pastry that's surprisingly simple yet intensely satisfying. Intrigued? Let's bake!
- Ultimate Dark Chocolate Layer Cake Recipe: A BakeWithEase Guide
- Introduction: Indulge in Decadence with Our Dark Chocolate Layer Cake
- Preparing for Your Dark Chocolate Masterpiece: Ingredients & Equipment
- Step-by-Step Guide: Baking the Dark Chocolate Cake Layers
- Crafting the Perfect Chocolate Ganache Filling & Frosting
- Assembling Your Dark Chocolate Layer Cake
- Tips & Tricks for Baking the Best Dark Chocolate Layer Cake
- Storing Your Dark Chocolate Layer Cake
- Conclusion: Enjoy Your Homemade Dark Chocolate Layer Cake
- Frequently Asked Questions
- Final Reflection: The Enduring Allure of Dark Chocolate
- Unleash Your Inner Cake Boss!
Ultimate Dark Chocolate Layer Cake Recipe: A BakeWithEase Guide
Introduction: Indulge in Decadence with Our Dark Chocolate Layer Cake
Welcome, fellow baking enthusiasts! Prepare your taste buds for an unforgettable journey into the world of chocolate. Today, we're diving deep into creating the ultimate dark chocolate layer cake recipe right here at BakeWithEase. This isn't just any cake; it's a rich, moist, and intensely chocolatey masterpiece designed to delight both novice bakers and seasoned pros. We've perfected the steps to ensure your success, resulting in a cake that's not only stunning but also incredibly delicious.
Baking a beautiful and tasty cake from scratch can feel daunting, especially a multi-layered one. However, with our detailed guide, you'll find the process straightforward and incredibly rewarding. We break down each stage, from selecting the finest dark chocolate to mastering the art of ganache and frosting, making this dark chocolate layer cake recipe accessible and enjoyable. Get ready to fill your kitchen with the irresistible aroma of baking chocolate and create a dessert that will earn you rave reviews.
Why This Dark Chocolate Layer Cake Recipe is a Must-Try
This specific dark chocolate layer cake recipe stands out for several reasons. Firstly, it utilizes both melted dark chocolate and cocoa powder, a combination that delivers an unparalleled depth of flavor that single-source chocolate cakes often miss. The structure is designed for maximum moisture retention, ensuring each bite is tender and never dry. We incorporate techniques that are simple yet effective, demystifying the process of creating a bakery-quality cake at home.
Furthermore, this recipe for dark chocolate layer cake includes a rich, silky smooth chocolate ganache filling and a decadent frosting, providing layers of chocolatey goodness in every slice. Unlike some recipes that can be overly sweet, our approach balances the sweetness with the deep notes of dark chocolate. This makes it a perfect dessert for special occasions, celebrations, or simply when you crave a truly spectacular chocolate treat. Following this BakeWithEase dark chocolate layer cake recipe guarantees a stunning result you'll be proud to share.
BakeWithEase Presents: The Perfect Dark Chocolate Cake
At BakeWithEase, our goal is to empower you to create delicious baked goods with confidence. This recipe for dark chocolate layer cake embodies that philosophy. We've tested and refined every step to ensure clarity and success for bakers of all levels. We understand that details matter, from the temperature of your ingredients to the type of chocolate you choose.
Our perfect dark chocolate cake recipe is more than just a list of ingredients and instructions; it's a guide to understanding the 'why' behind each step. For instance, we'll explain why using hot liquid is crucial for blooming cocoa powder or why cooling the cake layers correctly prevents shrinkage. By providing these insights, we help you build your baking knowledge and confidently tackle not just this recipe but future baking projects as well. Trust BakeWithEase to guide you to your perfect slice of dark chocolate heaven.
Preparing for Your Dark Chocolate Masterpiece: Ingredients & Equipment
Getting ready to bake is half the fun! Before you preheat your oven, it's essential to gather all your ingredients and equipment. This preparation stage is crucial for a smooth baking process and contributes significantly to the success of your dark chocolate layer cake recipe. Having everything measured and ready (mise en place) minimizes stress and prevents you from scrambling mid-recipe.
Taking the time to prepare ensures you don't realize you're missing a key ingredient or tool when you're already halfway through mixing the batter. For this rich dark chocolate layer cake, precision in measurement is particularly important for achieving the right texture and flavor balance. A quick checklist before you start can save you time and potential baking mishaps, making the entire experience much more enjoyable.
Gathering Your High-Quality Ingredients for the Dark Chocolate Cake
The quality of your ingredients directly impacts the final taste and texture of your dark chocolate layer cake. Using fresh, high-quality components will elevate your cake from good to truly exceptional. Pay attention to details like the freshness of your leavening agents (baking soda and baking powder) and the quality of your dairy and eggs.
For this recipe, we'll be using standard pantry staples, but sourcing the best versions you can find is always recommended. For example, using European-style butter with a higher fat content can contribute to a richer flavor and more tender crumb. Similarly, using large, fresh eggs at room temperature helps create a more emulsified batter, leading to a better cake structure. Let's look closer at some key ingredients.
The Best Dark Chocolate for a Rich Flavor
Choosing the right dark chocolate is paramount for this dark chocolate layer cake recipe. Opt for a high-quality dark chocolate with a cocoa percentage between 60% and 75%. Chocolate chips are convenient, but for the best flavor and melting consistency, we recommend using a bar of good quality dark chocolate and finely chopping it. Brands like Ghirardelli, Lindt, or Valrhona offer excellent options.
Avoid using baking chocolate labeled specifically for melting (like candy melts) as they often contain stabilizers that can affect the cake's texture and flavor profile. The natural cocoa butter content in quality dark chocolate contributes to the richness and moistness of the cake layers and the silkiness of the ganache. Approximately 4 to 6 ounces (113-170g) of finely chopped dark chocolate will be needed for the batter and potentially more for the ganache and frosting depending on your chosen recipe variations.
Essential Baking Ingredients for a Moist Cake
Beyond the dark chocolate, several other ingredients are crucial for achieving a moist and tender dark chocolate layer cake. All-purpose flour is the base, and sifting it helps prevent lumps and aerates it slightly. Granulated sugar provides sweetness and helps with moisture retention, while a touch of brown sugar can add depth and softness.
Cocoa powder is another key flavor component. Use unsweetened natural cocoa powder for a classic chocolate flavor, or Dutch-process cocoa for a darker color and milder taste. Adding a liquid fat, like vegetable oil or melted butter, along with buttermilk or sour cream, contributes significantly to the cake's moisture. The acidity in buttermilk/sour cream also reacts with baking soda, aiding in leavening and tenderness. Don't forget baking powder and baking soda for lift, salt to balance the sweetness, and vanilla extract to enhance the chocolate flavor.
Essential Baking Equipment for Cake Perfection
Having the right tools makes the baking process much smoother and helps ensure consistent results for your dark chocolate layer cake. You don't need a professional kitchen, but a few key pieces of equipment are indispensable. Ensure your oven is calibrated correctly; an oven thermometer can be invaluable as oven temperatures can vary by as much as 25-50°F (approx. 15-30°C) from the dial setting.
Basic equipment like measuring cups and spoons (both dry and liquid), mixing bowls of various sizes, a whisk, a rubber spatula, and a stand mixer or hand mixer will be essential. Parchment paper is a baker's best friend for lining pans, preventing sticking, and ensuring easy removal of your delicate cake layers.
Layer Cake Pans: Choosing the Right Size
For a classic dark chocolate layer cake, two or three round cake pans are typically used. The most common size is 8 or 9 inches (approx. 20-23 cm) in diameter. Using pans of the same size is crucial for creating even layers that stack neatly. If your recipe is designed for two 8-inch pans and you only have 9-inch pans, the layers will be thinner and may bake faster, so you'll need to adjust baking time accordingly.
Using good quality, light-colored metal pans is recommended as they conduct heat evenly, promoting uniform baking and preventing dark edges. Non-stick pans are helpful but should still be greased and floured or lined with parchment paper for insurance. Ensure your pans are at least 2 inches (approx. 5 cm) deep to accommodate the cake batter as it rises.
Mixing Bowls and Measuring Tools
You'll need at least two large mixing bowls for preparing the wet and dry ingredients separately before combining them for your dark chocolate layer cake batter. Glass, ceramic, or stainless steel bowls work well. Having a smaller bowl for melting chocolate or whisking eggs is also useful.
Accurate measuring is non-negotiable in baking. Use dry measuring cups for flour, sugar, and cocoa powder, leveling them off with a straight edge. Use a liquid measuring cup for milk, oil, or buttermilk, placed on a flat surface to read at eye level.
Measuring spoons should be used for smaller quantities like baking powder, baking soda, salt, and vanilla extract. Using a kitchen scale to measure flour and other dry ingredients by weight (grams or ounces) is the most accurate method and highly recommended for consistent results in any dark chocolate layer cake recipe. For example, 1 cup of all-purpose flour typically weighs around 120-130 grams.
Step-by-Step Guide: Baking the Dark Chocolate Cake Layers
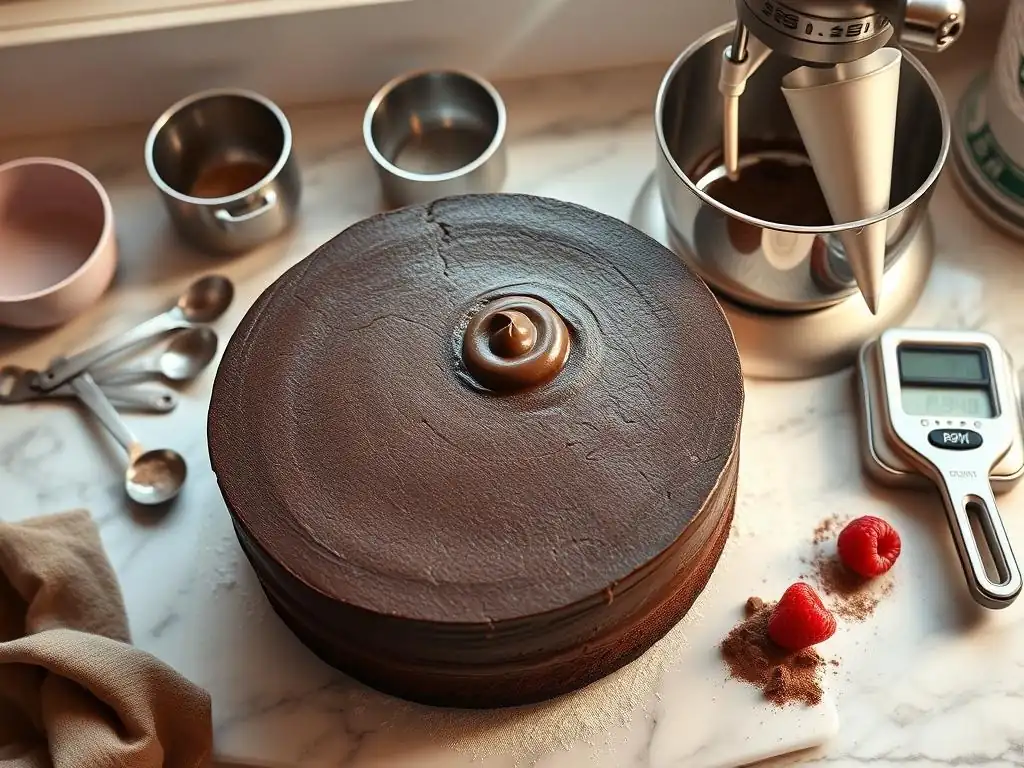
Now that you have your ingredients and equipment ready, it's time to dive into the heart of the dark chocolate layer cake recipe: baking the cake layers themselves. This is where the magic happens, transforming simple ingredients into moist, flavorful cake. Following these steps carefully will lead to perfectly baked layers that are easy to handle and assemble.
Patience and attention to detail are your allies in this stage. Don't rush the mixing process, and pay close attention to the visual cues that indicate when your cake layers are perfectly baked. Remember, slightly underbaked is often better than overbaked, as an overbaked cake can quickly become dry.
Step 1: Preparing the Dark Chocolate Cake Batter
Creating the batter for this dark chocolate layer cake requires combining the wet and dry ingredients in the correct order and manner. This ensures proper emulsification, activation of leavening agents, and even distribution of flavor components, especially the melted dark chocolate. Start by preheating your oven and preparing your cake pans by greasing and flouring them or lining the bottoms with parchment paper.
A common technique for moist chocolate cakes is the "reverse creaming" method or, as in this recipe, combining dry ingredients first and then adding wet. Blooming the cocoa powder with hot liquid is also a popular technique to intensify the chocolate flavor. This recipe incorporates both melted dark chocolate and cocoa powder, requiring a specific order of mixing to achieve the best results.
Melting the Dark Chocolate for a Smooth Texture
For this dark chocolate layer cake recipe, you'll need melted dark chocolate incorporated directly into the batter. This adds richness and moisture. The best way to melt dark chocolate is gently, either using a double boiler setup (a heatproof bowl set over a pot of simmering water, ensuring the bottom of the bowl doesn't touch the water) or in the microwave on low power (50%) in 30-second intervals, stirring well after each interval, until just melted and smooth.
Be careful not to overheat or burn the chocolate, as this can make it seize and become unusable. Once melted, let it cool slightly before adding it to the batter to avoid cooking the eggs or affecting the texture of other ingredients. The smooth, glossy melted dark chocolate is a key component in achieving the deep flavor of this layer cake recipe.
Combining Wet and Dry Ingredients for the Perfect Consistency
Start by whisking together the dry ingredients: flour, sugar, cocoa powder, baking soda, baking powder, and salt in a large bowl. In a separate bowl, whisk together the wet ingredients: eggs, buttermilk (or sour cream mixed with milk), oil (or melted butter), and vanilla extract. Gradually add the wet ingredients to the dry ingredients, mixing on low speed or by hand until just combined. Do not overmix, as this can develop the gluten in the flour, leading to a tough cake.
Finally, gently fold in the slightly cooled melted dark chocolate. Mix until no streaks of chocolate remain, but again, avoid overmixing. The batter for this dark chocolate layer cake recipe will likely be relatively thin, which is typical for a moist cake and helps ensure a tender crumb. A thin batter also helps the cake bake more evenly.
Step 2: Baking the Dark Chocolate Cake Layers
With the batter ready, it's time to get it into the pans and into the oven. Proper baking technique is crucial for achieving evenly cooked layers that rise well and have a beautiful texture. Ensure your oven has been preheating for at least 15-20 minutes to reach and stabilize at the correct temperature, typically around 350°F (175°C).
Position your oven rack in the center of the oven. This allows for the most even heat distribution, preventing the bottom from burning or the top from browning too quickly before the center is cooked through. Baking two or three layers simultaneously requires adequate spacing between the pans for air circulation.
Dividing the Batter Evenly
To ensure your dark chocolate layer cake has even layers that stack nicely, it's important to divide the batter as equally as possible between the prepared pans. The most accurate way to do this is by weight using your kitchen scale. Place a prepared pan on the scale, zero it out, and pour or spoon batter into it until you've reached the desired weight (total batter weight divided by the number of layers). For example, if your total batter weighs 1200 grams for two layers, aim for 600 grams per pan.
If you don't have a scale, you can eyeball it by pouring roughly equal amounts into each pan. Swirling the pan gently or using an offset spatula to spread the batter evenly to the edges helps ensure the layers bake flat, minimizing the need for excessive leveling later.
Baking Time and Temperature for Moist Layers
Bake the dark chocolate cake layers in the preheated oven at 350°F (175°C) for approximately 30-35 minutes. The exact baking time will vary depending on your oven, the size of your pans, and how accurately you measured your ingredients. Begin checking for doneness around the 30-minute mark.
The layers are done when a wooden skewer or toothpick inserted into the center comes out with a few moist crumbs attached, but no wet batter. The edges of the cake will start to pull away slightly from the sides of the pan, and the top will spring back gently when lightly touched. Overbaking is the primary cause of dry cake, so err on the side of caution. If baking multiple pans, rotate them halfway through the baking time for even cooking, especially if your oven has hot spots.
Proper cooling is just as important as baking for a successful dark chocolate layer cake. Rushing the cooling process can lead to cracked layers, sticking to the pan, or a gummy texture. Patience is key here to allow the cake's structure to set properly.
Immediately removing the cake from the oven and letting it cool completely in the pan can cause condensation and make the bottom layer soggy. Transferring it too soon to a cooling rack can cause it to break apart. There's a sweet spot for transferring.
Preventing Dryness During Cooling
Once the dark chocolate cake layers are removed from the oven, let them cool in their pans on a wire rack for about 10-15 minutes. This initial cooling period allows the cake to firm up slightly within the support of the pan. Running a knife around the edges can help loosen them.
After this initial cooling, invert the cakes onto a wire rack to cool completely. Cooling on a wire rack allows air circulation around the entire cake, preventing moisture buildup on the bottom and sides. Ensure the cakes are completely cool, which can take 1-2 hours, before attempting to level, fill, or frost them. Trying to work with warm cake layers will result in a messy, unstable dark chocolate layer cake.
Leveling the Cake Layers for a Professional Finish
Even with careful baking, cake layers can sometimes dome in the center. For a professional-looking dark chocolate layer cake with flat, stable layers, you'll want to level them. Once the layers are completely cool, use a long serrated knife or a cake leveler to carefully slice off the domed top, creating a flat surface.
Hold the knife parallel to the work surface and use a gentle sawing motion. You can save the trimmed cake scraps for cake pops or simply enjoy them as a baker's treat! Leveling creates a uniform height for each layer, making assembly easier and ensuring your dark chocolate layer cake sits straight and looks beautiful.
Crafting the Perfect Chocolate Ganache Filling & Frosting
No ultimate dark chocolate layer cake recipe would be complete without decadent chocolate filling and frosting. These components add moisture, richness, and another layer of intense chocolate flavor. We'll guide you through making a smooth ganache for the filling and a luscious frosting to cover the cake.
The beauty of chocolate ganache and frosting is their versatility. While a basic recipe is provided, you can easily customize them with flavorings to complement the dark chocolate layer cake. Getting the right consistency is key for both spreadability and stability.
Making the Silky Smooth Chocolate Ganache Filling
Chocolate ganache is a simple yet elegant filling made from just two ingredients: chocolate and heavy cream. When made correctly, it results in a rich, smooth, and intensely chocolatey filling that pairs perfectly with a dark chocolate layer cake. The ratio of chocolate to cream determines the consistency of the ganache.
For a pourable ganache, you might use a 1:1 ratio (equal parts chocolate and cream). For a thicker, spreadable filling like the one needed for between cake layers, a ratio closer to 2:1 (two parts chocolate to one part cream by weight) is ideal. For this dark chocolate layer cake recipe, we recommend using approximately 8 ounces (225g) of chopped dark chocolate and 4 ounces (115g) of heavy cream for the filling.
Achieving the Ideal Ganache Consistency
To make the ganache, heat the heavy cream in a saucepan over medium heat until it just begins to simmer around the edges. Remove from heat and pour the hot cream over your finely chopped dark chocolate in a heatproof bowl. Let it sit undisturbed for 5 minutes to allow the heat from the cream to melt the chocolate.
After 5 minutes, gently whisk the mixture starting from the center and working your way out until it is completely smooth and glossy. Avoid whisking too vigorously, as this can incorporate air bubbles. If a few chocolate pieces remain, you can heat the mixture briefly over a double boiler or in the microwave in 10-second bursts, stirring between each, until smooth.
Let the ganache cool at room temperature until it reaches a spreadable consistency, similar to thick pudding, which may take 1-2 hours. Do not refrigerate unless you need to speed up cooling slightly; if it becomes too firm, gently warm it.
Adding Flavor Variations to Your Ganache Filling
While plain dark chocolate ganache is divine, you can easily add flavor variations to enhance your dark chocolate layer cake. Stirring in a teaspoon of vanilla extract or a tablespoon of coffee liqueur (like Kahlúa) adds depth. A pinch of sea salt can heighten the chocolate flavor.
For a hint of spice, a tiny pinch of cayenne pepper or chili powder (less than 1/4 teaspoon) can be added to the hot cream before pouring it over the chocolate. Citrus zest, like orange, can also complement dark chocolate beautifully. Experiment with small amounts to find your favorite combination that complements this specific dark chocolate layer cake recipe.
Whipping Up a Decadent Dark Chocolate Frosting
Beyond the ganache filling, a generous coating of dark chocolate frosting is essential for the ultimate dark chocolate layer cake. A classic buttercream is a popular choice, offering a creamy texture that contrasts nicely with the dense cake and smooth ganache. This recipe uses a rich dark chocolate buttercream.
A standard dark chocolate buttercream typically involves creaming together softened butter, powdered sugar, cocoa powder, melted chocolate, and a liquid like milk or cream, along with vanilla extract and salt. The key is using high-quality cocoa and potentially some melted dark chocolate for maximum flavor.
Achieving a Light and Airy Frosting Texture
To achieve a light and airy dark chocolate frosting, start with softened butter, not melted. Cream the butter in a stand mixer with the paddle attachment (or with a hand mixer) on medium-high speed until it is pale and fluffy, which can take 3-5 minutes. This incorporates air, making the frosting lighter.
Gradually add the powdered sugar, one cup at a time, mixing on low speed until combined before increasing the speed. Scrape down the bowl often. Add the cocoa powder, melted and slightly cooled dark chocolate (around 2-4 oz or 55-115g), vanilla extract, and salt. Finally, add milk or cream, one tablespoon at a time, until the frosting reaches your desired consistency – thick enough to hold its shape but spreadable. Whipping the frosting for a few minutes on medium speed after all ingredients are added helps make it extra light and smooth.
Tips for a Smooth and Spreadable Frosting
Several factors contribute to a smooth and spreadable dark chocolate frosting for your layer cake. Ensure your butter is properly softened (it should yield to gentle pressure). Sifting your powdered sugar and cocoa powder before adding them to the butter prevents lumps.
If the frosting is too thick, add more milk or cream, one teaspoon at a time, mixing until smooth. If it's too thin, you can add a little more sifted powdered sugar or cocoa powder, or refrigerate it for 10-15 minutes to firm up slightly. For the smoothest finish when frosting the outside of the cake, you can warm a metal offset spatula slightly by dipping it in hot water and wiping it dry before smoothing the frosting. This helps melt the surface slightly, creating a professional look on your dark chocolate layer cake.
Assembling Your Dark Chocolate Layer Cake
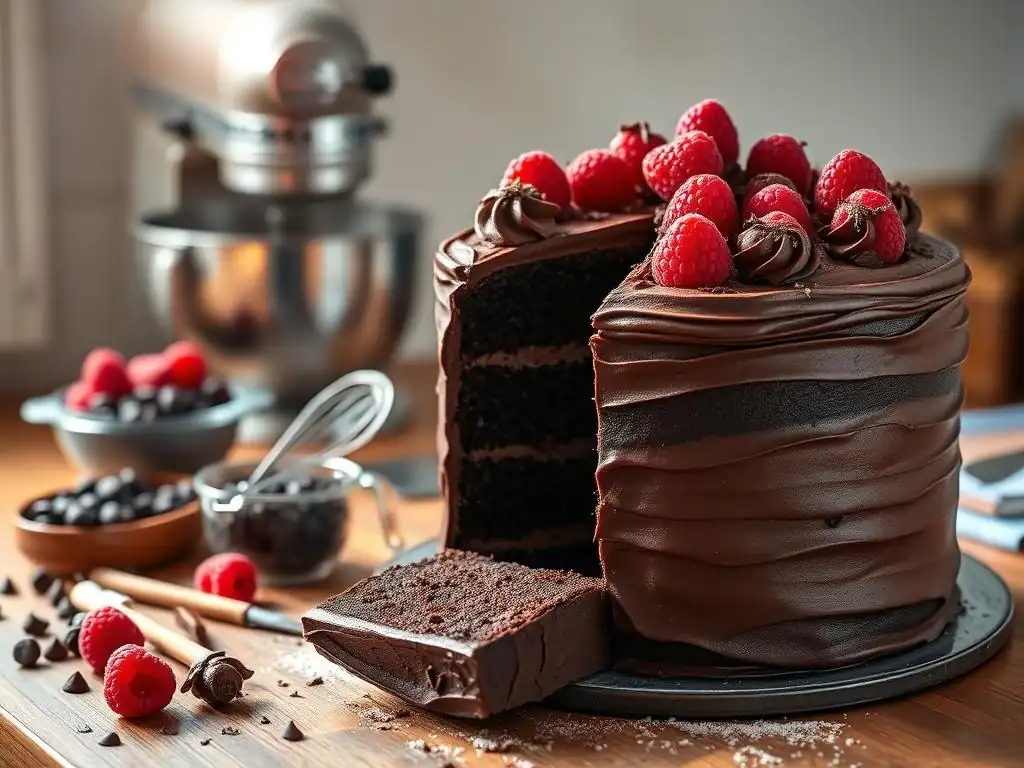
You've baked the perfect layers and crafted the delicious ganache and frosting. Now comes the exciting part: assembling your ultimate dark chocolate layer cake! This is where the layers come together to create a stunning dessert. Assembly requires a steady hand and a few simple techniques to ensure stability and an attractive finish.
Having a cake stand or a flat serving plate ready is helpful. A rotating cake turntable makes frosting much easier. Ensure your cake layers are completely cool and leveled before you begin.
Layering the Cake with Ganache Filling
Place the first leveled dark chocolate cake layer onto your serving plate or cake stand. If using a turntable, place a non-slip mat or a dab of frosting underneath the first layer to secure it. If your layers are very delicate, you might want to place a cake cardboard underneath the bottom layer for easier handling.
Spoon or pipe the cooled, spreadable dark chocolate ganache onto the first layer. Use an offset spatula to spread the ganache evenly across the top, leaving a small border (about 1/2 inch or 1 cm) around the edge. This border helps contain the ganache when the next layer is placed on top. Aim for a layer of ganache that is approximately 1/4 to 1/2 inch (approx. 0.5-1 cm) thick, depending on your preference.
Ensuring Even Distribution of the Filling
To ensure even distribution of the ganache filling between the dark chocolate cake layers, start by placing a dollop of ganache in the center and spreading it outwards towards the edges. Make sure the layer of ganache is relatively uniform in thickness across the entire surface.
Carefully place the second cake layer on top of the ganache, aligning it as best as possible with the bottom layer. Press down gently to secure it. If you have a third layer, repeat the process with the ganache filling. The weight of the layers will help distribute the ganache slightly, but starting with an even layer is key.
Frosting the Dark Chocolate Layer Cake
Once the layers are stacked with the ganache filling, it's time to apply the dark chocolate frosting. Start with a thin "crumb coat." Apply a thin layer of frosting all over the cake – top and sides – just enough to trap any loose crumbs. This initial layer doesn't need to be perfect.
Refrigerate the cake for 15-30 minutes until the crumb coat is firm to the touch. This step is crucial for preventing crumbs from getting into your final layer of frosting, ensuring a smooth finish on your dark chocolate layer cake.
Achieving a Smooth and Professional Finish
After the crumb coat is chilled and firm, apply the second, thicker layer of dark chocolate frosting. Start by adding a generous amount of frosting to the top and spreading it outwards towards the edges. Then, apply frosting to the sides, working your way around the cake.
Use an offset spatula or a bench scraper held against the side of the cake (at a slight angle) while rotating the turntable to smooth the frosting. For the top, use the spatula to smooth it or create swirls and peaks. Don't aim for absolute perfection on your first try; practice makes perfect! A smooth surface is achievable with patience and the right tools, giving your dark chocolate layer cake a polished look.
Decorating Ideas for Your Dark Chocolate Cake
Once your dark chocolate layer cake is frosted, you can leave it simply smooth or get creative with decorations. Simple swirls on top using an offset spatula are easy and elegant. You can pipe borders around the top and bottom edges using a piping bag fitted with a star or round tip.
For extra indulgence, drizzle melted chocolate or more ganache over the top, allowing it to drip down the sides. Chocolate shavings, curls, or sprinkles can be added to the top and sides. Fresh berries, like raspberries or strawberries, offer a beautiful color contrast and a touch of freshness. Consider placing whole dark chocolate pieces or truffles on top for a truly decadent finish to your dark chocolate layer cake.
Tips & Tricks for Baking the Best Dark Chocolate Layer Cake
Even with a great recipe, a few extra tips and tricks can make the difference between a good cake and an outstanding one. These insights from BakeWithEase address common challenges and offer ways to perfect your dark chocolate layer cake.
From ensuring moisture to troubleshooting issues, these pointers are gathered from years of baking experience. Implementing even a few of these tips can significantly improve the outcome of your dark chocolate layer cake recipe.
Achieving a Moist and Tender Cake Crumb
Several factors contribute to a moist and tender crumb in a dark chocolate layer cake. Using a combination of melted chocolate and cocoa powder adds fat and richness. Incorporating a liquid fat like oil or melted butter helps keep the cake moist for longer compared to recipes relying solely on creamed butter.
Buttermilk or sour cream adds moisture and acidity, which tenderizes the gluten in the flour and reacts with baking soda for a softer texture. Using hot liquid (like hot coffee or water) to bloom the cocoa powder not only intensifies the chocolate flavor but also helps create a moist cake. Finally, measuring ingredients accurately, especially flour, prevents a dry, dense cake.
Preventing a Dry Dark Chocolate Cake
A dry cake is a common baking disappointment. To prevent your dark chocolate layer cake from drying out, avoid overmixing the batter; mix until just combined. Overmixing develops gluten, leading to a tough, dry texture.
Most importantly, do not overbake the cake layers. Begin checking for doneness at the minimum recommended time (e.g., 30 minutes) and remove them as soon as a toothpick comes out with moist crumbs. Cooling the cakes properly on a wire rack also prevents them from steaming in the pan and becoming soggy or dense. Storing the finished cake correctly (see next section) also helps maintain its moisture.
Troubleshooting Common Baking Problems
Even experienced bakers encounter issues. Here are solutions to a couple of common problems when baking a dark chocolate layer cake.
Cake Sticking to the Pan
Cake sticking is frustrating! This is usually caused by inadequate pan preparation. Ensure you generously grease the pans with butter or baking spray, then flour them by adding a tablespoon or two of flour, swirling it around to coat all surfaces, and tapping out the excess.
For extra insurance, especially with rich cakes like this dark chocolate layer cake, always line the bottom of the pans with parchment paper cut to fit the exact size of the pan. This creates a non-stick barrier that ensures the cake releases cleanly. Make sure you also allow the cake to cool in the pan for the recommended 10-15 minutes before inverting it onto a wire rack.
Uneven Cake Layers
Uneven layers, often domed in the center, can result from oven hot spots or the pan being too small for the amount of batter. Ensure your oven temperature is accurate using an oven thermometer. Rotating the pans halfway through the baking time (e.g., at the 15 or 20-minute mark) can help them bake more evenly.
Dividing the batter accurately by weight between the pans also contributes to even layers. If doming is a persistent issue, you can try using cake strips (wet fabric strips wrapped around the outside of the pan) which help the cake bake more evenly from the edges to the center. Regardless, leveling the cooled layers with a serrated knife is a standard practice for creating a professional-looking dark chocolate layer cake.
Storing Your Dark Chocolate Layer Cake
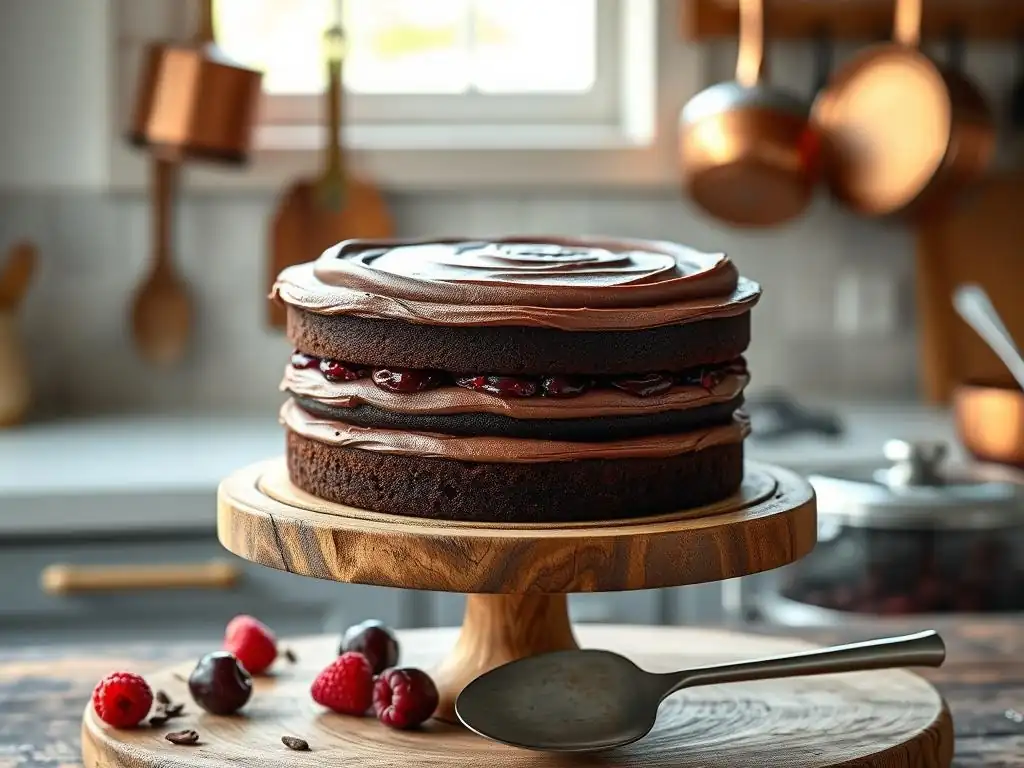
After all your hard work baking and decorating, you'll want to ensure your dark chocolate layer cake stays fresh and delicious. Proper storage is key to maintaining its moisture, texture, and flavor for as long as possible.
Whether you plan to enjoy it over a few days or save some for later, these storage tips will help you preserve the quality of your homemade dark chocolate layer cake.
Proper Storage to Maintain Freshness
If the dark chocolate layer cake is frosted with buttercream or ganache, it can typically be stored at room temperature in an airtight container for 2-3 days. However, if your frosting contains fresh cream, cream cheese, or perishable fillings, it's best to store the cake in the refrigerator.
When refrigerating, place the cake in an airtight container or cover it loosely with plastic wrap and then tightly with aluminum foil to prevent it from drying out or absorbing odors from the fridge. Allow refrigerated cake to sit at room temperature for about 30-60 minutes before serving for the best texture and flavor. For this dark chocolate layer cake recipe with ganache and buttercream, room temperature storage is usually fine for a couple of days, but refrigeration extends its shelf life to about 5-7 days.
Freezing the Cake for Later Enjoyment
One of the best ways to preserve your dark chocolate layer cake for longer is by freezing it. You can freeze individual slices or the entire cake (unfrosted layers or the fully assembled cake). To freeze individual slices, place them on a baking sheet and freeze until firm, about 1-2 hours. Then, wrap each slice tightly in plastic wrap and place in a freezer-safe container or bag.
To freeze whole unfrosted layers, ensure they are completely cool, wrap each layer tightly in plastic wrap, and then in aluminum foil. To freeze a fully assembled and frosted dark chocolate layer cake, freeze it uncovered until the frosting is firm, then wrap it tightly in plastic wrap and then aluminum foil. Properly wrapped cake can last in the freezer for up to 2-3 months. Thaw frozen cake overnight in the refrigerator before bringing it to room temperature to serve.
Conclusion: Enjoy Your Homemade Dark Chocolate Layer Cake
You've done it! You've successfully navigated the steps of our ultimate dark chocolate layer cake recipe and created a truly spectacular dessert. From selecting the finest ingredients to mastering the art of assembly, you've proven that baking a decadent layer cake is well within your reach with the right guidance.
Taking that first bite of your homemade creation, with its rich chocolate layers, silky ganache, and smooth frosting, is incredibly rewarding. This dark chocolate layer cake is more than just a dessert; it's a testament to your baking skills and patience.
We love seeing what our community bakes! Once you've made this dark chocolate layer cake recipe, we encourage you to share your photos and experiences. What variations did you try? Did you add any special decorations? Your success inspires other bakers in the BakeWithEase community.
Sharing your creations is a great way to connect with fellow baking enthusiasts and get feedback. It also helps us see how our recipes are working in your kitchens. We can't wait to see your beautiful dark chocolate layer cake!
More Delicious Chocolate Cake Recipes from BakeWithEase
If you enjoyed baking this dark chocolate layer cake, you'll be happy to know that BakeWithEase has many more delicious chocolate cake recipes for you to explore. From simple one-bowl chocolate cakes perfect for weeknight cravings to intricate tortes and flourless chocolate options, there's always a new chocolate adventure waiting.
Dive into our collection of chocolate cakes and desserts to find your next baking project. Whether you're looking for a quick brownie recipe, a classic chocolate chip cookie guide, or another show-stopping cake, BakeWithEase is here to provide the easy-to-follow instructions and helpful tips you need to succeed in the kitchen. Happy baking!
Frequently Asked Questions
What makes this dark chocolate layer cake recipe "ultimate"?
This recipe uses a combination of high-quality dark chocolate and Dutch-processed cocoa powder to achieve an intensely rich and moist cake. The frosting is also carefully balanced to complement the chocolate flavor.
Is this recipe suitable for beginner bakers?
While it involves multiple steps, the recipe is designed with clear, step-by-step instructions and tips from BakeWithEase. Even beginners can successfully bake this cake with careful attention to detail and accurate measurements.
Can I substitute ingredients in the dark chocolate layer cake?
While some substitutions are possible, using high-quality dark chocolate and cocoa is crucial for the best flavor. Substituting ingredients may alter the texture and taste of the final product.
How should I store the leftover dark chocolate layer cake?
Store leftover cake in an airtight container at room temperature for up to 3 days, or in the refrigerator for up to 5 days. Allow the cake to come to room temperature before serving for optimal flavor.
What are some tips for preventing a dry dark chocolate layer cake?
Avoid overbaking the cake by checking for doneness with a toothpick. Also, be sure to use the correct oven temperature and weigh your ingredients accurately, especially flour, for a moist result.
Final Reflection: The Enduring Allure of Dark Chocolate
The perfect dark chocolate layer cake isn't just a dessert; it's a testament to the power of simple, high-quality ingredients transformed into something truly extraordinary. This recipe, meticulously crafted and tested, aims to provide you with just that – a decadent experience that transcends mere indulgence. The rich, intense flavor of dark chocolate, balanced with the lightness of the cake layers and the creaminess of the frosting, is a testament to the artistry of baking.
The enduring appeal of chocolate, particularly dark chocolate, speaks to a deeper human desire for comfort and celebration. It's a flavor that evokes memories, connects us to loved ones, and elevates even the simplest of occasions. Chocolate is a perfect food, as far as I'm concerned. It's a comfort food, a celebration food, a food that's good for you in moderation.
This sentiment perfectly captures the multifaceted nature of chocolate's impact on our lives. From childhood birthdays to sophisticated adult gatherings, dark chocolate remains a constant source of joy and satisfaction.
Now, I invite you to go beyond simply following the recipe. Consider the process itself – the careful measuring, the gentle folding, the anticipation of the first bite. Embrace the artistry of baking, and allow this recipe to be a springboard for your own culinary creativity. Experiment with different types of dark chocolate, explore variations in frosting, and most importantly, share the joy of this delicious cake with those you love. The ultimate reward isn't just the taste, but the memories and connections created around this timeless treat.
Unleash Your Inner Cake Boss!
Thanks for joining us on this delicious journey into the world of dark chocolate decadence! We hope you’ve gained some valuable tips and tricks for baking the perfect layer cake. Ready to take your baking skills to the next level?
- Bake and share your masterpiece! Don't just admire this recipe – bring it to life and show off your amazing creation. Tag us on social media – we'd love to see your baking triumphs!
- Experiment with different fillings: Think beyond the classic whipped cream. Try a rich ganache, a vibrant fruit compote, or even a salted caramel layer. The possibilities are endless!
- Leave a comment and share your experience! What was your favorite part of the recipe? What modifications did you make? Let's create a thriving community of chocolate cake enthusiasts!
What unique twist will you add to this already amazing dark chocolate layer cake?