
Prevent Soggy Bottoms: The Ultimate Fruit Pie Secret

Welcome to BakeWithEase, your haven for baking bliss! Are you tired of the dreaded soggy bottom plaguing your beautiful fruit pies? Fear not! We're diving deep into the secrets to achieving perfectly crisp crusts every time. Discover the ultimate fruit pie soggy bottom fix and transform your baking from frustrating to fabulous. Intrigued? Let's get started and unlock the secrets to pie perfection!
- Prevent Soggy Bottoms: The Ultimate Fruit Pie Secret - BakeWithEase
- Introduction: Banishing the Soggy Bottom Blues in Fruit Pies
- Understanding the Enemy: Why Fruit Pies Get Soggy
- The Ultimate Fruit Pie Soggy Bottom Fix: Proven Techniques
- Advanced Techniques for Preventing Soggy Bottoms
- Recipe Adaptations: Applying the Soggy Bottom Fix to Your Favorite Fruit Pie
- Troubleshooting: Common Mistakes and How to Avoid Them
- Conclusion: Enjoy Perfectly Crisp Fruit Pies Every Time
-
Frequently Asked Questions
- What is the main cause of a soggy bottom in fruit pies?
- What are some effective techniques to prevent a soggy pie crust?
- How does blind baking help prevent a soggy fruit pie bottom?
- What types of thickening agents work best for fruit pie fillings?
- Can the type of fruit used in a pie affect the likelihood of a soggy bottom?
- Final Reflection: The Enduring Quest for the Perfect Pie Crust
- Unlock Your Perfect Pie Crust: A Flaky Future Awaits!
Prevent Soggy Bottoms: The Ultimate Fruit Pie Secret - BakeWithEase
Introduction: Banishing the Soggy Bottom Blues in Fruit Pies
Ah, the classic fruit pie. A flaky, golden crust overflowing with bubbling, sweet-tart fruit filling – it's a picture of comfort and deliciousness. But for many home bakers, this idyllic scene is often marred by a frustrating foe: the dreaded soggy bottom. That beautiful crust on top hides a sad, pale, and doughy layer beneath the filling.
It's a common challenge, but one that can absolutely be overcome! This guide is dedicated to providing the ultimate fruit pie soggy bottom fix, equipping you with the knowledge and techniques to achieve a perfectly crisp crust from edge to center, every single time. Get ready to say goodbye to soggy bottoms and hello to pie perfection!
Understanding the Enemy: Why Fruit Pies Get Soggy
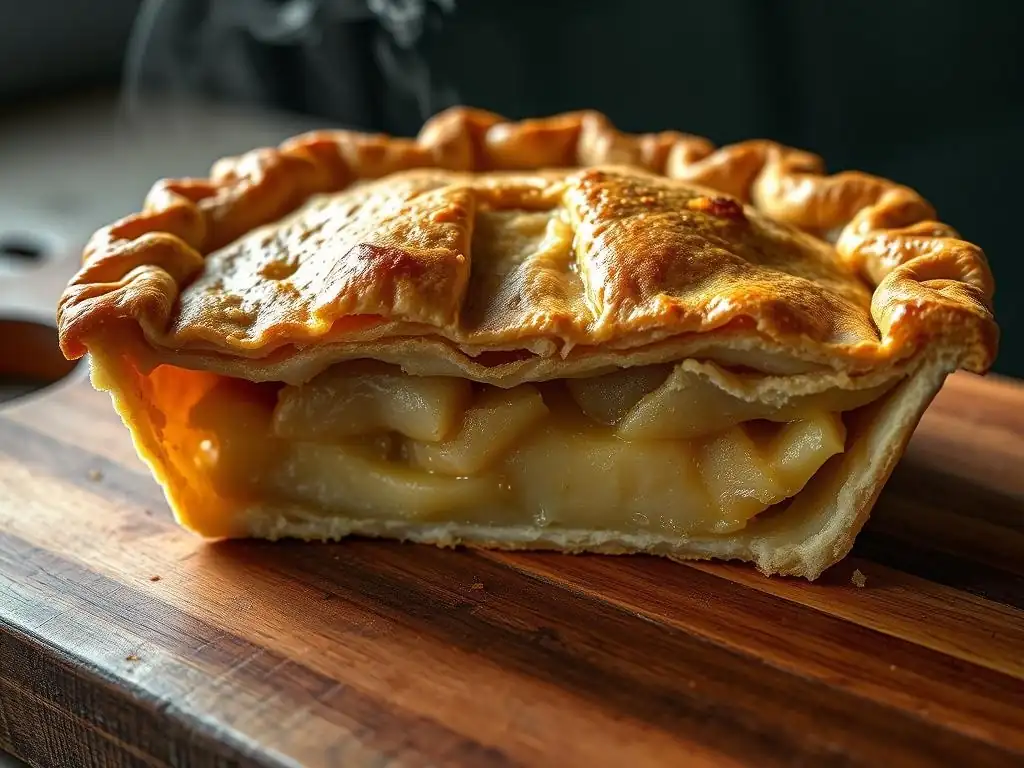
Before we tackle the problem, let's understand why it happens. A soggy pie bottom isn't a baking mystery; it's a direct result of moisture interaction. Fruit fillings are inherently wet, and as the pie bakes, this moisture (in the form of steam and liquid) is released. If the bottom crust isn't properly prepared or protected, it absorbs this moisture like a sponge, preventing it from fully cooking and becoming golden and crisp. Understanding the science and the sources of moisture is the first step towards implementing an effective fruit pie soggy bottom fix.
The Science Behind a Soggy Pie Crust
Pie crust is primarily made from flour, fat (like butter or shortening), water, and salt. When you bake a pie, several things happen. The fat melts, creating steam pockets that separate the gluten layers in the flour, which is what gives a crust its flakiness.
Simultaneously, the water in the dough evaporates, and the heat of the oven causes the starches in the flour to gelatinize and the proteins to denature, setting the structure of the crust. For the crust to become golden brown and crisp, it needs to reach a sufficient internal temperature (around 212°F or 100°C for water to fully evaporate and then higher for browning reactions like Maillard).
When excessive moisture from the filling permeates the bottom crust before it has a chance to set and crisp, it inhibits this process. The water from the filling keeps the crust temperature lower, preventing the necessary evaporation and browning, leaving it pale, doughy, and yes, soggy.
Think of it like trying to fry something in oil that's not hot enough – it just absorbs the oil and becomes greasy instead of crisp. Similarly, a pie crust overwhelmed by moisture before it's properly set won't crisp up. The steam from the filling rises, but liquid also seeps downwards.
Gravity is not your friend here! Preventing this migration of moisture and ensuring the bottom crust gets enough direct heat are key components of any successful fruit pie soggy bottom fix strategy. Techniques like blind baking or creating a barrier work by giving the bottom crust a head start or protection against this moisture assault.
High-Moisture Culprits: Common Soggy Bottom Causes in Fruit Pies
Certain fruits are notorious for releasing a significant amount of liquid when heated. Berries like strawberries, raspberries, and blueberries, or fruits like peaches and plums, have a high water content. Rhubarb, while acidic, also contains substantial moisture. Baking pies with these fruits often presents a greater challenge in preventing a soggy bottom compared to, say, an apple pie (though apples can also release a fair bit of juice depending on the variety). Using under-ripe fruit can sometimes help slightly, but it often compromises flavor.
Another major culprit is simply using too much fruit filling or not allowing the filling to thicken properly. An overstuffed pie means more moisture overall, and a filling that remains too liquid throughout the bake will inevitably soak into the bottom crust. For example, a typical blueberry pie might contain over 3 cups of fresh berries, releasing upwards of half a cup or more of liquid during baking if not properly managed with thickeners.
While you want a generous filling, ensuring it's not drowning the bottom crust is crucial. This highlights the importance of selecting appropriate thickeners and potentially pre-treating the fruit or filling, which are vital elements of a comprehensive fruit pie soggy bottom fix.
The Ultimate Fruit Pie Soggy Bottom Fix: Proven Techniques
Now that we understand the enemy, let's arm ourselves! Implementing a robust fruit pie soggy bottom fix involves a combination of techniques targeting both the crust and the filling. There isn't one single magic bullet, but using a few of these methods together dramatically increases your chances of pie-baking success.
Blind Baking for a Crisper Fruit Pie Crust
Blind baking, also known as pre-baking, is perhaps the most widely recommended fruit pie soggy bottom fix, especially for pies with very wet fillings. This technique involves partially or fully baking the bottom crust before adding the filling.
By giving the crust a head start in the oven without the burden of the moist filling, it has time to set its structure and crisp up. A fully blind-baked crust is ideal for custard or cream pies, but a partial blind bake is often sufficient and preferred for fruit pies, as the crust will continue to bake along with the filling.
The basic principle is to bake the empty pie shell until it's set and light golden (for a partial bake) or fully golden (for a full bake). This requires weighing down the crust with pie weights, dried beans, or rice to prevent it from puffing up or shrinking. After the initial bake with weights, the weights are removed, and the crust bakes for a few more minutes to dry out the bottom.
This pre-cooking step significantly reduces the amount of raw dough exposed to the wet filling, making it far more resistant to becoming soggy. It's a cornerstone technique for achieving a reliable fruit pie soggy bottom fix.
Step-by-Step Guide to Perfect Blind Baking
Here's a simple guide to partial blind baking for fruit pies:
- Prepare your pie dough and fit it into your pie plate. Crimp the edges.
- Chill the dough in the freezer for at least 15-20 minutes (or refrigerator for 30-60 minutes) until very firm. This helps prevent shrinkage.
- Preheat your oven to a relatively high temperature, typically around 375°F to 400°F (190°C to 200°C).
- Line the chilled pie shell with parchment paper or heavy-duty aluminum foil, pressing it gently into the corners and up the sides. Leave some overhang to make removal easier.
- Fill the lined shell with pie weights, dried beans, or uncooked rice, distributing them evenly to fill the shell right up to the edges.
- Bake for 15-20 minutes, or until the edges of the crust are set and just beginning to turn pale gold.
- Carefully remove the pie weights and parchment/foil.
- Prick the bottom of the crust all over with a fork (this helps prevent large bubbles).
- Return the crust to the oven for another 5-10 minutes, or until the bottom appears dry and lightly golden.
- Remove from the oven and let cool slightly before adding your fruit filling.
Sealing the Deal: Creating a Moisture Barrier
Even with blind baking, adding an extra layer of protection between the par-baked crust and the wet filling can provide an even more robust fruit pie soggy bottom fix. This involves creating a barrier that physically prevents moisture from seeping into the crust. Several simple ingredients can serve this purpose, adding minimal effort but significant protection.
These barriers work by forming a waterproof layer on the surface of the crust. When the liquid from the fruit filling is released, it encounters this layer instead of immediately soaking into the pastry. While no barrier is 100% impermeable forever, it significantly slows down the moisture transfer process, giving the bottom crust more time to bake and crisp up fully alongside the filling. This technique is particularly effective when combined with a partial blind bake, creating a powerful one-two punch against sogginess. It's an easy and often delicious addition to your fruit pie soggy bottom fix arsenal.
Egg Wash: A Simple and Effective Sealant
A common and easy barrier is a simple egg wash. After partially blind baking the crust and removing the weights, brush the bottom and sides of the hot crust with a thin layer of beaten egg white or a whole egg mixed with a tablespoon of water or milk.
Return the crust to the oven for just a few minutes (3-5 minutes) until the egg wash is set and looks dry and slightly glazed. The protein in the egg quickly coagulates when heated, forming a thin, protective, waterproof film on the surface of the crust. This layer acts as a shield against moisture from the filling. It's a quick step that adds minimal time but provides a noticeable improvement in preventing a soggy bottom.
Chocolate Coating: A Delicious Protective Layer
For fruit pies that pair well with chocolate (like cherry, raspberry, or even apple), a thin layer of melted chocolate or cocoa butter can serve as a delicious and effective barrier. After partially blind baking the crust, let it cool slightly.
Brush or spread a very thin layer of melted chocolate (white, milk, or dark, depending on your preference) or melted cocoa butter over the bottom of the crust. Allow it to cool and harden completely before adding the filling. This creates a solid, waterproof layer that is particularly effective against very wet fillings. It adds a subtle hint of chocolate flavor, enhancing the pie while providing an excellent fruit pie soggy bottom fix.
Jam Glaze: Adding Flavor and Protection
Another flavorful barrier option is a thin layer of fruit jam or preserves. Choose a flavor that complements your pie filling. Heat about 1/4 cup of jam gently until it's melted and spreadable.
After partially blind baking the crust, brush the bottom of the warm crust with the melted jam. The pectin and sugar in the jam create a sticky, somewhat impermeable layer as it cools. This not only acts as a moisture barrier but also adds an extra layer of fruit flavor and sweetness. It's a simple and tasty component of a successful fruit pie soggy bottom fix.
Thickeners: Controlling Excess Moisture in Fruit Pies
Managing the amount of free-flowing liquid in the fruit filling itself is absolutely critical for preventing a soggy bottom. Even with a perfectly baked crust and a moisture barrier, an overly watery filling will steam and seep relentlessly, eventually overwhelming your defenses. This is where thickeners come in. They work by absorbing or gelling with the fruit juices as the pie bakes, transforming excess liquid into a pleasant, spoonable consistency.
Choosing the right thickener and using the correct amount is key. Too little, and your filling will be a soupy mess; too much, and it can become gluey or overly firm. The ideal consistency is one where the filling holds its shape somewhat when sliced but is still juicy and tender. Properly thickening the filling is a non-negotiable step in any effective fruit pie soggy bottom fix strategy. It directly reduces the source of the problem.
Choosing the Right Thickener: Cornstarch, Tapioca, or Flour?
Several common kitchen ingredients can be used as thickeners for fruit pies, each with slightly different properties:
- Cornstarch: A very effective thickener, it creates a clear, glossy filling. It's best mixed with fruit and sugar before baking. Use approximately 2-3 tablespoons per 4-5 cups of fruit. Be aware that fillings thickened solely with cornstarch can break down and become runny if frozen and thawed.
- Tapioca Starch (Instant or Pearl): Tapioca creates a slightly less clear but very stable gel, making it a good choice for pies you might freeze. Pearl tapioca needs to be soaked first; instant tapioca can be mixed directly with the fruit. Use approximately 2-4 tablespoons of instant tapioca per 4-5 cups of fruit. It works well with acidic fruits.
- All-Purpose Flour: Flour is the least effective thickener by weight and can make fillings cloudy. It's often used in older recipes. You'll need more of it (about 4-5 tablespoons per 4-5 cups of fruit), and it requires more cooking time to get rid of a raw flour taste. It's generally less preferred for fruit pies compared to cornstarch or tapioca for optimal texture and clarity.
Mixing the thickener with the sugar before combining it with the fruit helps distribute it evenly and prevents clumping. The amount needed will vary based on the juiciness of the fruit; very wet fruits like berries may require slightly more thickener.
Pre-Cooking the Fruit Filling to Reduce Moisture
For extremely juicy fruits, or if you want maximum control over the filling consistency, consider pre-cooking the fruit filling slightly on the stovetop before adding it to the pie shell. This allows some of the excess liquid to evaporate before baking.
Combine your fruit, sugar, and thickener in a saucepan. Cook over medium heat, stirring gently, just until the mixture thickens and starts to bubble. This might take 5-10 minutes depending on the fruit volume. Remove from heat and let cool slightly before pouring into your prepared pie crust. This technique ensures the thickener is activated and excess water is driven off before the filling goes into the pie, significantly reducing the moisture challenge for the bottom crust. It's a more advanced but highly effective fruit pie soggy bottom fix, especially for berries or stone fruits.
Oven Temperature and Placement: Optimizing for a Crisp Crust
How you bake the pie is just as important as how you prepare it. Oven temperature and the position of the pie within the oven play crucial roles in ensuring the bottom crust bakes thoroughly and crisps up. Insufficient heat reaching the bottom of the pie is a common reason for sogginess, even if the top looks perfectly golden.
The goal is to ensure the bottom crust gets adequate heat to evaporate moisture and brown at the same rate as the top crust. This often requires placing the pie strategically and potentially using a slightly higher initial temperature. Proper oven technique is a fundamental part of a comprehensive fruit pie soggy bottom fix.
The Importance of a Hot Oven for Fruit Pies
Baking fruit pies at a relatively hot temperature, at least initially, helps set the crust quickly. Many recipes call for starting the pie at a higher temperature, such as 400°F or 425°F (200°C or 220°C), for the first 15-20 minutes before reducing the heat to a lower temperature (around 375°F or 190°C) for the remainder of the baking time.
This initial blast of high heat helps the fat in the crust melt rapidly, creating flakiness, and encourages the bottom crust to start baking and drying out before the filling releases too much liquid. It gives the crust a critical head start. While you'll likely need to shield the edges of the pie crust later in the bake to prevent burning, that initial high heat is a simple yet effective element of the fruit pie soggy bottom fix.
Proper Rack Placement for Even Baking
Where you place your pie in the oven significantly impacts how the heat reaches the bottom crust. For fruit pies, the best placement is typically on the lowest rack.
Placing the pie on the lowest rack positions it closest to the heating element (usually located at the bottom of the oven). This maximizes the direct heat reaching the bottom of the pie plate, promoting browning and crisping of the bottom crust. While the top crust will still brown, the increased heat from below provides the necessary boost to prevent sogginess. This simple adjustment in oven rack placement is a surprisingly effective part of the overall fruit pie soggy bottom fix strategy. Avoid placing it on the middle or upper racks, as this prioritizes top browning over bottom crisping.
Advanced Techniques for Preventing Soggy Bottoms
For those serious about banishing soggy bottoms or tackling particularly challenging pies, these advanced techniques offer additional layers of protection and heat distribution. They build upon the fundamental methods and can make a noticeable difference in achieving a truly crisp bottom crust.
Using a Pizza Stone or Baking Steel for Extra Heat
A professional baker's trick is to bake the pie directly on a preheated pizza stone or baking steel. These items retain and radiate heat very efficiently.
Place a pizza stone or baking steel on the lowest rack of your oven while the oven preheats to the required temperature (e.g., 400°F / 200°C). Once the oven and stone/steel are fully preheated (allow at least 30-60 minutes), place the pie directly onto the hot surface. The intense, even heat transferred from the stone/steel to the bottom of the pie plate provides a powerful boost to the bottom crust's baking process, accelerating drying and crisping. This is one of the most effective methods for ensuring a golden, flaky bottom crust and a top-tier fruit pie soggy bottom fix.
The Par-Bake and Freeze Method for Perfect Pies
If you want to make pies ahead of time and ensure a perfect crust, consider the par-bake and freeze method. This combines blind baking with the convenience of freezing.
Prepare your pie crust and fit it into the pie plate. Partially blind bake the crust as described earlier (Steps 1-9 of the blind baking guide, removing weights and baking for a few more minutes). Let the par-baked crust cool completely.
At this point, you can fill the crust with your prepared fruit filling (chilled, if pre-cooked) and assemble the top crust. Wrap the entire unbaked, filled pie tightly in plastic wrap and then foil. Freeze for up to 1-2 months.
When ready to bake, unwrap the frozen pie and bake directly from frozen in a preheated oven (often starting at a slightly higher temperature for the first 15-20 mins, like 425°F / 220°C, then reducing to 375°F / 190°C) for a longer time than a fresh pie (perhaps 1.5 - 2 hours, depending on size). The par-baking ensures the bottom crust is already partially set, and baking from frozen helps manage the moisture release as the pie slowly thaws and cooks. This advanced technique is a fantastic fruit pie soggy bottom fix for make-ahead pies.
Recipe Adaptations: Applying the Soggy Bottom Fix to Your Favorite Fruit Pie
These techniques aren't just theoretical; they can be applied to virtually any fruit pie recipe. Let's look at how you might adapt a couple of common pie types to incorporate the fruit pie soggy bottom fix methods we've discussed.
Adjusting a Strawberry Rhubarb Pie for a Crisper Crust
Strawberry rhubarb pie is a classic, but rhubarb releases a lot of liquid, making it a prime candidate for a soggy bottom. Here's how to adapt a standard recipe:
- Crust: Definitely partially blind bake the bottom crust. Follow the steps above, baking until the bottom is lightly golden. Consider adding an egg wash barrier after removing the weights for extra protection.
- Filling: Increase the amount of thickener slightly compared to what a basic recipe might call for. For about 6 cups of strawberry-rhubarb mixture, you might use 1/4 cup of instant tapioca or 3-4 tablespoons of cornstarch mixed with the sugar.
- Optional Filling Step: For maximum protection, gently pre-cook the strawberry-rhubarb filling on the stovetop until it just begins to thicken before cooling and adding it to the par-baked crust.
- Baking: Bake the pie on the lowest rack of your oven, preferably on a preheated pizza stone or baking steel. Start the oven at 425°F (220°C) for 15 minutes, then reduce to 375°F (190°C) and continue baking until the top is golden and the filling is bubbling thickly (likely 45-60+ minutes total). Remember to shield the edges if they brown too quickly.
By combining partial blind baking, a moisture barrier, proper thickening, and strategic oven use, you drastically improve your chances of a perfectly crisp bottom crust in this challenging pie. This multi-pronged approach is key to a successful fruit pie soggy bottom fix.
Example: Applying the Techniques to an Apple Pie Recipe
Even less "wet" pies like apple can benefit from these techniques, especially if you use a juicy apple variety or a lot of filling. Here's an example adaptation for a standard double-crust apple pie (using about 6-8 cups of sliced apples):
- Crust: Consider a partial blind bake for the bottom crust, especially if you've had soggy bottom issues before. Bake until just set and dry-looking. An egg wash barrier could also be applied.
- Filling: Use 3-4 tablespoons of flour, 2-3 tablespoons of cornstarch, or 3-4 tablespoons of instant tapioca mixed with the sugar, depending on your preference and the juiciness of the apples. Taste a raw slice of apple – if it's very juicy, lean towards the higher end of the thickener range.
- Baking: Place the pie on the lowest rack, ideally on a preheated pizza stone. Start baking at 400°F (200°C) for 20 minutes, then reduce to 375°F (190°C) and continue baking until the crust is golden brown and you can see the filling bubbling through the vents (total time often 60-80 minutes, depending on size and oven).
While apple pie might not always require blind baking depending on the recipe and apples, adding the lowest rack placement and using a pizza stone are simple, effective steps for a reliable fruit pie soggy bottom fix. Using the right amount of thickener is also vital for managing the juices that render out.
Troubleshooting: Common Mistakes and How to Avoid Them
Even with the best intentions, sometimes things go wrong. Knowing how to identify common issues and what to do if you encounter a soggy bottom can help salvage your pie or inform your approach next time.
Identifying and Correcting Under-Baked Crust Issues
An under-baked bottom crust is the primary cause of sogginess. You can usually tell during or after baking. During baking, if the top crust is golden but you don't see juices bubbling vigorously through the vents or around the edges (a sign the filling is truly hot and the bottom is cooking), or if the bottom crust looks pale through a glass pie plate, it might be under-baked. After baking, the tell-tale sign is a pale, soft, doughy bottom when you cut into the pie.
If you suspect it's under-baked towards the end of the baking time, but the top is already golden, loosely tent the top of the pie with foil and continue baking on the lowest rack (or on a preheated stone/steel if you weren't already) for another 10-15 minutes. The foil prevents the top from burning while allowing the bottom to catch up. If the pie is already out of the oven and you discover the soggy bottom when slicing, unfortunately, it's difficult to fully "fix" at that point, but you can learn for next time.
What to Do If Your Pie Crust is Already Soggy
If you've baked your pie and cut into it only to find a disappointingly soggy bottom, don't despair entirely! While you can't magically transform it into a crisp crust, you can sometimes mitigate the issue.
For individual slices, you can carefully place them on a baking sheet and put them under the broiler for a minute or two, watching very closely, to try and crisp up the bottom edge. Alternatively, you can embrace it and serve the pie slightly warm, as the texture is less noticeable than when cold. Most importantly, analyze what likely went wrong – was the filling too wet? Was the oven temperature or placement incorrect?
Did you skip blind baking? Use it as a learning experience to apply the appropriate fruit pie soggy bottom fix techniques to your next baking adventure. Remember, practice makes perfect pie!
Conclusion: Enjoy Perfectly Crisp Fruit Pies Every Time
Conquering the soggy bottom in fruit pies is a rite of passage for home bakers. While it can be frustrating, it's a problem with multiple effective solutions. By understanding the science of moisture transfer, controlling excess liquid in your filling with thickeners or pre-cooking, and protecting/prioritizing the baking of your bottom crust through techniques like blind baking, moisture barriers, proper oven placement, and using baking stones, you can dramatically improve your results.
Implementing a comprehensive fruit pie soggy bottom fix involves layering these techniques. Don't be afraid to experiment with different methods and combinations to find what works best for you, your recipes, and your oven. With practice and these proven strategies, you'll be enjoying perfectly crisp, delicious fruit pies every time!
Frequently Asked Questions
What is the main cause of a soggy bottom in fruit pies?
The main cause is excess moisture from the fruit filling seeping into the crust during baking. This often happens because the fruit releases juices as it cooks.
What are some effective techniques to prevent a soggy pie crust?
Pre-baking the crust (blind baking), using a thickening agent in the filling, and brushing the crust with egg wash or melted chocolate are all effective.
How does blind baking help prevent a soggy fruit pie bottom?
Blind baking partially cooks the pie crust before adding the filling. This creates a protective layer that is more resistant to moisture absorption.
What types of thickening agents work best for fruit pie fillings?
Cornstarch, tapioca starch, and flour are common choices. The best option depends on the type of fruit and the desired consistency of the filling.
Can the type of fruit used in a pie affect the likelihood of a soggy bottom?
Yes! Some fruits, like berries, naturally release more moisture than others. Adjusting the thickening agent quantity based on the fruit is crucial.
Final Reflection: The Enduring Quest for the Perfect Pie Crust
The fight against the soggy bottom is far from over, but armed with the right knowledge, we can win the battle for flawlessly crisp fruit pies. This seemingly simple culinary challenge speaks to a deeper desire: the pursuit of perfection, the satisfaction of mastering a classic, and the joy of sharing a truly delicious treat. The seemingly small detail of a soggy bottom can ruin an otherwise magnificent pie, highlighting the importance of even the smallest details in achieving culinary excellence.
The quest for the perfect pie crust, and the avoidance of the dreaded soggy bottom, is a journey that reflects our own human desire for control and mastery over our environment. It's a testament to the enduring power of tradition and the constant innovation within culinary arts. The best things in life are simple, but not easy.
This quote perfectly encapsulates the effort required to achieve a truly perfect pie, reminding us that the rewards are well worth the effort. The ongoing discussion and sharing of tips, like those explored in this article, demonstrate a vibrant community united by a shared passion for baking and a commitment to perfecting this timeless dessert.
Now, consider your own baking journey. What seemingly small details have you overlooked that resulted in less-than-perfect results? What new techniques will you try next time you bake a fruit pie? Don't let the fear of a soggy bottom deter you from embracing the joy of baking. Experiment, learn, and most importantly, enjoy the process of creating something delicious to share with those you love. The perfect pie, with its gloriously crisp bottom, awaits your touch.
Unlock Your Perfect Pie Crust: A Flaky Future Awaits!
Thanks for joining us on this delicious journey into the world of flawlessly flaky fruit pies! We hope you've gained some invaluable tips to banish soggy bottoms forever. Ready to put your new skills to the test?
- Bake your dream pie today! Grab your favorite recipe and try out the techniques we've shared – you'll be amazed at the difference.
- Share your pie-baking triumphs (and challenges!) with us on social media! Use #BakeWithEaseSoggyBottomSlayer to connect with fellow bakers.
- Consider experimenting with a new fruit filling! Challenge yourself to create a truly unique masterpiece.
What exciting flavor combination will you create with your newfound pie-making prowess?