
The Science of Freezing Desserts: What You Need to Know (Simply Put)

Welcome to BakeWithEase, your companion on a journey to baking brilliance! Ever wondered if you can really freeze that decadent dessert without sacrificing its texture and flavor? Dive in as we unlock the secrets behind freezing desserts for best taste, revealing simple yet effective strategies that will revolutionize how you prepare and store your sweet creations. Get ready to extend the life of your pastries and treats, all while preserving that fresh-baked deliciousness!
- Introduction: Preserving Deliciousness - Freezing Desserts for Best Taste
- Understanding the Science Behind Freezing
- Key Factors for Successful Dessert Freezing
- Step-by-Step Guide to Freezing Different Types of Desserts
- Thawing Desserts: The Right Way to Defrost
- Troubleshooting Common Freezing Issues
- Tips and Tricks for Optimizing Frozen Dessert Storage
- Conclusion: Mastering the Art of Freezing Desserts for Lasting Enjoyment
- Frequently Asked Questions
- Final Reflection: The Sweet Science of Frozen Perfection
- Unlock Your Dessert Freezing Power!
Introduction: Preserving Deliciousness - Freezing Desserts for Best Taste
Imagine having a slice of that incredible birthday cake weeks after the celebration, or perfectly baked cookies ready for an unexpected guest. Freezing desserts isn't just about avoiding waste; it's a fantastic way to extend the enjoyment of your baked goods and culinary creations. Mastering the art of freezing desserts for best taste means understanding a little bit about what happens at the molecular level when you drop temperatures below freezing.
Whether you're a seasoned baker looking to batch-prep treats or a beginner who's made too many brownies, learning the proper techniques for freezing desserts can save time, reduce stress, and ensure that every bite you eventually enjoy is as delicious as the day it was made. This guide will walk you through the science, the best practices, and the specific methods for keeping your favorite sweets tasting their absolute best straight from the freezer.
Understanding the Science Behind Freezing
How Freezing Affects Dessert Texture and Flavor
When you freeze a dessert, you're essentially slowing down the processes that cause spoilage and texture changes. However, freezing itself introduces new challenges. The primary component in most desserts is water, often making up 20-40% or more of the mass in items like cakes or custards. As this water freezes, it expands and forms ice crystals.
The size and formation of these crystals significantly impact the final texture upon thawing. Rapid freezing tends to create smaller crystals, which cause less damage to the cell structure of the food. Slower freezing allows larger crystals to form, which can rupture cell walls, leading to a mushy or dry texture after thawing.
Flavor is also affected. While freezing halts microbial growth, enzymatic reactions that alter flavor can slow down but may not stop completely. Additionally, the intense cold can dull some flavors. Fats in desserts, like butter in cookies or cream in ice cream, can also undergo oxidation over time, even in the freezer, leading to off-flavors often described as "stale" or "rancid." Proper packaging is crucial to minimize exposure to air, which is a major contributor to both oxidation and freezer burn, ensuring you maintain the original flavor profile when freezing desserts for best taste.
The Role of Water Crystals in Dessert Degradation
Water crystals are the main culprits behind many undesirable changes seen in frozen and thawed desserts. As mentioned, large ice crystals, formed during slow freezing or temperature fluctuations, can physically damage the delicate structure of cakes, pastries, and creams. Think of a sponge cake – the air pockets that give it lightness can collapse when large ice crystals form within them, resulting in a dense, crumbly texture upon thawing. In custards or ice cream, large crystals create a gritty or icy mouthfeel instead of the smooth, creamy texture you desire.
Furthermore, repeated freezing and thawing cycles (which can happen if your freezer door is opened frequently or power fluctuates) are particularly damaging. Each cycle allows small ice crystals to melt slightly and then refreeze into larger ones. This process, known as recrystallization, accelerates texture degradation. Minimizing temperature fluctuations and ensuring a consistent freezer temperature, ideally at 0°F (-18°C) or below, is key to keeping water crystals small and preserving the quality of your frozen desserts.
Key Factors for Successful Dessert Freezing
Choosing the Right Desserts to Freeze
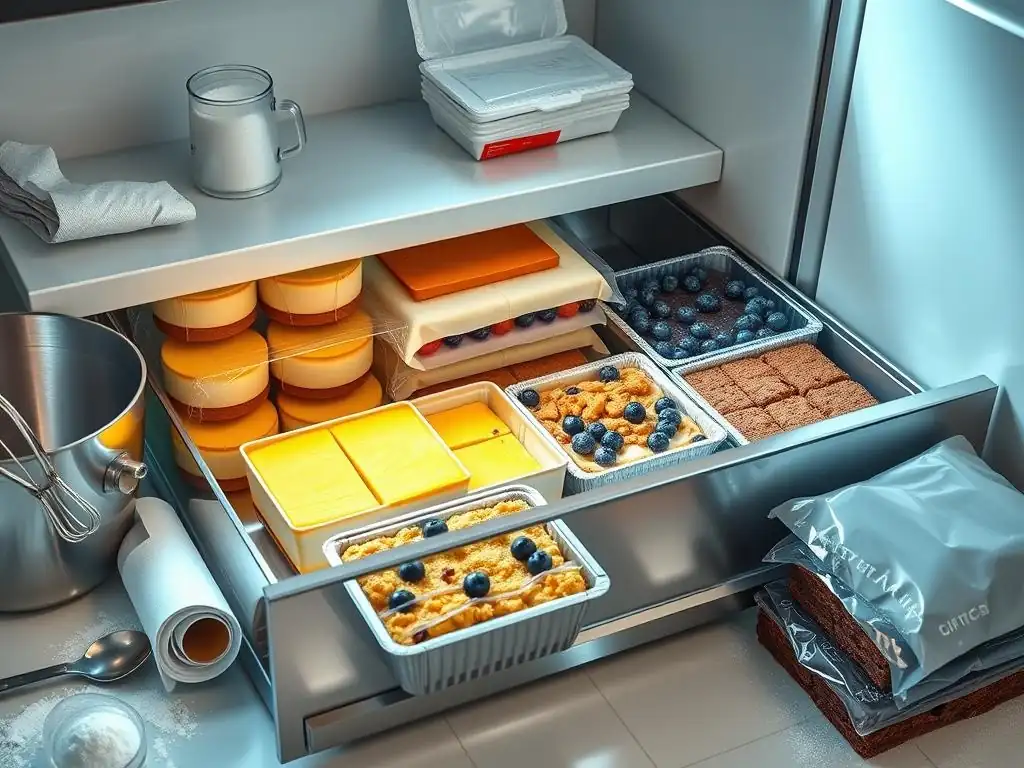
Not all desserts are created equal when it comes to their freezer potential. Those with high moisture content and delicate structures, or those relying on crisp textures, tend to fare worse. Desserts with a good amount of fat and sugar, however, generally freeze well because sugar acts as a cryoprotectant, interfering with large ice crystal formation, and fat maintains tenderness. For example, a rich pound cake freezes much better than a light sponge cake.
Understanding which desserts are freezer-friendly is the first step in successful freezing desserts for best taste. Generally, baked goods like cookies, brownies, unfrosted cakes, and fruit pies freeze well. Rich, dense items like cheesecakes or fudge also hold up nicely. Items with high water content fillings (like lemon meringue pie) or delicate components (like fresh fruit garnishes or certain frostings) require more care or are best frozen separately.
Best Dessert Types for Freezing (Examples)
- Cookies: Most drop cookies (chocolate chip, oatmeal), bar cookies (brownies, blondies), and cut-out cookies freeze exceptionally well, either as dough or baked. Baked cookies can last 3-6 months.
- Cakes: Unfrosted or buttercream-frosted cakes are great candidates. Sponge cakes and angel food cakes are more challenging due to their airy structure but can still be frozen with careful wrapping. A standard frosted cake might last 2-4 months.
- Pies: Fruit pies (baked or unbaked) and pecan pies freeze well. Cream pies or pies with meringue toppings are less ideal. A properly frozen fruit pie can last 6-8 months.
- Brownies & Blondies: These dense, fudgy treats freeze beautifully and retain their texture and flavor for several months, often up to 6 months.
- Cheesecakes: Baked cheesecakes freeze surprisingly well due to their density and high fat content. They can maintain quality for 1-2 months.
Desserts That Don't Freeze Well (And Why)
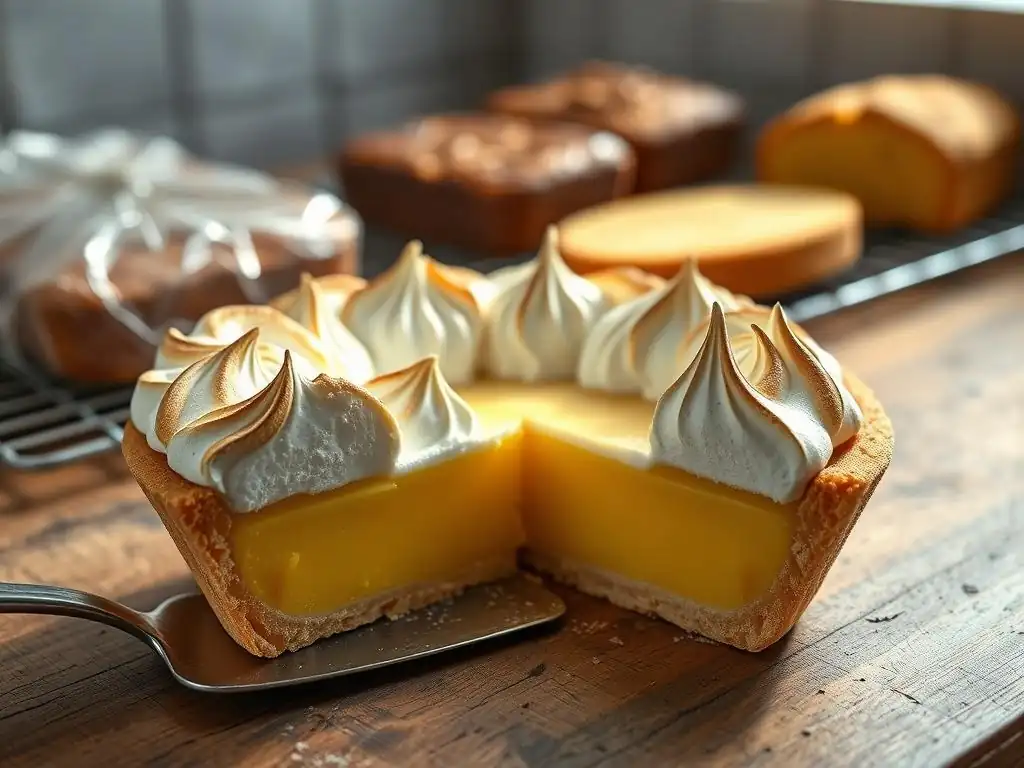
- Meringue-based items: Meringues (like on a lemon meringue pie) become rubbery and weep upon thawing due to the high water content and delicate protein structure.
- Custards (certain types): Cooked custards can separate or become watery and grainy when frozen and thawed, especially those thickened solely with eggs.
- Fresh Fruit: Unless pureed or cooked into a filling, fresh fruit toppings or inclusions can become mushy and discolored.
- Jellies/Gelatins: These high-water items can break down and weep upon thawing.
- Cream Cheese Frosting: Can sometimes separate or become grainy after freezing, though many home bakers have success with careful technique. Buttercream generally freezes better.
- Fried Desserts: Items like doughnuts or churros often lose their desired crisp texture and become soggy.
The Importance of Proper Packaging and Storage
Proper packaging is arguably the most critical factor in preserving the quality when freezing desserts for best taste. The enemy in the freezer is air. Air exposure leads to freezer burn, which occurs when surface moisture evaporates and ice crystals form on the surface, resulting in dry, discolored patches that ruin texture and flavor. It also allows oxidation to happen more readily.
Using materials that create an airtight seal is paramount. This includes specific freezer bags designed to withstand cold temperatures without becoming brittle, rigid airtight containers, and plastic wrap specifically for freezing. Wrapping items tightly, pressing out as much air as possible, and then adding a second layer of protection (like a freezer bag or foil) is a common best practice.
Selecting Airtight Containers for Optimal Preservation
Choosing the right container material matters. Rigid plastic or glass containers with tight-fitting lids are excellent for preventing crushing and providing a good seal. Ensure they are labeled as "freezer-safe." For irregularly shaped items or when space is limited, heavy-duty freezer bags are invaluable. Remove as much air as possible before sealing. Wrapping items first in plastic wrap or foil before placing them in a container adds an extra layer of protection against air and freezer burn.
Consider the size of the container relative to the dessert. Using a container that's too large leaves excess air space, increasing the risk of freezer burn. Ideally, the container should be just large enough to hold the dessert snugly. For items like cookie dough balls, laying them on a baking sheet to flash freeze for an hour before transferring to a freezer bag prevents them from sticking together.
Vacuum Sealing for Enhanced Freezing
For the ultimate protection against air and freezer burn, vacuum sealing is highly effective. Vacuum sealers remove nearly all the air from the packaging before sealing it tightly. This significantly extends the shelf life of frozen desserts and maintains their quality much longer than traditional methods. For example, cookies might last 3-6 months in a standard freezer bag, but vacuum-sealed, they could remain high quality for 9-12 months or even longer.
While vacuum sealing is excellent for solid items like cookies, brownies, or unfrosted cake layers, it's not suitable for delicate items that would be crushed, like frosted cakes or soft pastries, unless frozen solid first or placed in a rigid container before sealing. The initial investment in a vacuum sealer can be worthwhile for frequent batch bakers focused on long-term preservation and maintaining the best possible taste when freezing desserts.
Labeling and Dating: Preventing Freezer Burn and Spoilage
It might seem simple, but labeling and dating your frozen desserts is absolutely essential. Without clear labels, you'll end up with mystery items in your freezer, unsure of what they are or how long they've been there. This increases the likelihood of items sitting too long and succumbing to freezer burn or flavor degradation beyond an acceptable point.
Use freezer tape or labels that can withstand cold temperatures. Include the name of the dessert (e.g., "Chocolate Chip Cookies"), the date it was frozen (e.g., "Frozen 10/27/23"), and perhaps thawing instructions if complex. A simple system like "CCC - 10/27" is effective. Sticking to a "first-in, first-out" (FIFO) method, using the oldest items first, helps ensure rotation and minimizes waste, guaranteeing you enjoy your freezing desserts for best taste within their optimal timeframe.
Temperature Control: Maintaining Ideal Freezing Conditions
Consistency is key in the freezer. The ideal temperature for freezing food, including desserts, is 0°F (-18°C) or below. Maintaining this temperature consistently slows down enzymatic activity and prevents the growth of microorganisms effectively. More importantly, a stable, very cold temperature helps keep ice crystals small, preserving the texture of your desserts.
Fluctuations in temperature are detrimental. If the freezer temperature rises significantly (even if briefly), some ice crystals can melt. When the temperature drops again, this melted water refreezes, often forming larger crystals than before. This recrystallization process, as discussed earlier, degrades texture and quality over time. An appliance thermometer placed in the freezer can help you monitor the temperature and ensure it stays within the optimal range.
The Importance of Rapid Freezing
Rapid freezing is crucial for minimizing the formation of large ice crystals. The faster the food freezes, the less time water molecules have to migrate and clump together into large structures. Placing items directly into a freezer set at 0°F (-18°C) or lower, ideally in a dedicated freezer or an area of your main freezer that is consistently cold, helps achieve this. Avoid overloading the freezer with unfrozen items at once, as this can cause the temperature of existing items to rise slightly and slows down the freezing rate for everything.
For smaller items like individual cookies or berries, flash freezing is an excellent technique. This involves spreading them in a single layer on a baking sheet lined with parchment paper and placing the sheet in the freezer until the items are solid (usually 1-2 hours). Once frozen, transfer them to your final airtight packaging. This prevents items from sticking together and allows for quick, individual freezing.
Understanding Freezer Temperature Fluctuations
Freezer temperature fluctuations are a common issue in home freezers. They can be caused by:
- Frequent opening of the freezer door.
- Adding large amounts of unfrozen food at once.
- Door seals that are not tight.
- Power outages or brownouts.
- The defrost cycle (some freezers briefly warm up during this).
These fluctuations lead to the damaging recrystallization process. To minimize this, try to open the freezer door as infrequently as possible and close it quickly. Ensure the door seal is clean and intact (you can test it by closing the door on a piece of paper – it should be difficult to pull out). Avoid packing the freezer so full that air cannot circulate, but also keep it reasonably full (at least two-thirds) as frozen items help maintain the cold temperature. Monitoring with a thermometer is the best way to stay aware of your freezer's performance.
Step-by-Step Guide to Freezing Different Types of Desserts
Freezing Cakes: Tips for Keeping Them Moist
Freezing cakes successfully requires careful handling to protect their structure and moisture. The goal is to prevent moisture loss and crushing. Unfrosted cakes generally freeze better than frosted ones, but both are possible with the right technique. Ensure the cake is completely cooled before freezing; freezing a warm cake will create condensation inside the wrapping, leading to ice crystals and potential sogginess.
For best results when freezing desserts like cake, start by chilling the cake in the refrigerator for an hour or two until firm. This makes it easier to wrap without damaging the structure. Then, wrap the cake tightly in plastic wrap, ensuring no surface is exposed to air. Add a second layer of protection, such as aluminum foil or a freezer bag. For whole cakes, placing the wrapped cake in a sturdy container or cake box before freezing adds protection against being crushed.
How to Freeze Cake Layers
Freezing cake layers separately is ideal if you plan to assemble or frost the cake later. Once completely cooled, wrap each layer individually and very tightly in plastic wrap. Ensure the plastic wrap adheres well to the surface to prevent air pockets. Wrap each layer a second time in aluminum foil or place them in a freezer bag, pressing out excess air.
Layering the wrapped cakes with a piece of cardboard between them if stacking in the freezer can help prevent damage. Properly wrapped cake layers can be stored this way for 2-4 months. Thaw layers wrapped in the refrigerator to prevent condensation.
Freezing Frosted Cakes: Best Practices
Freezing a frosted cake requires an extra step to protect the frosting. First, place the uncovered frosted cake in the freezer for 1-2 hours, or until the frosting is completely firm to the touch. This "flash freezing" step hardens the exterior so the wrapping won't stick to or smudge the frosting.
Once the frosting is solid, wrap the cake tightly in plastic wrap, then in aluminum foil or place it carefully in a freezer-safe cake container. Using a sturdy container is highly recommended to protect the delicate frosted surface. Thaw frosted cakes wrapped in the refrigerator to minimize condensation. A standard buttercream or ganache frosting freezes better than a whipped cream or meringue frosting.
Cookies are one of the most freezer-friendly desserts, offering flexibility in freezing either the dough or the baked cookies. Freezing cookies for best taste is relatively straightforward, but preventing them from drying out or becoming crumbly is key. The fat content in most cookies helps them freeze well and maintain tenderness.
Whether freezing dough or baked cookies, proper packaging is crucial. Minimize air exposure by using airtight containers or heavy-duty freezer bags. Avoid freezing cookies that have delicate decorations (like sprinkles that might bleed) or very crisp textures that could become soft after thawing.
Freezing Cookie Dough vs. Baked Cookies
Freezing cookie dough offers incredible convenience. You can freeze dough in several ways:
- Logs: Shape dough into logs, wrap tightly in plastic wrap, then foil. Slice and bake from frozen, adding a minute or two to the baking time.
- Balls: Scoop dough into individual portion balls, flash freeze on a baking sheet, then transfer to a freezer bag or container. Bake from frozen.
- Cut-outs: Roll and cut dough, then flash freeze shapes on a baking sheet before transferring to packaging. Bake from frozen.
Frozen cookie dough can last 6-12 months.
Freezing baked cookies is perfect for having ready-to-eat treats. Ensure cookies are completely cooled. Place them in a single layer on a baking sheet and flash freeze until solid (1-2 hours). Then, transfer to an airtight container or freezer bag, layering with parchment paper if stacking. Baked cookies are best consumed within 3-6 months for optimal quality.
Preventing Cookie Crumbling After Thawing
The main reason cookies crumble after thawing is moisture loss during freezing or improper thawing. To prevent this:
- Ensure cookies are fully cooled before freezing.
- Wrap them very tightly to prevent air exposure and moisture evaporation (freezer burn).
- Use airtight containers or heavy-duty freezer bags.
- Thaw cookies properly. Small cookies can often be thawed at room temperature in their sealed container or bag to allow condensation to reabsorb. Larger or more delicate cookies might benefit from thawing in the refrigerator.
- Avoid repeated freezing and thawing.
Freezing Pies and Tarts: Avoiding Soggy Crusts
Freezing pies and tarts can be a great way to prepare ahead, especially for holidays. The biggest challenge is preventing a soggy bottom crust. The key is managing the moisture from the filling. Fruit pies generally freeze well, while cream-based or custard pies are more problematic due to water separation.
You can freeze fruit pies either baked or unbaked. Freezing unbaked is often preferred by bakers as it can result in a flakier crust when baked from frozen. For either method, ensure the pie is well-wrapped to protect the crust from freezer burn and absorb odors.
Freezing Unbaked Pies vs. Baked Pies
Freezing Unbaked Pies: Prepare the pie filling and crust as usual. Do not cut vents in the top crust yet. Wrap the entire unbaked pie tightly in plastic wrap, then in aluminum foil. Place it in the freezer until solid. Once frozen, you can transfer it to a large freezer bag or keep it wrapped. Freeze for up to 6-8 months. To bake, remove from freezer, unwrap, cut vents, and bake from frozen (this will take significantly longer than baking fresh, often 1.5 to 2 hours at a slightly lower temperature like 375°F/190°C).
Freezing Baked Pies: Bake the pie as instructed and let it cool completely. Wrap the cooled pie tightly in plastic wrap, then in aluminum foil or place it in a pie carrier or container designed for freezing. Freeze for up to 6-8 months. Thaw a baked pie in the refrigerator overnight. You can reheat it in a 350°F (175°C) oven for 15-20 minutes to crisp up the crust before serving.
Protecting Pie Crusts During Freezing
The crust is particularly vulnerable to freezer burn and absorbing odors. To protect it:
- Use a sturdy, high-fat crust recipe; fats help prevent ice crystal damage.
- Ensure the crust is completely covered by the wrapping; any exposed edges will quickly develop freezer burn.
- For unbaked pies, consider using a pie shield or foil crimped around the edges when baking from frozen to prevent the edges from burning before the center is cooked.
- For baked pies, ensure it's fully cooled before wrapping to prevent condensation.
Freezing Ice Cream and Frozen Desserts: Minimizing Ice Crystal Formation
While ice cream and other frozen desserts are meant to be frozen, maintaining their creamy texture and preventing excessive ice crystal growth requires attention. Large ice crystals give frozen desserts a gritty or icy mouthfeel, a common issue with homemade versions compared to commercial ones which often use stabilizers and rapid freezing methods.
The key to freezing ice cream for best taste is minimizing temperature fluctuations and exposure to air, which causes surface ice crystal formation. Homemade ice cream, lacking commercial stabilizers, is particularly susceptible to textural degradation over time in a standard home freezer.
Tips for Preventing Ice Cream Crystallization
Several techniques help minimize ice crystal growth in homemade ice cream:
- Use a rich base: Higher fat and sugar content (like in a custard base) helps interfere with crystal formation.
- Freeze rapidly: Transfer the churned ice cream to a very cold freezer immediately.
- Use an airtight container: Transfer churned ice cream to a shallow, airtight container rather than leaving it in the churner. Press plastic wrap directly onto the surface before putting the lid on to minimize air contact.
- Avoid temperature fluctuations: Store ice cream in the coldest part of the freezer, away from the door.
- Don't refreeze: Once thawed significantly, refreezing will result in massive ice crystals.
Storing Homemade Ice Cream for Longer Shelf Life
Homemade ice cream is best enjoyed within 1-2 months for optimal texture. Beyond that, ice crystals will inevitably grow, affecting quality. To maximize shelf life:
- Follow the tips above for preventing crystallization.
- Store in a high-quality, airtight container specifically designed for freezing. Shallow containers are often better than deep ones as they allow for faster freezing.
- Consider storing the container inside a freezer bag for an extra layer of protection.
- Keep the freezer consistently at 0°F (-18°C) or lower.
Thawing Desserts: The Right Way to Defrost
The thawing process is just as important as the freezing process for preserving the quality and texture of your desserts. Improper thawing can lead to sogginess, dryness, or texture changes that undo all your careful freezing efforts. The goal is usually a slow, controlled thaw that allows moisture to redistribute evenly and minimizes condensation.
The best thawing method depends largely on the type of dessert. Cakes, pies, and cheesecakes generally require a slow thaw in the refrigerator, while cookies and brownies can often thaw at room temperature. Ice cream is the exception, best enjoyed directly from the freezer or slightly softened for scooping.
Best Thawing Methods for Different Desserts
Choosing the correct environment for thawing is crucial for maintaining the integrity of the dessert. Thawing too quickly can cause the outside to become warm and potentially soggy while the inside is still frozen. Thawing slowly and wrapped helps manage condensation.
| Dessert Type | Recommended Thawing Method(s) | Notes |
|---|---|---|
| Cakes (Frosted) | Refrigerator (wrapped) | Takes several hours or overnight for a whole cake. |
| Cakes (Unfrosted) | Refrigerator (wrapped) | Similar time to frosted cakes. |
| Cookies | Room temperature (in sealed packaging) or Refrigerator | Room temp is faster, sealed packaging prevents condensation issues. |
| Brownies | Room temperature (in sealed packaging) or Refrigerator | Similar to cookies. |
| Baked Fruit Pies | Refrigerator, then optional brief reheat in oven | Refrigerator thaw prevents soggy crust. |
| Unbaked Fruit Pies | Bake directly from frozen (do not thaw) | Thawing unbaked pies can lead to a very soggy bottom crust. |
| Cheesecakes | Refrigerator (wrapped) | Takes 8-24 hours depending on size. |
| Ice Cream | Serve directly from freezer, or briefly soften at room temp. | Do not fully thaw and refreeze. |
Thawing Cakes and Pies
Cakes and pies (except unbaked pies) should almost always be thawed in the refrigerator while still wrapped. This slow, cold thawing process allows moisture to redistribute gradually throughout the cake or pie, preventing the exterior from becoming overly wet while the interior is still frozen. For a whole frosted cake or a large pie, this can take anywhere from 8 to 24 hours depending on size.
Once thawed, remove the wrapping from cakes to prevent condensation from making the surface sticky. Pies can often be unwrapped sooner, especially if the crust needs to air out slightly before serving or reheating. Never thaw cakes or pies on the counter at room temperature for extended periods, as this encourages bacterial growth and results in poor texture.
Thawing Cookies and Brownies
Cookies and brownies are more forgiving than cakes and pies. They can often be thawed at room temperature. The best practice is to leave them in their airtight container or freezer bag while they thaw. This allows any condensation that forms to settle on the outside of the packaging rather than directly on the baked goods, helping to maintain their texture.
Depending on size, cookies and brownies may take 30 minutes to a few hours to thaw at room temperature. Once thawed, you can remove them from the packaging. If you prefer a slightly warm cookie, you can pop thawed cookies in a low oven (around 300°F/150°C) for a few minutes.
Thawing Ice Cream and Frozen Treats
Ice cream and other frozen treats like sorbet or gelato are unique in that they are typically consumed while still frozen. Thawing is usually only necessary to soften them enough to scoop. The best way to do this is to simply leave the container on the counter for 10-20 minutes, or until it reaches your desired scooping consistency.
Avoid thawing ice cream in the microwave, as this can lead to uneven thawing and a loss of texture. Crucially, never let ice cream thaw completely and then refreeze it. This will cause the formation of massive ice crystals and ruin the smooth texture, resulting in an unpleasantly icy product.
Avoiding Common Thawing Mistakes
Several common errors can compromise the quality of your carefully frozen desserts during the thawing phase. Being aware of these pitfalls will help you ensure your treats taste just as good as the day they were made. Rushing the thawing process is perhaps the most frequent mistake.
Understanding the science of thawing – essentially, letting ice crystals melt and water reabsorb – highlights why patience and the right environment are key. Avoiding temperature extremes and managing condensation are paramount for preserving texture and flavor when freeing desserts for best taste and then enjoying them.
Preventing Condensation and Soggy Textures
Condensation forms when a cold object is exposed to warmer, humid air. This is why thawing frozen desserts directly on the counter can lead to wet surfaces and soggy textures. To prevent this:
- Thaw in the refrigerator: This is the most reliable method for larger items like cakes and pies. The cold environment minimizes the temperature difference and slows down condensation.
- Keep items wrapped: For cookies and brownies, thawing them inside their sealed packaging allows condensation to form on the outside of the bag or container.
- Gradual temperature change: If you must thaw at room temperature, choose a cool, low-humidity spot if possible.
Maintaining Dessert Quality During Thawing
Beyond preventing sogginess, maintaining overall quality involves protecting flavor and texture.
- Avoid rapid thawing: Microwaving or placing items in hot water can damage the structure and unevenly cook or melt the dessert.
- Don't refreeze thawed items: Once a dessert has thawed significantly, refreezing will severely degrade its texture due to large ice crystal formation.
- Handle gently: Frozen items can be brittle. Handle them carefully during the transition from freezer to thawing spot.
- Consider a quick refresh: Some baked goods, like cookies or muffins, can benefit from a few minutes in a warm oven after thawing to restore a fresh-baked texture.
Troubleshooting Common Freezing Issues
Even with the best practices, you might encounter issues when freezing desserts. Understanding the causes helps you prevent them in the future or mitigate their effects. Common problems include freezer burn, changes in texture (like dryness or gumminess), and loss of flavor.
These issues often stem from improper packaging, temperature fluctuations, or simply freezing a dessert that wasn't well-suited for freezing in the first place. Addressing these points directly is key to successful freezing desserts for best taste consistently.
Freezer Burn: Causes and Prevention
Freezer burn is perhaps the most recognizable freezing issue. It appears as dry, discolored patches (often grayish-brown) on the surface of frozen food. It's caused by dehydration – surface moisture evaporating into the dry freezer air and then forming ice crystals on the surface or inside the packaging. This process is accelerated by poor packaging and temperature fluctuations.
Prevention is the best approach:
- Wrap tightly: Use plastic wrap pressed directly onto the surface of the dessert, leaving no air gaps.
- Use airtight packaging: Follow the plastic wrap with a layer of foil, a freezer bag, or an airtight container.
- Remove air: Squeeze as much air out of bags as possible.
- Use appropriate materials: Ensure packaging is designed for freezing and won't become brittle.
- Maintain consistent temperature: Keep your freezer at 0°F (-18°C) or below and minimize door openings.
Texture Changes: Addressing Dryness or Gumminess
Texture changes like dryness, crumbliness, or gumminess are often linked to the formation and growth of large ice crystals. Large crystals physically disrupt the internal structure of the dessert.
- Dryness/Crumbliness: Often seen in cakes or quick breads. This is due to ice crystals damaging the cell structure, leading to moisture loss upon thawing. Prevention involves rapid freezing, consistent temperature, and careful, wrapped thawing.
- Gumminess: Can occur in items like muffins or some pie fillings. This might be related to starch retrogradation combined with ice crystal damage. Using recipes suitable for freezing and proper thawing helps.
Ensuring the dessert is completely cooled before freezing is also critical; residual heat creates steam that turns into damaging ice crystals. Using recipes with higher fat and sugar content (like pound cake vs. angel food cake) can provide a buffer against textural issues.
Flavor Loss: Preserving Dessert Flavors
Frozen desserts can lose their vibrant flavors over time, or even absorb off-flavors from other items in the freezer. This is primarily due to oxidation of fats and exposure to air, but also the dulling effect of extreme cold on taste buds.
To preserve flavor:
- Minimize air exposure: This is the most important step. Airtight packaging prevents oxidation and absorption of odors. Vacuum sealing is excellent for this.
- Wrap fatty items well: Desserts high in butter or cream are more prone to off-flavors from fat oxidation.
- Avoid freezing strongly flavored items together: Keep desserts separate from savory foods with strong odors (like onions or fish) unless they are exceptionally well-sealed.
- Don't store indefinitely: While freezing halts spoilage, quality degrades over time. Aim to consume frozen desserts within their recommended timeframe (e.g., 3-6 months for most baked goods) for the best flavor experience.
Tips and Tricks for Optimizing Frozen Dessert Storage
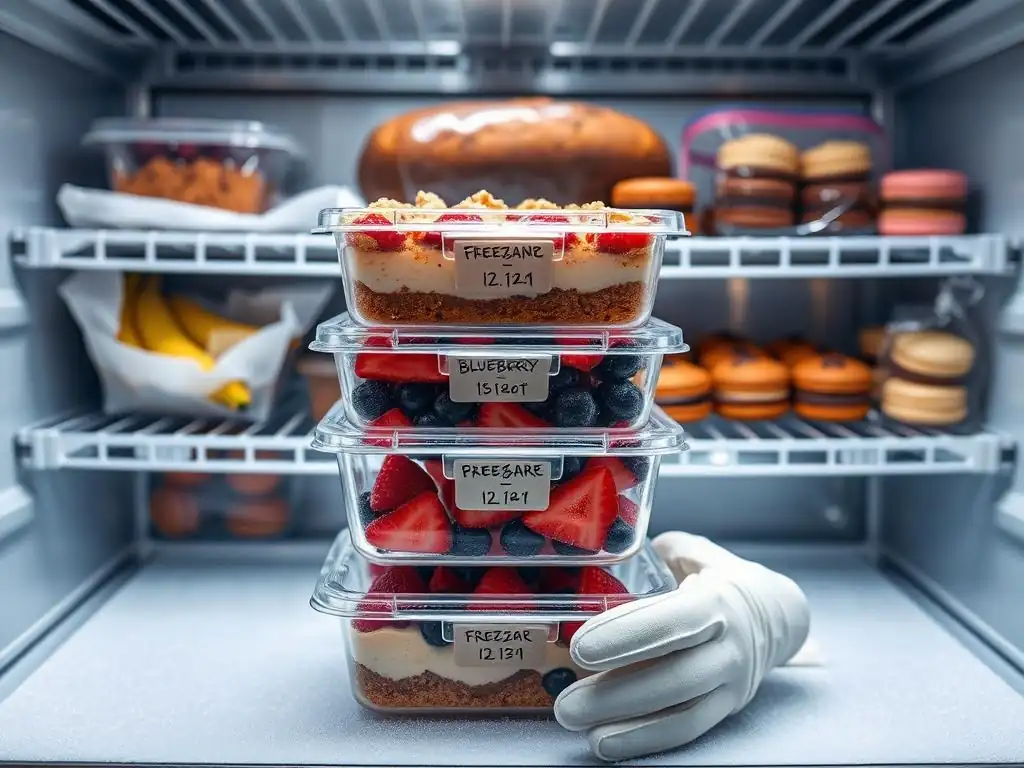
Beyond the basic techniques, a few extra tips can make your experience with freezing desserts for best taste even more successful. Maximizing freezer space, understanding realistic shelf lives, and knowing how to potentially rescue a slightly compromised dessert are valuable skills for any home baker.
Treating your freezer as a carefully organized pantry for future enjoyment rather than just a long-term holding tank will yield better results. A little planning goes a long way in preserving the quality of your frozen treats.
Maximizing Freezer Space for Desserts
Freezer space is often at a premium. Efficient storage techniques can help you fit more while keeping items accessible and protected.
- Freeze flat, then stack: For items like cookie dough balls or individual brownies, flash freeze on a sheet pan, then transfer to bags. The bags can be stacked neatly.
- Use square or rectangular containers: These pack more efficiently than round ones.
- Remove air from bags: Bags take up less space when excess air is squeezed out.
- Utilize vertical space: Stack containers or bags where possible.
- Use sturdy containers for delicate items: Protect cakes and pies from being crushed.
Consider using a freezer inventory list or app to keep track of what you have and when it was frozen. This helps with rotation and prevents items from getting lost and forgotten at the bottom, potentially exceeding their optimal storage time.
Extending the Shelf Life of Frozen Desserts
While freezing makes desserts last much longer than refrigeration or pantry storage, the quality doesn't last indefinitely. The recommended storage times (e.g., 3-6 months for cookies, 2-4 months for cakes) are for optimal quality, not safety. Food kept consistently at 0°F (-18°C) is safe indefinitely, but texture and flavor degrade.
To maximize the quality shelf life:
- Use the coldest part of the freezer: Often the back or bottom, away from the door.
- Minimize door openings: Reduce temperature fluctuations.
- Ensure airtight packaging: This is the single best way to prevent freezer burn and flavor degradation. Vacuum sealing offers the longest quality shelf life.
- Freeze items at their peak freshness: Don't freeze a dessert that's already a bit stale or past its prime.
Reviving Slightly Freezer-Burned Desserts
While preventing freezer burn is ideal, sometimes it happens. A dessert with minor freezer burn isn't necessarily ruined, especially if the burn is only on the surface.
- Trim the affected areas: If the freezer burn is localized (e.g., on the edges of a cake or cookie), you can often simply cut away the dry, discolored parts.
- Rehydrate (carefully): For slightly dry cakes or brownies, a glaze, simple syrup soak, or extra frosting can sometimes help add back moisture. This is more effective for mild cases.
- Repurpose: If the texture is too compromised for serving as is, consider using the dessert in another way. Slightly dry cake can be crumbled for cake pops or trifles. Dry brownies can be used in milkshakes or as a base for a frozen dessert.
Severe freezer burn, where the damage goes deep into the dessert, will likely result in unpleasant texture and flavor that cannot be fully salvaged. Prevention remains the most reliable method for enjoying your freezing desserts for best taste.
Conclusion: Mastering the Art of Freezing Desserts for Lasting Enjoyment
Freezing desserts is a fantastic tool in any baker's arsenal, offering convenience, reducing waste, and allowing you to enjoy your favorite treats whenever the craving strikes. By understanding the simple science behind how freezing affects food, particularly the role of water crystals and air, you can take proactive steps to protect the texture and flavor of your creations.
From selecting the right desserts to freeze and mastering airtight packaging techniques to controlling freezer temperature and thawing correctly, each step plays a vital role in preserving quality. While some desserts freeze better than others, applying the principles of rapid freezing, minimizing air exposure, and thawing gently will significantly improve your results across the board. Embrace the power of your freezer, follow these guidelines for freezing desserts for best taste, and you'll unlock a world of ready-to-eat deliciousness, ensuring your baking efforts bring lasting enjoyment.
Frequently Asked Questions
How does freezing affect the texture of desserts?
Freezing can create ice crystals that alter the texture. Desserts with high water content are more susceptible to becoming grainy or soggy upon thawing. Proper wrapping and storage are crucial to minimize this effect.
Which types of desserts freeze best?
Generally, desserts with a lower water content, like cookies and some cakes (especially those with fat), freeze well. Desserts with high fat content also tend to freeze better than those with a lot of liquid.
What is the best way to wrap desserts for freezing?
The key is to prevent freezer burn. Use airtight containers or wrap desserts tightly in multiple layers of plastic wrap and then aluminum foil. Always label with the date!
How long can I freeze desserts and still maintain good quality?
Most desserts can be frozen for 1-3 months without significant quality loss. Some, like cookies, can last longer, while others, like custard-based desserts, should be consumed sooner for optimal taste and texture.
What's the best way to thaw frozen desserts?
Thawing in the refrigerator overnight is generally recommended for best results. This allows for a slow, even thaw, minimizing moisture loss and preserving texture. Some desserts can be thawed at room temperature, but monitor them closely to prevent spoilage.
Final Reflection: The Sweet Science of Frozen Perfection
The art of freezing desserts isn't just about convenience; it's about unlocking the full potential of flavor and texture. Mastering the science behind freezing allows us to transform simple ingredients into culinary masterpieces, ensuring each bite is a burst of deliciousness. From preventing ice crystals to maximizing creamy texture, understanding these principles elevates the everyday dessert into something truly special.
The impact of freezing techniques on our culinary landscape is undeniable. We've moved beyond simply freezing leftovers to a sophisticated understanding of how temperature and time affect the final product. This evolution reflects a broader cultural shift towards appreciating the nuances of food preparation, a pursuit of excellence that extends far beyond the kitchen. The best things in life are simple, but not easy.
This quote perfectly encapsulates the journey of mastering frozen desserts; while the ingredients might be basic, achieving optimal results requires attention to detail and a willingness to experiment.
Now, consider your own dessert-making journey. What have you learned from exploring the science behind freezing? Perhaps you'll experiment with different freezing methods, or perhaps you'll simply appreciate your favorite frozen treat with a newfound understanding of the artistry involved. Take this knowledge and use it to elevate your own culinary creations. Embrace the science, experiment with techniques, and unlock the sweet potential waiting within your freezer. The next time you reach for a frozen dessert, remember the power of understanding – and the deliciousness that awaits.
Unlock Your Dessert Freezing Power!
Thanks for diving into the science of freezing desserts with us! We hope you now feel confident and equipped to tackle those freezer-friendly treats. Ready to put your newfound knowledge into action?
- Master your freezer stash: Create a personalized dessert freezing calendar – plan ahead and schedule your baking projects for optimal freezer efficiency. This will minimize food waste and maximize enjoyment!
- Share your frozen dessert triumphs (and challenges!): Join our BakeWithEase community and share your tips, recipes, and frozen dessert adventures. Let's learn from each other!
- Experiment with a new frozen dessert recipe today: Challenge yourself to try a completely new frozen dessert recipe that you've always been curious about. You might just discover your new signature dish!
So, what incredible frozen dessert creation will you conquer next?