
The Secret to Perfect Sugar Cookies for Decorating


Welcome to BakeWithEase, where baking dreams become delicious realities! Ever wondered how to achieve those flawlessly decorated sugar cookies you see online? The Secret to Perfect Sugar Cookies for Decorating lies within reach, and we're here to unveil it. Get ready to transform your ordinary batch into edible masterpieces with our expert tips and tricks. Intrigued? Let's get baking!
- Mastering Holiday Sugar Cookies for Decorating
- Your Guide to Decorator-Worthy Christmas Sugar Cookies
- The Foundation: Essential Ingredients for the Best Sugar Cookies
-
Step-by-Step Guide: Baking Flawless Sugar Cookies
- Mixing the Dough: Creaming Butter and Sugar Correctly
- Incorporating Eggs and Vanilla: Achieving Emulsion
- Adding Dry Ingredients: Avoiding Overmixing
- Chilling the Dough: Essential for Preventing Spreading
- Rolling Out the Dough: Achieving Even Thickness
- Cutting Out Shapes: Using Cookie Cutters Effectively
- Baking the Cookies: Preventing Burning and Ensuring Doneness
- Cooling Completely: Preparing for Decorating
- The Secret to a Smooth Surface: Preventing Bubbles and Cracks
- Royal Icing 101: The Decorator's Best Friend
-
Expert Sugar Cookie Decorating Tips and Tricks
- Outlining the Cookies: Creating a Clean Border
- Flooding the Cookies: Achieving a Smooth, Even Surface
- Wet-on-Wet Technique: Creating Intricate Designs
- Adding Details: Using Sprinkles, Edible Markers, and More
- Working with Stencils: Creating Professional-Looking Designs
- Drying the Decorated Cookies: Preventing Smudging
- Troubleshooting Common Sugar Cookie Decorating Problems
- Creative Sugar Cookie Decorating Ideas for Christmas
- Storing Decorated Sugar Cookies: Keeping Them Fresh
- Enjoy Your Beautiful and Delicious Sugar Cookies!
-
Frequently Asked Questions
- How do I prevent my sugar cookies from spreading while baking?
- What is the best type of flour to use for sugar cookies intended for decorating?
- How do I make sure my sugar cookies have a smooth surface for decorating?
- What kind of icing is best for decorating sugar cookies?
- What are some beginner-friendly decorating techniques for sugar cookies?
- Final Reflection: The Enduring Sweetness of Perfect Sugar Cookies
- Unlock Your Inner Cookie Artist!
Crafting beautiful, edible art for the holidays starts with the right canvas, and that's exactly what this sugar cookie recipe provides. Unlike some recipes that yield soft, puffy cookies prone to spreading, this method focuses on creating a sturdy yet tender cookie that holds its shape beautifully during baking.
This is crucial for intricate cookie cutter designs, like delicate snowflakes or detailed gingerbread houses, ensuring that the sharp edges and fine points you cut out remain intact after baking. The flat, smooth surface is also ideal for applying royal icing, serving as a perfect base for flooding and detailed piping work without bumps or craters.
Furthermore, these cookies bake up without excessive bubbling or spreading, which are common issues that can ruin a decorating surface. The careful balance of ingredients and specific chilling and baking techniques outlined here minimize these problems, resulting in cookies that are consistently flat and ready for decoration. This reliability means less frustration and more successful decorating sessions, allowing you to focus on the creative aspect of bringing your Christmas visions to life. For anyone looking for perfect sugar cookies decorating tips, starting with a reliable cookie base is paramount, and this recipe delivers just that.
The type and quality of flour significantly impact the texture of your sugar cookies. Using a standard all-purpose flour with a protein content typically around 10-12% is recommended. This protein level provides enough structure to hold the cookie's shape without making it tough.
Cake flour, with a lower protein content (around 8-9%), can result in a more delicate cookie, but might be too fragile for handling and decorating, especially for larger or more complex shapes. Bread flour, with its higher protein (12-14%), would develop too much gluten, leading to a chewy or tough cookie, which is not desirable for a classic sugar cookie.
Measuring your flour accurately is just as important as the type you choose. Too much flour can lead to dry, crumbly cookies that crack easily when rolled or baked, while too little can cause excessive spreading.
For the most consistent results, use a kitchen scale to measure your flour by weight – typically 120-130 grams per cup, depending on how it's sifted or scooped. Spooning flour lightly into your measuring cup and leveling it off with a straight edge is a common volume measurement method, but it can still vary; weighing offers the most precision for achieving that perfect, tender crumb necessary for durable decorating cookies.
Unsalted Butter: For Rich Flavor and Texture
Unsalted butter is the preferred choice for sugar cookies because it gives you complete control over the salt content in your recipe. Different brands of salted butter can have varying amounts of salt, leading to inconsistent results and potentially an overly salty cookie that clashes with sweet icing. High-quality unsalted butter, ideally with a higher fat percentage (around 82% compared to standard 80%), contributes significantly to the cookie's rich flavor and tender texture. The fat coats the flour particles, preventing excessive gluten development and resulting in a melt-in-your-mouth quality.
The temperature of your butter is absolutely critical. For creaming with sugar, butter should be at cool room temperature, which means it's slightly yielding to the touch but still holds its shape – typically around 65-68°F (18-20°C). If the butter is too warm and soft (melty), it won't incorporate air properly during the creaming process, leading to dense cookies that spread excessively.
If it's too cold and hard, it won't cream smoothly with the sugar, resulting in a lumpy dough and potentially uneven baking. Using cool room temperature butter is one of the fundamental perfect sugar cookies decorating tips to ensure minimal spread and a smooth surface.
Granulated Sugar: Achieving the Right Sweetness
Granulated sugar not only provides sweetness but also plays a structural role in sugar cookies. When creamed with butter, the sharp edges of the sugar crystals cut into the butter, creating tiny air pockets. These air pockets expand during baking, contributing to the cookie's lift and tender texture. Using the correct amount is vital; too much sugar can cause the cookies to spread too thin and become brittle, while too little can result in a tough, less flavorful cookie.
While granulated sugar is standard, some recipes might suggest a small amount of powdered sugar. Powdered sugar contains cornstarch, which can help absorb moisture and result in an even softer cookie, but it doesn't contribute to aeration during creaming like granulated sugar does. For cookies specifically designed for decorating, granulated sugar is generally preferred for its structural contribution and the crisp edge it helps create, which is beneficial for preventing royal icing from bleeding. Ensuring the right balance of sugar is key among perfect sugar cookies decorating tips for a stable cookie base.
Binding Agents: Eggs and Vanilla Extract
Eggs serve as a primary binding agent in sugar cookies, holding the dough together and adding richness. The protein in the egg contributes to the cookie's structure, while the fat in the yolk adds tenderness and flavor. Using large eggs, typically weighing around 50 grams each, is standard unless otherwise specified. Ensuring your eggs are also at room temperature helps them emulsify better with the creamed butter and sugar mixture, leading to a smoother, more uniform dough. Cold eggs can curdle the mixture, affecting the final texture.
Vanilla extract is essential for flavoring classic sugar cookies. High-quality pure vanilla extract provides the best flavor profile, complementing the butter and sugar without overpowering them. Avoid imitation vanilla extract if possible, as its flavor can be less nuanced and sometimes leaves an artificial aftertaste. Other extracts like almond, lemon, or even peppermint can be used to vary the flavor profile for different holiday themes, but vanilla remains the traditional and often preferred choice for its classic, comforting taste that pairs well with various icing flavors.
Mixing the Dough: Creaming Butter and Sugar Correctly
The first step to flawless sugar cookies is properly creaming the cool room temperature butter and granulated sugar. Use a stand mixer with the paddle attachment or a hand mixer. Beat the butter on medium speed for about 1-2 minutes until it's smooth and creamy. Then, add the sugar gradually and continue creaming on medium-high speed for 3-5 minutes.
During this process, the mixture will become lighter in color and fluffier in texture as air is incorporated. Scrape down the sides and bottom of the bowl frequently to ensure even mixing. This aeration is crucial for the cookie's structure and prevents excessive spread later on.
Over-creaming can incorporate too much air, potentially leading to cookies that puff up too much and then fall, creating an uneven surface. Under-creaming, on the other hand, won't create enough air pockets, resulting in dense cookies that might spread more than desired. The ideal texture after creaming should be light, airy, and pale yellow. This foundation sets the stage for achieving perfect sugar cookies decorating tips later in the process.
Incorporating Eggs and Vanilla: Achieving Emulsion
Once the butter and sugar are properly creamed, add the room temperature eggs, one at a time, beating well after each addition. Beat on medium speed just until the egg is fully incorporated into the mixture. Adding eggs slowly helps create a stable emulsion, preventing the mixture from separating or curdling. If the mixture looks slightly curdled, don't worry; it often smooths out once the flour is added.
After the eggs are incorporated, add the vanilla extract (or other flavorings). Beat for just another 30 seconds to distribute the flavor evenly. Avoid overmixing at this stage. The goal is to combine the ingredients smoothly before introducing the dry components, which require more gentle handling. This ensures a cohesive wet base for the dough.
Adding Dry Ingredients: Avoiding Overmixing
Combine your measured flour, baking powder (if the recipe calls for it, though many decorating cookie recipes omit it to prevent puffing), and salt in a separate bowl. Whisk them together to ensure they are evenly distributed. Gradually add the dry ingredients to the wet ingredients on low speed, or mix by hand. Mix just until the dry ingredients are incorporated and no streaks of flour remain. This usually takes less than a minute on a mixer.
Overmixing the dough after adding flour develops gluten, resulting in tough cookies. For tender sugar cookies, stop mixing as soon as the dough comes together. The dough might look slightly crumbly at this stage, but it should hold together when squeezed. Turn the dough out onto a clean surface or plastic wrap for the next step.
Chilling the Dough: Essential for Preventing Spreading
Chilling the dough is perhaps the most crucial step for creating cookies that hold their shape perfectly for decorating. Divide the dough into two or three portions and flatten each into a disk or rectangle. Wrap each portion tightly in plastic wrap. Refrigerate the dough for a minimum of 1-2 hours, or preferably 24 hours. Chilling solidifies the butter, making the dough firm and easy to roll without sticking. More importantly, cold butter melts slower in the oven, which minimizes spread, helping your cut shapes maintain their definition.
A longer chill time, up to 2-3 days, can even improve the flavor as the ingredients meld. If you're in a hurry, you can freeze the dough for 20-30 minutes until firm, but refrigeration is generally preferred for consistency. Working with well-chilled dough is one of the most effective perfect sugar cookies decorating tips you'll receive.
Rolling Out the Dough: Achieving Even Thickness
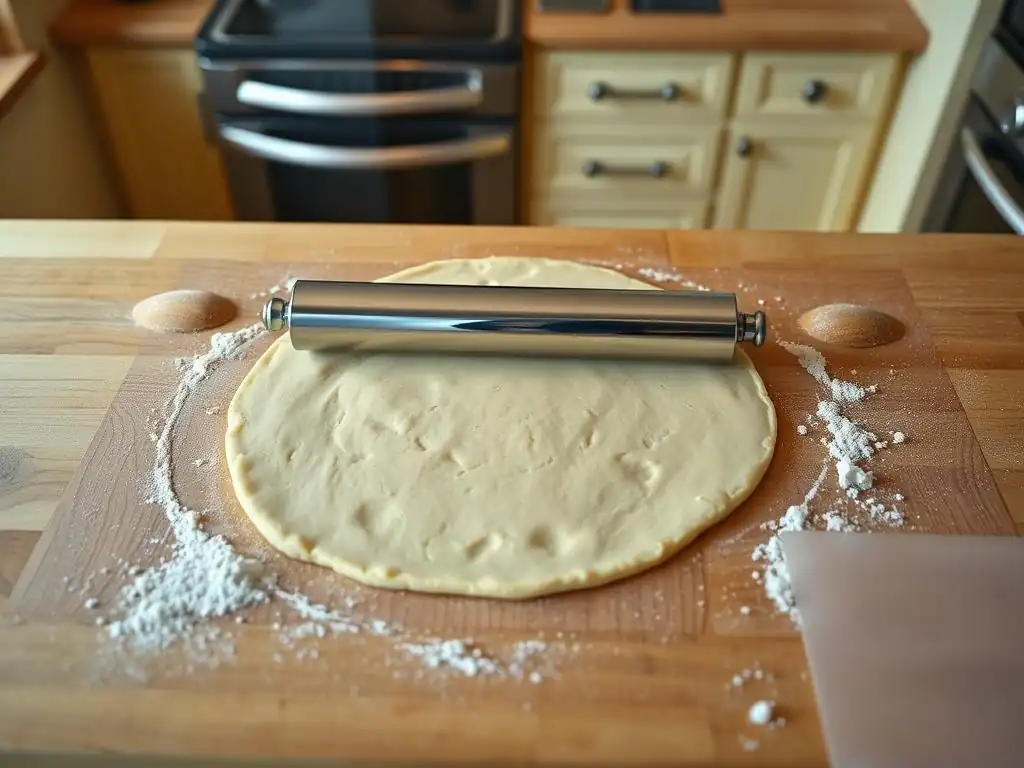
When ready to roll, take one portion of chilled dough out of the refrigerator and let it sit at room temperature for just 5-10 minutes to make it slightly more pliable – it should still be quite firm. Lightly flour your work surface and your rolling pin. Roll the dough evenly to your desired thickness, typically between 1/4 inch (approx. 6mm) and 3/8 inch (approx. 9mm). A consistent thickness is vital for even baking; thinner spots will burn before thicker spots are done.
Using rolling pin guides or adjustable rolling pins can help achieve a perfectly uniform thickness across the entire sheet of dough. Roll from the center outwards, rotating the dough occasionally to prevent sticking. Avoid adding excessive flour to the surface, as this can make the cookies dry and powdery. If the dough becomes too soft while rolling, pop it back into the refrigerator for 10-15 minutes to firm up.
Once the dough is rolled to the correct thickness, it's time to cut out your shapes. Dip your cookie cutters in flour before each cut to prevent sticking. Press the cutter straight down firmly without twisting, which can distort the shape. Lift the cutter straight up. For intricate shapes, a gentle tap on the counter might help release the dough.
Carefully transfer the cut shapes to a baking sheet lined with parchment paper. Use a thin spatula or offset spatula to lift the cookies, especially delicate ones. Arrange them on the baking sheet about 1-2 inches apart; while this dough doesn't spread much, a little space is still needed for airflow. Re-roll scraps gently, combine them, flatten, and chill again before cutting more shapes. Overworking the scraps can lead to tougher cookies.
Bake the cookies in a preheated oven, typically at 350°F (175°C). The baking time will vary depending on the size and thickness of your cookies, usually ranging from 8 to 12 minutes. Small, thin cookies might be done in 8-9 minutes, while larger, thicker ones could take 10-12 minutes or slightly longer. You'll know they're done when the edges are lightly golden brown, or for a softer cookie, just barely set and no longer appear wet in the center.
Baking on parchment paper prevents sticking and ensures even heat distribution on the bottom. Bake one sheet of cookies at a time in the center rack of your oven for the most consistent results. If baking multiple sheets, rotate them halfway through the baking time. Keep a close eye on the cookies, as they can go from perfectly baked to slightly burnt very quickly. Slightly underbaking them ensures a softer texture, while baking until just golden provides a firmer base for decorating.
Cooling Completely: Preparing for Decorating
Once baked, remove the cookie sheets from the oven and let the cookies cool on the sheet for 5-10 minutes. This allows them to firm up slightly before moving. Attempting to move them too soon can cause them to break. After the initial cooling on the sheet, carefully transfer the cookies to a wire cooling rack using a spatula.
It is absolutely essential that the cookies are completely cool before you begin decorating them, especially if using royal icing. Warm cookies will melt the icing, causing it to spread, lose its definition, and potentially soak into the cookie, making it soggy. Allow the cookies to cool for at least 1-2 hours at room temperature, or longer if your kitchen is warm, until they are entirely cool to the touch. This patience is a key component of successful perfect sugar cookies decorating tips.
The Secret to a Smooth Surface: Preventing Bubbles and Cracks
Dough Consistency: The Right Balance of Moisture
Achieving a smooth surface on your baked sugar cookies starts with the dough itself. A dough that is too wet can lead to excessive bubbling during baking as the moisture evaporates rapidly. Conversely, a dough that is too dry will be crumbly and prone to cracking when rolled and baked, resulting in a rough surface. The recipe's balance of ingredients, particularly the flour-to-butter ratio and the amount of liquid (eggs, vanilla), is designed to create a dough that is pliable enough to roll without cracking but firm enough to hold its shape and bake evenly.
Ensuring your ingredients are measured accurately, ideally by weight for flour, is the first step in controlling dough consistency. If your dough feels too sticky after mixing, you can add a tablespoon of flour at a time, mixing minimally, until it reaches the right consistency – it should be soft but not sticky. If it feels too dry and crumbly, add a teaspoon of milk or cream, again mixing minimally. Proper chilling also helps solidify the fat, contributing to a smoother bake.
Baking Temperature: Finding the Sweet Spot
The oven temperature plays a significant role in preventing bubbles and cracks on the cookie surface. Baking at the recommended temperature, typically 350°F (175°C), allows the cookie to set gradually. If the oven is too hot, the outside of the cookie can set too quickly while the inside is still expanding, leading to cracks. High heat can also cause butter to melt and steam to escape too rapidly, resulting in surface bubbles.
Using an oven thermometer is highly recommended, as oven temperatures can vary significantly from the dial setting – sometimes by as much as 25-50°F (15-30°C). Calibrating your oven or adjusting the set temperature based on a reliable thermometer ensures you are baking at the intended heat. Baking at the correct, consistent temperature promotes even rising and setting, leading to a smoother, flatter cookie surface ideal for applying perfect sugar cookies decorating tips.
Proper placement of cookies on the baking sheet and the baking sheet in the oven contributes to even baking and helps prevent issues like cracking or uneven browning. Arrange cookies of similar size and thickness on the same baking sheet. This ensures they all bake at the same rate. Placing cookies too close together can hinder airflow, leading to uneven heat distribution. Leave about 1-2 inches (2.5-5 cm) between cookies.
Within the oven, bake one sheet at a time on the center rack. This is where the heat is typically most consistent. If you must bake two sheets at once, place them on separate racks and rotate their positions (top to bottom, front to back) halfway through the baking time. Overcrowding the oven or using multiple sheets without rotation can lead to some cookies baking faster or slower than others, increasing the chance of surface imperfections.
Parchment Paper: Preventing Sticking and Burning
Lining your baking sheets with parchment paper is a simple yet effective step that aids in achieving a smooth cookie surface. Parchment paper prevents the cookies from sticking to the pan, which can cause breakage or mar the bottom surface when transferring. It also helps distribute heat more evenly across the bottom of the cookie, reducing the risk of hotspots that could lead to uneven browning or burning.
While silicone baking mats are also an option, some bakers find that parchment paper results in a slightly crisper edge, which can be beneficial for creating a defined border when decorating with royal icing. Parchment paper is also disposable, making cleanup easier. Regardless of whether you use parchment or a silicone mat, ensuring the baking surface is clean and properly lined is a small detail that contributes significantly to the overall quality and smoothness of your baked cookies.
Royal Icing 101: The Decorator's Best Friend
Royal Icing Recipe: A Detailed Guide
Royal icing is the gold standard for decorating sugar cookies due to its smooth application and hard-drying finish. A basic recipe typically involves confectioners' sugar (powdered sugar), meringue powder (or egg whites), and water or milk. Meringue powder is widely preferred for safety and consistency; it's a dried mix of egg whites, sugar, and stabilizers. A common ratio is 4 cups (about 450-500g) of confectioners' sugar, 3 tablespoons of meringue powder, and about 1/2 cup (120ml) of water.
To make the icing, whisk together the confectioners' sugar and meringue powder in a large bowl. Gradually add the water while mixing on low speed with a stand mixer (using the whisk attachment) or a hand mixer. Once combined, increase the speed to medium-high and beat for 5-7 minutes until the icing is thick, glossy, and holds stiff peaks.
If using egg whites instead of meringue powder, use about 3 large fresh egg whites per 4 cups of sugar, ensuring they are pasteurized for safety, and beat as described. Achieving the right consistency is key among perfect sugar cookies decorating tips using royal icing.
Achieving the Right Consistency: Flood Icing vs. Piping Icing
Royal icing is versatile because its consistency can be adjusted for different decorating purposes. Piping consistency is thick enough to hold sharp lines and details, similar to toothpaste. You can test this by lifting the whisk; the icing should form a stiff peak that stands up. This consistency is used for outlining cookies, piping borders, writing text, and creating intricate details.
Flood consistency is thinner and used to fill in outlined areas, creating a smooth, flat surface. To achieve flood consistency, gradually add small amounts of water (a teaspoon or two at a time) to the piping consistency icing, mixing until smooth after each addition. The correct flood consistency is reached when a ribbon of icing dropped back into the bowl disappears into the surface within 10-15 seconds. If it disappears faster, it's too thin; if it takes longer, it's too thick. You will typically need both consistencies for decorating outlined cookies.
Coloring Royal Icing: Using Gel Food Coloring
Gel food coloring is highly recommended for coloring royal icing over liquid food coloring. Gel colors are concentrated pigments suspended in a gel base, requiring only a small amount to achieve vibrant colors without adding excessive liquid that could thin the icing consistency. Liquid food coloring can significantly alter the icing's thickness and may not produce intense colors without using a large quantity.
To color icing, start with a small amount of gel color on a toothpick and stir it into the icing. Gradually add more color until you achieve the desired shade. Remember that colors can deepen slightly as the icing dries. For dark or vibrant colors like deep red or black, it's often best to mix the color ahead of time (an hour or more) to allow the color to develop, potentially reducing the amount of coloring needed. Divide your prepared royal icing into separate bowls for each color you plan to use before coloring.
Storing Royal Icing: Preventing Drying and Hardening
Royal icing dries hard when exposed to air, which is great for decorated cookies but requires careful storage of unused icing. Store royal icing in airtight containers at room temperature. To prevent a crust from forming on the surface, place a piece of plastic wrap directly onto the surface of the icing before sealing the container with a lid.
When you're ready to use stored icing, stir it gently. If it seems too thick, add a tiny amount of water (a drop or two at a time) to bring it back to the desired consistency. Icing stored properly at room temperature can last for several days, typically up to a week. Do not refrigerate royal icing made with meringue powder, as condensation can affect its texture. Icing made with fresh egg whites should be refrigerated and used within a couple of days due to food safety concerns.

Outlining is the first step in many royal icing decorating techniques and is crucial for containing the flood icing. Use piping consistency royal icing in a piping bag fitted with a small round tip (like a PME #1.5 or Wilton #2). Hold the piping bag at a 45-degree angle just above the cookie surface. Apply gentle, consistent pressure while guiding the icing around the edge of the cookie, slightly off the edge or directly on it, depending on the desired look.
Don't drag the tip through the icing; instead, let the line of icing fall onto the cookie surface, guiding it with the tip. This "pulling" technique helps create a smooth, even line. Connect your starting and ending points seamlessly. Allow the outline to dry for 10-20 minutes, or until it forms a slight crust, before flooding the interior. This helps create a dam that holds the thinner flood icing in place. Mastering this step is one of the foundational perfect sugar cookies decorating tips.
Flooding involves filling the outlined area with flood consistency royal icing to create a smooth, background surface. Transfer flood consistency icing to a piping bag or squeeze bottle. Starting from the outline, gently squeeze the icing to fill the enclosed area. Use a scribe tool, toothpick, or small offset spatula to gently spread the icing to the edges and corners, ensuring full coverage.
Work quickly but carefully to avoid air bubbles. If bubbles appear, gently pop them with your scribe tool or toothpick and smooth the area. Fill the area completely without overfilling, which could cause the icing to spill over the outline.
Once the area is filled, gently shake the cookie side to side to help the icing settle into a perfectly smooth, flat surface. Let the flooded icing dry completely before adding any details on top – this can take 6-24 hours depending on humidity and icing thickness. This technique is central to achieving perfect sugar cookies decorating tips for a professional look.
Wet-on-Wet Technique: Creating Intricate Designs
The wet-on-wet technique allows you to create designs that lie flush with the flooded background, resulting in a smooth surface without raised lines. To use this method, first flood the cookie with your base color. While the base flood icing is still wet, immediately drop or pipe lines, dots, or swirls of a different color of flood consistency icing onto the wet base.
Then, use a scribe tool or toothpick to drag through the wet icing layers to create patterns like marbling, spiderwebs, hearts, or flowers. For example, to create a marble effect, pipe lines of contrasting colors onto the wet base, then drag a scribe tool through the lines in alternating directions. The key is that both the base layer and the added design colors are wet when you manipulate them, causing them to blend slightly and dry together as a single, smooth layer. This technique is a favorite among those sharing perfect sugar cookies decorating tips for its seamless results.
Adding Details: Using Sprinkles, Edible Markers, and More
Once the base flood layer is completely dry (which can take 12-24 hours), you can add details using piping consistency icing, edible markers, sprinkles, or other edible decorations. Use piping consistency icing with fine tips (like PME #00 or #0) to add intricate lines, dots, swirls, or text. Practice your piping on parchment paper first to get a feel for the pressure needed.
To attach sprinkles or other non-icing decorations like edible glitter or dragees, apply a small amount of piping consistency icing or edible glue where you want the decoration to stick, then carefully place the decoration. Alternatively, you can sprinkle directly onto wet flood icing if you want the sprinkles to be embedded in the surface, but be mindful that this can sometimes cause colors to bleed. Edible markers are great for adding fine lines, drawings, or text onto a fully dried royal icing surface.
Working with Stencils: Creating Professional-Looking Designs
Stencils are a fantastic way to add consistent, professional-looking designs to your sugar cookies, especially for repetitive patterns or detailed images. There are a few ways to use stencils with royal icing. One common method is to place a stencil directly on top of a fully dried flood-coated cookie.
Hold the stencil firmly in place (sometimes using magnets on a Stencil Genie tool or gently holding by hand). Apply medium consistency royal icing (thicker than flood, thinner than piping) over the stencil using an offset spatula or scraper, ensuring the openings are filled evenly. Scrape off any excess icing at a 45-degree angle. Carefully lift the stencil straight up to reveal the design. Clean the stencil between uses for crisp results. This method allows for repeatable patterns and intricate details not easily achievable by hand piping, adding another dimension to perfect sugar cookies decorating tips.
Proper drying is essential for royal icing to set hard and prevent smudging or damage to your intricate designs. After flooding or adding wet-on-wet details, let the cookies air dry undisturbed for at least 6-8 hours, and ideally 12-24 hours, especially if you plan to layer decorations or package them. Drying time depends heavily on humidity levels; higher humidity means longer drying times.
Placing cookies in front of a fan can significantly speed up the drying process, often reducing the initial drying time to 2-4 hours for the surface to crust, though a full dry through the layers still takes longer. Avoid covering the cookies until they are completely hard to the touch. Once fully dry, they can be stacked carefully without damaging the icing. Patience during the drying phase is a vital part of achieving truly perfect sugar cookies decorating tips.
Icing Bleeding: Causes and Solutions
Icing bleeding, where colors spread or mix unintentionally, is a frustrating issue. It can happen for several reasons, including using too much liquid food coloring, applying wet icing onto a base that isn't fully dry, or high humidity. Some colors, particularly deep reds, blacks, and dark blues, are more prone to bleeding due to the high concentration of pigment.
To minimize bleeding, use gel food coloring exclusively and use it sparingly, allowing colors to deepen naturally over time. Ensure your base layer of royal icing is completely dry before adding any subsequent layers or details on top – this often requires 12-24 hours of drying time. If you're working in high humidity, use a fan to speed up drying. Some specialty food colorings are marketed as "bleed-resistant" and can be helpful for challenging colors. If minor bleeding occurs, you might be able to strategically cover it with additional piping or details once dry.
Icing Cracking: Preventing and Repairing
Cracking in royal icing can occur for a few reasons: applying icing too thickly, drying too quickly on the surface before the layers underneath are dry, or baking cookies that are slightly uneven. If the cookie itself isn't perfectly flat, the icing might crack as it dries over an uneven surface. Using a fan on cookies that aren't fully dried can sometimes cause the surface to crust and crack as the underlying layer continues to contract slightly.
To prevent cracks, ensure your cookies are baked flat and cooled completely. Apply flood icing in a consistent, not overly thick layer. While fans help drying, avoid placing cookies directly under a strong fan immediately after flooding; let them sit for 30 minutes to an hour first. If a crack appears on a fully dried cookie, you can sometimes repair it by carefully piping a thin line of matching icing over the crack or by strategically adding a decorative element like a sprinkle or piped dot to cover it.
Uneven Icing: Achieving a Smooth Finish
Uneven royal icing can result from inconsistent flood consistency, not using enough icing to fill the area, or not properly settling the icing after flooding. If the flood icing is too thick, it won't level out smoothly. If you don't use enough icing, it might pool in the center, leaving thinner areas near the edges. Not gently shaking the cookie after flooding can also leave visible brush strokes or uneven patches.
Ensure your flood icing is the correct consistency – it should level itself within 10-15 seconds when a ribbon is dropped back into the bowl. Use enough icing to generously fill the outlined area. After flooding, gently pick up the cookie and shake it side-to-side and back-and-forth horizontally for a few seconds; this helps the icing settle and become perfectly smooth. Using a scribe tool to gently guide icing to the edges and pop bubbles also contributes to a smooth finish. Practice with flood consistency is key to mastering this aspect of perfect sugar cookies decorating tips.
Sprinkles Not Sticking: Tips for Secure Placement
When adding sprinkles or other decorations, the key is applying them when the surface you want them to stick to is still wet or tacky. If you're applying sprinkles to a flooded area, do so immediately after flooding while the icing is still wet. The sprinkles will sink slightly into the icing and adhere as it dries. Be aware that this can sometimes cause colors from the sprinkles to bleed onto the icing.
For more precise placement or for adding sprinkles after the flood layer has dried, use a small amount of piping consistency icing or edible glue as an adhesive. Pipe a thin line or dot of icing where you want the sprinkle to go, then place the sprinkle onto the wet icing. This method gives you more control and prevents bleeding, but requires more time for individual placement. For covering larger areas on a dry surface, you can lightly brush the area with edible glue or a thin layer of thinned piping icing before applying sprinkles.

Classic Christmas Designs: Snowflakes, Trees, and Ornaments
Classic Christmas sugar cookie designs are timeless and always popular. Think snowflakes piped with delicate white icing, evergreen trees flooded in vibrant green and adorned with sprinkle "ornaments," or round cookies transformed into festive baubles with colorful flood icing and intricate piped patterns. Using traditional Christmas colors like red, green, white, silver, and gold is key here.
You can use piping consistency icing to create detailed snowdrifts, add needles to tree branches, or pipe intricate patterns like swirls, dots, and zigzags onto ornament shapes. For snowflakes, outline and flood the cookie white, then use piping consistency white or light blue icing to pipe the snowflake arms and details. Adding edible glitter or shimmering dust while the icing is still wet can give these classic designs an extra sparkle, embodying the festive spirit of perfect sugar cookies decorating tips for the holidays.
Modern Christmas Designs: Geometric Patterns, Brush Embroidery, and Marbleized Effects
Beyond the traditional, modern decorating techniques can give your Christmas cookies a fresh, contemporary look. Geometric patterns, like stripes, chevrons, or plaid, can be created using the wet-on-wet technique or by layering dried sections of flood icing. Use bold, modern color palettes like teal, silver, purple, or even non-traditional brights.
Brush embroidery is another elegant technique: pipe a line or shape with medium consistency icing, then immediately use a slightly damp, clean food-safe brush to pull the edges of the icing inward, creating a textured, embroidered look. Marbleized effects, achieved with the wet-on-wet technique using swirling colors, can mimic festive wrapping paper or abstract art. These modern approaches offer exciting ways to utilize perfect sugar cookies decorating tips for unique holiday treats.
Adding a personal touch makes sugar cookies extra special, especially for gifts or holiday gatherings. You can easily personalize cookies by writing names, dates, or short messages directly onto the fully dried royal icing surface. Use piping consistency icing with a very fine tip (like PME #00 or #0) for writing. Practice your lettering on parchment paper first to ensure smooth lines and consistent size.
Alternatively, edible markers work well for writing on a dry, smooth icing surface and offer more control for those less comfortable with piping text. Stencils with letters or numbers can also be used to apply names or dates with royal icing or even edible spray colors onto a dried base. Personalized cookies are a thoughtful way to use your perfect sugar cookies decorating tips to create memorable holiday treats.
Airtight Containers: Preventing Staling
Once your beautifully decorated sugar cookies are completely dry (usually 12-24 hours after the final icing is applied), proper storage is key to keeping them fresh and delicious. Store cookies in an airtight container at room temperature. Exposure to air will quickly make the cookies stale and hard.
Avoid refrigerating or freezing cookies decorated with royal icing unless absolutely necessary, as condensation during thawing can damage the icing, causing colors to bleed or the surface to become sticky. If you must store them for longer than a week, or in a very humid environment, ensure they are fully dry before placing them in the airtight container. A food-safe desiccant packet (like those found in food packaging) can be added to the container to help absorb excess moisture, further preserving freshness and the integrity of the icing.
When storing multiple decorated cookies in the same container, it's essential to prevent them from sticking together or damaging each other's decorations. Once the royal icing is completely dry and hard, the cookies can generally be layered.
Place a piece of parchment paper, wax paper, or food-safe tissue paper between each layer of cookies in the airtight container. This barrier protects the delicate icing designs from being scratched, smudged, or stuck to the cookies above or below. For cookies with very high or fragile decorations, you might need to store them in a single layer or use dividers within the container. Gentle handling is always necessary when stacking.
While not ideal for maintaining perfect icing texture, freezing is an option for long-term storage of decorated sugar cookies, extending their shelf life for up to 3-6 months. Ensure the royal icing is absolutely rock hard and completely dry before freezing.
To freeze, first arrange the fully dried, decorated cookies in a single layer on a baking sheet and place them in the freezer for about 30-60 minutes until they are firm. This flash freezing prevents them from sticking together. Then, transfer the cookies to an airtight freezer-safe container. Layer the cookies carefully with parchment or wax paper in between each layer.
To thaw, remove the container from the freezer and let it come to room temperature undisturbed before opening. This slow thawing process helps minimize condensation, which is the main risk to the icing. Do not open the container until the cookies are fully thawed to room temperature.
Frequently Asked Questions
To prevent spreading, ensure your dough is chilled thoroughly before baking. Also, use cold butter and avoid overmixing the dough.
Using all-purpose flour is a good starting point. However, cake flour can also be mixed in to create a more tender cookie.
Roll the dough out evenly between two sheets of parchment paper to ensure a smooth surface. Avoid over-handling the dough, as this can cause uneven textures.
Royal icing is the most common and recommended type of icing. It dries hard, making it ideal for intricate designs that will hold their shape.
Start with simple techniques like flooding and outlining using royal icing. Experiment with sprinkles and simple patterns before trying more advanced methods.
The pursuit of the perfect sugar cookie transcends mere baking; it's a journey into artistry, precision, and the joy of shared sweetness. In today's fast-paced world, where instant gratification often reigns supreme, taking the time to meticulously craft these delicate treats offers a powerful antidote – a moment of mindful creation and connection. The techniques discussed – from chilling the dough to mastering the perfect icing consistency – are not just steps in a recipe, but building blocks for a richer, more fulfilling experience.
The influence of sugar cookies extends far beyond the kitchen table. They are a symbol of celebration, a canvas for creativity, and a tangible expression of love and care. From childhood memories of holiday baking with family to the intricate designs adorning modern wedding cakes, these simple cookies carry a profound cultural weight. Baking is at once child's play and adult joy. And love, of course.
– This sentiment perfectly captures the enduring appeal of creating and sharing these delightful confections.
Now, I invite you to consider your own approach to baking. What elements of this process resonate most deeply with you? Perhaps it's the meticulous precision of measuring ingredients, the satisfying feel of rolling out the dough, or the sheer delight of seeing your creations come to life with vibrant colors and intricate designs. Whatever it may be, embrace that joy, and let the spirit of the perfect sugar cookie inspire you to create moments of sweetness and connection in your own life. Don't just bake cookies; bake memories.
Thanks for joining us on this delicious journey into the world of perfect sugar cookies! We hope you gained valuable tips and tricks to elevate your baking game. Now it's time to put your newfound knowledge into action.
- Whip up a batch of your own amazing cookies: Use the recipe and techniques you just learned to create stunning cookies ready for decorating. Let your creativity shine!
- Share your cookie creations: Post a picture of your masterpiece on social media using #BakeWithEaseCookies – we'd love to see them!
- Experiment with different decorating techniques: Try adding new colors, sprinkles, or even fondant to truly personalize your cookies.
Ready to transform your kitchen into a cookie decorating wonderland? What exciting designs will you create?