
Simple & Sweet Easter Cookie Recipes

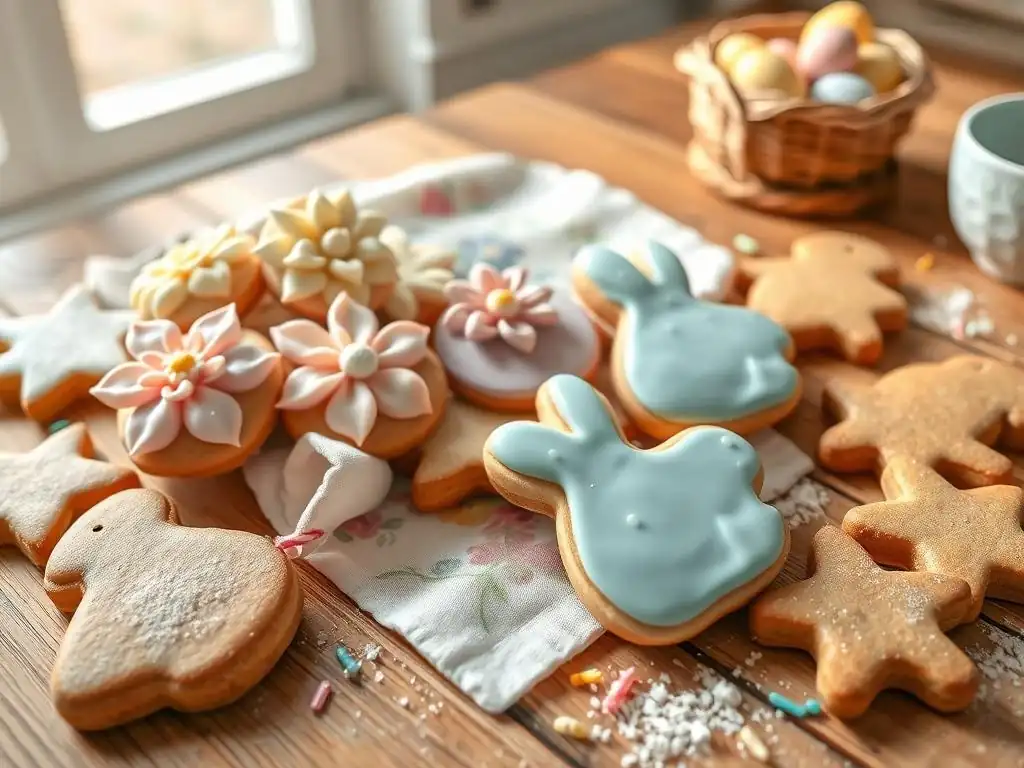
Welcome to BakeWithEase, your haven for simplifying the joys of baking! Are you ready to sprinkle some sweetness into your Easter celebrations? This year, forget complicated recipes and embrace the delight of creating adorable and delicious treats. Dive in to discover our collection of easy Easter cookie recipes for beginners and learn how you can whip up unforgettable memories with minimal fuss. Curious about the secret to perfectly shaped bunny cookies or flawlessly frosted chicks? Let's unlock those baking secrets together...
- Simple & Sweet Easter Cookie Recipes: BakeWithEase
- Introduction to Easy Easter Cookie Baking for Beginners
- Must-Try Easy Easter Cookie Recipes for Beginners
- Essential Easter Cookie Baking Tips & Tricks
- Storing Your Homemade Easter Cookies
- Beyond the Basics: Easy Easter Cookie Variations
- Conclusion: Enjoy Baking Easy Easter Cookies!
-
Frequently Asked Questions
- What makes these Easter cookie recipes easy for beginners?
- Where can I find the exact ingredients for these cookie recipes?
- What kind of baking equipment is essential for making these cookies?
- Are there any allergy-friendly substitutions I can make in these recipes?
- How can I store these Easter cookies to keep them fresh?
- Final Reflection: The Enduring Sweetness of Shared Moments
- Unleash Your Inner Easter Baker!
Spring is a time of renewal, fresh starts, and vibrant colors, making it the perfect season to gather in the kitchen and bake something special. Easter brings with it delightful traditions, and crafting homemade cookies is a cherished way to celebrate. For those new to baking, the idea of making festive cookies might seem daunting, but it doesn't have to be!
This guide is specifically designed for beginners, focusing on simple techniques and straightforward recipes that promise delicious results without the stress. Imagine the joy of decorating colorful cookies shaped like bunnies, eggs, or chicks, creating edible art that's as fun to make as it is to eat.
Embarking on your first Easter cookie project can be a rewarding experience. You don't need fancy equipment or years of practice to create beautiful and tasty treats. The key is starting with easy Easter cookie recipes beginners can confidently tackle. These recipes often involve minimal ingredients, simple mixing methods, and forgiving doughs. We'll explore options that range from classic cut-outs perfect for decorating to quick no-bake wonders. By following these simple steps, you'll be well on your way to baking delightful Easter cookies that will impress your friends and family, and perhaps even start a new annual tradition.
BakeWithEase's Guide to Simple Easter Treats
At BakeWithEase, we believe that baking should be an enjoyable and accessible activity for everyone, regardless of their skill level. Our mission is to demystify baking, providing clear, step-by-step instructions and helpful tips that guarantee success. This guide to easy Easter cookie recipes beginners is a prime example of our approach. We've curated recipes that are not only simple but also incredibly versatile, allowing you to customize them to your taste and decorative vision. From selecting the right basic ingredients to mastering simple decorating techniques, we'll walk you through the entire process.
We understand that beginners might have questions about everything from chilling dough to using food coloring. That's why this guide covers the essentials, providing practical advice alongside our delicious recipes. We'll share insights on common pitfalls to avoid and offer creative ideas for making your Easter cookies truly special. Our goal is to empower you to step into the kitchen this Easter season with confidence, knowing that you have the resources and guidance needed to bake delightful treats. Get ready to discover the joy of creating sweet, festive cookies that are perfect for sharing or simply enjoying yourself.

Sugar cookies are the quintessential canvas for holiday decorating, and they are surprisingly simple to make, making them ideal easy Easter cookie recipes beginners. The basic dough requires just a few common pantry staples: butter, sugar, eggs, flour, and a leavening agent like baking powder, plus a touch of vanilla for flavor. The simplicity of the recipe means there's less room for error, and the dough is forgiving enough for novice bakers to handle. Once mixed, the dough is typically chilled, rolled out, and cut into festive shapes using cookie cutters – think bunnies, eggs, flowers, or crosses.
Baking sugar cookies is also a great way to practice fundamental baking techniques. Learning to cream butter and sugar until light and fluffy, incorporating dry ingredients without overmixing, and chilling dough properly are all valuable skills. A standard batch of sugar cookies, using about 1 cup of butter and 3 cups of flour, can yield anywhere from 2 to 4 dozen cookies, depending on the size of your cutters.
This provides plenty of opportunities for practicing rolling, cutting, and, most importantly, decorating! The relatively short baking time, usually between 8 and 12 minutes at 350°F (175°C), means you'll have warm, delicious cookies ready for cooling and decorating in no time.
Recipe: Simple Easter Sugar Cookies with Royal Icing
- Yields: Approx. 3 dozen cookies
- Prep time: 20 minutes + 1 hour chilling
- Bake time: 8-12 minutes per batch
Ingredients:
- 1 cup (2 sticks) unsalted butter, softened
- 1 ½ cups granulated sugar
- 2 large eggs
- 1 teaspoon vanilla extract
- 3 cups all-purpose flour
- 1 teaspoon baking powder
- ½ teaspoon salt
For Simple Royal Icing:
- 2 cups confectioners' sugar, sifted
- 2-3 tablespoons milk or water
- ½ teaspoon vanilla extract
- Optional: Food coloring
Instructions:
- In a large bowl, cream together the softened butter and granulated sugar until light and fluffy, about 3-5 minutes.
- Beat in the eggs one at a time, then stir in the vanilla extract.
- In a separate medium bowl, whisk together the flour, baking powder, and salt.
- Gradually add the dry ingredients to the wet ingredients, mixing on low speed until just combined. Do not overmix.
- Divide the dough in half, flatten each half into a disc, wrap tightly in plastic wrap, and refrigerate for at least 1 hour.
- Preheat oven to 350°F (175°C). Line baking sheets with parchment paper.
- On a lightly floured surface, roll out one disc of dough to about ¼ inch thickness.
- Cut out shapes using Easter-themed cookie cutters. Carefully transfer cookies to the prepared baking sheets, spacing them about 1 inch apart.
- Bake for 8-12 minutes, or until the edges are lightly golden.
- Let cookies cool on the baking sheet for 5 minutes before transferring them to a wire rack to cool completely.
- Make the Royal Icing: In a medium bowl, whisk together the sifted confectioners' sugar, milk/water, and vanilla extract until smooth and desired consistency is reached. Add more liquid a teaspoon at a time if needed. For thicker icing (for outlining), use less liquid. For thinner icing (for flooding), use more.
- Divide icing into separate bowls and stir in food coloring if desired.
- Decorate cooled cookies using icing bags or spread with a knife. Allow icing to harden completely (this can take 1-2 hours depending on thickness and humidity).
Tips for Perfect Sugar Cookies: Avoid Common Mistakes
Achieving perfect sugar cookies is within reach for any beginner with a few key tips. One common mistake is not chilling the dough long enough. Chilling is crucial because it solidifies the butter, which helps the cookies hold their shape better during baking and prevents them from spreading too much. Aim for at least 60 minutes in the refrigerator. Another pitfall is overworking the dough after adding the flour. Overmixing develops the gluten, resulting in tough, dense cookies instead of light, tender ones. Mix until the dry ingredients are just incorporated.
Rolling the dough too thin or unevenly can also lead to issues. If the dough is too thin, the cookies can become brittle or burn easily. Aim for a consistent thickness of about ¼ inch for even baking. Using too much flour when rolling can make the cookies dry, so use just enough to prevent sticking.
Finally, ensure your oven temperature is accurate – an oven thermometer can be a great tool. Baking time is also critical; pull the cookies out as soon as the edges are lightly golden. Overbaking will result in hard, dry cookies. Following these simple guidelines will help beginners create beautiful and delicious easy Easter sugar cookies.
For the ultimate easy Easter cookie recipes beginners, look no further than no-bake options. These are perfect for involving kids and require no oven time, making them incredibly safe and simple. No-bake cookies often rely on ingredients like crushed cookies or cereal, peanut butter, and melted chocolate or candy melts as a binder. They typically come together in minutes on the stovetop or in the microwave and then just need time to set up, usually in the refrigerator. This eliminates the variables of baking time and temperature, significantly reducing the potential for errors.
No-bake cookies are also incredibly versatile when it comes to shaping and decorating. Since they don't spread or change shape in an oven, you can mold them into specific forms before chilling. For Easter, shaping them into eggs is intuitive and fun. A batch made with about 1 cup of peanut butter and 2 cups of cereal can yield roughly 1 to 1.5 dozen egg-shaped treats. The setting time in the fridge is usually about 30-60 minutes, much faster than waiting for baked cookies to cool and then decorating. This makes them a fantastic last-minute option for Easter celebrations.
Recipe: No-Bake Chocolate Easter Egg Cookies
- Yields: Approx. 15-20 cookies
- Prep time: 15 minutes + 30 minutes chilling
Ingredients:
- 1 ½ cups crushed chocolate cookies (like Oreos, filling removed) or graham crackers
- ½ cup smooth peanut butter
- ¼ cup honey or corn syrup
- 1 cup chocolate candy melts or chocolate chips
- Optional: Pastel sprinkles, edible glitter, additional candy melts in various colors
Instructions:
- In a medium bowl, combine the crushed cookies or graham crackers, peanut butter, and honey/corn syrup.
- Mix thoroughly until the mixture is well combined and holds together when pressed. It should resemble a thick dough.
- Line a baking sheet or plate with parchment paper.
- Take small portions of the mixture (about 1-2 tablespoons) and roll them into egg shapes. Place them on the prepared baking sheet.
- Place the shaped eggs in the refrigerator for about 15-20 minutes to firm up slightly.
- While the eggs are chilling, melt the chocolate candy melts or chocolate chips. You can do this in a microwave-safe bowl, heating in 30-second intervals and stirring until smooth, or use a double boiler.
- Dip each chilled egg into the melted chocolate, ensuring it's fully coated. Use a fork or dipping tool to lift it out, letting excess chocolate drip off.
- Return the chocolate-coated eggs to the parchment-lined sheet.
- Immediately decorate with sprinkles or edible glitter before the chocolate sets. If using additional colored candy melts for drizzles, melt them separately and drizzle over the set chocolate.
- Place the cookies back in the refrigerator for at least 30 minutes, or until the chocolate is completely set.
Decorating Ideas for No-Bake Easter Cookies
Decorating no-bake Easter egg cookies is where the real fun begins, offering endless possibilities even for beginners. Since the base is simple, the decoration can be as elaborate or as minimal as you like. One of the easiest methods is simply dipping the shaped cookies in melted chocolate (milk, dark, or white) and then immediately covering them with festive sprinkles, nonpareils, or edible glitter before the chocolate sets. Pastel colors of sprinkles are perfect for the Easter theme.
Another simple yet effective technique is using contrasting colors of melted candy melts or chocolate to create patterns. After the main chocolate coating has set, melt small amounts of white or colored candy melts. Drizzle them over the eggs using a spoon, a piping bag with a fine tip, or even just dipping a fork in the melted candy and shaking it over the cookies to create thin lines.
You can also use edible markers to draw simple patterns like zigzags or dots on a fully set chocolate coating. For a classic look, attach small candies like mini M&M's or jelly beans onto the chocolate before it sets to resemble decorated Easter eggs. These easy methods make decorating accessible and enjoyable for beginners.
Peanut Butter Blossoms: An Easter Twist on a Classic
Peanut Butter Blossoms are a beloved cookie for their soft, chewy texture and the iconic chocolate kiss pressed into the center. Adapting this classic recipe for Easter is incredibly simple and results in delightful, festive treats. The basic dough is straightforward, typically involving peanut butter, sugar, eggs, flour, and baking soda. What makes them Easter-ready is swapping the traditional chocolate kiss for pastel-colored candies or chocolates. Think pastel-wrapped chocolate kisses, mini pastel-colored peanut butter cups, or even just pressing colorful Easter M&M's into the warm cookies.
Baking Peanut Butter Blossoms is a great way for beginners to practice scooping and rolling cookie dough. A standard recipe using about 1 cup of peanut butter and 1 cup of flour can yield roughly 3-4 dozen cookies. The dough is usually rolled into small balls, rolled in sugar (optional but recommended for texture), and then baked.
The defining step is pressing the candy into the center immediately after they come out of the oven, while they are still warm and soft. This creates the signature "blossom" shape and ensures the candy adheres. The baking time is short, usually 8-10 minutes at 375°F (190°C), making them a relatively quick bake.
Recipe: Easter Peanut Butter Blossoms with Pastel Candies
- Yields: Approx. 3-4 dozen cookies
- Prep time: 15 minutes
- Bake time: 8-10 minutes per batch
Ingredients:
- ½ cup (1 stick) unsalted butter, softened
- ½ cup granulated sugar
- ½ cup packed light brown sugar
- ½ cup creamy peanut butter
- 1 large egg
- 1 teaspoon vanilla extract
- 1 ¾ cups all-purpose flour
- 1 teaspoon baking soda
- ½ teaspoon salt
- Approx. 4 dozen pastel-wrapped chocolate candies (like Easter Kisses) or pastel mini peanut butter cups
Instructions:
- Preheat oven to 375°F (190°C).
- In a large bowl, cream together the softened butter, granulated sugar, and brown sugar until light and fluffy.
- Beat in the peanut butter until well combined.
- Add the egg and vanilla extract, mixing until just incorporated.
- In a separate medium bowl, whisk together the flour, baking soda, and salt.
- Gradually add the dry ingredients to the wet ingredients, mixing on low speed until a dough forms.
- Roll dough into small balls, about 1 inch in diameter. Optional: Roll balls in granulated sugar before placing on baking sheet.
- Place cookie balls about 2 inches apart on ungreased baking sheets.
- Bake for 8-10 minutes, or until edges are lightly golden and the center is set but still looks soft. Do not overbake.
- Immediately upon removing from the oven, gently press a pastel chocolate candy into the center of each warm cookie. The cookies will crack slightly around the edges – this is normal.
- Let cookies cool on the baking sheets for 5-10 minutes before carefully transferring them to a wire rack to cool completely.
Making Peanut Butter Blossoms Festive for Easter
Transforming classic Peanut Butter Blossoms into festive easy Easter cookies is all about the finishing touch. The most significant change is the color of the candy pressed into the center. Instead of traditional silver-wrapped chocolate kisses, seek out seasonal pastel varieties. Many chocolate companies release special Easter versions wrapped in pink, purple, blue, and green foils. Alternatively, mini peanut butter cups with pastel candy shells or even just regular chocolate kisses with colorful Easter M&M's pressed into them work wonderfully.
Beyond the center candy, you can add other simple Easter touches. Before baking, you can roll the cookie dough balls in pastel-colored sanding sugar instead of regular granulated sugar for an extra sparkle and hint of color.
Once the cookies are baked and the candy is pressed, you could also add a tiny dot of colored icing or edible glue and place a small Easter-themed sprinkle (like a bunny or chick shape) next to the candy center. These small additions require minimal extra effort but significantly enhance the Easter theme, making these easy Easter cookie recipes beginners can easily make look truly festive.
Shortbread is renowned for its rich, buttery flavor and tender, crumbly texture. It's also one of the simplest cookie doughs to make, requiring just a few basic ingredients: butter, sugar, and flour, often in a ratio of 1:2:3 by weight (butter, sugar, flour). This minimalist approach means there's less to measure and mix, making it an excellent choice for easy Easter cookie recipes beginners. The dough doesn't contain eggs or leavening agents like baking powder or soda, which contributes to its dense, melt-in-your-mouth consistency and helps it hold its shape well during baking.
Working with shortbread dough is slightly different from sugar cookie dough. It can be crumbly when first mixed, but pressing it together with your hands helps it come together. Once formed, it's often pressed directly into a pan or rolled out and cut. For Easter, rolling and cutting into shapes like bunnies or eggs works perfectly.
Because of the high butter content, chilling is essential to prevent excessive spreading. Baking shortbread is done at a lower temperature, typically around 300-325°F (150-160°C), for a longer time, usually 15-25 minutes, until just lightly golden around the edges. This slow bake ensures the cookies are cooked through without browning too much, preserving their delicate texture. A batch made with 1 cup of butter yields approximately 2-3 dozen cookies depending on size.
Recipe: Easy Shortbread Easter Bunny Cookies
- Yields: Approx. 2-3 dozen cookies
- Prep time: 15 minutes + 30 minutes chilling
- Bake time: 18-22 minutes per batch
Ingredients:
- 1 cup (2 sticks) unsalted butter, softened
- ½ cup confectioners' sugar
- 2 cups all-purpose flour
- ¼ teaspoon salt
Instructions:
- In a large bowl, cream together the softened butter and confectioners' sugar until light and fluffy.
- In a separate bowl, whisk together the flour and salt.
- Gradually add the dry ingredients to the butter mixture, mixing on low speed until the dough just comes together in large clumps. Avoid overmixing.
- Turn the dough out onto a clean surface and gently press it together with your hands to form a cohesive dough.
- Shape the dough into a disc, wrap tightly in plastic wrap, and refrigerate for at least 30 minutes.
- Preheat oven to 325°F (160°C). Line baking sheets with parchment paper.
- On a lightly floured surface, roll out the dough to about ½ inch thickness.
- Cut out shapes using Easter-themed cookie cutters, such as bunny shapes. Carefully transfer cookies to the prepared baking sheets.
- Bake for 18-22 minutes, or until the edges are set and lightly golden. The centers may still look pale.
- Let cookies cool on the baking sheet for 10 minutes before transferring them to a wire rack to cool completely.
Variations: Adding Lemon Zest or Vanilla Extract
While classic shortbread is delicious in its pure, buttery form, adding simple flavor variations can make these easy Easter cookies even more special. For a bright, springy twist, incorporate the finely grated zest of one lemon into the dough along with the sugar and butter. Lemon pairs beautifully with the richness of the butter and adds a refreshing note that's perfect for the season. Just a teaspoon or two of zest is enough to impart a noticeable citrus flavor without overpowering the delicate shortbread.
Another easy variation is adding vanilla extract. Although not traditionally included in pure shortbread, a teaspoon of good quality vanilla extract enhances the buttery flavor and adds a subtle sweetness. Stir it in with the butter and sugar. You could also experiment with other extracts like almond extract (use sparingly, perhaps ¼ to ½ teaspoon) for a different nutty profile, or even a touch of lavender extract for a unique floral note, though vanilla and lemon are arguably the most beginner-friendly additions. These simple flavor boosts elevate your easy Easter shortbread cookies with minimal extra effort.
Selecting the correct ingredients is fundamental to successful baking, especially for beginners tackling easy Easter cookie recipes. For most cookie recipes, using unsalted butter is recommended because it allows you to control the amount of salt in the recipe. Ensure your butter is at the correct temperature – usually softened, meaning it's pliable but still cool to the touch, not greasy or melted. This is crucial for proper creaming with sugar, which incorporates air for texture. Using cold butter when the recipe calls for softened can result in dense cookies.
Flour is another key ingredient. All-purpose flour is standard for most easy cookie recipes. Measure flour correctly by spooning it into your measuring cup and leveling it off with a straight edge, rather than scooping directly from the bag, which can compact the flour and lead to using too much. For recipes using leavening agents like baking powder or soda, ensure they are fresh; expired leaveners won't activate properly, resulting in flat or dense cookies. Using fresh, quality ingredients, even in simple recipes, makes a significant difference in the final taste and texture of your easy Easter cookies.
Royal icing is the go-to for decorating sugar cookies, providing a smooth, hard finish that's perfect for intricate designs and vibrant colors. For beginners, mastering royal icing starts with understanding consistency. A basic recipe involves confectioners' sugar, a liquid (water, milk, or meringue powder/egg white mixture), and flavoring. For easy Easter cookies, you'll typically need two main consistencies: a thicker one for outlining and a thinner one (flood icing) for filling in areas. The thicker icing should hold its shape when piped, while the flood icing should spread and smooth out on its own.
Achieving the right consistency is key and often requires adding the liquid very gradually. Start with a small amount and add just a teaspoon at a time, mixing thoroughly, until you reach the desired flow. For outlining, the icing should fall off your spoon in thick ribbons. For flooding, it should flow more easily, smoothing out within about 10-15 seconds after you drizzle a line on the surface.
Using meringue powder instead of raw egg whites is safer and more stable for beginners. Practice on parchment paper before decorating your cookies. Don't be discouraged if your first attempts aren't perfect; practice makes progress, and even simply flooded cookies with sprinkles look festive and are a great starting point for easy Easter cookie decorating.
Baking Time and Temperature: Getting it Right Every Time
Getting the baking time and temperature right is crucial for perfectly cooked cookies, whether they are easy Easter cookie recipes beginners are trying or more complex bakes. Most cookie recipes call for preheating the oven to a specific temperature, commonly between 325°F (160°C) and 375°F (190°C). Always preheat your oven fully before putting cookies in; baking in a cold oven can lead to uneven spreading and cooking. It typically takes 10-15 minutes for an oven to reach the set temperature.
Cookie baking times are often given as a range (e.g., 8-12 minutes) because ovens can vary and cookie size affects cooking time. Start checking your cookies at the lower end of the time range. Look for visual cues: the edges should appear set and often lightly golden, while the centers might still look slightly soft or pale. Cookies continue to cook slightly on the hot baking sheet after they are removed from the oven.
Overbaking is a common mistake that results in dry, hard cookies. If your cookies are consistently baking too fast or too slow, consider using an oven thermometer to check if your oven's temperature is accurate. Baking one test batch first can also help you determine the perfect timing for your oven and cookie size.
Decorating easy Easter cookies can be a highlight of the baking process, and there are many simple techniques perfect for beginners. You don't need advanced piping skills to create festive looks. Focusing on basic methods allows you to achieve beautiful results with minimal frustration. The simplest decoration is often the most effective and accessible.
Using Sprinkles and Edible Glitter
Sprinkles and edible glitter are beginner decorators' best friends. They are easy to apply and instantly add color and sparkle to any cookie. For sugar cookies decorated with royal icing, apply sprinkles or glitter immediately after flooding an area with icing, while it's still wet, so they adhere.
For cookies dipped in melted chocolate (like our no-bake eggs) or pressed with candies (like Peanut Butter Blossoms), add sprinkles right after dipping or pressing, before the chocolate or cookie cools and sets. Look for Easter-themed sprinkle mixes with pastel colors, bunny or egg shapes, or simple nonpareils. Edible glitter can be sprinkled over wet icing or even brushed onto dry surfaces using edible glue or a tiny amount of clear extract.
Creating Simple Icing Designs
Even with basic royal icing, beginners can create simple, effective designs. Once you have your outline and flood icing consistencies ready, try these easy techniques. After flooding a cookie, while the icing is still wet, you can use a toothpick or skewer to swirl colors together (wet-on-wet technique) or drag lines through the wet icing to create marbling effects.
For example, flood an egg shape with white icing, then immediately drop small dots of pastel colors onto the wet white icing and swirl gently with a toothpick. Once the flood icing is completely dry (allow several hours or even overnight), you can use the thicker outline icing to pipe simple dots, lines, or zigzags on top. Using just one or two colors per cookie keeps it simple and clean.
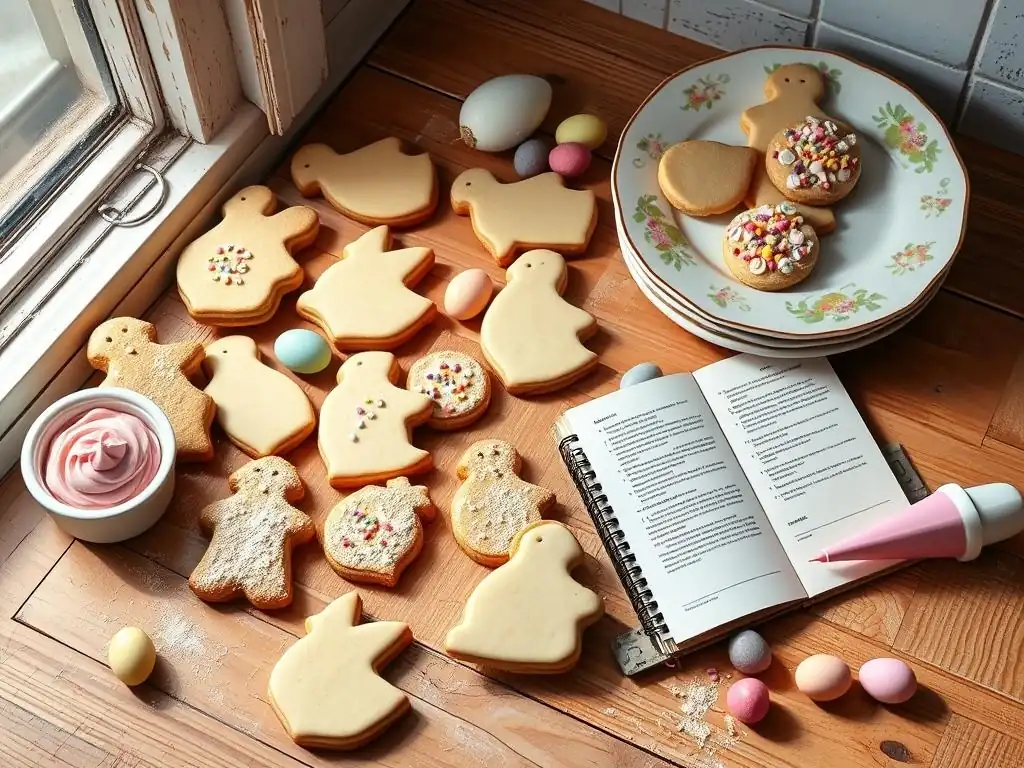
Proper storage is essential to keep your easy Easter cookies tasting their best for as long as possible. Once your cookies are completely cooled and decorated (if applicable, ensure icing is fully hardened), store them in an airtight container at room temperature. Layering cookies in the container with parchment paper or wax paper between layers prevents them from sticking together or decorations from smudging. Most baked cookies, like sugar cookies, shortbread, or peanut butter blossoms, will stay fresh for about 3-5 days when stored this way.
Avoid storing different types of cookies in the same container, especially if some have strong flavors (like gingerbread, though not an Easter focus here) or different textures (soft vs. crisp), as flavors and textures can transfer. For decorated cookies, ensure the icing is completely dry before stacking, even with parchment paper in between. Storing cookies in a cool, dry place away from direct sunlight or heat sources helps maintain their quality. No-bake cookies, especially those with chocolate coatings, are best stored in the refrigerator and are typically enjoyed within 5-7 days.
Freezing is an excellent option if you want to bake ahead or save some of your easy Easter cookies for later. Most baked cookie doughs can be frozen, as can baked, undecorated cookies. To freeze dough, wrap discs or logs tightly in plastic wrap, then place in a freezer-safe bag for up to 3 months. Thaw in the refrigerator before rolling or slicing and baking as usual. This is a great way for beginners to get a head start on holiday baking.
To freeze baked, undecorated cookies, ensure they are completely cooled. Place them in a single layer on a baking sheet and freeze until solid (about 1-2 hours). Once frozen, transfer the cookies to an airtight freezer-safe container or bag, layering with parchment or wax paper to prevent sticking. Label with the date.
Baked cookies can be frozen for up to 6-12 months, though quality is best within the first few months. Thaw frozen cookies at room temperature before decorating or serving. Freezing decorated cookies is possible, but the icing might become slightly dull or condensation upon thawing could affect delicate decorations. For beginners, freezing undecorated cookies is the simplest approach.

Baking gluten-free easy Easter cookies is entirely achievable for beginners with a few simple adjustments. Many classic cookie recipes can be adapted by substituting regular all-purpose flour with a gluten-free all-purpose flour blend. Look for blends that are designed as a 1:1 substitute for wheat flour and contain a mix of flours (like rice, tapioca, potato starch) and often xanthan gum, which helps mimic the structure that gluten provides. Using a reputable 1:1 blend in standard sugar cookie or shortbread recipes often works seamlessly without needing other ingredient changes.
When using gluten-free flour, the dough might feel slightly different – sometimes a bit more crumbly or absorbent. You might need to add a tiny bit more liquid (like a teaspoon of milk or water) to bring the dough together, or let it rest for 15-30 minutes before rolling so the flours can hydrate. Recipes specifically developed to be gluten-free, such as those based on almond flour, coconut flour, or oat flour, can also be excellent choices.
Many simple recipes for peanut butter cookies or certain types of no-bake cookies are naturally gluten-free if you ensure all ingredients (like chocolate or mix-ins) are certified gluten-free. Reading labels carefully is key when exploring gluten-free easy Easter cookie recipes beginners.
Creating vegan easy Easter cookies means finding plant-based substitutes for traditional dairy and eggs. This is simpler than ever with the wide availability of vegan ingredients. Butter can be replaced with vegan butter sticks, which are designed to perform similarly to dairy butter in baking. Eggs can be substituted using various methods depending on the recipe's function for the egg:
- For binding: Use applesauce (¼ cup per egg), mashed banana (¼ cup per egg), or a "flax egg" (1 tablespoon ground flaxseed mixed with 3 tablespoons water, let sit for 5 minutes).
- For leavening: Use a bit more baking powder or a combination of baking soda and vinegar.
- For richness/moisture: Vegan yogurt or sour cream can sometimes substitute.
Many simple cookie recipes, like certain shortbreads (which require no eggs) or peanut butter cookies, are easily made vegan by just swapping the butter for a vegan alternative. For sugar cookies, a flax egg or commercial egg replacer often works well. No-bake cookies are frequently vegan already or require only simple swaps like using vegan chocolate chips or ensuring your crushed cookies are dairy-free. When looking for vegan easy Easter cookie recipes beginners, focus on recipes that use straightforward substitutions and have minimal egg requirements in their original form.
Achieving vibrant, festive colors for your easy Easter cookies doesn't always require artificial food dyes. Natural food coloring options are readily available and can create beautiful pastel shades perfect for spring. These are derived from fruits, vegetables, and plants. For example, beet juice or powder can create pink or red hues, turmeric or carrot juice yields yellow, spinach or spirulina powder makes green, and purple sweet potato or blueberry powder gives purple or blue.
When using natural colorings, be aware that the colors might be slightly less intense than synthetic dyes and can sometimes impart a subtle flavor, especially if using large quantities. Liquids (like juices) can also affect icing or dough consistency, so add them sparingly.
For icing, it's often easier to use natural food coloring powders or gels specifically designed for baking, as they are more concentrated and less likely to alter consistency. Adding natural coloring to white royal icing or simple glazes is a great way to make your easy Easter cookies pop with color while using ingredients you might feel better about.
We hope this guide has inspired you to try your hand at baking easy Easter cookies this season. From classic sugar cookies ready for decorating to quick no-bake treats and simple shortbread, there's an accessible recipe here for every beginner. Baking and decorating Easter cookies is a wonderful activity to do solo for a relaxing afternoon, or with family and friends, creating lasting memories. The process of mixing dough, cutting shapes, and adding colorful decorations is inherently joyful and rewarding.
We would absolutely love to see the delightful easy Easter cookies you create using our recipes and tips! Sharing your baking successes is a great way to connect with other home bakers and celebrate the joy of the season. Whether you master the royal icing flood, create perfect peanut butter blossoms with pastel centers, or simply enjoy the process of making and eating delicious shortbread bunnies, your creations are worth celebrating.
Happy Easter Baking!
As you embark on your Easter cookie baking adventure, remember to have fun and don't worry too much about perfection. The most important ingredient is always the love and care you put into making them. These easy Easter cookie recipes beginners are designed to set you up for success and build your confidence in the kitchen. Enjoy the process, savor the sweet aromas filling your home, and delight in sharing your homemade treats with loved ones.
From our kitchen at BakeWithEase to yours, we wish you a very Happy Easter filled with warmth, joy, and lots of delicious easy Easter cookies! May your baking be easy, your decorating be fun, and your cookies be sweet. Happy baking!
Frequently Asked Questions
These recipes prioritize simple instructions and readily available ingredients. They also often feature minimal decorating techniques, making them perfect for first-time bakers.
The recipes on BakeWithEase.com include a detailed ingredients list with specific measurements. Most ingredients are also commonly found in major grocery stores.
You'll need basic equipment like mixing bowls, measuring cups and spoons, baking sheets, and parchment paper. A hand mixer can be helpful, but isn't always essential.
Are there any allergy-friendly substitutions I can make in these recipes?
Many recipes can be adapted with gluten-free flour, dairy-free butter substitutes, or egg replacements. Check the BakeWithEase.com recipe comments for specific allergy-friendly suggestions.
Store baked cookies in an airtight container at room temperature. Some cookies, especially those with frosting, may benefit from refrigeration to maintain freshness.
The simple act of baking, especially during holidays like Easter, transcends mere culinary creation; it becomes a powerful symbol of connection and joy. These easy Easter cookie recipes, designed with beginners in mind, are more than just instructions; they are blueprints for creating lasting memories and strengthening bonds. The ease of preparation ensures that even the busiest individuals can participate in this cherished tradition.
The impact of shared culinary experiences, particularly those involving simple recipes passed down through generations, is profound. It's a way to connect with our heritage, express love and care, and create a sense of belonging. As the renowned chef Julia Child once said, People who love to eat are always the best people.
This sentiment rings true, especially when considering the joy that these simple cookies bring to both the baker and those who share in the sweet reward. The act of baking, itself, becomes a meditative practice, a moment of calm amidst the often-hectic pace of modern life.
Now, I invite you to consider the recipes presented not just as instructions, but as invitations. Think about who you might share these cookies with – family, friends, neighbors, or even yourself! Embrace the simplicity, enjoy the process, and savor the sweet moments created. Let the aroma of warm spices and the delightful crunch of these cookies fill your home with the spirit of Easter and the warmth of shared connection. This Easter, let's bake a little joy into our lives.
Unleash Your Inner Easter Baker!
Thanks for spending time with us and exploring these delightful Easter cookie recipes! We hope you found inspiration and maybe even a new favorite treat. Now it's time to get baking!
- Whip up your favorite recipe: Choose one of the delicious recipes from the article and start baking! Don't be afraid to experiment with different colors and sprinkles. This is your chance to create some truly unique Easter cookies!
- Share your creations: Post a picture of your finished cookies on social media and tag us—we'd love to see your baking masterpieces! Use #BakeWithEaseEaster.
- Challenge a friend: Send this article to a friend and challenge them to a friendly Easter baking competition! Who can create the most creative or delicious cookies?
Ready to transform your kitchen into a sweet Easter wonderland?