
Simple Vanilla Layer Cake: Assembly Guide for Beginners

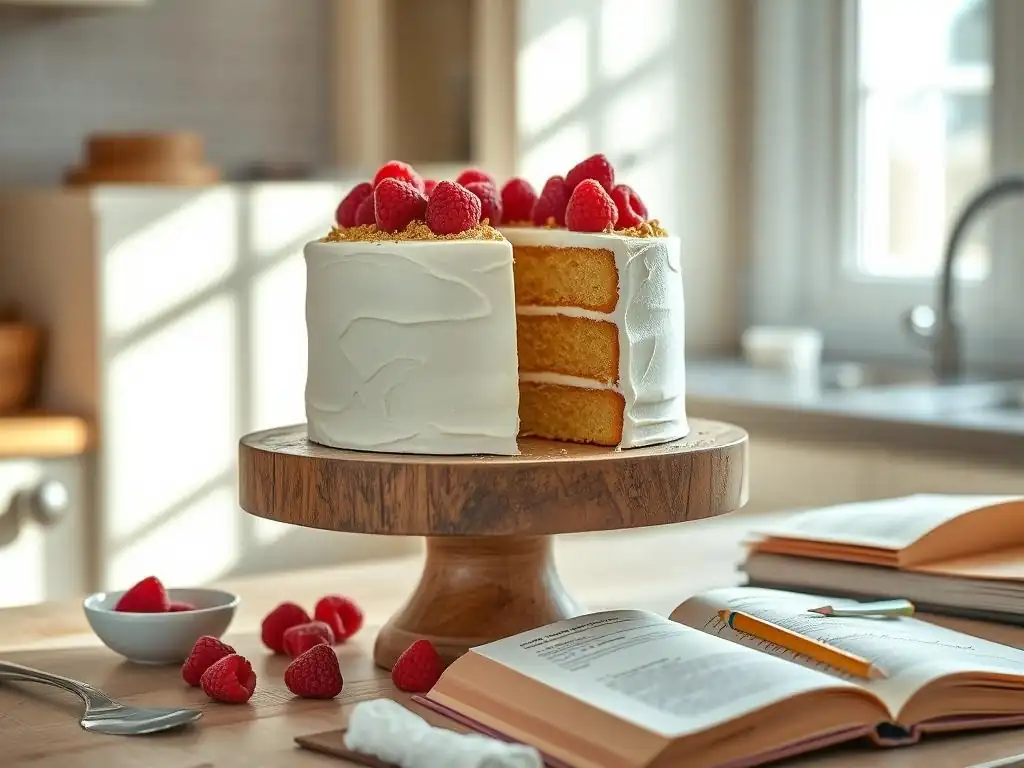
Welcome to BakeWithEase, where even the most ambitious baking projects become delightfully achievable! Ever dreamt of creating a show-stopping dessert without the stress? Get ready to turn that dream into reality. Our latest guide unlocks the secrets to crafting a stunningly simple easy vanilla layer cake recipe. But what makes this cake truly special? Discover the foolproof assembly techniques that guarantee a perfect result every time, and prepare to impress with your newfound baking prowess. Let's get baking!
- Getting Started: Ingredients and Equipment
- Baking the Vanilla Cake Layers
- Vanilla Buttercream Frosting
- Assembling the Vanilla Layer Cake
- Decorating the Vanilla Layer Cake
- Slicing and Serving
- Storing the Cake
- Troubleshooting
-
Frequently Asked Questions
- What makes this vanilla layer cake recipe "easy" for beginners?
- Can I substitute ingredients in this easy vanilla layer cake recipe?
- How do I prevent my cake layers from sticking to the pans?
- What's the best way to assemble a simple vanilla layer cake?
- How long will this easy vanilla layer cake recipe keep, and how should it be stored?
- Final Reflection: The Sweet Simplicity of Baking and Connection
- Unleash Your Inner Baker: Master the Art of Layer Cake Assembly!
Getting Started: Ingredients and Equipment
Vanilla Cake Ingredients
Crafting a delicious vanilla layer cake starts with high-quality ingredients. You'll typically need all-purpose flour, granulated sugar, unsalted butter (softened), large eggs, milk (whole milk is often preferred for richness), pure vanilla extract, baking powder, and a pinch of salt. Using unsalted butter allows you to control the salt content in your recipe, ensuring it doesn't overpower the delicate vanilla flavor. The quality of your vanilla extract is also paramount; opt for pure extract over imitation for the best taste profile.
The specific quantities will vary based on your chosen recipe, but understanding the role of each ingredient is key. Flour provides structure, sugar adds sweetness and tenderness, butter contributes richness and moisture, eggs bind everything together and add lift, milk provides liquid and helps activate leavening agents, baking powder ensures the cake rises properly, and salt balances the sweetness. Ensure all cold ingredients, like butter and eggs, are brought to room temperature before mixing, as this helps them emulsify properly with other ingredients, leading to a smoother batter and a more tender cake crumb.
Essential Baking Equipment
Having the right tools makes the vanilla layer cake assembly process much smoother, especially for beginners. You'll need two or three round cake pans (typically 8 or 9 inches in diameter), parchment paper for lining the pans, measuring cups and spoons for accurate ingredient amounts, a large mixing bowl, and either a stand mixer or a hand mixer. A rubber spatula or wooden spoon is essential for scraping down the sides of the bowl and folding in ingredients.
Beyond the mixing stage, specific equipment aids in the assembly and decoration. An offset spatula is invaluable for spreading frosting evenly between layers and around the sides of the cake. A cooling rack is necessary for cooling the baked layers completely before frosting. For leveling the cake layers, a long serrated knife or a dedicated cake leveler works well. Finally, a cake turntable can significantly simplify the frosting process, allowing you to rotate the cake smoothly as you work.
Baking the Vanilla Cake Layers
Pan Preparation
Proper pan preparation is crucial for ensuring your vanilla cake layers release cleanly after baking. The standard method involves greasing the pans thoroughly and then flouring them. Use softened butter, shortening, or a non-stick baking spray to coat the bottom and sides of each pan, making sure to get into all the corners. For extra insurance against sticking and to create a perfectly flat bottom, cut circles of parchment paper to fit the bottom of your pans and press them into the greased surface.
After greasing, add a tablespoon or two of flour to the pan, tilt and rotate it to coat the greased surfaces evenly, then tap out any excess flour. This creates a non-stick barrier that prevents the cake from adhering to the pan as it bakes and cools. For chocolate cakes, cocoa powder is often used instead of flour to avoid white marks, but for a vanilla cake, flour is standard. Taking these few minutes to prepare your pans correctly will save you frustration later when it's time to turn out the delicate cake layers.
Mixing the Batter
The technique for mixing vanilla cake batter greatly impacts the final texture. The creaming method is common: you beat softened butter and sugar together until light and fluffy, incorporating air that helps the cake rise. Eggs are then added one at a time, followed by vanilla extract. Dry ingredients (flour, baking powder, salt) and wet ingredients (milk, often combined with vanilla if not added with eggs) are then added alternately, starting and ending with the dry ingredients. Mix just until combined, being careful not to overmix, which can develop too much gluten and result in a tough cake.
Another method, the reverse creaming method, involves mixing the dry ingredients first, then cutting in the softened butter until the mixture resembles coarse crumbs, before adding the wet ingredients. This method coats the flour particles with fat, inhibiting gluten development and often resulting in a very tender, fine-crumbed cake. Whichever method your recipe specifies, follow it closely and avoid the temptation to beat the batter for too long after the flour is added; a few lumps are preferable to a tough cake.
Baking Time and Temperature
Accurate baking temperature and time are vital for evenly baked vanilla cake layers. Most vanilla cake recipes call for baking at around 350°F (175°C). Preheat your oven completely before putting the cakes in; opening the oven door too early or placing cakes in a cool oven can affect their rise and texture. Divide the batter evenly between the prepared pans to ensure the layers are roughly the same thickness, which helps them bake uniformly and makes stacking easier.
Baking time will vary depending on your oven, the size of your pans, and the specific recipe, but typically ranges from 25 to 35 minutes for 8 or 9-inch layers. You can test for doneness by gently pressing the top center of the cake; it should spring back slightly. A more reliable method is inserting a toothpick into the center; if it comes out clean or with a few moist crumbs attached, the cake is done.
If it comes out with wet batter, continue baking for a few more minutes and test again. Avoid opening the oven door repeatedly during baking, especially in the first 20 minutes, as this can cause the cakes to collapse.
Cooling the Layers
Properly cooling your vanilla cake layers is a critical step before assembly. Once the cakes are baked and the toothpick test confirms they are done, remove them from the oven and let them cool in their pans on a wire rack for about 10-15 minutes. This initial cooling period allows the cake to set slightly and become firm enough to handle without breaking. Running an offset spatula or knife gently around the edge of the pan can help loosen the cake from the sides.
After the initial cooling period in the pan, invert the cakes onto the wire rack to cool completely. Cooling racks allow air to circulate around the entire cake, preventing condensation that could make the bottom soggy and ensuring the cake cools down relatively quickly and evenly. Attempting to level or frost warm cake layers will result in crumbling and melting frosting. Ensure the layers are fully cooled to room temperature – this can take 1-2 hours depending on your environment – before moving on to leveling and frosting.
Vanilla Buttercream Frosting
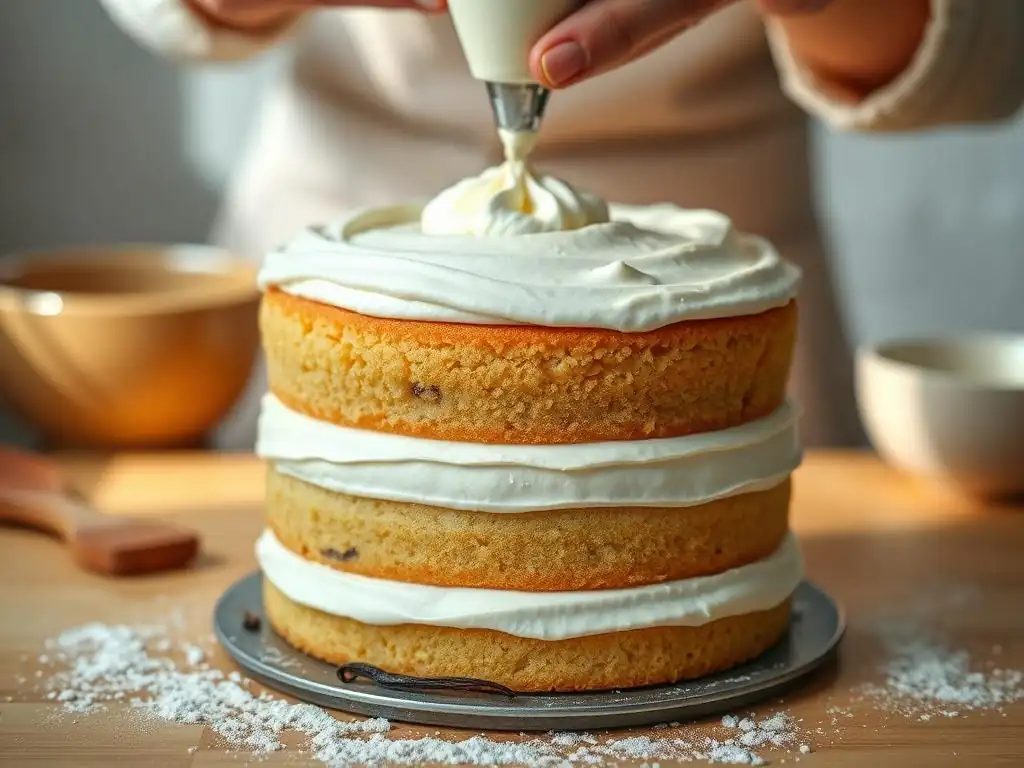
Making the Buttercream
Vanilla buttercream is a classic pairing for a simple vanilla layer cake. A common type is American buttercream, made by creaming softened butter until smooth, then gradually beating in powdered sugar (also known as confectioners' sugar). It's crucial to sift the powdered sugar to remove any lumps, ensuring a smooth frosting texture. Once the sugar is incorporated, vanilla extract is added for flavor, and a liquid like milk or cream is added a tablespoon at a time until the desired consistency is reached.
Another popular option is Swiss meringue buttercream or Italian meringue buttercream, which are made by whipping egg whites and sugar into a stable meringue and then gradually beating in softened butter. These meringued buttercreams are often less sweet and have a lighter, silkier texture than American buttercream. Whichever type you choose, ensure your butter is softened but not melted, as this is key to achieving a stable emulsion. Beat the ingredients on medium-high speed for several minutes to incorporate air and create a light, fluffy frosting.
Achieving the Right Consistency
The consistency of your vanilla buttercream is vital for easy spreading and a smooth finish on your layer cake. If the buttercream is too thick, it will be difficult to spread evenly and can tear the cake layers. If it's too thin, it will run off the sides of the cake and won't hold its shape for decorating. The primary way to adjust consistency is by adding more liquid (milk, cream, or even a touch of water or vanilla extract) to thin it out, or adding more sifted powdered sugar to thicken it up.
Start by adding liquid sparingly, perhaps half a tablespoon at a time, beating well after each addition until the frosting is spreadable but still holds its shape. If it becomes too thin, gradually add more powdered sugar, beating until smooth. Temperature also plays a role; if your kitchen is warm, the buttercream may soften. If this happens, you can refrigerate it for 15-30 minutes, then re-whip it before using. The ideal consistency should be smooth and spreadable, similar to soft-serve ice cream, while firm enough to stay put on the cake.
Assembling the Vanilla Layer Cake
Leveling the Layers
Leveling the cake layers ensures a stable, even surface for stacking, which is essential for a professional-looking vanilla layer cake. After the cakes are completely cooled, use a long serrated knife or a dedicated cake leveler to carefully slice off any domed tops, making the surface flat. Hold the knife parallel to the counter and use a gentle sawing motion, keeping your other hand lightly on top of the cake to steady it. If using a cake leveler, adjust it to the desired height and saw through the cake.
Leveling creates uniform layers that stack neatly without wobbling or leaning. The removed cake scraps, often called "cake tops," are perfectly edible and delicious! You can save them for snacking, crumbling over ice cream, or even making cake pops. Don't skip this step; trying to frost uneven layers is frustrating and will likely result in an unstable cake tower. Aim for layers that are as flat and uniform in thickness as possible.
First Layer of Buttercream
With your bottom cake layer placed on your serving plate or cake stand, it's time to add the first layer of vanilla buttercream. Use an offset spatula to scoop a generous amount of frosting onto the center of the layer. Start spreading the frosting outwards towards the edges, using smooth, even strokes. Aim for a consistent thickness, generally between a quarter and half an inch, across the entire surface.
Ensure the buttercream extends fully to the edges of the cake layer. This creates a seal that helps hold the layers together and prevents the top layer from sliding. A good, even layer of frosting between tiers is key to both the structure and the flavor balance of your assembled vanilla cake. Take your time to make this layer smooth and uniform before adding the next cake layer.
Stacking the Layers
Carefully lift your second vanilla cake layer (or third, if making a taller cake) and position it directly on top of the first frosting layer. Try to center the top layer as precisely as possible over the bottom one. Using your hands to support the sides of the cake as you lift and place it can help prevent breakage, especially if the layers are delicate. If you have more layers, repeat the process of adding frosting and stacking.
Once the layer is placed, gently press down on the top layer to secure it to the buttercream beneath. This helps adhere the layers and slightly compresses the frosting, ensuring good contact. Stand back and check the cake from the side to see if the layers are stacked evenly. If one layer is slightly off-center, you can gently push it into place before applying the next layer of frosting or the crumb coat.
Crumb Coating
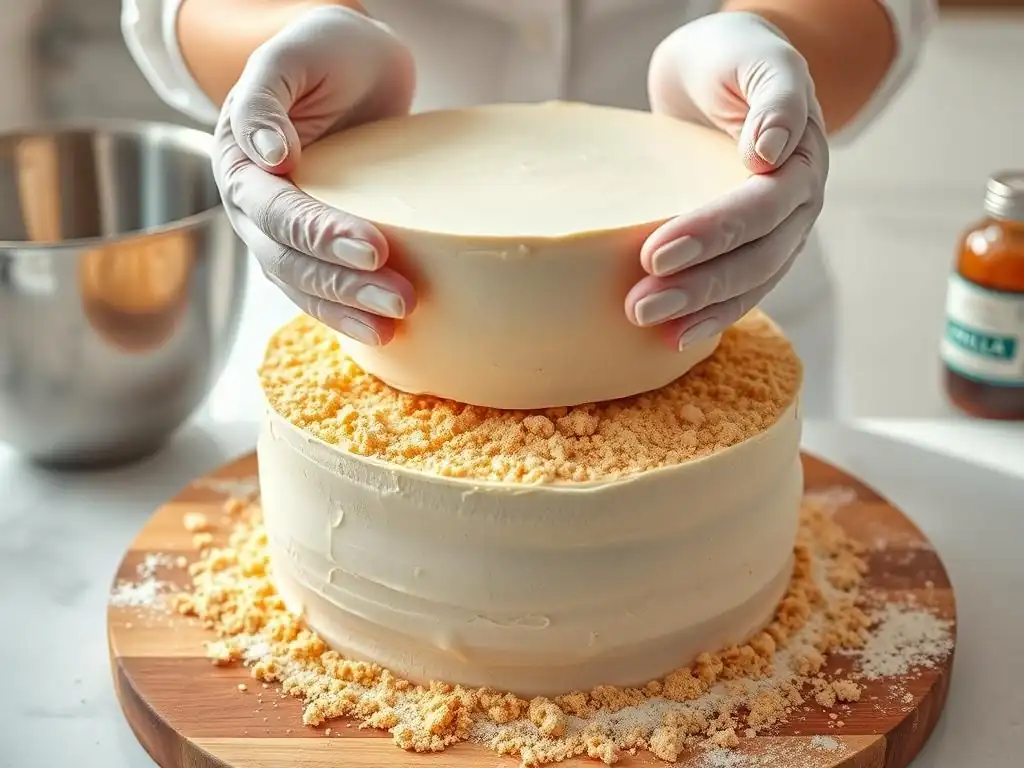
The crumb coat is a thin layer of frosting applied to the entire cake exterior before the final layer of frosting. Its primary purpose is to trap any loose crumbs from the cake layers, preventing them from getting into your final, smooth frosting layer. Apply a thin, even layer of vanilla buttercream all around the sides and top of the stacked cake using an offset spatula. It doesn't need to be perfectly smooth, just enough to cover the cake surface.
Once the crumb coat is applied, place the cake in the refrigerator for about 20-30 minutes, or until the frosting is firm to the touch. This chilling period hardens the crumb coat, effectively sealing in all the crumbs. This step is especially important for moist or tender cakes that tend to shed more crumbs. A firm crumb coat provides a stable, smooth base for applying the final layer of frosting, making it much easier to achieve a clean finish.
Final Frosting
After the crumb coat has chilled and firmed up, it's time for the final layer of vanilla buttercream. This is where you apply a thicker, more generous layer of frosting that will be the finished exterior of your vanilla layer cake. Start by applying a good amount of frosting to the top, spreading it outwards with an offset spatula. Then, apply frosting to the sides of the cake, working your way around until the entire cake is covered.
Use your offset spatula or a bench scraper to smooth the frosting on the sides and top. For a rustic look, you can create swirls or peaks. For a smooth finish, use a bench scraper held perpendicular to the cake side (or parallel to the top) and rotate the cake on a turntable, allowing the scraper to remove excess frosting and create a clean surface. You may need to reapply frosting in some areas and smooth again until you are happy with the finish.
Decorating the Vanilla Layer Cake
Simple Decorating Ideas
Once your vanilla layer cake is frosted, you can add simple decorations to enhance its appeal. For a minimalist look, simply ensure the final frosting layer is smooth and clean. You can add a border around the top and bottom edges using a piping bag fitted with a star or round tip. Fresh berries, like raspberries or strawberries, are a beautiful and delicious addition, especially when placed around the top edge or scattered artistically.
Another easy idea is to sprinkle the top of the cake with cake crumbs (from leveling), sprinkles, or edible glitter. A light dusting of powdered sugar using a sieve can also create an elegant finish. Don't feel pressured to attempt complex designs; sometimes, the simplest decorations best complement the classic flavor of a vanilla layer cake. A few well-placed elements can make a significant visual impact.
Using a Piping Bag
A piping bag is a versatile tool for adding decorative touches to your vanilla layer cake, even with basic techniques. To use one, fit it with your desired piping tip and stand the bag tip-down in a tall glass or cup. Fold the top edge of the bag over the rim of the glass. Use an offset spatula to fill the bag with vanilla buttercream, pushing the frosting down towards the tip and avoiding air pockets. Don't overfill the bag; fill it no more than two-thirds full.
Once filled, unfold the top of the bag and twist it closed just above the frosting. Hold the twisted end firmly with your dominant hand and guide the tip with your other hand. Apply steady, even pressure to the twisted end to push the frosting through the tip. Practice on a piece of parchment paper first to get a feel for the pressure needed to create consistent shapes like dots, stars, or simple lines. For a beginner, starting with a basic shell border or simple rosettes on top is a great way to add flair.
Slicing and Serving
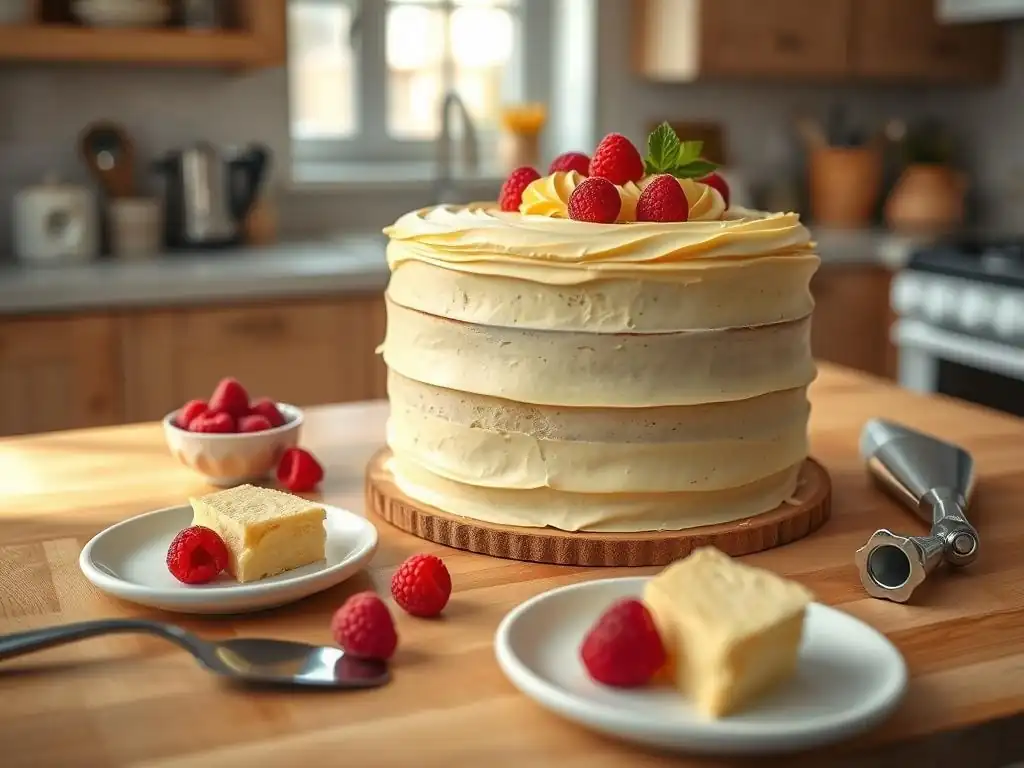
Clean Slicing Techniques
Slicing a vanilla layer cake cleanly ensures each slice looks appealing and holds its shape. The best method is to use a long, sharp knife that has been heated. Fill a tall glass or pitcher with hot water and dip the knife blade into the water for a few seconds. Wipe the blade completely dry with a clean cloth before making your first cut. The warm, dry blade will glide more easily through the cake and frosting without dragging or tearing.
After each slice, repeat the process: dip the knife back into the hot water, wipe it dry, and then make the next cut. This prevents frosting and crumbs from building up on the blade, which can cause messy slices. For even portions, it's often easiest to slice the cake into halves, then quarters, and then cut slices from each quarter. Using a cake server or a spatula to carefully lift each slice onto a plate helps maintain its structure.
Serving Suggestions
A simple vanilla layer cake is delicious on its own, but a few serving suggestions can elevate the experience. A classic pairing is a scoop of vanilla ice cream or a dollop of freshly whipped cream alongside each slice. The creamy texture and complementary flavor enhance the cake beautifully. For a touch of brightness, serve with fresh berries, such as strawberries, raspberries, or blueberries, especially if they were used in the decoration.
A light drizzle of fruit coulis (like raspberry or strawberry) or a simple caramel sauce can add another layer of flavor and visual appeal. Consider serving the cake with a hot beverage like coffee or tea, which pairs wonderfully with sweet desserts. Ultimately, the best way to serve your easy vanilla layer cake is with a smile, ready to share the delicious result of your baking efforts!
Storing the Cake
Storage Techniques
Proper storage is key to keeping your simple vanilla layer cake fresh and moist. If the cake is not cut, the best way to store it is loosely covered with plastic wrap or placed under a cake dome at room temperature for up to 1-2 days. This allows the cake to remain soft. For longer storage, or if the cake has perishable fillings or frostings (like cream cheese frosting or fresh fruit fillings), it should be refrigerated.
Once cut, the exposed cake surfaces can dry out quickly. To prevent this, cover the cut edges directly with plastic wrap before covering the entire cake or placing it in an airtight container. A plastic cake carrier is ideal for storing a whole or partially eaten cake in the refrigerator, protecting it from absorbing odors and keeping it moist. Properly stored in the fridge, a vanilla layer cake can last for 3-4 days. For even longer storage, individual slices or wrapped layers can be frozen for up to 2-3 months.
Troubleshooting
Uneven Cake Layers
Uneven cake layers are a common issue for beginners, often resulting in a leaning cake tower. The primary causes include uneven heat distribution in the oven, batter not being distributed evenly between pans, or pans being placed too close together in the oven. To mitigate this, always preheat your oven fully, rotate your pans halfway through the baking time for more even cooking, and use a scale to weigh the batter and ensure equal amounts go into each pan.
If you still end up with slightly uneven layers after baking, don't despair! This is where the leveling step becomes even more important. Use your serrated knife or cake leveler to carefully trim the taller side down to match the height of the shorter side, or simply level off any significant domes. While ideally you want perfectly flat layers, minor imperfections can often be corrected during leveling and masked by the frosting during assembly.
Soft Buttercream
Buttercream that is too soft can make frosting a layer cake a frustrating experience, leading to drips and difficulty achieving a smooth finish. This usually happens if the butter was too soft to begin with (perhaps slightly melted), or if too much liquid was added during mixing. A warm kitchen environment can also cause buttercream to soften quickly as you work with it.
If your vanilla buttercream is too soft, the quickest fix is often refrigeration. Place the bowl of buttercream in the refrigerator for 15-30 minutes, checking its consistency periodically. Once it has firmed up, take it out and re-whip it briefly with your mixer to restore its smooth, spreadable texture. If it's still too soft, you can try adding a tablespoon or two of additional sifted powdered sugar and beating it in, which will help thicken it.
Crumbly Cake
A crumbly vanilla cake can be challenging to frost, as pieces break off and mix into your buttercream. This issue is most often caused by overbaking the cake layers, which dries them out, or by a recipe that doesn't contain enough moisture. If your cake layers feel dry or look very porous, they are likely to be crumbly.
To salvage a crumbly cake before frosting, you can use a simple syrup soak. Prepare a simple syrup by heating equal parts sugar and water until the sugar dissolves, then let it cool. Brush or drizzle this cooled syrup lightly over the top of each cake layer before you start assembling and frosting. The syrup will add moisture back into the cake, making it less prone to crumbling and significantly improving its texture. Be careful not to oversaturate the cake; just enough to moisten the top surface.
Frequently Asked Questions
What makes this vanilla layer cake recipe "easy" for beginners?
This recipe focuses on simple techniques and easy-to-find ingredients, making it approachable for those new to baking. The step-by-step guide ensures clarity and success.
Can I substitute ingredients in this easy vanilla layer cake recipe?
While substitutions are possible, it's best to follow the recipe closely for the best results. Minor adjustments like using a different type of milk or vanilla extract are usually fine.
How do I prevent my cake layers from sticking to the pans?
Properly greasing and flouring your cake pans is crucial. You can also use parchment paper rounds at the bottom of the pans for extra insurance against sticking.
What's the best way to assemble a simple vanilla layer cake?
Ensure your cake layers are completely cooled before assembling. Use a leveling tool to trim any domes and then evenly spread frosting between each layer.
How long will this easy vanilla layer cake recipe keep, and how should it be stored?
Properly stored in the refrigerator, the cake will last for 3-4 days. Keep it in an airtight container to prevent it from drying out and absorbing other flavors.
Final Reflection: The Sweet Simplicity of Baking and Connection
The seemingly simple act of baking a vanilla layer cake transcends mere culinary creation; it's a powerful symbol of comfort, connection, and the joy of shared experiences. In today's fast-paced world, taking the time to meticulously layer sponge, whip cream, and frost a cake offers a much-needed respite, a tangible reminder of slower, more deliberate moments. This simple act, as detailed in this guide, can be a source of immense personal satisfaction and a gateway to creating meaningful memories.
The enduring appeal of the vanilla layer cake lies not just in its deliciousness, but in its versatility and ability to evoke powerful emotions. It's a cake that bridges generations, a blank canvas for personal expression through decoration, and a centerpiece for celebrations both big and small. As Julia Child wisely said, Find something you're passionate about and keep tremendously interested in it.
For many, that passion is found in the kitchen, in the transformative power of simple ingredients and a little bit of love. The process of baking, from measuring ingredients to the final flourish of frosting, becomes a meditative practice, a chance to disconnect from the digital world and reconnect with oneself.
Now, I invite you to consider the possibilities. Perhaps you'll use this guide to bake a cake for a loved one, a small act of kindness that speaks volumes. Maybe you'll use it as a springboard to explore your own creativity, experimenting with different flavors and frostings. Or maybe you'll simply enjoy the quiet satisfaction of creating something beautiful and delicious with your own two hands. Whatever your path, remember the joy found in the simple things, the sweetness of shared moments, and the enduring power of a perfectly baked vanilla layer cake.
Unleash Your Inner Baker: Master the Art of Layer Cake Assembly!
Thanks for joining us on this delicious journey into layer cake perfection! We hope you gained confidence in tackling this seemingly daunting treat. Now, it's time to put your newfound skills to the test.
- Bake your masterpiece: Don't let that recipe gather dust! Try making this vanilla layer cake (or your own variation!) this week.
- Share your creation: Show off your beautiful cake on social media using #BakeWithEaseLayerCake – we'd love to see your results!
- Explore new flavor combinations: What exciting fillings and frostings will you dream up next?
Ready to transform your kitchen into a cake-decorating haven?