
Flaky Pie Crust for Your Fall Apple & Pumpkin Pies

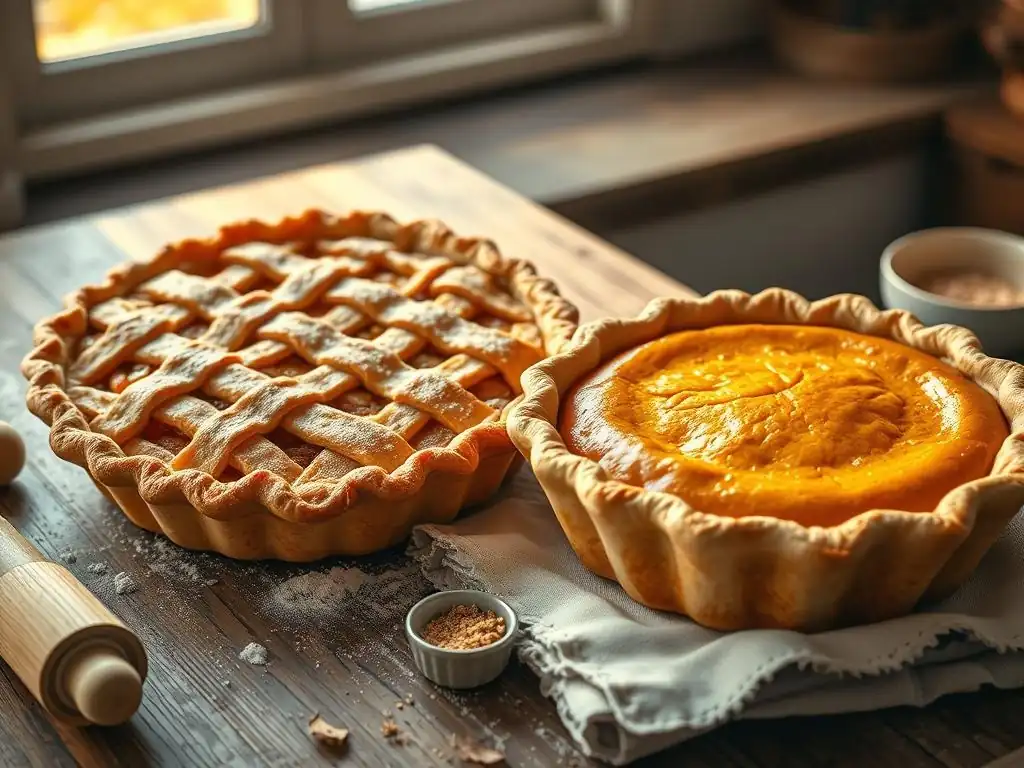
Welcome to BakeWithEase, where baking dreams come true, one effortless recipe at a time! Are you ready to unlock the secret to a perfectly flaky pie crust? This Fall, elevate your apple and pumpkin pies with our easy-to-follow guide and discover the simple techniques that will have everyone begging for seconds. Intrigued? Let's bake!
- Flaky Pie Crust for Your Fall Apple & Pumpkin Pies: The BakeWithEase Guide
- Achieve the Perfect Flaky Pie Crust: An Easy Recipe for Fall Baking
- Why Flaky Pie Crust is Essential for Apple and Pumpkin Pies
- BakeWithEase's Easy Flaky Pie Crust Recipe: Step-by-Step
- Rolling Out Your Flaky Pie Crust: Tips and Techniques
- Blind Baking: Pre-Baking Your Pie Crust
- Troubleshooting Common Pie Crust Problems
- Flaky Pie Crust Variations: Exploring Different Options
- Using Your Flaky Pie Crust for Apple and Pumpkin Pies
- Storing Your Flaky Pie Crust: Freshness Tips
- Achieving Flaky Pie Crust Perfection: Recap and Final Tips
- Frequently Asked Questions
- Final Reflection: The Enduring Allure of a Perfectly Flaky Crust
- Unlock Your Perfect Pie Crust: It's Easier Than You Think!
Flaky Pie Crust for Your Fall Apple & Pumpkin Pies: The BakeWithEase Guide
Achieve the Perfect Flaky Pie Crust: An Easy Recipe for Fall Baking
Welcome to BakeWithEase, where we believe that mastering classic baking techniques should be simple and rewarding. As the leaves change color and the air turns crisp, our thoughts drift to cozy kitchens filled with the aroma of warm spices and sweet fruit. Fall baking just isn't complete without a delicious pie, and the foundation of any truly great pie is a wonderfully flaky crust. Forget store-bought; achieving a beautiful, flaky pie crust recipe is easier than you might think, even for beginners.
This guide will walk you through everything you need to know to create a consistently flaky, tender, and flavorful pie crust perfect for showcasing those seasonal apples and pumpkins. We'll demystify the process, share our best tips and tricks, and provide a straightforward recipe that will become your go-to. Get ready to impress yourself and your loved ones with homemade pies that taste as incredible as they look, all starting with this easy flaky pie crust recipe.
Why Flaky Pie Crust is Essential for Apple and Pumpkin Pies
The Texture Secret: Understanding Flaky vs. Crumbly Crusts
The defining characteristic of a truly great pie crust is its flakiness – layers upon layers of delicate, buttery pastry that shatter slightly when you cut into them. This texture is achieved by incorporating cold fat (like butter or shortening) into the flour in small pieces. As the crust bakes, the water in the fat turns to steam, pushing apart the layers of dough and creating those desirable air pockets. This contrasts sharply with a crumbly crust, which results from fat being fully incorporated into the flour, leading to a more uniform, cookie-like texture without distinct layers.
Understanding this difference is crucial for pie success. A flaky crust provides a light, airy counterpoint to rich, moist fillings like those found in apple or pumpkin pies. It's not just about taste; it's the textural experience that elevates the entire dessert. Aiming for flakiness means paying close attention to keeping ingredients cold and handling the dough minimally, allowing those pockets of fat to work their magic in the oven.
Enhancing Fall Flavors: How Crust Texture Complements Apple and Pumpkin Pie Fillings
Fall pies, particularly apple and pumpkin, are known for their comforting, often dense, and moist fillings. A flaky pie crust serves as the perfect structural and textural balance to these fillings. Imagine biting into a slice of warm apple pie – the soft, spiced apples meet the crisp, airy layers of the crust. This textural contrast is incredibly satisfying and prevents the pie from feeling heavy or monotonous.
For a creamy pumpkin pie, the delicate flakiness of the crust provides a much-needed textural variation against the smooth, custard-like filling. A soggy or overly hard crust can detract significantly from the experience. By focusing on creating a perfectly flaky foundation, you ensure that the vibrant, warm flavors of pumpkin and cinnamon or the sweet-tartness of baked apples are beautifully framed and enhanced, making each bite a delightful combination of textures and tastes.
BakeWithEase's Easy Flaky Pie Crust Recipe: Step-by-Step
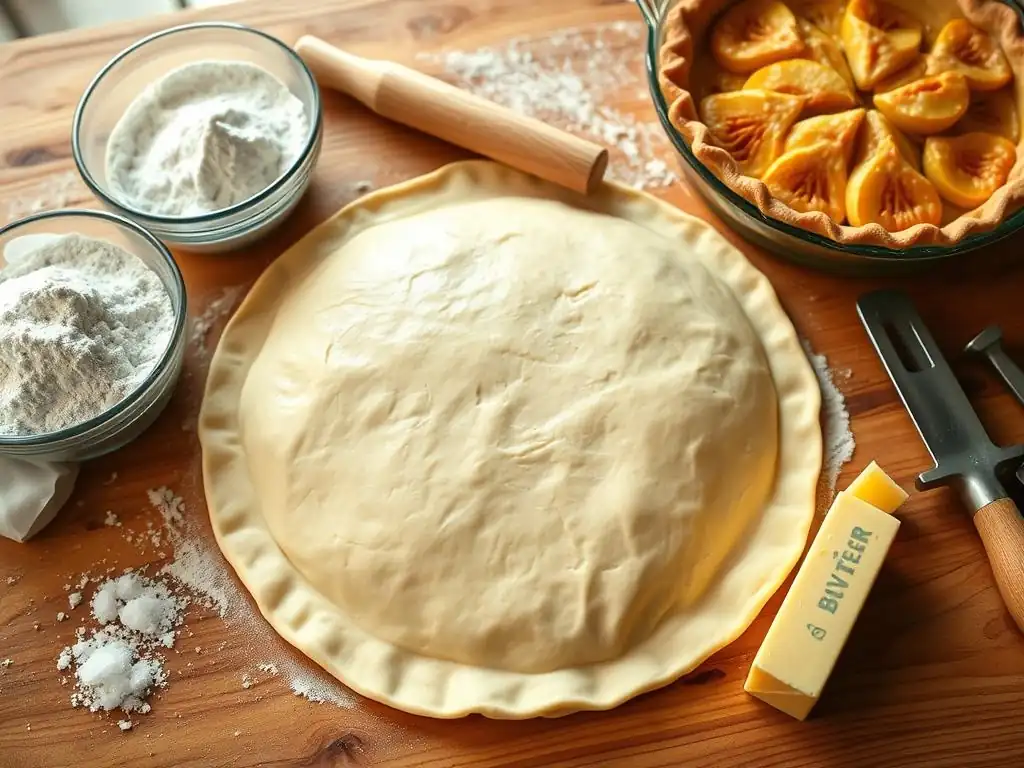
Ingredients for a Perfect Flaky Pie Crust
Measuring Ingredients Accurately: The Key to Success
Baking, perhaps more than cooking, relies heavily on precise measurements. For a successful flaky pie crust recipe, accuracy is paramount. Too much flour can make the dough tough, while too little can make it sticky and difficult to handle. Similarly, the ratio of fat and liquid needs to be just right to achieve the desired flakiness and tenderness without the dough becoming greasy or dry.
We recommend using the "spoon and level" method for measuring flour: gently spoon the flour into your measuring cup until it overflows, then level it off with a straight edge like a knife. Avoid scooping directly from the bag, as this can compact the flour, leading to up to 25% more flour than needed. For fat, chilling it and then cutting it into precise amounts is crucial. Using a kitchen scale for flour (e.g., 125 grams per cup approximation) can offer even greater accuracy, ensuring consistent results every time you make this easy flaky pie crust recipe.
Choosing the Right Flour: All-Purpose vs. Pastry Flour
The type of flour you use significantly impacts the final texture of your crust. All-purpose flour is the most common choice for pie crusts and works very well for achieving flakiness. It typically has a protein content around 10-12%, which allows for some gluten development, providing structure, but not so much that it becomes tough, especially when handled minimally.
Pastry flour, on the other hand, has a lower protein content (around 8-9%). Using pastry flour can result in a slightly more tender crust, as less gluten is formed. However, it can also be a bit trickier to work with as the dough might be more delicate. For a reliable and easy flaky pie crust recipe, we generally recommend starting with good quality all-purpose flour. It provides a great balance of structure and tenderness, making it forgiving for beginners while still delivering excellent flakiness.
The Importance of Cold Butter (or Shortening)
This is perhaps the most critical secret to a flaky pie crust: your fat must be cold. Whether you choose unsalted butter, vegetable shortening, or a combination, the fat should be thoroughly chilled and cut into small pieces, typically about the size of peas or small beans. Some bakers even recommend freezing the cut fat for 10-15 minutes before adding it to the flour.
Cold fat doesn't fully blend with the flour; instead, it remains in distinct pieces. During baking, these cold pockets of fat melt, releasing steam. This steam is what creates those crucial air pockets and layers that define a flaky crust. If your fat is too warm, it will incorporate too much into the flour, resulting in a more uniform, crumbly texture rather than the desired layers. Keeping everything cold – the fat, the water, and even the flour if your kitchen is warm – is key to unlocking the flakiness potential of this easy flaky pie crust recipe.
Equipment Needed for Making Pie Crust
Essential Tools for Easy Pie Crust Preparation
Making pie crust doesn't require a vast collection of specialized gadgets, but a few key tools can make the process much smoother and help ensure a flaky result. A large mixing bowl is essential for combining ingredients. You'll need a way to cut the cold fat into the flour; options include a pastry blender (a tool with wires or blades), two forks, or even your fingertips (working quickly to avoid warming the fat).
A rolling pin is, of course, necessary for rolling out the dough. Choose one you are comfortable with, whether it's a classic tapered French pin or a straight American-style pin with handles. A clean, flat work surface is also needed – a countertop, a large cutting board, or a pastry mat all work well. Lastly, a pie plate (ceramic, glass, or metal) is needed for assembling and baking your pie. Having these simple tools ready makes following this easy flaky pie crust recipe a breeze.
Step-by-Step Instructions: Making the Dough
Combining Dry Ingredients for Flaky Crust
The first step in making your easy flaky pie crust recipe dough is to combine the dry ingredients. In your large mixing bowl, whisk together the flour and salt. The salt adds flavor and helps to balance the richness of the fat. Some recipes also include a pinch of sugar, which can aid in browning and add a touch of sweetness, though it's not strictly necessary for flakiness.
Ensure these dry ingredients are well combined before adding the fat. This initial mixing is straightforward and can be done with a whisk or fork. It prepares the base for incorporating the crucial cold fat that will later create the flaky layers. This simple beginning sets the stage for the textural magic to come.
Cutting in the Cold Butter: The Secret to Flakiness
This step is where the magic happens for a flaky pie crust. Add your cold, cut-up butter (or shortening) to the flour mixture. Now, using your chosen method (pastry blender, forks, or fingertips), work the fat into the flour until the mixture resembles coarse crumbs with some larger pieces of fat remaining, roughly the size of peas or small beans. It's vital not to overwork the mixture at this stage. You want visible pieces of fat.
The goal is to coat the flour particles with fat while leaving some fat pieces intact. These intact pieces are what create the steam pockets during baking. If you rub the fat in until the mixture looks like fine breadcrumbs or cornmeal, you've gone too far, and your crust will likely be more crumbly than flaky. Work quickly to keep the fat as cold as possible throughout this process – this is key to this easy flaky pie crust recipe's success.
Adding Ice Water: Hydrating the Dough Properly
Once the fat is cut into the flour, it's time to add the liquid. This is typically ice water. The cold temperature helps maintain the chill of the fat, and the water hydrates the flour, allowing gluten to develop minimally and bind the dough together. Add the ice water a tablespoon at a time, sprinkling it evenly over the flour mixture.
Using a fork or your hands, gently mix the water into the dry ingredients until the dough just barely comes together. You'll likely need anywhere from 4 to 8 tablespoons of ice water, depending on the humidity and the flour. The mixture should look shaggy and might have some dry bits at the bottom of the bowl. When you squeeze a handful, it should hold together without being overly sticky or wet. Stop adding water as soon as the dough can be coaxed into a cohesive mass; over-hydrating leads to a tough crust.
Forming the Dough Disc: Preparing for Chilling
Once the dough has just come together, turn it out onto a clean, lightly floured surface. Gather the shaggy mixture and gently press it together to form a cohesive ball. Avoid kneading the dough like bread dough; this develops gluten too much and results in a tough crust. The goal is just to bring the mixture together.
Once formed, flatten the ball into a disc about 1 inch thick. This disc shape makes it much easier to roll out later. Wrap the disc tightly in plastic wrap. For a double-crust pie, divide the dough in half after adding the water and form two separate discs. This easy flaky pie crust recipe requires chilling at this stage before rolling.
Chilling the Dough: Why It's Crucial
How Chilling Affects Gluten Development
Chilling the dough is a non-negotiable step for a truly flaky and tender pie crust. First, chilling allows the gluten proteins in the flour to relax. When you mix flour and water, gluten begins to develop. Handling the dough, even gently, encourages more gluten formation. Chilling the dough for at least 30 minutes significantly slows down this process, resulting in a more tender crust.
Furthermore, chilling solidifies the fat particles that you cut into the flour. These cold, hard pieces of fat are what create the flaky layers during baking. If the fat is warm and soft, it will melt prematurely in the oven and incorporate into the flour rather than creating steam pockets. A well-chilled dough handles better, shrinks less during baking, and is much easier to roll out without sticking, all contributing to the success of this easy flaky pie crust recipe.
Optimal Chilling Time for the Best Results
While a minimum of 30 minutes in the refrigerator is necessary for the dough to firm up and the gluten to relax, chilling for longer periods, such as 1 to 2 hours, or even overnight, can yield even better results. The longer chill time allows the flavors to meld and the gluten to fully relax, making the dough more pliable and less likely to shrink when baked.
If you are in a hurry, 30 minutes will suffice, but you might find the dough slightly more resistant to rolling. For optimal flakiness and ease of handling, planning ahead and chilling for at least an hour is recommended. You can even make the dough a day or two in advance; just ensure it's well-wrapped to prevent it from drying out. Allow very cold dough to sit at room temperature for 5-10 minutes before rolling if it feels too hard.
Rolling Out Your Flaky Pie Crust: Tips and Techniques
Preparing Your Work Surface for Rolling
Before you take your chilled dough out of the refrigerator, prepare a clean, dry work surface. A countertop, a large cutting board, or a dedicated pastry mat works well. Lightly flour the surface. The key here is "lightly" – too much flour can make your crust tough and dry by incorporating excess flour into the dough during rolling.
You also want to lightly flour your rolling pin. Some bakers prefer to roll the dough between two sheets of parchment paper or plastic wrap, which eliminates the need for surface flour and can help prevent sticking, though it can make it harder to feel the dough's thickness. Whichever method you choose, ensure your surface is ready before the cold dough starts to warm up.
Rolling the Dough to the Right Thickness
Remove one disc of chilled dough from the refrigerator. If it's been chilling for a long time, let it sit at room temperature for 5-10 minutes until it's slightly pliable but still cold. Place the dough disc on your lightly floured surface. Begin rolling from the center outwards, rotating the dough frequently (about a quarter turn after each roll) to keep it from sticking and to ensure an even circle.
Roll the dough into a circle about 12-13 inches in diameter for a standard 9-inch pie plate, and about 1/8 inch thick. You should be able to see the small flecks of fat in the dough. If the dough cracks at the edges, you can gently pinch them back together. If it sticks, lift it carefully and add a tiny bit more flour underneath. Don't overwork the dough; roll it just enough to reach the desired size and thickness.
Transferring the Crust to Your Pie Plate: Avoiding Tears
Transferring the rolled-out dough to the pie plate can be the trickiest part. One common method is to gently roll the dough loosely around your rolling pin. Then, unroll it over your pie plate, centering it before letting it fall into place.
Alternatively, you can carefully fold the dough circle in half or quarters and then unfold it into the pie plate. Whichever method you use, gently ease the dough into the bottom and sides of the plate, making sure it's nestled without stretching it. Stretching the dough can cause it to shrink significantly during baking. Trim any excess dough, leaving about a 1-inch overhang around the edge for crimping.
Crimping the Edges: Finishing Touches
The final step before filling or baking is to finish the edges of your pie crust. This not only looks beautiful but also helps seal the filling inside and provides structure. Fold the 1-inch overhang of dough under itself so that the folded edge is flush with the rim of the pie plate.
Once folded, you can crimp the edges using various techniques. The most common method is to use the index finger of one hand to push the dough from the inside while using the thumb and index finger of the other hand to pinch the dough from the outside, creating a wavy pattern around the rim. You can also use the tines of a fork to press indentations around the edge. Ensure the crimp is firmly pressed to prevent the edge from slumping during baking.
Blind Baking: Pre-Baking Your Pie Crust
Why Blind Baking is Necessary for Certain Pies
Blind baking, or pre-baking, your pie crust involves partially or fully baking the empty crust before adding the filling. This step is essential for pies with wet fillings (like pumpkin pie or quiche) or fillings that don't require baking (like cream pies or pudding pies). Pre-baking helps to prevent a soggy bottom crust, a common pie woe.
For wet fillings, a partial blind bake gives the bottom crust a head start in firming up before the moist filling is added. For no-bake fillings, a full blind bake is required to cook the crust completely. Blind baking ensures that the foundation of your pie is sturdy and cooked through, providing the best possible base for your delicious fall fillings.
How to Blind Bake: Using Pie Weights or Beans
To blind bake your crust, after fitting it into the pie plate and crimping the edges, you need to prevent it from puffing up or shrinking during baking. Line the unbaked crust with parchment paper or aluminum foil, pressing it gently into the corners and up the sides. Then, fill the lined crust with pie weights, dried beans, or uncooked rice. These weights hold the dough down and prevent the bottom from bubbling up.
Place the weighted crust on a baking sheet (to catch any spills and make it easier to handle) and bake in a preheated oven (often around 375-400°F or 190-200°C). For a partial bake, bake for about 15-20 minutes until the edges are lightly golden. Remove the weights and liner, then prick the bottom of the crust all over with a fork (this helps steam escape and prevents puffing during the second stage of baking).
Return to the oven for another 5-10 minutes until the bottom is set but not necessarily browned. For a full blind bake, continue baking after removing weights until the crust is golden brown, which might take another 10-15 minutes.
Preventing Shrinkage During Blind Baking
Shrinkage is a common problem when blind baking. Several factors contribute to it, including insufficient chilling of the dough, stretching the dough when fitting it into the pie plate, or not using enough pie weights. Ensuring your dough is well-chilled (at least 30 minutes, preferably longer) is the first defense against shrinkage.
When fitting the dough into the pie plate, gently ease it in without pulling or stretching it. Leave that 1-inch overhang and fold it under before crimping; this double layer around the rim provides stability. Finally, make sure you use enough pie weights to fill the crust right up to the crimped edge. The weight holds the dough against the sides of the plate, preventing it from slumping down as it bakes. Baking on a hot baking sheet can also help set the bottom crust quickly, reducing shrinkage.
Troubleshooting Common Pie Crust Problems
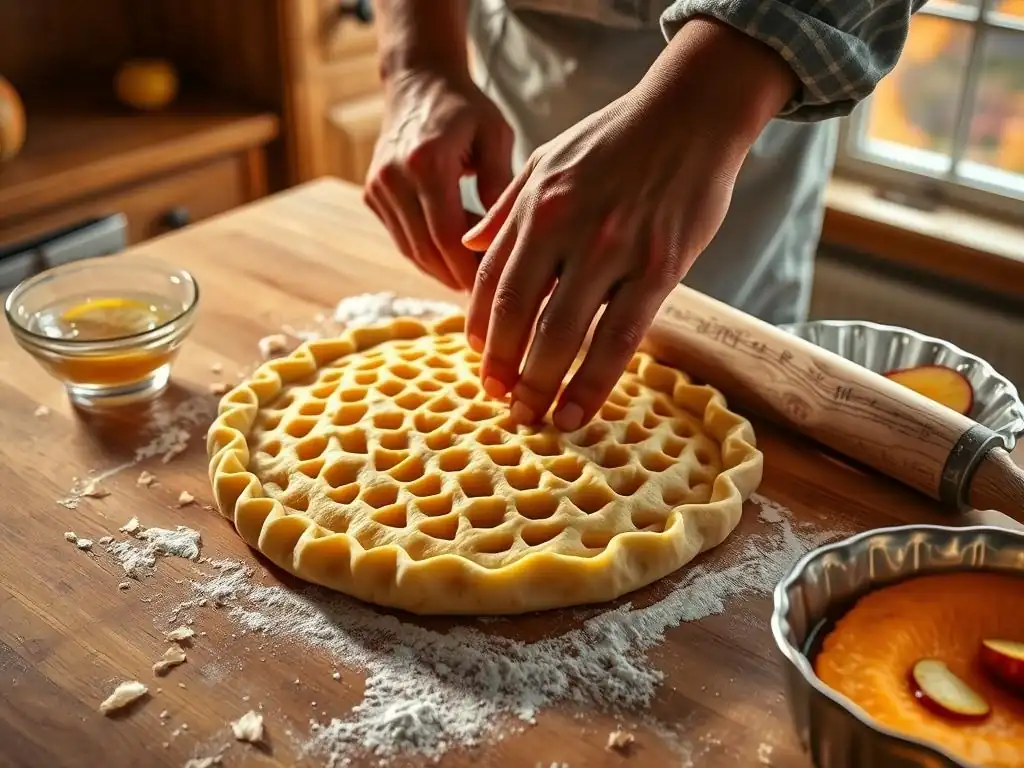
Dry and Crumbly Crust: Causes and Solutions
A dry and crumbly dough that won't come together is usually a result of not enough liquid or too much flour. When adding the ice water, make sure you add just enough so that the dough holds together when squeezed, but not so much that it's sticky. Humidity levels can affect how much water is needed; on a dry day, you might need a little more.
If your dough is too dry after mixing, you can try adding another teaspoon or two of ice water, sprinkling it over the dry bits and gently incorporating it until the dough just holds together. Be careful not to add too much at once. Using the spoon and level method for measuring flour is also crucial, as compacted flour can lead to a significantly drier dough. Remember, a shaggy dough is okay before chilling; don't keep adding water trying to make it smooth like bread dough.
Tough Crust: Avoiding Over-Mixing
A tough pie crust is typically caused by over-mixing or overworking the dough. When flour and water are combined and agitated, gluten develops. While some gluten is needed for structure, too much makes the crust chewy instead of tender and flaky. This is why we emphasize gentle handling and minimal mixing.
When cutting in the fat, stop as soon as the mixture resembles coarse crumbs and peas. When adding water, mix only until the dough just comes together. Avoid kneading or repeatedly re-rolling scraps. The less you handle the dough, the less gluten develops, and the more tender your easy flaky pie crust recipe will be. Chilling the dough also helps relax any gluten that has developed.
Shrinking Crust: How to Prevent It
We touched on shrinkage during blind baking, but it can happen even with filled pies. The main culprits are insufficient chilling and stretching the dough when putting it into the pie plate. Gluten has elastic properties, and if the dough is stretched, it will try to spring back to its original size in the heat of the oven.
Ensure your dough is thoroughly chilled (at least 30 minutes, ideally longer). When transferring the rolled dough to the pie plate, gently ease it in without pulling or stretching it. Let the dough settle into the corners. Leaving a generous overhang (about 1 inch) and folding it under before crimping also adds weight and structure to the edge, helping to anchor the crust and reduce shrinkage.
Soggy Bottom Crust: Tips for a Crispy Base
A soggy bottom crust is a common frustration, especially with moist fruit or custard fillings like those in apple and pumpkin pies. The moisture from the filling can seep into the bottom crust before it has a chance to cook and crisp up. The primary defense against this is blind baking the crust, as discussed earlier. Partially blind baking gives the bottom crust a head start.
Other tips include baking the pie on a preheated baking sheet or pizza stone placed on the lowest rack of your oven; the direct heat helps set the bottom crust quickly. You can also brush the bottom of the partially blind-baked crust with a thin layer of egg white or melted butter before adding the filling; this creates a barrier against moisture. Ensuring your filling isn't excessively watery also helps.
Flaky Pie Crust Variations: Exploring Different Options
All-Butter Pie Crust: The Classic Choice
An all-butter flaky pie crust is often considered the gold standard by many bakers. Unsalted butter provides unparalleled flavor and richness. As butter contains about 15-18% water, it's excellent for creating steam and thus flakiness. However, butter has a lower melting point than shortening, which means you must be extra careful to keep everything cold throughout the process.
An all-butter crust tends to be slightly less tender than one made with shortening, but its superior taste makes it a popular choice. Achieving maximum flakiness with butter requires diligent chilling and quick handling. This variation produces a beautiful, golden-brown crust with a pure, rich flavor that complements both sweet and savory fillings beautifully, including classic apple and pumpkin.
Shortening Pie Crust: For Extra Tenderness
Vegetable shortening is a hydrogenated fat that is 100% fat (containing no water). This lack of water means shortening contributes differently to flakiness compared to butter. Instead of creating steam pockets, shortening coats the flour particles more thoroughly, inhibiting gluten development and resulting in a very tender, almost crumbly-flaky texture.
Shortening has a higher melting point than butter, making it easier to handle, especially in warm kitchens, as it stays solid longer. A shortening crust is often paler than a butter crust. While it may lack the rich flavor of butter, shortening excels at producing a reliably tender crust. Many bakers opt for a combination of butter and shortening to get the best of both worlds: the flavor of butter and the tenderness and ease of handling of shortening, resulting in a wonderfully easy flaky pie crust recipe.
Lard Pie Crust: A Traditional Approach
Lard, rendered pork fat, is a very traditional fat for pie crusts, and for good reason. Like shortening, it is 100% fat and has a relatively high melting point, making it easy to work with and excellent for creating tenderness. Lard produces incredibly flaky layers and a very tender crust.
Good quality, rendered lard (preferably leaf lard) has a neutral or even slightly pleasant flavor that works well in pies. Avoid hydrogenated lard, which behaves more like vegetable shortening. While perhaps less common today, a lard-based crust is a favorite among many experienced bakers for its exceptional texture. If you're looking for a truly old-fashioned, easy flaky pie crust recipe, lard is worth exploring.
Gluten-Free Flaky Pie Crust: Adaptations for Dietary Needs
Creating a flaky pie crust without gluten can be challenging, as gluten provides structure. However, it is definitely possible with the right blend of gluten-free flours and starches, combined with similar techniques used for traditional crusts. Gluten-free blends often include rice flour, sorghum flour, tapioca starch, and potato starch. Xanthan gum or psyllium husk is often added to provide necessary binding and structure in the absence of gluten.
The principles of keeping ingredients cold and minimizing handling still apply. Using a blend of fats, such as butter and shortening, can also help achieve flakiness. The dough might feel different – potentially more crumbly or sticky – but with practice, you can create a delicious and flaky gluten-free crust suitable for your fall apple and pumpkin pies. Look for specific gluten-free pie crust recipes that are designed to mimic the flaky texture.
Using Your Flaky Pie Crust for Apple and Pumpkin Pies
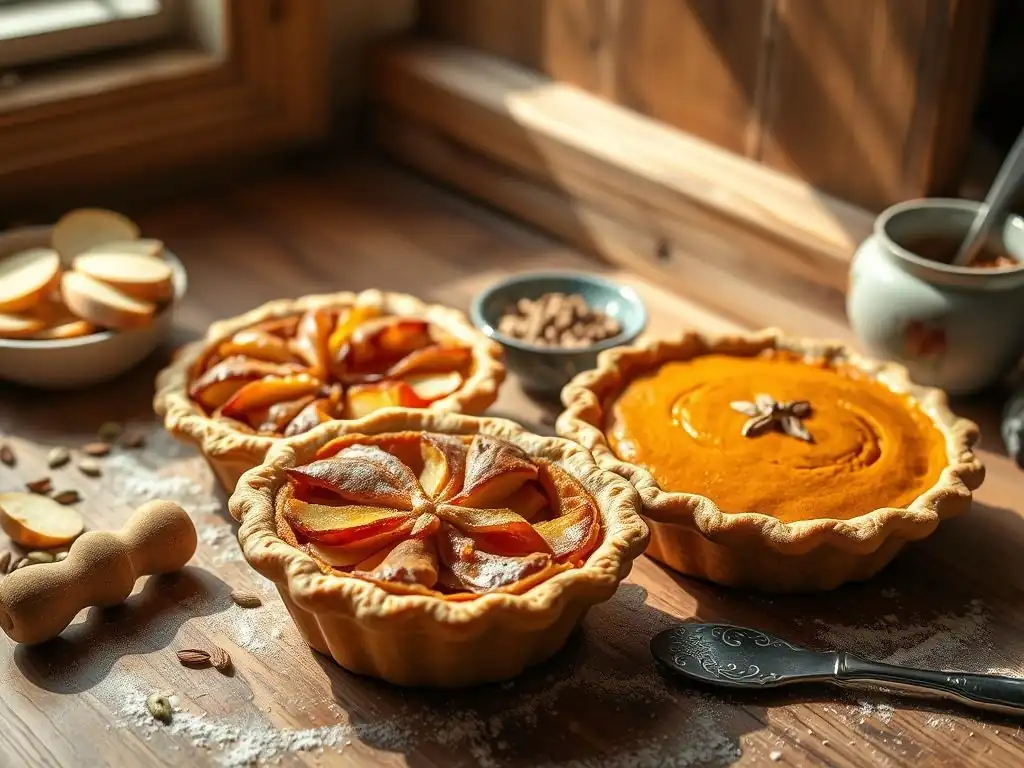
Pairing the Crust with Different Apple Pie Fillings
A perfectly flaky pie crust is the ideal vehicle for showcasing the variety of apple pie fillings. For a classic, slightly thickened sliced apple filling, the sturdy yet tender crust provides a wonderful base and top. If you prefer a more rustic, less structured filling with chunkier apple pieces, the flaky layers hold up well, preventing the pie from becoming too soupy while offering textural contrast.
Consider the sweetness and tartness of your apples. A rich, buttery flaky crust complements sweet apples beautifully, adding depth. For tarter apple varieties, the slight richness of the crust can balance the acidity. Whether your filling is spiced with cinnamon, nutmeg, and cloves or incorporates a touch of caramel or brown sugar, the neutral yet flavorful background of a well-made flaky crust enhances the overall profile of your apple pie.
The Perfect Crust for a Classic Pumpkin Pie Recipe
Pumpkin pie, with its smooth, dense, and moist custard filling, absolutely benefits from a flaky crust. Because the filling is wet and baked for a relatively long time at a moderate temperature, blind baking the bottom crust is highly recommended to prevent sogginess. A partial blind bake allows the bottom crust to set and firm up before the heavy, liquid filling is added.
The delicate, crisp layers of the flaky crust provide a much-needed textural counterpoint to the creamy, spiced pumpkin filling. A tender, flaky edge is delightful to bite into alongside the smooth custard. This easy flaky pie crust recipe provides the necessary structure and delicious foundation for that iconic fall dessert, ensuring your classic pumpkin pie recipe is a textural and flavorful success.
Other Fall Baking Ideas: Beyond Apple and Pumpkin
While this easy flaky pie crust recipe is perfect for apple and pumpkin pies, its versatility extends to many other fall baking creations. Think about savory pies like quiches filled with seasonal vegetables like squash or mushrooms, or pot pies brimming with turkey or chicken and root vegetables.
Sweet options abound as well. Consider pear pie, mixed berry pie (using frozen berries or late-season fresh ones), pecan pie, or even a sweet potato pie. The principles of using a flaky crust apply across the board, providing a delicious, buttery base and top for a wide range of seasonal fillings, both sweet and savory. Mastering this basic flaky pie crust recipe opens up a world of fall baking possibilities.
Storing Your Flaky Pie Crust: Freshness Tips
Storing Unbaked Pie Crust Dough
One of the great things about making your own flaky pie crust is that the dough can be made ahead of time. After forming the disc(s) and wrapping tightly in plastic wrap, the dough can be stored in the refrigerator for 1 to 2 days. This allows you to break up the pie-making process, making it more manageable.
For longer storage, unbaked pie dough discs can be frozen. Wrap the plastic-wrapped disc(s) again in aluminum foil or place them in a freezer-safe bag. Frozen dough can last for up to 3-4 months. To use frozen dough, transfer it to the refrigerator the day before you plan to bake to allow it to thaw slowly. Avoid thawing at room temperature, as this can cause the fat to warm up too much.
Storing Baked Pie Crust
If you've blind-baked a pie crust and need to store it before filling, allow the baked crust to cool completely in the pie plate on a wire rack. Once cooled, you can cover the pie plate loosely with plastic wrap or aluminum foil. A blind-baked crust can be stored at room temperature for about 1 to 2 days, provided your kitchen isn't excessively humid.
For longer storage, a blind-baked crust can also be frozen. Once completely cool, wrap the entire pie plate containing the crust tightly in plastic wrap, then in aluminum foil, or place it in a large freezer bag. Frozen baked crusts can be stored for about 1-2 months. Thaw a frozen baked crust at room temperature before filling.
Achieving Flaky Pie Crust Perfection: Recap and Final Tips
Mastering the Art of Pie Crust: Practice Makes Perfect
Creating a consistently flaky pie crust is a fundamental skill in baking, and like any skill, it improves with practice. Don't be discouraged if your first attempt isn't perfectly layered or if you encounter some sticking or cracking. Each attempt teaches you more about the dough – how it feels when it has enough water, how quickly it warms up, and how to handle it gently.
Pay attention to the details: keeping ingredients cold, not over-mixing, and chilling the dough are the most critical factors. Use this easy flaky pie crust recipe as your starting point, and you'll build confidence with each pie you make. Soon, rolling out and baking a beautiful, flaky crust for your fall apple and pumpkin pies will feel like second nature.
- Key Takeaways for Flaky Success:
- Always use cold fat (butter, shortening, or lard) and ice water.
- Cut the fat into the flour until it resembles coarse crumbs and pea-sized pieces.
- Add just enough water for the dough to barely come together; it should be shaggy.
- Handle the dough minimally to avoid developing tough gluten.
- Chill the dough for at least 30 minutes, preferably longer, before rolling.
- Roll the dough gently and evenly, rotating frequently.
- Don't stretch the dough when placing it in the pie plate.
- Consider blind baking for wet fillings to prevent a soggy bottom.
Making a delicious, flaky pie crust recipe is easy when you understand the basic principles and follow the steps carefully. This guide provides you with a reliable recipe and all the essential tips to achieve that coveted flaky texture perfect for your fall apple and pumpkin pies. Happy baking!
Frequently Asked Questions
How can I ensure my pie crust is extra flaky?
The key to a flaky crust lies in keeping the butter cold and using cold water. Work quickly and don't overmix the dough to prevent gluten development.
What type of fat works best for a flaky pie crust recipe easy?
While shortening can create a tender crust, cold butter provides the best flavor and contributes significantly to flakiness. A combination of both can also work well.
Can I make the pie crust dough ahead of time?
Yes! In fact, it's recommended. Wrap the dough tightly in plastic wrap and refrigerate it for at least 30 minutes, or even overnight, to allow the gluten to relax.
What's the secret to preventing a soggy bottom crust?
Blind baking the crust, using a pre-heated baking sheet, and brushing the bottom crust with a thin layer of egg white before adding the filling can all help prevent a soggy bottom.
Why is it important to use ice water in the flaky pie crust recipe easy?
Ice water keeps the butter cold, preventing it from melting and incorporating fully into the flour. This creates layers of fat that, when baked, result in a flaky texture.
Final Reflection: The Enduring Allure of a Perfectly Flaky Crust
The pursuit of the perfect flaky pie crust transcends mere culinary skill; it's a testament to the enduring power of simple pleasures and the joy of homemade goodness. In a world increasingly dominated by convenience and pre-packaged goods, the act of creating something from scratch, something as seemingly simple as a pie crust, offers a profound sense of accomplishment and connection to tradition. This article explored the nuances of achieving that perfect flakiness, offering accessible techniques and tips for even the most novice bakers.
The result? A recipe that empowers you to create a truly exceptional pie, a centerpiece for your autumn celebrations.
The journey to mastering a flaky pie crust is a metaphor for life itself – requiring patience, attention to detail, and a willingness to embrace imperfection. The subtle variations in temperature, the gentle touch required for handling the dough, these are all lessons that extend beyond the kitchen. The best things in life are worth the wait,
a sentiment perfectly encapsulates the rewarding experience of crafting a truly exceptional pie crust. The aroma alone, the anticipation of the first bite, these are sensory experiences that connect us to generations past, reminding us of the simple joys that enrich our lives.
Now, I invite you to roll up your sleeves, gather your ingredients, and embark on your own pie-crust adventure. Don't be afraid to experiment, to adjust the recipe to your own preferences, and most importantly, to savor the process.
The flaky, buttery layers of your creation will not only delight your taste buds but will also serve as a reminder of the satisfaction found in creating something beautiful and delicious with your own two hands. Let the aroma of warm spices and perfectly baked pastry fill your home, a testament to your culinary prowess and a celebration of the simple, yet profound, joy of baking.
Unlock Your Perfect Pie Crust: It's Easier Than You Think!
Thanks for taking the time to explore the secrets of a flawlessly flaky pie crust! We hope you've gained the confidence to tackle those autumnal apple and pumpkin pies with ease. Ready to put your new skills to the test?
- Bake your dream pie: Grab your ingredients and try out the recipe today! Let us know how it turns out – we love seeing your creations.
- Share your success (or even your struggles!): Post a picture of your pie on social media and tag us – we'd love to feature you!
- Explore more pie recipes: Dive into our extensive collection and find the perfect crust for your next baking adventure.
So, what delicious flavor will your next masterpiece showcase? Let us know in the comments below!