
Homemade Vanilla Bean Ice Cream Base (No Machine Needed!)

Welcome to BakeWithEase, your kitchen companion for all things baking! Ever dream of scooping up creamy, homemade ice cream without the fuss of a machine? Then you're in the right place. Discover our secrets to achieving perfectly smooth and delicious no churn vanilla ice cream that rivals anything you'll find in stores. Intrigued? Keep reading to unlock the surprisingly simple steps to this delightful frozen treat and prepare to impress with your pastry prowess!
- Homemade Vanilla Bean Ice Cream Base (No Machine Needed!) - BakeWithEase
- Introduction: The Easiest No-Churn Vanilla Ice Cream Recipe
- What Makes This No-Churn Vanilla Ice Cream Special?
- Ingredients for Your No-Churn Vanilla Bean Ice Cream
- Step-by-Step Guide: Making Your Vanilla Ice Cream Base
- Tips for the Best No-Churn Vanilla Bean Ice Cream
- Variations on the Classic Vanilla Ice Cream Base
- Storing Your Homemade No-Churn Vanilla Ice Cream
- Troubleshooting Common No-Churn Ice Cream Issues
- Serving Suggestions for Your Vanilla Bean Ice Cream
- Conclusion: Enjoy Your Effortless Homemade Ice Cream
-
Frequently Asked Questions
- What makes this vanilla ice cream "no churn"?
- What ingredients are essential for this no-churn vanilla ice cream?
- How long does it take for the no-churn ice cream to freeze properly?
- Can I add other flavors or mix-ins to this vanilla ice cream base?
- How should I store the no-churn vanilla ice cream?
- Final Reflection: The Sweet Simplicity of Homemade Happiness
- Unlock Your Inner Ice Cream Maestro!
Homemade Vanilla Bean Ice Cream Base (No Machine Needed!) - BakeWithEase
Introduction: The Easiest No-Churn Vanilla Ice Cream Recipe
Craving Homemade Ice Cream? Skip the Machine!
Imagine a hot summer day, the kind where the air shimmers and all you want is a scoop of creamy, delicious ice cream. But maybe you don't own a bulky ice cream maker, or perhaps you're just looking for a simpler way to satisfy that craving. The good news is, you absolutely don't need a specialized machine to make incredible homemade ice cream.
Thanks to a clever technique, you can whip up a luscious, smooth no churn vanilla ice cream right in your own kitchen with minimal effort and basic tools you likely already have. This method is a game-changer for anyone who loves the idea of homemade treats but is short on space or time.
Making no churn vanilla ice cream opens up a world of possibilities. It's surprisingly easy, requiring just a few key ingredients and a bit of patience while it freezes. This approach demystifies the ice cream-making process, making it accessible to everyone, regardless of their baking or cooking experience level. Forget the churning, the ice baths, and the specialized equipment. With this recipe, your freezer does most of the work, leaving you free to relax and anticipate the delightful result. It's the perfect entry point into the world of frozen desserts without the commitment of extra gadgets.
BakeWithEase Presents: A Simple Vanilla Bean Ice Cream Base
Here at BakeWithEase, we're all about making baking and dessert creation accessible and enjoyable for everyone. That's why we're thrilled to share our simple yet effective recipe for a no churn vanilla ice cream base. This recipe focuses on creating a rich, intensely flavored vanilla foundation that is incredibly creamy, despite the absence of an ice cream machine. We've stripped away complexity to give you a straightforward guide that guarantees delicious results every time. This basic vanilla base is fantastic on its own, but it also serves as the perfect canvas for countless flavor variations and mix-ins.
Our goal is to empower you to create delightful treats from scratch. This no churn vanilla ice cream recipe embodies that philosophy. It relies on simple techniques like whipping cream and gentle folding, skills that are useful in many other dessert applications. We'll walk you through each step, explaining the 'why' behind the 'how', so you not only follow the recipe but also understand the magic that makes this no-churn method work. Get ready to impress yourself and your loved ones with homemade ice cream that tastes like it came from a gourmet parlor, all without a single churn.
What Makes This No-Churn Vanilla Ice Cream Special?
Rich Vanilla Bean Flavor Without an Ice Cream Maker
The secret to a truly exceptional no churn vanilla ice cream lies in the quality of the vanilla and how its flavor is infused. Unlike some methods that rely solely on extract, this recipe highlights the use of real vanilla beans.
A single vanilla bean, typically yielding about 1-2 teaspoons of seeds, is packed with thousands of flavor compounds, offering a depth and complexity that extract alone can't replicate. Infusing the warm cream with these tiny black specks allows the full spectrum of vanilla aroma and taste to develop, resulting in an ice cream that is intensely fragrant and boasts those beautiful, visible vanilla bean flecks.
Using real vanilla beans elevates this no churn vanilla ice cream from good to extraordinary. While high-quality vanilla extract (about 1-2 teaspoons) can be used as a substitute in a pinch, the subtle nuances and visual appeal of the bean are unparalleled.
Different vanilla origins, like Madagascar (sweet, classic), Tahitian (floral, fruity), or Mexican (smoky, spicy), can lend unique characteristics to your base. A standard Madagascar vanilla bean, often costing around $4-8 depending on grade and source, is an investment that pays off significantly in the final flavor profile, providing that authentic, rich vanilla experience that is the hallmark of premium ice cream.
Minimal Ingredients, Maximum Creaminess: The Secret Revealed
The magic behind no churn vanilla ice cream with its incredible creaminess lies in the combination of two key ingredients: heavy cream and sweetened condensed milk. Traditional ice cream makers work by churning the mixture as it freezes, which incorporates air and breaks up ice crystals, resulting in a smooth texture. Without this churning, we need a different approach to achieve that same result.
Sweetened condensed milk, a thick, syrupy product made by heating milk to remove about 60% of its water and adding sugar, plays a crucial role. Its high sugar content (around 55%) and low water activity help to inhibit the formation of large, icy crystals during freezing.
When stiffly whipped heavy cream is gently folded into the sweetened condensed milk, it creates a stable, airy base. The whipped cream provides the necessary volume and lightness, mimicking the air incorporated during churning. The fat content of the heavy cream (typically 36-40%) also contributes significantly to the rich mouthfeel and smooth texture.
This combination of ingredients, often just two main components plus flavoring, simplifies the process dramatically compared to custard-based ice creams which require tempering eggs and cooking. The result is a surprisingly light yet incredibly rich and smooth no churn vanilla ice cream that sets beautifully in the freezer.
Ingredients for Your No-Churn Vanilla Bean Ice Cream
The Star: High-Quality Vanilla Beans
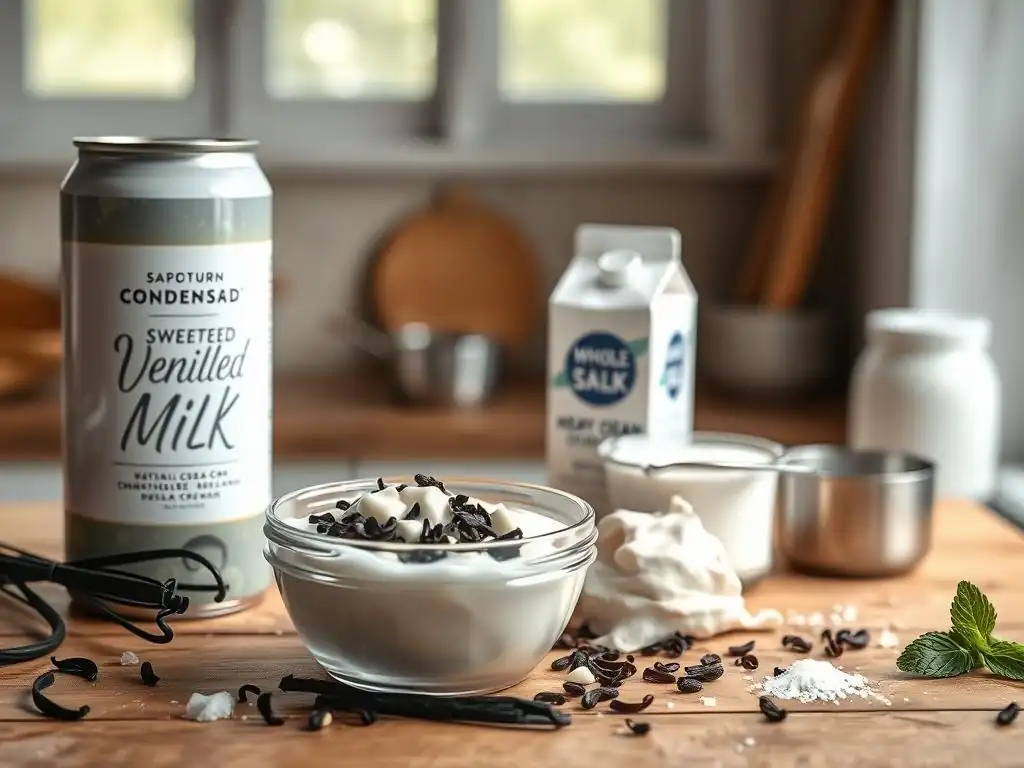
For the most authentic and intense flavor in your no churn vanilla ice cream, high-quality vanilla beans are essential. Look for beans that are plump, moist, and pliable, not dry or brittle. This indicates freshness and a higher concentration of vanillin, the primary flavor compound. One good quality vanilla bean, typically around 6-8 inches long, is usually sufficient for a standard batch yielding about 1.5 to 2 quarts of ice cream. While buying beans can feel like a splurge, remember that the flavor they impart is far superior to extract for this specific application where vanilla is the star.
To extract the maximum flavor, you'll split the bean lengthwise using a sharp paring knife and scrape out the tiny, dark seeds (often called "vanilla caviar") from the inside. Both the scraped seeds and the scraped pod itself contain valuable flavor. The pod can be steeped in warm liquid (like the cream base before whipping, or even sugar for vanilla sugar later) to infuse even more vanilla goodness. Store unused vanilla beans in an airtight container in a cool, dark place, not the refrigerator, to maintain their moisture and aroma for several months.
Heavy Cream: The Key to a Luxurious Texture
Heavy cream, also known as heavy whipping cream, is non-negotiable for achieving the rich, creamy texture of this no churn vanilla ice cream. This type of cream contains at least 36% milk fat, which is crucial for whipping into stable peaks. When whipped, heavy cream incorporates air, giving the ice cream its necessary volume and lightness without churning. The high fat content also contributes to a smoother, more decadent mouthfeel and helps prevent the formation of large ice crystals.
For a standard batch producing about 1.5 quarts, you'll typically need around 2 cups (or roughly 470ml) of cold heavy cream. Ensure the cream is very cold before whipping; this helps it whip up faster and achieve firmer peaks.
Using cream with a lower fat content, like whipping cream (often 30-35% fat), might still work but could result in a slightly less rich texture and potentially softer set. Ultra-pasteurized heavy cream can sometimes be more challenging to whip to very stiff peaks, so if possible, opt for pasteurized heavy cream for the best results in your no churn vanilla ice cream base.
Sweetened Condensed Milk: No-Churn Magic
Sweetened condensed milk is the unsung hero of no churn vanilla ice cream. It's a concentrated milk product with a significant amount of added sugar, which is key to its function in this recipe. The high sugar content acts as an antifreeze, lowering the freezing point of the mixture and interfering with the formation of large, crunchy ice crystals that can ruin the texture of homemade ice cream. Without the churning action of a machine, this ingredient is vital for ensuring a smooth, scoopable consistency.
A standard 14-ounce can (approximately 400g) of sweetened condensed milk is typically used for a batch made with 2 cups of heavy cream. This provides the perfect balance of sweetness and texture-enhancing properties. Be sure to use sweetened condensed milk, not evaporated milk, as they are different products with different sugar levels and viscosities. The thickness and sugar concentration of sweetened condensed milk bind the whipped cream and flavoring together, creating the stable base that freezes into delightful no churn vanilla ice cream.
Optional Add-Ins: Enhance Your Vanilla Ice Cream Base
While a pure no churn vanilla ice cream is heavenly on its own, the base is incredibly versatile and welcomes a variety of mix-ins and flavor enhancements. These additions can be folded in during the final step before freezing to customize your creation. Consider ingredients like chocolate chips, chopped nuts, swirls of caramel or fruit puree, or even crumbled cookies. The base recipe provides about 1.5 quarts of ice cream, which can comfortably handle about 1/2 to 1 cup of solid mix-ins or several generous swirls of sauce without compromising the texture.
For example, adding 1/2 cup of mini chocolate chips or 3/4 cup of chopped roasted pecans can transform the basic vanilla into a new treat. A swirl made from reducing 1 cup of pureed strawberries with a tablespoon of sugar until slightly thickened adds a fruity dimension. Just remember to chill any liquid or semi-liquid mix-ins, like fruit purees or melted chocolate swirls, before adding them to the base to prevent them from deflating the whipped cream. Experimenting with different additions is part of the fun of making no churn vanilla ice cream.
Step-by-Step Guide: Making Your Vanilla Ice Cream Base
Step 1: Preparing the Vanilla Bean Infusion
Begin by preparing your vanilla bean. Using a sharp knife, slice the vanilla bean lengthwise down the center. Open the bean and use the back of the knife to scrape out the tiny, dark seeds, gathering them into a small pile. These seeds are packed with intense vanilla flavor and will create those beautiful speckles in your no churn vanilla ice cream.
In a small saucepan, gently warm about 1/4 cup of the heavy cream over low heat. Add the scraped vanilla seeds and the scraped vanilla pod to the warm cream. Stir occasionally and let it steep for about 5-10 minutes, ensuring it doesn't boil. This gentle heating helps to extract maximum flavor from the vanilla bean. Remove the vanilla pod from the cream and let the infused cream cool slightly before proceeding. Discard the pod or save it to make vanilla sugar.
Step 2: Whipping the Heavy Cream to Stiff Peaks
Pour the remaining cold heavy cream (about 1.75 cups) into a large, clean mixing bowl. If you used the vanilla infusion method, ensure the infused cream has cooled sufficiently and add it to the cold cream in the bowl. Using an electric mixer (handheld or stand mixer with a whisk attachment), start whipping the cream on medium speed. Gradually increase the speed to high.
Continue whipping until the cream forms stiff peaks. This means that when you lift the whisk, the peaks stand straight up without drooping. Be careful not to over-whip, as this can turn the cream grainy. Achieving stiff peaks is crucial because the whipped cream provides the necessary aeration for your no churn vanilla ice cream, mimicking the texture achieved by churning. This step usually takes 3-5 minutes depending on your mixer and the coldness of the cream.
Step 3: Gently Folding in the Sweetened Condensed Milk
Once your heavy cream has reached stiff peaks, it's time to incorporate the sweetened condensed milk. Pour the entire can of sweetened condensed milk into the bowl with the whipped cream. This is where the gentle folding technique is important to maintain the airiness of the whipped cream.
Using a large rubber spatula, gently fold the sweetened condensed milk into the whipped cream. Cut down through the mixture, scoop from the bottom, and fold it over the top. Rotate the bowl as you go. Continue folding just until the sweetened condensed milk is fully incorporated and there are no streaks of white cream visible. Do not stir or beat the mixture vigorously, as this will deflate the whipped cream and result in a less airy, potentially icier no churn vanilla ice cream. The mixture should be thick, smooth, and uniform in color.
Step 4: Adding Your Favorite Mix-Ins (Optional)
If you plan to add any optional mix-ins like chocolate chips, nuts, or swirls, this is the time to do it. Gently fold them into the ice cream base using your spatula. For solid mix-ins, add them directly to the mixture and fold until evenly distributed. For swirls, dollop the sauce or puree over the mixture and use a knife or skewer to gently swirl it through, being careful not to overmix.
Adding mix-ins at this stage ensures they are evenly distributed throughout your no churn vanilla ice cream. Remember the guidelines mentioned earlier: around 1/2 to 1 cup of solid mix-ins is generally a good amount for a batch this size. Ensure any sauces or purees are cool to avoid melting the base. This step allows you to customize your batch and create unique flavor combinations beyond the classic vanilla.
Step 5: Freezing for the Perfect No-Churn Vanilla Ice Cream
Transfer the finished ice cream base into a freezer-safe container. A loaf pan (approximately 9x5 inches, holding about 1.5 quarts) is a popular choice, but any airtight container works well. Smooth the top with your spatula if desired. To help prevent ice crystals from forming on the surface, you can press a layer of plastic wrap directly onto the surface of the ice cream before covering the container with its lid or a layer of aluminum foil.
Place the container in the freezer. For the best results and a firm, scoopable texture, freeze the no churn vanilla ice cream for at least 6-8 hours, or preferably overnight. Avoid opening the freezer frequently during this time. The longer chilling period allows the mixture to freeze solid and the flavors to meld together. Patience is key to enjoying the creamy, smooth texture of your homemade treat.
Tips for the Best No-Churn Vanilla Bean Ice Cream
Choosing the Right Vanilla Beans for Intense Flavor
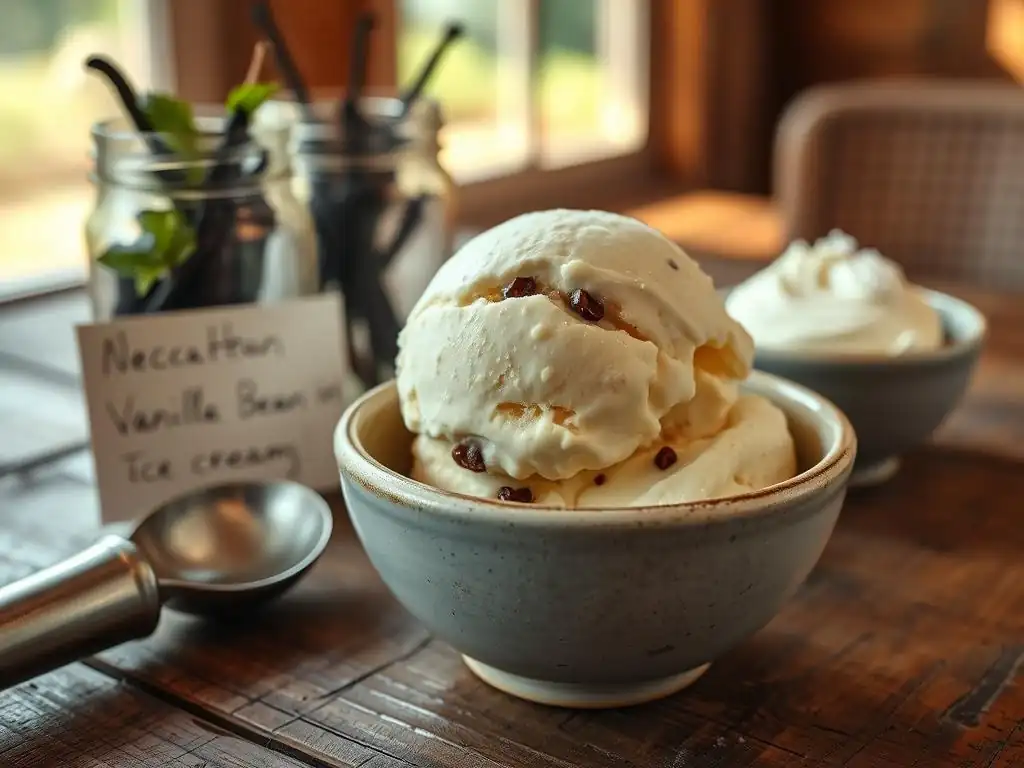
The flavor of your no churn vanilla ice cream hinges significantly on the quality and type of vanilla bean you select. As mentioned, plump, moist beans are ideal. Consider the origin for nuanced flavors: Madagascar vanilla offers a classic, sweet, and creamy profile that pairs wonderfully with dairy. Tahitian beans provide more floral and fruity notes, while Mexican beans can add a hint of spice or smokiness. For a rich, traditional vanilla ice cream, Madagascar beans are a superb choice, often costing between $5-$8 per bean depending on grade and supplier.
To maximize the flavor extraction, ensure you correctly split the bean and scrape out all the seeds. Don't discard the scraped pod; steeping it in the warm cream is a simple yet effective way to pull out residual flavor compounds. Some bakers even store used, dried pods in sugar to create vanilla-infused sugar over time. Investing in high-quality beans from a reputable source, such as King Arthur Baking or Vanilla Sourcing, can make a noticeable difference in the depth and authenticity of your no churn vanilla ice cream.
Achieving Stiff Peaks: The Importance of Whipping
Whipping the heavy cream to stiff peaks is arguably the most critical step in making successful no churn vanilla ice cream. This process incorporates air into the cream, which is essential for creating a light and airy texture without churning. If the cream is not whipped sufficiently (only to soft or medium peaks), the final ice cream will be dense and potentially icier because it lacks the necessary trapped air pockets to disrupt ice crystal formation.
Ensure your heavy cream is very cold before whipping – ideally straight from the refrigerator. A cold bowl and whisk can also help. Start whipping on medium speed to build volume, then increase to high speed to achieve stiffness. You'll know you've reached stiff peaks when the peaks stand straight up when the whisk is lifted, and the cream holds its shape firmly. It typically takes 3-5 minutes with an electric mixer. Over-whipping can cause the cream to curdle, so stop as soon as stiff peaks are achieved for the perfect base for your no churn vanilla ice cream.
Avoiding Ice Crystals: Gentle Folding Techniques
One of the main challenges in making no churn vanilla ice cream is preventing the formation of large, undesirable ice crystals. The combination of sweetened condensed milk and whipped cream significantly helps with this, but technique is also key, particularly during the folding step. Vigorously stirring or beating the whipped cream and condensed milk together will deflate the air you worked so hard to incorporate.
The proper technique involves gentle folding with a spatula. Think of it as carefully combining the mixtures without agitating them too much. Use a motion that cuts down through the center and folds the mixture from the bottom up and over. Rotate the bowl to ensure even mixing. Stop folding as soon as the two components are just combined and no streaks remain. This gentle approach preserves the airiness of the whipped cream, which is vital for a smooth, creamy texture in your finished no churn vanilla ice cream.
Freezing Time: Patience is Key to Creamy Perfection
Allowing sufficient freezing time is essential for your no churn vanilla ice cream to set properly and develop its ideal creamy texture. While it might be tempting to check it frequently or rush the process, adequate freezing time, typically 6-8 hours or overnight, is required for the mixture to firm up completely. Freezing allows the water molecules to crystallize in a controlled manner, helped by the sugar and fat content, leading to a smoother result.
Placing the container in the coldest part of your freezer, away from the door, can also help speed up the process slightly and ensure consistent freezing. Covering the surface directly with plastic wrap before lidding the container helps minimize exposure to air, further reducing the risk of surface ice crystals. While a batch might seem firm enough after just 4-5 hours, letting it freeze for the full recommended time ensures it reaches that perfect, scoopable consistency that makes no churn vanilla ice cream so satisfying.
Variations on the Classic Vanilla Ice Cream Base
Chocolate Chip No-Churn Vanilla Ice Cream
Transforming the classic no churn vanilla ice cream base into a chocolate chip version is simple and incredibly popular. Once you've folded the sweetened condensed milk into the whipped cream, gently fold in about 1/2 to 3/4 cup of your favorite chocolate chips. Mini chocolate chips work particularly well as they distribute more evenly throughout the ice cream, ensuring a bit of chocolate in every bite.
You can use semi-sweet, milk, or dark chocolate chips depending on your preference. For an extra touch, consider using chopped chocolate from a bar for irregular shapes and sizes. Ensure the chips are evenly distributed throughout the base before transferring it to the freezer container. This slight modification adds a delightful textural contrast and classic flavor pairing to the smooth and creamy no churn vanilla ice cream.
Strawberry Swirl No-Churn Vanilla Ice Cream
Adding a vibrant strawberry swirl is a fantastic way to introduce fruitiness to your no churn vanilla ice cream. To create the swirl, you'll need about 1 to 1.5 cups of strawberry puree (made by blending fresh or frozen strawberries). For a thicker, more concentrated swirl, gently cook the puree in a small saucepan with 1-2 tablespoons of sugar until it reduces slightly and thickens, about 10-15 minutes. Allow the strawberry sauce to cool completely.
Once the vanilla ice cream base is ready in its container, dollop spoonfuls of the cooled strawberry sauce over the top. Use a knife or skewer to gently swirl the sauce into the base, creating ribbons of pink throughout the white vanilla. Avoid over-swirling, or the colors will muddy. This method adds a beautiful visual appeal and a refreshing fruity contrast to the rich no churn vanilla ice cream.
Coffee Infused No-Churn Vanilla Ice Cream
For coffee lovers, infusing the no churn vanilla ice cream base with coffee flavor is a delightful variation. You have a couple of options: you can dissolve 1-2 tablespoons of instant espresso powder in a tablespoon of hot water and let it cool, then fold it into the base along with the condensed milk. Alternatively, you can steep about 1/4 cup of coffee beans (lightly crushed) in the warm cream step alongside the vanilla bean, then strain them out before whipping.
A third option is to fold in about 1/4 to 1/2 cup of strongly brewed, cooled coffee or cold brew concentrate. Start with a smaller amount and taste a tiny bit of the base (before freezing) if you like, to gauge the coffee intensity. The richness of the vanilla bean still complements the coffee flavor beautifully. This variation creates a sophisticated coffee-vanilla no churn vanilla ice cream perfect for an afternoon treat or an after-dinner dessert.
Storing Your Homemade No-Churn Vanilla Ice Cream
Proper Storage for Optimal Texture and Flavor
Proper storage is crucial to maintain the smooth texture and delicious flavor of your homemade no churn vanilla ice cream. The best way to store it is in an airtight container. This minimizes exposure to air, which is the primary cause of freezer burn and the formation of large ice crystals on the surface. Plastic, glass, or metal containers designed for freezing work well.
Before sealing the container, press a layer of plastic wrap or parchment paper directly onto the surface of the ice cream. This creates an extra barrier against air contact. Place the lid on tightly. Storing the container towards the back of the freezer, where temperatures are most consistent and coldest, is also beneficial. Avoid storing it in the freezer door, which experiences frequent temperature fluctuations every time the door is opened. Following these steps helps ensure your no churn vanilla ice cream stays creamy and fresh for longer.
How Long Does No-Churn Ice Cream Last?
When stored properly in an airtight container with a surface cover, homemade no churn vanilla ice cream generally maintains its best quality for about 1 to 2 months. After this time, while it may still be safe to eat, the texture can start to degrade, potentially becoming icier, and the flavors might diminish.
The lack of stabilizers and preservatives found in many commercial ice creams means homemade versions typically have a shorter optimal shelf life. Freezing temperatures help preserve the ice cream, but exposure to air and temperature fluctuations over time will eventually impact its quality. For the most enjoyable experience, aim to consume your no churn vanilla ice cream within the first month or so after making it.
Troubleshooting Common No-Churn Ice Cream Issues
Ice Crystals Forming: Causes and Solutions
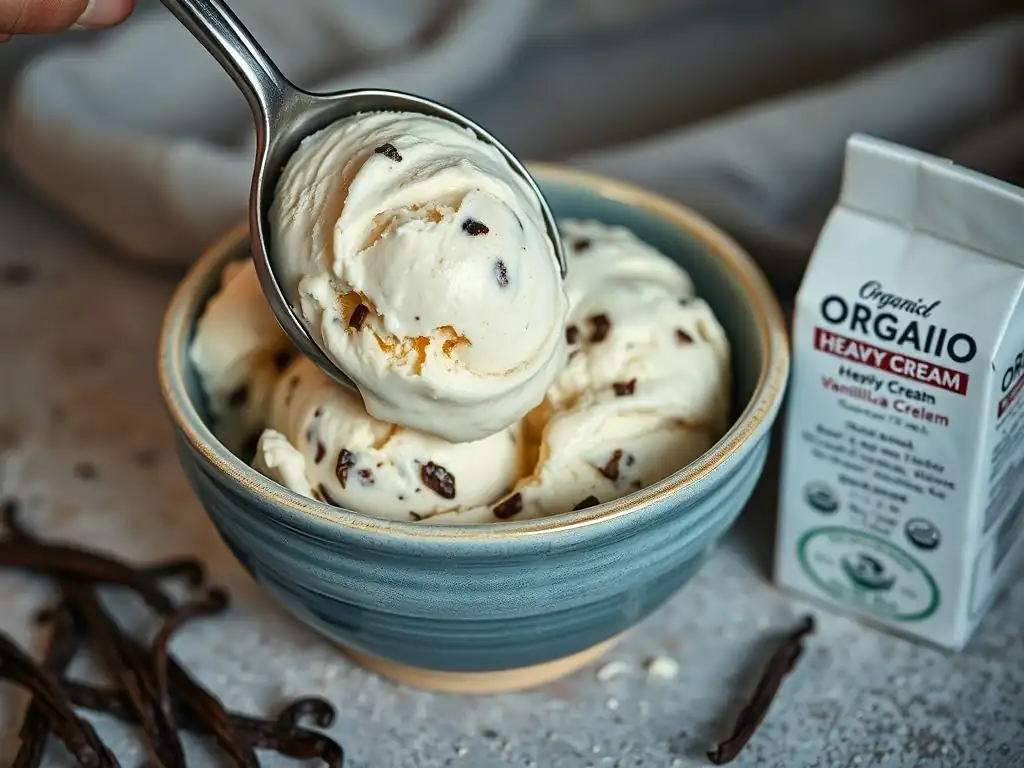
One of the most common issues with no churn vanilla ice cream is the formation of ice crystals, which results in a less smooth, grainy texture. This usually happens due to too much water in the mixture, insufficient fat/sugar to interfere with crystallization, or improper freezing/storage. Causes can include not whipping the cream to stiff enough peaks (meaning less air and a higher water-to-air ratio), using a low-fat cream, or temperature fluctuations in the freezer.
To minimize ice crystals:
- Ensure heavy cream is whipped to stiff peaks.
- Use sweetened condensed milk as specified.
- Fold ingredients gently to preserve air.
- Freeze in an airtight container.
- Press plastic wrap directly onto the surface before lidding.
- Store in the coldest part of the freezer.
- Avoid frequent thawing and refreezing.
If you do notice a few small crystals, letting the ice cream sit at room temperature for a few minutes before scooping can sometimes help.
Ice Cream Too Soft: Tips for a Firmer Texture
If your no churn vanilla ice cream is too soft and doesn't freeze to a firm, scoopable consistency, it might be due to insufficient freezing time or temperature, or potentially an imbalance in the recipe (though less common with standard ratios). Ensure you are using heavy cream (at least 36% fat) and not a lighter cream.
Make sure your freezer is set to 0°F (-18°C) or colder. Allow the ice cream to freeze for the full recommended time, at least 6-8 hours, preferably overnight. If you've added a significant amount of liquid mix-ins (like extra extract or a watery sauce), this could also contribute to softness. For a firmer set, ensure adequate freezing time and temperature. If consistently soft, double-check ingredient ratios in your recipe compared to standard no churn vanilla ice cream proportions (typically 2 parts whipped heavy cream to 1 part sweetened condensed milk by volume or weight).
Vanilla Flavor Not Strong Enough: How to Boost the Taste
If your no churn vanilla ice cream lacks a strong vanilla punch, the issue likely lies with the quality or quantity of vanilla used. Using a dried-out vanilla bean, not scraping enough seeds, or relying solely on a low-quality extract can result in a weak flavor.
To boost the vanilla taste:
- Use a fresh, plump, high-quality vanilla bean.
- Ensure you scrape out all the seeds and infuse them (and the pod) in warm cream as described.
- Alternatively, use a high-quality pure vanilla extract. For a standard batch, 1.5 to 2 teaspoons of a good extract can provide noticeable flavor, though it won't have the speckles or depth of the bean.
- Consider adding a tiny pinch of salt to the base; salt can enhance sweetness and amplify flavors, including vanilla.
- You could also add a small amount (1/4 teaspoon) of vanilla bean paste in addition to or instead of the bean/extract for concentrated flavor and speckles. Experimenting with these options can help you achieve the perfect vanilla intensity in your no churn vanilla ice cream.
Serving Suggestions for Your Vanilla Bean Ice Cream
Perfect Pairings: Desserts to Serve Alongside
Homemade no churn vanilla ice cream is a versatile dessert component that pairs beautifully with a wide range of warm and cold treats. Its creamy texture and classic flavor make it an excellent accompaniment to many baked goods. Serve a generous scoop alongside a slice of warm apple pie or a molten chocolate lava cake for a delightful hot-and-cold contrast.
It's also the ideal partner for fruit-based desserts like a berry crumble, peach cobbler, or grilled pineapple. The simple elegance of the vanilla complements the sweetness and slight tartness of the fruit. Consider serving it with a warm brownie or a slice of pound cake. A single scoop of your smooth no churn vanilla ice cream elevates these simple desserts into something truly special, adding richness and a cooling element.
Creative Toppings for a Delicious Sundae
While delicious on its own, your homemade no churn vanilla ice cream is the perfect base for building an epic sundae. Get creative with toppings to add layers of flavor and texture. Classic choices include hot fudge sauce, caramel sauce, or strawberry sauce (like the swirl variation mentioned earlier).
Beyond the classics, consider toppings like toasted nuts (pecans, walnuts, almonds), fresh berries, sliced bananas, whipped cream, or sprinkles. For a more gourmet sundae, try toasted coconut flakes, chopped cookies (like Oreos or shortbread), crushed candies, or even a drizzle of high-quality olive oil and a sprinkle of flaky sea salt for a sophisticated twist. The neutral yet rich profile of the no churn vanilla ice cream allows these various toppings to shine.
Conclusion: Enjoy Your Effortless Homemade Ice Cream
Baking Made Easy: No-Churn Vanilla Ice Cream Success!
Congratulations! You've successfully made delicious, creamy homemade ice cream without needing any special equipment. This no churn vanilla ice cream recipe proves that creating delightful frozen treats from scratch can be incredibly simple and accessible. By combining just a few key ingredients and using basic techniques like whipping and folding, you've achieved a result that rivals churned ice cream in terms of texture and flavor.
This method demystifies the process, making it perfect for beginners and experienced bakers alike. It's a testament to the fact that sometimes, the simplest approaches yield the most satisfying results. Enjoy the pride of scooping your own smooth, intensely vanilla-flavored creation, knowing you made it with ease right in your kitchen. This no churn vanilla ice cream is a sweet victory for effortless homemade desserts.
We hope you absolutely love your homemade no churn vanilla ice cream! We'd be thrilled to see your creations and hear about your experience. Did you add any fun mix-ins? What did you serve it with? Sharing your baking and dessert successes inspires others in our community to try new things.
Don't hesitate to spread the word about how easy and rewarding it is to make no churn vanilla ice cream. This recipe is a fantastic starting point for countless variations and a perfect way to cool down on a warm day or elevate any dessert spread. Keep exploring the world of easy baking and dessert making with BakeWithEase – we're here to help you find joy in every scoop and slice!
Frequently Asked Questions
What makes this vanilla ice cream "no churn"?
This recipe doesn't require an ice cream maker. Instead, it relies on a combination of whipped cream and condensed milk to create a smooth, creamy texture without churning.
What ingredients are essential for this no-churn vanilla ice cream?
The key ingredients are heavy cream, sweetened condensed milk, vanilla extract (or vanilla bean paste), and a pinch of salt. These are the foundation for the ice cream's flavor and texture.
How long does it take for the no-churn ice cream to freeze properly?
It typically takes at least 6-8 hours in the freezer for the ice cream to fully set. For best results, freeze overnight.
Can I add other flavors or mix-ins to this vanilla ice cream base?
Absolutely! Once the base is prepared, you can fold in ingredients like chocolate chips, fruit, nuts, or cookie pieces. Just be sure to add them before freezing, and don't add too much, or it will be difficult to freeze.
How should I store the no-churn vanilla ice cream?
Store the ice cream in an airtight container in the freezer to prevent freezer burn. It's best consumed within 2-3 weeks for optimal flavor and texture.
Final Reflection: The Sweet Simplicity of Homemade Happiness
The pursuit of creamy, delicious ice cream doesn't require a fancy machine; it simply requires a little patience and a whole lot of love. This article demonstrated that crafting a truly exceptional vanilla bean ice cream base is entirely achievable at home, without the need for specialized equipment. The ease and accessibility of this recipe challenge the notion that homemade ice cream is a daunting task, opening up a world of culinary creativity to everyone.
The enduring appeal of homemade ice cream transcends mere indulgence; it's a connection to simpler times, a celebration of fresh ingredients, and a testament to the power of creating something delicious with your own hands. The best things in life are homemade.
This sentiment rings truer than ever when considering the satisfaction derived from transforming simple ingredients into a luxurious treat. The process itself becomes a meditative experience, a mindful escape from the everyday rush, and the final product, a symbol of personal accomplishment and shared joy.
Now, I invite you to embrace the simplicity and satisfaction of crafting your own vanilla bean ice cream base. Don't be intimidated by the seemingly complex world of ice cream making. Experiment with different extracts, mix-ins, and flavor combinations. Share your creations with loved ones, and savor the sweet taste of success—and homemade happiness. The journey from simple ingredients to a delightful dessert is a rewarding one, and I hope this article has inspired you to embark on it.
Unlock Your Inner Ice Cream Maestro!
Thanks for taking the time to explore the world of creamy, homemade ice cream! We hope you've gained the confidence to ditch the ice cream maker and embrace the simplicity of this recipe. Now it’s time to put your newfound skills to the test!
- Whip up a batch of this delicious vanilla bean base: Use the recipe as a springboard—experiment with different mix-ins like fresh berries, chocolate chips, or even cookie dough! Let your creativity flow!
- Share your ice cream creations: Tag us on social media with your photos – we'd love to see your culinary masterpieces!
- Challenge a friend to a homemade ice cream-off: See who can come up with the most inventive flavor combination!
Ready to transform your kitchen into a delightful ice cream parlor? What unique flavor adventure will you embark on next?