
Deep Dive into Yeast Life Cycle During Baking


Welcome to BakeWithEase, your trusted guide to the wonderful world of baking! Ever wondered about the magic behind perfectly risen bread? Prepare to unlock the secrets! This article takes a deep dive into the yeast fermentation baking process details, exploring the fascinating life cycle of yeast and its crucial role in creating light, airy, and delicious baked goods. Intrigued? Discover how understanding this process can transform your baking from good to extraordinary – let's get started!
- Understanding Yeast Fermentation in Baking
- Stages of the Yeast Life Cycle: A Baker's Perspective
- Key Factors Influencing Yeast Activity During Baking
- Troubleshooting Yeast Fermentation Problems
- Optimizing Your Baking with Yeast Knowledge
-
Frequently Asked Questions
- How does yeast fermentation contribute to the baking process?
- What are the key factors that influence the rate of yeast fermentation?
- What happens to the yeast during the baking stage itself?
- What are the different types of yeast used in baking, and how do they differ?
- Can I control the speed of fermentation in my baking?
- Final Reflection: The Unseen Powerhouse of Baking
- Unlock Your Baking Potential: Master the Yeast!
Understanding Yeast Fermentation in Baking
The Role of Yeast in Bread Making
Yeast, a single-celled microorganism belonging to the fungus family, plays an absolutely crucial role in the creation of most leavened baked goods, particularly bread. Its primary function is to consume sugars present in the dough and, through a process called fermentation, produce carbon dioxide gas and alcohol. This gas gets trapped within the elastic network of gluten in the dough, causing it to rise.
Without yeast, bread would be flat, dense, and lacking the characteristic airy texture we all love. Beyond leavening, yeast fermentation also contributes significantly to the complex flavors and aromas that develop during both the proofing stage and the baking process itself.
The magic of yeast is its ability to transform simple ingredients – flour, water, and a little sugar – into something truly spectacular. As the yeast population thrives and metabolizes, it releases organic acids and other compounds that enhance the dough's flavor profile. Think of the subtle tang in a well-fermented loaf or the rich aroma filling your kitchen as it bakes.
This development of flavor is an integral part of the overall yeast fermentation baking process details, contributing just as much as the physical rise to the final quality of the baked good. Understanding this role is the first step to mastering yeast-leavened baking.
Yeast Fermentation Baking Process Details: An Overview
The yeast fermentation baking process details involve a series of interconnected stages, starting from the moment yeast is activated until it eventually dies in the oven. Broadly, this process can be broken down into activation, fermentation (often called proofing or rising), and oven spring. During activation, dormant yeast cells are brought back to life with warmth and moisture. The fermentation stage is where the bulk of the gas production occurs, causing the dough to increase significantly in volume. This is the core period where the yeast's metabolic activity shapes the dough's structure and flavor.
Following the fermentation, the dough is shaped and undergoes a final rise (secondary fermentation or proofing). Finally, when the dough hits the hot oven, there's a rapid burst of activity known as oven spring, where residual gas expands rapidly before the yeast is killed by the heat. Mastering the timing and conditions of these stages is key to successful baking.
The temperature of the dough, the availability of sugars, the amount of moisture, and even the salt concentration all influence the rate and effectiveness of the yeast fermentation process. Paying close attention to these variables allows bakers to control the outcome and achieve consistent, delicious results.
Stages of the Yeast Life Cycle: A Baker's Perspective
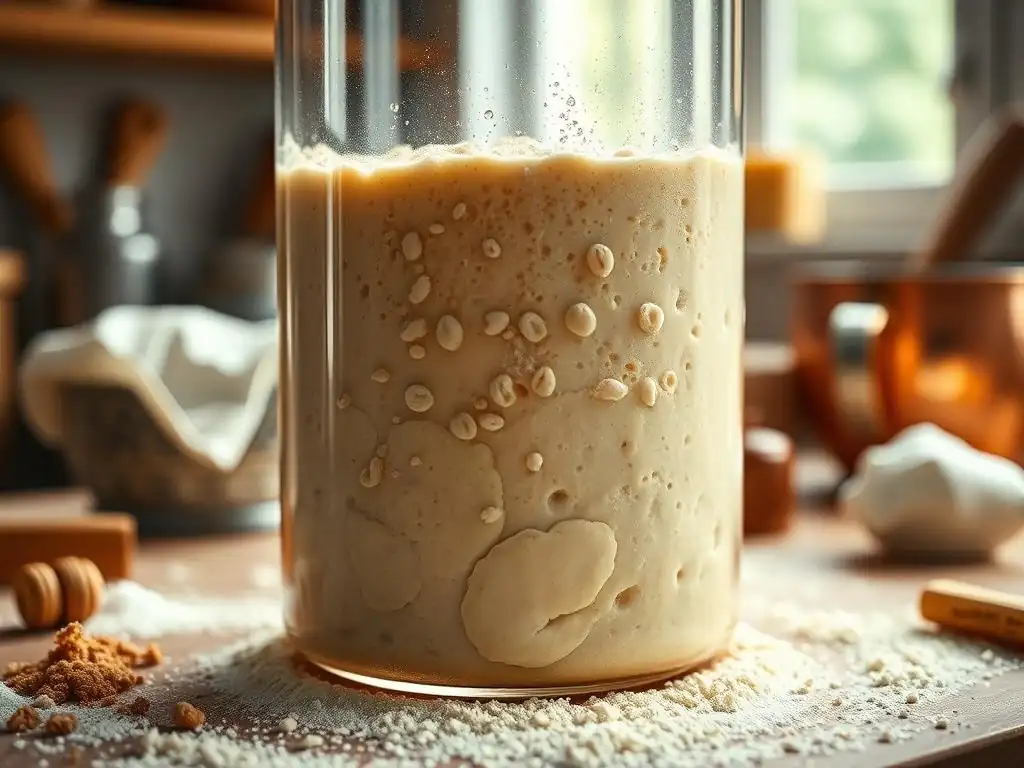
Dormant Stage: Activating Yeast for Baking
Yeast, in its packaged form, is essentially in a state of suspended animation – dormant. Whether it's dry granules or a compressed cake, the yeast cells are alive but inactive, waiting for the right conditions to wake up. This dormancy allows yeast to be stored for extended periods. For bakers, the first step in the yeast fermentation baking process details is always activation. This involves providing the yeast with warmth and hydration, typically by mixing it with warm liquid (water or milk) within a specific temperature range, often between 100°F and 115°F (38°C to 46°C) for active dry yeast.
Once rehydrated and warmed, the yeast cells begin to absorb moisture and nutrients. They start their metabolic processes, essentially waking up and preparing to reproduce and consume sugars. You'll often see visual cues that activation is successful, such as the mixture becoming foamy or bubbly within 5-10 minutes. This foam is a sign that the yeast is alive and actively producing carbon dioxide. Skipping or improperly executing this activation step, especially with active dry yeast, can lead to slow or failed fermentation, resulting in a dense loaf because the yeast wasn't ready to perform its leavening function effectively.
Different Types of Yeast: Dry, Fresh, and Instant
Bakers commonly encounter three main types of commercial yeast, each requiring slightly different handling during the activation phase of the yeast fermentation baking process details.
- Active Dry Yeast: This is the most common type for home bakers. It consists of dehydrated yeast granules that are dormant and require rehydration in warm liquid (typically 100-115°F / 38-46°C) before being added to the rest of the ingredients. The outer layer of the granules needs to dissolve for the yeast inside to become active.
- Instant Yeast: Also dehydrated granules, but smaller and more porous than active dry. Instant yeast does not require pre-hydration and can be mixed directly with the dry ingredients. It's designed to be faster-acting and more reliable, hence "instant." Its optimal temperature range in dough is similar, but it's less sensitive to cooler liquids.
- Fresh Yeast (Cake Yeast): This is a moist, block form of yeast that is highly perishable and must be refrigerated. It's very active and dissolves easily in lukewarm liquid (around 80-90°F / 27-32°C). Because it's already hydrated, it starts working quickly once mixed into dough. Fresh yeast is often favored by professional bakers for its consistent performance and subtle flavor contribution.
Choosing the right type of yeast depends on the recipe and desired outcome. While instant yeast is convenient and speeds up the yeast fermentation process, some bakers prefer the slightly slower, more controlled rise and nuanced flavor development offered by active dry or fresh yeast.
Hydration and Temperature: Key Factors for Yeast Activation
Hydration is absolutely critical for activating dormant yeast cells. Water or another liquid serves as the medium for the yeast to absorb moisture, swell, and begin metabolic activity. Without sufficient liquid, the yeast cells cannot properly rehydrate and will remain dormant or become sluggish. The type and amount of liquid used (e.g., water, milk, or even juice) can also subtly affect the dough, but the primary role for activation is providing that essential moisture.
Temperature is equally vital, acting as the catalyst for yeast activity. Too cold, and the yeast remains sluggish or dormant. Too hot, and the yeast cells can be killed. Active dry yeast typically requires a warmer liquid (100-115°F or 38-46°C) to break its outer shell and rehydrate effectively.
Instant yeast is more forgiving and can be added directly to dry ingredients, relying on the dough's overall temperature (ideally 75-85°F or 24-29°C) for activation and fermentation. Fresh yeast prefers a slightly cooler liquid (80-90°F or 27-32°C). Maintaining the correct temperature range during the initial mixing and the subsequent proofing stage is paramount to ensure the yeast fermentation baking process details unfold successfully.
Exponential Growth Phase: The Magic of Fermentation
Once activated and incorporated into the dough, yeast enters its most productive phase for baking: exponential growth and fermentation. Provided with a food source (sugars) and a favorable environment (warmth, moisture), the yeast cells begin to reproduce rapidly through budding. More importantly for baking, they consume the available sugars and produce carbon dioxide (CO₂) gas and ethanol (alcohol) as byproducts.
This gas is trapped within the gluten network of the dough, causing it to expand – this is the first rise, or bulk fermentation. The rate of gas production is directly related to the yeast population and its activity level, which is heavily influenced by temperature.
During this phase of the yeast fermentation baking process details, the dough visibly increases in volume, sometimes doubling or even tripling in size depending on the recipe and conditions. This period isn't just about volume; the alcohol and organic acids produced by the yeast contribute significantly to the dough's flavor development.
Longer, slower fermentation at cooler temperatures (like in the refrigerator) allows for more complex flavors to develop compared to a rapid warm fermentation. A typical first rise for a standard bread dough might take 1 to 2 hours at room temperature (around 75°F or 24°C), while a cold fermentation could take 8 to 12 hours or even longer.
Sugar Consumption and Carbon Dioxide Production
Yeast primarily feeds on simple sugars like glucose and fructose. Flour contains complex carbohydrates (starches), which yeast cannot directly consume. However, enzymes present in the flour itself (amylase) and also produced by the yeast break down these starches into simpler, fermentable sugars. This enzymatic activity is crucial, providing a continuous food source for the yeast throughout the fermentation process. Adding a small amount of sugar to a bread recipe initially gives the yeast a readily available food source to kickstart the process, especially important when using leaner flours with less inherent sugar.
As yeast metabolizes these sugars, it performs anaerobic respiration, producing carbon dioxide and ethanol. The CO₂ gas is what creates the bubbles that leaven the dough. A strong, well-developed gluten structure is essential to trap this gas effectively.
If the gluten is weak or underdeveloped, the gas will escape, resulting in poor rise and a dense crumb. The amount of sugar available and the activity of the enzymes breaking down starch directly impact how much gas is produced and thus how much the dough rises during the yeast fermentation baking process details. Too much sugar (above ~6-8% of flour weight) can actually inhibit yeast activity due to osmotic pressure, while too little might limit gas production later in fermentation.
The Impact of Gluten Development During Fermentation
Gluten development is intrinsically linked to the yeast fermentation process. Gluten, formed when proteins in flour (glutenin and gliadin) hydrate and are worked (kneaded or mixed), creates an elastic network capable of trapping the carbon dioxide gas produced by the yeast. As the yeast ferments and produces gas, this network stretches and expands, allowing the dough to rise. The constant internal pressure from the rising dough also helps to further strengthen and align the gluten strands over time, especially during longer fermentation periods.
Furthermore, the acids produced by yeast during fermentation contribute to breaking down the gluten network slightly, which can improve the extensibility (stretchiness) of the dough, making it easier to shape. However, if fermentation goes on for too long (over-fermentation), these acids can weaken the gluten structure excessively, leading to collapse.
Thus, the yeast fermentation baking process details are not just about gas production, but also about the dynamic interaction between the biological activity of yeast and the physical development and subsequent breakdown of the gluten network. Proper gluten development before and during fermentation is crucial for a well-risen loaf with a good texture.
Stationary Phase: Reaching Peak Fermentation
After the exponential growth phase, the yeast population and gas production rate begin to plateau. This is the stationary phase, where the readily available sugars might be dwindling, and the accumulation of ethanol and other metabolic byproducts starts to inhibit yeast activity. The dough has typically reached near its maximum volume for the first rise. While gas is still being produced, the rate slows down significantly. This stage represents peak fermentation – the dough is fully proofed and ready to be gently shaped and prepared for the final rise or baking.
Recognizing this stage is critical in the yeast fermentation baking process details. Over-proofing can lead to dough collapse, while under-proofing results in a dense loaf. The stationary phase is often characterized by the dough looking significantly larger, feeling airy and light, and passing the "poke test" (gently pressing a finger into the dough; if the indentation slowly springs back halfway, it's usually ready). The aroma will be pleasantly yeasty and slightly alcoholic, not overly sour or pungent.
Recognizing Optimal Fermentation: Visual and Aromatic Cues
Visual cues are your first indicator that the dough is reaching optimal fermentation. It should have significantly increased in volume, often doubling or even tripling, depending on the recipe's target proofing level. The surface should appear nicely rounded and possibly have small bubbles visible just beneath the surface. The dough should look and feel airy and light when gently handled.
Aromatic cues are also important during the yeast fermentation baking process details. A properly fermented dough will have a pleasant, slightly sweet, and yeasty smell. It might have a hint of alcohol due to the ethanol byproduct. An overly sharp, vinegary, or strongly alcoholic smell can indicate that the dough is moving towards or has entered the decline phase (over-fermentation). Learning to trust your senses – sight, touch, and smell – is key to mastering the timing of fermentation.
- Visual Checklist for Optimal Proofing:
- [ ] Dough has significantly increased in volume (check recipe for target).
- [ ] Surface is rounded and appears airy.
- [ ] Poke test: Indentation springs back slowly halfway.
Avoiding Over-Proofing: Maintaining Dough Integrity
Over-proofing occurs when the dough ferments for too long, moving past the stationary phase and into decline. As readily available sugars are depleted, and waste products like ethanol and organic acids accumulate, the yeast activity slows dramatically. More importantly, the acids start to break down the gluten structure excessively. This weakens the dough's ability to hold the gas produced, leading to collapse. The dough might look inflated initially but will be fragile and prone to deflating when handled.
To avoid over-proofing during the yeast fermentation baking process details, it's crucial to monitor the dough rather than strictly adhering to time alone, as fermentation speed varies with temperature and yeast activity. Use the visual and tactile cues mentioned earlier. If you suspect the dough is approaching over-proofing but aren't ready to bake, you can often slow down the process by refrigerating the dough.
This dramatically reduces yeast activity. If dough has already slightly over-proofed, you might try gently reshaping it and giving it a very short second proof, but severely over-proofed dough is difficult to salvage and often results in a dense, poorly structured loaf with a strong, off-flavor.
Decline Phase: The Consequences of Over-Fermentation
The decline phase in the yeast life cycle occurs when fermentation continues past its optimal point. The yeast runs out of easily accessible food (fermentable sugars), and the environment becomes increasingly hostile due to the accumulation of metabolic byproducts, particularly ethanol and organic acids. Yeast activity slows drastically and eventually stops as the cells start to die off. This marks the point of over-fermentation, which has significant negative consequences for the dough and the final baked product.
In the decline phase, the dough's structure begins to deteriorate. The gluten network, weakened by the prolonged exposure to acids and the lack of new gas production to keep it stretched, starts to break down. The dough may begin to deflate or flatten as the trapped gas escapes from the weakened structure. The pleasant yeasty aroma gives way to a sharper, more alcoholic, or overly sour smell. Understanding this phase is vital for bakers to prevent it, as reversing its effects is difficult.
Understanding the Effects of Yeast Starvation
Yeast starvation is a primary driver of the decline phase in the yeast fermentation baking process details. As the yeast consumes the simple sugars initially present and the enzymes work to break down starches into more sugars, the supply can eventually dwindle, especially in long fermentations or lean doughs with little added sugar. When the food source becomes scarce, yeast activity slows down. They produce less CO₂, leading to reduced leavening power.
Beyond just stopping gas production, starvation contributes to the accumulation of undesirable flavors. When stressed by lack of food, yeast can produce different metabolic byproducts than during active fermentation. This, combined with the continued enzymatic breakdown of flour components, can lead to off-flavors and aromas in the dough and finished bread. Preventing yeast starvation, often through careful timing or sometimes by incorporating a small amount of additional sugar in very long ferments (though this is less common in traditional bread making), is key to maintaining optimal yeast activity throughout the intended fermentation period.
How Over-Fermentation Affects Baked Goods
Over-fermentation has several detrimental effects on the final baked product. Structurally, bread made from over-proofed dough is often dense, heavy, and can have a coarse, uneven crumb structure. The weakened gluten cannot support the dough during oven spring, leading to a poor rise in the oven and potentially collapse. The crust might be pale and lack the desirable browning because the yeast has consumed most of the available sugars needed for the Maillard reaction.
Flavor-wise, over-fermented bread can have an overly strong, sometimes unpleasant sour or alcoholic taste and smell. This is due to the excessive buildup of organic acids and ethanol. While some tang is desirable in certain breads like sourdough (which uses different microorganisms), in a standard yeast bread, it's usually considered a fault. Recognizing the signs of over-fermentation in the dough stage of the yeast fermentation baking process details is crucial to avoid these negative outcomes and achieve a well-risen, flavorful loaf.
Key Factors Influencing Yeast Activity During Baking
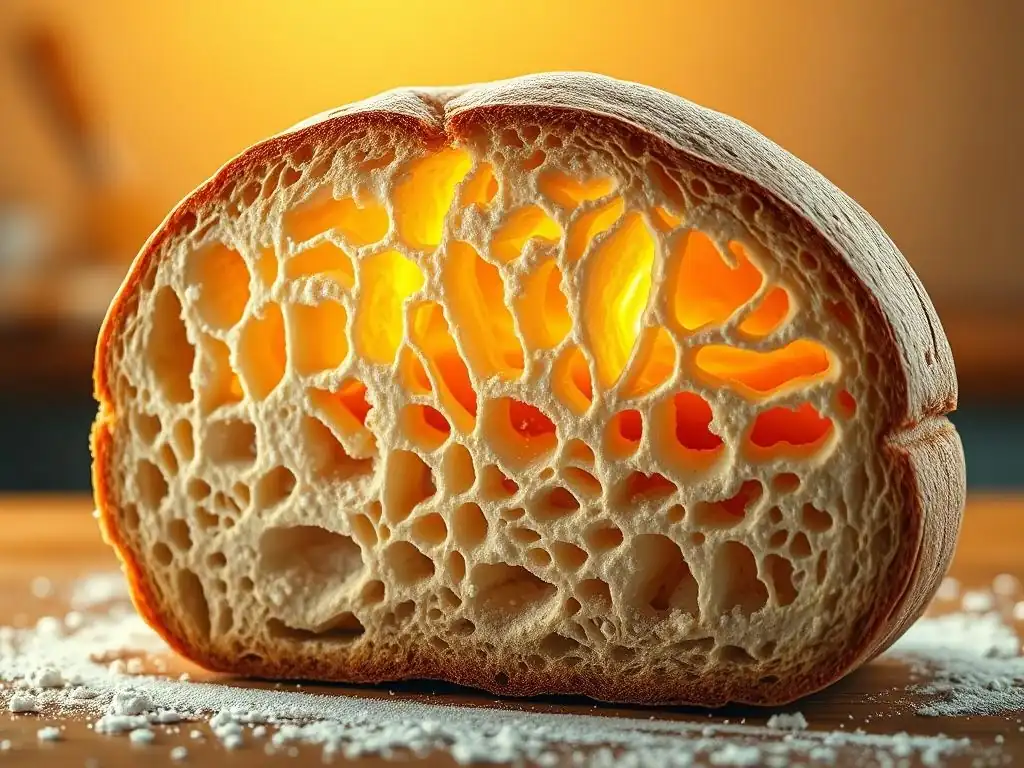
Temperature Control: Optimizing Yeast Performance
Temperature is perhaps the single most influential factor in controlling the rate of the yeast fermentation baking process details. Yeast activity is highly sensitive to temperature changes. Within a certain range, increasing the temperature speeds up fermentation, while decreasing it slows it down. This sensitivity allows bakers to manipulate proofing times to fit their schedule and desired flavor development. Understanding the optimal temperature zones for yeast is fundamental to successful baking.
Maintaining a consistent temperature during fermentation is also important for even rising. Fluctuations can lead to uneven gas production and dough development. This is why many bakers use proofing boxes or specific locations in their homes (like a slightly warm oven with the light on) to create a stable environment. By controlling temperature precisely, bakers can ensure the yeast works at the desired pace, leading to predictable and consistent results batch after batch.
The Ideal Temperature Range for Yeast Fermentation
Yeast is most active within a specific temperature range. For most common bread yeasts (like Saccharomyces cerevisiae), the ideal temperature for fermentation is generally considered to be between 75°F and 85°F (24°C to 29°C). Within this range, yeast produces gas at a vigorous pace, leading to a relatively fast rise (e.g., 1-2 hours for a standard loaf). This is often the target temperature for bulk fermentation and proofing in many standard recipes.
Temperatures outside this range significantly impact the yeast fermentation process details. Below 70°F (21°C), yeast activity slows considerably, leading to much longer proofing times (e.g., 4-12 hours or more in the refrigerator at 35-40°F / 2-4°C). While slower, cold fermentation often results in superior flavor development. Above 95°F (35°C), fermentation accelerates rapidly, potentially leading to over-proofing and off-flavors. Temperatures above 130-140°F (54-60°C) are lethal to yeast, which is why fermentation stops in the oven.
How Temperature Impacts Fermentation Rate
The relationship between temperature and fermentation rate is roughly exponential within the yeast's active range. For example, raising the dough temperature by just 10°F (around 5-6°C) within the optimal range can potentially double the rate of gas production. This is why a dough that takes 2 hours to proof at 75°F (24°C) might take only 1 hour at 85°F (29°C). Conversely, dropping the temperature to 50°F (10°C) could extend the proofing time to 6-8 hours or more.
This sensitivity allows bakers great control over the yeast fermentation baking process details. Need bread ready faster? A warmer environment will speed things up. Want to develop more complex flavors or proof overnight? A cooler temperature is your friend. It's a powerful lever for bakers to pull, allowing them to manage their schedule and the characteristics of the final bread. However, rapid fermentation at very high temperatures can sometimes compromise flavor and texture compared to a moderate pace.
Sugar Availability: Fueling the Fermentation Process
Sugar is the primary food source that fuels the yeast fermentation baking process details. Yeast consumes simple sugars (monosaccharides like glucose and fructose, and disaccharides like sucrose and maltose) and converts them into carbon dioxide and ethanol. Flour itself contains some fermentable sugars, and enzymes in flour (amylase) break down starches into more sugars over time, providing a sustained food supply during longer ferments.
Adding sugar to a bread recipe serves multiple purposes regarding yeast activity. Firstly, it provides an immediate, readily available food source, helping to kickstart fermentation quickly, especially useful with leaner doughs or slower yeasts. Secondly, residual sugar that isn't consumed by the yeast contributes to crust browning during baking (via the Maillard reaction and caramelization) and adds sweetness to the final product. The amount of sugar added directly impacts the initial fermentation rate and the amount of residual sugar left for browning and flavor.
Simple Sugars vs. Complex Carbohydrates
Yeast directly consumes simple sugars. These include glucose and fructose (found in honey, fruits) and disaccharides like sucrose (table sugar) and maltose (produced from starch breakdown). When sucrose is added to dough, yeast produces an enzyme called invertase, which breaks it down into glucose and fructose, making it consumable. Maltose, produced from starch by amylase enzymes, is also readily consumed by yeast.
Complex carbohydrates like starch (polysaccharides) cannot be directly consumed by yeast. They must first be broken down into simpler sugars by enzymes. Flour naturally contains amylase enzymes. During the dough mixing and resting periods, these enzymes begin to hydrolyze starch into maltose and other fermentable sugars, providing a slower, sustained release of food for the yeast throughout the yeast fermentation process. This enzymatic action is particularly important in doughs with little or no added sugar, ensuring the yeast has fuel for the entire proofing period.
Adjusting Sugar Levels for Different Baking Applications
The amount of sugar added to a dough recipe varies significantly depending on the type of baked good. Lean doughs, like classic French bread or pizza dough, contain very little or no added sugar (typically 0-2% of flour weight). They rely primarily on the sugars produced from starch breakdown by enzymes to fuel the yeast fermentation baking process details. This results in a less sweet crumb and a crust that browns primarily from the Maillard reaction.
Rich doughs, such as brioche, cinnamon rolls, or sweet breads, contain higher levels of added sugar (often 5-20% or more). While this provides ample food for the yeast, very high sugar concentrations (above ~8-10%) can actually slow down fermentation due to osmotic pressure, drawing water out of the yeast cells. In these cases, more yeast or a longer fermentation time might be needed. The higher sugar also contributes significantly to sweetness, moisture retention, and crust browning, resulting in softer, sweeter baked goods.
Moisture Levels: Creating the Perfect Environment
Moisture is essential for the yeast fermentation baking process details. Yeast cells require water to become active from their dormant state and to carry out their metabolic processes. Water acts as the medium for transporting sugars into the yeast cells and transporting waste products (like CO₂ and ethanol) out. Proper hydration of the dough is crucial for creating an environment where yeast can thrive.
The hydration level of a dough (the ratio of water to flour) significantly impacts the dough's consistency and, indirectly, the yeast's environment. Wetter doughs (higher hydration, e.g., 70%+ water to flour) are typically stickier and slacker, but they can sometimes ferment slightly faster initially because the sugars are more readily accessible to the yeast cells in the more fluid environment.
Drier doughs (lower hydration, e.g., 50-60%) are stiffer and require more kneading but provide a denser structure for trapping gas once fermented. Ensuring adequate moisture is available to the yeast throughout the process is a key factor in successful dough development and fermentation.
Hydration Ratios and Dough Consistency
Hydration ratio is a fundamental concept in baking, expressed as the weight of water divided by the weight of flour, multiplied by 100 to get a percentage. A standard sandwich loaf might have a hydration of 60-65%, while a rustic artisan loaf or ciabatta could be 75% or higher. This ratio determines the dough's consistency, ranging from stiff and easy to handle at lower hydrations to very wet and challenging to work with at high hydrations.
The hydration level influences the yeast fermentation baking process details indirectly. In higher hydration doughs, the yeast cells are perhaps slightly more mobile and have easier access to dissolved sugars. The resulting dough is often more extensible, allowing it to expand significantly from the internal pressure of CO₂. Lower hydration doughs provide a tighter gluten structure, which, while requiring more effort to develop, can trap gas effectively for a good rise in a denser loaf. Bakers choose hydration based on the desired bread style and their comfort level working with different dough consistencies.
Preventing Dry or Sticky Dough
Achieving the correct dough consistency is vital for optimal yeast activity and overall dough handling. Dough that is too dry can inhibit yeast activity because there isn't enough moisture for the cells to function efficiently, potentially leading to a slow or incomplete yeast fermentation process. Dry doughs also develop gluten more slowly and can result in a dense, dry final product.
Conversely, dough that is too sticky, usually from excessive hydration, can be difficult to handle and shape. While very wet doughs can ferment well, their weak structure can make it hard to trap gas effectively, sometimes leading to a less airy crumb or collapse during shaping or baking.
Maintaining the hydration level specified in a recipe, or adjusting it slightly based on the flour's absorption properties, is key to providing the yeast with the right environment and ensuring manageable dough consistency throughout the yeast fermentation baking process details. Adding flour gradually during mixing helps prevent accidentally making the dough too wet.
Salt Concentration: Balancing Yeast Activity
Salt ( Sodium Chloride) is a ubiquitous ingredient in bread making, playing several critical roles: it enhances flavor, strengthens the gluten structure, and most importantly for our discussion, it regulates yeast activity. Salt has a complex relationship with yeast; while essential for overall bread quality, it is also a natural inhibitor of yeast fermentation.
Salt works by drawing water out of the yeast cells via osmosis, slowing down their metabolic processes and gas production. This inhibitory effect is crucial for controlling the rate of the yeast fermentation baking process details. Without salt, yeast would ferment uncontrollably fast, leading to rapid over-proofing, weakened gluten, and poor flavor development. Salt acts like a brake, allowing for a slower, more controlled rise that benefits both structure and flavor.
The Role of Salt in Controlling Fermentation
The inhibitory effect of salt on yeast is directly related to its concentration in the dough. At typical levels used in bread (around 1.8% to 2.2% of flour weight), salt slows fermentation to a manageable pace without stopping it. This controlled pace allows time for desirable flavor compounds to develop and for the gluten structure to strengthen adequately to support the rise.
Adding salt at the correct stage is also important. Often, salt is added after the initial mixing of flour and water, sometimes even after a short autolyse period (a rest period allowing flour to hydrate). Adding salt too early, especially directly onto the yeast or before the flour is fully hydrated, can shock or damage the yeast cells, significantly hindering the yeast fermentation process. It's best to add salt once other ingredients are somewhat incorporated or dissolved, ensuring it's evenly distributed throughout the dough without directly overwhelming pockets of yeast.
Proper Salt Measurement for Optimal Results
Precise measurement of salt is vital in baking, not just for flavor but also for controlling the yeast fermentation baking process details. Too little salt, and the fermentation might be too rapid, the gluten weak, and the flavor bland. Too much salt, and yeast activity will be severely inhibited, leading to a very slow or stalled rise, a dense loaf, and an unpleasantly salty taste.
Most bread recipes specify salt as a percentage of the flour weight (baker's percentage), typically falling within the 1.8% to 2.2% range. Using a kitchen scale to weigh both flour and salt provides the most accurate measurement, ensuring consistent results. For example, for 500 grams of flour, you would use 9 to 11 grams of salt. Volume measurements for salt can be inconsistent due to variations in crystal size. Accurate salt measurement is a simple step that has a profound impact on the success of the yeast fermentation process and the quality of the final bread.
Troubleshooting Yeast Fermentation Problems

Common Issues and Solutions
Despite following a recipe, bakers sometimes encounter issues with the yeast fermentation baking process details. The dough might not rise, rise too slowly, or rise too much and then collapse. Identifying the root cause is key to fixing the problem and improving future bakes. Common issues often relate back to the fundamental factors influencing yeast activity: temperature, hydration, sugar, salt, and the viability of the yeast itself.
Troubleshooting requires a systematic approach. Review the recipe, your ingredients, and your process. Was the yeast fresh and properly activated? Was the liquid temperature correct? Was the dough temperature optimal during proofing? Was salt added at the right time? By considering these variables, you can pinpoint where the yeast fermentation process might have gone awry and adjust your technique.
Slow Fermentation: Identifying the Root Cause
Slow fermentation is a frequent issue, resulting in a dough that doesn't rise sufficiently within the expected time frame. Several factors can contribute to this:
- Inactive or Dead Yeast: The most common cause. Yeast might be old, improperly stored, or killed by hot liquid. Solution: Check yeast expiration date, store properly (airtight, cool/fridge/freezer), ensure liquid temperature for activation is correct (100-115°F for active dry, 80-90°F for fresh).
- Low Dough Temperature: Yeast activity is sluggish in cool environments. Solution: Find a warmer spot for proofing (75-85°F), use a proofing box, or warm your oven slightly (turn on briefly, then turn off) before placing dough inside.
- Insufficient Sugar: Not enough fermentable sugar for yeast to consume. Solution: Ensure recipe includes adequate sugar or allow longer fermentation time for enzymes to break down starch.
- Too Much Salt: High salt concentration inhibits yeast. Solution: Double-check salt measurement; ensure salt was not added directly onto yeast during mixing.
- Low Hydration: Very dry dough can slow activity. Solution: Ensure adequate water is used according to the recipe or adjust slightly for very dry flour.
Address the suspected cause, and the dough should begin to ferment more actively, although it might require more time than originally planned.
Inconsistent Results: Maintaining Quality Control
Achieving consistent results with the yeast fermentation baking process details requires attention to detail and control over variables. Batch-to-batch inconsistency often stems from subtle variations in ingredients, environment, or technique:
- Temperature Fluctuations: Ambient temperature changes significantly affect fermentation speed. Solution: Use a thermometer to check dough temperature and proofing environment; use a consistent proofing location.
- Inaccurate Measurements: Variations in flour, water, or salt amounts. Solution: Use a kitchen scale for weighing ingredients, especially flour and water.
- Yeast Viability: Even if not dead, yeast activity can vary slightly between packages or if stored improperly. Solution: Use fresh yeast from a reliable source; perform a quick activation test on active dry yeast if unsure.
- Mixing/Kneading Variations: Inconsistent gluten development affects how well the dough traps gas. Solution: Follow recipe mixing times/techniques consistently; assess dough development using windowpane test.
Maintaining a baking journal to record temperatures, times, and observations can help identify patterns and improve consistency over time.
Troubleshooting Dense Bread: Adjusting Proofing Time and Temperature
Dense bread is a common disappointment and is often linked to issues during the yeast fermentation process details, specifically under-proofing or over-proofing.
- Under-Proofing: The dough didn't ferment long enough or at a warm enough temperature. Yeast didn't produce enough gas to adequately leaven the dough, resulting in a small volume and dense crumb. Solution: Allow dough to proof longer at a suitable temperature (75-85°F). Use the poke test to check for readiness.
- Over-Proofing: The dough fermented too long, and the gluten structure weakened and collapsed. The dough may have risen initially but then partially deflated or felt fragile. This leads to poor oven spring and a dense structure, often near the bottom of the loaf. Solution: Monitor dough more closely; use visual and poke tests; reduce proofing time or temperature for future bakes; consider refrigerating dough if you need to pause fermentation.
Other factors like poor gluten development, insufficient hydration, or baking at too low a temperature can also contribute to dense bread, but improper proofing is a primary culprit related to yeast activity.
Optimizing Your Baking with Yeast Knowledge
Applying the Yeast Life Cycle Principles
Understanding the different stages of the yeast life cycle – from dormant activation through exponential growth, stationary phase, and potential decline – provides bakers with a powerful framework for controlling the yeast fermentation baking process details. Knowing what yeast needs (warmth, moisture, food) and what inhibits it (excessive heat, high salt/sugar concentration, lack of food) allows you to proactively create the optimal conditions for your desired outcome.
By observing the dough and recognizing the cues associated with each phase, you can make informed decisions about timing, temperature, and handling. This knowledge empowers you to move beyond simply following a recipe blindly and instead actively manage the fermentation, adapting to environmental factors and ingredient variations. It transforms baking from a rigid process into a dynamic interaction with living organisms.
Mastering the Art of Fermentation for Superior Baked Goods
True mastery in baking often lies in mastering fermentation. It's not just about making the dough rise; it's about developing flavor, improving texture, and achieving predictable results. Controlling the yeast fermentation process details allows you to manipulate the dough's characteristics. Want a tangier flavor? Try a longer, cooler fermentation. Need an airy, open crumb? Focus on proper gluten development and optimal proofing.
Experimenting with different temperatures and proofing times for the same recipe is an excellent way to see the principles of the yeast life cycle in action. Compare a loaf proofed quickly at a warm temperature versus one proofed slowly in the refrigerator. Note the differences in rise, crumb structure, crust color, and flavor. This hands-on experience, guided by your understanding of yeast, is the path to consistently baking superior bread and other yeast-leavened goods.
Sourdough Bread: Utilizing Natural Yeast Fermentation
While commercial yeast is a single strain of Saccharomyces cerevisiae, sourdough baking harnesses the power of wild yeast and lactic acid bacteria working in symbiosis. A sourdough starter is a living culture of these microorganisms, maintained with regular feeding of flour and water. The wild yeast strains in a starter, often different from commercial strains, also consume sugars and produce CO₂ for leavening, contributing to the yeast fermentation baking process details.
However, the lactic acid bacteria in sourdough starters are equally important. They ferment sugars into lactic and acetic acids, which contribute the characteristic tangy flavor of sourdough bread. The slower, longer fermentation cycles typical in sourdough baking allow these acids to develop fully and also strengthen the gluten structure and break down complex carbohydrates, improving digestibility and nutrient availability. Working with a sourdough starter is a deeper dive into natural fermentation, requiring patience and observation to understand the unique life cycle and activity of its diverse microbial population.
Frequently Asked Questions
How does yeast fermentation contribute to the baking process?
Yeast fermentation produces carbon dioxide which causes dough to rise, creating the characteristic light and airy texture of baked goods. It also contributes to the unique flavor profile of many baked goods.
What are the key factors that influence the rate of yeast fermentation?
Temperature is crucial; yeast thrives in a warm (but not hot) environment. The availability of sugar for the yeast to consume, and the hydration level of the dough also play significant roles.
What happens to the yeast during the baking stage itself?
As the oven temperature rises, the yeast becomes increasingly active, leading to a final burst of carbon dioxide production. Eventually, the heat kills the yeast, setting the structure of the baked good.
What are the different types of yeast used in baking, and how do they differ?
Common types include active dry yeast, instant dry yeast, and fresh yeast. They differ mainly in their moisture content, activation requirements, and shelf life.
Can I control the speed of fermentation in my baking?
Yes, by adjusting the temperature of the dough's environment. Cooler temperatures slow down fermentation, while warmer temperatures accelerate the process. You can also control the amount of sugar in the dough.
Final Reflection: The Unseen Powerhouse of Baking
Understanding the yeast fermentation process is not just about rising dough; it's about unlocking the secrets to truly exceptional baked goods. The intricate dance of yeast, sugar, and time, as detailed in this article, directly impacts the texture, flavor, and overall quality of your bread, pastries, and more. Mastering this process elevates baking from a simple task to a precise craft.
The impact of yeast on our culinary landscape is profound and often overlooked. We benefit daily from the centuries-old knowledge of harnessing this microscopic organism, yet rarely consider the complex biochemical reactions occurring within our bread dough. Bread is the staff of life,
a simple phrase that belies the intricate biological processes that make it possible. This understanding allows us to appreciate the artistry and science behind even the simplest loaf, fostering a deeper connection to our food and its origins.
Now, consider your own baking journey. What new techniques will you employ, armed with this deeper knowledge of yeast fermentation? Will you experiment with different yeast strains, explore the nuances of temperature control, or perhaps delve into the fascinating world of sourdough starters? The possibilities are vast. Embrace the challenge, experiment with your newfound knowledge, and discover the joy of truly understanding the unseen powerhouse that brings your baked creations to life.
Unlock Your Baking Potential: Master the Yeast!
Thanks for taking the time to explore the fascinating world of yeast and its crucial role in baking! We hope you gained valuable insights into its life cycle and how to leverage that knowledge for perfect results. Now, it's time to put your newfound expertise into practice.
- Try a new bread recipe: Challenge yourself with a sourdough starter or a complex artisan loaf. See how your understanding of yeast's behavior translates into improved texture and flavor. This is your chance to shine!
- Share your baking journey: Tell us about your experiences—what worked, what didn't, and any exciting discoveries you made while experimenting with yeast. We'd love to hear from you in the comments!
- Explore our Yeast Resources: Dive deeper into our collection of baking guides and tips. You'll find even more detailed information on bread making techniques and yeast management.
Ready to elevate your baking game? What will your first yeast-powered adventure be?