
The Art of Plating: Easy Garnishes That Impress

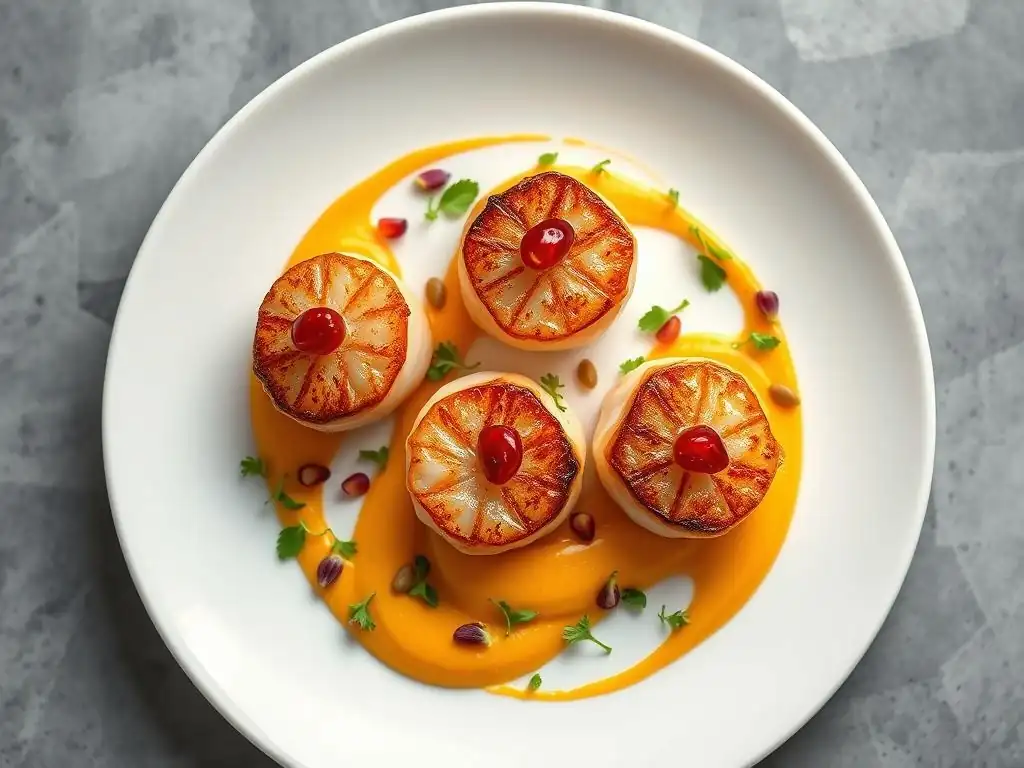
Welcome to BakeWithEase, your kitchen companion on a journey to baking brilliance! Ever wondered how to transform your delicious creations into edible masterpieces? This week, we unlock the secrets to beautiful plating techniques for beginners. Discover how simple garnishes can elevate your pastries and desserts from ordinary to extraordinary, sparking delight with every glance and bite. Get ready to impress – let's begin!
- Introduction to Beautiful Plating Techniques for Beginners
- Mastering Basic Plating Techniques for Elegant Desserts
- Easy Garnishes That Impress: A Beginner's Guide
- Advanced Plating Techniques (Simplified for Beginners)
- Plating Specific Desserts: Examples and Inspiration
- Essential Tools for Beautiful Dessert Plating
- Tips and Tricks for Impressive Plating Results
- Conclusion: Elevate Your Baking with Beautiful Plating
-
Frequently Asked Questions
- How important is plating for the overall baking experience?
- What are some easy garnishes for beginners to use when plating baked goods?
- Where can I find inspiration for beautiful plating techniques?
- What tools are essential for beginner-friendly plating?
- Can plating techniques hide imperfections in my baking?
- Final Reflection: The Enduring Power of Presentation
- Unleash Your Inner Food Artist!
Introduction to Beautiful Plating Techniques for Beginners
Why Plating Matters: Elevating Your Baked Creations
The journey of enjoying a delicious dessert begins long before the first bite. It starts with the visual appeal. Presentation plays a crucial role in the overall dining experience, influencing perception of taste and quality.
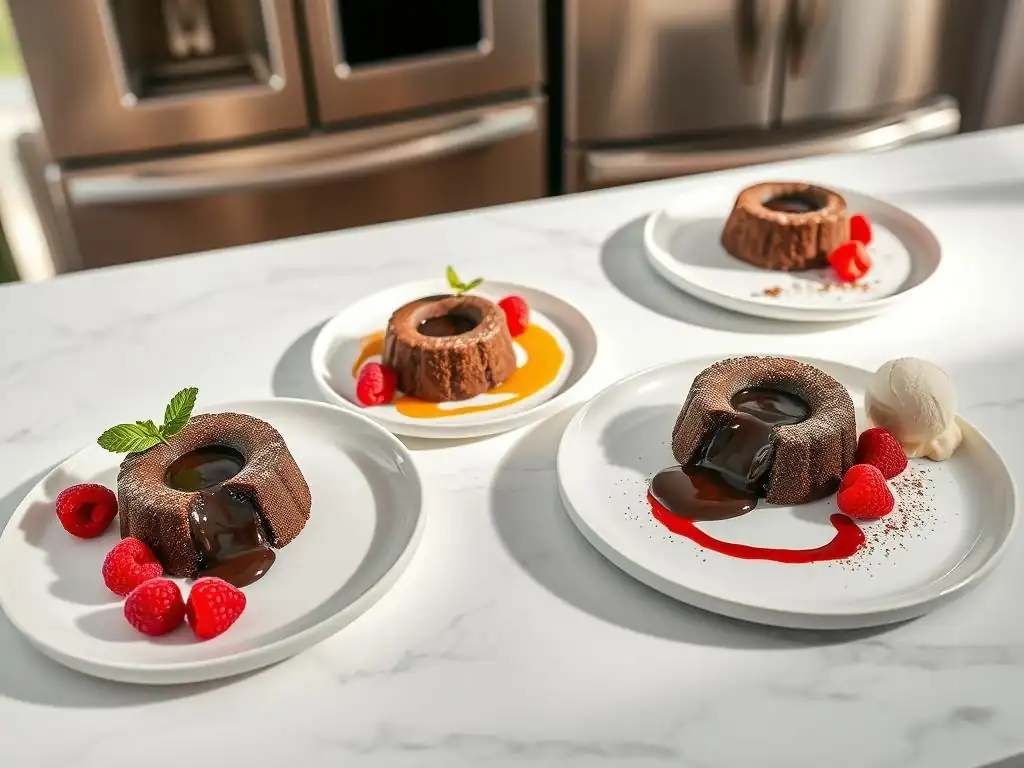
Mastering beautiful plating techniques, even simple ones, can transform a humble cookie or cake slice into a stunning masterpiece, making your guests feel truly special. It shows care, attention to detail, and enhances the anticipation of the delightful flavors to come. Think about a beautifully plated chocolate lava cake versus one simply placed on a plate – the visual difference alone promises a more luxurious experience.
Beyond the aesthetic, thoughtful plating guides the diner's eye and can highlight specific components of the dessert. A strategically placed garnish or swirl of sauce can draw attention to the star element, whether it's the flaky crust of a tart or the rich ganache topping of a cake. For beginners, focusing on simple plating techniques is an accessible way to start elevating your baking, adding that professional touch without needing complex skills. It’s about creating a harmonious composition that is both inviting and exciting, turning your homemade treats into memorable experiences.
BakeWithEase's Guide to Simple Yet Stunning Garnishes
At BakeWithEase, we believe that beautiful plating shouldn't be intimidating, especially for those new to the kitchen. Our focus is on easy-to-learn techniques and readily available ingredients that can make a big impact. This guide is designed to demystify the art of plating, breaking it down into simple steps and achievable garnishes that beginners can master quickly. We'll explore how to use everyday items like fruit, chocolate, and even fresh herbs to add flair and elegance to your desserts.
We'll walk you through creating vibrant fruit purees, delicate chocolate shavings, and using simple dustings like cocoa powder or icing sugar to add intricate patterns. You'll discover how a few carefully placed elements can completely change the look of a dessert. Our goal is to provide you with practical, easy plating techniques that you can start using today, boosting your confidence and bringing a new level of artistry to your baking creations. Get ready to impress yourself and everyone you bake for with minimal effort!
Mastering Basic Plating Techniques for Elegant Desserts
Understanding Plate Composition: Balance and Harmony
Effective dessert plating is about creating a balanced and harmonious composition on the plate. Think of the plate as a canvas where you arrange the main dessert element and its garnishes. A key principle is the rule of odds – arranging items in groups of three or five tends to be more visually appealing than even numbers. Consider the negative space, or the empty areas on the plate; it's just as important as the filled space, allowing the elements to breathe and stand out. Avoid overcrowding the plate, which can make the dessert look messy and uninviting.
Balance also applies to height and texture. Adding elements with varying heights, like a scoop of ice cream next to a flat tart, creates visual interest. Incorporating different textures, such as a smooth sauce next to a crunchy crumble, adds depth and complexity to the experience. For beautiful plating techniques for beginners, start simple: place the main dessert slightly off-center, add a garnish or two in a small cluster, and perhaps a simple swirl of sauce. Focus on creating a sense of movement or flow on the plate, guiding the eye through the different components.
Color Theory for Visually Appealing Dessert Plates
Color is one of the most powerful tools in beautiful plating. Vibrant, contrasting colors immediately catch the eye and make a dessert look more appetizing. Think about the natural colors of fruits like bright red raspberries, deep purple blueberries, or sunny yellow mangoes – these can add incredible visual pop. Pairing complementary colors, like a green mint sprig on a rich brown chocolate dessert, creates a striking contrast. Analogous colors, which are next to each other on the color wheel (like shades of red and orange), can create a more subtle, harmonious look.
Consider the color of your dessert and the plate itself when planning your garnishes. A white plate provides a neutral background that makes colors stand out, while a dark plate can make light-colored desserts look more dramatic. Aim for a few key colors rather than too many, which can look chaotic. For instance, a simple vanilla panna cotta (white/cream) can be beautifully enhanced with a vibrant red berry coulis and a green mint leaf, introducing three distinct, appealing colors. Understanding basic color principles helps you choose garnishes that not only taste good but also make your dessert visually unforgettable.
Easy Garnishes That Impress: A Beginner's Guide
Fruit Purees: Adding Flavor and Visual Appeal
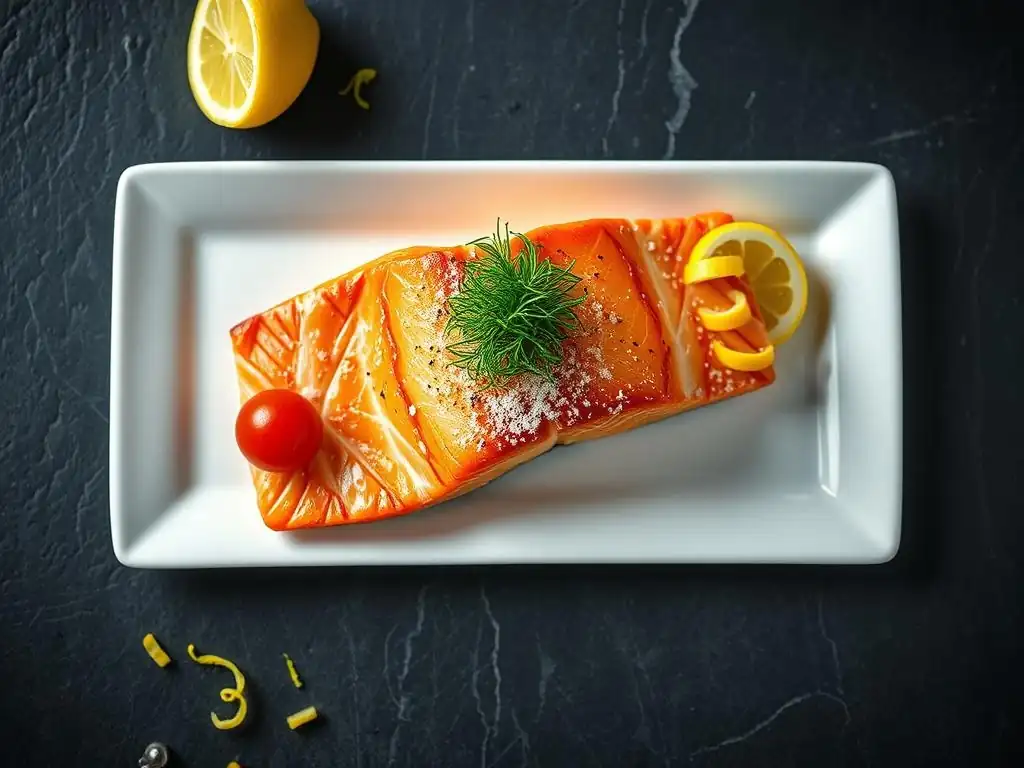
Fruit purees, also known as coulis, are fantastic for beautiful plating techniques for beginners. They are simple to make and offer intense color and flavor that complements many desserts. A basic puree involves simmering fresh or frozen fruit with a little sugar and a squeeze of lemon juice until soft, then blending it until smooth and straining it to remove seeds. Approximately 250 grams of fruit, 2-3 tablespoons of sugar, and a teaspoon of lemon juice will yield enough puree for several plates. Common choices include raspberry, strawberry, mango, or passion fruit.
Purees add moisture and a burst of fresh, often slightly tart flavor that balances sweet desserts. Their smooth, liquid consistency makes them ideal for creating elegant swirls, dots, or lines on the plate. For example, a vibrant raspberry puree around a slice of chocolate cake not only adds a beautiful red border but also provides a tangy counterpoint to the rich chocolate. They are incredibly versatile and require minimal equipment – just a saucepan, blender, and a fine-mesh sieve.
Creating Smooth and Vibrant Fruit Puree Swirls
To create a beautiful swirl with fruit puree, ensure the puree is smooth and of a pourable consistency – not too thick, not too thin. You can adjust the consistency by adding a little water if it's too thick or simmering it longer if it's too thin. A squeeze bottle with a fine tip is ideal for precise lines and dots, but a spoon works perfectly well for creating more organic shapes or large swooshes.
Start by placing your dessert on the plate. Then, using a spoon, drizzle or swipe the puree across the plate in a curved motion. For a more controlled look, place small dots of puree around the dessert and gently pull a toothpick or the tip of a knife through them. For a classic swirl, place a dollop of puree and use the back of a spoon to spread it outwards in a circular motion or a single swipe. Practice on a spare plate first to get a feel for the consistency and the movement.
Using Stencils for Precise Puree Designs
Stencils offer a simple way to create intricate and consistent designs with fruit purees, perfect for adding a touch of elegance to your beautiful plating techniques. You can buy dedicated plating stencils or even make your own from thin plastic sheets. Choose a design that complements your dessert – geometric shapes, floral patterns, or abstract swirls.
Place the stencil flat on the plate where you want the design to appear. Carefully spoon or pour a small amount of puree onto the stencil, spreading it evenly with an offset spatula or the back of a spoon to fill the cut-out areas. Ensure you don't use too much puree, as it can seep under the stencil. Gently lift the stencil straight up to reveal the design. This technique works best with slightly thicker purees that hold their shape. It’s a quick way to add a professional-looking element to your plate with minimal artistic skill required.
Chocolate Shavings and Curls: A Classic Touch
Chocolate is a beloved dessert ingredient, and incorporating it as a garnish is a timeless and easy plating technique. Chocolate shavings and curls add texture, rich flavor, and a touch of sophistication. They are incredibly versatile and pair well with almost any dessert, from cakes and tarts to mousses and ice cream. Using different types of chocolate – dark, milk, or white – allows you to vary the color and intensity of the garnish.
Creating chocolate shavings or curls is surprisingly simple and requires just a bar of chocolate and a vegetable peeler or a sharp knife. Approximately 20-30 grams of chocolate is usually sufficient to garnish a few plates generously. The key is to use chocolate that is at room temperature, not straight from the fridge, as it will curl more easily. It's a quick way to add a bit of decadence and visual interest to your beautiful plating efforts.
Mastering the Art of Chocolate Shaving
To create beautiful chocolate shavings, hold a block of chocolate firmly and use a vegetable peeler to shave along the edge. Apply gentle, even pressure. The curls will vary in size and shape depending on the angle and pressure you use. For smaller, finer shavings, use the peeler on the flat surface of the chocolate. For larger curls, use the peeler on the side edge of a chocolate bar.
Alternatively, you can use a sharp knife. Place the chocolate bar on a flat surface and scrape the blade along the top surface at an angle. This will create smaller, delicate shavings. Remember to handle the shavings minimally to prevent them from melting from the heat of your fingers. A small spoon or tweezers can help you place them precisely on the plate.
Different Types of Chocolate for Garnishing
The type of chocolate you choose for garnishing can significantly impact the look and flavor of your plated dessert. Dark chocolate (with 60-70% cocoa solids) offers a deep, rich color and intense flavor that contrasts beautifully with lighter desserts like cheesecakes or vanilla panna cotta. Milk chocolate provides a lighter brown color and a sweeter, creamier taste, often pairing well with fruit-based desserts or those with caramel notes.
White chocolate offers a stark contrast in color, adding brightness to dark desserts like chocolate cake. Its sweet, milky flavor works well with berries or citrus. Consider the overall flavor profile of your dessert when selecting your chocolate garnish. You can even mix and match different types of chocolate shavings on the same plate for added visual and flavor complexity.
Fresh Herbs: Adding Aroma and a Pop of Color
Using fresh herbs is one of the simplest yet most effective beautiful plating techniques for beginners. A sprig of fresh mint, a leaf of basil, or a delicate rosemary sprig can add a vibrant pop of green color and a wonderful aromatic element to a dessert. Herbs are not just for savory dishes; many pair wonderfully with sweet flavors. They provide a refreshing contrast and make the plate look fresh and inviting.
The key is selecting herbs that complement the dessert's flavor profile. Mint is a classic choice, pairing well with chocolate, berries, or citrus. Basil offers a slightly peppery, aromatic note that works surprisingly well with strawberries, peaches, or lemon. Rosemary, with its piney fragrance, can complement desserts featuring apples, pears, or even chocolate. A single, perfectly placed herb sprig can elevate the entire presentation.
Choosing the Right Herbs for Your Desserts (Mint, Basil, Rosemary)
When selecting herbs for dessert plating, consider the dominant flavors of your dish.
- Mint: The most common dessert herb, offering a cool, refreshing taste. It's nearly universally compatible, especially with chocolate, berries (strawberries, raspberries, blueberries), lemon, and even creamy desserts like panna cotta or ice cream. A single vibrant green leaf or a small sprig is often enough.
- Basil: Less traditional but increasingly popular. Sweet basil has anise-like undertones that pair exceptionally well with red fruits like strawberries and cherries, as well as stone fruits like peaches and apricots. It adds an unexpected layer of aromatic complexity.
- Rosemary: A bolder herb, best used sparingly. Its pungent, slightly piney flavor complements baked fruits like apples and pears, and surprisingly, can add an interesting dimension to some chocolate desserts. A small, delicate sprig or a few finely chopped leaves can be used.
Always use fresh, vibrant herbs without any wilting or brown spots. Gently wash and pat them dry before placing them on the plate.
Simple Herb Placement Techniques
Placing herbs on the plate is straightforward. The goal is to add a touch of color and freshness without overwhelming the dessert.
- Single Sprig: The simplest method is to place one or two small sprigs near the main dessert element. Position it to follow the line of a sauce swirl or to sit alongside a piece of cake or tart.
- Scattered Leaves: For smaller leaves like mint, you can gently scatter a few around the dessert. Ensure they look intentionally placed, not just dropped.
- Chopped Herbs: For a more subtle infusion of color and aroma, finely chop a few leaves and sprinkle them lightly over a sauce or around the base of the dessert. This works well with herbs like basil or rosemary where a whole sprig might be too dominant.
Remember, less is often more with herbs. A small amount adds elegance; too much can make the plate look cluttered or introduce too strong an herbal flavor.
Edible Flowers: A Touch of Elegance
Edible flowers are a beautiful and increasingly popular way to add color, whimsy, and a touch of natural elegance to your dessert plating. They come in a vast array of colors, shapes, and sizes, from tiny violas and pansies to larger nasturtiums and borage flowers. Using edible flowers instantly elevates your beautiful plating techniques, making desserts look sophisticated and special, perfect for occasions.
While some edible flowers have a subtle flavor (often slightly peppery or herbaceous), they are primarily used for their visual appeal. Approximately 5-10 small flowers or petals are usually sufficient to garnish a single dessert plate effectively. They add a delicate, ethereal quality that is hard to achieve with other garnishes.
Sourcing and Preparing Edible Flowers
Sourcing edible flowers requires care. Do not use flowers from florists, garden centers, or unknown sources, as they may have been treated with pesticides or chemicals. Always purchase edible flowers specifically labelled for consumption from reputable sources, such as specialty grocery stores, farmers' markets, or online suppliers. You can also grow your own from seeds specifically meant for culinary use.
Once sourced, gently rinse the flowers under cool water and pat them dry with a paper towel. Inspect them for any insects or imperfections. Use them as fresh as possible, as they are delicate and can wilt quickly. Store them in the refrigerator in an airtight container lined with a damp paper towel.
Arranging Edible Flowers for Maximum Impact
Edible flowers are best used sparingly to add delicate pops of color.
- Scattered: Gently scatter a few small flowers or individual petals around the base of the dessert or over a sauce.
- Clustered: Arrange a small cluster of flowers in one area of the plate, perhaps alongside a dollop of cream or a fruit garnish.
- On the Dessert: Place a single, perfect flower directly on top of a cupcake, tart, or cake slice. Ensure it sits securely.
Consider the size and shape of the flowers in relation to your dessert. Tiny violas look lovely scattered, while a larger pansy might be better used as a single focal point. Their delicate nature means they should be the last element added to the plate just before serving.
Dustings: Cocoa Powder, Icing Sugar, and Spices
Dustings of cocoa powder, icing sugar (powdered sugar), or ground spices are among the easiest and most effective beautiful plating techniques for beginners. They add a subtle layer of flavor and a beautiful, often stark, visual contrast to the plate. A light dusting can soften the edges of a dessert or add a hint of color, while using stencils allows for more intricate designs.
These garnishes are incredibly quick to apply and require minimal skill. A small amount, perhaps a teaspoon or two per plate, is usually enough to create a significant visual effect. They are also very budget-friendly, using ingredients commonly found in most baking pantries.
Creating Stenciled Designs with Dustings
Stencils are perfect for creating precise patterns with dustings. As mentioned with purees, you can use dedicated plating stencils or make your own. Place the stencil flat on the plate where you want the design. Ensure the stencil lies flush against the surface to prevent the powder from slipping underneath.
Hold a fine-mesh sieve (or a shaker specifically for sugar/cocoa) over the stencil and gently tap it to release a light, even layer of your chosen powder. Cover the entire stencil area. Carefully lift the stencil straight up to reveal the design. This technique works best on a clean, dry plate or directly onto a dessert with a flat surface (like a brownie or a firm tart).
Choosing the Right Dusting for Your Dessert
The choice of dusting depends on the dessert and the desired effect.
- Icing Sugar: Adds a delicate sweetness and a bright white contrast, perfect for dark chocolate desserts, fruit tarts, or brownies. It gives a classic, often rustic, look.
- Cocoa Powder: Provides a rich brown color and a slightly bitter, chocolatey flavor. It works wonderfully on lighter-colored desserts like cheesecakes, vanilla cakes, or panna cotta.
- Spices: Ground cinnamon, nutmeg, or espresso powder can add aromatic flavor and subtle color. Cinnamon is great with apple or pumpkin desserts, while espresso powder complements chocolate. Use spices very sparingly due to their strong flavor.
You can also combine dustings, perhaps using cocoa powder for a stenciled design and then a light dusting of icing sugar around the edge of the plate.
Advanced Plating Techniques (Simplified for Beginners)
Sauce Painting: Creating Artistic Designs
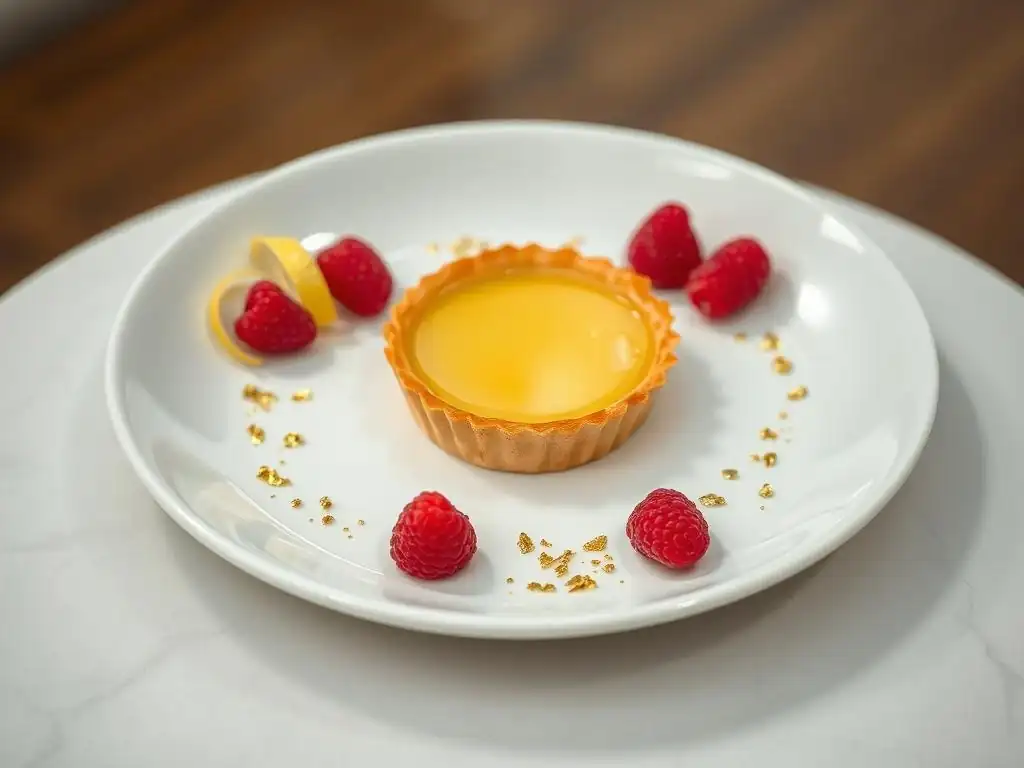
Sauce painting is a technique that allows you to create artistic swirls, swooshes, or patterns on the plate using a dessert sauce. While professional chefs create elaborate designs, beginners can master simple yet elegant techniques. This adds a dynamic element to the plate, guiding the eye and introducing another layer of flavor and texture. It's a step up in beautiful plating techniques but still achievable with practice.
The key to successful sauce painting is using a sauce with the right consistency – thick enough to hold its shape but liquid enough to flow smoothly. Sauces like chocolate ganache (slightly cooled), fruit coulis, or caramel sauce work well. You don't need fancy tools to start; a spoon or a simple squeeze bottle will suffice.
Simple Sauce Recipes for Plating
Here are two simple sauces suitable for plating:
Basic Berry Coulis:
Ingredients:
- 2 cups fresh or frozen berries (raspberries, strawberries)
- 2-4 tablespoons granulated sugar (adjust to taste)
- 1 tablespoon lemon juice
Combine ingredients in a saucepan. Cook over medium heat, stirring occasionally, until berries soften and release juices (about 5-10 minutes). Simmer for another 5-10 minutes until slightly thickened. Remove from heat, blend until smooth, and strain through a fine-mesh sieve. Chill before using.
Simple Chocolate Sauce:
Ingredients:
- 1/2 cup heavy cream
- 1 cup chopped chocolate (dark, milk, or semi-sweet)
- 1 tablespoon butter (optional, for shine)
Heat cream in a saucepan over medium heat until just simmering. Remove from heat, add chopped chocolate, and let sit for 5 minutes. Whisk until smooth. Stir in butter if using. Let cool slightly until it reaches a pourable but not watery consistency.
Tools for Sauce Painting (Spoons, Bottles)
You can start sauce painting with tools you likely already have:
- Spoon: The back of a spoon is excellent for creating swooshes. Place a dollop of sauce on the plate and use the back of the spoon to drag it across the plate in a curved or straight line. You can also use the edge of the spoon to drizzle lines.
- Squeeze Bottle: A small plastic squeeze bottle with a fine tip offers more control for creating dots, lines, or even writing on the plate. Fill the bottle with sauce and practice applying even pressure.
For more control, an offset spatula can be used to spread sauce thinly, or a piping bag with a small round tip can create perfect dots. Don't be afraid to experiment with different tools and techniques to see what feels most comfortable and effective for your beautiful plating style.
Crumbles and Streusels: Adding Texture
Adding texture is a vital component of beautiful plating, and crumbles or streusels are easy ways to achieve this. The contrast between a smooth dessert and a crunchy element is delightful both visually and texturally. Crumbles add height, irregularity, and a rustic charm to the plate. They are also incredibly easy to make with just a few pantry staples.
A basic crumble topping consists of flour, sugar, butter, and sometimes oats or nuts. Baking it separately creates a delightful, crumbly texture that can be scattered around the dessert. About 1/4 to 1/2 cup of baked crumble is usually enough to garnish several plates. This technique adds visual interest and a satisfying crunch.
Making a Simple Crumble Topping
Here's a simple recipe for a versatile crumble topping:
Ingredients:
- 1/2 cup all-purpose flour
- 1/4 cup granulated sugar
- 1/4 cup cold butter, cut into small cubes
- Pinch of salt
- Optional: 1/4 cup rolled oats or chopped nuts (almonds, pecans)
In a bowl, combine flour, sugar, salt, and optional oats/nuts. Cut in the cold butter using your fingertips, a pastry blender, or a fork until the mixture resembles coarse crumbs. Spread the mixture evenly on a baking sheet lined with parchment paper. Bake in a preheated oven at 350°F (175°C) for 10-15 minutes, or until golden brown and crisp. Let cool completely before using.
Strategically Placing Crumbles on the Plate
Once cooled, crumbles can be scattered or placed strategically.
- Scattered: Simply sprinkle a small handful of crumble around the base of your dessert or along a sauce line.
- Piled: Create a small pile or mound of crumble next to the dessert to add height and a focal point.
- Border: Form a border of crumble around the edge of the plate or along one side.
Crumbles work particularly well with creamy desserts like mousses, puddings, or panna cotta, as the contrast in texture is most pronounced. They also add a lovely finish to baked desserts like tarts or cakes.
Plating Specific Desserts: Examples and Inspiration
Plating a Simple Chocolate Cake
Plating a slice of simple chocolate cake can be elevated with a few easy beautiful plating techniques.
- Place the cake slice slightly off-center on the plate.
- Add a swirl or swoosh of raspberry or cherry coulis alongside the cake.
- Sprinkle a few dark chocolate shavings over the sauce or on top of the cake slice.
- Place a single fresh mint sprig near the chocolate shavings or on the cake.
- Dust the plate lightly with icing sugar using a small sieve, perhaps in a corner away from the main elements.
This combination uses color contrast (red sauce, green mint, white sugar on brown cake), adds texture (shavings), and introduces complementary flavors (fruit, mint) with minimal effort.
Plating Fruit Tarts for Visual Appeal
Fruit tarts are already visually appealing due to the colorful fruit, but beautiful plating can enhance them further.
- Place the tart (individual or a slice) on the plate.
- Add a dollop of whipped cream or a scoop of vanilla ice cream next to the tart.
- Drizzle a warm fruit sauce (matching the tart's fruit) or a contrasting sauce like caramel around the plate.
- Scatter a few edible flowers or chopped nuts around the sauce or cream.
- Finish with a light dusting of icing sugar over the tart's crust or around the plate's edge.
This method adds creaminess, extra flavor, and delicate details like flowers or nuts, making the tart look even more inviting.
Plating Individual Cheesecakes with Flair
Individual cheesecakes, whether baked or no-bake, are perfect canvases for beautiful plating techniques.
- Place the cheesecake in the center or slightly off-center.
- Create a pool or swirl of vibrant berry coulis or passion fruit puree on one side of the cheesecake.
- Add a pile of graham cracker crumble or toasted coconut flakes next to the puree for texture.
- Top the cheesecake with a few fresh berries (matching the puree) or a dollop of whipped cream.
- Garnish with a fresh mint leaf or a few white chocolate shavings.
The creamy cheesecake contrasts beautifully with the vibrant sauce and crunchy crumble, while the fresh fruit and mint add brightness and color.
Essential Tools for Beautiful Dessert Plating
Must-Have Plating Tools for Beginners
You don't need a professional kitchen setup to start practicing beautiful plating techniques. Here are a few essential, budget-friendly tools that will help you:
- Fine-Mesh Sieve: Essential for dusting icing sugar, cocoa powder, or spices evenly over the plate or through a stencil.
- Small Offset Spatula: Useful for spreading sauces, lifting delicate items, or cleaning edges.
- Squeeze Bottles: Great for controlled application of sauces, allowing for dots, lines, and swirls. Look for ones with fine tips.
- Tweezers (Optional but helpful): Precision tweezers make it easy to place small, delicate garnishes like edible flowers, small berries, or chocolate shavings exactly where you want them without damaging them.
- Vegetable Peeler: The easiest tool for creating chocolate shavings and curls.
Having these simple tools on hand will significantly expand your ability to execute various beautiful plating techniques with ease and precision.
Budget-Friendly Options for Plating on a Dime
You don't need to invest heavily to start beautiful plating. Many effective techniques use common kitchen items:
- Use the back of a spoon for creating sauce swooshes instead of a dedicated plating spoon.
- Cut a small hole in a plastic baggie to act as a makeshift piping bag for sauces or melted chocolate lines.
- Use parchment paper cutouts or even sturdy paper doilies as temporary stencils for dustings.
- Your fingers can be used carefully to scatter crumbles or nuts (just ensure hands are clean! ).
- Look for inexpensive white plates at discount stores or thrift shops – white provides the best backdrop for making your colorful desserts and garnishes pop.
Creativity is key! Many beautiful plating techniques can be adapted using items already in your kitchen, proving that stunning presentation is accessible to everyone, regardless of budget.
Tips and Tricks for Impressive Plating Results
Practice Makes Perfect: Experiment with Different Techniques
The best way to improve your beautiful plating techniques is to practice. Don't expect perfection on your first try. Use spare plates or even just parchment paper to experiment with sauce swirls, dusting patterns, and garnish placement before plating your actual dessert. Try out different combinations of garnishes – perhaps a sauce with a crumble, or edible flowers with chocolate shavings.
Experimenting helps you understand how different consistencies of sauces work, how much pressure to apply when dusting, and the best way to handle delicate garnishes. Take photos of your practice plates to see what looks good from different angles. The more you practice, the more confident and creative you will become with your plating.
Less is More: Avoiding Overcrowded Plates
One of the most common mistakes beginners make in beautiful plating is putting too many elements on the plate. An overcrowded plate looks messy and detracts from the main dessert. The goal is to enhance the dessert, not bury it under garnishes. Think of garnishes as accessories – a few well-chosen pieces make a statement, while too many look cluttered.
Focus on one or two key garnishes that complement the dessert in flavor, texture, and color. Leave plenty of negative space on the plate. This allows each element to stand out and makes the overall presentation feel clean, elegant, and sophisticated. When in doubt, remove a garnish rather than adding another.
Lighting and Photography: Showcasing Your Plating Skills
Once you've mastered beautiful plating techniques, you'll want to share your creations! Good lighting is crucial for photographing desserts to showcase your plating skills effectively. Natural light is almost always the best option. Place your plated dessert near a window, but avoid direct sunlight, which can create harsh shadows. Diffused light (like on a slightly overcast day) works wonderfully.
Position the plate so the light source is coming from the side or slightly behind the dessert to highlight textures and create depth. Experiment with different angles – overhead shots work well for showcasing overall composition and patterns, while eye-level shots focus on height and texture. Use a clean, simple background that doesn't distract from the dessert. A little effort in photography ensures your stunning plating gets the appreciation it deserves.
Conclusion: Elevate Your Baking with Beautiful Plating
Recap of Easy Plating Techniques
We've explored several easy beautiful plating techniques for beginners that can transform your homemade desserts. From creating vibrant fruit purees and elegant chocolate shavings to using simple dustings and fresh herbs, these methods are accessible and impactful. We also touched on slightly more advanced but still manageable techniques like sauce painting and incorporating crunchy crumbles. Remember the importance of plate composition, color theory, and the principle of "less is more" when arranging your elements.
These techniques are not just about making food look pretty; they enhance the entire sensory experience of enjoying a dessert, adding layers of flavor, texture, and aroma. By focusing on simple, achievable steps, anyone can start practicing beautiful plating and take their baking presentation to the next level.
Encouragement to Experiment and Develop Your Style
Now that you have a foundation in beautiful plating techniques, the most important step is to start experimenting! Don't be afraid to try new combinations of garnishes, practice different sauce patterns, or use stencils in creative ways. Every dessert is an opportunity to play and develop your own unique plating style.
Think about the story you want your plate to tell. Is it rustic and comforting, or elegant and sophisticated? Let the dessert itself inspire your garnishes and arrangement. With practice and a willingness to try new things, you'll find that beautiful plating becomes a natural extension of your baking process, adding joy to both the creation and the consumption of your delicious treats. Happy plating!
Frequently Asked Questions
How important is plating for the overall baking experience?
Plating is incredibly important! It elevates the entire experience by making your baked goods look as good as they taste. Visual appeal significantly influences how we perceive flavor.
What are some easy garnishes for beginners to use when plating baked goods?
Simple options include dusting with powdered sugar, adding a dollop of whipped cream, or arranging fresh berries. These are all quick and require minimal skill.
Where can I find inspiration for beautiful plating techniques?
BakeWithEase.com offers plenty of inspiration! Look at our recipe photos and plating guides for ideas. You can also find inspiration on social media platforms like Instagram and Pinterest.
What tools are essential for beginner-friendly plating?
You don't need much! A small offset spatula is helpful for spreading sauces, and a pair of tweezers can be used for precise placement of garnishes. A squeeze bottle is great for creating designs.
Can plating techniques hide imperfections in my baking?
To some extent, yes! Strategic placement of garnishes or a dusting of powdered sugar can draw attention away from minor flaws. However, focus on improving your baking skills first!
Final Reflection: The Enduring Power of Presentation
The art of plating, once confined to high-end restaurants, is now a readily accessible skill that elevates the everyday dining experience. A beautifully plated meal isn't just about aesthetics; it's about enhancing the enjoyment of food, transforming a simple dish into a culinary masterpiece, and fostering a deeper appreciation for the artistry involved in cooking. This accessibility empowers everyone, from novice cooks to seasoned chefs, to create visually stunning and memorable meals.
The impact of visually appealing food extends far beyond the plate itself; it influences our perception of taste, our social interactions, and even our emotional connection to food. We live in a visually-driven world, and the presentation of our food plays a significant role in how we experience it. As the saying goes, We eat first with our eyes.
This simple truth underscores the importance of mastering even basic plating techniques, transforming a meal into a celebration of both flavor and artistry. It's a skill that enriches our lives, allowing us to share joy and creativity with those we love.
Now, consider your own kitchen. What simple garnish could you add to your next meal to elevate its presentation? Don't be afraid to experiment, to play with colors and textures, to find your own unique style. The journey of mastering the art of plating is a personal one, filled with discovery and delicious results. Embrace the challenge, and let your creativity shine through in every dish you create. The rewards—both visual and emotional—are well worth the effort.
Unleash Your Inner Food Artist!
Thanks for taking the time to explore the art of plating with us! We hope you're feeling inspired to elevate your culinary creations. Ready to transform your everyday meals into edible masterpieces?
- Master a new garnish technique: Choose one of the garnishes from the article and practice it with your next meal. Challenge yourself to make it even better than our examples!
- Share your plated creations: Show off your newfound skills by posting a picture on social media using #BakeWithEasePlating. We'd love to see your stunning results!
- Experiment with unexpected combinations: Try pairing a garnish from the article with a dish you wouldn't normally consider. What surprising flavor combinations can you discover?
What's the one garnish you're most excited to try, and which dish will you use it on?