
Simple Fresh Fruit Tart with Easy Pastry Cream

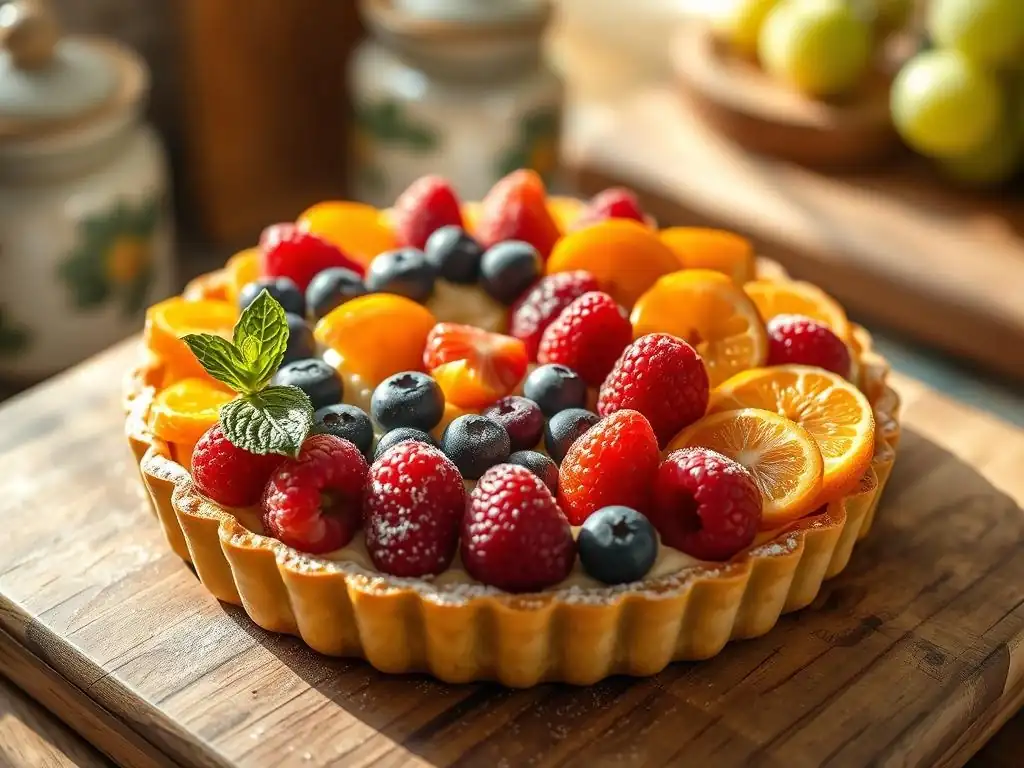
Welcome to BakeWithEase, your friendly guide to the delightful world of baking! Ever dreamt of creating a show-stopping dessert that's surprisingly simple? Dive into our world of easy recipes and foolproof techniques, and discover the secrets to baking perfection. This week, we're unveiling our Easy Fresh Fruit Tart Recipe – a burst of seasonal flavor on a buttery crust. But what makes this tart truly irresistible? Find out as we explore the magic of homemade pastry cream and the art of perfectly arranged fruit. Get ready to impress!
- Lemon Raspberry Tart with Vanilla Bean Pastry Cream
- Introduction to a Vibrant Spring Dessert: Lemon Raspberry Tart
- Understanding the Components of a Delicious Fruit Tart
- Homemade Tart Crust: A Step-by-Step Guide
- Vanilla Bean Pastry Cream Filling: Quick and Easy Recipe
- Assembling Your Lemon Raspberry Tart
- Baking Tips and Tricks
- Variations and Adaptations
- Troubleshooting Common Tart Problems
- Serving and Enjoying Your Homemade Fruit Tart
- Conclusion: Your Lemon Raspberry Tart Success
- Frequently Asked Questions
- Final Reflection: The Sweet Simplicity of Sharing
- Unlock Your Inner Pastry Chef!
Lemon Raspberry Tart with Vanilla Bean Pastry Cream
Introduction to a Vibrant Spring Dessert: Lemon Raspberry Tart
Why This Lemon Raspberry Tart is Perfect for Spring
Spring brings a sense of renewal, and what better way to celebrate the season's bounty than with a light, bright dessert? This lemon raspberry tart embodies the freshness of spring with its vibrant colors and zesty flavors. The tartness of the lemon in the pastry cream and the burst of fresh raspberries cut through the richness of the sweet components, creating a perfectly balanced bite that feels refreshing after a long winter. It’s an elegant yet approachable dessert, making it an ideal centerpiece for spring gatherings, from Easter brunch to Mother's Day tea.
Moreover, focusing on an easy fresh fruit tart recipe like this one allows bakers of all skill levels to create something beautiful and delicious without feeling overwhelmed. The steps are broken down into manageable parts: the crust, the pastry cream, and the assembly. Using seasonal fruits like raspberries ensures peak flavor and availability, often at a better price point. This simple fresh fruit tart recipe provides a delightful way to welcome warmer weather and the array of fruits it brings.
Your Guide to Mastering Fruit Tarts
Welcome to your comprehensive guide to creating a stunning lemon raspberry tart with ease. This article walks you through each stage, from preparing a simple, flaky tart crust to whipping up a smooth, luscious vanilla bean pastry cream and finally assembling your masterpiece with fresh fruit. We'll share tips and tricks used by bakers to ensure your tart is not only visually appealing but also boasts incredible texture and flavor. Mastering this easy fresh fruit tart recipe will give you the confidence to experiment with other fruit and flavor combinations.
By following these detailed steps, you'll learn the fundamentals of tart making, including essential techniques like blind baking the crust to prevent sogginess and tempering eggs for a silky pastry cream. We aim to demystify the process, turning what might seem daunting into a fun and rewarding baking project. Whether you're a beginner or looking to refine your skills, this guide provides the insights needed to achieve a professional-quality tart right in your own kitchen, proving that an easy fresh fruit tart recipe can yield spectacular results.
Understanding the Components of a Delicious Fruit Tart
The Key Elements: Crust, Pastry Cream, and Fresh Fruit
A truly delicious fruit tart is a harmonious blend of three main components, each playing a crucial role in the final experience. First, there's the crust, which provides the foundation. A good tart crust should be crisp and buttery, offering a delightful contrast to the creamy filling. It needs to be sturdy enough to hold the filling and fruit but tender enough to cut through easily. A common type used in easy fresh fruit tart recipes is a pâte sucrée, or sweet shortcrust pastry, known for its rich flavor and crumbly texture.
Second is the filling, typically a pastry cream (crème pâtissière). This rich, smooth custard is thickened with eggs and starch, providing a luxurious bed for the fruit. Vanilla bean is a classic flavor, but it can be infused with citrus zest, chocolate, or other extracts. The pastry cream should be smooth and not too sweet, allowing the natural flavors of the fruit to shine.
Finally, the fresh fruit is the star. It adds vibrant color, fresh flavor, and essential texture. Choosing ripe, in-season fruit like bright red raspberries and yellow lemon zest ensures the best taste and appearance for your easy fresh fruit tart recipe.
Homemade Tart Crust: A Step-by-Step Guide
Ingredients for the Tart Crust
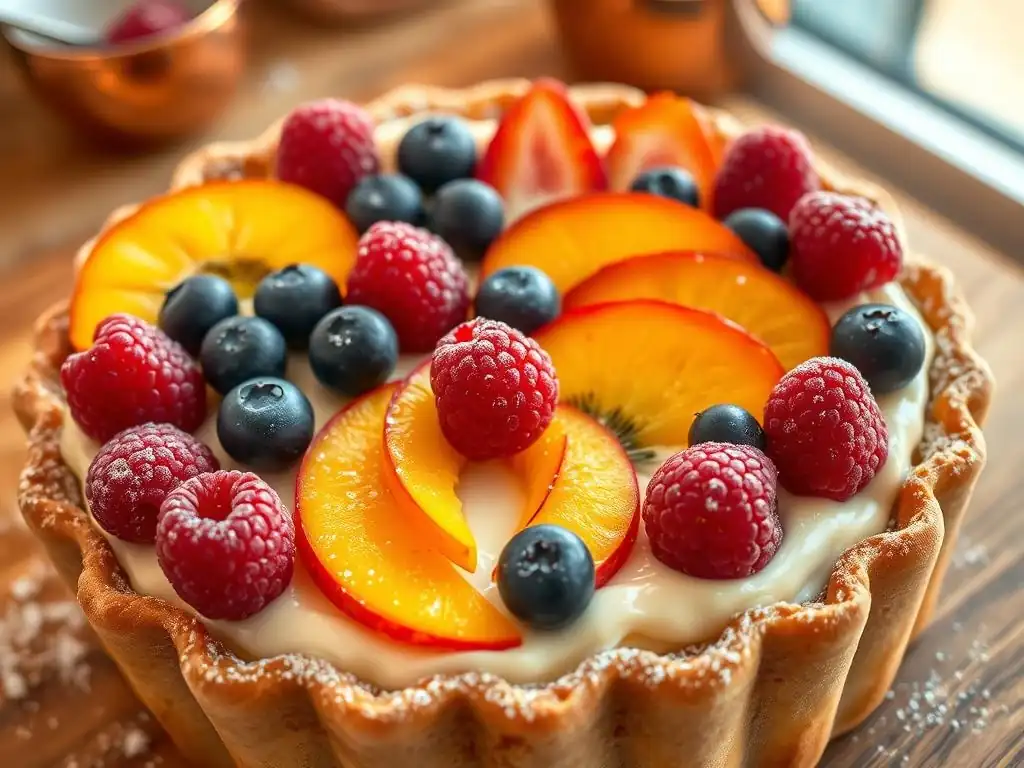
Creating a simple, flaky tart crust requires just a few basic ingredients, but quality matters. For a standard 9-inch tart pan, you'll need:
- About 1 ¼ cups (150g) all-purpose flour
- ½ cup (113g) cold unsalted butter, cut into small cubes
- ¼ cup (50g) granulated sugar
- ¼ teaspoon salt
- 1 large egg yolk
- 1-2 tablespoons ice water
Using cold butter is absolutely critical for achieving a flaky crust. As the butter melts in the oven, it creates steam pockets that separate the layers of dough, resulting in that desirable tender, flaky texture. The egg yolk adds richness and helps bind the dough, while the sugar provides a touch of sweetness that complements the fruit and cream. This ingredient list is designed for an easy fresh fruit tart recipe crust that is both forgiving and delicious.
Preparing the Tart Dough
Preparing the dough begins by combining the dry ingredients. In a medium bowl, whisk together the flour, sugar, and salt. Next, cut in the cold butter using a pastry blender, fork, or your fingertips until the mixture resembles coarse crumbs with some pea-sized pieces of butter remaining. This is another key step for flakiness – don't overwork the butter into the flour.
In a small bowl, whisk the egg yolk with 1 tablespoon of ice water. Add this wet mixture to the dry ingredients and mix until the dough just starts to come together. If it seems too dry, add the second tablespoon of ice water, but be careful not to add too much, as wet dough can become tough.
Turn the dough out onto a lightly floured surface and gently bring it together into a disc. Avoid kneading the dough extensively; this develops gluten and leads to a tough crust. Wrap the disc tightly in plastic wrap and refrigerate for at least 30 minutes (or up to 2 days). Chilling the dough allows the gluten to relax and the butter to firm up, making it much easier to roll out and resulting in a flakier crust. This simple process ensures your easy fresh fruit tart recipe starts with a solid foundation.
Blind Baking the Tart Shell
Blind baking is the process of partially or fully baking a tart crust before adding the filling. This is essential for tarts with wet fillings, like pastry cream, to prevent the bottom crust from becoming soggy. After chilling, roll the dough out on a lightly floured surface into a circle about 12 inches in diameter and about ⅛ inch thick.
Carefully transfer the dough to your 9-inch tart pan, pressing it gently into the bottom and up the sides. Trim any excess dough from the edges. Prick the bottom of the crust all over with a fork; this helps prevent it from puffing up during baking.
Line the tart shell with parchment paper or foil, pressing it against the sides and into the corners. Fill the lined shell with pie weights, dried beans, or rice, distributing them evenly. Bake in a preheated oven at 375°F (190°C) for 15-20 minutes, or until the edges are lightly golden. Remove the weights and parchment/foil and continue baking for another 5-10 minutes, or until the bottom is golden brown and appears dry.
For a fully baked crust (often preferred for fruit tarts with fillings that aren't baked further), bake until the entire crust is a deep golden brown. Let the crust cool completely in the pan on a wire rack before adding the filling. This crucial step guarantees a crisp base for your easy fresh fruit tart recipe.
Vanilla Bean Pastry Cream Filling: Quick and Easy Recipe
Ingredients for the Pastry Cream Filling
A rich, smooth pastry cream is the heart of many fruit tarts, and this vanilla bean version is both classic and incredibly delicious. The ingredients needed for a quantity sufficient for a 9-inch tart are:
- 2 cups (475ml) whole milk
- ½ vanilla bean, split lengthwise, or 1 teaspoon vanilla bean paste
- ½ cup (100g) granulated sugar, divided
- ¼ cup (30g) cornstarch
- 4 large egg yolks
- 2 tablespoons unsalted butter, softened
Using whole milk results in a creamier, richer pastry cream compared to lower-fat alternatives. The vanilla bean (or paste) provides authentic, intense vanilla flavor, visible as tiny black specks throughout the cream. Cornstarch is used as a thickener; it provides a smooth consistency without the need for too many egg yolks, making it a bit more foolproof. The egg yolks add richness, color, and help with thickening. Finally, the butter is added at the end for extra richness and a silky texture. These simple ingredients combine to create the luscious filling for your easy fresh fruit tart recipe.
Making the Pastry Cream
Making pastry cream involves a few key steps, but it's quite straightforward once you understand the process. Start by heating the milk with the split vanilla bean (or paste) and half of the sugar (¼ cup or 50g) in a medium saucepan over medium heat. Bring it just to a simmer, stirring occasionally. While the milk is heating, whisk together the remaining sugar (¼ cup or 50g) and cornstarch in a medium heatproof bowl. Add the egg yolks to the sugar/cornstarch mixture and whisk until pale and thick; this is called a blanchiment.
Once the milk is simmering, remove the vanilla bean pod (scrape the seeds into the milk if using a bean). Slowly pour about half of the hot milk into the egg yolk mixture while whisking constantly. This process is called tempering, and it gradually warms the egg yolks, preventing them from scrambling when added to the hot milk. Pour the tempered egg mixture back into the saucepan with the remaining hot milk.
Cook over medium heat, whisking constantly, until the mixture thickens significantly and comes to a gentle boil. Let it boil for about 1 minute while whisking to ensure the cornstarch is fully cooked and the cream is thick. Remove from heat, whisk in the softened butter until smooth.
Tips for Avoiding Lumps in Your Pastry Cream
Achieving a perfectly smooth pastry cream is key to a delightful tart filling. Lumps usually occur if the cornstarch isn't fully dissolved, if the eggs aren't tempered properly, or if the cream isn't cooked sufficiently while whisking. Here are some tips to help you avoid them:
- Whisk Cornstarch and Sugar Thoroughly: Before adding the egg yolks, make sure the cornstarch is completely mixed with the sugar. This helps distribute the starch evenly.
- Whisk Eggs Until Thick: Whisking the sugar and cornstarch with the egg yolks until pale and thick ensures the starch is coated by the yolks, aiding in smooth thickening.
- Temper Eggs Slowly: Pour the hot milk into the egg mixture slowly in a thin stream while whisking vigorously. This gradually raises the temperature of the yolks without cooking them too quickly.
- Whisk Constantly While Cooking: Once the tempered mixture is back in the saucepan, whisk continuously, paying attention to the bottom edges of the pan where thickening happens first. This prevents sticking and ensures even cooking.
- Cook Until Thick: Don't stop cooking too early. The cream needs to come to a boil and cook for about 1 minute while whisking to reach maximum thickness and cook out the starchy flavor.
- Strain if Necessary: If, despite your best efforts, you end up with a few lumps, you can press the finished pastry cream through a fine-mesh sieve while it's still hot.
- Cover Properly: Once made, transfer the pastry cream to a clean bowl and immediately press plastic wrap directly onto the surface of the cream. This prevents a skin from forming as it cools, which can also cause lumps.
Following these steps will help ensure your vanilla bean pastry cream for this easy fresh fruit tart recipe is wonderfully smooth and luxurious.
Assembling Your Lemon Raspberry Tart
Selecting Fresh Raspberries and Lemons
The quality of your fruit significantly impacts the final taste and appearance of your easy fresh fruit tart recipe. For this lemon raspberry tart, choose bright, plump, and firm raspberries. They should be a vibrant red color with no signs of mushiness or mold. Inspect the containers carefully before purchasing. Gently rinse them just before use and pat them dry thoroughly; excess moisture can make the tart soggy.
For the lemon element, you'll primarily use the zest, and perhaps a little juice in the glaze. Select firm, brightly colored lemons with blemish-free skin. Organic lemons are often preferred if you're using the zest, as they are less likely to have pesticide residues. Wash the lemons well before zesting. The fine zest contains the volatile oils that provide intense lemon flavor and aroma without the acidity of the juice.
Arranging the Fruit
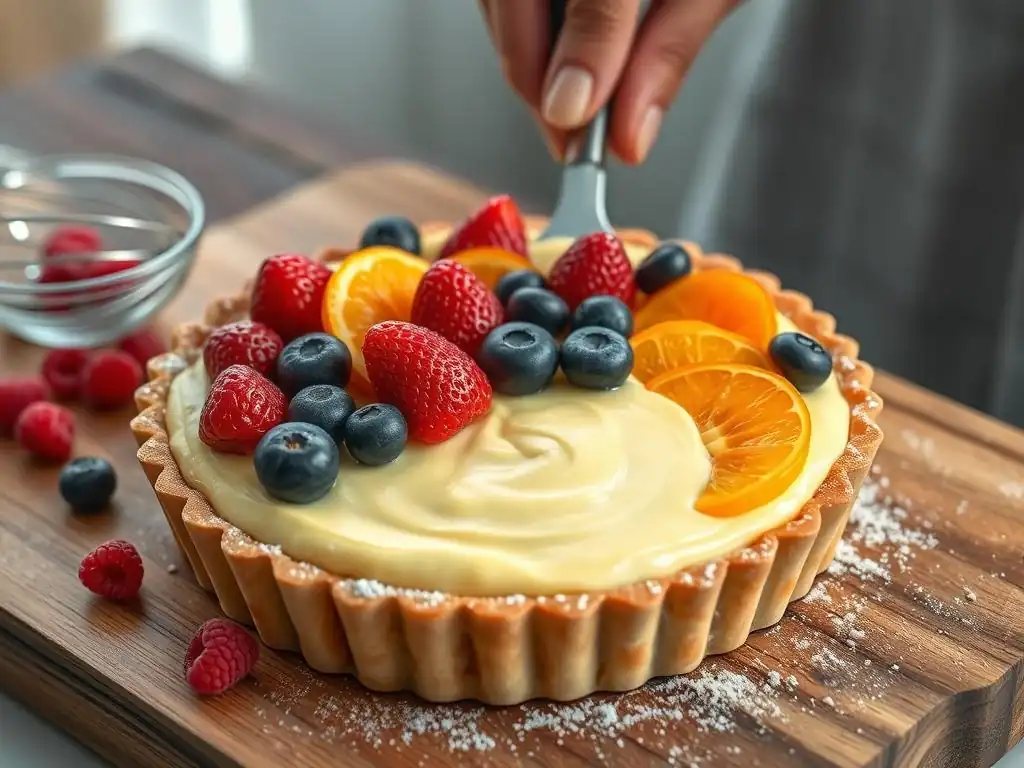
Arranging the fruit is where you bring your artistic touch to the easy fresh fruit tart recipe. Once the blind-baked crust is completely cool and filled with the chilled pastry cream, it's time to add the raspberries. Start arranging the raspberries on top of the pastry cream. You can place them randomly for a rustic look or arrange them in a neat pattern, perhaps in concentric circles starting from the outside edge and working your way in, or in rows. Aim to cover the surface of the pastry cream generously with the berries.
You can sprinkle fresh lemon zest directly over the berries and cream for an extra burst of citrus flavor and color. Consider adding a few thin slices of lemon (with rind removed if preferred) or other complementary fruits like blueberries or small segments of orange if you like, though keeping it simple with just raspberries and lemon zest highlights the core flavors. The visual appeal of the vibrant red raspberries against the creamy yellow pastry cream is part of what makes this such a delightful spring dessert.
Glazing the Fruit Tart
Glazing the fruit gives the tart a beautiful, professional sheen and helps keep the fruit looking fresh. A simple glaze can be made by warming some apricot jam or red currant jelly with a tiny bit of water or lemon juice until it's melted and brushable. About 2-3 tablespoons of jam warmed with 1 teaspoon of liquid is usually sufficient for a 9-inch tart. Strain the warmed jam through a fine-mesh sieve to remove any chunks of fruit.
Using a pastry brush, gently brush the warm glaze over the arranged raspberries. Be careful not to disturb the fruit. The glaze adds a touch of sweetness and provides a protective layer, preventing the fruit from drying out or looking dull. It gives the tart a finished, polished look that makes it even more appealing. Allow the glaze to set slightly before serving. This final touch elevates your easy fresh fruit tart recipe from simple to stunning.
Baking Tips and Tricks
Achieving a Golden-Brown Tart Crust
A perfectly golden-brown tart crust is the mark of a well-baked tart. To achieve this, several factors are important during the blind baking process. First, ensure your oven is accurately preheated to 375°F (190°C). An oven thermometer can help verify this. When blind baking, bake with weights initially until the edges are set and lightly colored (about 15-20 minutes). Then, remove the weights and parchment and continue baking.
The second bake without weights is where the bottom of the crust finishes cooking and achieves its golden color. This usually takes another 5-10 minutes, but keep a close eye on it. The bottom should look dry and uniformly golden. If you notice certain spots browning faster, you can loosely tent that area with a small piece of foil. Don't be afraid of color; a pale crust often indicates it's underbaked and prone to sogginess. A deep golden hue ensures a crisp, flavorful base for your easy fresh fruit tart recipe.
Preventing a Soggy Bottom Crust
Preventing a soggy bottom is arguably the most critical challenge in making a fruit tart with a creamy filling. The primary method is thorough blind baking, as detailed earlier. The crust must be fully baked and golden brown before the filling is added. This creates a barrier that prevents moisture from the pastry cream from seeping into the crust.
Another helpful tip is to ensure the pastry cream is completely cool and set before adding it to the cooled tart shell. Warm filling can introduce steam and condensation, making the crust soft. Additionally, some bakers like to brush the inside of the fully baked crust with a thin layer of melted white chocolate or egg white immediately after removing it from the oven. Once set, this creates an extra waterproof layer. While not strictly necessary if blind baking is done correctly, it provides added insurance for your easy fresh fruit tart recipe.
Storing Your Fruit Tart
Once assembled, a fresh fruit tart is best enjoyed within 1-2 days for optimal freshness and texture. Store the tart in the refrigerator. If you have any leftover slices, cover the cut edge with plastic wrap or place the slices in an airtight container.
The pastry cream is perishable and must be kept cold. While the crust can soften slightly over time due to the moisture from the filling and fruit, storing it correctly in the fridge helps maintain its quality for as long as possible. For the best experience with this easy fresh fruit tart recipe, serve it chilled, directly from the refrigerator.
Variations and Adaptations
Different Crust Options
While a classic sweet shortcrust (pâte sucrée) is recommended for this easy fresh fruit tart recipe, you have other crust options to explore. A pâte sablée, or sandy dough, is richer and more crumbly due to a higher ratio of butter and often contains almond flour. It has a more delicate texture.
For a simpler alternative, you could use a crushed cookie crust made from shortbread or graham crackers mixed with melted butter. This requires no rolling or blind baking (though a quick bake to set is often recommended) and offers a different flavor profile. Gluten-free flour blends can also be substituted in many tart dough recipes, often with the addition of xanthan gum, to cater to dietary needs while still creating a delicious base for your easy fresh fruit tart recipe.
Exploring Different Pastry Cream Flavors
The vanilla bean pastry cream in this recipe is a fantastic starting point, but the possibilities for flavor variations are endless. To make a lemon pastry cream, whisk finely grated lemon zest into the hot milk or stir in some lemon juice and zest after the cream has thickened (be cautious with adding too much acid, which can curdle the cream; lemon zest is often a safer bet for flavor).
Other delicious variations include chocolate pastry cream (whisk in chopped chocolate or cocoa powder after cooking), coffee pastry cream (dissolve instant coffee or add coffee extract to the hot milk), or even a spiced version with cinnamon or cardamom. You can also infuse the milk with citrus peels or star anise during heating for different aromatic notes. These simple changes allow you to tailor the easy fresh fruit tart recipe to your taste preferences or the season.
Seasonal Fruit Combinations
This easy fresh fruit tart recipe is incredibly versatile when it comes to the fruit topping. While raspberries and lemon are perfect for spring, consider other seasonal combinations. In summer, think about ripe strawberries, blueberries, peaches, or mixed berries. A peach and blueberry tart is wonderfully vibrant.
Autumn offers figs, pears, or apples (often requiring pre-cooking). Winter might feature citrus segments (like mandarins or grapefruit) or roasted fruits. The key is to use fresh, ripe fruit that complements the sweetness of the pastry cream and the richness of the crust. A simple fresh fruit tart recipe truly shines when topped with the best produce the season has to offer.
Troubleshooting Common Tart Problems
Soggy Crust Solutions
As mentioned, soggy crust is a common issue. If you find your crust isn't as crisp as you'd like, even after blind baking, here are some potential causes and fixes:
- Insufficient Blind Baking: Ensure the crust is truly golden brown and dry on the bottom after removing the weights. If it's still pale or looks damp, bake it longer.
- Adding Warm Filling: Make sure the pastry cream is completely chilled and set before adding it to the cooled tart shell.
- Excess Moisture from Fruit: Ensure your fruit is washed and thoroughly dried before arranging it on the tart.
- Storing Too Long: Tarts with creamy fillings are best eaten within a day or two. The longer they sit, the more moisture will transfer to the crust.
If you've already assembled the tart and notice slight sogginess, unfortunately, it's hard to reverse. For future attempts at this easy fresh fruit tart recipe, focus on perfecting the blind baking step.
Runny Pastry Cream Fixes
A runny pastry cream isn't ideal for a tart filling as it won't hold its shape when sliced. This usually happens because the cream wasn't cooked long enough or at a high enough temperature to activate the starch and thicken the eggs.
- Cook Longer: Ensure the cream comes to a boil and is whisked vigorously for at least 1 minute after thickening. Starch needs heat and time to reach its full thickening potential.
- Proper Ratio: Double-check your measurements to ensure you used the correct amount of cornstarch and egg yolks relative to the milk.
- Re-cooking (Carefully): If your cream is too thin after chilling, you can gently reheat it in a saucepan over low heat, whisking constantly, and cook for another minute or two after it thickens again. Be very careful not to scorch it or curdle the eggs. Whisking in a little extra cornstarch mixed with cold milk before reheating can help, but this is a tricky fix.
- Add Stabilizer: For extra insurance or if you prefer a firmer set, some recipes incorporate gelatin or butter into the pastry cream. This easy fresh fruit tart recipe uses butter for richness and some stability.
Preventing runny pastry cream by cooking it correctly the first time is the best approach for your easy fresh fruit tart recipe.
Fruit Browning Prevention
Some fruits, like sliced apples or pears, can brown when exposed to air. While not a major issue with raspberries and lemons, it's worth noting for variations. For fruits prone to browning, toss them gently with a little lemon juice before arranging them on the tart.
For fruits like raspberries, the main concern is drying out or losing their vibrant color over time. This is where the glaze is particularly helpful. Brushing the berries with a warm apricot or red currant glaze seals them, keeps them looking fresh, and adds a lovely sheen. This simple step maintains the visual appeal of your easy fresh fruit tart recipe.
Serving and Enjoying Your Homemade Fruit Tart
Pairing Suggestions
A slice of this beautiful lemon raspberry tart is delightful on its own, but certain pairings can enhance the experience. Consider serving it with a dollop of freshly whipped cream or a scoop of good quality vanilla ice cream. The cool, creamy addition complements the tartness of the fruit and the richness of the pastry cream.
For beverages, a light, slightly sweet wine like a Moscato d'Asti or a late-harvest Riesling pairs well with fruit desserts. Non-alcoholic options include a sparkling lemonade, iced tea, or a light herbal tea. The goal is to choose something that complements the bright, fresh flavors of the tart without overpowering them. Sharing this easy fresh fruit tart recipe with loved ones is a simple pleasure.
Making Ahead and Storing Instructions
While the assembled tart is best within a day or two, you can prepare some components in advance to make assembly quicker.
- Tart Crust: The tart dough can be made up to 2 days in advance and stored wrapped in the refrigerator. You can also blind bake the tart shell up to 1 day ahead and store it at room temperature (or loosely covered) until ready to fill.
- Pastry Cream: The vanilla bean pastry cream can be made up to 2 days in advance. Store it in the refrigerator with plastic wrap pressed directly onto the surface to prevent a skin. Whisk it gently before using it to ensure it's smooth.
Assemble the tart no more than a few hours before serving for the freshest result. If you need to make it further ahead, assemble it, glaze the fruit, and store it in the refrigerator. As mentioned earlier, store any leftovers in the fridge. This easy fresh fruit tart recipe is perfect for preparing components ahead, making entertaining much less stressful.
Conclusion: Your Lemon Raspberry Tart Success
Celebrate Spring with This Delightful Dessert
You've successfully navigated the steps to create a stunning and delicious lemon raspberry tart! From mastering the flaky crust and silky pastry cream to artfully arranging the fresh fruit, you've made a dessert that is truly a celebration of spring flavors. This easy fresh fruit tart recipe proves that homemade doesn't have to be complicated to be impressive.
The combination of the crisp, buttery crust, the smooth, vanilla-scented pastry cream, and the bright, slightly tart raspberries with a hint of lemon zest is simply irresistible. It's a dessert that looks as good as it tastes, making it perfect for sharing. We hope this guide has empowered you to tackle fruit tarts with confidence and that this easy fresh fruit tart recipe becomes a favorite in your spring baking repertoire. Enjoy every vibrant bite!
Frequently Asked Questions
What kind of fruit works best in this Easy Fresh Fruit Tart Recipe?
Almost any fresh, seasonal fruit works well! Consider berries, sliced stone fruits, or even kiwi. The key is to choose fruits that are ripe but firm so they hold their shape.
How do I prevent the tart crust from shrinking during baking?
To prevent shrinkage, blind bake the crust using pie weights or dried beans. Also, ensure the dough is properly chilled before baking and that you dock the bottom with a fork.
Can I make the pastry cream ahead of time?
Yes, definitely! The pastry cream can be made up to two days in advance and stored in the refrigerator. Just be sure to cover it with plastic wrap directly on the surface to prevent a skin from forming.
What if I don't have time to make the pastry cream?
If you're short on time, you can use a high-quality vanilla pudding as a substitute. Look for one that's thick and creamy to mimic the texture of the homemade pastry cream.
How long will the Simple Fresh Fruit Tart last?
The tart is best enjoyed the same day it's assembled to maintain the freshness of the fruit and the crispness of the crust. However, it can be stored in the refrigerator for up to two days, though the crust may soften.
Final Reflection: The Sweet Simplicity of Sharing
The ease of creating a beautiful and delicious dessert shouldn't be underestimated, especially in today's fast-paced world. This simple fresh fruit tart recipe proves that culinary artistry doesn't require hours of painstaking work or specialized skills. It's a testament to the power of fresh, high-quality ingredients and a few well-chosen techniques to create something truly special.
The joy of baking, and specifically the act of sharing homemade treats, has always held a special place in my heart. It's a tangible expression of care and connection, a way to bring people together around a table. Food is symbolic of love when words are inadequate.
– Alan D. Wolfelt. This sentiment rings especially true when considering the simple pleasure of a homemade tart, shared with loved ones. The process itself, from selecting the perfect fruits to the satisfying crackle of the pastry, becomes a meditative experience, a moment of calm amidst the chaos.
Now, I invite you to try this recipe. Don't be intimidated by the seemingly elegant result; the process is surprisingly straightforward. More importantly, consider the impact of sharing this simple pleasure with others. Imagine the smiles, the conversations, the memories created around a slice of this fresh fruit tart. Let this recipe be a reminder that even the smallest acts of culinary creativity can bring immense joy and connection. Bake one, share one, and savor the sweetness.
Unlock Your Inner Pastry Chef!
Thanks for joining us on this delicious journey! We hope you've gained the confidence to tackle a beautiful and flavorful fruit tart. Now it's time to put your newfound skills to the test!
- Bake your own masterpiece: Gather your ingredients and recreate this Simple Fresh Fruit Tart. Let us know how it turns out!
- Share your creation: Post a picture of your finished tart on social media and tag us! We’d love to see your baking brilliance.
- Explore more easy dessert recipes: Dive into our recipe archives and discover your next baking adventure.
Ready to transform your kitchen into a pastry paradise? What other delicious treats will you bake today?