
Understanding AllPurpose Flour: A Beginner's Guide

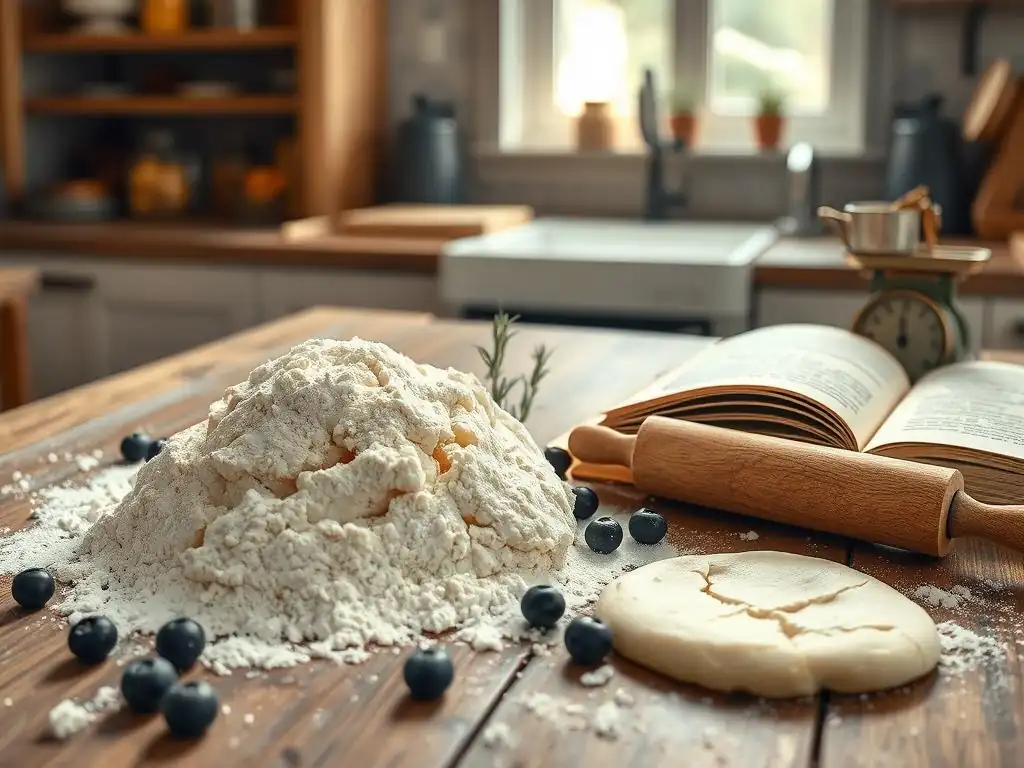
Welcome to BakeWithEase, where your baking journey begins! Ever wondered if you're truly getting the most out of that bag of all-purpose flour sitting in your pantry? This guide unlocks its secrets, transforming you from a baking novice to a confident creator. Discover everything you need to know about this essential ingredient and prepare to elevate your baking – let's get started!
- Understanding All-Purpose Flour: A Baker's Essential Guide
- Introduction to All-Purpose Flour for Home Bakers
- What Exactly is All-Purpose Flour? Production and Properties
- Types of All-Purpose Flour: Bleached vs. Unbleached - A Detailed Comparison
- All-Purpose Flour in Baking: Diverse Applications
- Measuring All-Purpose Flour Accurately: Techniques for Consistent Results
- Storing All-Purpose Flour Properly: Preserving Quality and Preventing Spoilage
- All-Purpose Flour Substitutes: Exploring Alternatives
- Troubleshooting with All-Purpose Flour: Common Issues and Solutions
- All-Purpose Flour Recipes to Get You Started
- Conclusion: Mastering Baking with All-Purpose Flour
-
Frequently Asked Questions
- What exactly is all-purpose flour and why is it so popular?
- How does all-purpose flour differ from other types of flour, like bread flour or cake flour?
- Is all-purpose flour suitable for all baking projects, or are there times when I should use a different type of flour?
- What are some common mistakes beginners make when using all-purpose flour, and how can I avoid them?
- How should I store all-purpose flour to keep it fresh and prevent it from going bad?
- Final Reflection: The Humble Power of All-Purpose Flour
- Unlock Your Baking Potential: Master All-Purpose Flour!
Understanding All-Purpose Flour: A Baker's Essential Guide
Introduction to All-Purpose Flour for Home Bakers
The Cornerstone of Baking: Understanding All-Purpose Flour
Welcome to the wonderful world of baking! As you embark on this delicious journey, you'll quickly discover that one ingredient appears in countless recipes: all-purpose flour. Think of it as the unsung hero in your pantry, the foundation upon which many delightful creations are built.
Understanding all-purpose flour is the first crucial step for any beginner baker. It's not just a white powder; it's a carefully crafted ingredient with specific properties that influence the structure, texture, and overall success of your baked goods, from fluffy muffins to chewy cookies. Getting to know this versatile flour is key to unlocking your baking potential and ensuring consistent, delicious results every time you tie on your apron.
This comprehensive all purpose flour beginner guide will walk you through everything you need to know about this essential ingredient. We'll explore what it is, how it's made, its key characteristics, and how to use it effectively in various recipes. Whether you're attempting your first batch of cookies or a simple loaf of bread, mastering all-purpose flour will give you the confidence to tackle almost any baking project. So, let's dive in and demystify this fundamental component of successful baking, building a strong foundation for your baking adventures.
Versatility in a Bag: Why All-Purpose Flour is a Staple
All-purpose flour earns its name because it is truly designed to be versatile, capable of being used in a wide range of baking applications. Unlike specialized flours like bread flour (higher protein) or cake flour (lower protein), all-purpose flour strikes a balance. This moderate protein content allows it to perform reasonably well in everything from delicate cakes and pastries to sturdy breads and pizza doughs. For a beginner baker building their pantry, having a bag of all-purpose flour is essential because it covers the basics for a vast majority of starter recipes.
Consider a typical beginner's baking list: chocolate chip cookies, simple cupcakes, quick bread like banana bread, or even basic pancakes. All of these can be made successfully with all-purpose flour. This single ingredient minimizes the need for multiple specialized flours when you're just starting out, making baking more accessible and less intimidating. It's the reliable workhorse that allows you to experiment with different techniques and recipes without needing a fully stocked flour cupboard right away. Its adaptability makes it the perfect starting point for anyone learning to bake.
What Exactly is All-Purpose Flour? Production and Properties
Milling Process and Grain Selection for All-Purpose Flour
All-purpose flour begins its life as wheat kernels. The production process involves milling these kernels to separate the three main parts: the bran (the outer layer), the germ (the embryo), and the endosperm (the starchy interior). For white flours like all-purpose, the bran and germ are typically removed, leaving behind primarily the endosperm. This removal results in a finer, whiter flour with a longer shelf life compared to whole wheat flour, which retains all parts of the kernel. The milling process breaks down the endosperm into a fine powder, creating the texture we recognize as flour.
The wheat used for all-purpose flour is usually a blend of hard and soft wheat varieties. Hard wheat is higher in protein, contributing to stronger gluten development needed for structure, while soft wheat is lower in protein, resulting in a more tender crumb. By blending these two types, millers achieve a moderate protein level, typically ranging from about 10% to 12%.
This specific blend is what gives all-purpose flour its versatility, allowing it to function adequately in recipes requiring varying degrees of structure and tenderness. The precise blend can vary slightly between brands and regions, subtly affecting its baking properties.
Protein Content and Gluten Development in All-Purpose Flour
The protein content of flour is a critical factor in baking, specifically because it directly relates to gluten development. When flour is mixed with liquid and agitated (like kneading or stirring), two proteins naturally present in wheat, gliadin and glutenin, combine to form gluten. Gluten is an elastic network that provides structure to baked goods. In bread baking, strong gluten is needed to trap the carbon dioxide produced by yeast, causing the dough to rise and creating a chewy texture. In cakes and pastries, less gluten development is desired to ensure a tender, light crumb.
All-purpose flour, with its moderate protein content (around 10-12%), offers a middle ground for gluten development. It can develop enough gluten to provide some structure in quick breads and muffins, and with more mixing and kneading, it can form a network strong enough for basic yeasted doughs, though not as robust as bread flour.
For tender baked goods like cakes and cookies, the key is to minimize gluten development by mixing just until the ingredients are combined. Understanding this relationship between protein, mixing, and gluten is fundamental to using all-purpose flour successfully in various recipes, making this a key part of any all purpose flour beginner guide.
Types of All-Purpose Flour: Bleached vs. Unbleached - A Detailed Comparison
Bleached All-Purpose Flour: Uses and Effects on Baked Goods
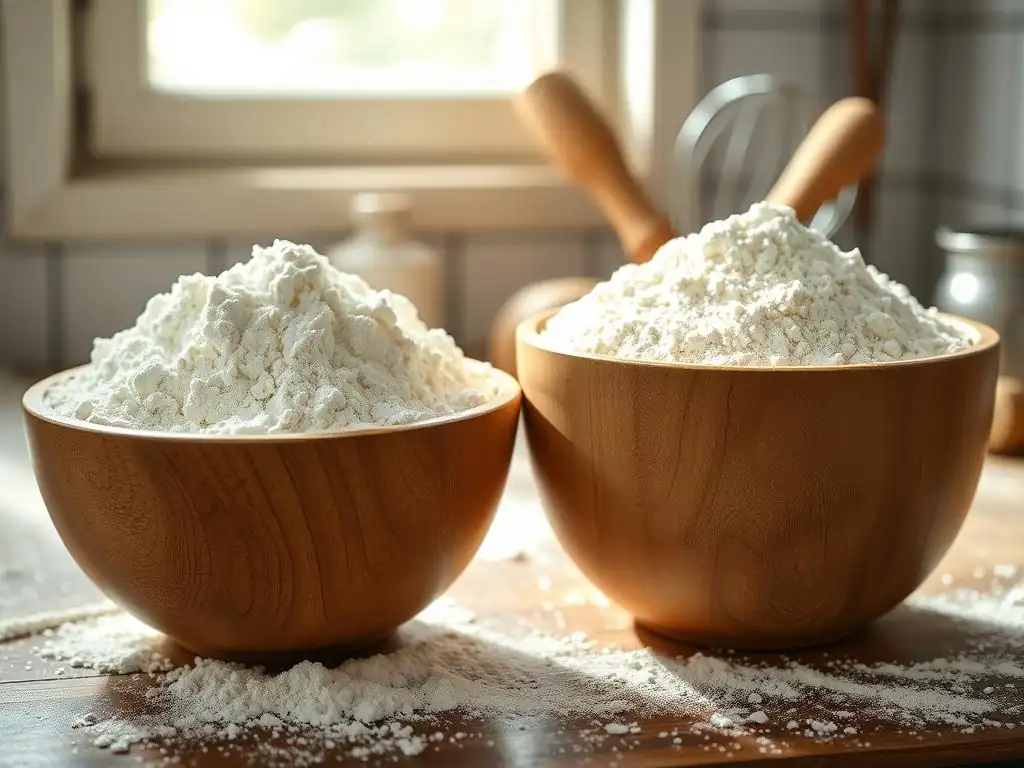
Bleached all-purpose flour undergoes a chemical process, often using agents like benzoyl peroxide or chlorine gas, to whiten the flour and speed up the aging process. Freshly milled flour has a slightly yellowish tint and needs time to age naturally before its baking properties are optimal. Chemical bleaching achieves this aging effect rapidly, oxidizing the proteins and improving the flour's ability to form gluten and absorb liquid quickly. This results in a flour that is whiter, has a finer texture, and tends to absorb liquids slightly faster than unbleached flour.
Chemically bleached flour is often preferred for recipes where a very white color and fine, tender crumb are desired, such as white cakes, biscuits, and pastries. The bleaching process can slightly weaken the protein structure, which can contribute to a softer, more tender result in delicate baked goods. While some argue about potential subtle flavor differences or nutritional impacts, for most home bakers, the primary differences lie in color, texture, and handling properties. Its consistent performance and fine texture make it a popular choice for many standard baking applications.
Unbleached All-Purpose Flour: Natural Flavor and Baking Applications
Unbleached all-purpose flour is aged naturally over time, rather than through chemical processes. This natural aging allows the flour to whiten and mature slowly, developing its baking properties without the use of chemicals. As a result, unbleached flour typically has a slightly creamier or off-white color compared to bleached flour and might have a slightly coarser texture. Some bakers believe unbleached flour has a more natural or nuanced flavor, though this difference is often subtle and difficult to detect in most finished baked goods.
Unbleached all-purpose flour is generally considered slightly stronger than bleached flour, meaning its protein structure is a bit more robust and capable of developing slightly more gluten. This makes it an excellent choice for recipes that require more structure, such as rustic breads, puff pastry, and eclairs. However, it is still versatile enough for use in cakes, cookies, and other baked goods. Many bakers prefer unbleached flour for its natural processing and reliable performance across a wide range of recipes, making it a go-to choice for many home kitchens.
Selecting the Right All-Purpose Flour for Different Baking Needs
Choosing between bleached and unbleached all-purpose flour often comes down to personal preference and the specific requirements of the recipe. For delicate cakes, biscuits, or pastries where a very white color and tender crumb are paramount, some bakers prefer bleached flour due to its finer texture and slightly weaker protein structure. For recipes requiring a bit more structure or those where the natural aging is valued, unbleached flour is an excellent choice. It performs well in everything from cookies to quick breads and even some yeasted doughs.
Ultimately, for most beginner recipes found in an all purpose flour beginner guide, either bleached or unbleached all-purpose flour will work just fine. The differences are often subtle, and the success of your bake depends more on accurate measurement and proper technique than on the bleach status of the flour. If a recipe specifically calls for one over the other, it's best to follow that recommendation. Otherwise, feel free to experiment and see if you notice a difference in your results or simply choose based on availability or personal preference regarding processing.
All-Purpose Flour in Baking: Diverse Applications
Baking Cakes with All-Purpose Flour: Structure and Texture Considerations
When baking cakes with all-purpose flour, the goal is typically a tender, moist crumb. The key challenge is to develop just enough gluten for structure but not so much that the cake becomes tough or rubbery. All-purpose flour's moderate protein content makes it suitable, but it requires careful handling. Overmixing the batter after adding the flour is the most common pitfall. Excessive mixing develops gluten, which is great for bread but detrimental to cake texture.
To achieve a tender cake, use the 'creaming method' (beating butter and sugar) to incorporate air, and then alternate adding dry ingredients (flour) and wet ingredients, mixing only until just combined. For example, in a classic vanilla cake recipe using 2 cups (approx. 240-250g) of all-purpose flour, you would typically mix the flour in two or three additions, stopping as soon as no dry streaks remain. This minimal mixing allows the starches to absorb liquid and provides just enough gluten for the cake to hold its shape as it bakes, resulting in a light and airy texture.
All-purpose flour is the standard flour for most cookie recipes, offering a balance between structure and tenderness. The amount of gluten development in cookie dough significantly impacts the final texture – more gluten can lead to chewier cookies, while less leads to more tender or crumbly ones. Unlike cakes, cookie dough often benefits from a bit more mixing, especially in recipes aiming for a chewier texture, like classic chocolate chip cookies. However, overmixing can still lead to tough cookies.
Consider a standard recipe for drop cookies using about 2.5 cups (approx. 300-315g) of all-purpose flour. Mixing the dry ingredients into the wet ingredients until just combined will yield a tender cookie. For a slightly chewier result, you might mix for a few seconds longer, but avoid aggressive kneading.
The proportion of ingredients (like butter, sugar, and eggs) also plays a huge role alongside the flour. For instance, using more brown sugar and melted butter can enhance chewiness, working in conjunction with the flour's protein. Chilling the dough also impacts how the flour behaves, often leading to thicker, chewier cookies.
Using All-Purpose Flour for Breads: A Basic Overview
While bread flour is the preferred choice for many yeast breads due to its higher protein content (typically 12-14%) and superior gluten-forming ability, all-purpose flour can certainly be used for basic bread recipes, especially for beginners. It won't produce a loaf with the same chewy crumb or high rise as bread flour, but it's perfectly adequate for simple sandwich loaves, rolls, or pizza dough. The key difference when using all-purpose flour for bread is that you'll likely need to knead the dough for a longer period to develop sufficient gluten strength.
In a simple white bread recipe calling for around 3-4 cups (approx. 360-500g) of all-purpose flour, you would mix the ingredients and then knead the dough for 8-10 minutes (by hand) or 6-8 minutes (by stand mixer) until it becomes smooth and elastic. While this develops the gluten network, the lower protein means the network won't be as strong as one formed with bread flour.
This results in a slightly denser crumb and less dramatic oven spring. However, for a beginner learning the process of yeast activation, mixing, kneading, and rising, using readily available all-purpose flour is a great starting point.
Measuring All-Purpose Flour Accurately: Techniques for Consistent Results
Spooning and Leveling: A Reliable Measurement Method
Accurately measuring flour is arguably one of the most critical steps for consistent baking results, especially when following recipes designed for volume measurements (like cups). The 'spoon and level' method is widely recommended for dry ingredients like flour in beginner recipes. To use this technique, gently spoon the flour from its container into your dry measuring cup. Do not scoop directly from the bag with the measuring cup, as this compacts the flour, leading to significantly more flour than intended.
Once the measuring cup is slightly overfilled, use a straight edge, like the back of a knife or a flat spatula, to level off the excess flour, ensuring the top is flat and even with the rim of the cup. This method minimizes compaction and provides a more consistent volume measurement compared to scooping. While not as precise as weighing, spooning and leveling is a vast improvement over scooping and is the standard technique assumed by most recipes that list flour in cups. Mastering this simple technique is essential for any all purpose flour beginner guide.
Weighing All-Purpose Flour: Achieving Precision in Baking
For the most accurate and consistent results in baking, weighing ingredients, including all-purpose flour, is the preferred method used by professional bakers and increasingly recommended in home baking recipes. Flour can settle in its packaging, and its density can vary slightly depending on humidity and how it's stored.
Volume measurements (cups) are subject to significant variation based on how the flour is scooped or packed into the cup. For example, one cup of spooned and leveled all-purpose flour typically weighs between 120 and 125 grams, while a cup scooped directly from the bag can weigh 140 grams or more – a difference of over 15%!
Using a digital kitchen scale eliminates this variability. Simply place your mixing bowl on the scale, tare the scale to zero, and then add the flour directly to the bowl until the desired weight is reached. This ensures you are using the exact amount of flour specified in the recipe every time, leading to more predictable outcomes. While it requires a scale, weighing is simpler and faster once you get used to it and is the single best way to improve consistency in your baking.
Volume to Weight Conversion: All-Purpose Flour Measurement Chart
Understanding the approximate relationship between volume and weight for all-purpose flour is helpful, especially when a recipe provides only one type of measurement. While weighing is more accurate, having a conversion chart can be useful for quickly estimating or adjusting recipes. Remember that these are approximations and can vary slightly based on density and humidity.
Here is a general chart for spooned and leveled all-purpose flour:
- ¼ cup ≈ 30 grams
- ⅓ cup ≈ 40 grams
- ½ cup ≈ 60 grams
- ⅔ cup ≈ 80 grams
- ¾ cup ≈ 90 grams
- 1 cup ≈ 120-125 grams
Using a task list format, let's illustrate a conversion example:
- [ ] Recipe calls for 3 cups All-Purpose Flour (spooned & leveled)
- [ ] Calculate approximate weight: 3 cups * 120 grams/cup = 360 grams
- [ ] Or: 3 cups * 125 grams/cup = 375 grams
- [ ] So, 3 cups is approximately 360-375 grams.
While this chart is a useful reference for an all purpose flour beginner guide, whenever possible, rely on the method (weighing or spooning/leveling) specified in the recipe, or ideally, use a scale for maximum accuracy.
Storing All-Purpose Flour Properly: Preserving Quality and Preventing Spoilage
Optimal Storage Conditions for All-Purpose Flour
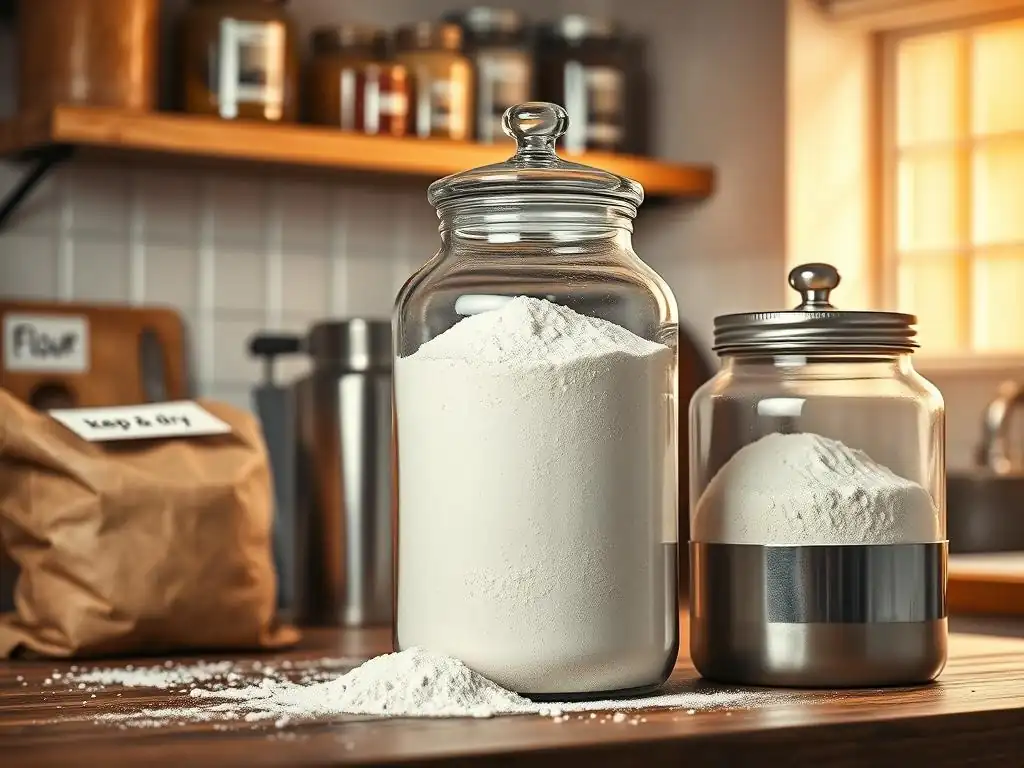
Proper storage is crucial to keep your all-purpose flour fresh and prevent it from spoiling, becoming rancid, or attracting pests. Flour is a dry pantry staple, but it is susceptible to moisture, air, light, and temperature fluctuations. The ideal storage environment for all-purpose flour is cool, dry, and dark. High temperatures and humidity can accelerate spoilage and encourage mold growth.
Store flour in an airtight container. The original paper bag is not sufficient as it is not airtight and can be easily penetrated by pests. Transferring the flour to a rigid plastic container with a tight-fitting lid, a glass jar with a sealable lid, or even a heavy-duty zip-top bag (squeezing out excess air) will protect it from moisture, air, and pantry moths or beetles.
Keep the container in a cool pantry away from direct sunlight and heat sources like ovens or radiators. For longer-term storage, flour can even be kept in the freezer, which significantly extends its shelf life.
Shelf Life and Signs of Spoilage in All-Purpose Flour
All-purpose flour has a relatively long shelf life compared to whole grain flours (due to the removal of the perishable germ), but it doesn't last indefinitely. When stored properly in a cool, dry, dark place, it can typically last for 6 to 12 months after the 'best by' date printed on the package. If stored in the freezer, its quality can be maintained for even longer, potentially up to 2 years.
Signs of spoilage in all-purpose flour include a change in color (from white or creamy to yellowish or grayish), an off smell (it should smell neutral or slightly sweet, not musty, sour, or rancid), and the presence of pests like small beetles or larvae (often called pantry weevils). If you notice any of these signs, it's best to discard the flour. Using spoiled flour will negatively impact the flavor and texture of your baked goods and can potentially be a health hazard. Always check your flour before using it, especially if it's been stored for a while.
All-Purpose Flour Substitutes: Exploring Alternatives
Common Substitutions When You're Out of All-Purpose Flour
Finding yourself mid-recipe without enough all-purpose flour can be frustrating! While all-purpose is the most versatile, you might be able to substitute other flours in a pinch, depending on the recipe. For simple recipes like pancakes, muffins, or quick breads, you might be able to substitute bread flour or pastry flour cup-for-cup, though the texture will likely be slightly different. Bread flour could make quick breads a bit tougher, while pastry flour could make them a bit too tender.
Whole wheat flour can sometimes substitute a portion (say, up to 50%) of the all-purpose flour in hearty recipes like muffins or cookies, but it will change the texture and flavor significantly and often requires additional liquid. Cake flour (lower protein) is a poor substitute for recipes requiring significant structure like bread, but it could potentially be used in delicate cakes if you adjust the amount (often more cake flour is needed by volume due to its lightness).
Using a different flour will change the outcome, so for best results, it's ideal to use the flour specified. However, for a beginner needing a quick fix, these approximations might work in forgiving recipes.
Gluten-Free Flour Blends: A Viable Alternative for Gluten-Free Baking
For individuals with gluten sensitivities or celiac disease, or those simply choosing a gluten-free lifestyle, gluten-free all-purpose flour blends are a necessary alternative. These blends are specifically formulated to mimic the properties of wheat-based all-purpose flour as closely as possible. They are typically a mixture of various gluten-free flours (such as rice flour, sorghum flour, potato starch, tapioca starch) and often include binders like xanthan gum or guar gum to help provide structure that gluten would normally provide.
When using a gluten-free all-purpose blend as a substitute for wheat all-purpose flour, it's crucial to use a blend specifically labeled as "all-purpose" and designed for a 1:1 substitution in most recipes. However, results can vary depending on the brand and the specific recipe. Some recipes may require slight adjustments to liquid content or baking time. Using a high-quality gluten-free all-purpose blend opens up a vast range of baking possibilities for those avoiding gluten, allowing them to enjoy everything from cookies and cakes to breads.
Substituting All-Purpose Flour in Pancake Recipes
Pancake recipes are quite forgiving, making them a good candidate for experimenting with flour substitutions if you don't have all-purpose flour on hand. If you have self-rising flour, you can often substitute it directly for the all-purpose flour and baking powder/soda in a standard pancake recipe. Self-rising flour already contains leavening and salt. A common ratio is to replace 1 cup of all-purpose flour plus 1.5 teaspoons of baking powder and 0.5 teaspoon of salt with 1 cup of self-rising flour.
Other flours can also work, though they will alter the texture. Whole wheat flour will result in denser, nuttier pancakes. A blend of oat flour and a starch (like cornstarch or potato starch) can also work for a gluten-free option, though you'll need to add leavening. Even basic cornmeal can be used to make cornbread-style pancakes. The key is that pancakes don't rely heavily on gluten development for structure, making them adaptable. However, for the classic fluffy pancake texture, all-purpose flour remains the standard, as highlighted in any good all purpose flour beginner guide recipe section.
Troubleshooting with All-Purpose Flour: Common Issues and Solutions
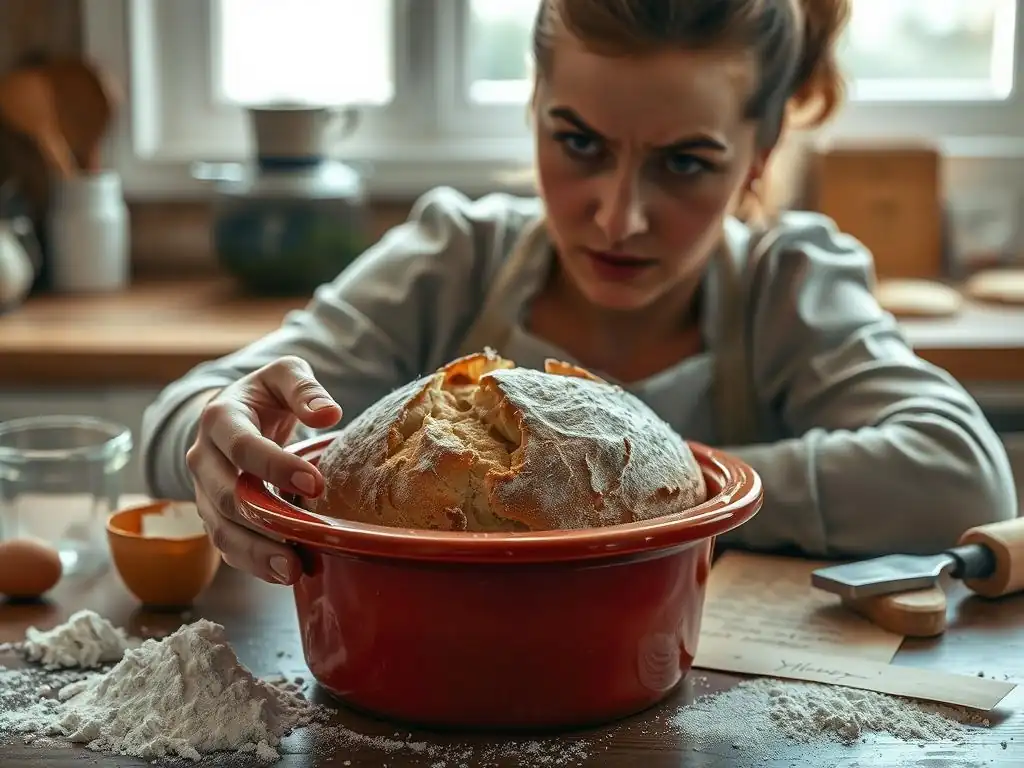
One of the most common frustrations for beginner bakers is ending up with cakes or cookies that are dense or tough instead of light and tender. When using all-purpose flour, this issue is frequently related to gluten development. As discussed earlier, overmixing the batter or dough after the flour has been added activates the gluten proteins, creating a strong, elastic network. While desirable in bread, this network makes cakes and cookies tough and dense.
To prevent this, mix dry ingredients into wet ingredients only until just combined. For cakes, stop mixing as soon as you no longer see streaks of dry flour. For cookies, mix until the ingredients are incorporated, but avoid overworking the dough. Another factor can be using too much flour, often due to inaccurate measurement (scooping instead of spooning and leveling or weighing). Ensure you are measuring correctly, ideally by weight (1 cup ≈ 120-125g), to avoid adding excess flour, which throws off the dry-to-wet ratio and can lead to a heavy texture.
Tough Dough: Correcting Overworked All-Purpose Flour
Dough made with all-purpose flour, especially for recipes like biscuits, pie crusts, or even some quick breads, can become tough if overworked. This again relates to excessive gluten development. When dough is mixed or kneaded too much, the gluten network becomes too strong and tight, resulting in a product that is hard or chewy instead of tender and flaky. This is particularly true for recipes where you want minimal gluten development.
For pastries like pie crusts or biscuits, the goal is often to mix just until the dough barely comes together, leaving some visible pieces of fat (butter or shortening) which create flakiness. Overmixing turns these into a uniform paste and develops gluten. If your dough feels resistant, elastic, or hard to work with, it's likely overworked.
Unfortunately, once gluten is overdeveloped, it's difficult to reverse. Allowing the dough to rest for 20-30 minutes can sometimes help relax the gluten slightly, making it easier to handle, but it won't completely fix a tough texture. The best solution is prevention: mix gently and only as much as the recipe instructs.
Flat cookies can be caused by several factors, and while not always solely a flour issue, the flour's properties and how it's measured play a role. If cookies spread too much and end up thin and flat, it could be due to too little flour, causing the dough to be too wet and lacking structure. This might happen if flour is measured incorrectly (e.g., not enough is added). Using softened or melted butter instead of properly creamed room-temperature butter can also contribute to spread, as can using too much sugar or not enough leavening.
Sometimes, the protein content of the all-purpose flour used might slightly affect spread, but this is usually minor compared to other factors. Ensure you are using the correct measurement of flour (again, weighing is best!) and that your leavening agents (baking soda/powder) are fresh. Chilling the cookie dough before baking is an excellent technique to reduce spread, allowing the fat to firm up and the flour to fully hydrate, which provides more structure during baking. This simple step can often turn flat cookies into perfectly shaped ones, even when using standard all-purpose flour.
All-Purpose Flour Recipes to Get You Started
Classic Vanilla Cake Recipe Using All-Purpose Flour
Here's a simple, classic vanilla cake recipe perfect for using your all-purpose flour. This recipe yields a tender cake, ideal for beginners.
Yields: One 8-inch round cake Prep time: 15 minutes Bake time: 30-35 minutes
Ingredients:
- 1 ½ cups (approx. 180-188g) All-Purpose Flour, spooned & leveled
- 1 ½ teaspoons Baking Powder
- ¼ teaspoon Salt
- ½ cup (113g) Unsalted Butter, softened
- 1 cup (200g) Granulated Sugar
- 2 large Eggs
- 1 teaspoon Vanilla Extract
- ½ cup (120ml) Milk
Instructions:
1. Preheat oven to 350°F (175°C). Grease and flour an 8-inch round cake pan.
2. In a medium bowl, whisk together the measured All-Purpose Flour, baking powder, and salt.
3. In a large bowl, cream the softened butter and sugar together using an electric mixer until light and fluffy, about 3-5 minutes.
4. Beat in the eggs one at a time, then stir in the vanilla extract.
5. Add the dry ingredients to the wet ingredients in three additions, alternating with the milk in two additions (start and end with dry ingredients). Mix on low speed *just* until combined and no dry streaks of flour remain. Do not overmix.
6. Pour batter into the prepared pan and spread evenly.
7. Bake for 30-35 minutes, or until a toothpick inserted into the center comes out clean.
8. Let the cake cool in the pan for 10 minutes before inverting onto a wire rack to cool completely.
This recipe demonstrates how All-Purpose Flour provides structure while aiming for minimal gluten development for tenderness.
Every all purpose flour beginner guide needs a chocolate chip cookie recipe! This simple version is reliable and uses standard all-purpose flour.
Yields: Approx. 2 dozen cookies Prep time: 15 minutes (plus chilling time) Bake time: 10-12 minutes per batch
Ingredients:
- 2 ¼ cups (approx. 270-280g) All-Purpose Flour, spooned & leveled
- 1 teaspoon Baking Soda
- ½ teaspoon Salt
- 1 cup (2 sticks or 226g) Unsalted Butter, softened
- ¾ cup (150g) Granulated Sugar
- ¾ cup (160g) Packed Light Brown Sugar
- 2 large Eggs
- 1 teaspoon Vanilla Extract
- 2 cups (approx. 340g) Chocolate Chips
Instructions:
1. In a small bowl, whisk together the measured All-Purpose Flour, baking soda, and salt.
2. In a large bowl, cream the softened butter, granulated sugar, and brown sugar until light and fluffy, about 2-3 minutes.
3. Beat in the eggs one at a time, then stir in the vanilla extract.
4. Gradually add the dry ingredients to the wet ingredients, mixing on low speed *just* until combined. Do not overmix.
5. Stir in the chocolate chips using a spoon or spatula.
6. (Optional but recommended for thicker cookies): Cover the dough and chill in the refrigerator for at least 30 minutes.
7. Preheat oven to 375°F (190°C). Line baking sheets with parchment paper.
8. Drop rounded tablespoons of dough onto the prepared baking sheets, about 2 inches apart.
9. Bake for 10-12 minutes, or until the edges are golden brown and the centers are still slightly soft.
10. Let cool on the baking sheets for a few minutes before transferring to a wire rack to cool completely.
This recipe shows how all-purpose flour works with fats and sugars to create a classic cookie texture.
Quick and Easy All-Purpose Flour Pizza Dough Recipe
You can even make simple pizza dough with all-purpose flour! This recipe is a great starting point for beginners learning about yeast and dough handling.
Yields: Two 10-12 inch pizzas Prep time: 20 minutes Rise time: 1-1.5 hours Bake time: 10-15 minutes
Ingredients:
- 2 ½ cups (approx. 300-315g) All-Purpose Flour, spooned & leveled, plus more for dusting
- 1 teaspoon Granulated Sugar
- 1 teaspoon Salt
- 1 packet (2 ¼ teaspoons) Instant or Active Dry Yeast
- 1 cup (240ml) Warm Water (105-115°F or 40-46°C)
- 2 tablespoons Olive Oil, plus more for bowl
Instructions:
1. In a large bowl, whisk together the measured All-Purpose Flour, sugar, salt, and yeast. If using active dry yeast, let it bloom in the warm water for 5 minutes first.
2. Add the warm water and olive oil to the dry ingredients. Mix with a spoon or in a stand mixer with a dough hook until a shaggy dough forms.
3. Turn the dough out onto a lightly floured surface. Knead for about 5-8 minutes (or 4-6 minutes in a stand mixer) until the dough is smooth and elastic. It might be slightly sticky; add minimal flour as needed.
4. Lightly oil a clean bowl. Place the dough in the bowl, turning to coat. Cover the bowl tightly with plastic wrap.
5. Let the dough rise in a warm place until doubled in size, about 1 to 1.5 hours.
6. Punch down the dough to deflate it gently. Divide in half.
7. Shape each half into a pizza crust on a lightly floured surface or directly on a pizza peel dusted with cornmeal. Add your desired toppings.
8. Bake on a preheated pizza stone or baking sheet in a preheated oven (450-500°F or 230-260°C) for 10-15 minutes, or until the crust is golden and the cheese is bubbly.
This recipe demonstrates how All-Purpose Flour can develop enough gluten with kneading to create a workable dough, perfect for an all purpose flour beginner guide looking to make simple breads.
Conclusion: Mastering Baking with All-Purpose Flour
The Power of All-Purpose Flour: A Versatile Ingredient
As we've explored, understanding all-purpose flour is fundamental to mastering the basics of baking. Its moderate protein content makes it the ultimate versatile ingredient, capable of performing reasonably well in a vast array of recipes. From providing just enough structure for a tender cake to developing sufficient gluten for a simple pizza dough or yielding that perfect chewiness in cookies, all-purpose flour truly lives up to its name. It's the reliable starting point that allows beginners to dive into the world of baking without needing a pantry full of specialized flours.
By learning about its properties, how it's milled, the difference between bleached and unbleached varieties, and most importantly, how to measure and handle it correctly, you gain confidence in the kitchen. This all purpose flour beginner guide has aimed to equip you with the foundational knowledge needed to use this essential ingredient successfully. With accurate measurements and an understanding of how mixing affects gluten, you are well on your way to creating delicious baked goods consistently.
Expanding Your Baking Skills: Next Steps and Resources
Now that you have a solid grasp of all-purpose flour, you are ready to expand your baking repertoire! Start by trying the beginner recipes provided in this guide – the vanilla cake, chocolate chip cookies, or pizza dough. Practice accurate measuring techniques, pay attention to mixing times, and observe how the dough or batter changes. Don't be afraid to experiment and learn from your results; every bake is a learning opportunity.
As you become more comfortable, you can explore recipes that use all-purpose flour in different ways or begin to understand when a more specialized flour might be beneficial (like bread flour for artisan loaves or cake flour for incredibly fine-crumbed cakes). Continue to seek out reliable recipes from trusted sources. BakeWithEase.com offers many more step-by-step guides and simple recipes designed for beginners. Keep practicing, keep exploring, and most importantly, keep enjoying the process of creating delicious treats from scratch using your newfound understanding of all-purpose flour!
Frequently Asked Questions
What exactly is all-purpose flour and why is it so popular?
All-purpose flour is a versatile wheat flour that's been refined and bleached (or unbleached). It's popular because it works well in a wide range of baking recipes, from cakes to cookies.
How does all-purpose flour differ from other types of flour, like bread flour or cake flour?
All-purpose flour has a medium protein content. Bread flour has higher protein for stronger gluten development, while cake flour has lower protein for a tender crumb.
Is all-purpose flour suitable for all baking projects, or are there times when I should use a different type of flour?
While versatile, all-purpose flour isn't always ideal. For chewy breads, bread flour is better. For delicate cakes, cake flour provides a finer texture.
What are some common mistakes beginners make when using all-purpose flour, and how can I avoid them?
Over-measuring is a big one; spoon and level instead of scooping. Also, avoid over-mixing, as this develops too much gluten and results in a tough baked good.
How should I store all-purpose flour to keep it fresh and prevent it from going bad?
Store all-purpose flour in an airtight container in a cool, dry place. This protects it from moisture, pests, and odors, extending its shelf life.
Final Reflection: The Humble Power of All-Purpose Flour
Understanding all-purpose flour is more than just knowing a single ingredient; it's unlocking a gateway to culinary creativity. This seemingly simple ingredient forms the backbone of countless recipes, from everyday meals to ambitious baking projects. Mastering its nuances empowers you to confidently tackle a wide range of recipes, transforming your kitchen experience.
The influence of all-purpose flour extends far beyond the individual baker or cook. It's a foundational element in countless cultural cuisines, a testament to its versatility and accessibility. Its ubiquity speaks to its importance in feeding communities and fostering culinary traditions across the globe. The simplest things are often the most profound.
This quote perfectly encapsulates the power of all-purpose flour – its simplicity belies its immense potential.
Now, consider your own kitchen. What new recipes will you attempt, armed with this newfound knowledge? Will you experiment with different brands, exploring subtle variations in texture and taste? I encourage you to embrace the possibilities. Don't be afraid to get your hands floury, to experiment, and to discover the joy of creating something delicious from this humble yet powerful ingredient. The journey of culinary exploration begins with a single ingredient, and all-purpose flour is the perfect starting point.
Here's a Call to Action (CTA) tailored to the article "Understanding All-Purpose Flour: A Beginner's Guide" on BakeWithEase.com:
Unlock Your Baking Potential: Master All-Purpose Flour!
Thanks for taking the time to learn more about all-purpose flour! We hope you now feel more confident in your baking abilities. Ready to put your newfound knowledge to the test?
- Bake something amazing! Try a simple recipe using all-purpose flour – cookies, muffins, or even bread!
- Share your baking journey! Post a picture of your creation on social media and tag us – we’d love to see it!
- Challenge yourself: Experiment with different brands of all-purpose flour and see how it affects the texture of your baked goods.
What delicious creation will you bake with your newly acquired flour expertise?