
When Your Dough Doesn't Double: Troubleshooting Proofing

Welcome to BakeWithEase, where baking dreams become delicious realities! Are you staring at a dishearteningly small lump of dough, wondering why it refuses to cooperate? This is a common hurdle in bread baking, and we're here to help. Dive into our guide on when your dough won't double proof, unlocking the secrets to perfect fermentation and fluffy loaves. Discover the troubleshooting tips you need to conquer proofing problems and bake with confidence. Ready to transform your baking woes into baking wins? Let's get started!
- Troubleshooting Slow Dough Rise: Achieve Perfect Bread Every Time (BakeWithEase.com)
- Understanding Proofing and Its Importance in Bread Baking
- Common Reasons Why Your Dough Isn't Rising Properly
- Troubleshooting: Step-by-Step Solutions for Insufficient Dough Rise
- Preventing Future Proofing Problems: Best Practices for Consistent Results
- Advanced Troubleshooting: Addressing Complex Issues
- Conclusion: Mastering Dough Rise for BakeWithEase Bread
- Frequently Asked Questions
- Final Reflection: The Humble Rise of Dough and the Resilience of the Baker
- Unleash Your Inner Baker: Master the Art of Proofing!
Troubleshooting Slow Dough Rise: Achieve Perfect Bread Every Time (BakeWithEase.com)
Understanding Proofing and Its Importance in Bread Baking
What is Proofing and Why is it Crucial for Bread?
Proofing, also known as fermentation, is a critical stage in bread making where yeast consumes sugars in the dough and produces carbon dioxide gas and alcohol. This gas gets trapped within the gluten structure of the dough, causing it to expand and rise. This process is essential for developing the texture, flavor, and aroma of the finished bread. A successful proof ensures a light, airy crumb and a well-formed loaf. When your dough won't double proof or rises sluggishly, it directly impacts the final quality, often resulting in dense, heavy bread.
Beyond just making the dough larger, proofing also allows enzymes in the flour to break down complex starches into simpler sugars that the yeast can feed on. Simultaneously, the alcohol produced contributes to the characteristic fermented flavor of bread. Adequate proofing is not just about volume; it's about chemical transformation and flavor development. Skipping or rushing this step means underdeveloped flavor and a poor crumb structure, leaving you wondering why your dough won't double proof as expected.
The Ideal Conditions for Consistent Dough Rise
Achieving consistent dough rise relies on providing the yeast with the optimal environment to thrive. The key factors are temperature, food (sugar from flour or added sugar), and moisture. Yeast is most active within a specific temperature range, typically between 75°F and 85°F (24°C to 29°C). Maintaining this temperature consistently allows the yeast to ferment at a steady pace, ensuring your dough doubles in size within the expected timeframe outlined in your recipe.
Humidity also plays a role in preventing the surface of the dough from drying out, which can restrict expansion. A slightly humid environment helps keep the dough supple and allows it to stretch as the gas is produced. Creating these stable conditions, whether in a proofing box, a slightly warm oven, or even just a draft-free spot, is fundamental to avoiding issues where your dough won't double proof and achieving that perfect, airy texture.
Common Reasons Why Your Dough Isn't Rising Properly
Yeast Issues: Ensuring Viable Yeast
Expired Yeast: Checking Expiration Dates and Performing a Yeast Test
Yeast is a living organism, and like all living things, it has a shelf life. Using expired yeast is one of the most frequent reasons why dough won't double proof. Over time, the yeast cells die, and their leavening power diminishes significantly. Always check the expiration date on the yeast package before you start baking. If the date has passed, or if the package has been open for a long time (especially for active dry yeast stored at room temperature), the yeast may no longer be viable.
To confirm your yeast is still alive and active, you can perform a simple test. Dissolve 1 teaspoon of sugar in 1/2 cup of lukewarm water (around 105°F-115°F or 40°C-46°C). Stir in 2 1/4 teaspoons (one standard packet) of yeast. Let it sit for 5-10 minutes. If the mixture becomes frothy and bubbly, the yeast is active and ready to use. If nothing happens, or you see only minimal foam, your yeast is likely dead or inactive, explaining why your dough won't double proof.
Inactive Yeast: Troubleshooting and Activating Yeast
Sometimes, yeast isn't expired but simply hasn't been properly activated. Active dry yeast, for example, requires rehydration in warm liquid before being added to the dry ingredients. Using water that is too cold won't wake the yeast up, while water that is too hot can kill it. The ideal temperature range for activating active dry yeast is typically 105°F-115°F (40°C-46°C). Instant yeast, on the other hand, can usually be mixed directly with dry ingredients, but it still needs sufficient moisture and warmth in the dough to become active.
If you suspect your yeast is inactive within the dough mixture itself (perhaps you didn't use the right liquid temperature initially), you might try gently warming the dough slightly, ensuring it doesn't get too hot. Sometimes, kneading for an extra minute or two can also help distribute the yeast and warm the dough slightly through friction. However, the best approach is always to ensure your yeast is active before it goes into the main dough mixture, especially if you've experienced problems where your dough won't double proof in the past.
Using the Correct Yeast Type: Understanding Different Yeast Varieties
The world of baking yeast includes several types, and using the wrong one or misunderstanding its requirements can lead to proofing failures. Active dry yeast and instant yeast are the most common for home bakers. Active dry yeast granules are larger and need to be dissolved and proofed in liquid before use. Instant yeast has finer granules and activators that allow it to be mixed directly with dry ingredients; it also tends to rise faster.
Using active dry yeast directly without proofing it first, or substituting instant yeast 1:1 for active dry in a recipe that calls for proofing, might result in a sluggish or absent rise. For example, if a recipe specifically calls for proofing active dry yeast and you skip that step, your dough won't double proof on schedule because the yeast hasn't been properly hydrated and activated. Ensure you understand which type of yeast your recipe requires and follow the instructions for its use precisely.
Temperature Problems: Maintaining Optimal Proofing Temperature
Finding the Sweet Spot: The Ideal Temperature Range for Dough Proofing
Yeast activity is highly sensitive to temperature. The ideal temperature range for most bread dough proofing is between 75°F and 85°F (24°C to 29°C). Within this range, yeast ferments efficiently, producing gas at a steady rate, allowing the dough to double in volume as expected. Temperatures significantly outside this range can drastically slow down or even halt fermentation, which is a common reason why your dough won't double proof.
Think of yeast like Goldilocks: it doesn't like it too cold or too hot, but just right. Maintaining a consistent temperature throughout the proofing period is key. Fluctuations can lead to uneven rising. Using a thermometer to check the ambient temperature where you are proofing, or even the internal temperature of the dough itself (aiming for the lower end of the range, around 75°F/24°C, is often a safe bet to avoid over-proofing later), can help ensure you're in the sweet spot.
How Cold Temperatures Inhibit Dough Rising
When dough is too cold, typically below 70°F (21°C), yeast activity slows down dramatically. At refrigerator temperatures (around 40°F/4°C), yeast is nearly dormant, which is why cold proofing is used to slow fermentation for flavor development over longer periods. If your kitchen is cold, placing your dough in a drafty spot, or using cold ingredients, your dough won't double proof within the recipe's stated time. The rise might happen eventually, but it will be much slower.
For instance, proofing dough at 65°F (18°C) might take 2-3 hours to double, whereas at 80°F (27°C), it might take only 60-90 minutes. If your recipe assumes a standard room temperature proof and your environment is significantly colder, you'll likely encounter a sluggish rise. Insulating the proofing container or finding a warmer spot can help counteract this issue.
Dealing with Overly Warm Environments and Their Impact
While warmth is good for yeast, excessive heat can be detrimental. Temperatures above 95°F (35°C) can actually start to kill yeast cells, halting fermentation entirely. Even temperatures in the high 80s or low 90s (around 30°C-34°C) can cause the yeast to ferment too quickly, leading to a rapid rise but potentially compromising flavor development and dough structure. A rapid, forced rise can result in bread with a poor crumb and less complex taste.
If your kitchen is very warm, perhaps during summer or near a hot oven, you might find your dough rises much faster than expected. While this might seem like a good problem, it can lead to over-proofing before you're ready to bake. It's better to find a slightly cooler spot, perhaps a pantry or a cooler part of the counter, to ensure a steady, controlled rise. If your dough won't double proof because the yeast was killed by excessive heat, there's unfortunately no saving it; you'll need to start over with new yeast.
Hydration Levels: Balancing Moisture for Dough Development
Dough Too Dry: Addressing Insufficient Hydration
The amount of water (or other liquid) in your dough, known as hydration, significantly affects its texture and how it proofs. If the dough is too dry, it will be stiff and less extensible. The gluten network, which traps the gases produced by the yeast, won't be able to stretch easily. This restricted expansion means that even if the yeast is active, the dough won't double proof effectively because the structure is too tight to accommodate the gas.
A dry dough often feels tough and doesn't stick to your hands much during kneading. If you suspect your dough is too dry after mixing, you can try adding a small amount of water, a teaspoon at a time, and kneading it in until the dough becomes more pliable and slightly tacky. Be cautious not to add too much at once, as it's easier to add more water than to take it away. Proper hydration is key to a dough that can expand freely as it proofs.
Dough Too Wet: Managing Excessive Hydration
Conversely, dough that is too wet can also pose proofing challenges, though for different reasons than dry dough. Very wet doughs (like ciabatta, which can be over 80% hydration) are often slack and spread out rather than rising upwards significantly. While they are fermenting, the lack of strong structure can make it appear as though the dough won't double proof in the conventional sense of gaining vertical height.
For standard bread doughs, excessive hydration can make the dough very sticky and difficult to handle. It might spread excessively during proofing and lack the structural integrity to hold the gas effectively, leading to a dense or uneven crumb. While wet doughs can produce wonderful bread, they often require specific techniques like stretch and folds instead of traditional kneading and may not visually double in the same way a drier dough does. If your recipe isn't intended to be high-hydration and your dough is excessively wet, it can certainly contribute to a perceived lack of rise.
Sugar and Salt Imbalances: Impacting Yeast Activity

The Effect of Sugar on Yeast Activity and Fermentation
Sugar provides food for yeast, helping to kickstart fermentation and contributing to crust color and flavor. A small amount of sugar is beneficial and can even help activate yeast quickly. However, too much sugar can have the opposite effect. In high concentrations, sugar draws water out of the yeast cells through osmosis, effectively dehydrating them and slowing or inhibiting their activity. This is why very sweet doughs (like brioche) often require more yeast or a longer proofing time.
If your recipe has a high sugar content and your dough won't double proof, the sugar concentration might be too high for the amount of yeast used or the proofing time allotted. For standard bread recipes, the amount of sugar is usually balanced to support yeast activity without inhibiting it. Ensure you are measuring sugar accurately and not accidentally adding too much.
The Inhibiting Effect of Salt on Yeast Activity
Salt is a crucial ingredient in bread making, enhancing flavor and controlling the rate of fermentation. However, like sugar, too much salt can inhibit yeast activity. Salt competes with yeast for water and, in high concentrations, can draw water out of yeast cells, slowing them down. This is why most recipes instruct you to add salt after the initial mixing of flour, water, and yeast, or to ensure it's not in direct contact with the yeast for too long during the initial stages.
If you've accidentally added too much salt to your dough, it's a significant factor in why your dough won't double proof or rises very slowly. The salt is essentially suppressing the yeast. While difficult to correct once mixed in, understanding this effect highlights the importance of accurate salt measurement (typically 1.8% to 2.2% of the flour weight in standard bread) and adding it at the appropriate stage in the mixing process.
Gluten Development: Achieving Adequate Gluten Strength
The Importance of Proper Kneading Techniques
Gluten, formed when proteins in flour (glutenin and gliadin) combine with water and are developed through mixing or kneading, creates the elastic network that traps the carbon dioxide gas produced by the yeast. If the gluten is not sufficiently developed, this network will be weak and unable to hold the gas, causing it to escape from the dough. Even if the yeast is active and producing gas, the dough won't double proof properly if the structure isn't there to support it.
Proper kneading, whether by hand or machine, aligns the gluten strands and strengthens the network. The required kneading time varies depending on the flour type, hydration level, and method, but is typically between 5-15 minutes by machine or 10-20 minutes by hand for many recipes. Insufficient kneading is a common culprit when your dough feels dense and doesn't show significant volume increase during proofing.
Testing for Adequate Gluten Development
You can test for adequate gluten development using the "windowpane test." Take a small piece of dough (about the size of a golf ball) and gently stretch it between your fingers. If the dough can be stretched thin enough to see light through it without tearing, it means the gluten is well-developed. If it tears easily before becoming translucent, it needs more kneading.
Another indicator is the dough's texture. Well-kneaded dough should feel smooth, elastic, and resilient. When poked gently with a finger, the indentation should slowly spring back. If the dough feels slack, lumpy, or tears easily, it likely requires more kneading to build that crucial gluten structure necessary for a successful rise. Without this structure, your dough won't double proof effectively, regardless of how active your yeast is.
Troubleshooting: Step-by-Step Solutions for Insufficient Dough Rise
Reviving Sluggish Yeast: Boosting Yeast Activity
Proofing Yeast Separately: Testing Yeast Viability
If your dough won't double proof and you suspect yeast issues, the first step is to test the yeast's viability outside the main dough. As mentioned earlier, dissolve 1 tsp sugar in 1/2 cup lukewarm water (105-115°F / 40-46°C), stir in 2 1/4 tsp (one packet) of your yeast, and wait 5-10 minutes. A bubbly, frothy surface confirms the yeast is alive.
If the yeast proofs successfully in the water, the issue lies elsewhere in your dough (temperature, salt, sugar, etc.). If it doesn't bubble, the yeast is dead or inactive. In this case, you'll need to discard the dough and start over with fresh, proven yeast. Trying to force a rise with dead yeast is futile.
Using a Pinch of Sugar to Activate Yeast
Sometimes, a dough containing seemingly active yeast is just rising very slowly. This could be due to slightly cool temperatures or insufficient initial food for the yeast. You can try to give the yeast a boost by adding a small amount of sugar. Dissolve 1-2 teaspoons of sugar in a tablespoon or two of warm water (around 80°F/27°C) and gently knead this into the dough.
Be careful not to add too much liquid, as it can change the dough's hydration. The small amount of sugar provides an immediate food source for the yeast, potentially waking it up and encouraging fermentation. Combine this with placing the dough in a warmer spot, and you might see activity pick up, helping your dough finally double proof.
Adjusting Temperature: Creating a Stable Proofing Environment
Using a Warm Oven for Proofing
One of the most reliable ways to ensure your dough proofs at an optimal temperature is to use your oven. Crucially, the oven should be turned off. You can either turn the oven on to its lowest setting (often 150°F/65°C) for just one minute, then turn it off before placing the dough inside. Or, simply place a pan of hot, steaming water on the bottom rack and put your covered dough on the middle rack. The residual heat and steam create a warm, humid environment perfect for proofing.
This method helps maintain a consistent temperature, usually within the desired 75-85°F (24-29°C) range, and prevents drafts. It's an excellent technique if your kitchen is cold and you're struggling to get your dough to double proof within the expected time. Just be sure the oven is off before placing the dough inside to avoid killing the yeast with excessive heat.
Creating a Humidity-Controlled Proofing Environment
Maintaining adequate humidity prevents the dough surface from drying out and forming a skin, which can restrict its ability to expand. Using the warm oven method with a pan of hot water also provides humidity. Alternatively, you can cover your proofing bowl tightly with plastic wrap or place the bowl inside a large, clear plastic bag, ensuring there's some air space around the dough.
For even more control, some bakers use dedicated proofing boxes or even improvise by placing the covered dough in a microwave or oven (turned off) with a cup of hot water. These enclosed spaces trap moisture released by the dough and the surrounding air, creating a humid microclimate. This helps keep the dough surface pliable, allowing for maximum expansion as the dough won't double proof properly if its surface is dry and crusty.
Correcting Hydration: Adjusting Water Content
Adding Water Carefully: Hydration Adjustment Tips
If your dough feels too dry after the initial mix and knead, and you suspect this is why your dough won't double proof effectively, you can try to increase the hydration. Add water in very small increments, perhaps a teaspoon at a time, kneading it fully into the dough before adding more. You can dip your hands in water while kneading – the water on your hands will incorporate into the dough.
Continue adding small amounts of water and kneading until the dough reaches the desired consistency – pliable, slightly tacky, and elastic. Be patient, as it takes time to work extra liquid into developed dough. This is best done early in the process, ideally during or just after the initial kneading, rather than halfway through proofing.
Addressing Salt and Sugar Imbalances: Making Recipe Adjustments
How to Correct for Too Much Salt
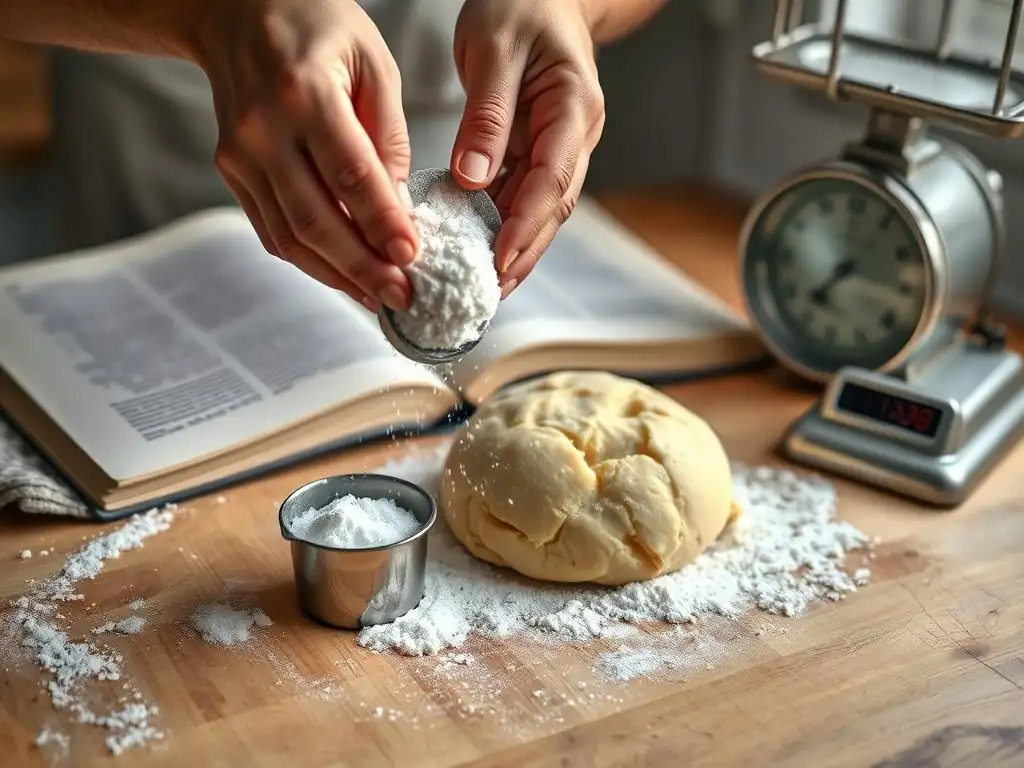
If you've accidentally added too much salt to your dough, it's one of the hardest issues to fix, and it's likely why your dough won't double proof. High salt levels severely inhibit yeast. One potential workaround, though not always successful, is to make a second, smaller batch of dough without salt and with extra yeast, then knead the two doughs together.
For example, if you used twice the required salt in a 500g flour recipe, you could make a small dough with 250g flour, the standard amount of yeast for 750g total flour, and no salt. Kneading this into the salty dough dilutes the salt concentration relative to the yeast and flour. However, the best solution is prevention: measure salt accurately and avoid direct contact with yeast during initial mixing.
How to Correct for Too Little Sugar
If your dough contains yeast and you suspect it's not rising because there isn't enough readily available sugar (especially in lean doughs), you can try adding a small amount of sugar during proofing. Dissolve 1-2 teaspoons of sugar in a tablespoon of warm water and gently knead or fold it into the dough.
This provides the yeast with a quick food source to boost fermentation. This technique is only applicable if the recipe should have some sugar but you added too little, or if the dough is very lean. Adding sugar won't help if the primary issue is dead yeast or temperature extremes.
Strengthening Gluten: Improving Dough Structure
The Windowpane Test: Assessing Gluten Strength
As mentioned before, the windowpane test is your key indicator for sufficient gluten development. After kneading, pinch off a small piece of dough and gently stretch it. If it stretches thin enough to see light through without tearing, the gluten is well-developed. If it tears easily, the dough needs more kneading.
If your dough won't double proof and it feels dense and rips easily, it's likely a gluten issue. You can try kneading the dough for another 5-10 minutes, by hand or machine, to further develop the gluten structure. Be careful not to over-knead, which can break down the gluten, but under-kneading is a much more common problem for home bakers struggling with a lack of rise.
Using the Stretch and Fold Method for Gluten Development
If your dough is already proofing but seems slack and isn't gaining volume, or if you prefer a less intensive kneading method, you can use the stretch and fold technique during the first hour or two of proofing. Every 20-30 minutes, gently stretch a portion of the dough up and fold it over onto itself. Rotate the bowl and repeat 3-4 times.
This process helps build strength in the gluten network without aggressive kneading. It's particularly useful for wetter doughs where traditional kneading is difficult. Performing a few sets of stretch and folds can significantly improve the dough's structure and ability to hold gas, helping it double proof more effectively.
Preventing Future Proofing Problems: Best Practices for Consistent Results
Using a Reliable Recipe: Selecting a Proven Formula
Starting with a well-tested recipe from a reputable source significantly reduces the chances of encountering issues where your dough won't double proof. Recipes developed by experienced bakers usually have the right balance of ingredients, clear instructions for mixing and kneading, and realistic proofing times based on standard conditions.
Avoid recipes from unverified sources or those that seem overly simplified, especially when you're new to baking specific types of bread. A reliable recipe provides a solid foundation and helps you understand the expected look and feel of the dough at each stage, making it easier to spot potential problems early on.
Measuring Ingredients Accurately: Precision in Baking
Baking is a science, and accurate measurement is paramount. Using a kitchen scale to weigh your ingredients, especially flour and water, is much more precise than using volume measurements (cups and spoons). A cup of flour can vary in weight by as much as 20% depending on how it's scooped, leading to significant variations in hydration and, consequently, proofing.
For example, a recipe calling for 500g of flour and 325g of water (65% hydration) will behave very differently if you accidentally measure 550g of flour using cups. This results in lower effective hydration, leading to a drier, stiffer dough that won't double proof as readily. Precise measurement ensures you are working with the intended dough consistency.
Monitoring Dough Temperature: Using a Thermometer
Since temperature is such a critical factor in yeast activity, using an instant-read thermometer to check the temperature of your proofing environment and even the dough itself can be incredibly helpful. Aim for dough temperature in the low to mid-70s°F (around 24°C).
If your dough is significantly colder than this after mixing, you'll know it will need a longer proofing time or a warmer environment. If it's too warm, you might need to find a cooler spot. Consistently monitoring temperature takes the guesswork out of proofing and is a key practice for preventing future instances where your dough won't double proof.
Properly Storing Yeast: Maintaining Yeast Viability
Proper storage is essential for keeping your yeast active. Unopened packages of active dry or instant yeast are best stored in a cool, dry place, like a pantry, until their expiration date. Once opened, yeast should be stored in an airtight container in the refrigerator or freezer.
Storing yeast in the freezer can extend its shelf life significantly, often for several months past the printed expiration date. When using frozen yeast, simply take it out a few minutes before use. Keeping yeast fresh and viable is a fundamental step in avoiding the frustrating problem of a dough that won't double proof.
Advanced Troubleshooting: Addressing Complex Issues
Dealing with Over-Proofed Dough (And How to Salvage It)
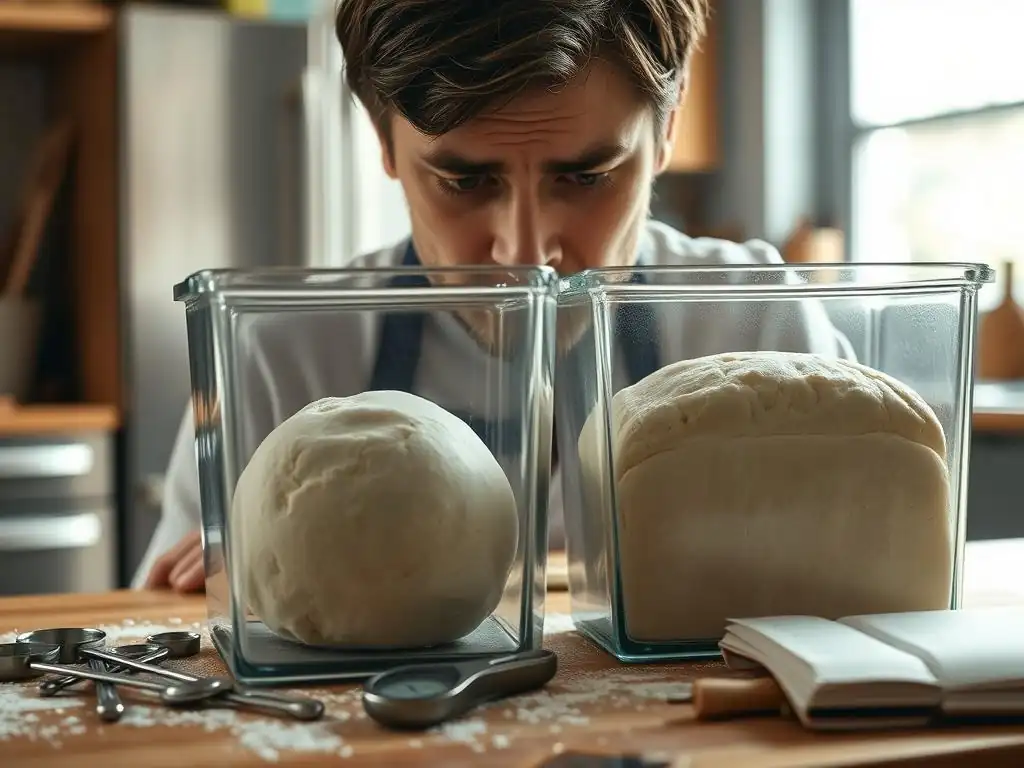
While this article focuses on dough that won't double proof, it's also possible for dough to over-proof. This happens when the yeast has consumed most of the available sugars and the gluten structure begins to break down. Over-proofed dough often looks significantly larger than doubled, may have started to collapse slightly, smells strongly of alcohol, and feels very fragile and gassy.
Salvaging over-proofed dough is sometimes possible, but it won't yield the same result as perfectly proofed dough. Gently deflate the dough, reshape it, and try a very short second proof (often just 15-30 minutes) before baking. The resulting loaf may be less airy and have a less desirable texture, but it might still be edible. The key is to catch it before it completely collapses.
Understanding the Impact of Altitude on Proofing
Altitude affects baking in several ways, and proofing is one of them. At higher altitudes, there is lower atmospheric pressure. This reduced pressure allows the gases produced by the yeast to expand more easily and quickly. Consequently, dough will proof faster at high altitudes compared to sea level.
If you live at a high altitude (generally considered above 3,000 feet or about 900 meters) and are using a recipe developed for sea level, your dough might over-proof quickly if you follow the timing strictly. To adjust, you may need to reduce the amount of yeast slightly, use cooler proofing temperatures, or shorten the proofing time. Conversely, if your dough won't double proof at altitude, check other factors first, but be aware that recipe adjustments might be needed.
Adjusting Recipes for Different Flours (e.g., Whole Wheat, Rye)
Different types of flour behave very differently during proofing. Whole wheat flour, for instance, contains bran and germ particles that can cut through the developing gluten strands, resulting in a weaker structure. Dough made with 100% whole wheat flour may not achieve the same dramatic volume increase as dough made with white bread flour, even when fully proofed.
Rye flour contains less gluten-forming protein than wheat flour. Doughs with a high percentage of rye rely more on other components, like pentosans, for structure, and they often don't double in volume like wheat doughs. If your dough won't double proof significantly and it's made with alternative flours, consider the flour type. It might be proofing correctly for that specific flour, even if the visual rise is less impressive than you'd expect from a white loaf. Recipes using these flours often have different indicators for proofing completion than simply doubling.
Conclusion: Mastering Dough Rise for BakeWithEase Bread
Key Takeaways for Successful Dough Rise
Mastering dough proofing is fundamental to baking great bread. When your dough won't double proof, it's usually a solvable issue related to the living conditions you've provided for the yeast. Remember the key factors: ensuring your yeast is active, maintaining the right temperature (75-85°F or 24-29°C is ideal), balancing hydration, accurately measuring salt and sugar, and developing sufficient gluten structure.
Troubleshooting involves systematically checking each of these variables. Test your yeast, find a warm spot for proofing, adjust hydration if necessary, and ensure you've kneaded enough. By understanding the science behind fermentation and implementing these best practices, you can consistently achieve that beautiful, airy rise for all your BakeWithEase bread creations.
Further Resources for Bread Baking Mastery on BakeWithEase.com
If you're still encountering issues or want to deepen your bread baking knowledge, BakeWithEase.com offers a wealth of resources. Explore our detailed guides on different kneading techniques, understanding flour types, working with sourdough starters, and solving other common baking problems. We have step-by-step tutorials for various bread recipes, from simple no-knead loaves to enriched doughs, providing the guidance you need to build confidence in your baking skills.
Don't let a sluggish dough discourage you! Every bake is a learning opportunity. By applying the principles discussed here and utilizing the resources available on BakeWithEase.com, you'll be well on your way to consistently baking delicious, perfectly proofed bread that you'll be proud to share. Happy baking!
Frequently Asked Questions
Why isn't my dough doubling in size during proofing?
The most common reason is incorrect temperature. The ideal temperature for proofing is usually between 75-85°F. Also, insufficient yeast or expired yeast could be the culprit.
How can I tell if my yeast is still active?
You can test your yeast by mixing it with warm water and a little sugar. If it foams within 5-10 minutes, it's likely still active and usable. A lack of bubbling indicates the yeast is dead.
What if my kitchen is too cold for proofing?
If your kitchen is cold, create a warmer environment for your dough. You could try placing it in a slightly warmed oven (turned off!), a proofing box, or near a warm water bath.
Does the type of flour affect proofing time?
Yes, different flours absorb water differently. Whole wheat flour, for example, can take longer to proof than all-purpose flour due to its higher fiber content.
Is there such a thing as over-proofing dough?
Absolutely! Over-proofed dough can collapse and have a sour, unpleasant taste. It's important to monitor your dough and not just rely on a set time.
Final Reflection: The Humble Rise of Dough and the Resilience of the Baker
The frustrating failure of a dough to properly proof is more than just a culinary inconvenience; it's a potent lesson in patience, observation, and the delicate dance between science and art in baking. This seemingly simple process reveals the intricate interplay of yeast activity, temperature, hydration, and even the subtle nuances of flour quality. Understanding these factors is key to unlocking baking success, and overcoming the challenges of a stubbornly uncooperative dough.
The journey of a dough, from initial mixing to its glorious rise, mirrors our own personal journeys. We face setbacks, unexpected obstacles, and moments of doubt. But just as a baker learns to troubleshoot a sluggish proof, we too can learn to adapt, persevere, and find success even when faced with adversity. The greatest glory in living lies not in never falling, but in rising every time we fall.
- Nelson Mandela. This quote resonates deeply with the baking process, reminding us that even the most experienced bakers encounter proofing problems. The true measure of skill lies not in avoiding failure, but in learning from it.
Now, consider your own "dough." What aspects of your life require the same careful attention, patience, and understanding as a slow-rising loaf? What seemingly insurmountable obstacles can you approach with the same methodical troubleshooting skills you've learned here? Take a moment to reflect on this, and remember that even a seemingly insignificant detail, like the temperature of your kitchen, can make all the difference. Embrace the process, learn from your mistakes, and watch your own "dough" rise to its full potential.
Unleash Your Inner Baker: Master the Art of Proofing!
Thanks for taking the time to explore the sometimes-tricky world of bread proofing! We hope you gained valuable insights into why your dough might not be rising as expected. Now, let's put that knowledge into action.
- Schedule your next bake: Choose your favorite bread recipe and plan to bake it this week, paying close attention to the proofing process. This is your chance to put your newfound expertise to the test!
- Share your successes (and struggles!): Join our BakeWithEase community forum and share your proofing experiences. Let’s help each other rise to the occasion!
- Experiment with different flours: Try a new type of flour next time – perhaps a whole wheat or rye – and see how it impacts your proofing process.
Ready to transform your bread baking? What specific proofing challenge are you most excited to tackle next?