
Troubleshooting Weak Sourdough Dough: Strengthening Your Structure

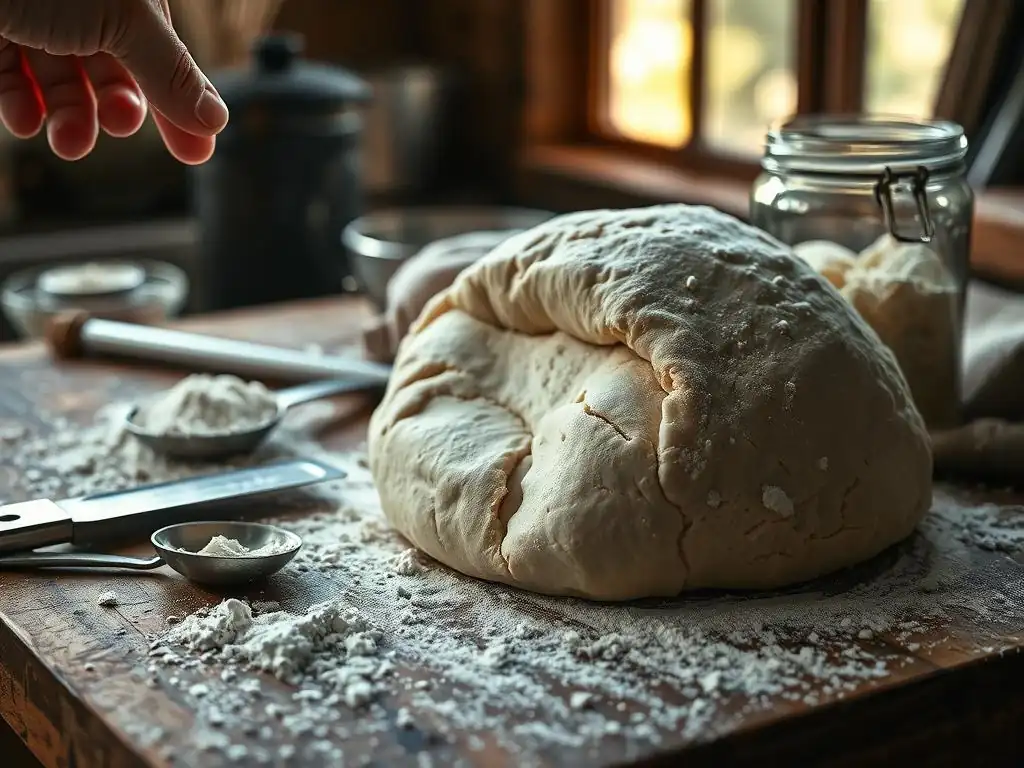
Welcome to BakeWithEase, your kitchen companion for conquering the world of baking! Ever felt defeated by a weak sourdough dough that just won't cooperate? You're not alone! We'll guide you through common pitfalls and proven troubleshooting tips to achieve that coveted, strong structure in your sourdough. Discover the secrets to transforming a sticky, unmanageable mess into a beautifully risen loaf. Intrigued? Let's dive in and strengthen your sourdough skills!
Dealing with weak sourdough dough can be one of the most frustrating challenges in the baking journey. You've nurtured your starter, followed a recipe, but instead of a springy, elastic dough, you're left with a slack, unmanageable mass that struggles to hold its shape. This often leads to loaves with poor oven spring, a dense crumb, and a disappointing result. Fortunately, understanding the underlying causes and applying specific techniques can transform your dough from weak to wonderfully strong. This guide provides essential weak sourdough dough troubleshooting tips to help you build better structure and achieve baking success.
- Understanding Weak Sourdough Dough
-
Weak Sourdough Dough Troubleshooting Tips: The Baker's Guide
- Addressing Inadequate Gluten Development in Sourdough
- The Importance of Flour Type for Sourdough Strength
- Water Temperature's Role in Sourdough Dough Strength
- Mastering the Autolyse Technique for Stronger Sourdough
- The Impact of Hydration Levels on Sourdough Dough
- Bulk Fermentation: Key to Sourdough Strength
- Shaping Techniques to Enhance Sourdough Structure
- Proofing Strategies for Weak Sourdough Dough
- Baking Temperature and its Effect on Sourdough Structure
- Preventing Weak Sourdough Dough: Proactive Measures
- Strengthening Sourdough Dough: A Summary of Solutions
- Advanced Sourdough Baking: Building on Your Knowledge
-
Frequently Asked Questions
- What are the most common causes of a weak sourdough dough?
- How can I strengthen the gluten in my sourdough dough?
- What role does hydration play in sourdough dough strength?
- How do I know if my sourdough starter is active enough?
- What are some quick fixes I can try if my sourdough dough is too weak during bulk fermentation?
- Final Reflection: The Resilient Rise of Sourdough
- Unlock Your Sourdough's Potential: Stronger Starts, Better Bread!
Understanding Weak Sourdough Dough
Before we dive into the solutions, it's crucial to understand what weak sourdough dough looks and feels like and the common culprits behind its lack of strength. Recognizing these signs early is the first step in effective weak sourdough dough troubleshooting.
Identifying the Signs of Weak Sourdough
A weak sourdough dough typically lacks tension and elasticity. When you try to stretch or fold it, it tears easily instead of offering resistance and stretching thinly. It often feels sticky and might cling excessively to your hands or the work surface, even after adequate bulk fermentation.
Visually, a weak dough will spread out significantly during bulk fermentation and proofing, failing to maintain any height or dome shape. It won't feel pillowy or airy, but rather dense and heavy. Trying to shape it is difficult because it doesn't hold the tension you try to create; it simply relaxes back into a flat puddle.
For example, if you attempt a boule shape, it might immediately start spreading outwards like a disc on the counter rather than holding a round form. This inability to maintain shape is a hallmark sign that your dough needs some weak sourdough dough troubleshooting attention.
Common Causes of Weak Sourdough Structure
Several factors can contribute to a weak sourdough dough structure. One of the most frequent issues is inadequate gluten development. Gluten is the protein network that provides structure and elasticity to bread dough, trapping the gases produced by fermentation. If this network isn't sufficiently developed through mixing, kneading, or folding, the dough will be weak.
Other common causes include using flour with insufficient protein content, incorrect hydration levels for the specific flour used, an inactive or weak sourdough starter, improper fermentation timing or temperature (either too short, too long, too cold, or too warm), or even improper shaping techniques. For instance, using an all-purpose flour with 10% protein instead of a bread flour with 12-14% protein can drastically impact dough strength.
Similarly, over-fermenting the dough can cause the gluten structure to break down, leading to a weak, soupy texture. Identifying which of these factors is at play is key to effective weak sourdough dough troubleshooting.
Weak Sourdough Dough Troubleshooting Tips: The Baker's Guide

Now that we know what weak sourdough dough looks like and why it happens, let's explore specific weak sourdough dough troubleshooting tips and techniques to build strength.
Addressing Inadequate Gluten Development in Sourdough
Gluten development is fundamental to a strong dough structure. If your dough feels weak and tears easily, it likely needs more work to build that gluten network. This can be achieved through mechanical mixing, kneading, or manual folding techniques.
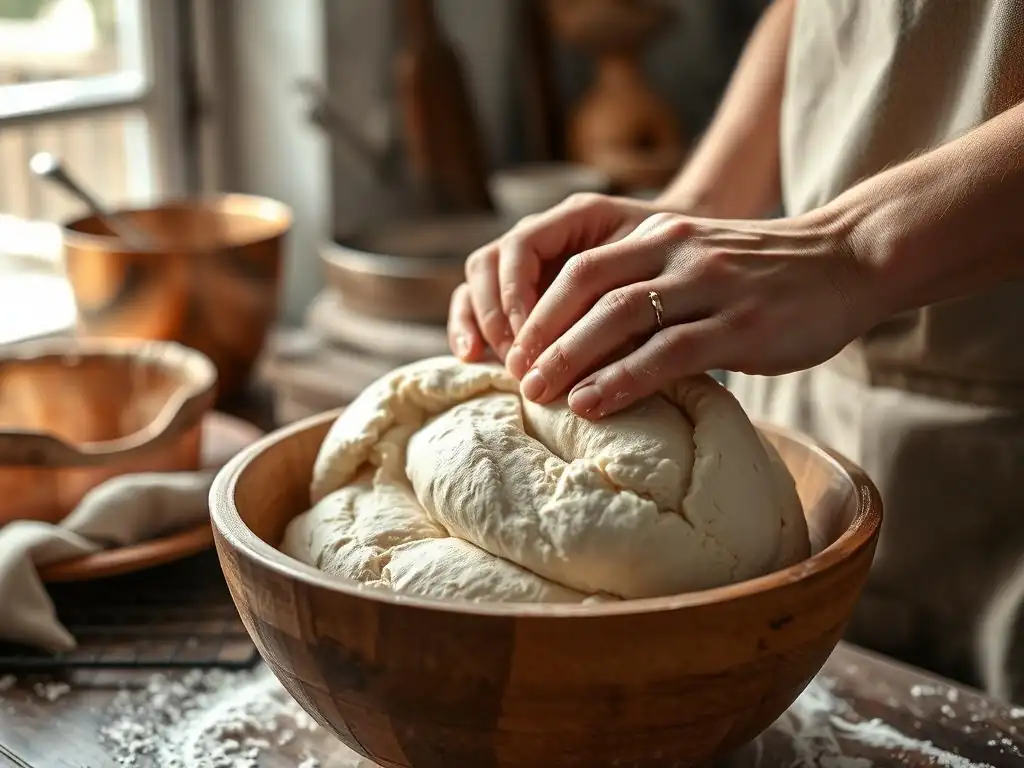
For sourdough, especially higher hydration doughs, manual folds are often preferred. Techniques like stretch and folds or coil folds performed during the early stages of bulk fermentation help align the gluten strands and build strength without requiring intense kneading. For example, performing 3-5 sets of stretch and folds at 30-45 minute intervals during the first few hours of bulk fermentation can significantly improve dough strength.
Each set involves gently stretching the dough and folding it over itself, rotating the bowl each time. This action encourages the gluten to bond and create a robust network capable of trapping the fermentation gases.
The Importance of Flour Type for Sourdough Strength
The type of flour you use plays a critical role in the strength and structure of your sourdough dough. Different flours have varying protein contents, which directly affects gluten potential.
Choosing the Right Flour for a Strong Sourdough Structure
Opting for a flour with a higher protein content is one of the most direct weak sourdough dough troubleshooting tips for improving strength. Bread flour, typically containing 12-14% protein, is designed to develop a strong gluten network suitable for yeasted and sourdough breads. It provides the elasticity and structure needed for a well-risen loaf with a good crumb structure.
In contrast, using a lower protein flour, such as cake flour (around 8-10% protein) or even some all-purpose flours (around 10-11.5%), will inherently result in a weaker dough. While you can certainly make delicious breads with lower protein flours, they require different handling and expectations.
For a robust, structured sourdough loaf, especially one with higher hydration, starting with a high-quality bread flour is highly recommended. Some bakers also incorporate a small percentage of strong whole wheat or rye flour (which have different protein structures that can also contribute to dough strength, though in different ways than white wheat flour) for added complexity and structure.
Protein Content and its Impact on Sourdough Dough
The protein in flour, specifically glutenin and gliadin, forms gluten when hydrated and worked. A higher percentage of these proteins means the potential for a stronger, more elastic gluten network. Bread flour's 12-14% protein range allows it to absorb more water and develop a structure capable of supporting a large, airy loaf.
When you use flour with, say, only 10% protein, the gluten network that can form is inherently weaker. This results in a dough that is less able to hold its shape, struggles with high hydration levels, and is prone to spreading during fermentation and baking. If you're consistently experiencing weak dough, check the protein content of your flour. Switching from a lower-protein all-purpose flour to a dedicated bread flour can be a simple yet effective weak sourdough dough troubleshooting tip.
Water Temperature's Role in Sourdough Dough Strength
Water temperature might seem like a minor detail, but it significantly impacts the dough's temperature, which in turn affects the rate of fermentation and gluten development. Using water that is too cold or too warm can lead to issues.
Adjusting Water Temperature for Optimal Dough Development
The ideal dough temperature for sourdough fermentation is typically between 75°F and 78°F (24°C and 26°C). This temperature range encourages optimal activity from both the sourdough starter and the natural enzymes in the flour that help develop gluten. If your kitchen is cool, using warmer water will help bring the dough temperature up to this ideal range. Conversely, if your kitchen is warm, cooler water will help keep the dough temperature in check.
Using water that is too cold slows down fermentation and gluten development, potentially leading to a dense, underdeveloped dough. Using water that is too warm can accelerate fermentation too quickly, potentially causing the gluten structure to break down before it has fully developed or leading to over-proofing.
Aiming for that target dough temperature by adjusting your water temperature is a key weak sourdough dough troubleshooting step for consistent results. You can calculate the required water temperature using a simple formula that considers room temperature, flour temperature, and starter temperature, but a good starting point is often slightly warm to the touch, around 80-85°F (27-30°C), especially in average room conditions.
Mastering the Autolyse Technique for Stronger Sourdough
The autolyse is a simple technique that involves mixing just the flour and water from your recipe and letting it rest before adding the starter and salt. This resting period offers significant benefits for dough strength.
How Autolyse Strengthens Gluten Networks
During the autolyse rest period, typically ranging from 30 minutes to a few hours, the water fully hydrates the flour proteins. Enzymes naturally present in the flour begin to break down some starches, making the dough more extensible. Crucially, the glutenin and gliadin proteins start to bond and form gluten with minimal effort from you.
This initial gluten development makes the dough less sticky and easier to handle when you eventually add the starter and salt. It also shortens the time needed for subsequent mixing or folding to achieve full gluten development. A dough that has undergone autolyse is often noticeably smoother and more elastic from the start, providing a better foundation for a strong final structure. Incorporating an autolyse is a highly recommended weak sourdough dough troubleshooting tip, especially for higher hydration doughs.
The Impact of Hydration Levels on Sourdough Dough
Hydration refers to the ratio of water to flour in your dough (usually expressed as a percentage of the flour weight). While high hydration can yield an open, airy crumb, it also makes the dough more challenging to handle and can appear weak if not managed correctly.
Understanding and Adjusting Hydration for Stronger Dough
A dough with 75% hydration, for example, has 750g of water for every 1000g of flour. Higher hydration levels (e.g., 80% or more) require stronger flour and more developed technique to manage. A dough that seems weak might simply be too highly hydrated for the type of flour used or your current skill level.
One effective weak sourdough dough troubleshooting tip is to slightly reduce the hydration in your recipe. If a recipe calls for 80% hydration and your dough is consistently weak and unmanageable, try reducing it to 75% or even 70% in your next bake. This makes the dough easier to handle, allowing you to practice and build confidence while still achieving good results.
As your technique improves and you understand how your specific flour behaves, you can gradually increase hydration again. Also, remember that different flours absorb water differently; a high-protein bread flour will absorb more water than an all-purpose flour.
Bulk Fermentation: Key to Sourdough Strength
Bulk fermentation, the first rise after mixing, is where the dough develops flavor, volume, and much of its structure. Issues during this phase are common causes of weak dough.
Optimizing Bulk Fermentation Time and Temperature
The duration and temperature of bulk fermentation significantly impact dough strength. Sourdough fermentation is slower than commercial yeast fermentation and is highly temperature-dependent. At room temperature (around 70-78°F / 21-26°C), bulk fermentation typically takes 4-6 hours, or sometimes longer depending on the starter's activity and dough temperature.
Under-fermenting means the gluten network hasn't fully developed, and the dough lacks strength and extensibility. Over-fermenting, however, is a frequent cause of weak, soupy dough. As fermentation progresses too long, the acids produced by the starter can start to break down the gluten structure, leading to a loss of tension and elasticity.
A dough that has over-fermented will often feel very slack, gassy, and may tear easily. Learning to read your dough – looking for signs like increased volume (often around 50-75% increase), a slightly domed surface, and a jiggly, airy texture – is crucial for optimizing bulk fermentation and avoiding weak dough.
The Importance of Folds During Bulk Fermentation
Incorporating a series of folds during the initial part of bulk fermentation is one of the most effective weak sourdough dough troubleshooting tips for building strength. These folds (stretch and folds or coil folds) help to organize the developing gluten network, build tension, and equalize the dough temperature.
Performing 3-5 sets of folds during the first 2-3 hours of bulk fermentation, spaced 30-60 minutes apart, can transform a slack dough into a strong, cohesive mass. Each fold strengthens the gluten, making the dough more capable of holding its shape and trapping gas. As bulk fermentation progresses, the dough will become stronger and require fewer, if any, folds in the later stages. If your dough feels weak early in bulk fermentation, ensure you are performing enough sets of gentle, effective folds.
Shaping Techniques to Enhance Sourdough Structure

Even with a well-developed dough, improper shaping can lead to a loaf that spreads rather than holds its form, mimicking the signs of weak sourdough dough. Shaping is where you create the final surface tension that helps the loaf maintain its structure during proofing and baking.
Gentle Handling for a Well-Structured Loaf
Effective shaping requires creating tension on the surface of the dough without tearing the delicate gluten network you've built. Techniques like preshaping and final shaping are designed to gently coax the dough into a tight ball or batard, creating a smooth, taut surface.
For a boule (round loaf), this involves folding the edges of the dough towards the center and then using the friction against the work surface to tighten the ball. For a batard (oval loaf), it involves folding the dough into an envelope shape and then rolling it tightly. The key is to use just enough force to create tension but not so much that the dough resists or tears.
A well-shaped loaf will feel taut and hold its shape immediately after shaping. If your dough goes slack quickly after shaping, it could indicate either a shaping issue or that the underlying dough structure is weak (potentially due to fermentation problems).
Proofing Strategies for Weak Sourdough Dough
Proofing (the final rise before baking) is another stage where a previously strong dough can become weak if not managed correctly. Over-proofing is a common culprit.
Recognizing Over-Proofing and Under-Proofing
The goal of proofing is for the dough to increase in volume and become light and airy. However, if proofed for too long or at too warm a temperature, the yeast activity can peak, and the gluten structure begins to degrade. This leads to a dough that feels overly gassy, loses tension, and might even start to deflate. This is classic over-proofing, and it results in a weak dough that collapses in the oven.
A simple "poke test" can help determine if your dough is properly proofed. Gently press a floured finger into the dough about half an inch deep. If the indentation springs back immediately, it's likely under-proofed (and might be weak due to insufficient gas). If it springs back slowly but not completely, it's likely perfectly proofed. If the indentation stays completely or mostly put, the dough is likely over-proofed and will feel weak and potentially collapse. Adjusting proofing time and temperature based on your dough's behavior is a crucial weak sourdough dough troubleshooting tip.
Baking Temperature and its Effect on Sourdough Structure
While dough strength is primarily built before the oven, the initial moments in the hot oven are critical for achieving good structure and oven spring.
Achieving Optimal Oven Spring and Crust Formation
Baking sourdough at a high initial temperature, often in a Dutch oven or with steam, helps set the crust quickly and allows the dough to achieve maximum oven spring before the structure fully solidifies. A typical temperature range for sourdough is 450-500°F (230-260°C).
If the oven temperature is too low, the crust sets too slowly, and the dough spreads out before it has a chance to rise fully, resulting in a flatter loaf that can appear weak. Ensuring your oven is fully preheated and using a method that traps steam (like a Dutch oven or baking stone with a steam tray) helps create the ideal environment for initial oven spring and crust development. While this doesn't fix a fundamentally weak dough, it ensures that a well-structured dough performs optimally in the bake.
Preventing Weak Sourdough Dough: Proactive Measures
Prevention is often the best weak sourdough dough troubleshooting tip. By addressing potential issues before they arise, you can consistently achieve strong, manageable doughs.
Optimizing Your Starter for Peak Performance
A healthy, active sourdough starter is the foundation of good sourdough bread. A weak or inactive starter will struggle to ferment the dough properly, leading to slow or insufficient gas production and underdeveloped gluten.
Maintaining a Healthy and Active Sourdough Starter
Feed your starter regularly (daily if kept at room temperature, or weekly if refrigerated, followed by a few regular feedings before use). Feed it with a consistent ratio of flour and water (e.g., 1:2:2 starter:water:flour by weight is a common strong feeding ratio). Use good quality, unbleached flour.
Your starter should double or triple in size within 4-8 hours of feeding (depending on temperature) and be bubbly and airy before you use it. It should also pass the float test, where a small dollop floats in water. If your starter is sluggish, inconsistent, or doesn't show significant activity, it needs some TLC before you attempt to bake with it.
Accurate Measurements for Consistent Results
Baking is a science, and precision matters. Using a scale to weigh your ingredients, especially flour and water, is essential for consistent results and avoiding weak dough.
Using volume measurements (cups) is notoriously inaccurate because flour can pack differently each time. A cup of flour can weigh anywhere from 100g to 150g or more! This variability means your hydration level could be significantly different from what the recipe intended, leading to unexpected results, including weak dough. Weighing your ingredients ensures you're using the correct hydration ratio and that the proportions of flour, water, starter, and salt are consistent every time. This consistency is key to identifying and troubleshooting issues effectively.
Troubleshooting Common Starter Problems: Hooches, Mold, and Inactivity
Sometimes, despite your best efforts, your starter might show signs of distress like liquid separation (hooch), mold, or general inactivity. These are indicators that your starter's health needs attention before it can properly leaven your dough.
Hooch (a layer of liquid on top) usually means your starter is hungry and needs more frequent feedings. Mold is a sign of contamination, and unfortunately, you'll likely need to discard the affected starter and start over or salvage a small, unaffected portion if possible. Inactivity can stem from various issues, including infrequent feeding, incorrect feeding ratios, using chlorinated water, or incorrect temperature. Addressing these problems – switching to filtered water, adjusting feeding schedules and ratios, or finding a warmer spot for your starter – is crucial. A strong, vibrant starter is your best defense against weak sourdough dough.
Strengthening Sourdough Dough: A Summary of Solutions
Tackling weak sourdough dough requires understanding the interplay of ingredients, technique, and fermentation. It's a common issue, but one that is highly solvable with the right approach.
Recap of Key Troubleshooting Tips
Here's a quick recap of the essential weak sourdough dough troubleshooting tips we've covered:
- Assess Gluten Development: Perform sufficient stretch and folds or coil folds during bulk fermentation.
- Check Your Flour: Use a high-protein bread flour (12-14%) for stronger structure.
- Mind Water Temperature: Aim for a target dough temperature (75-78°F) by adjusting water temperature.
- Implement Autolyse: Rest flour and water together for 30+ minutes before adding starter/salt.
- Adjust Hydration: Reduce hydration slightly if dough is consistently unmanageable for your flour/technique.
- Optimize Bulk Fermentation: Learn to read your dough; avoid under or over-fermenting based on volume and texture cues.
- Refine Shaping: Practice creating surface tension without tearing the dough.
- Monitor Proofing: Use the poke test to avoid over-proofing, which weakens dough structure.
- Ensure Proper Baking: Use high initial oven temperature and steam for optimal oven spring.
- Maintain a Healthy Starter: Feed regularly, use good flour/water, and look for signs of activity.
- Weigh Ingredients: Use a scale for accurate and consistent hydration.
Achieving the Perfect Sourdough Structure: High-Hydration Country Loaf
Achieving a beautifully structured sourdough loaf, even one with high hydration, is absolutely possible. It comes down to mastering the fundamental techniques and being attentive to your dough's needs at each stage. A high-hydration country loaf, for instance, requires a strong starter, a high-protein flour capable of absorbing significant water, diligent folding during bulk fermentation to build structure, and careful shaping to create surface tension.
Example Workflow for a Strong High-Hydration Dough:
1. Autolyse: Mix flour and water (e.g., 80% hydration) for 30-60 mins.
2. Mix: Add ripe starter and salt; mix until combined.
3. Bulk Fermentation (4-6 hours at 75°F):
   - Perform 4-5 sets of coil folds or stretch & folds during the first 2-3 hours, 30-45 mins apart.
   - Let dough rest and develop until volume increases by 50-75% and it feels airy.
4. Preshaping: Gently shape into a loose ball; rest 20-30 mins.
5. Final Shaping: Create tight surface tension; place in banneton.
6. Cold Proof (Optional but recommended for handling): 12-18 hours in fridge.
7. Bake: Preheat oven/Dutch oven to 475°F. Bake covered for 20 mins, then uncovered for 20-25 mins.
This structured approach, combined with paying attention to the feel and behavior of your dough, provides the best framework for troubleshooting weak sourdough dough and building strength.
Advanced Sourdough Baking: Building on Your Knowledge
Once you've mastered the basics of strengthening your dough and consistently achieving good structure, you might be ready to explore more advanced techniques.
Further Resources for Advanced Sourdough Techniques: Lamination, Scoring, and Specialty Grains
Advanced techniques like lamination, intricate scoring patterns, and incorporating specialty grains (like spelt, rye, or kamut) offer exciting ways to further enhance your sourdough skills and the characteristics of your loaves. Lamination involves stretching the dough into a thin rectangle and folding it like a business letter, further strengthening the gluten and allowing for additions like herbs or cheese. Mastering scoring not only creates beautiful patterns but also controls where the dough expands in the oven, influencing the final shape and crumb.
Working with specialty grains requires understanding their unique protein structures and absorption rates, presenting new challenges and rewards in building dough strength and flavor. Exploring these areas builds upon the foundational weak sourdough dough troubleshooting tips you've learned, pushing your baking to new heights.
Frequently Asked Questions
What are the most common causes of a weak sourdough dough?
A weak sourdough dough is often caused by under-development of gluten, too much hydration relative to the flour's protein content, or an underactive starter.
How can I strengthen the gluten in my sourdough dough?
You can strengthen gluten through techniques like kneading (either by hand or machine), autolysing the flour and water before adding the starter, and performing stretch and folds during bulk fermentation.
What role does hydration play in sourdough dough strength?
Too much water can lead to a slack and weak dough. Finding the right hydration balance is crucial; consider using a lower hydration percentage or a higher protein flour.
How do I know if my sourdough starter is active enough?
An active starter should double in size within a few hours after feeding and have a bubbly texture. An underactive starter will result in a weak dough due to insufficient leavening power.
What are some quick fixes I can try if my sourdough dough is too weak during bulk fermentation?
Gently try additional stretch and folds spaced 30-60 minutes apart to build strength. You can also consider a cold ferment in the refrigerator to give the dough more structure.
Final Reflection: The Resilient Rise of Sourdough
The struggle with weak sourdough dough is a universal experience, a testament to the capricious nature of this ancient craft. Many aspiring bakers encounter frustration, leading to discarded loaves and a sense of defeat. However, understanding the underlying causes – from hydration imbalances to insufficient fermentation – empowers us to transform those setbacks into valuable learning opportunities. This journey, filled with both failures and triumphs, ultimately strengthens our baking skills and deepens our appreciation for the process.
The ongoing fascination with sourdough reflects more than just a culinary trend; it's a connection to a time-honored tradition, a testament to the enduring power of simple ingredients transformed by time and patience. Bread is the staff of life,
a simple phrase, yet it encapsulates the profound role bread, and the process of making it, plays in our culture and personal lives. The challenges of sourdough, particularly the frustration of a weak dough, only serve to heighten the satisfaction of a perfectly risen loaf, a reward earned through understanding and perseverance.
Now, consider your own baking journey. Have you experienced the frustration of a weak sourdough dough? What lessons have you learned? Remember, every failed loaf is a step closer to mastering this craft. Don't be discouraged by setbacks; embrace the learning process, experiment with different techniques, and celebrate the small victories along the way. The next time you face a weak dough, approach it not with fear, but with curiosity and a renewed determination to understand and overcome the challenges. The reward – a beautifully risen, tangy loaf of sourdough – is well worth the effort.
Unlock Your Sourdough's Potential: Stronger Starts, Better Bread!
Thanks for diving deep into the world of sourdough with us! You've now got the knowledge to tackle even the trickiest doughs. Ready to put your new skills to the test?
- Bake a Bold Loaf: Use what you've learned to attempt that sourdough recipe you've been eyeing—this time with confidence in your starter's strength! Document your progress and share your results!
- Analyze and Adapt: Reflect on what worked and what didn't in your latest bake. What adjustments will you make next time to further improve your sourdough's structure? Keep detailed notes to track your improvements.
- Join the Conversation: Share your sourdough triumphs (and challenges!) in the comments below. Let's learn from each other's experiences and build a stronger sourdough community!
What unique ingredient or technique will you try in your next sourdough adventure?