
The Ultimate Beginner's Guide to GlutenFree Yeast Bread

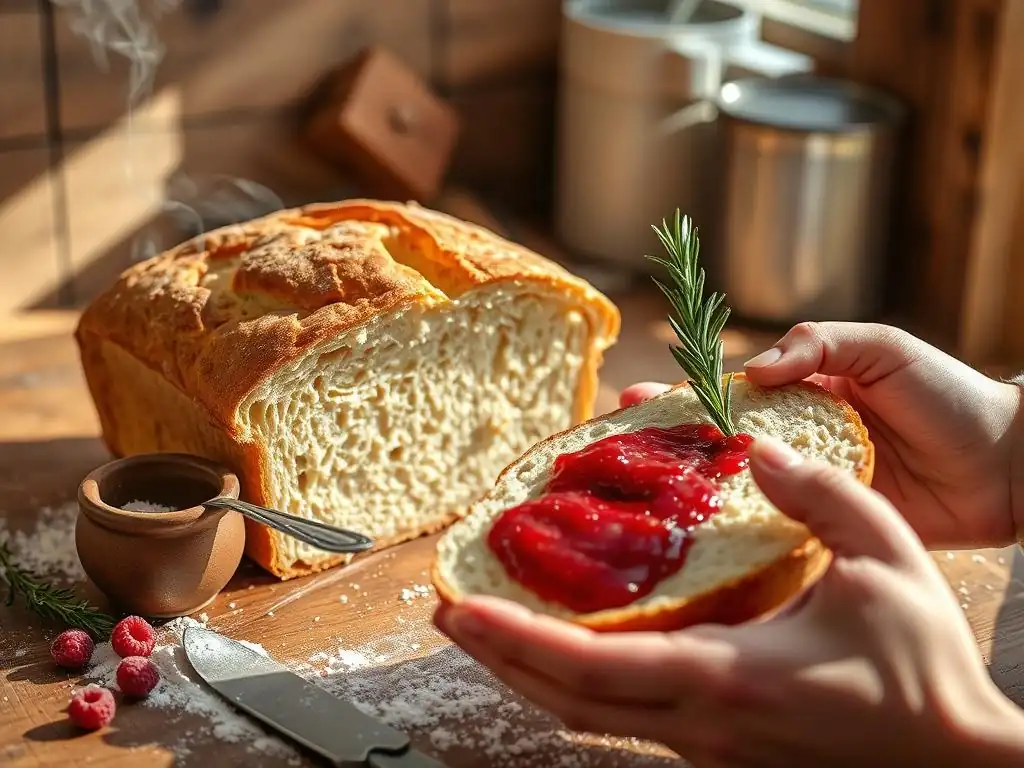
Welcome to BakeWithEase, your companion on a delicious journey into the world of baking! Ever dreamt of crafting the perfect loaf of bread, even without gluten? Get ready to unlock the secrets with our guide to a foolproof Glutenfree yeast bread recipe. Discover simple techniques and easy-to-find ingredients that will transform your kitchen into a bakery. Curious how to achieve that airy texture and golden crust? Let's get baking!
Baking a loaf of warm, homemade bread is one of life's simple pleasures, and for those following a gluten-free diet, this joy is absolutely within reach! While traditional wheat bread relies on gluten for its structure and elasticity, creating a delicious gluten-free yeast bread recipe requires understanding different ingredients and techniques. This guide is designed for beginners, walking you through every step to bake a successful and satisfying loaf without gluten.
- Introduction to Gluten-Free Yeast Bread Baking
-
Essential Ingredients for Gluten-Free Yeast Bread
- Gluten-Free Flour Blend: Choosing the Right Mix [Rice Flour, Tapioca Starch, Potato Starch]
- Yeast: Types and Activation Methods for Gluten-Free Baking [Instant Yeast, Active Dry Yeast]
- Binders: Replacing Gluten's Role in Gluten-Free Bread (Xanthan Gum, Psyllium Husk)
- Liquids: Importance of Hydration in Gluten-Free Yeast Bread Recipes [Water, Almond Milk]
- Sweeteners and Fats: Enhancing Flavor and Texture in Gluten-Free Bread [Honey, Olive Oil]
- Essential Equipment for Baking Gluten-Free Yeast Bread
- Gluten-Free Yeast Bread Recipe: A Step-by-Step Guide
- Troubleshooting Common Issues in Gluten-Free Yeast Bread Baking
- Tips and Tricks for Perfect Gluten-Free Yeast Bread
- Gluten-Free Yeast Bread Recipe Variations
- Conclusion: Mastering the Art of Gluten-Free Yeast Bread
-
Frequently Asked Questions
- What makes this gluten-free yeast bread recipe beginner-friendly?
- What kind of gluten-free flour blend is recommended for this recipe?
- How important is the quality of the yeast used in the recipe?
- What are some common problems people face when baking gluten-free yeast bread, and how does this recipe address them?
- Can I substitute ingredients in this gluten-free yeast bread recipe?
- Final Reflection: The Rising Power of Gluten-Free Baking
- Unleash Your Inner Baker: Craft Your First Gluten-Free Loaf!
Introduction to Gluten-Free Yeast Bread Baking
Stepping into the world of gluten-free baking, especially when it involves yeast, can feel like navigating uncharted territory compared to wheat-based baking. Gluten-free yeast bread presents unique challenges but also offers incredibly rewarding results. Unlike quick breads, yeast-leavened loaves develop deeper flavors and a more complex texture through fermentation, which is a hallmark of traditional bread making. Mastering a basic gluten-free yeast bread recipe opens the door to countless variations.
Successfully baking gluten-free yeast bread involves more than just swapping out wheat flour. It requires a fundamental understanding of how gluten-free ingredients interact and how yeast behaves in the absence of gluten's strong protein network. This guide will equip you with the knowledge to tackle these differences head-on, transforming potential frustrations into baking triumphs.
Why Bake Gluten-Free Yeast Bread? [Health Benefits and Dietary Needs]
Baking gluten-free yeast bread is often a necessity for individuals with celiac disease, a serious autoimmune disorder where gluten consumption damages the small intestine. According to the Celiac Disease Foundation, it affects approximately 1 in 100 people worldwide. For these individuals, a strict, lifelong gluten-free diet is the only treatment, making a reliable glutenfree yeast bread recipe essential for enjoying staples like sandwiches or toast.
Beyond celiac disease, many people choose to avoid gluten due to non-celiac gluten sensitivity or for perceived health benefits. Baking at home allows complete control over ingredients, avoiding potential cross-contamination risks common in commercial gluten-free products and enabling the use of nutritious whole-grain gluten-free flours like brown rice, sorghum, or millet. This can contribute to a more diverse and nutrient-rich diet compared to relying solely on refined starches often found in store-bought options.
Understanding the Challenges of Gluten-Free Yeast Bread
The primary challenge in gluten-free yeast bread is the absence of gluten, the protein network that provides structure, elasticity, and chewiness in traditional bread. Gluten traps the carbon dioxide gas produced by yeast, allowing the dough to rise and hold its shape. Without gluten, doughs tend to be stickier, less elastic, and prone to collapsing. This means gluten-free dough doesn't require extensive kneading like wheat dough; overmixing can actually be detrimental.
Another significant hurdle is achieving adequate rise and a desirable texture. Gluten-free flours absorb liquids differently and lack the extensibility of wheat flour. This often necessitates higher hydration levels in the dough, sometimes reaching 80-100% hydration relative to the flour weight, compared to 60-70% for wheat dough. Additionally, specific binders are crucial to mimic gluten's function, holding the dough together and preventing a crumbly or dense loaf. Getting the balance of flour blend, binder, and hydration right is key to a successful glutenfree yeast bread recipe.
Essential Ingredients for Gluten-Free Yeast Bread
Crafting a great gluten-free yeast bread starts with selecting the right ingredients. Each component plays a specific role in compensating for the absence of gluten, contributing to structure, flavor, and texture. Understanding these roles is fundamental to mastering any glutenfree yeast bread recipe.
Using high-quality, fresh ingredients is always recommended for the best results in baking. Pay particular attention to the freshness of your gluten-free flour blend and yeast, as these are crucial for successful rising and flavor development in your gluten-free yeast bread.
Gluten-Free Flour Blend: Choosing the Right Mix [Rice Flour, Tapioca Starch, Potato Starch]
A successful gluten-free yeast bread recipe almost always relies on a blend of different flours and starches, rather than a single flour. This is because no single gluten-free flour can replicate the properties of wheat flour. Common components include white rice flour and brown rice flour for structure, tapioca starch (or tapioca flour) for chewiness and crust development, and potato starch (not potato flour) for tenderness and moisture retention. A typical blend might be roughly 40% whole grain flour (like brown rice or sorghum) and 60% starches and white rice flour, though ratios vary.
Pre-made gluten-free all-purpose flour blends are convenient, but check their ingredients – some already contain binders like xanthan gum, which will affect the amount you need to add separately. Experimenting with different blends is part of the journey; a blend heavy on starches might yield a lighter, softer crumb, while one with more whole grains will offer more flavor and density. For a classic glutenfree yeast bread recipe, a balanced blend is usually recommended.
Yeast: Types and Activation Methods for Gluten-Free Baking [Instant Yeast, Active Dry Yeast]
Yeast is the leavening agent that makes bread rise by producing carbon dioxide gas. In gluten-free baking, yeast works just as it does in traditional baking, but the dough's structure is less able to hold the gas, making proper yeast activation and proofing timing critical. The two most common types are active dry yeast and instant yeast. Active dry yeast typically needs to be proofed (activated) in warm liquid (around 105-115°F or 40-46°C) with a pinch of sugar for 5-10 minutes until foamy before being added to dry ingredients.
Instant yeast, also called rapid-rise or quick-rise yeast, is more finely ground and can often be added directly to the dry ingredients without proofing, though some bakers still prefer to proof it to ensure it's active. It generally works faster than active dry yeast. For a reliable glutenfree yeast bread recipe, ensure your yeast is fresh (check the expiration date) and stored correctly. If using active dry yeast, the foaming test is a vital step to confirm its viability before committing to the rest of the recipe.
Binders: Replacing Gluten's Role in Gluten-Free Bread (Xanthan Gum, Psyllium Husk)
Since gluten is absent, binders are essential to provide structure, elasticity, and cohesion to gluten-free dough, preventing it from becoming crumbly or dense. The two most common binders used in a glutenfree yeast bread recipe are xanthan gum and psyllium husk (often as whole husks or powder). Xanthan gum is a polysaccharide produced by fermentation and is used in small amounts, typically around 1 to 2 teaspoons per cup of gluten-free flour blend. It helps trap gases and provides some elasticity.
Psyllium husk, a fiber derived from the seeds of the Plantago ovata plant, is another popular binder. When mixed with liquid, it forms a gel-like substance that mimics some of gluten's properties, adding structure and improving the texture of gluten-free bread, often resulting in a less crumbly crumb. Psyllium husk powder is more concentrated than whole husks, so the amount needed will be less. Many successful glutenfree yeast bread recipes use one or both binders; the choice and ratio can significantly impact the final texture.
Liquids: Importance of Hydration in Gluten-Free Yeast Bread Recipes [Water, Almond Milk]
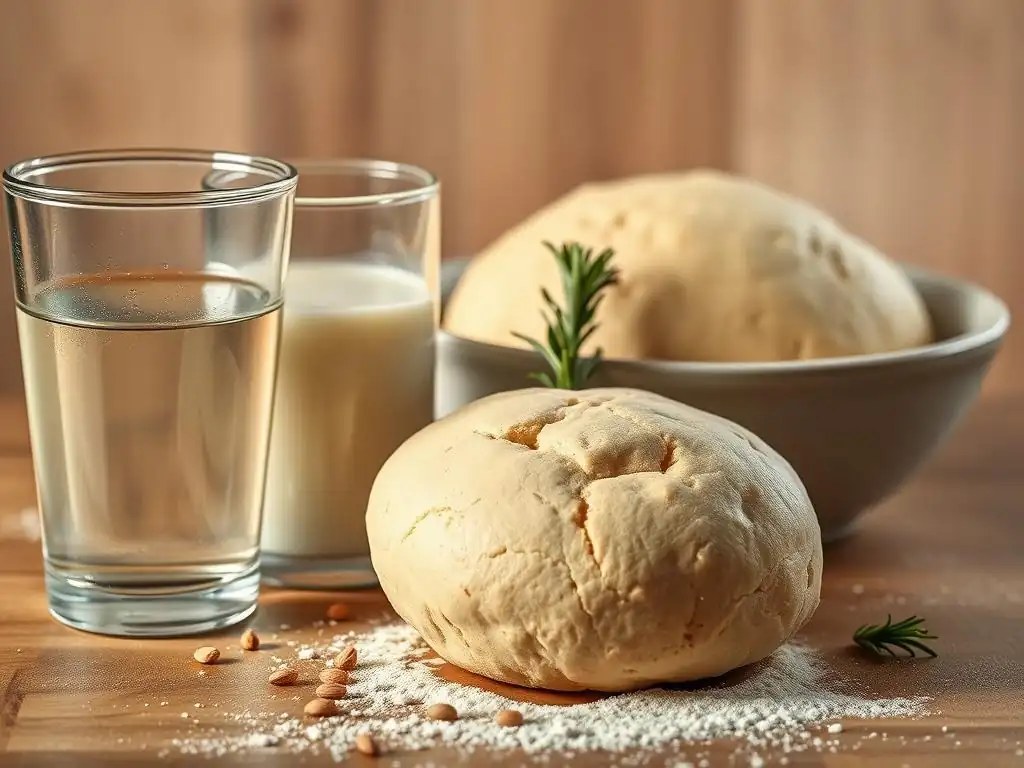
Liquid is crucial in any bread recipe, hydrating the flour and activating the yeast. In gluten-free yeast bread, hydration levels are often higher than in traditional bread, frequently ranging from 80% to 100% hydration relative to the flour weight. This is because gluten-free flours and starches absorb liquid differently and need extra moisture to prevent a dry, crumbly texture. Using the right amount of liquid is critical for the success of your glutenfree yeast bread recipe.
The type of liquid also matters. Warm water is the most common base and is excellent for activating yeast. However, other liquids like milk (dairy or non-dairy such as almond milk or soy milk) or buttermilk can add richness, flavor, and contribute to browning. Ensure the liquid temperature is appropriate for activating yeast (around 105-115°F or 40-46°C) if proofing active dry yeast, or simply warm if adding directly to instant yeast and dry ingredients.
Sweeteners and Fats: Enhancing Flavor and Texture in Gluten-Free Bread [Honey, Olive Oil]
Sweeteners like sugar, honey, maple syrup, or agave nectar play a dual role in a glutenfree yeast bread recipe. They provide food for the yeast, helping it to activate and produce carbon dioxide more effectively, leading to a better rise. Additionally, sweeteners contribute to the flavor and help with crust browning during baking, resulting in a more appealing loaf. Small amounts are usually sufficient, often just a tablespoon or two.
Fats, such as olive oil, melted butter, or other vegetable oils, contribute to the tenderness and moisture of the gluten-free bread crumb. They can also improve the crust texture. Just a small amount of fat, perhaps 2-4 tablespoons per loaf, can make a noticeable difference in the final texture, keeping the bread from drying out too quickly. For a savory glutenfree yeast bread recipe, olive oil adds a wonderful aroma and flavor.
Essential Equipment for Baking Gluten-Free Yeast Bread
Having the right tools can make the process of baking a glutenfree yeast bread recipe much smoother and contribute to better results. While you don't need a professional setup, a few key pieces of equipment are highly recommended for beginner bakers.
Using appropriate equipment helps manage the often stickier nature of gluten-free dough and ensures even baking and proper structure development. Investing in a few quality items will elevate your gluten-free bread baking experience.
Bread Pans: Choosing the Right Size and Material [Loaf Pan, Dutch Oven]
For a standard sandwich-style glutenfree yeast bread recipe, a loaf pan is essential. A standard 9x5 inch (23x13 cm) metal loaf pan is a common choice, providing good structure and even heat distribution. Glass loaf pans also work but may require a slight adjustment in baking time or temperature as they heat differently. Greasing and flouring the pan (using gluten-free flour or cornmeal) or lining it with parchment paper is crucial to prevent the sticky dough from adhering.
For a more rustic or artisan-style glutenfree yeast bread recipe, a Dutch oven is an excellent option. Baking in a preheated Dutch oven, often with the lid on for the first part of the bake, creates a steamy environment that promotes a fantastic crust and helps the loaf achieve a great rise before the crust sets. A 5-quart or 6-quart Dutch oven is typically sufficient for a standard loaf size.
Mixing Bowls and Utensils for Gluten-Free Dough
You'll need at least two mixing bowls: one small one for proofing active dry yeast (if using) and a larger one for combining the dry and wet ingredients. Stainless steel or glass bowls are easy to clean and non-reactive. Since gluten-free dough is often mixed rather than kneaded, a sturdy spoon or a rubber spatula is usually sufficient for combining ingredients.
For mixing the dough, a stand mixer fitted with a paddle attachment can be helpful, especially for higher hydration doughs, but it's not strictly necessary for most beginner glutenfree yeast bread recipes. If using a mixer, mix only until the ingredients are just combined and the binder has had a chance to start its work, typically only a few minutes, as overmixing can negatively impact the texture.
Proofing Baskets or Bowls: Shaping Gluten-Free Loaves [Banneton, Ramekin]
Proofing baskets, also known as bannetons, are traditionally used to hold and shape bread dough during its final rise, giving the loaf structure and often imprinting a pattern on the crust. While not strictly required for a loaf pan glutenfree yeast bread recipe, they are excellent for shaping freestanding loaves like boules or batards. Bannetons are typically made of rattan and should be well-floured with gluten-free flour or rice flour to prevent sticking.
If you don't have a banneton, any bowl of an appropriate size lined with a floured tea towel can serve as a proofing vessel. For smaller rolls or specific shapes, even ramekins or muffin tins can be used for proofing. The key is to provide support to the relatively weaker gluten-free dough as it rises during the final proof before baking.
Oven Essentials: Thermometers and Baking Stones for Even Baking
An accurate oven thermometer is invaluable for any baking project, especially gluten-free bread. Oven temperatures can vary significantly from the dial setting, sometimes by as much as 50°F (10°C) or more. Knowing the true temperature ensures your glutenfree yeast bread bakes correctly, promoting proper rise and crust development. Place an oven thermometer inside to check the actual temperature before preheating and baking.
A baking stone or steel can also improve the bake of your gluten-free bread, particularly for freeform loaves or if baking in a Dutch oven. Placed on a rack during preheating, the stone absorbs and radiates heat, providing a consistent, high-temperature surface that helps the loaf spring up quickly and develop a good crust. While not essential for every glutenfree yeast bread recipe baked in a loaf pan, it's a worthwhile investment for exploring artisan styles.
Gluten-Free Yeast Bread Recipe: A Step-by-Step Guide
Ready to bake? This section outlines a basic approach to a beginner-friendly glutenfree yeast bread recipe. Remember that exact measurements and times will vary slightly depending on your specific flour blend, environment, and yeast. Treat this as a foundational method you can adapt.
Baking gluten-free yeast bread successfully involves careful attention to detail, especially regarding ingredient temperatures, mixing, and proofing. Follow these steps methodically, and you'll be well on your way to enjoying warm, homemade gluten-free bread.
Step 1: Preparing the Gluten-Free Dough
The initial stage involves combining your ingredients to form the dough. Unlike wheat dough, which develops structure through kneading, gluten-free dough relies on hydration and binders. The process is typically quicker and less labor-intensive.
Getting the right consistency at this stage is important. Gluten-free dough will be much wetter and stickier than wheat dough; it won't form a smooth, elastic ball. It should resemble a thick batter or very soft cookie dough.
Activating the Yeast for Gluten-Free Bread
If using active dry yeast, begin by proofing it. In a small bowl, combine the yeast with warm liquid (105-115°F or 40-46°C) and a pinch of sugar. Stir gently and let stand for 5-10 minutes. You should see a foamy layer develop on top, indicating the yeast is alive and active. If it doesn't foam, your yeast may be dead or the liquid temperature was incorrect, and you should start over with fresh yeast.
If using instant yeast, you can often skip this step and add it directly to your dry ingredients. However, some bakers still prefer to proof instant yeast, especially if they are unsure of its freshness, following the same method as for active dry yeast. Ensure your liquid temperature is warm, not hot, as excessive heat can kill the yeast.
Combining Dry and Wet Ingredients for Optimal Texture
In a large mixing bowl, whisk together your gluten-free flour blend, binder (xanthan gum and/or psyllium husk), salt, and any other dry ingredients like sugar or dried herbs. In a separate bowl or the bowl with your proofed yeast, combine the warm liquid (including any fats like oil or melted butter) and any wet sweeteners like honey.
Pour the wet ingredients into the bowl with the dry ingredients. It's often recommended to add liquids gradually to control the consistency, especially if you are new to a specific gluten-free yeast bread recipe. Mix until everything is just combined.
Mixing Techniques for Gluten-Free Dough [Gentle Folding]
Gluten-free dough does not require kneading in the traditional sense. Overmixing can actually break down the structure provided by the binders, leading to a gummy texture. The goal is simply to thoroughly combine the ingredients.
Use a sturdy spoon, spatula, or a stand mixer with a paddle attachment on low speed. Mix for just 2-4 minutes, or until no dry pockets of flour remain and the dough looks uniform. The dough will be quite wet and sticky, more like a thick cake batter than traditional bread dough. Gentle folding can help incorporate ingredients without overworking the mix.
Step 2: Proofing the Gluten-Free Yeast Dough
Proofing is the period when the yeast ferments the sugars in the dough, producing carbon dioxide gas that causes the dough to rise. This step is crucial for developing flavor and achieving a light texture in your glutenfree yeast bread.
Gluten-free dough often doesn't double in size like wheat dough during proofing. Look for a noticeable increase in volume, perhaps 50-75%, and a slightly puffy appearance.
First Proof: Creating Structure and Flavor
After mixing, the dough undergoes its first rise (sometimes called bulk fermentation). Cover the bowl loosely with plastic wrap or a damp towel to prevent drying. Place the bowl in a warm, draft-free spot. An oven with the light on (but not heated) is an ideal location, typically providing a temperature around 75-85°F (24-30°C).
The first proof usually takes 30-60 minutes, depending on the recipe, yeast activity, and ambient temperature. The dough should increase in volume and become slightly puffy. This initial rise is important for developing the internal structure and flavor of the glutenfree yeast bread.
Second Proof: Achieving the Right Rise
After the first proof, the dough is typically shaped and placed in its baking pan or proofing basket for the second rise (final proof). This proof is often shorter than the first, typically 20-40 minutes. Again, place the pan or basket in a warm, draft-free environment.
The dough should continue to rise, filling out the pan or basket. Be careful not to overproof gluten-free dough, as it can rise beautifully and then collapse during baking. It should look visibly risen but not stretched thin or fragile. A gentle poke test (if applicable to the recipe) might show the dough springing back slowly.
Step 3: Shaping the Gluten-Free Yeast Bread Loaf
Shaping gluten-free dough is different from shaping wheat dough due to its stickiness and lack of elasticity. The goal is to create a relatively uniform shape that fits your pan or holds its form for freeform baking.
Handling the dough gently is key. Avoid excessive manipulation, which can deflate the air pockets created during proofing.
Techniques for Shaping Gluten-Free Dough
For a loaf pan glutenfree yeast bread recipe, shaping is quite simple. After the first proof, you can gently degas the dough slightly by stirring it down or turning it out onto a lightly floured surface (use gluten-free flour). Then, gently fold the edges towards the center a few times to create some tension, or simply scoop the dough directly into the prepared loaf pan.
For freeform loaves like boules, turn the dough onto a well-floured surface. Using floured hands or a bench scraper, gently coax the dough into a round or oval shape, folding the edges underneath to create surface tension. Place the shaped dough seam-side up in a floured proofing basket or seam-side down on parchment paper for baking.
Placing the Dough in the Bread Pan
Once shaped, immediately transfer the dough to your prepared loaf pan or onto parchment paper if baking freeform. Ensure the pan is adequately greased and floured or lined with parchment paper to prevent sticking – this is particularly important for the sticky nature of gluten-free dough.
If using a loaf pan, gently press the dough into the corners and smooth the top with a wet spatula or floured hands. This helps the loaf bake into a nice shape. Cover the pan loosely for the second proof.
Step 4: Baking the Gluten-Free Yeast Bread
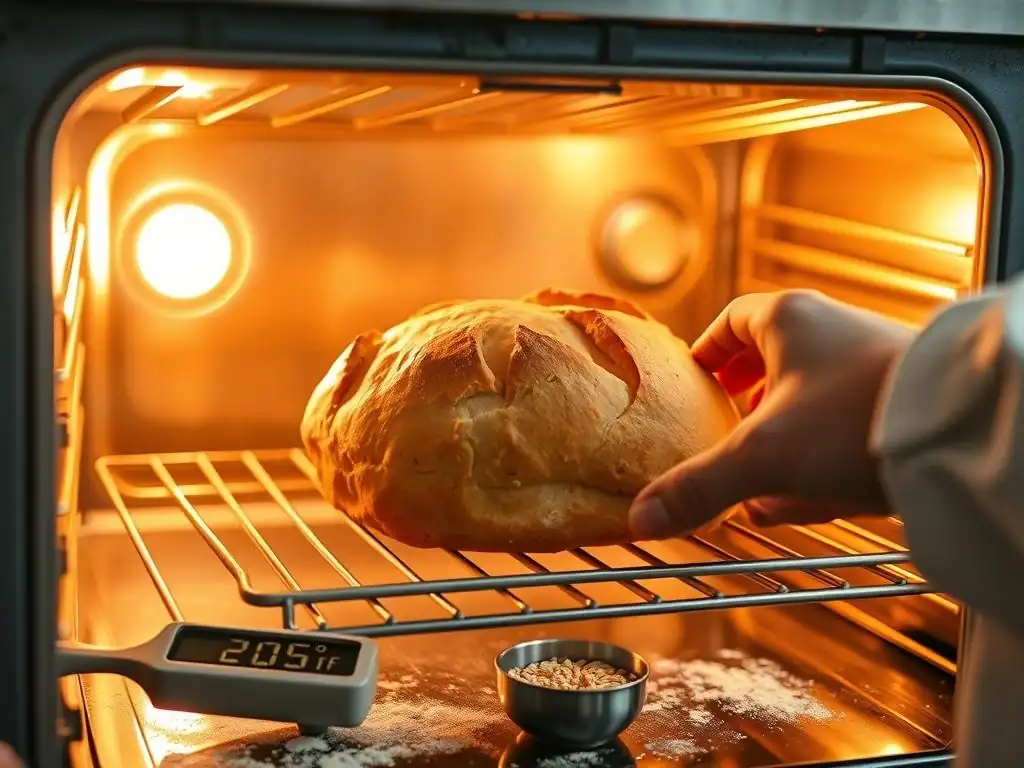
Baking is where the magic happens – the heat causes the loaf to expand rapidly (oven spring) and sets the structure. Proper oven temperature and baking time are crucial for a well-baked loaf with a good crust and fully cooked interior.
Preheating your oven thoroughly is essential. Using an oven thermometer ensures it reaches and maintains the correct temperature for your glutenfree yeast bread recipe.
Oven Temperature and Baking Time Guidelines
Most gluten-free yeast bread recipes bake at temperatures between 375°F and 400°F (190°C to 200°C). Preheat your oven for at least 20-30 minutes with the baking pan or stone inside (if using) to ensure it's fully up to temperature.
Baking time for a standard loaf pan bread typically ranges from 40 to 60 minutes. Freeform loaves or larger loaves may take longer. If baking in a Dutch oven, you'll usually bake with the lid on for the first 20-30 minutes to trap steam, then remove the lid to allow the crust to brown for the remaining 20-30 minutes.
Checking for Doneness: Internal Temperature and Visual Cues
The most reliable way to check if your gluten-free yeast bread is done is by measuring its internal temperature. A fully baked loaf should reach an internal temperature of 200-210°F (93-99°C) when measured with an instant-read thermometer inserted into the center of the loaf.
Visual cues also help. The crust should be a deep golden brown, and the bottom of the loaf should sound hollow when tapped. If the crust is browning too quickly before the interior is cooked, you can loosely tent the loaf with aluminum foil.
Step 5: Cooling and Slicing Your Gluten-Free Bread
The cooling process is just as important as baking for gluten-free bread. Rushing this step can result in a gummy interior texture, which is a common issue. Patience is key here!
Allowing the bread to cool completely helps the internal structure set and allows moisture to redistribute evenly throughout the loaf.
Cooling the Bread Properly to Prevent Gumminess
Immediately after removing the gluten-free yeast bread from the oven, take it out of the pan (if using one) and place it on a wire cooling rack. This allows air to circulate around the entire loaf, preventing steam from condensing on the bottom and making it soggy.
Let the bread cool completely to room temperature before slicing – this can take anywhere from 1 to 3 hours, depending on the size of the loaf and ambient temperature. Slicing warm gluten-free bread is a common cause of a gummy texture because the starches haven't fully set yet.
Slicing Techniques for Gluten-Free Bread
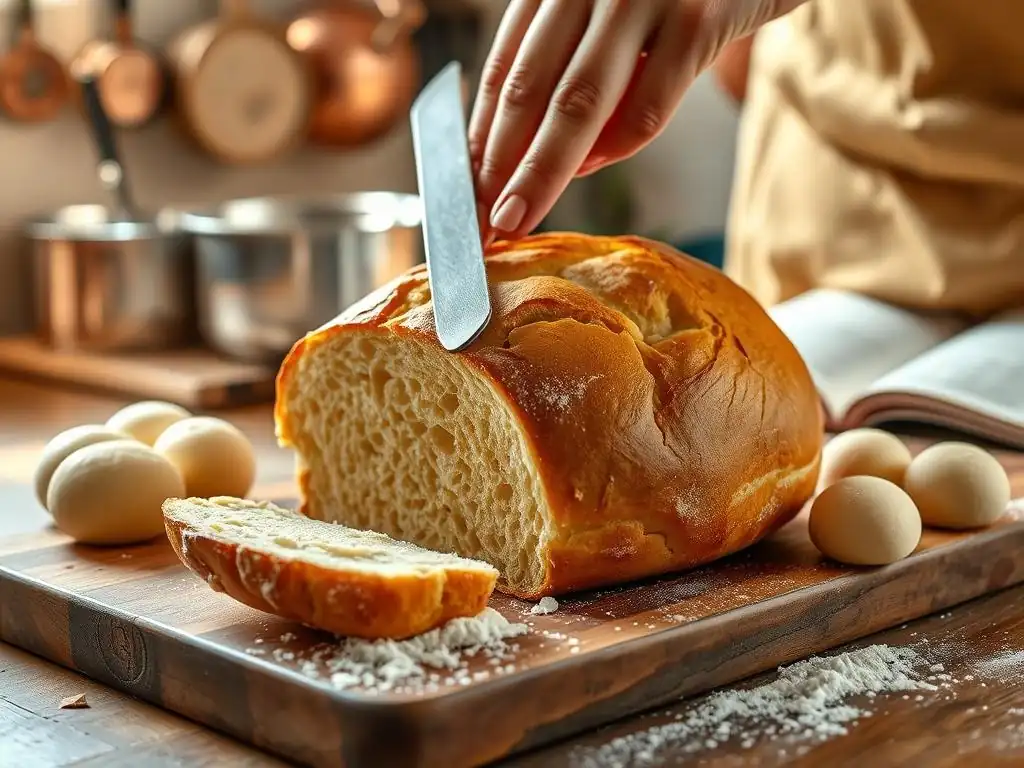
Once your gluten-free yeast bread is completely cool, you can slice it. Use a sharp serrated knife for the cleanest cuts. Slice gently back and forth without applying excessive downward pressure, which can compress the loaf.
Some people find that slicing gluten-free bread works best when it's slightly chilled. If you plan to store the bread, it's often best to slice only what you need immediately and store the rest as a whole loaf or in larger pieces to maintain freshness.
Troubleshooting Common Issues in Gluten-Free Yeast Bread Baking
Even with a great glutenfree yeast bread recipe, you might encounter challenges. Understanding common problems and their solutions will help you refine your technique and achieve consistent results. Don't be discouraged by a less-than-perfect loaf; every bake is a learning opportunity!
Identifying the root cause of an issue is the first step to fixing it. Often, problems stem from ingredient ratios, temperature, or proofing times.
Dense or Gummy Bread: Identifying the Causes and Solutions
Dense or gummy texture is one of the most frequent complaints about gluten-free bread. Common causes include insufficient liquid (dough was too dry), overmixing the dough (breaking down the binder's structure), under-proofing (not enough rise), or slicing the bread before it has completely cooled.
To fix this in your next glutenfree yeast bread recipe attempt, ensure you are using the correct amount of liquid (often higher hydration is needed), mix only until just combined, allow sufficient but not excessive proofing time, and always let the bread cool completely on a wire rack before slicing. Using the correct amount and type of binder (like psyllium husk) is also crucial for preventing gumminess.
Bread Not Rising: Troubleshooting Yeast and Proofing Issues
If your gluten-free yeast bread didn't rise sufficiently, the issue likely lies with the yeast or the proofing environment. Possible causes include using inactive or dead yeast (check the expiration date, proof active dry yeast first! ), using liquid that is too hot (killing the yeast) or too cold (inhibiting activity), a proofing environment that is too cold or drafty, or insufficient proofing time.
Ensure your yeast is fresh and stored correctly (often in the refrigerator or freezer). Use a thermometer to check liquid temperature. Find a warm, draft-free spot for proofing, ideally 75-85°F (24-30°C). Give the dough adequate time to rise, but don't expect it to double like wheat dough; a 50-75% increase is usually sufficient for a glutenfree yeast bread recipe.
Dry or Crumbly Bread: Addressing Hydration and Ingredient Balance
Dry or crumbly gluten-free bread is often a sign of insufficient hydration or an imbalance in the flour blend or binder. If the dough was too stiff initially, there wasn't enough liquid to properly hydrate the flours and starches. An incorrect ratio of starches to flours or too little binder can also lead to a crumbly texture that falls apart easily.
Increase the liquid slightly in your next glutenfree yeast bread recipe attempt if the dough seemed stiff. Ensure your flour blend has a good balance of starches and flours. Double-check that you added the correct amount of binder (xanthan gum or psyllium husk), as this is critical for holding the crumb together.
Sinking Bread: Preventing Collapse During Baking
If your gluten-free yeast bread rose beautifully during proofing but then sank in the oven, it's likely due to over-proofing. When dough over-proofs, the gluten (or in this case, the binder's structure) weakens and can no longer support the gas produced by the yeast, leading to collapse. Other causes can include too much yeast or insufficient baking time/temperature.
To prevent sinking, pay close attention during the final proof. The dough should look puffy but not overly expanded or fragile. Reduce the proofing time slightly in subsequent attempts if you suspect over-proofing. Ensure your oven is fully preheated to the correct temperature, as sufficient initial heat helps set the structure quickly, preventing collapse.
Tips and Tricks for Perfect Gluten-Free Yeast Bread
Baking a successful glutenfree yeast bread recipe consistently comes with practice and learning a few helpful tricks. These tips can help you enhance flavor, improve crust texture, and keep your bread fresh longer.
Small adjustments in technique or adding simple ingredients can significantly impact the quality of your homemade gluten-free bread.
Enhancing Flavor with Add-Ins [Rosemary, Sunflower Seeds, Walnuts]
Once you've mastered a basic glutenfree yeast bread recipe, you can easily customize it with add-ins to boost flavor and texture. Incorporate ingredients like fresh or dried herbs (such as rosemary or thyme), seeds (like sunflower seeds, poppy seeds, or sesame seeds), nuts (like walnuts or pecans), dried fruits (cranberries or raisins), or even cheese.
Add these ingredients during the final mixing stage after the main dough has come together. For a standard loaf pan recipe, about 1/2 to 1 cup of total add-ins is a good starting point. This not only makes your gluten-free yeast bread more interesting but also adds nutritional value.
Achieving a Crispy Crust on Gluten-Free Bread
Getting a lovely, crispy crust on gluten-free bread can be challenging as the dough tends to be higher in moisture. Baking in a preheated Dutch oven is one of the most effective ways to achieve a crispy crust, as the trapped steam in the first part of the bake keeps the surface moist, allowing for maximum oven spring before the crust sets.
Another technique is to create steam in your oven. You can do this by placing a pan of hot water on the bottom rack of your oven when you preheat it, or by pouring hot water into a preheated cast iron pan placed on the bottom rack just as you put the bread in. Baking on a preheated baking stone or steel also helps by providing a burst of heat from underneath.
Storing Gluten-Free Yeast Bread for Optimal Freshness
Gluten-free bread tends to dry out more quickly than wheat bread because it lacks gluten's ability to retain moisture. To keep your homemade glutenfree yeast bread fresh, store it properly. Once completely cooled, wrap the loaf tightly in plastic wrap or beeswax wrap, then place it in a bread box or a resealable plastic bag.
For longer storage, gluten-free bread freezes exceptionally well. Slice the cooled loaf, then wrap individual slices or portions in plastic wrap before placing them in a freezer-safe bag or container. Frozen gluten-free bread can last for up to 3-4 months. Thaw slices as needed at room temperature or toast directly from frozen.
Adapting the Recipe for Different Flour Blends
The success of a glutenfree yeast bread recipe often depends on the specific flour blend used, as different blends have varying absorption rates and compositions. If you substitute one blend for another, you may need to adjust the amount of liquid. A blend higher in starches might need slightly less liquid than one with more whole grains.
Start by using the amount of liquid specified in the recipe, but observe the dough consistency. If it seems too dry and stiff, add a tablespoon or two more liquid at a time until it reaches a thick, scoopable batter-like consistency. Conversely, if it seems excessively wet and slack, you might need to add a touch more flour blend. Keep notes on your adjustments for future bakes.
Gluten-Free Yeast Bread Recipe Variations
Once you feel confident with a basic glutenfree yeast bread recipe, you can explore exciting variations. Simple tweaks to ingredients or shape can result in dramatically different types of bread, from soft sandwich loaves to rustic artisan boules.
Experimenting with flour blends, add-ins, and baking methods allows you to customize your gluten-free bread to suit any meal or craving.
Gluten-Free Sandwich Bread Recipe
A classic gluten-free sandwich bread recipe is designed for softness, sliceability, and structure to hold fillings. These recipes typically use a balanced gluten-free flour blend, sufficient binder (often including psyllium husk for tenderness), and are baked in a standard loaf pan.
Key characteristics include a relatively fine, even crumb and a soft crust. Hydration levels are carefully controlled to achieve this texture, and the dough is usually mixed to a thick batter consistency before being scooped or gently shaped into the loaf pan.
Gluten-Free Artisan Bread Recipe
Creating a gluten-free artisan bread recipe focuses on developing a chewy interior and a rustic, crispy crust, often baked in a freeform shape like a boule or batard. These recipes might use higher hydration levels and benefit greatly from baking in a preheated Dutch oven to achieve a superior crust and oven spring.
Flour blends for artisan loaves might incorporate more whole grains like brown rice or sorghum for flavor. Proofing is often done in a banneton to help the dough hold its shape. The resulting loaf is perfect for dipping in soup or serving with cheese.
Gluten-Free Sweet Bread Recipe [Cinnamon Raisin]
A gluten-free sweet bread recipe, like a cinnamon raisin loaf, adds sugar, spices, and dried fruit to the basic dough. The sugar contributes to browning and tenderness, while the add-ins provide flavor and texture.
These loaves are often baked in a loaf pan and can be enjoyed for breakfast or a snack. The dough might be slightly richer with the addition of butter or eggs. Ensure dried fruits are evenly distributed and consider soaking raisins briefly in warm water or juice before adding to plump them up.
Conclusion: Mastering the Art of Gluten-Free Yeast Bread
Baking gluten-free yeast bread is a skill that develops with practice and patience. While it differs significantly from traditional wheat baking, it is incredibly rewarding to pull a warm, fragrant loaf of homemade gluten-free bread from your oven. By understanding the role of each ingredient, mastering the techniques of mixing and proofing, and troubleshooting common issues, you can consistently bake delicious bread that meets your dietary needs.
Don't be afraid to experiment with different flour blends, binders, and add-ins to find your favorite glutenfree yeast bread recipe. Embrace the learning process, celebrate your successes, and enjoy the wonderful taste and texture of bread you made yourself.
Enjoying Your Homemade Gluten-Free Bread
There's nothing quite like slicing into a fresh loaf of homemade gluten-free yeast bread. Whether you use it for sandwiches, toast, or simply enjoy it with butter, savor the satisfaction of your baking achievement. Share it with friends and family, or keep it all to yourself – you earned it!
Remember that while cooling is essential before the initial slice, slightly warming leftover slices can improve their texture. Gluten-free bread is a versatile foundation for countless meals and snacks. Keep baking, keep experimenting, and keep enjoying the delicious journey of making your own glutenfree yeast bread recipe.
Frequently Asked Questions
What makes this gluten-free yeast bread recipe beginner-friendly?
This recipe focuses on simple steps and easy-to-find ingredients, making it accessible to bakers with little to no experience baking gluten-free bread. It also features clear instructions to avoid common mistakes.
What kind of gluten-free flour blend is recommended for this recipe?
The recipe generally works best with a high-quality all-purpose gluten-free flour blend that contains xanthan gum. Check the ingredients to ensure it contains a binder for the best results.
How important is the quality of the yeast used in the recipe?
Using fresh, active yeast is crucial for a good rise in gluten-free yeast bread. Always check the expiration date and proof the yeast before adding it to the other ingredients.
What are some common problems people face when baking gluten-free yeast bread, and how does this recipe address them?
Common issues include a gummy texture and a lack of rise. This recipe combats these by using the right flour blend, and providing tips on proper hydration.
Can I substitute ingredients in this gluten-free yeast bread recipe?
While some substitutions are possible, it's important to be cautious. Changing the flour blend or liquid ratios can significantly affect the final product. Follow the recipe closely for best results.
Final Reflection: The Rising Power of Gluten-Free Baking
The quest for delicious, fluffy gluten-free yeast bread is no longer a niche pursuit; it's a mainstream movement. This guide has explored the intricacies of achieving that perfect loaf, demonstrating that with the right techniques and understanding, the seemingly impossible becomes achievable. The demand for accessible and reliable gluten-free recipes continues to grow, reflecting a wider societal shift towards inclusivity and dietary awareness.
This journey into the world of gluten-free yeast bread has been a personal one, filled with both triumphs and setbacks. I've learned firsthand the importance of precision and patience, mirroring the dedication many gluten-free bakers demonstrate daily. The challenge of recreating the texture and flavor of traditional bread without gluten is a testament to human ingenuity and our persistent desire for culinary excellence. The greatest pleasure in life is doing what people say you cannot do.
– Walter Bagehot. This quote perfectly encapsulates the spirit of gluten-free baking, pushing boundaries and proving that limitations can be overcome.
Now, it's your turn. Don't be intimidated by the seemingly complex world of gluten-free yeast bread. Armed with the knowledge and techniques shared in this guide, you have the power to create delicious, satisfying loaves that you can proudly share with friends and family. Experiment, adapt, and most importantly, enjoy the process of baking your own gluten-free masterpiece. The journey may have its challenges, but the reward of a perfectly risen, flavorful loaf is well worth the effort.
Unleash Your Inner Baker: Craft Your First Gluten-Free Loaf!
Thanks for taking the time to explore the world of gluten-free yeast bread! We hope you've gained the confidence to tackle this seemingly daunting task. Now it's time to put your newfound knowledge into action.
- Bake your first gluten-free masterpiece! Use the recipes and techniques you've learned here to create a delicious loaf. Don't be afraid to experiment – the best bakers are those who aren't afraid to get their hands a little messy.
- Share your baking journey! Snap a photo of your creation and share it on social media using #BakeWithEaseGlutenFree. Let's inspire each other!
- Explore our other gluten-free recipes on BakeWithEase.com – we've got plenty more delicious adventures waiting for you.
What unique twist will you add to your first gluten-free yeast bread? Let us know in the comments!